
Reading Time: 7 minutesCompact Flash cards may have been overtaken by SD cards in terms of popularity, but many people still rely on CF cards to store important files. Because of that, CF card data recovery is still a common concern.
Whether you own a CF card that’s now corrupted or you accidentally deleted important photos from it, worry not. Your data is likely still recoverable. In this article, we listed three Compact Flash data recovery solutions alongside three methods you can use to fix a corrupted CF card.
How to Recover Data from a CF Card
There are two main ways to perform CF card recovery: using data recovery software, and through CF card data recovery services.
Recovering CF card data shouldn’t be too hard, especially if you do it as soon as possible. This means you should stop using the memory card at the first sign of trouble. Also, we strongly caution against attempting to fix your CF card before performing any of the following file recovery measures.
Method 1: Use Data Recovery Software Like Disk Drill
Disk Drill is one of the best CF card recovery software available on the market. It’s fast, effective, and reliable. The best thing is, there’s a free version that you can use to recover up to 500MB of data. You can then upgrade to PRO as needed. It works excellently with all brands, so you can use it for Toshiba, Samsung, and SanDisk CF card recovery, among others.
Follow these steps to recover CF card data using Disk Drill:
- Download Disk Drill for Windows from official site. Launch the executable file and install the software.
- Make sure the CF card is connected to your computer.
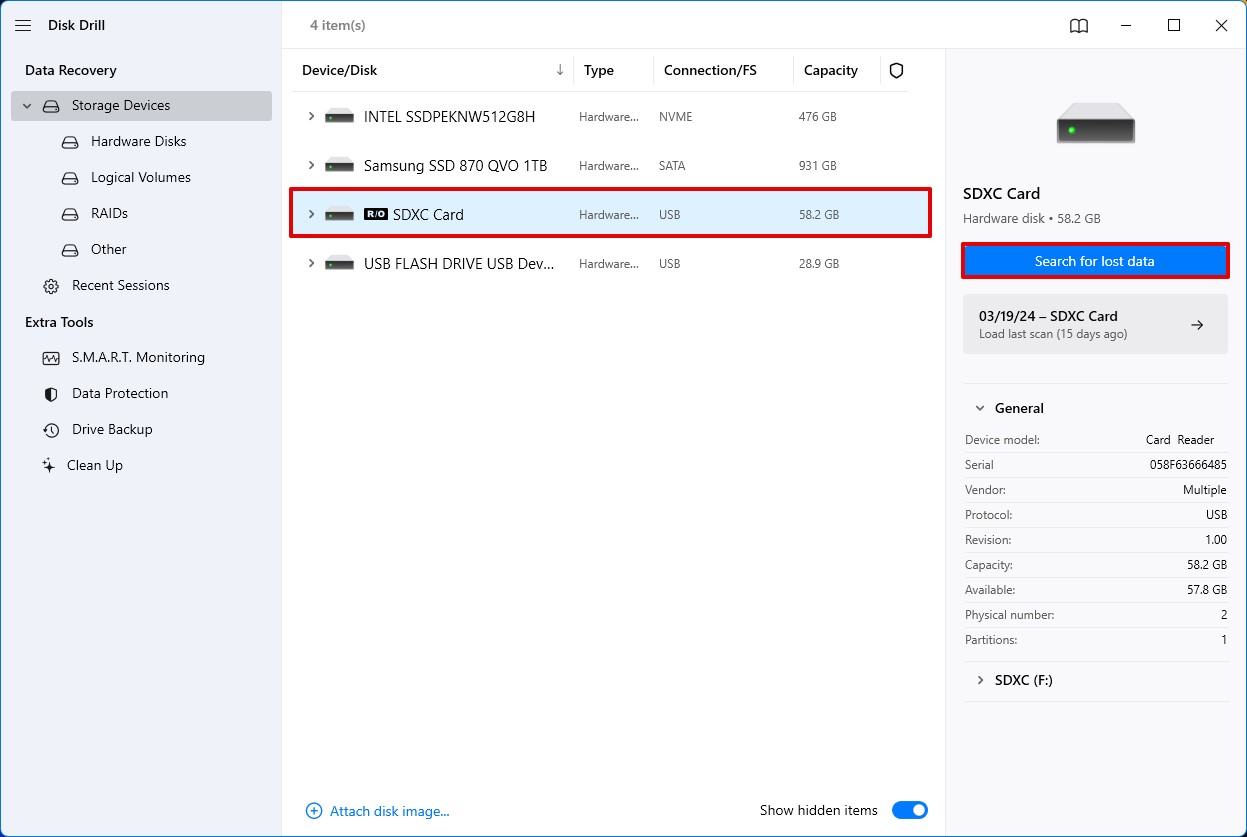
- Open Disk Drill once the installation process is finished. You will immediately see all the available disks and devices on Disk Drill’s Data Recovery panel. Select the Compact Flash card, then click Search for lost data.
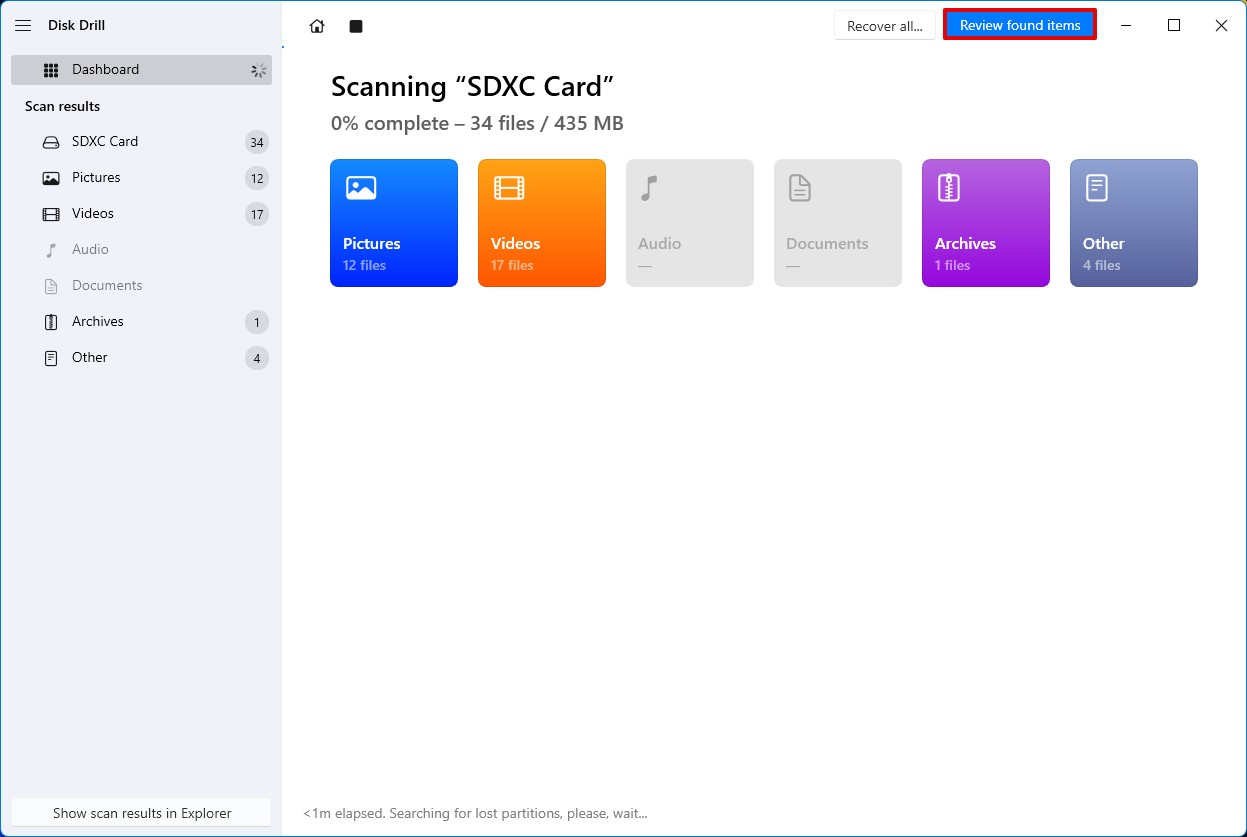
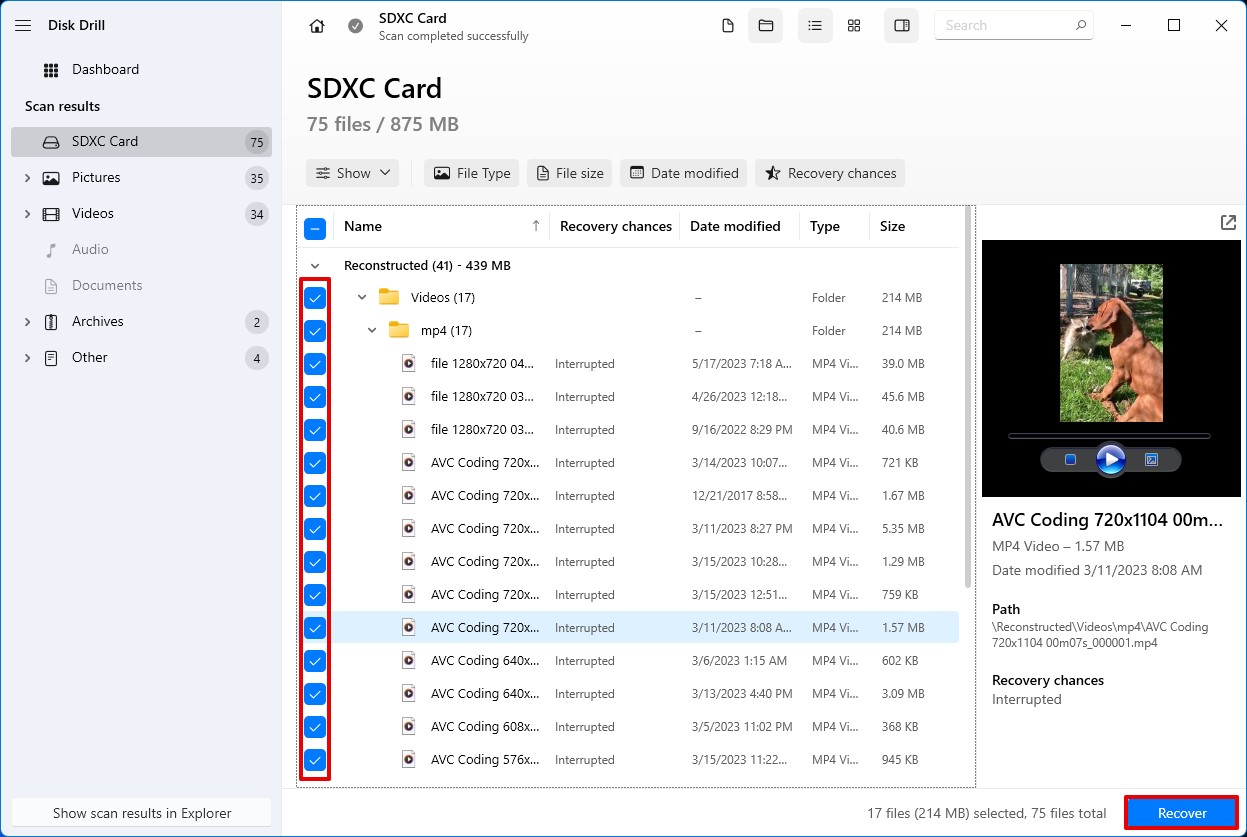
- Wait for the scan to finish. Then click Review found items. You will see a list of recoverable files alongside information on their respective recovery chances, file type, and size.
- Select all the files you want to recover. Click Recover.
- Assign a new destination for the recovered files. Click Next and then wait for the Compact Flash card data recovery process to finish.
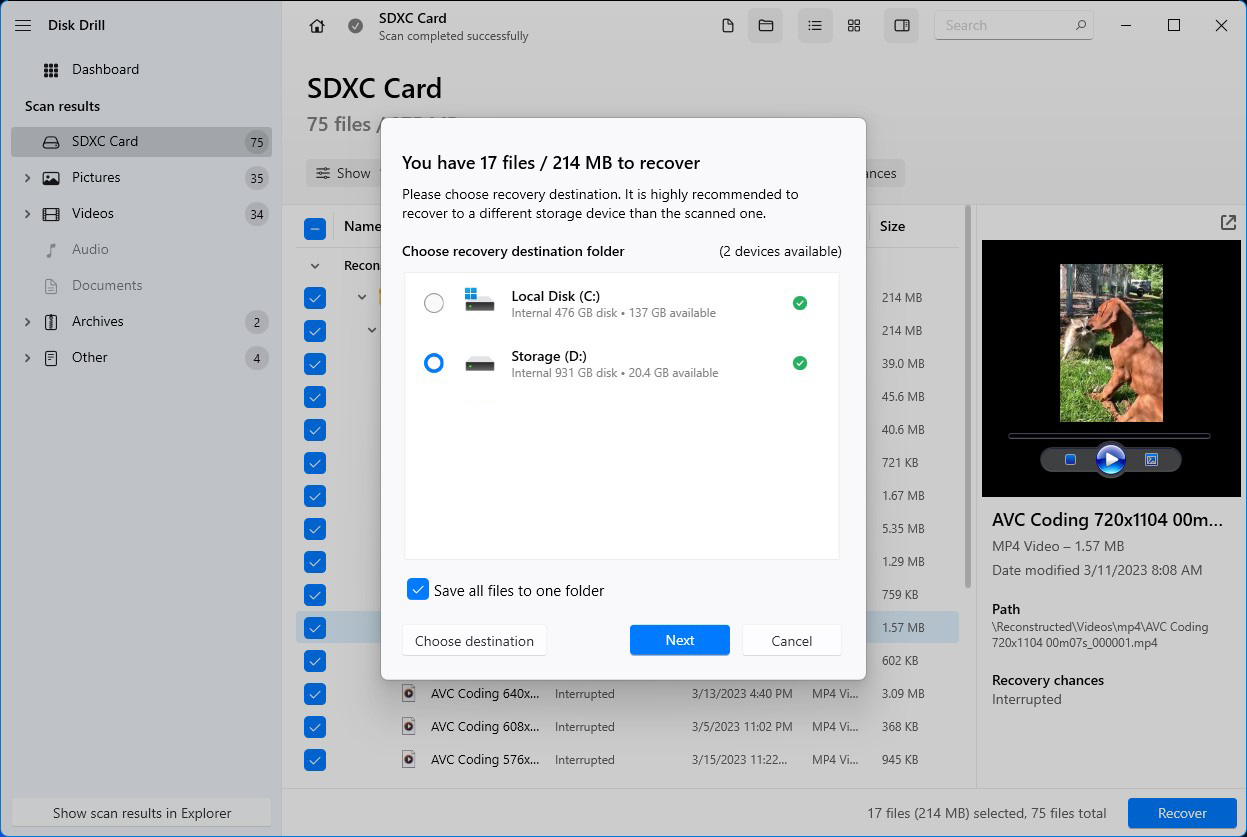

After Disk Drill completes the data recovery process, you will be given an option to immediately show the recovered files in File Explorer.
You can also try to use Windows File Recovery to recover CF card data. It is a relatively new command-line utility available from the Microsoft Store. It’s not as beginner-friendly as Disk Drill since you will be interacting with the command line, but it’s completely free so it’s worth a shot.
Method 2: Consult Professional Data Recovery Services
You can seek professionals to perform corrupted CF card data recovery for you. This solution is perfect if you don’t feel comfortable using CF card recovery software as data is too valuable, or card is too damaged to work with.
When employing data recovery services you can expect the following process:
- Discuss your issue with the experts to understand the potential recovery scope.
- The service conducts an assessment to determine the extent of the damage and feasibility of recovery.
- Experts use specialized tools and cleanroom environments to maximize the chances of data retrieval.
- Recovered data is returned securely, often with a guarantee of confidentiality.
Look for a data recovery service with a proven track record and only if they offer a no-recovery-no-fee policy. For example, the CleverFiles Data Recovery Lab boasts a 98% success rate. Also, they will charge you only if your data is successfully retrieved.
How to Fix a Corrupted CF Card
Before you begin, it’s important to assess the value of the data on your CF card. If the data is of significant importance and irreplaceable then it’s absolutely in your best interests to recover data before fixing the card. After the data is safe – then it is the time to try to breathe new life into your card.
Method 1: Insert the CF Card into Another Device
If the CF card isn’t being recognized by your device, there’s a chance it might be an issue with the latter. To rule this out, check if the CF card functions correctly on another device. Try inserting it into a different camera, or if you’re experiencing the error when the CF card is connected to your computer, use a different card reader.
Once you’re certain that the problem lies with the CF card itself and your computer is able to recognize the memory card, you can proceed to the next methods.
Method 2: Assign a New Drive Letter to CF Card
Sometimes, Windows might not show a CF card in File Explorer because its assigned drive letter is already in use by another device, or the card hasn’t been assigned a drive letter at all. Changing the drive letter can resolve these conflicts and make the card visible and accessible.
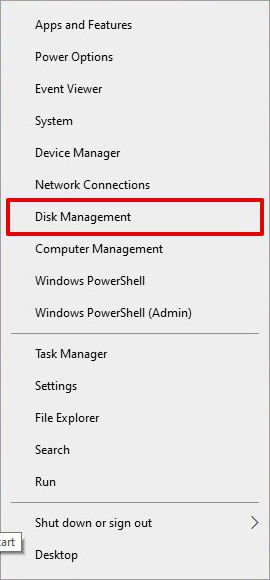
- Right-click on the Start button and select ‘Disk Management’.
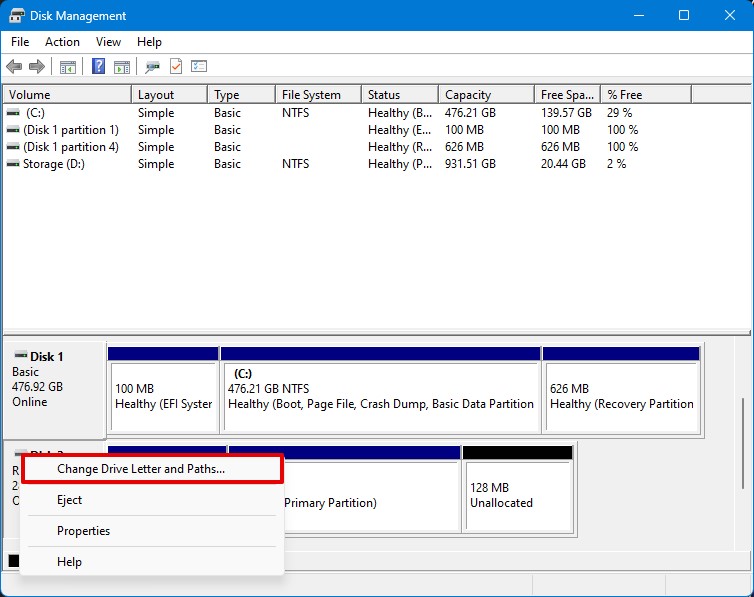
- Find the CF card in the volume list. It might be labeled as ‘Removable’.

- Right-click on the CF card’s volume and select ‘Change Drive Letter and Paths…’.
- Click on ‘Change’ if the CF card already has a drive letter, or ‘Add’ if it doesn’t. Then, select a new letter from the dropdown menu.
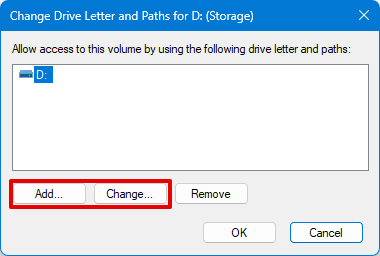
- Click ‘OK’ to apply the new drive letter. You might need to confirm the change in a popup dialog.
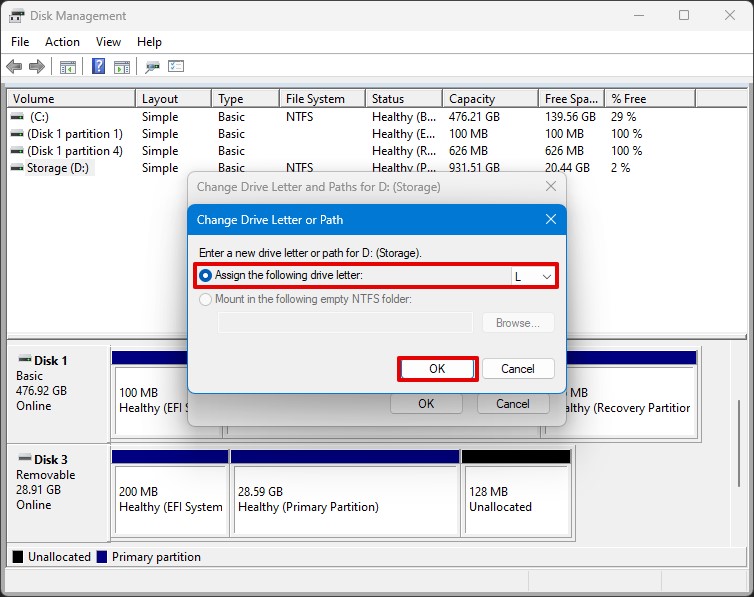


Note: Make sure to choose a drive letter that is not currently in use by another device to avoid further conflicts.
Method 3: Use the CHKDSK Command to Find and Fix Errors
The CHKDSK command is a Windows utility that checks the file system and file system metadata of a volume for logical and physical errors. It can fix various issues related to bad sectors, improper shutdowns, and corruption.
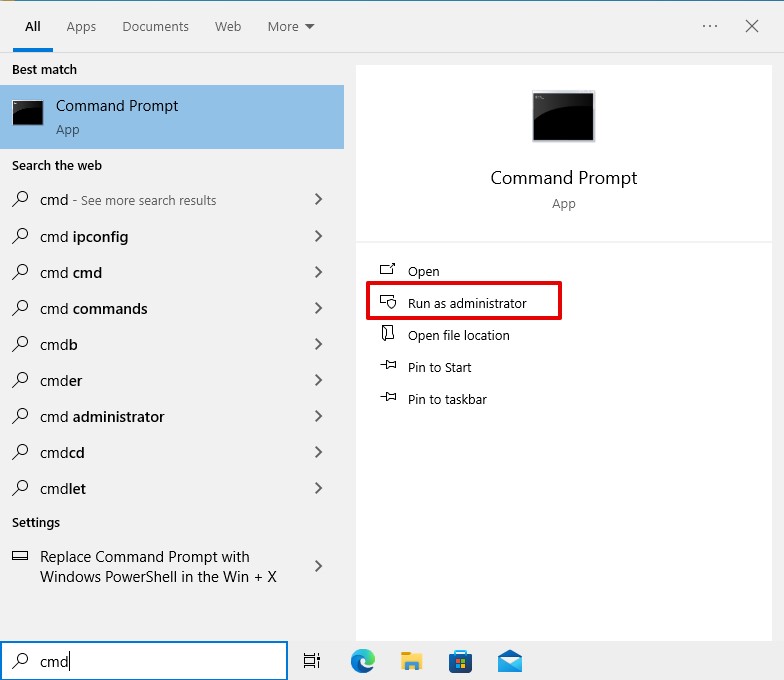
- Type CMD on the search box on the Windows Start Menu.
- Select Run as administrator beneath the Command Prompt icon, as shown below.
- Make sure the CF card is connected to your computer.
- Type the following command:
chkdsk E: /f
Replace E with the drive letter assigned to the CF card on your computer.
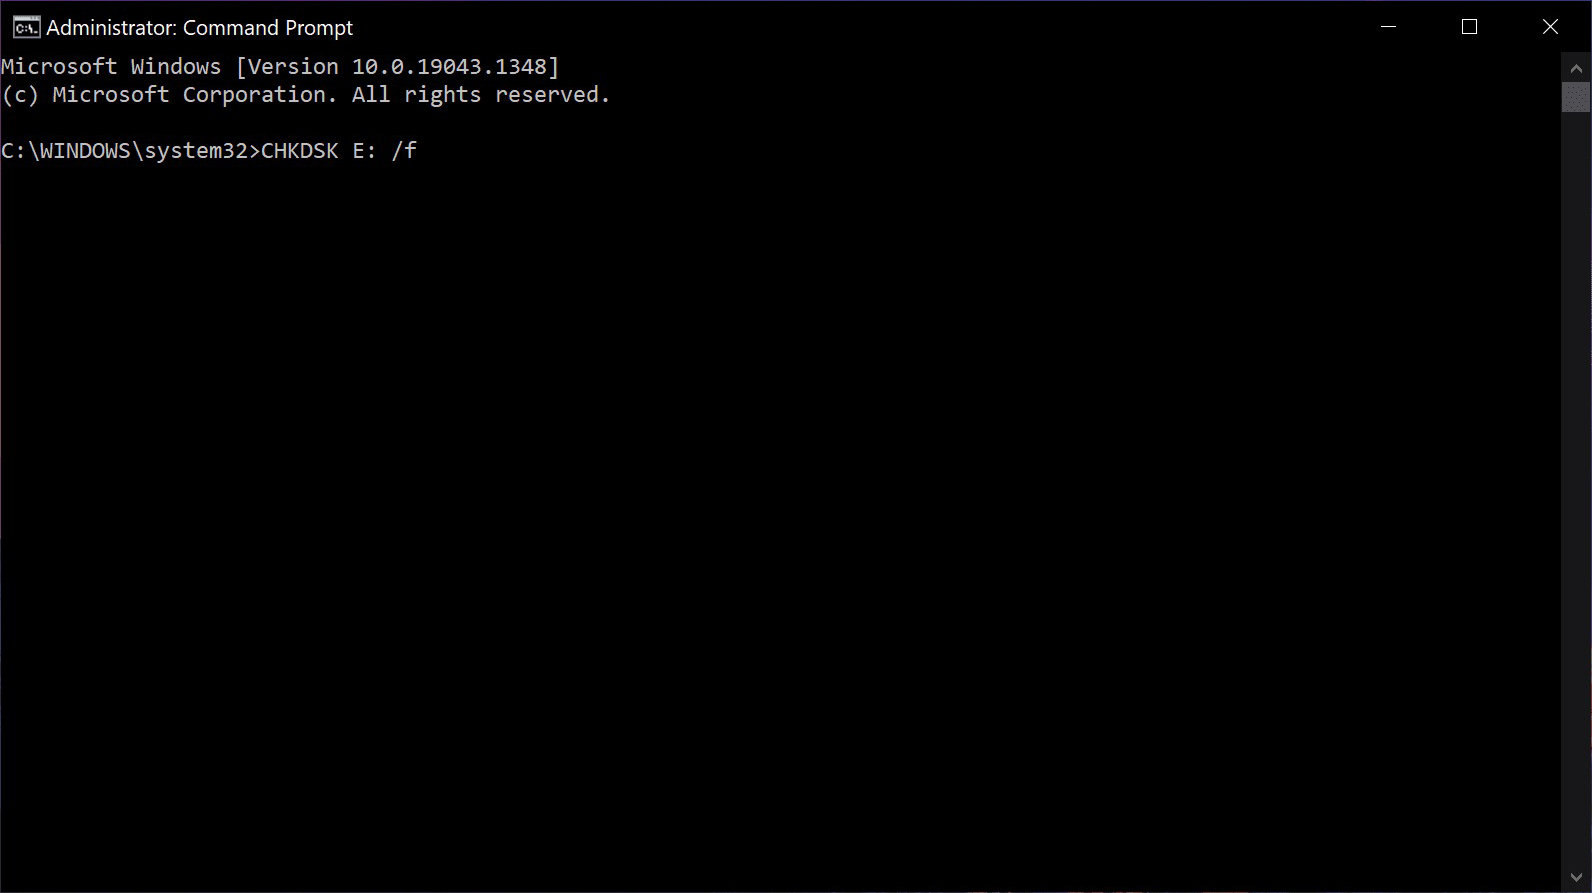
- Press Enter and wait for the command to finish running. The chkdsk utility will scan your drive for errors and fix the errors it finds.
Your card should work correctly after the CHKDSK process is complete. If this does not fix the issue, move on to the next method.
Method 4: Format the CF Card
Formatting might seem like a severe approach to many, but it’s a powerful way to fix faulty storage devices. Formatting a CF card is sort of like spring cleaning–it clears previously existing data and replaces a damaged file system with a new one.
Now, we strongly suggest that you make full use of the best CF card recovery software you can find before attempting to format your storage device. Doing so will give you the best chances of recovering all of your important photos, videos, and documents and minimize the risk of permanent data loss.
This is how you can format your memory card after CF card data recovery:
- Open File Explorer. You can do this by searching File Explorer on the Start menu or by clicking the folder icon on the Windows taskbar.
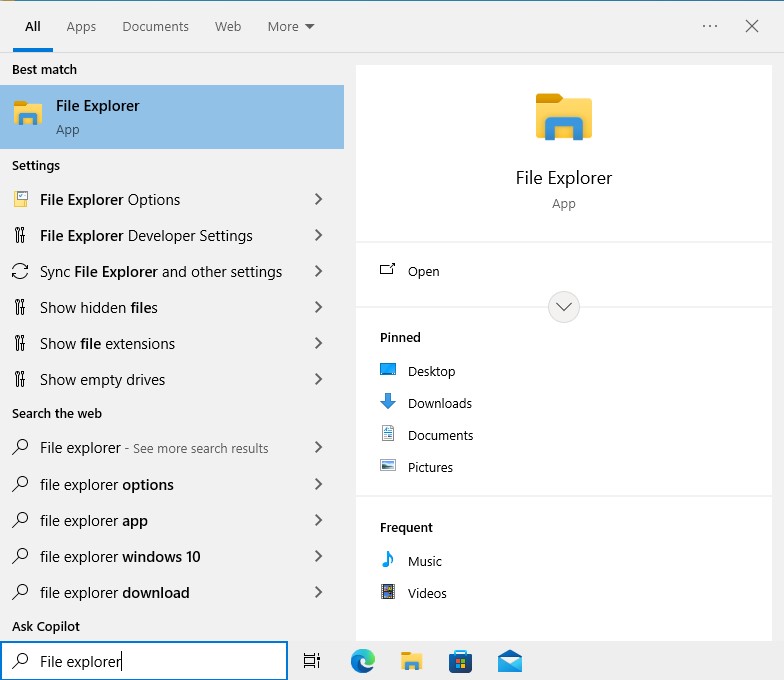
- Navigate to This PC.
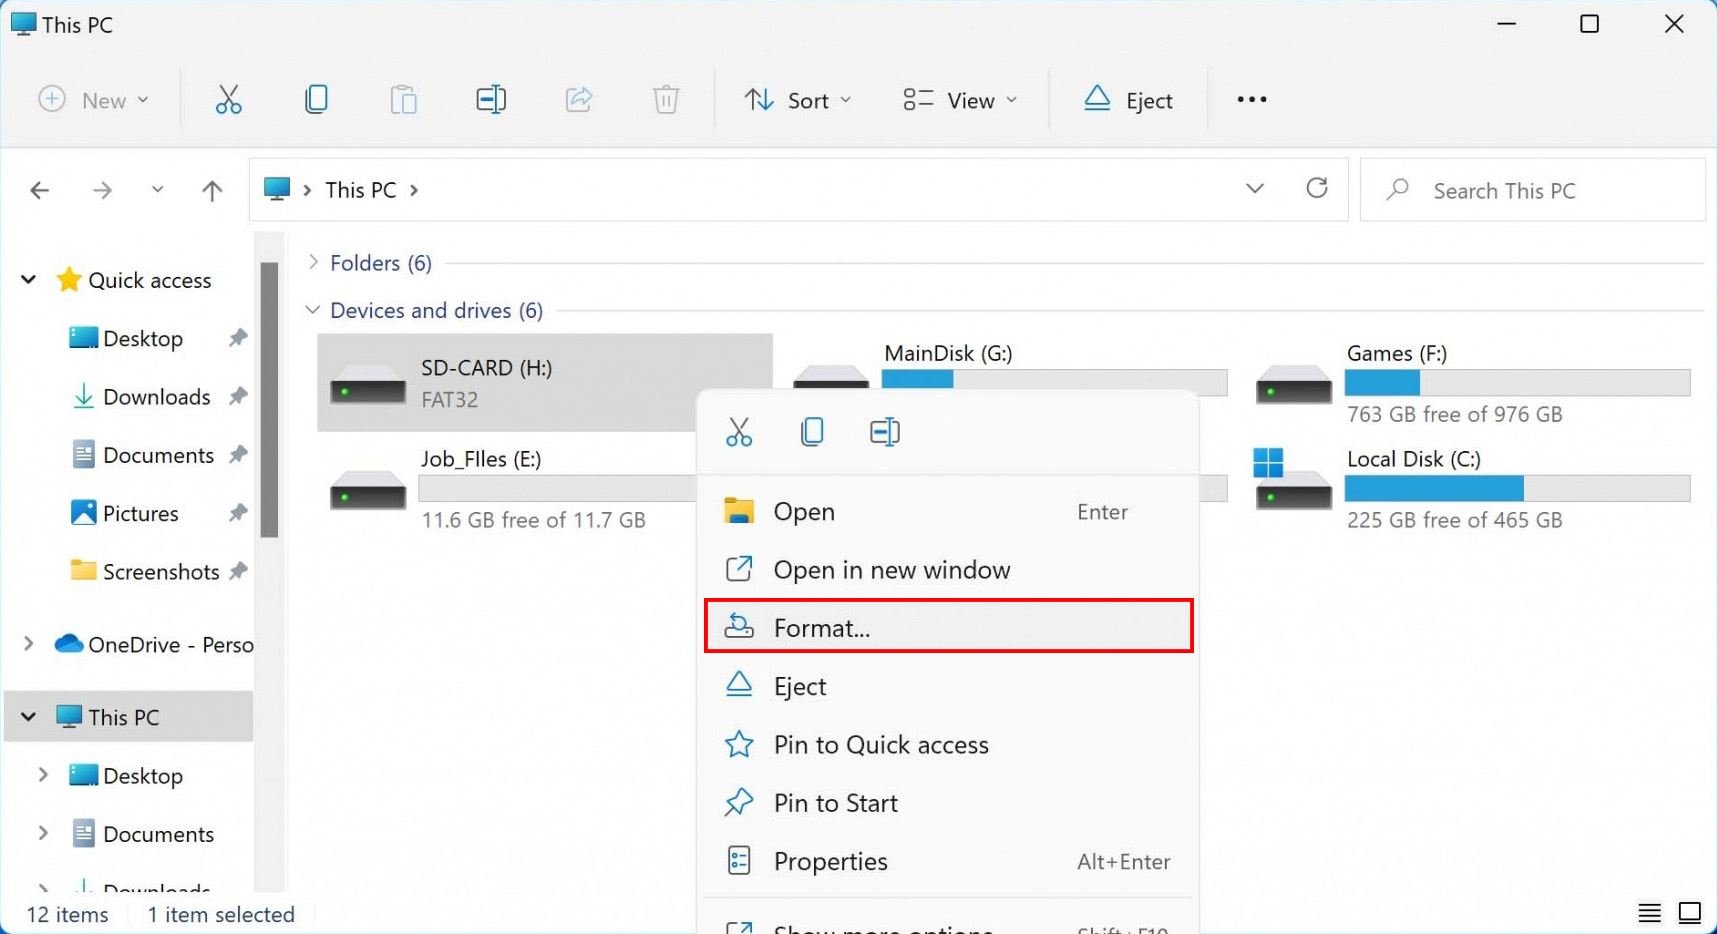
- Look in the Devices and drives section and right-click on the Compact Flash card.
- Select Format.
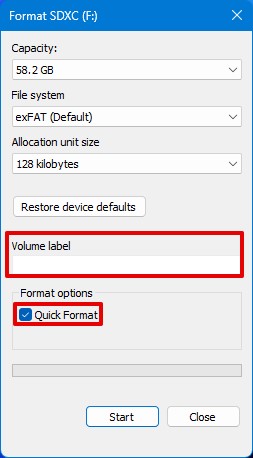
- Edit the Volume label field as needed and check Quick Format.
- Click Start. Wait until the formatting process is complete.
The Bottom Line
It’s easy to assume the worst when one of your memory devices malfunctions. But with the help of trusted CF card recovery tools, chances are high that you’ll be able to retrieve your important files. Always remember: perform data recovery at the first sign of data loss for best results!
FAQ
- card is not properly inserted into the device
- card is corrupted or has suffered physical damage
- device is not compatible with the card
- card is not formatted or is formatted using an incompatible file system
- card is full and there is no more space available for new data
- Improper removal of the card from a device
- Virus or malware infection
- Physical damage to the card
- Power failure or other interruption during data transfer
- Excessive wear and tear on the card or the card reader