Reading Time: 5 minutesLaCie is one of the leaders in the premium storage device space and is known for its rugged external drives and high-performing products. But just because its hard drives are adept at protecting themselves from physical damage, doesn’t mean that the files stored within them aren’t prone to data loss.
We’ve come up with this article to discuss how the brand sets itself apart from the competition and the different methods of LaCie data recovery in case some of your hard drive’s files are compromised or mistakenly deleted.
How Are LaCie Hard Drives Different From the Other Brands
LaCie has always been at the forefront of innovation when it comes to storage media design, incorporating next-generation ports before much of the competition whether it’s Firewire, advanced USB technology, and even Thunderbolt. But what LaCie really excels at is data safety, with the brand recognizing that devices are replaceable but the information housed within them may not always be.
They’ve developed ultra-durable drives, data recovery services, and advanced backup features, all to keep users’ files as secure as possible. Some of their greatest hits include their incredibly sturdy Rugged mobile hard drive with its trademark protective orange rubber sleeve, their remarkable dependable d2 desktop drive, and their various multi-drive solutions.
How To Recover Data From a LaCie Hard Drive
There are more than a few ways for potential LaCie hard drive recovery, but we’ll discuss two of the most successful methods you can utilize.
Method 1: LaCie Data Recovery Services
In most cases, if you want to recover files from a heavily compromised, physically damaged, or old LaCie external hard drive, you’d need to seek the assistance of third-party data retrieval professionals. They specialize in the recovery of various forms of data loss and storage device errors.
Fortunately, LaCie has realized the need of their users for such an important resource, so they’ve come up with their very own Rescue Data Recovery Services. Here are a few important things to know about the service:
- It’s available solely for LaCie products that are still within warranty.
- It spans all sorts of data loss scenarios.
- It boasts an impressive 95% recovery rate.
- Your warranty makes you eligible for just one in-lab recovery session.
Warranties on LaCie products range from 2 to 5 years depending on the device and the service is available all over the globe. If successful, your data will be returned on a compact storage device. You’ll also be able to access the files through the cloud using an account for up to 2 months.
To utilize the service, you’ll first want to check the warranty of your hard drive which you can do here. Once you’ve confirmed that the device is still within warranty, you can check this page for the various ways you can reach out to the service. This includes requesting an email from the support team, calling them on their 1800 number, or heading down to an official service center near you.
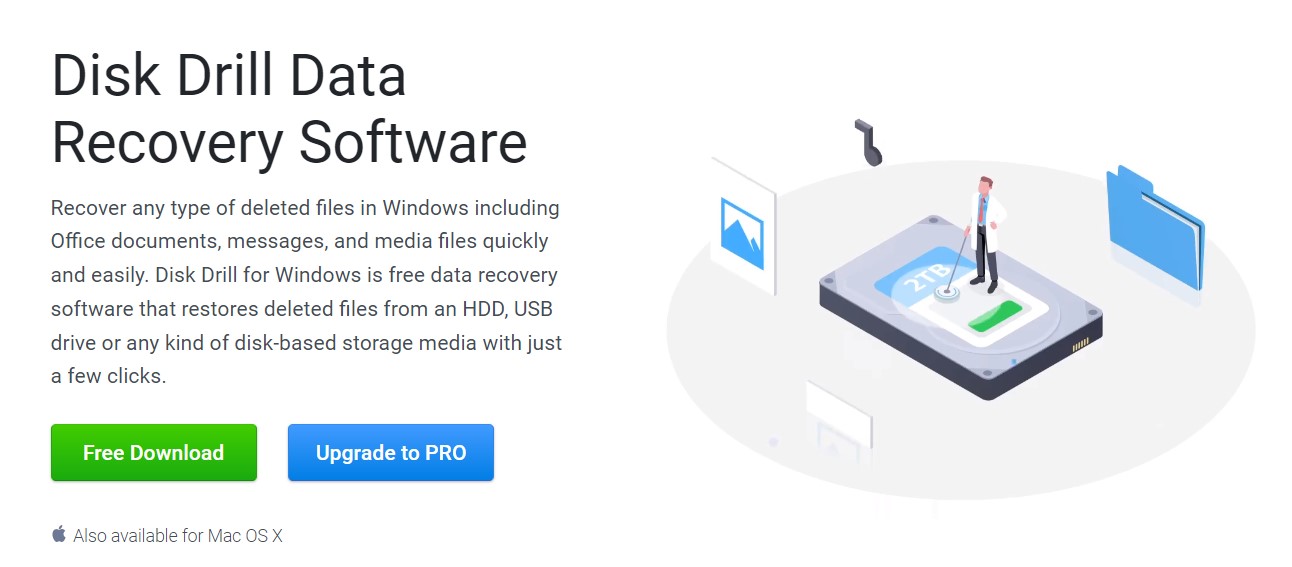
Method 2: Data Recovery Software
If you’re not keen on sending your hard drive to a facility and would rather try a more DIY approach, your best bet at recovering your hard drive would be by using a data recovery program. Disk Drill is one of the best around, boasting a fantastic retrieval rate, a user interface that suits both newbies and advanced users, and support for a wide array of different file types and storage mediums.
It’s a good idea to create a backup image of your hard drive and attempt the recovery process from the backup instead of the actual device. This lessens the chances of losing even more information. You should also stop using the drive immediately to avoid overwriting recoverable files and further data loss. Here are the instructions on how you can use Disk Drill to recover your hard drive:
- Download and properly install Disk Drill from the Cleverfiles website.
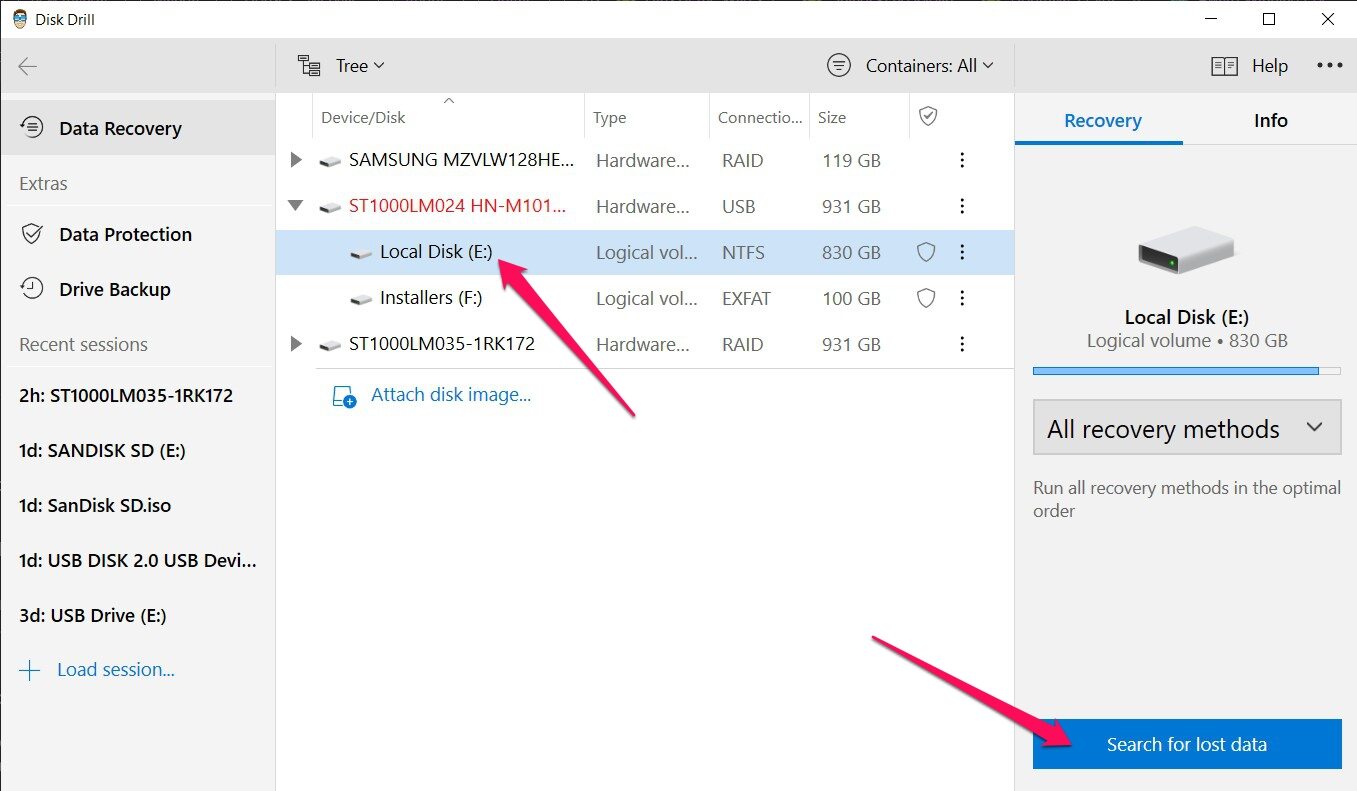
- Launch the app, select your LaCie hard drive from the list of available devices, then click the Search for lost data button to proceed. If you’re recovering from an image, you can click the Attach disk image… link and browse for the image file which will then appear on the list alongside the physical devices.
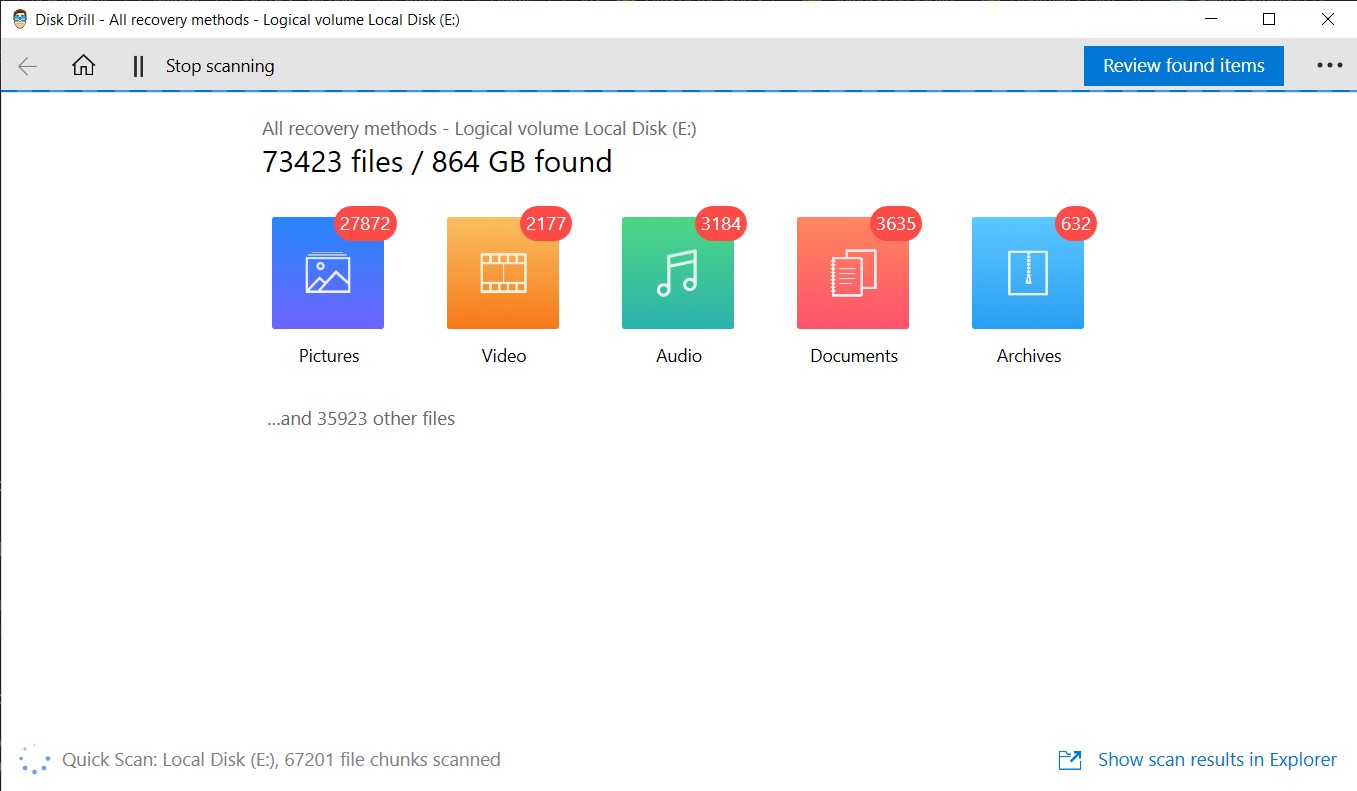
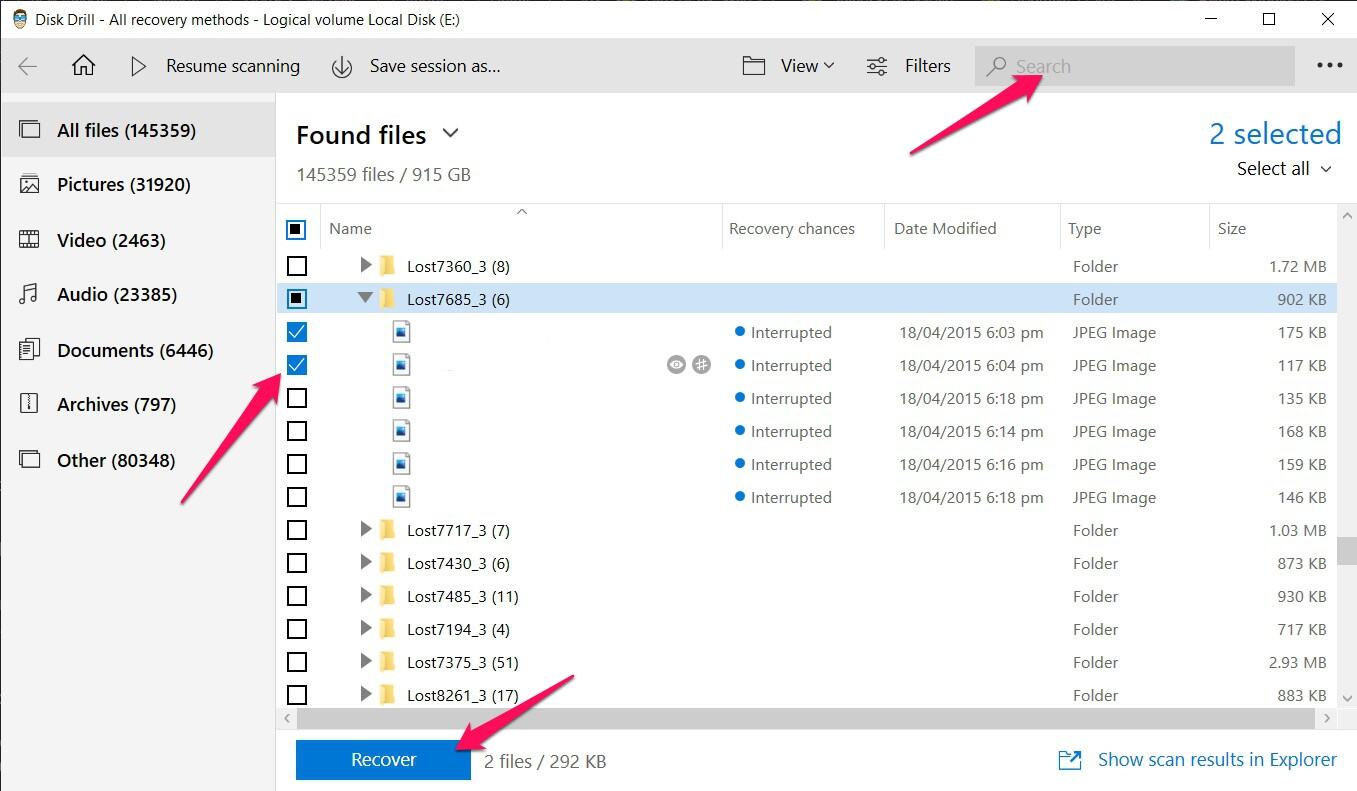
- Disk Drill will now scan your drive for any recoverable files. Your hard drive’s read speed and overall capacity will greatly affect how long this process takes. While this is ongoing, you can click the Review found items buttons on the top-right corner to check out the scan results in real-time.
- When you get to the results page, you can filter out your results by using the categories on the left pane or the search bar in the top-right corner. In addition to file names, the search bar allows you to search file extensions as well, such as .jpg or .pdf, so you can leverage that if you want to narrow down your search. Highlight all the files you want to recover by ticking the checkboxes on the left of the file names, then click the Recover button to proceed.
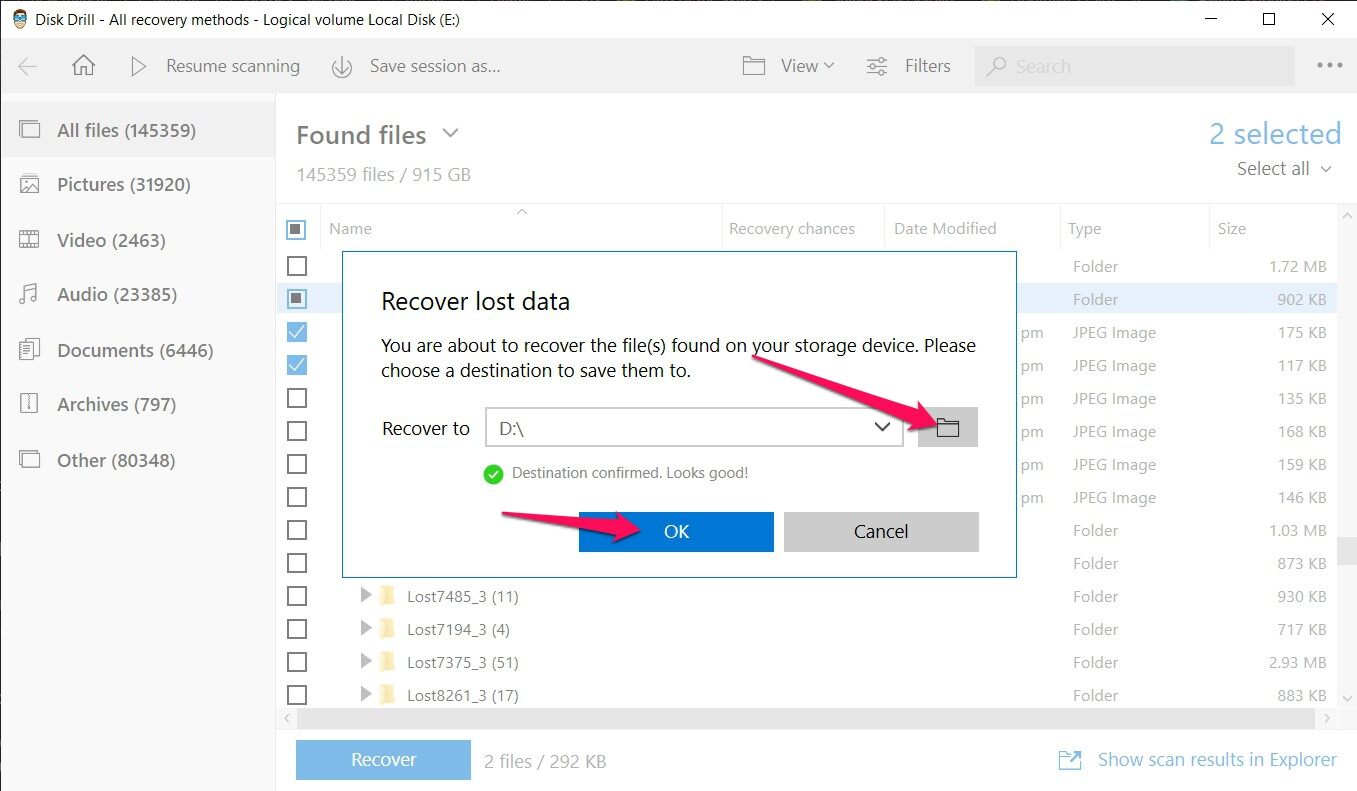
- You’ll get a pop-up asking you to choose the location where your recovered files should be stored. This has to be on a different drive than the one you’re recovering from, or you’ll run into an error. Click OK when you’re good to go.
- Disk Drill will now attempt to recover your files. On the completion screen, you’ll see a Show recovered data in Explorer button that you can click to go directly to your retrieved files.