Reading Time: 8 minutesEven though NTFS is a significant upgrade over Microsoft’s older FAT32 system, it’s still not immune to data loss. You’ve got a few ways to recover lost or deleted files. In this guide, we’ll lay out each option step by step and show you how to recover data from an NTFS partition, whether it’s on an internal drive or an external one.
Before you begin the recovery process, stop using the drive so you don’t accidentally overwrite your lost data. We also highly recommend creating a backup to keep your data exactly as it is. That way, if anything goes wrong during recovery, you’ll have a point to fall back on.
How to Recover Deleted Files From an NTFS Partition
Files can be lost from an NTFS partition for various reasons, such as accidental deletion, formatting errors, you name it. When that happens, Windows first removes the file from its location, then drops it from the file system, and eventually, the drive can overwrite its space. Because data loss can play out in different ways, we’ve put together several recovery methods to cover as many scenarios as possible. If the first try doesn’t work, move on to the next one – we’ll help you find a way to get your deleted data from the NTFS partition back.
Method #1: Check the Recycle Bin for Deleted Files
If you can’t find your files on an NTFS partition, start by checking the Recycle Bin. Windows sends files deleted the usual way there first, and they stick around until you empty the bin or it hits its size limit. Think of the Recycle Bin as a safety net that helps you restore files when you need them.
Keep in mind, though, that using the Shift + Delete command skips the Recycle Bin entirely. The same thing happens with files you delete from an SD card or USB drive connected to your PC – they are deleted immediately without landing in the Recycle Bin.
- Double-click the Recycle Bin icon on your desktop.

- Browse the list of deleted files and folders. Sort by name, deletion date, or original location to find what you’re looking for.
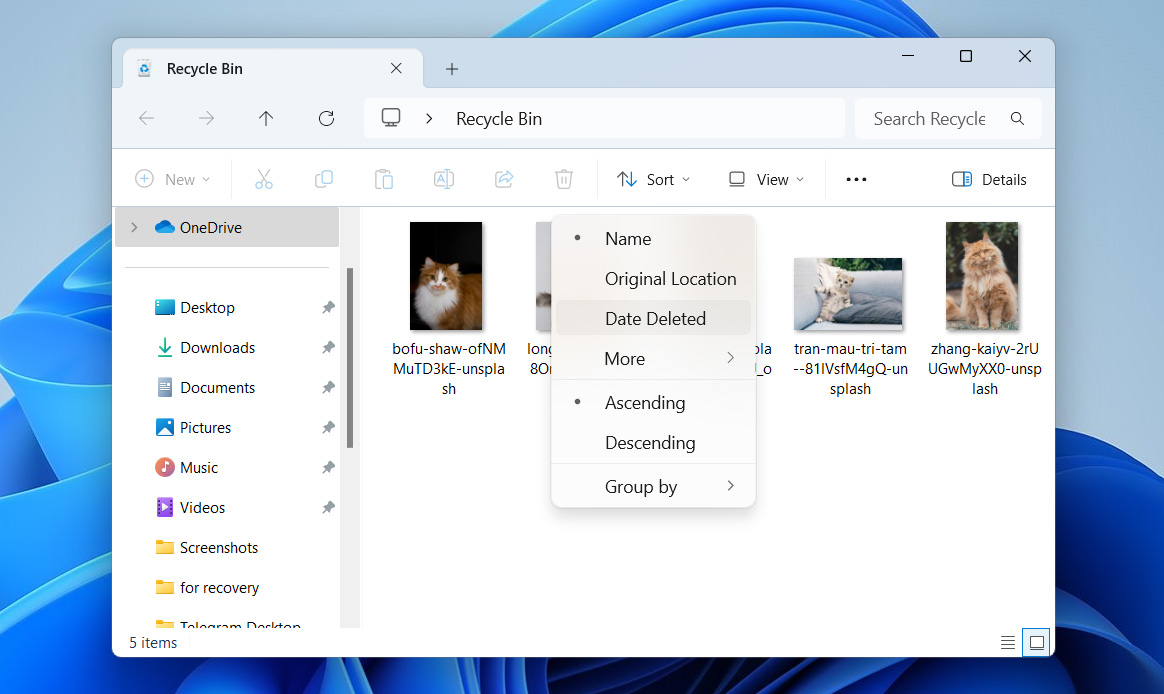
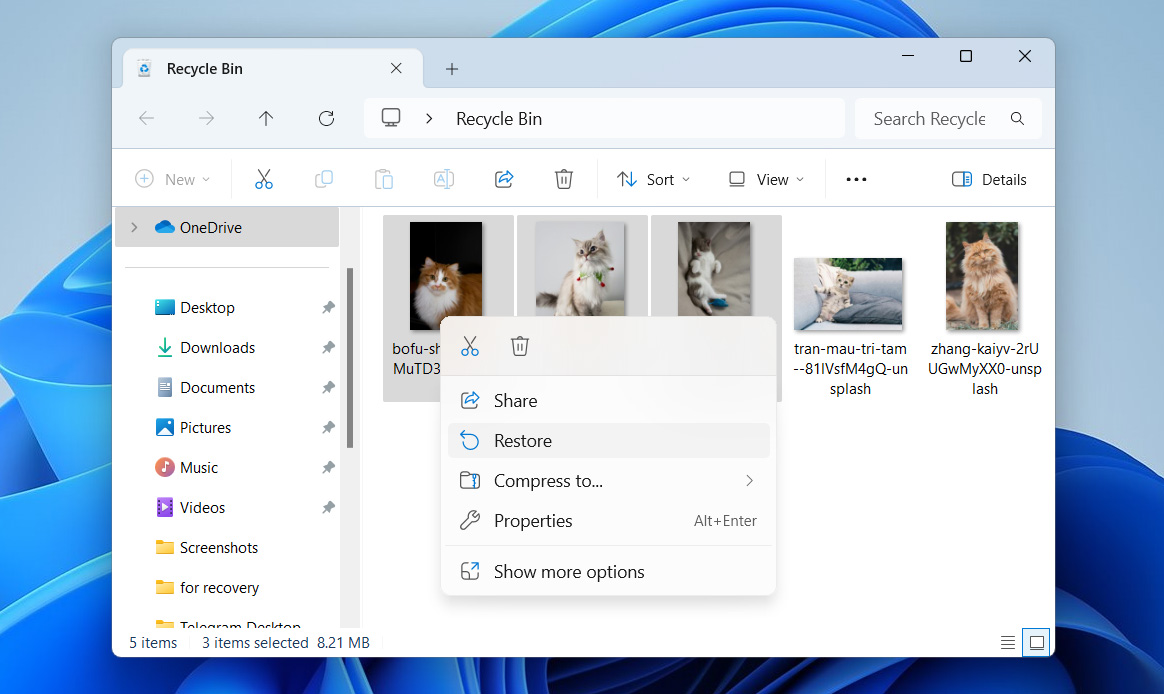
- Then, right-click the file or folder, choose Restore, and it will return to its original location.
- Go to the original location to confirm it has been restored correctly.


Method #2: Use NTFS Data Recovery Software
If you don’t see your files in the Recycle Bin, you’ll need data recovery software to get them back. These tools scan the file system and piece together deleted files, provided their data hasn’t been overwritten. That’s why it’s so important to stop using the drive and act fast when you’re trying to recover data from an NTFS partition.
If you’ve never used data recovery software before, choosing one among the many options available on Google can be difficult. To make it easy, check out our list of the best Windows recovery tools or browse our top open-source options. Short on time? Go straight for Disk Drill. It’s a trusted data recovery software that handles nearly any data-loss scenario. Even if your NTFS file system is corrupted, Disk Drill can recover files using signatures alone (no intact file system is needed), and it supports approximately 400 file types.
Here are the steps to follow to recover NTFS partitions using Disk Drill:
- Go to the official CleverFiles website and download Disk Drill. When installing it, follow the prompts, but confirm that you don’t install it on the same drive where your lost NTFS data is located, as you might overwrite it.
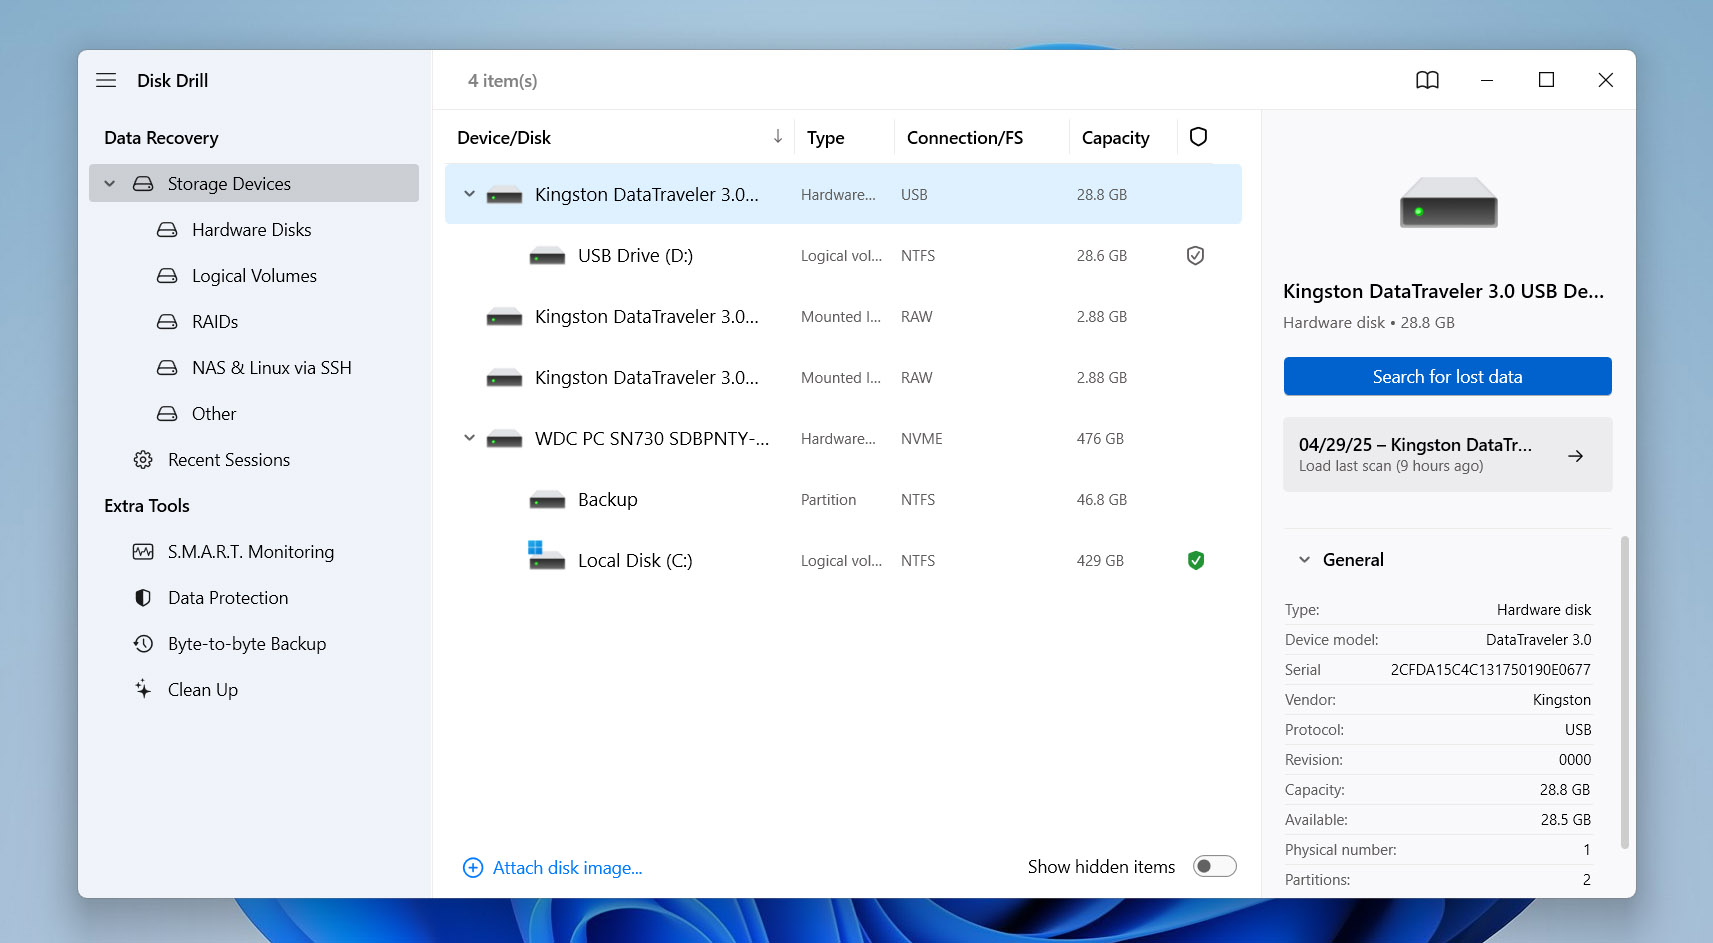
- Launch Disk Drill. It will show you a list of all available drives. If you’re trying to recover data from an external drive, plug it in now, and it should show up. Select the entire disk (not just the NTFS partition) that contains the lost data. Scanning the whole drive usually gives better results. Then, click Search for lost data to start the scan.
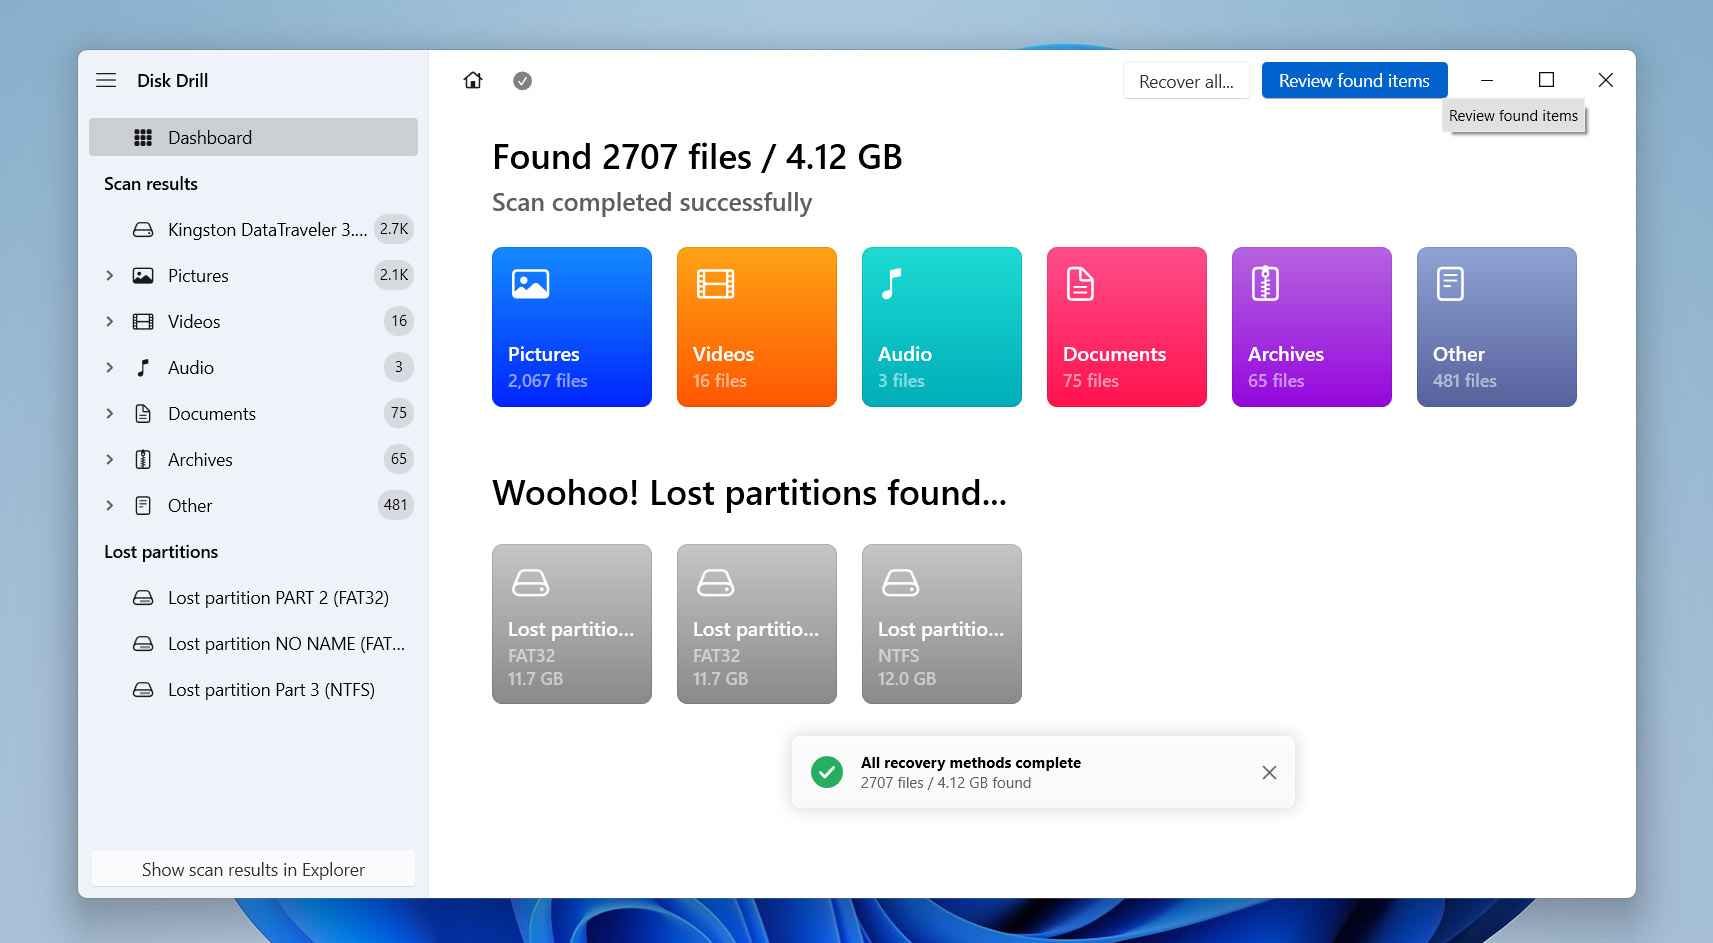
- Once the scan finishes, hit Review found items to see what Disk Drill has recovered. You can start recovering files as they appear, but it’s better to wait until the full scan is complete. Disk Drill will then indicate the likelihood of successfully recovering each file, categorized as high, average, or low.
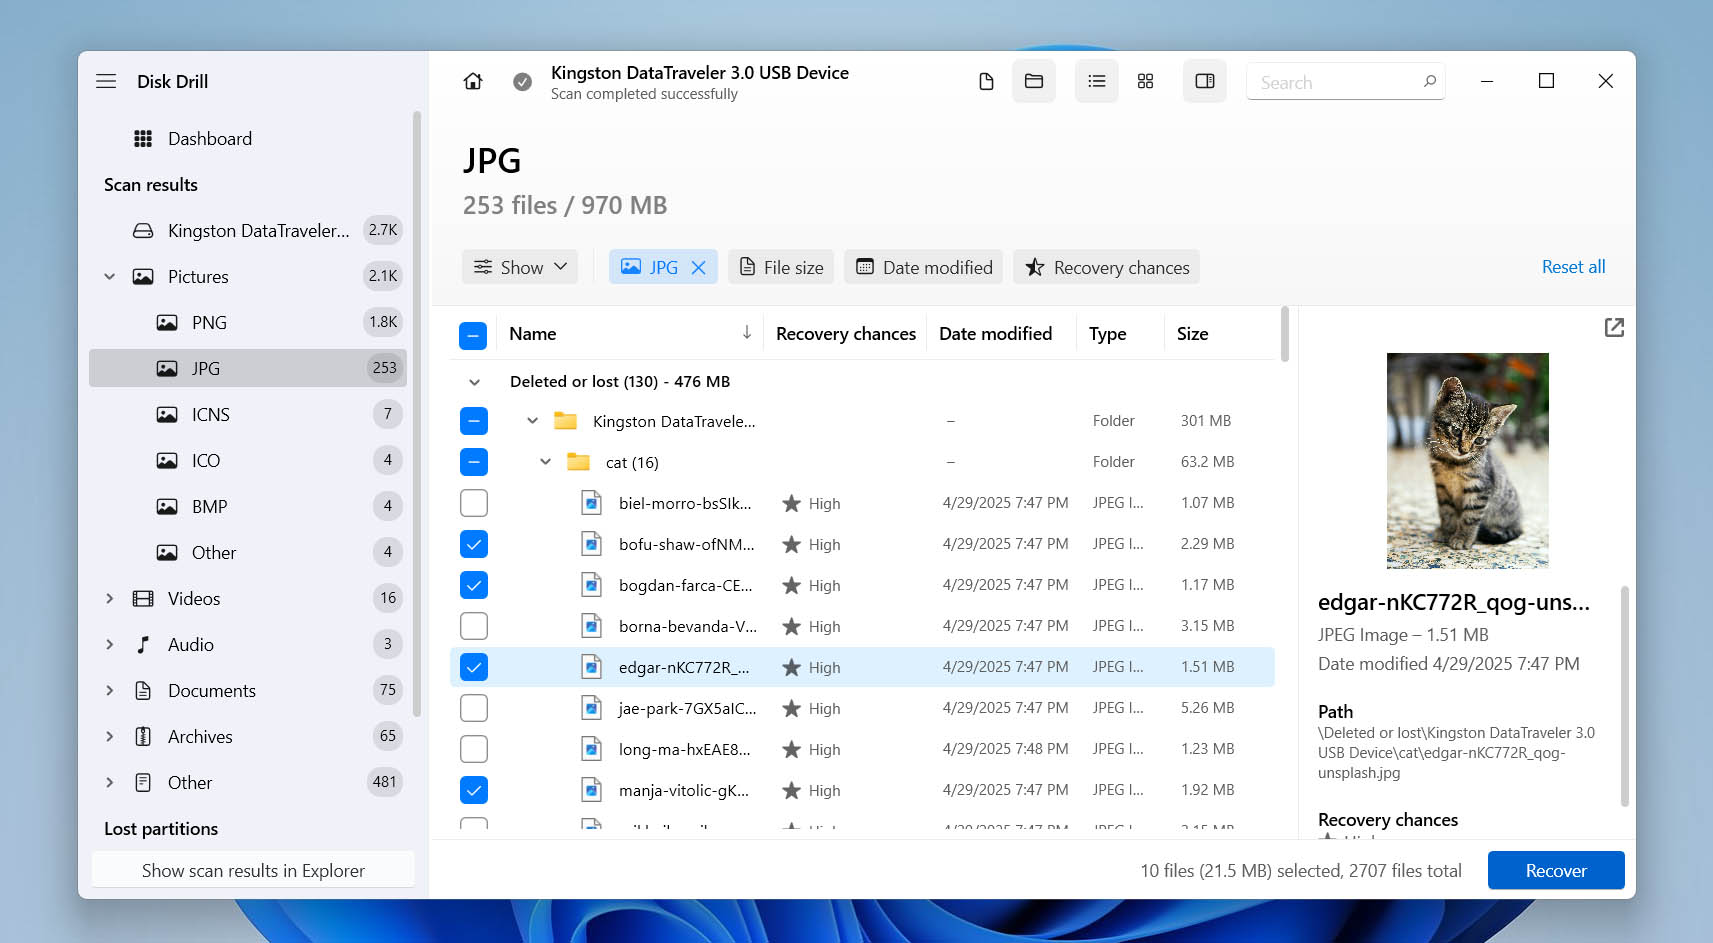
- Browse through the results and check the boxes next to the files you want. Double-click any file to preview it. When you’re ready, click the blue Recover button in the bottom right.
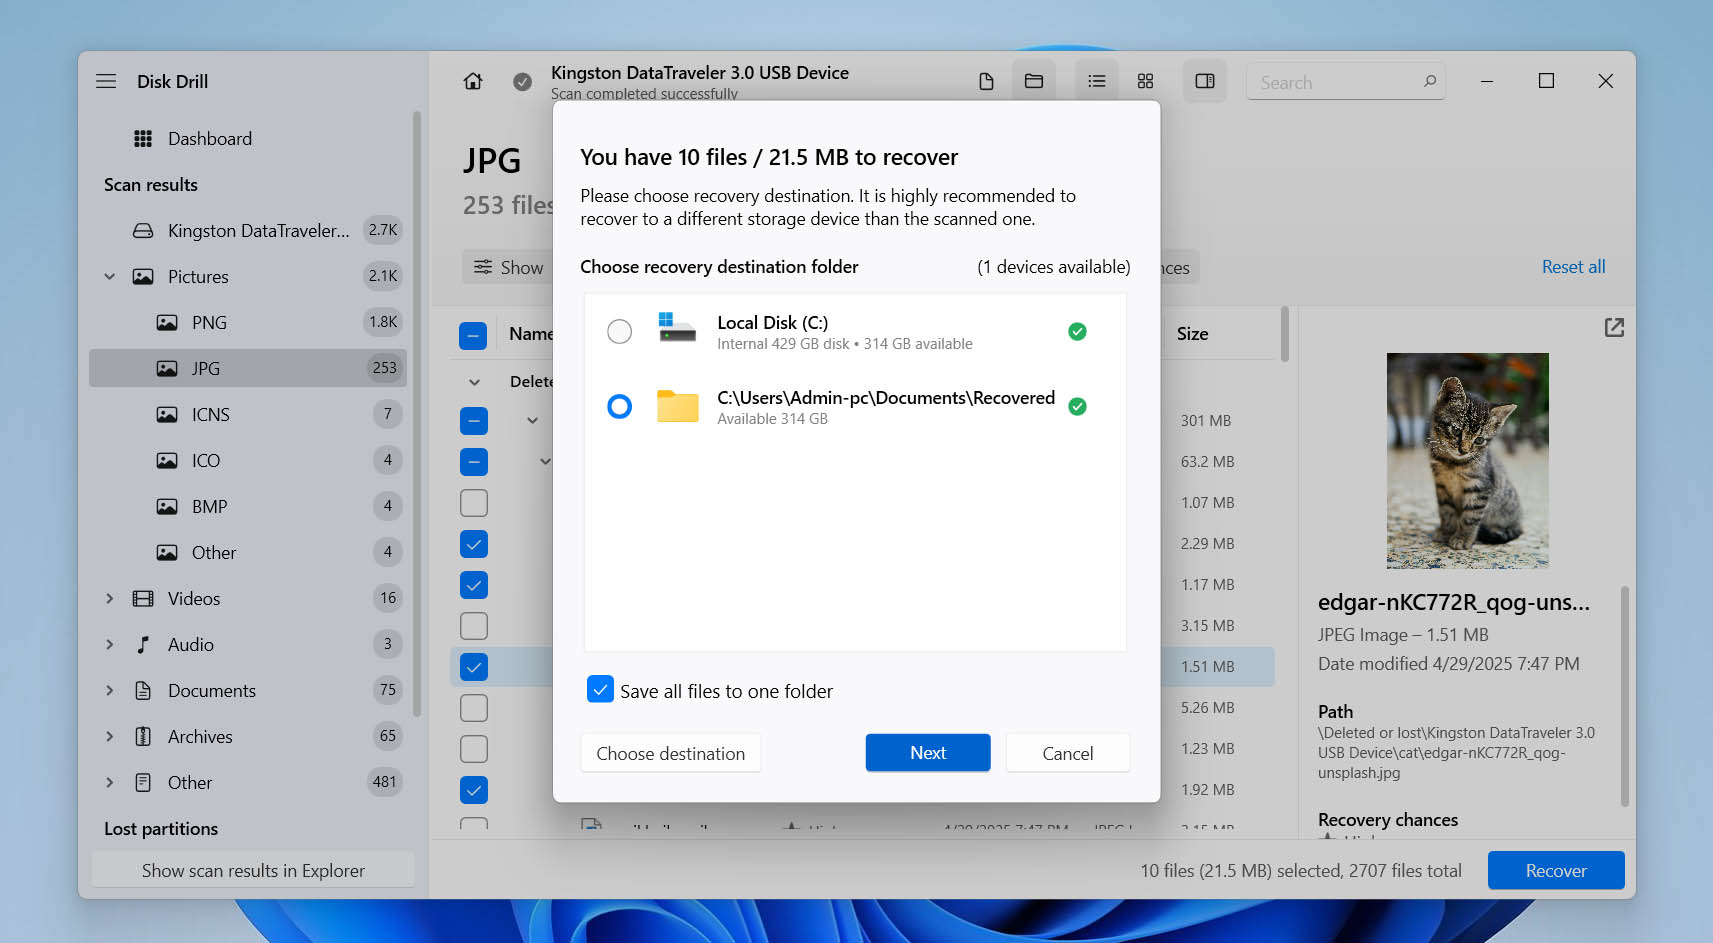
- Choose where you want to save the recovered files. If you’re planning to run more scans later, don’t save them to the same disk you’re recovering from. Disk Drill displays a green checkmark for safe locations and a yellow icon if the area may cause issues. After you select a destination, click Next.
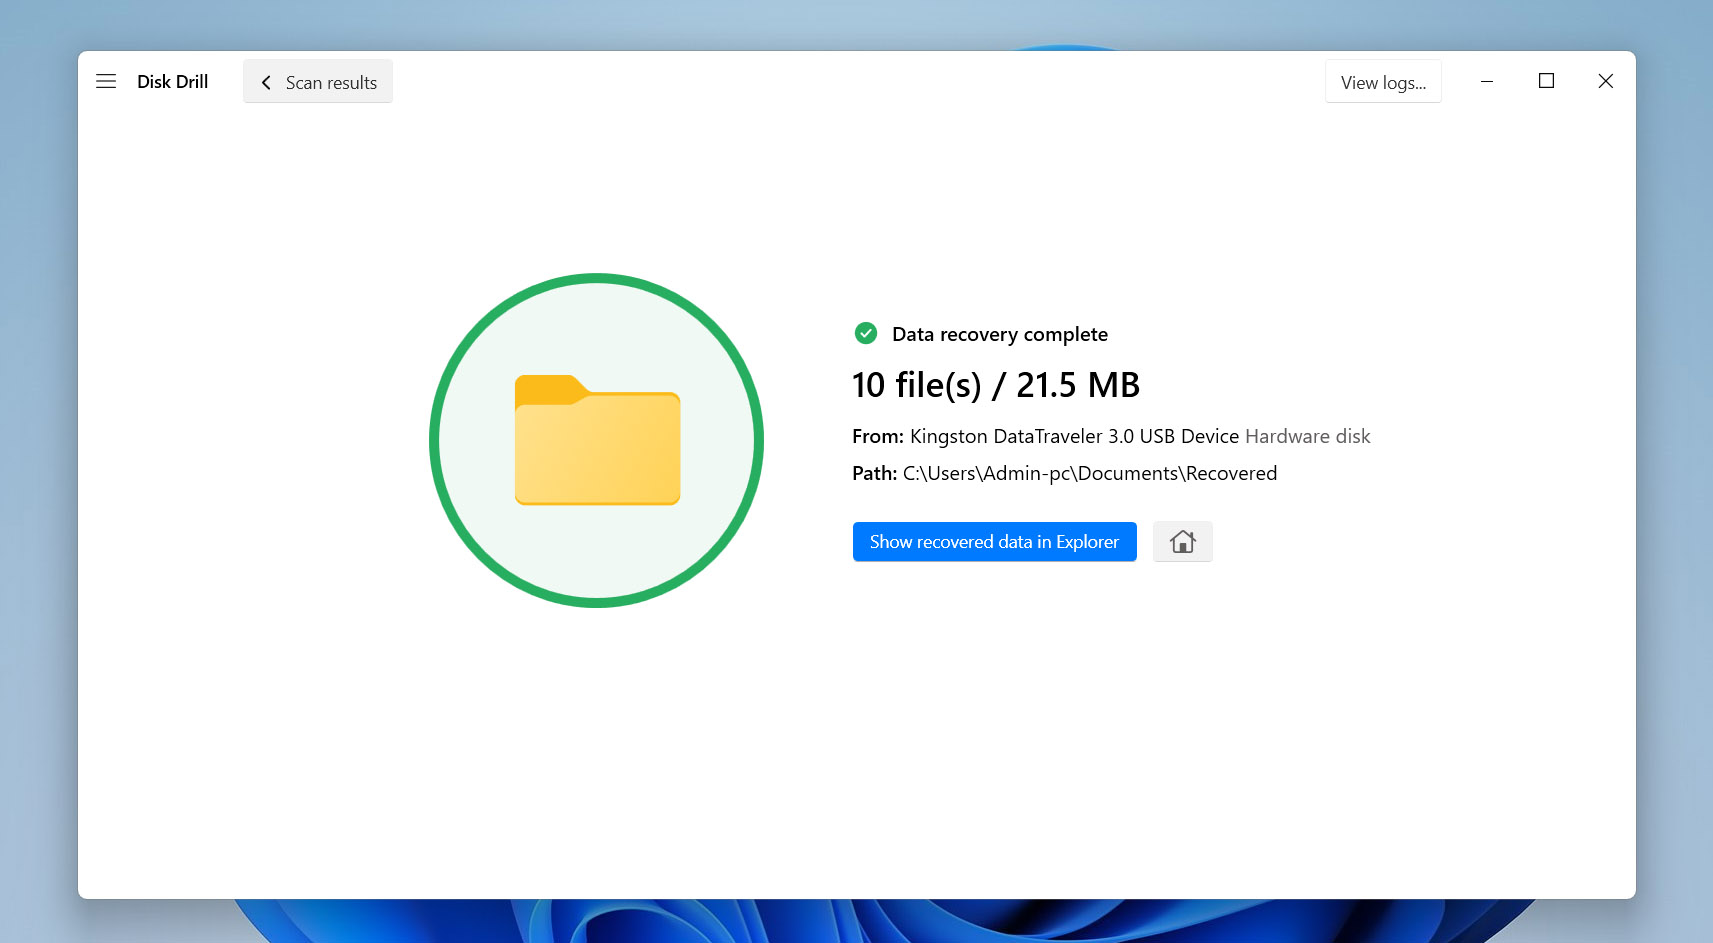
- Disk Drill will restore the files and display a confirmation message when the process is complete. You can open the folder right away to check your recovered data.


Disk Drill allows you to recover up to 500 MB of data for free, which is typically enough for your most critical files. If you need more, upgrade to the Pro version.
Method #3: Recover an Entire Lost NTFS Partition
Sometimes it’s not just your files that go missing, you might lose the entire NTFS partition or find it’s so corrupted you can’t access it at all. In such cases, consider using TestDisk. It’s a free, open-source, command-line tool that can restore lost partitions and repair non-booting drives, making it perfect for heavy-duty disk recovery.
Sometimes TestDisk can fix the partition but mess up the file table, which means you’ll get the drive back but lose your files. To avoid this, recover your most important data first, use Disk Drill as we showed, or at least create a byte-for-byte image of the drive so you have a backup in case anything goes wrong.
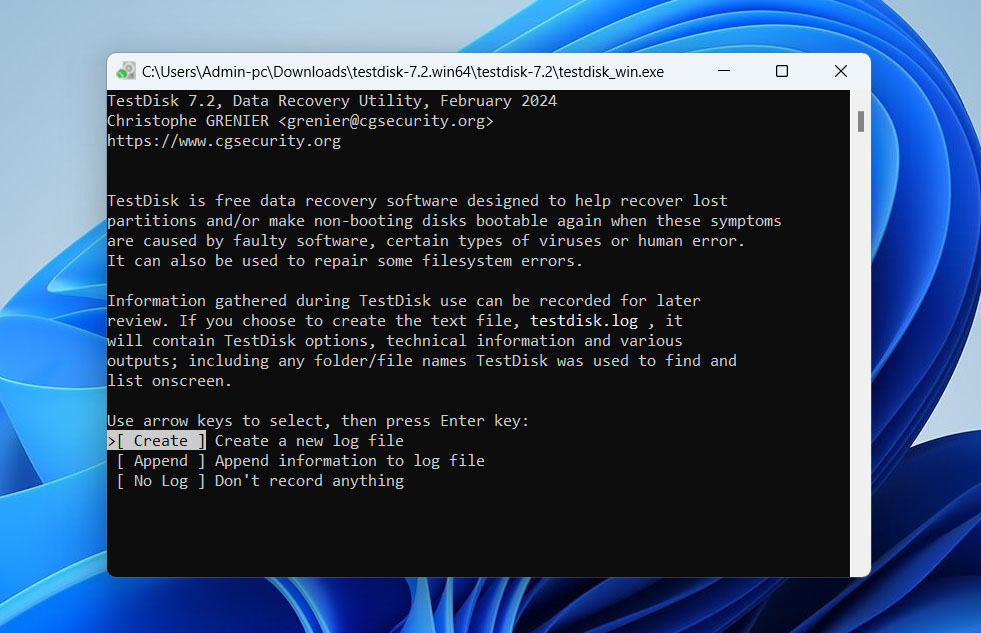
- Download TestDisk from its official website. Extract the files and run the TestDisk executable to open the command-line interface.
- When TestDisk launches, it’ll ask if you want to create a log file. Choose Create – keeping a log can help if you run into any issues later.
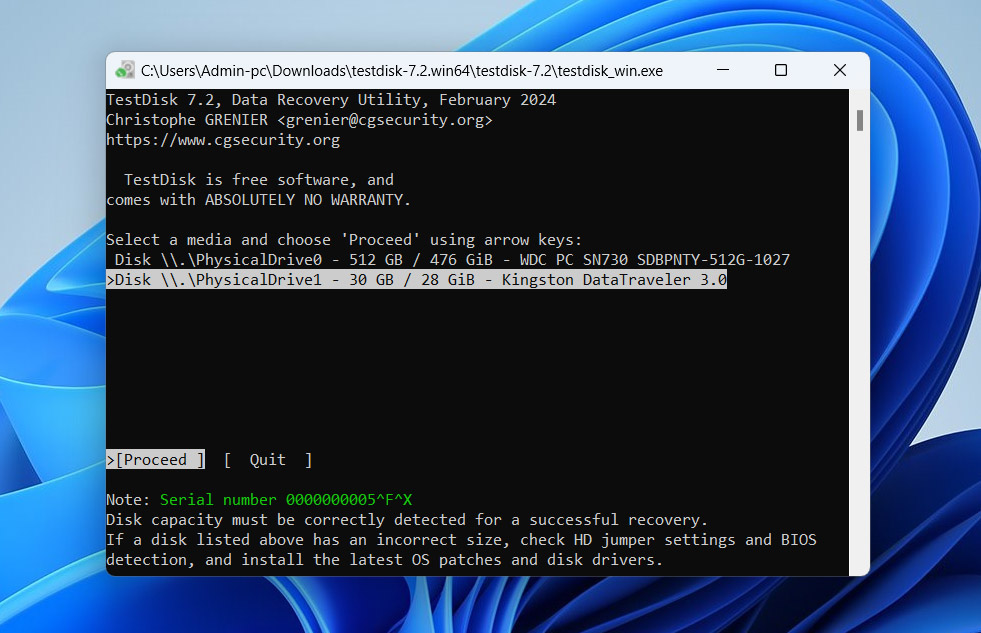
- TestDisk will then show a list of all connected storage devices. Use the arrow keys to select the disk that had the lost NTFS partition, then press Enter.
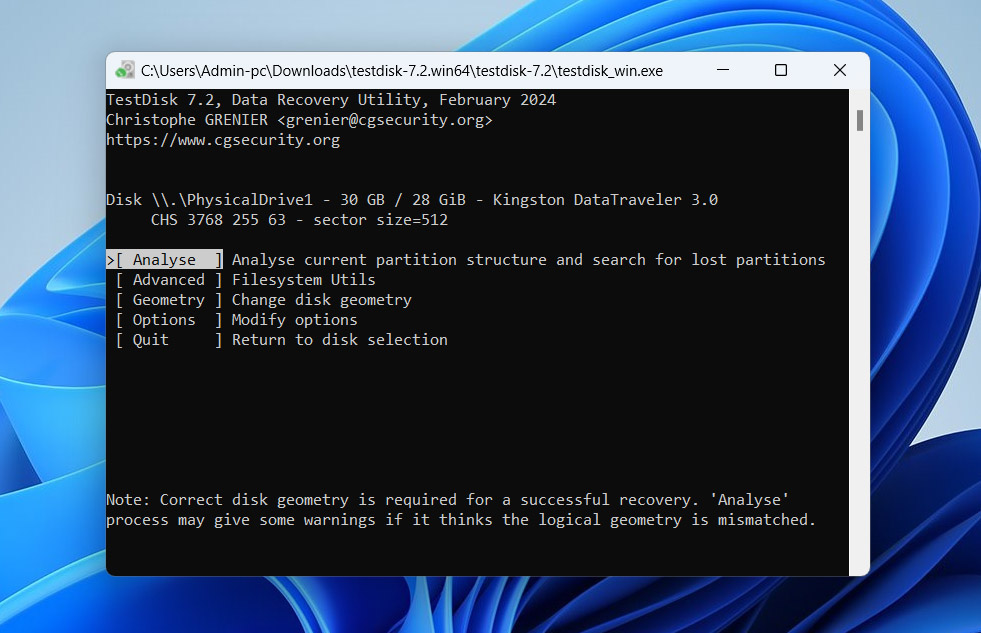
- Next, it’ll ask for the partition table type. TestDisk usually detects this automatically. For most Windows systems, it’ll be Intel or EFI GPT if you’re using a newer computer with UEFI.

- Select Analyse, then choose Quick Search, and hit Enter to start scanning for lost partitions.
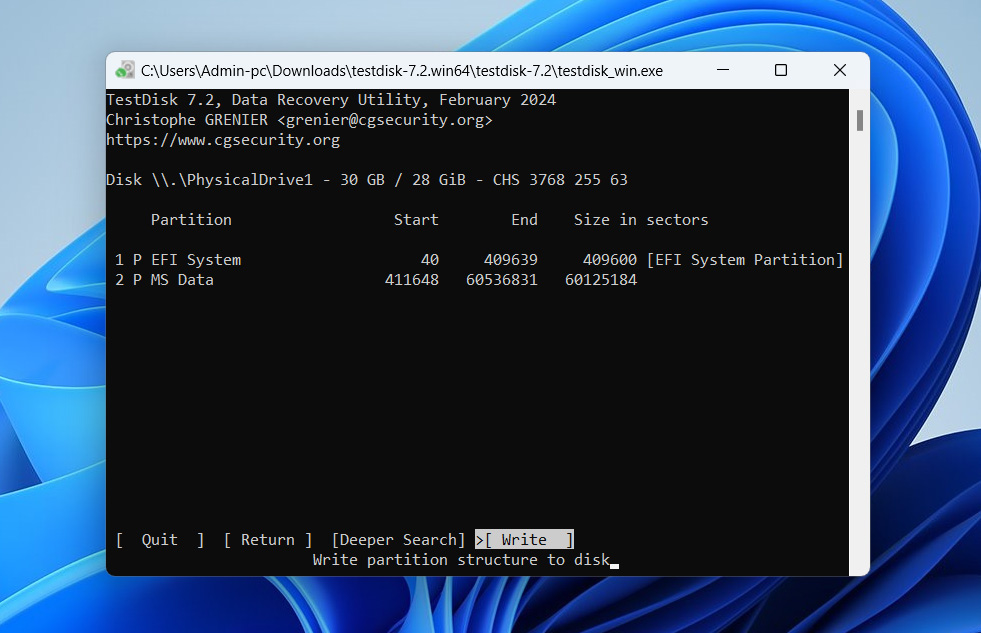
- Once the scan finishes, TestDisk will list any partitions it finds. If you see the missing NTFS partition, press P to view the files and make sure it’s the right one.
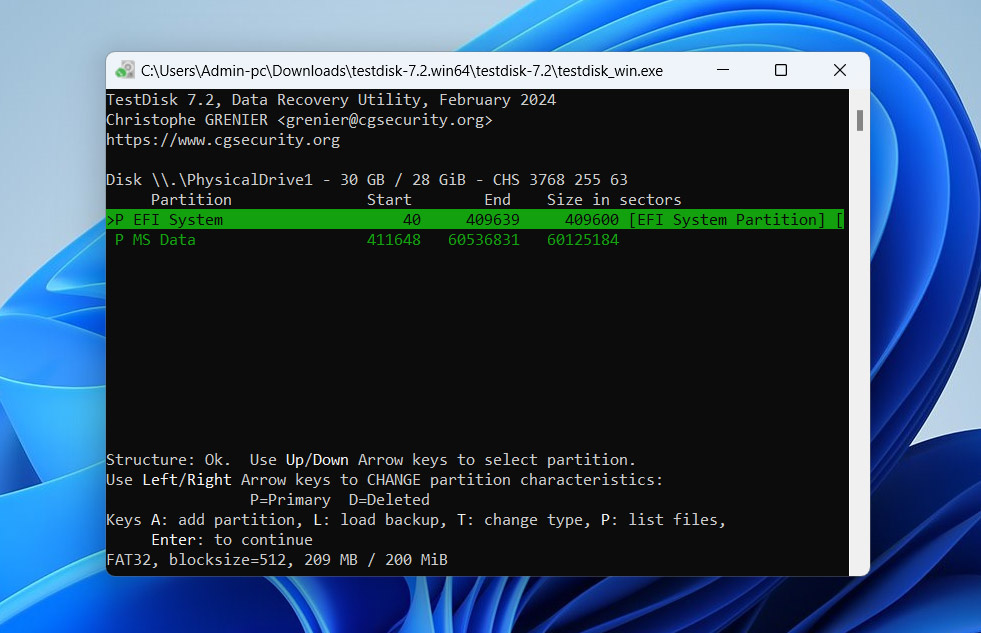
- If everything checks out, choose Write to save the new partition table to the disk.
- After restoring the partition, exit TestDisk and reboot your computer. Then check if the partition and your files are accessible again.


If TestDisk doesn’t find the partition on the first try, you can run a Deeper Search. It takes longer, but it digs deeper and has a better chance of finding lost partitions.
Method #4: Use Existing Backups to Restore Data from an NTFS Partition
The last method we’ll cover is restoring it using a File History backup. File History is a built-in Windows feature that automatically saves copies of files from your libraries, desktop, favorites, and contacts folders. Just keep in mind, it’s not a full system backup – it only captures specific folders and their contents.
This method only works if you had File History set up before the data went missing from the NTFS partition. Additionally, the files you lost must have been stored in one of the default folders that File History covers, such as Documents, Music, Pictures, Videos, Desktop, Favorites, or Contacts. If the files weren’t stored in one of those folders, this method won’t help you recover them.
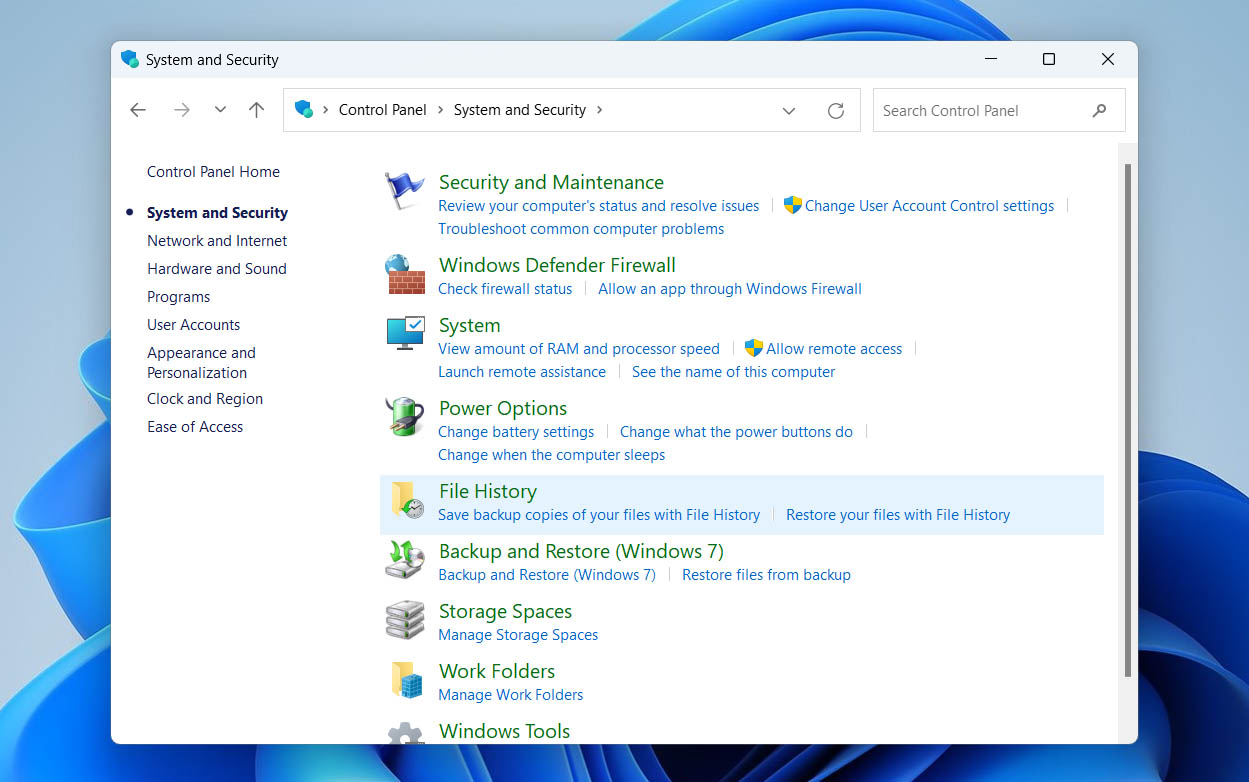
- Open the Control Panel on your Windows PC. Go to System and Security, then click File History.
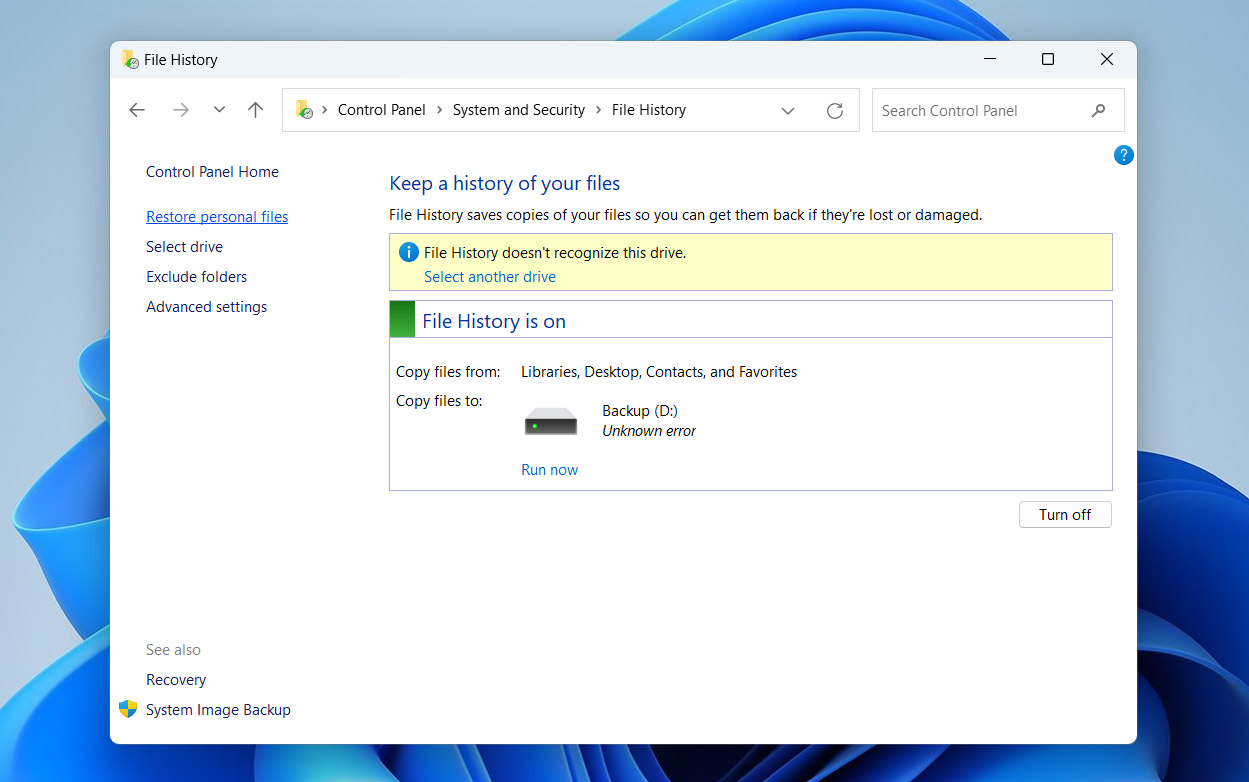
- In the File History window, select Restore personal files on the left.
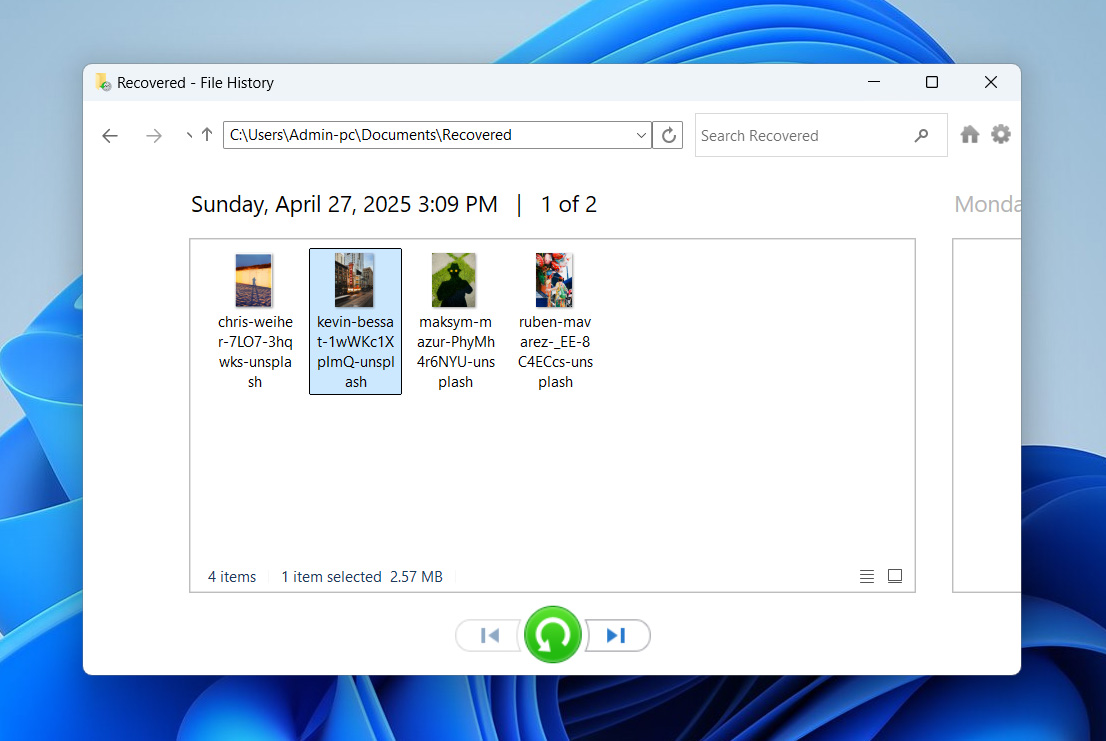
- Use the arrows to scroll through your backups by date and time to find the version that has your lost files.
- Once you’ve found it, navigate the folders, check the files or folders you want, and click the green Restore button at the bottom to send them back to their original location. If you’d rather not overwrite existing files, right-click the restore button and choose Restore to, then pick a different folder.
- Go to the restored location and double-check that your files are all there and intact.


Sure, you can also recover files from a physical or cloud backup, if you have one. That’s probably the first thing you’d check before turning to articles like this. But let’s be honest – if you’re here reading this, you likely don’t have a backup handy, or it didn’t include the files you lost.
Conclusion
Losing data on an NTFS partition is common, but it’s usually fixable. Start by opening the Recycle Bin – if your files are there, hit Restore and you’re good. If not, check for any backups and restore from those. No backups? Use a recovery tool like Disk Drill right away. The faster you act, the better your chances – before Windows overwrites what’s left of your deleted files.
If files disappear from an NTFS partition without you deleting them, the file system may be in a bad state. You may need to reformat the partition, but read up on how to do it without losing data first, so you won’t have to stress later. If a reformat doesn’t fix the problem, it might be cheaper (and easier) to replace the drive altogether than to pay a professional to repair it.