
Reading Time: 5 minutesWhen a file is deleted, it is usually sent to the Recycle Bin. However, under some circumstances, files may not show up in the Recycle Bin. The good news is- they aren’t immediately wiped from your storage, the space they occupy is simply marked as free for new data. If you act quickly, you can recover a deleted file or folder not in the Recycle Bin using one of the methods outlined below.
How to Recover Deleted Files That Are Not in the Recycle Bin
Here, we’ll explore both Built-in Windows Tools as well as Third-Party Data Recovery Software.
Method 1: Recover Files That Are Not in the Recycle Bin Using Data Recovery Software
Disk Drill offers professional-level functionality and is easy to use. It can also recover more than 400 different file types, which makes it one of the best data recovery applications available on the market. To use Disk Drill to recover deleted items that are not in the Recycle Bin do the following:
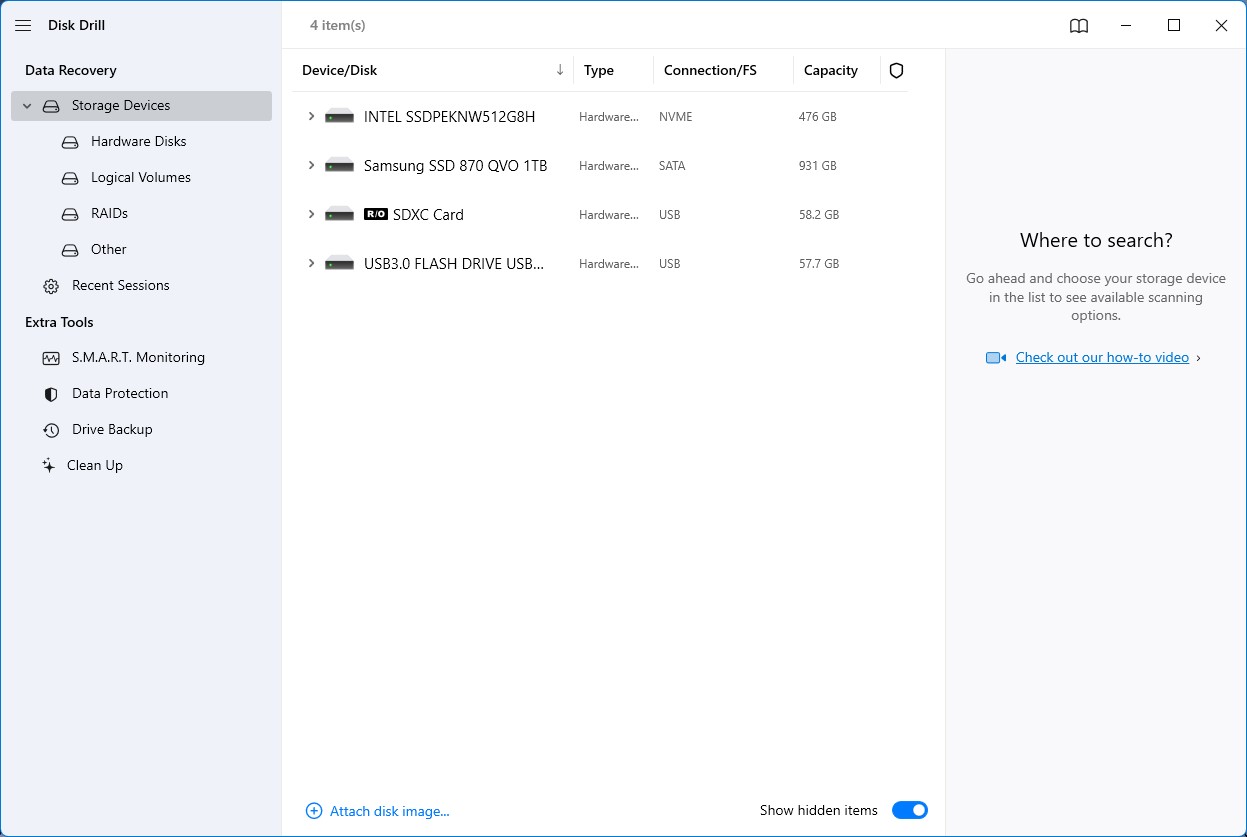
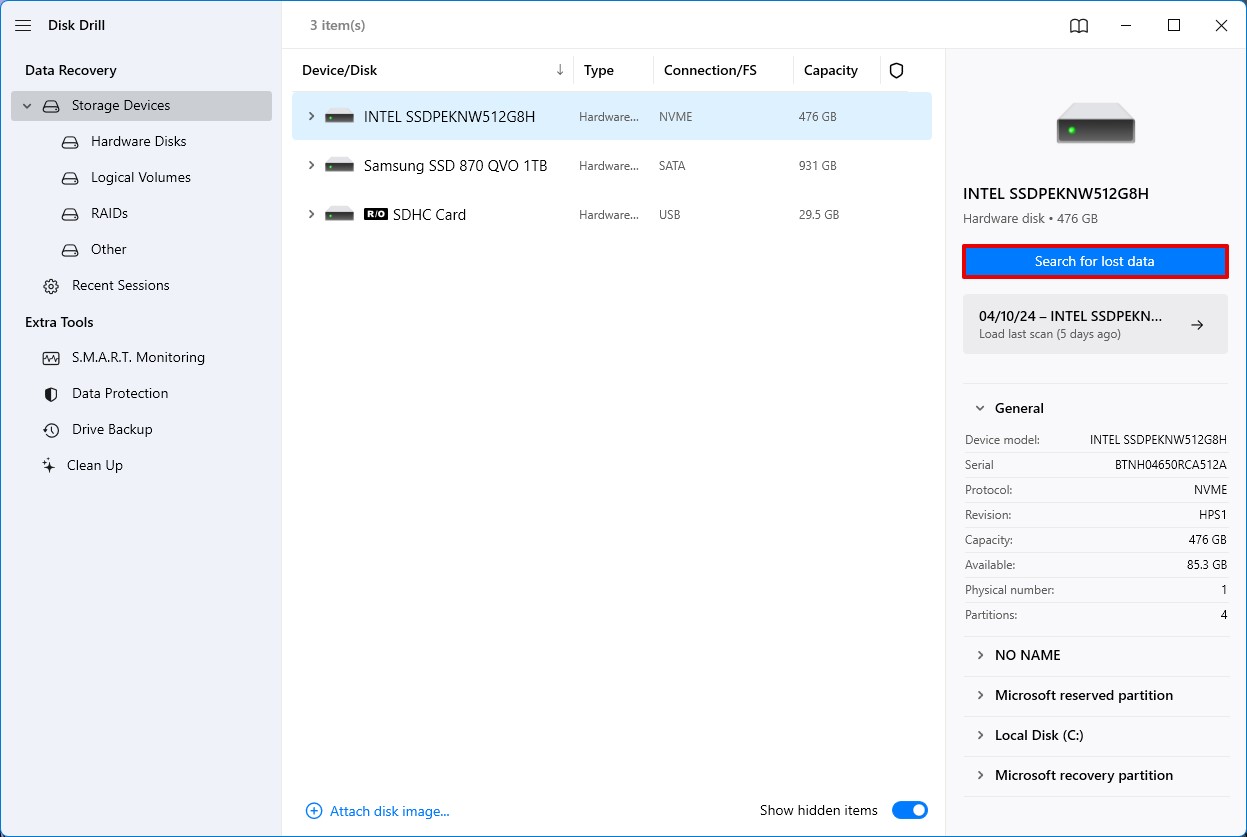
- Download Disk Drill and install it on your computer. Windows’ User Account Control will ask you for admin permissions to allow Disk Drill to run its advanced data recovery algorithms. After you open Disk Drill, select the drive that you want to recover from.
- Select Search for lost data to start the search process. This runs through all of Disk Drill’s available recovery algorithms in the optimal order to increase your chances of finding the maximum amount of files possible.
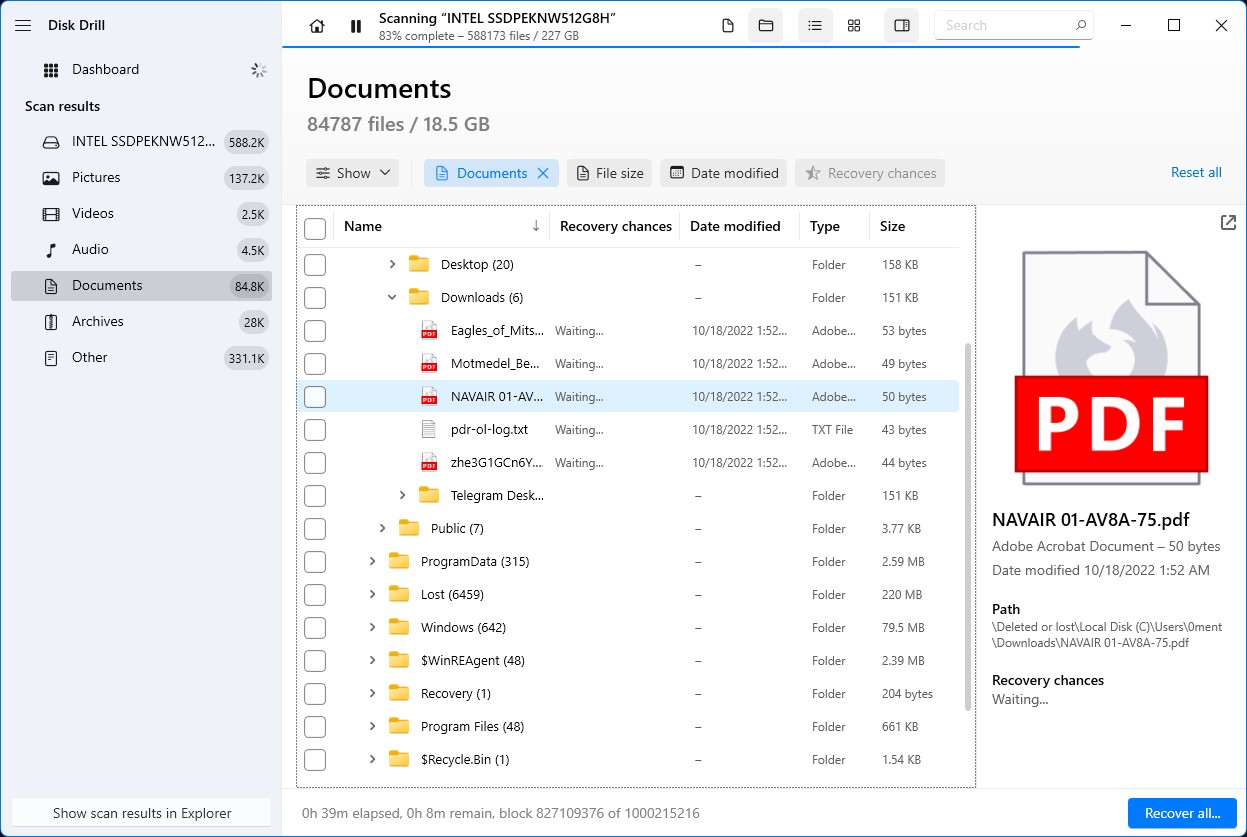
- Locate the files that you want to recover. You will be presented with a list of files that can be recovered. This list will even include hidden files. Select the category of file that best corresponds to what you’re looking for. For example, if you were looking for a document, you would select Documents to help you find what you’re looking for more quickly.
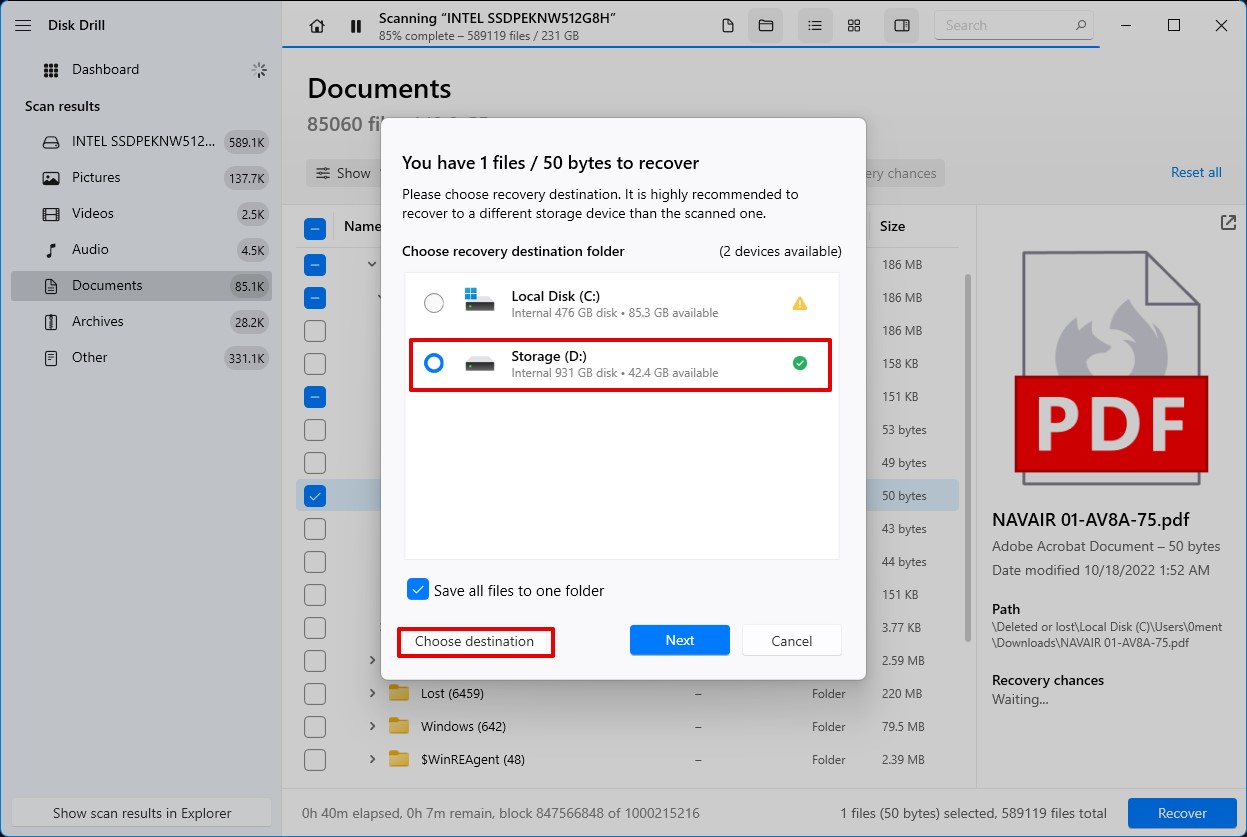
- Save the files you want to recover. You should save these files to another storage device as you may overwrite the very files that you’re trying to recover if you attempt to save these files to the same storage devices that you’re recovering from. Disk Drill will display a confirmation message to let you know if the process was successful or not.

Method 2: Recover Deleted Files That Are Not in the Recycle Bin Using File History
If File History is set up on your computer, you can restore files by following these steps:
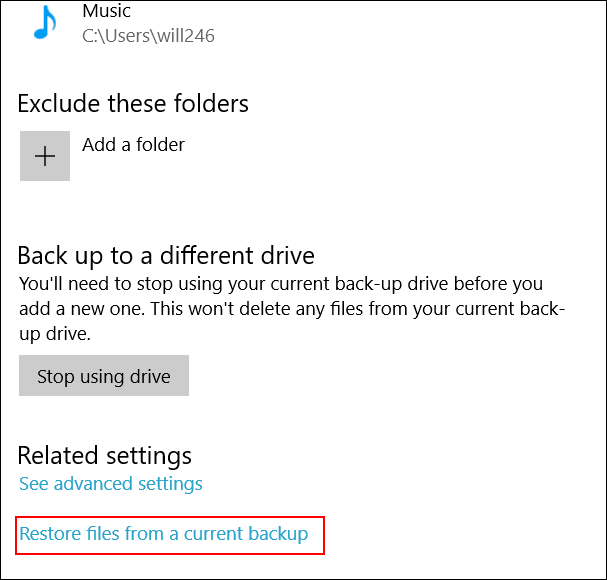
- Open the Settings app and then go to Update & Security > Backup. Select Restore files from a current backup to get started.
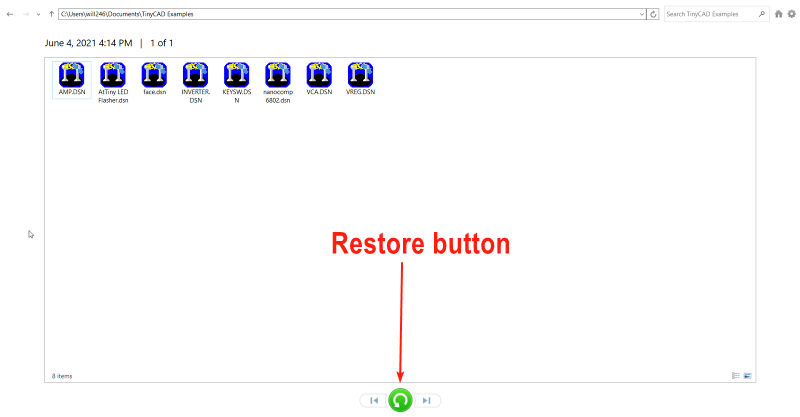
- Browse to the folder where the files that were deleted were originally located. From there, you can select the green Restore button.


Method 3: Recover Deleted Files That Are Not in the Recycle Bin Using Folder’s Previous Versions
Alternatively, you can rollback the folder that contained your files to the previous version. Here’s how:
- Browse to the location of the deleted files, right-click on the folder, and then select Properties.
- Click on the Previous Versions tab.
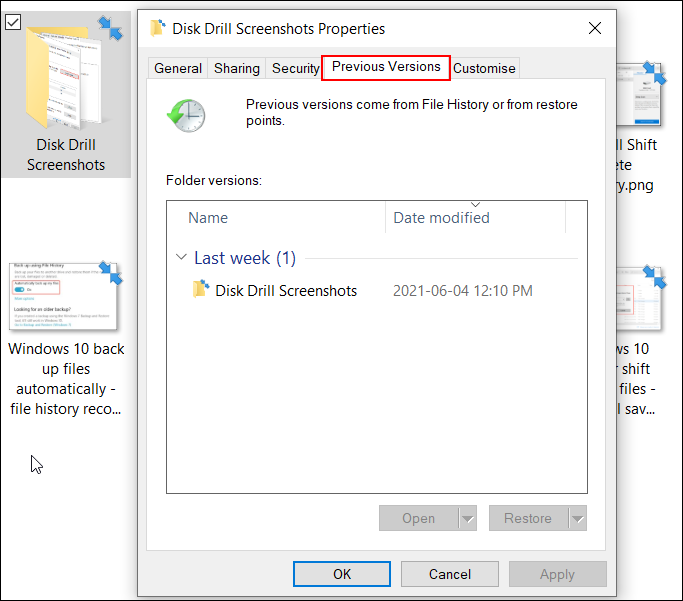
- You will then be able to select any of the previous versions of the file. Check the dates associated with the previous versions available to see if any backups correspond with the time when your files still were there.
- Select this backup and click on ‘Restore’.

How to Set Up File History
If you didn’t set up file history previously, here’s the guide on how to do it now.
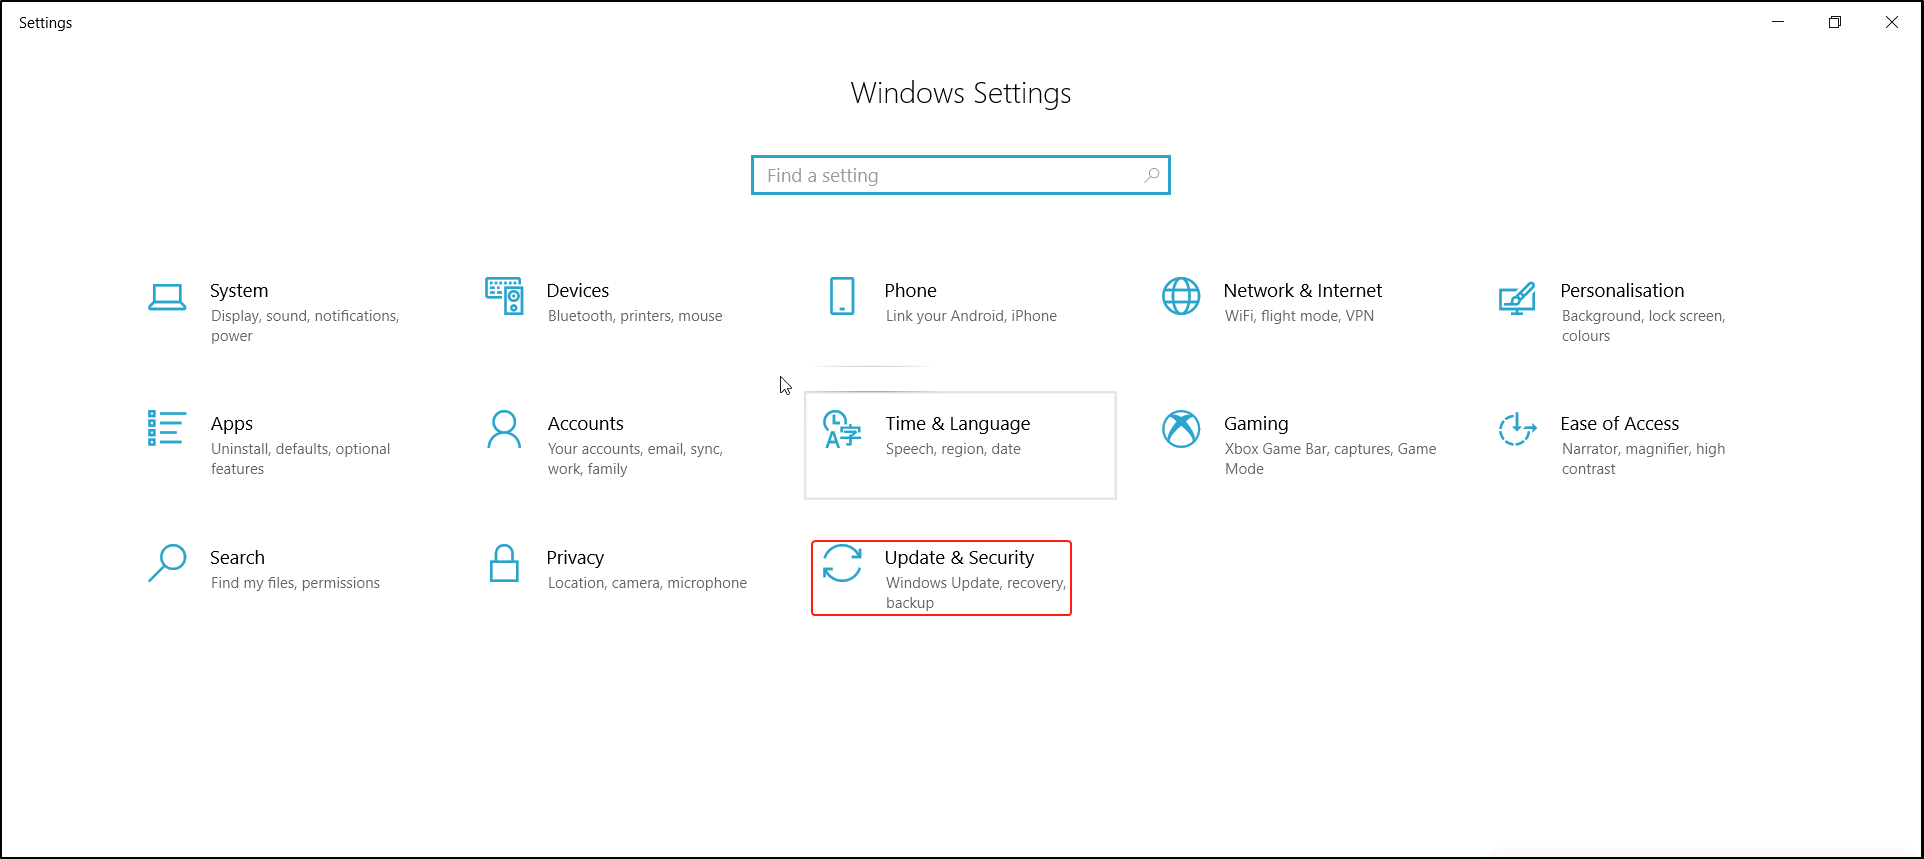
- Open the Settings app in Windows and go to Update & Security.
- Select Backup from the left sidebar.
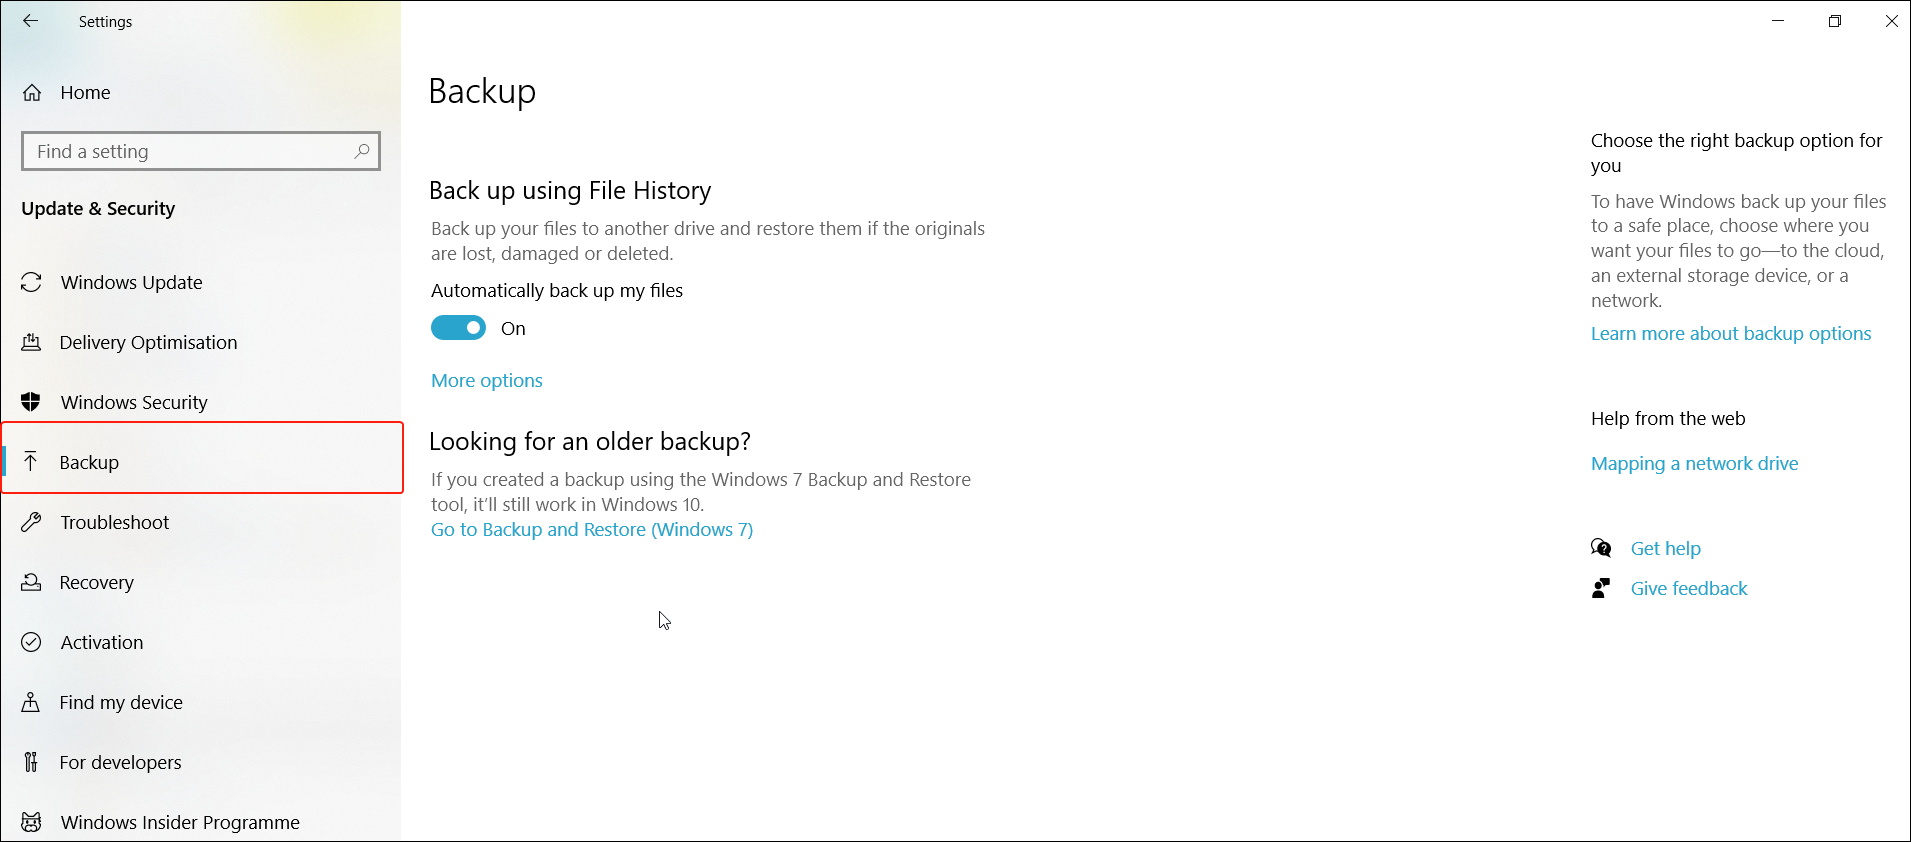
- From the Backup screen, you will now be able to select the drive that you want to use for backing up your files. Select Add a drive to do this.

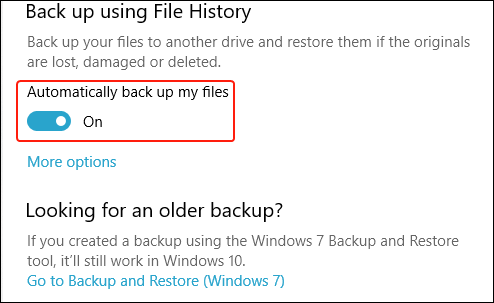
- After completing this, you should switch on automatic backups so that you don’t have to worry about manually completing backups. Do this by toggling on the Automatically back up my files option.


Wrapping Up
Files can be permanently deleted in Windows 11. However, there are chances to revert even that. With the right tools, you will be able to recover these files. You have the choice of using third-party data recovery software such as Disk Drill to recover ‘permanently’ deleted files that don’t go to the Recycle Bin or you can use tools built into windows to do this. The File History option backs up your files and with it, you can restore backups of files that may have been deleted but didn’t show up in the Recycle Bin.
FAQs