
Reading Time: 9 minutesDeleted a folder on your Windows computer and now trying to figure out how to recover it? We all use folders every day, as they’re a simple, customizable way to organize files, photos, documents, and more. However, when you delete a folder (whether intentionally or accidentally), all the files inside it are also deleted. That could mean losing hundreds or even thousands of items, like a year’s worth of photos or important work documents.
In this article, we’ll walk you through all the methods you can use to get your deleted folder and everything inside it back.
If you just deleted a folder and immediately realized it was a mistake, and you haven’t done anything else yet, press Ctrl + Z. This shortcut undoes your last action, so if deleting the folder was the last thing you did, it should bring it right back. If that doesn’t work, keep reading for more ways to recover it.
Is It Possible to Recover Deleted Folders on Windows 10 and Newer?
It’s pretty simple, as long as you pick the method that fits how you deleted the folder. Here’s what to know before you get started:
- 🗑️ If you deleted a folder using the typical Delete option or the Delete key, your folder will be moved to the Recycle Bin – open the bin and click Restore.
- 🫢 If you hit Shift + Delete to delete the folder or empty the Recycle Bin, Windows treats the folder as permanently deleted. However, if nothing has overwritten the data yet, data recovery software for Windows can still recover it. These programs scan the drive and piece files back together from leftover data.
- 💾 You’ll want to know which type of drive you’re dealing with. On an HDD, your most considerable risk is overwriting, so don’t save anything new until you’ve recovered your folder. On an SSD, it’s trickier – the moment you delete a file, the TRIM command kicks in and instantly clears that space, making recovery impossible (TRIM keeps SSDs fast by erasing unused blocks). If you’re on an SSD, you have to act right away and try to recover the folder immediately before TRIM scrubs it for good.
- 🗃️ If you’ve set up Windows’ built-in backups, you’re in great shape. Simply restore the deleted folder from your backup – no need to worry about overwriting or TRIM. Regular backups, whether manual or automatic, guarantee you can always get your data back.
5 Methods to Recover Deleted Folders on Windows
Everyone’s Windows habits differ – some of you have used recovery tools before, some back up regularly, and others haven’t. We’ll cover every method here. Pick one, review the steps, and follow them carefully.
Note that the methods below are ranked by urgency. If you’re unsure how the folder was deleted or which approach to take, work through each one in the order we list.
Method #1: Check the Recycle Bin for a Deleted Folder
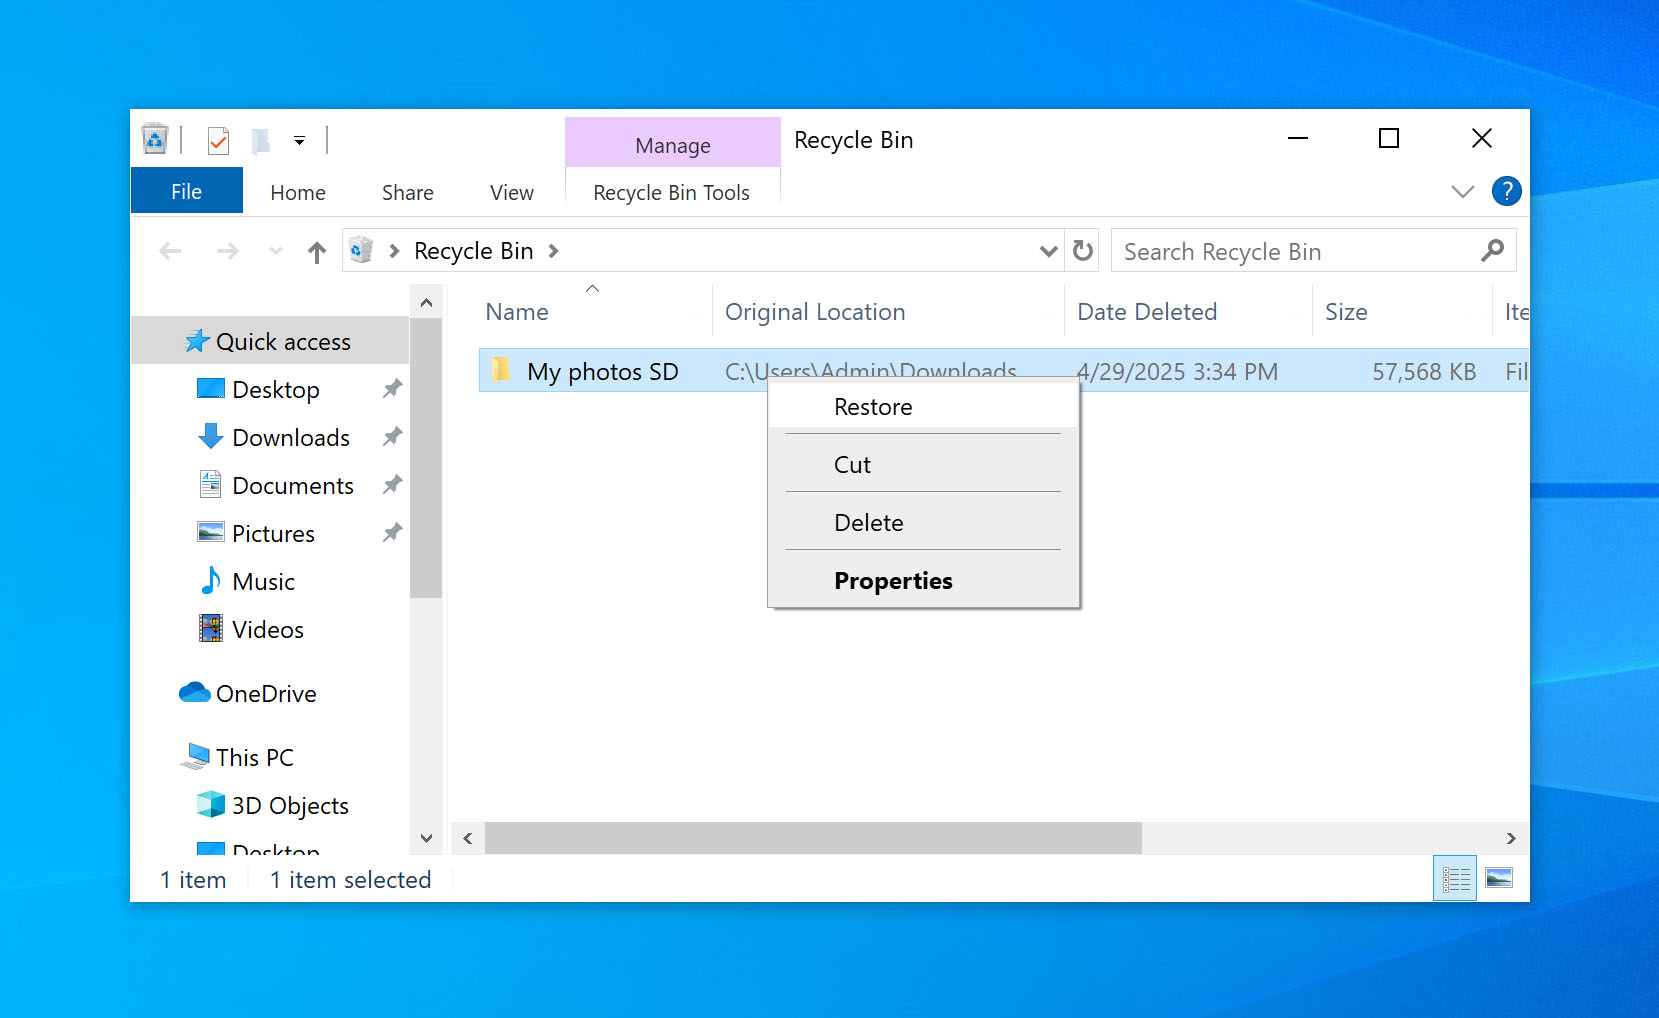
If you delete a folder on Windows and Ctrl + Z doesn’t bring it back, the first place you should check is the Recycle Bin. Windows sets aside part of your drive’s space in the form of the Recycle Bin to hold deleted files and folders, so you can restore or delete them whenever you want.
Remember, folders you delete with Shift + Delete skip the Recycle Bin entirely. The same goes for items that exceed the Recycle Bin’s storage limit.
- Double-click the Recycle Bin icon on your desktop to open it. Look through the list to find your deleted folder.

- If you find it, right-click the folder and select Restore – it’ll go back to its original spot. If you need to restore multiple folders, hold down the Ctrl key while clicking each one, then right-click and choose Restore to bring them all back at once.


Method #2: Use Data Recovery Software
These tools are beneficial if the folder was deleted from the Recycle Bin or removed in a way that bypassed it altogether. As long as the data hasn’t been overwritten by new files, like ones you downloaded or transferred from another device, recovery software can still scan your file system and bring it back.
We have tested several data recovery programs, but for this article, we will concentrate on Disk Drill. It’s our favorite because it handles almost any data loss situation without a problem, and recovering a deleted folder is no big deal for it. Disk Drill supports a wide range of file types and works with most storage devices, as well as various file systems such as FAT32, NTFS, and exFAT. Plus, a big bonus – it can restore entire folder structures, not just the individual files (something a lot of recovery tools can’t do).
Here’s an easy guide on how you can use Disk Drill to recover deleted folders:
- Download Disk Drill for Windows from the official website. Make sure you save the installer to a different drive than the one where your deleted folder was stored, so you don’t accidentally overwrite your data.
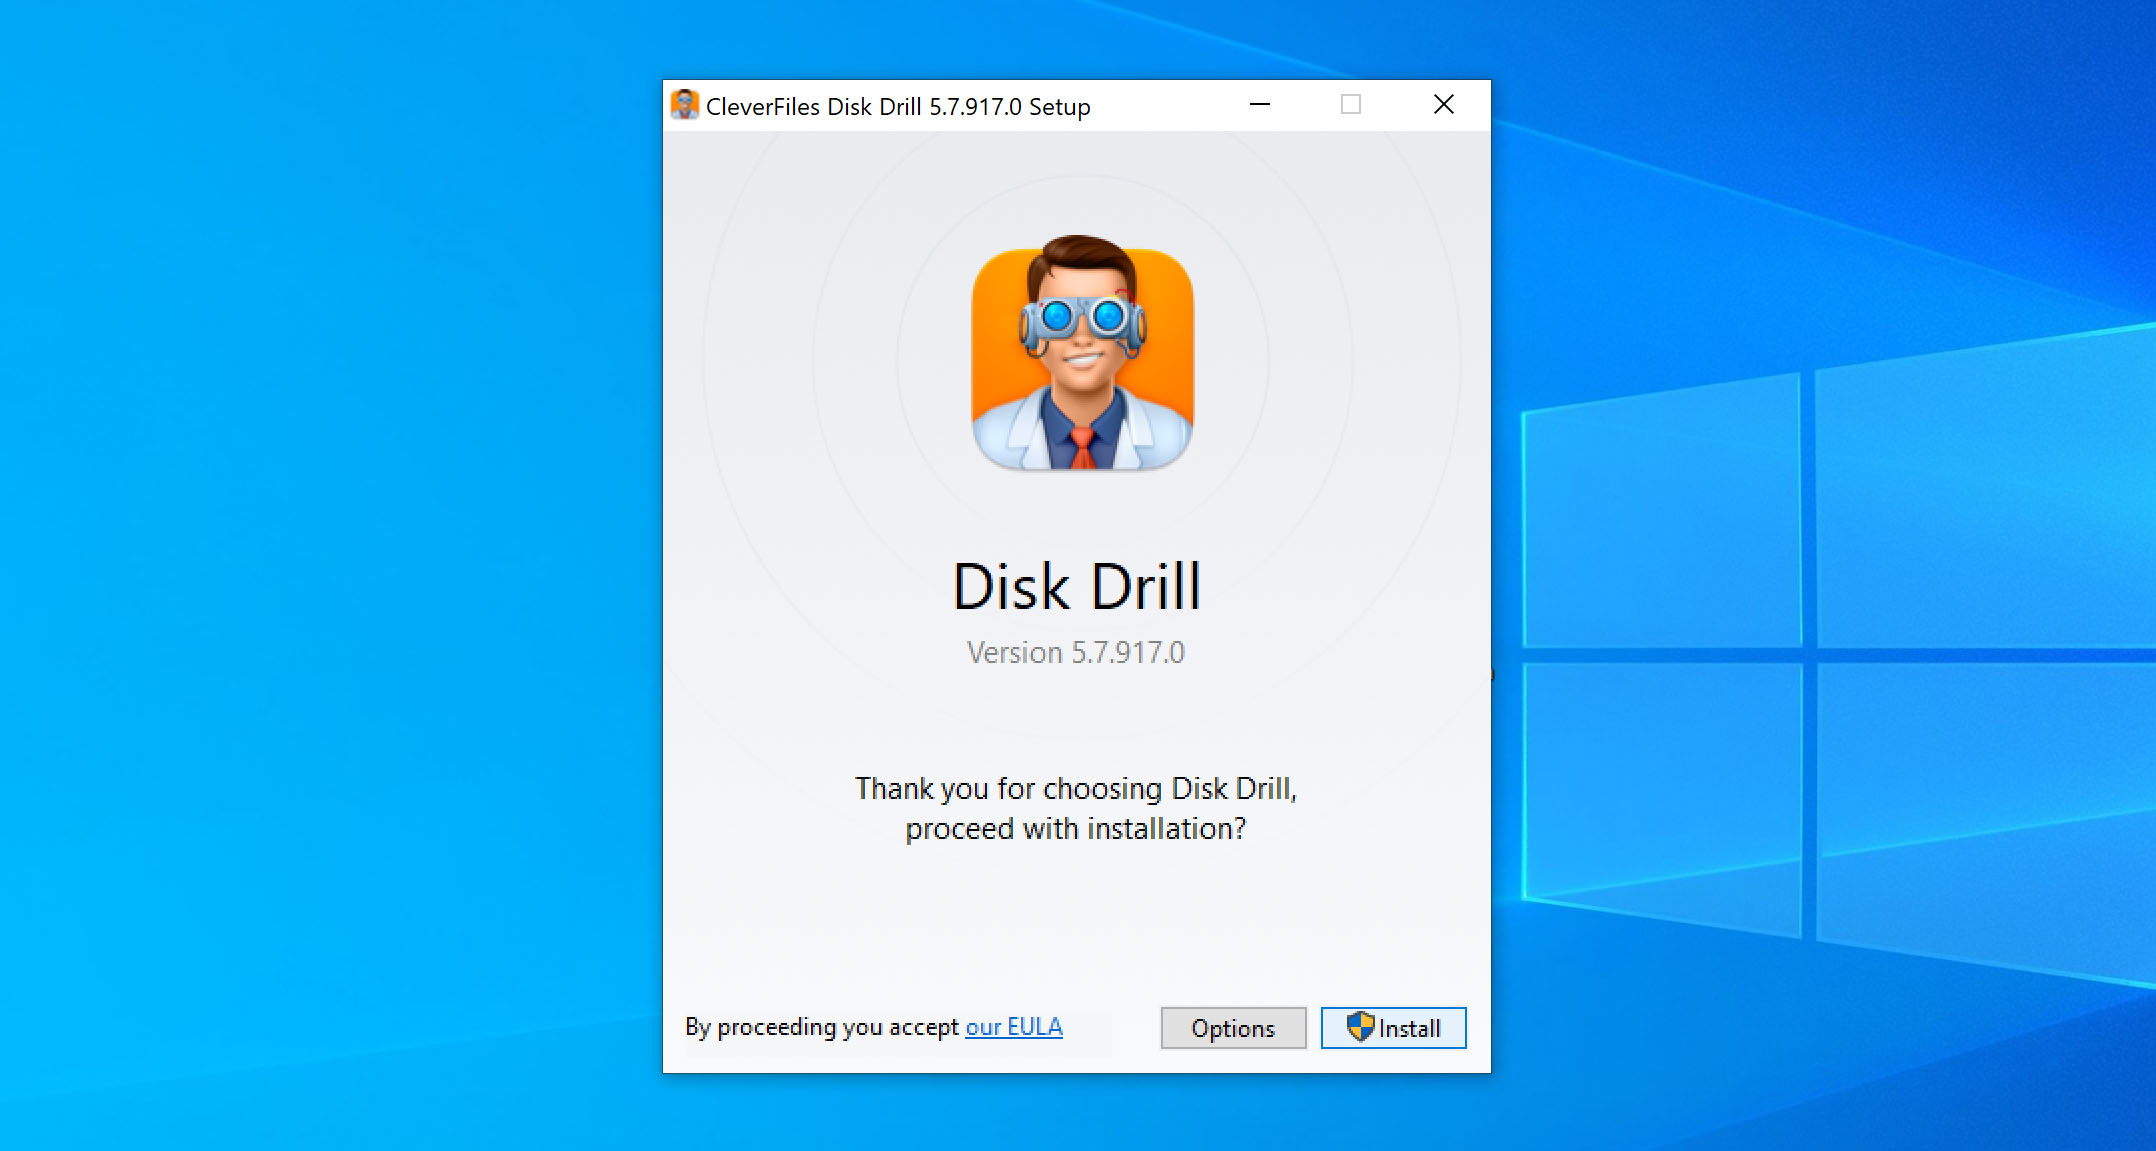
- Follow the on-screen instructions to install the program.
- Launch Disk Drill from your desktop or Start menu. If a User Account Control pop-up appears asking for permission to make changes, click Yes.
- Disk Drill will then show a list of all available devices. If you’re trying to recover a folder from an external drive, connect it to your computer, and it should pop up in the list. Select the correct device and click Search for lost data.
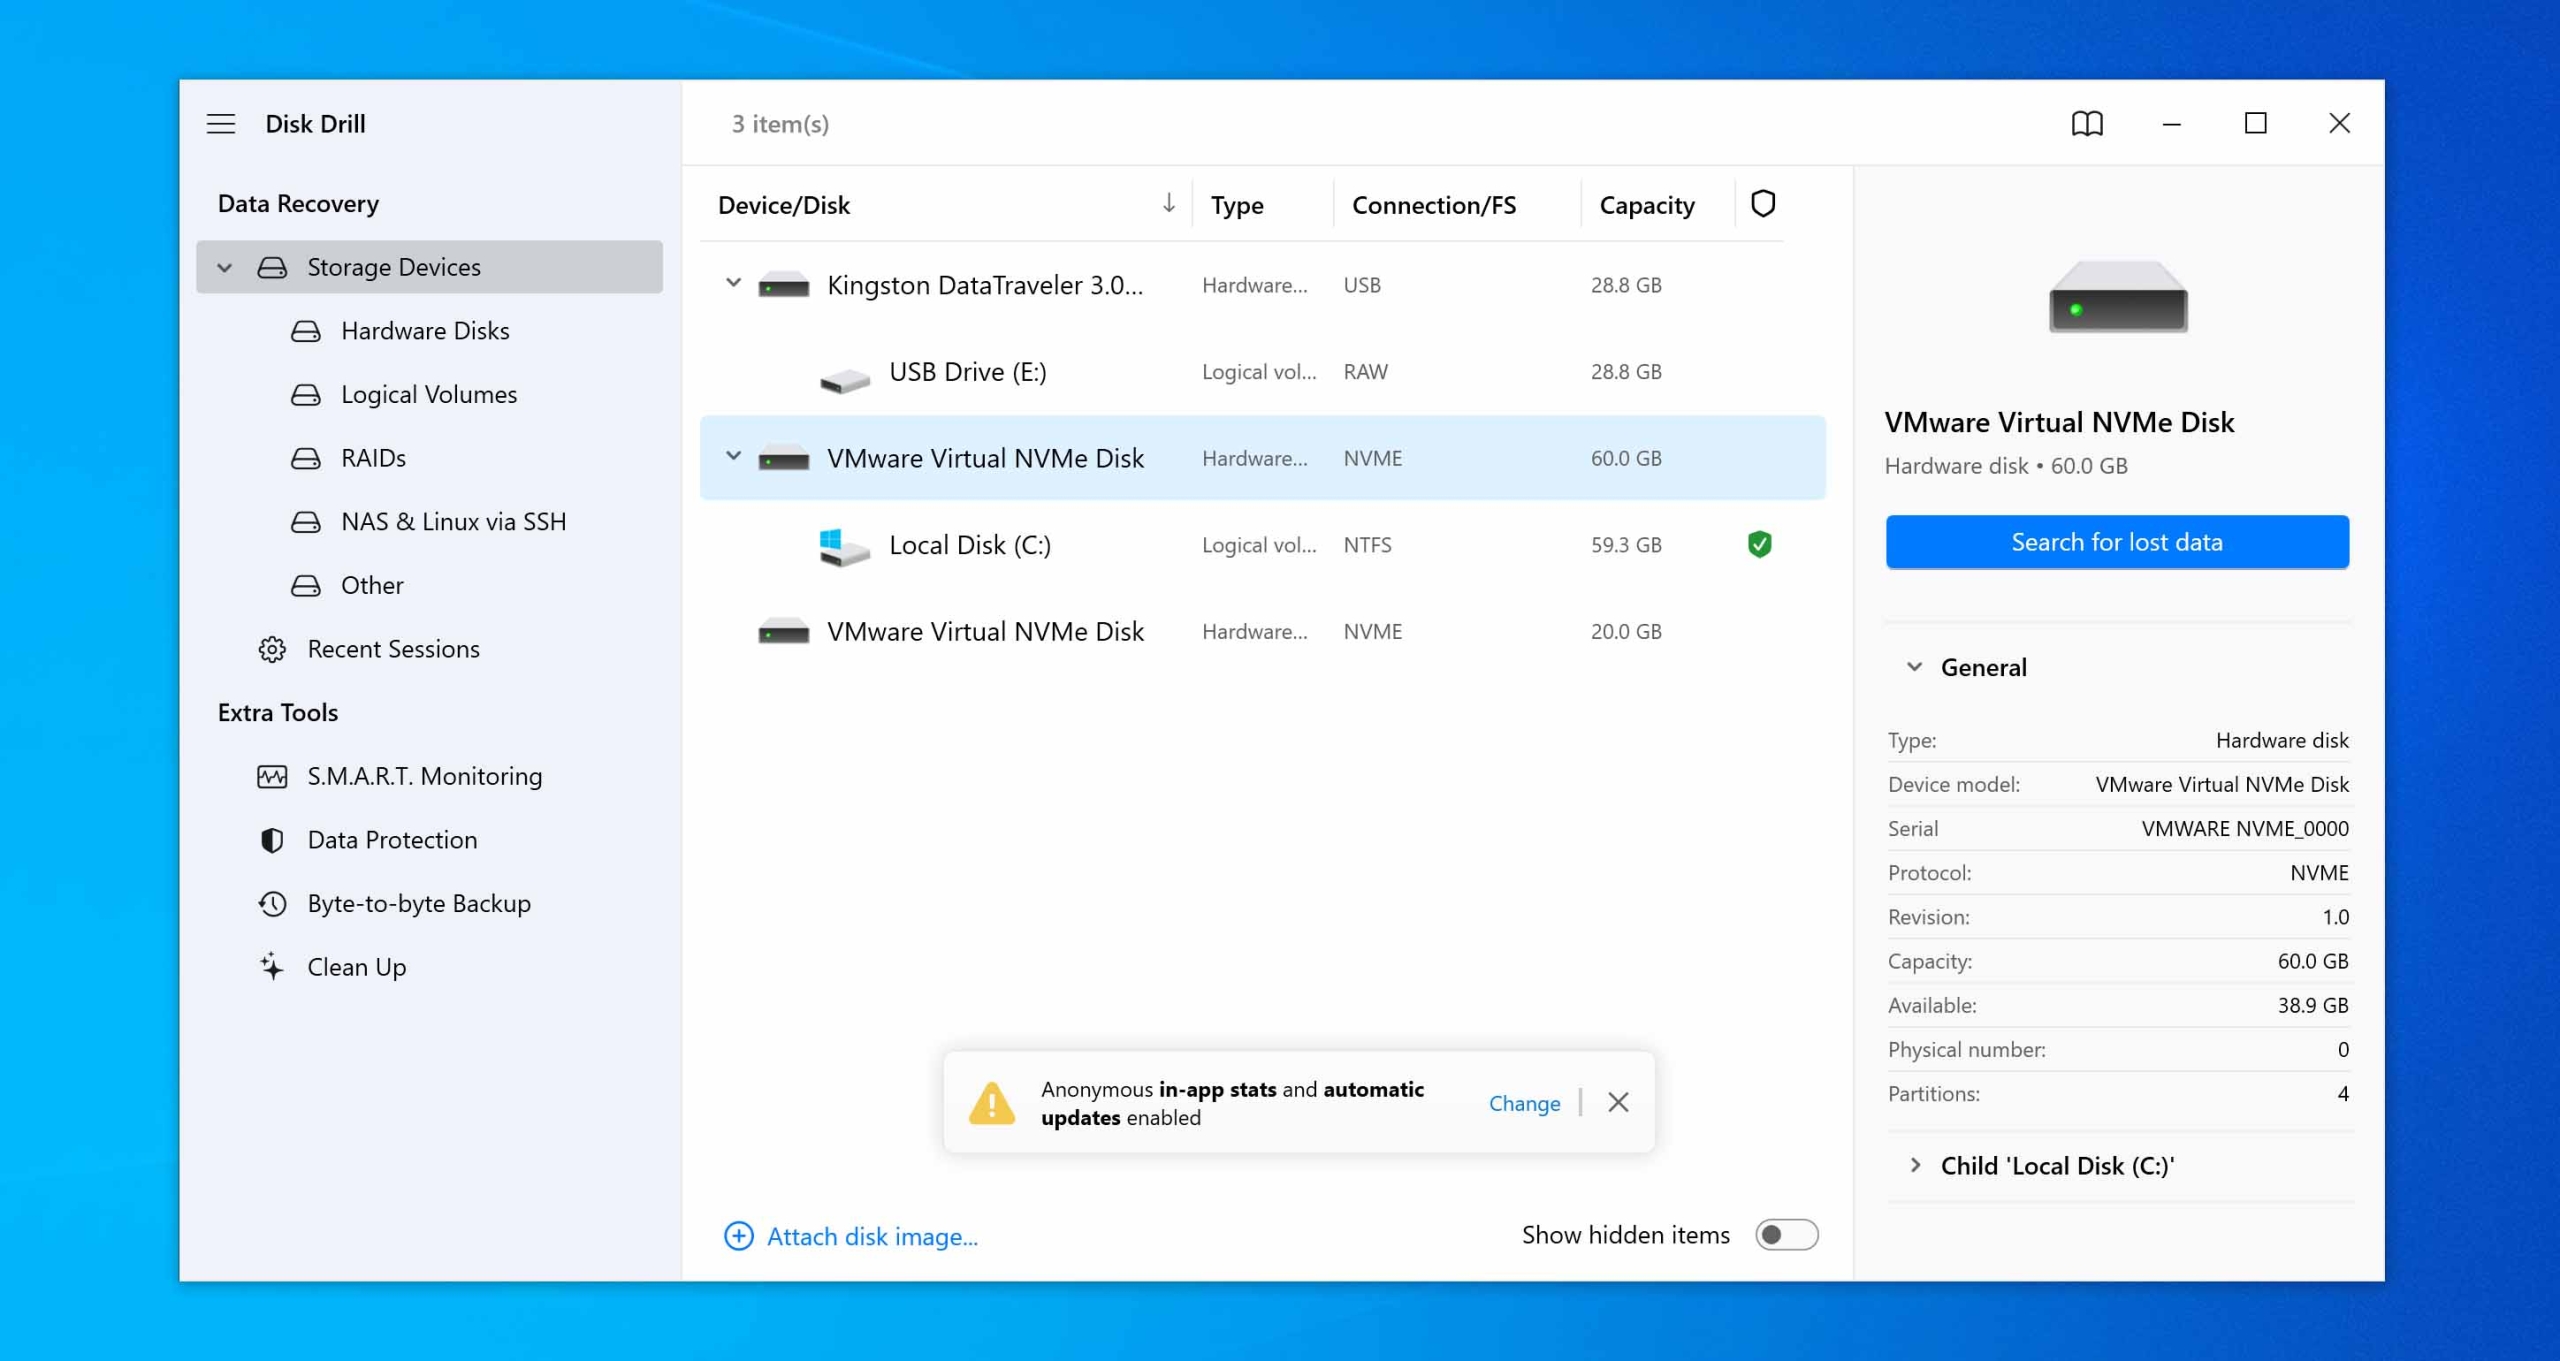
- You’ll see the scan progress in real time. While you can start recovering files as they appear, it’s usually better to wait until the full scan is complete to achieve the best results.
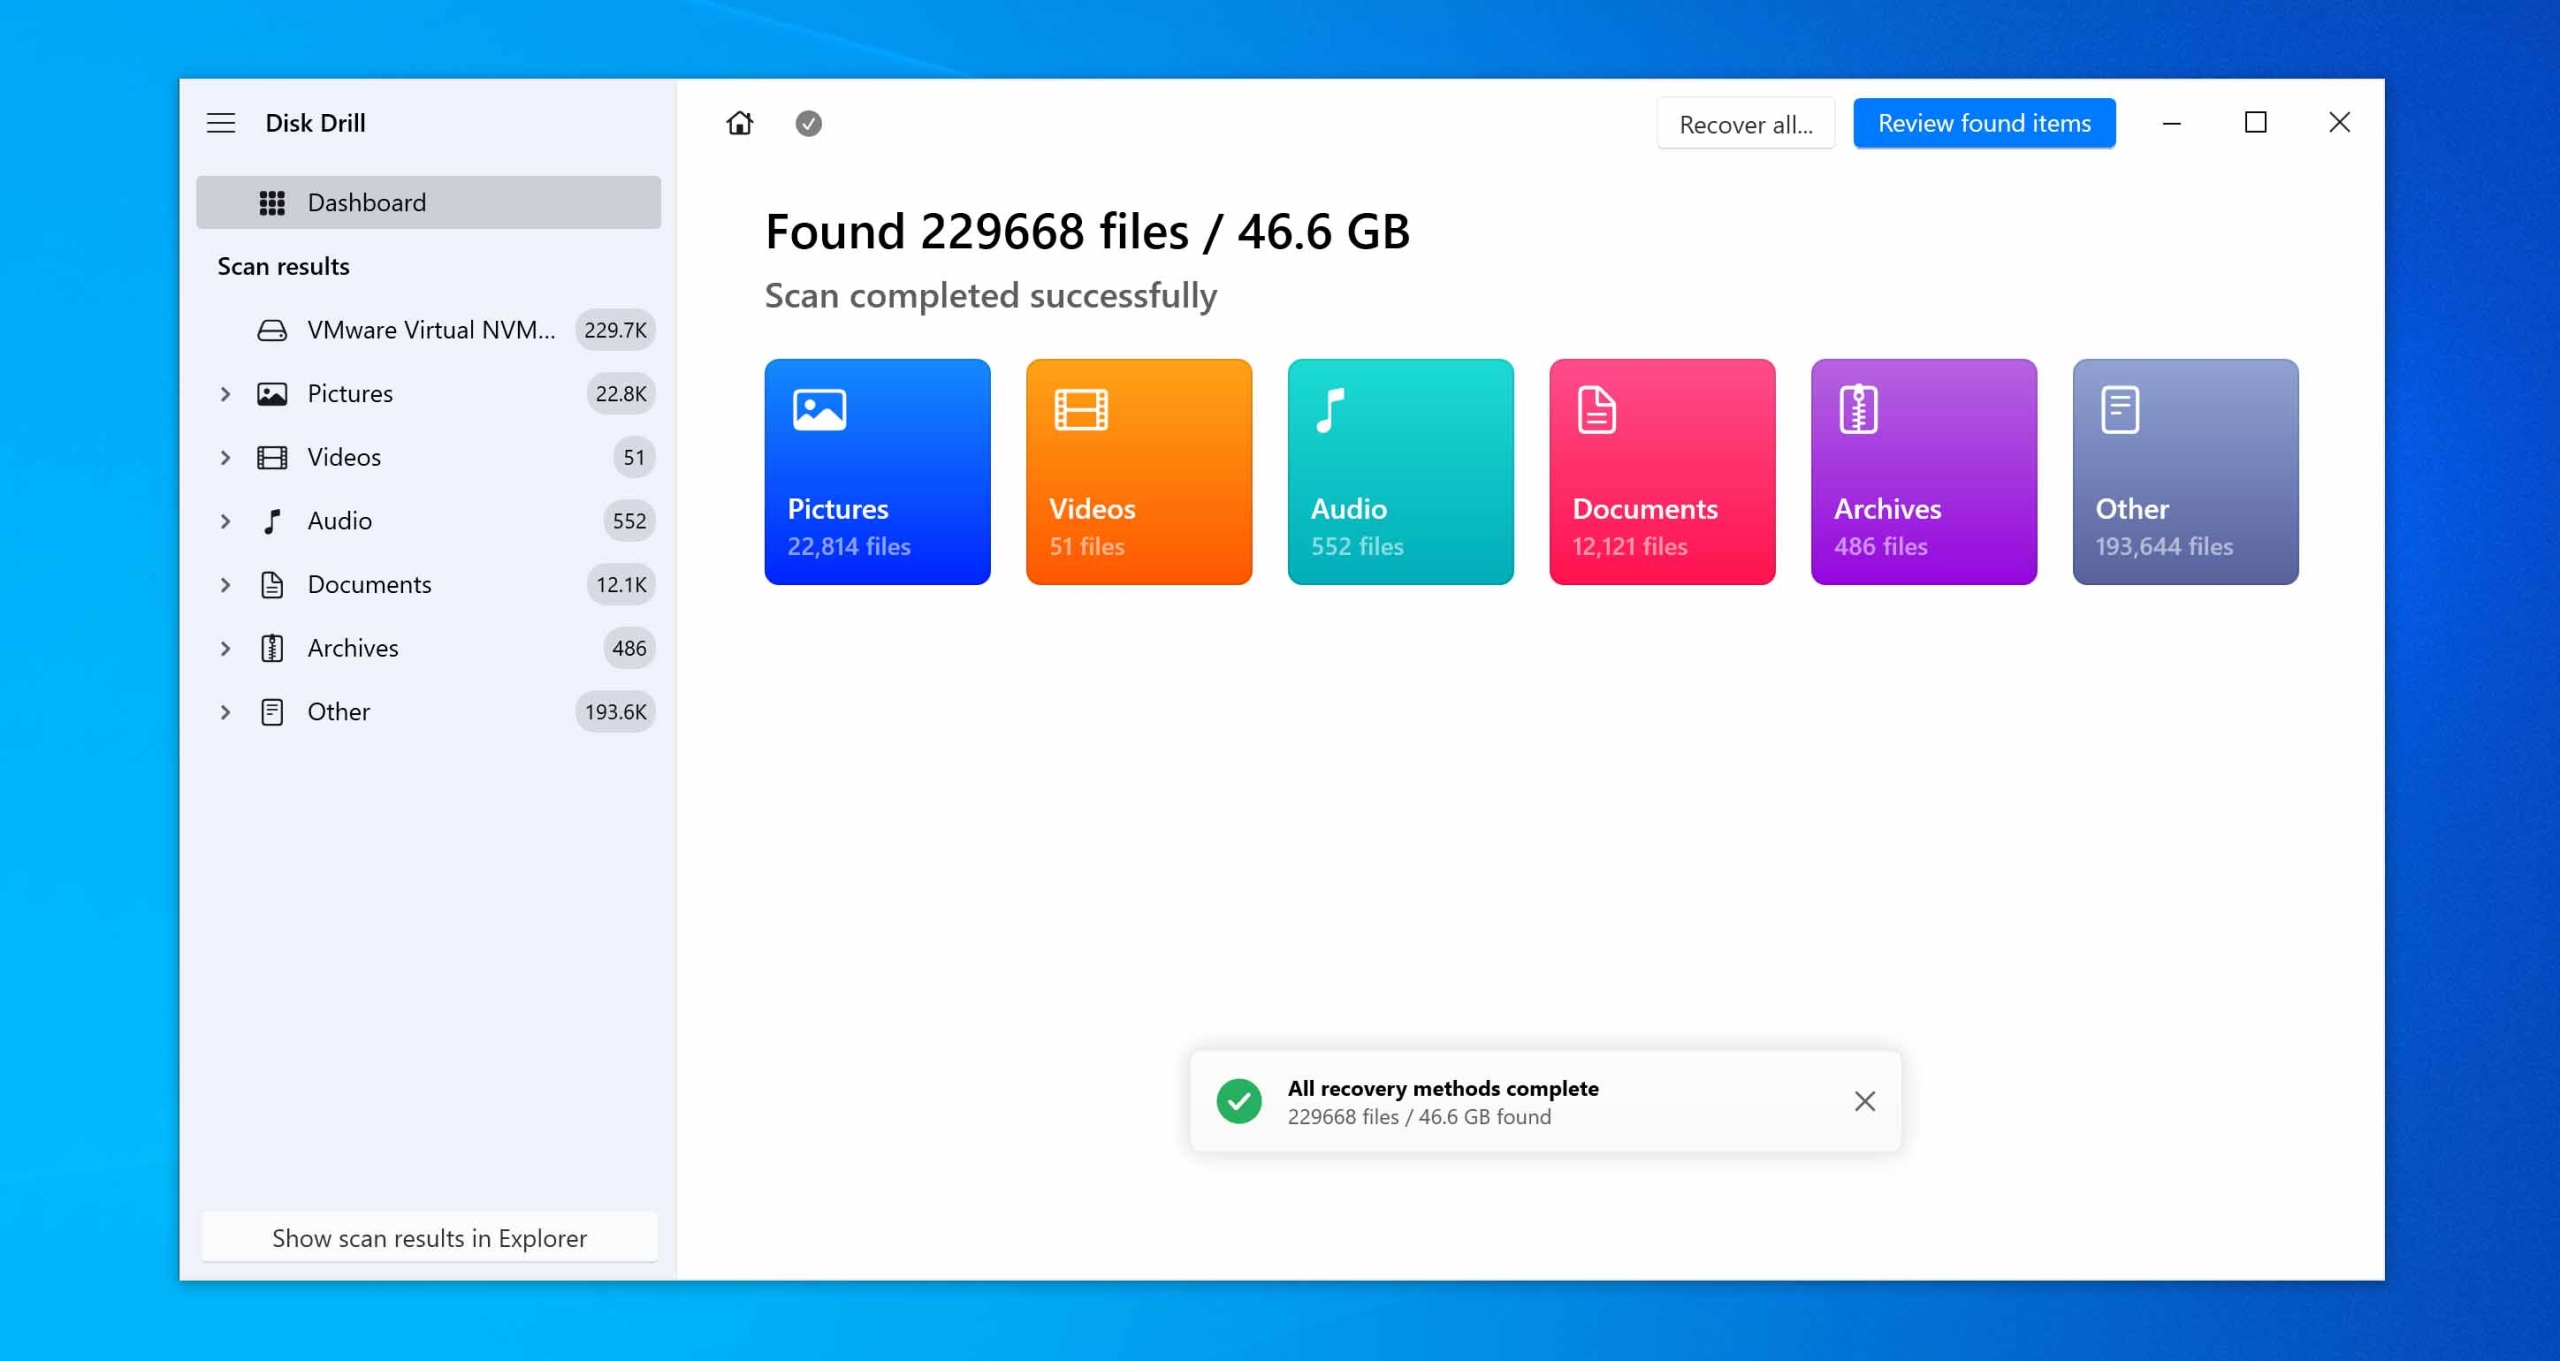
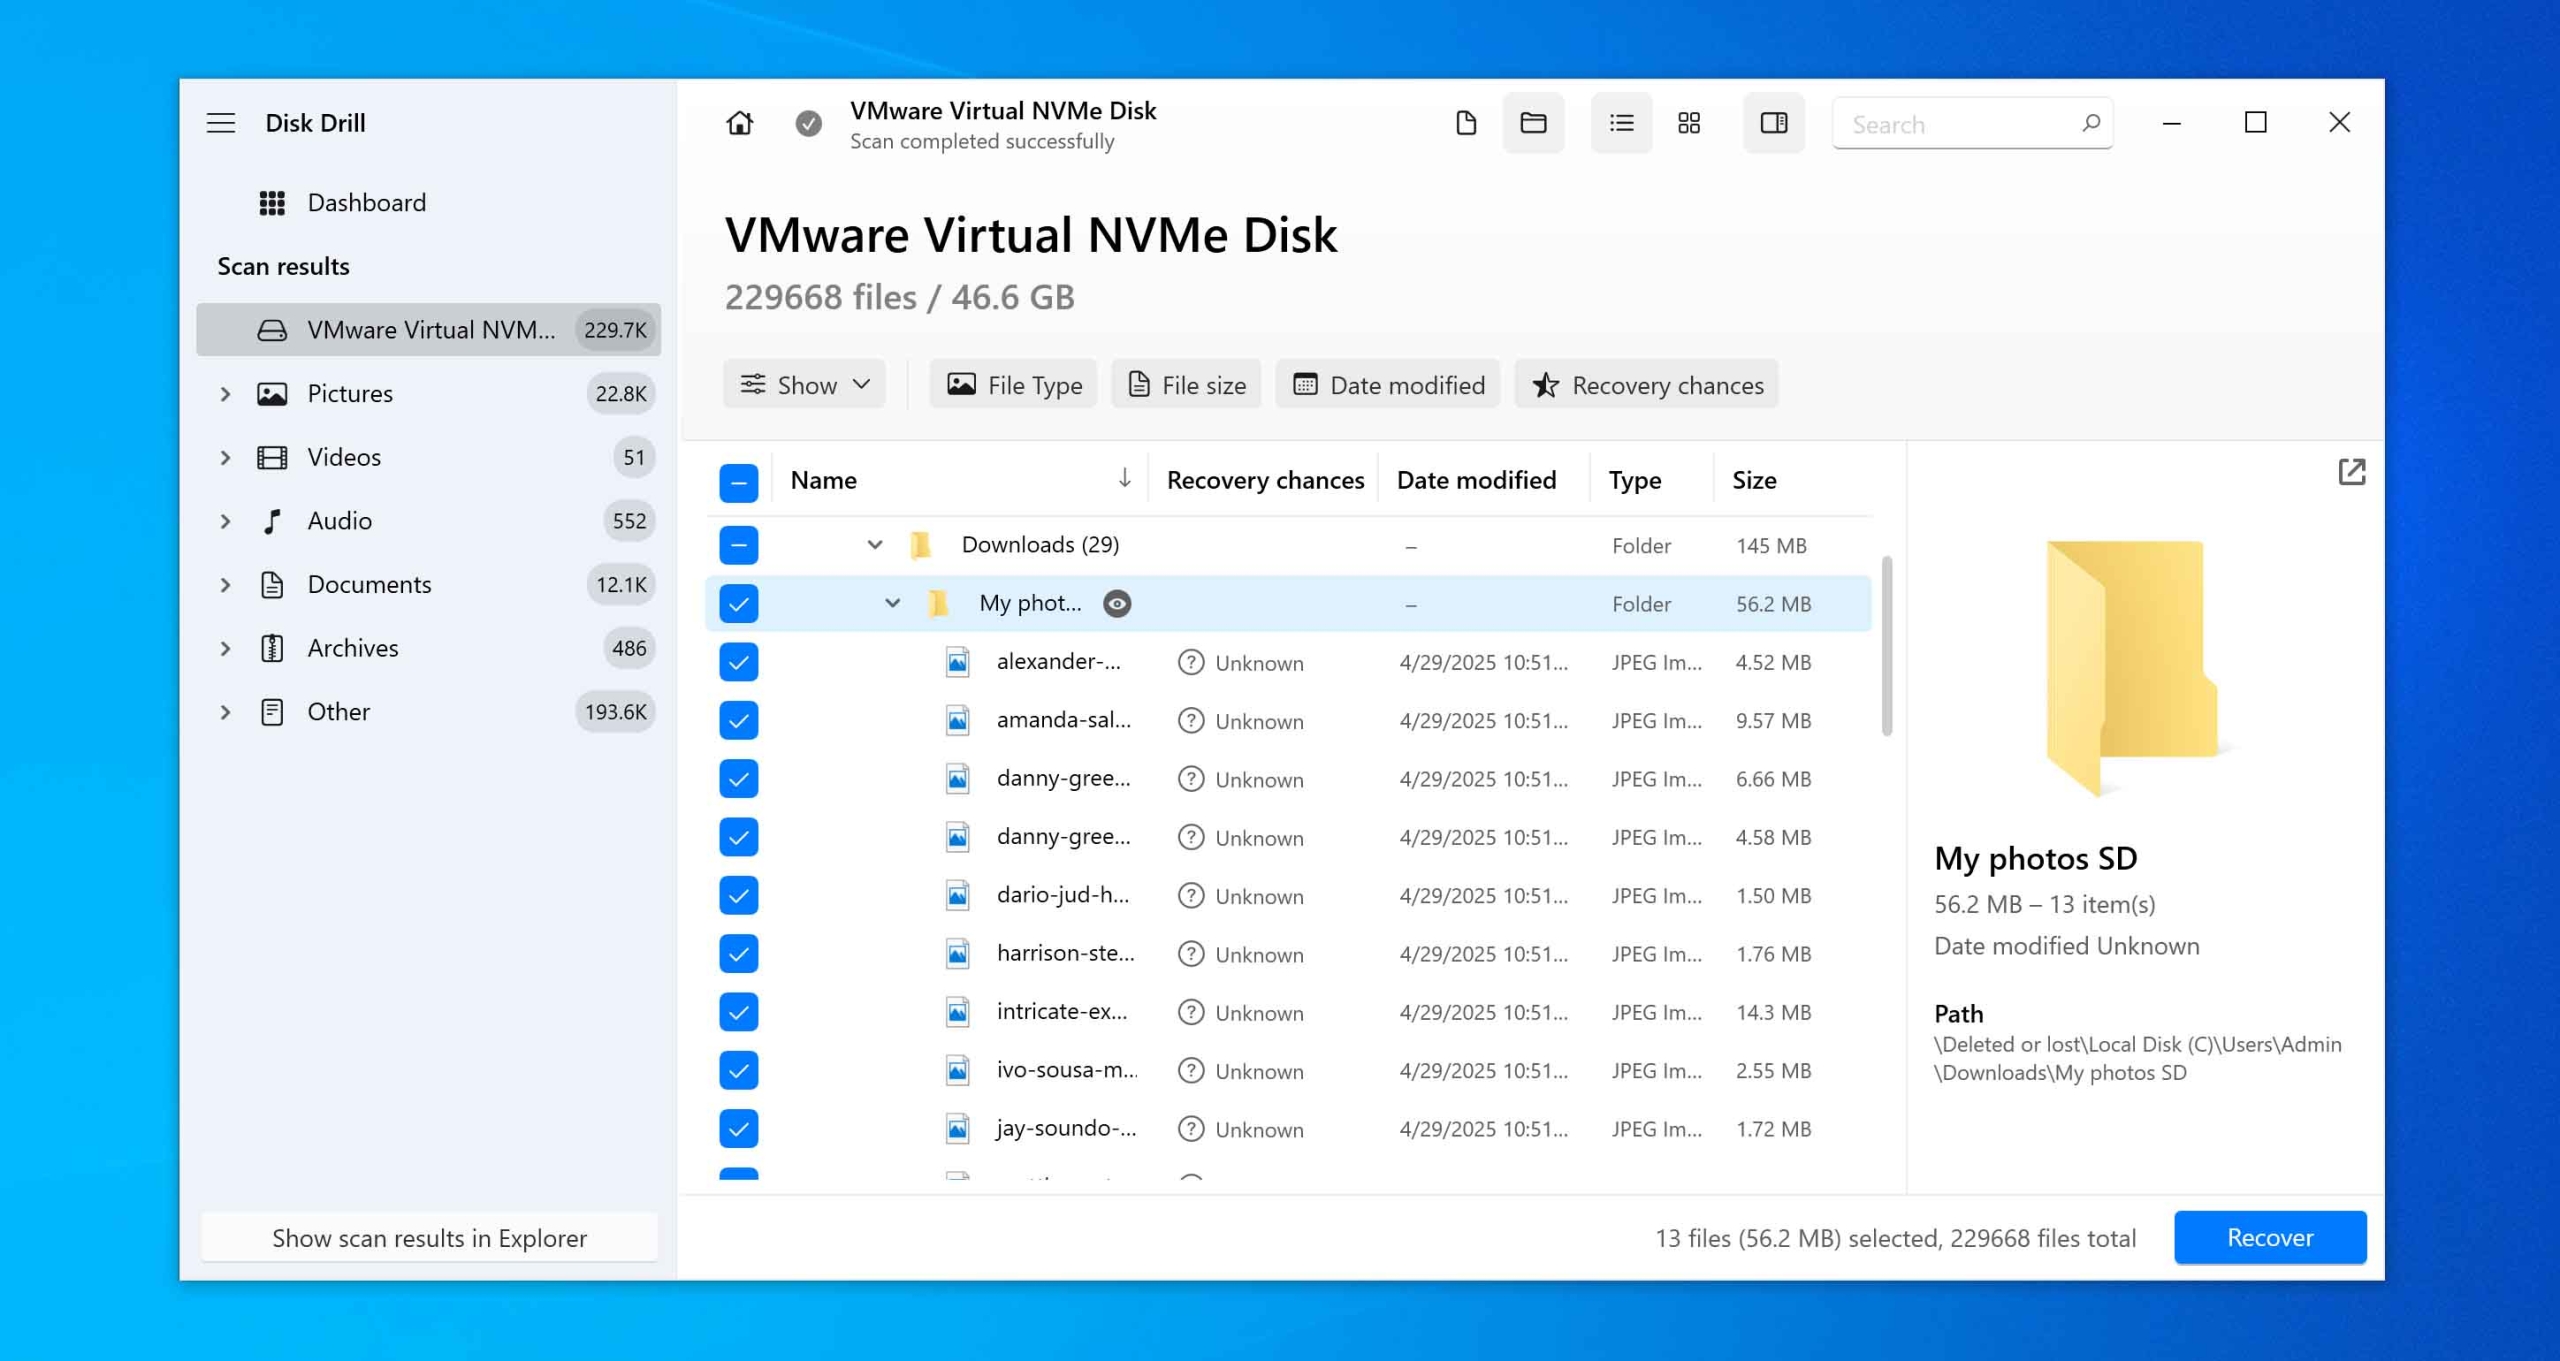
- Once the scan is done, Disk Drill will organize the recoverable files into categories. Use the search bar to quickly find your deleted folder, especially if you remember its name.
- Select the box next to the folder you want to recover, then click the Recover button located at the bottom right of the window.
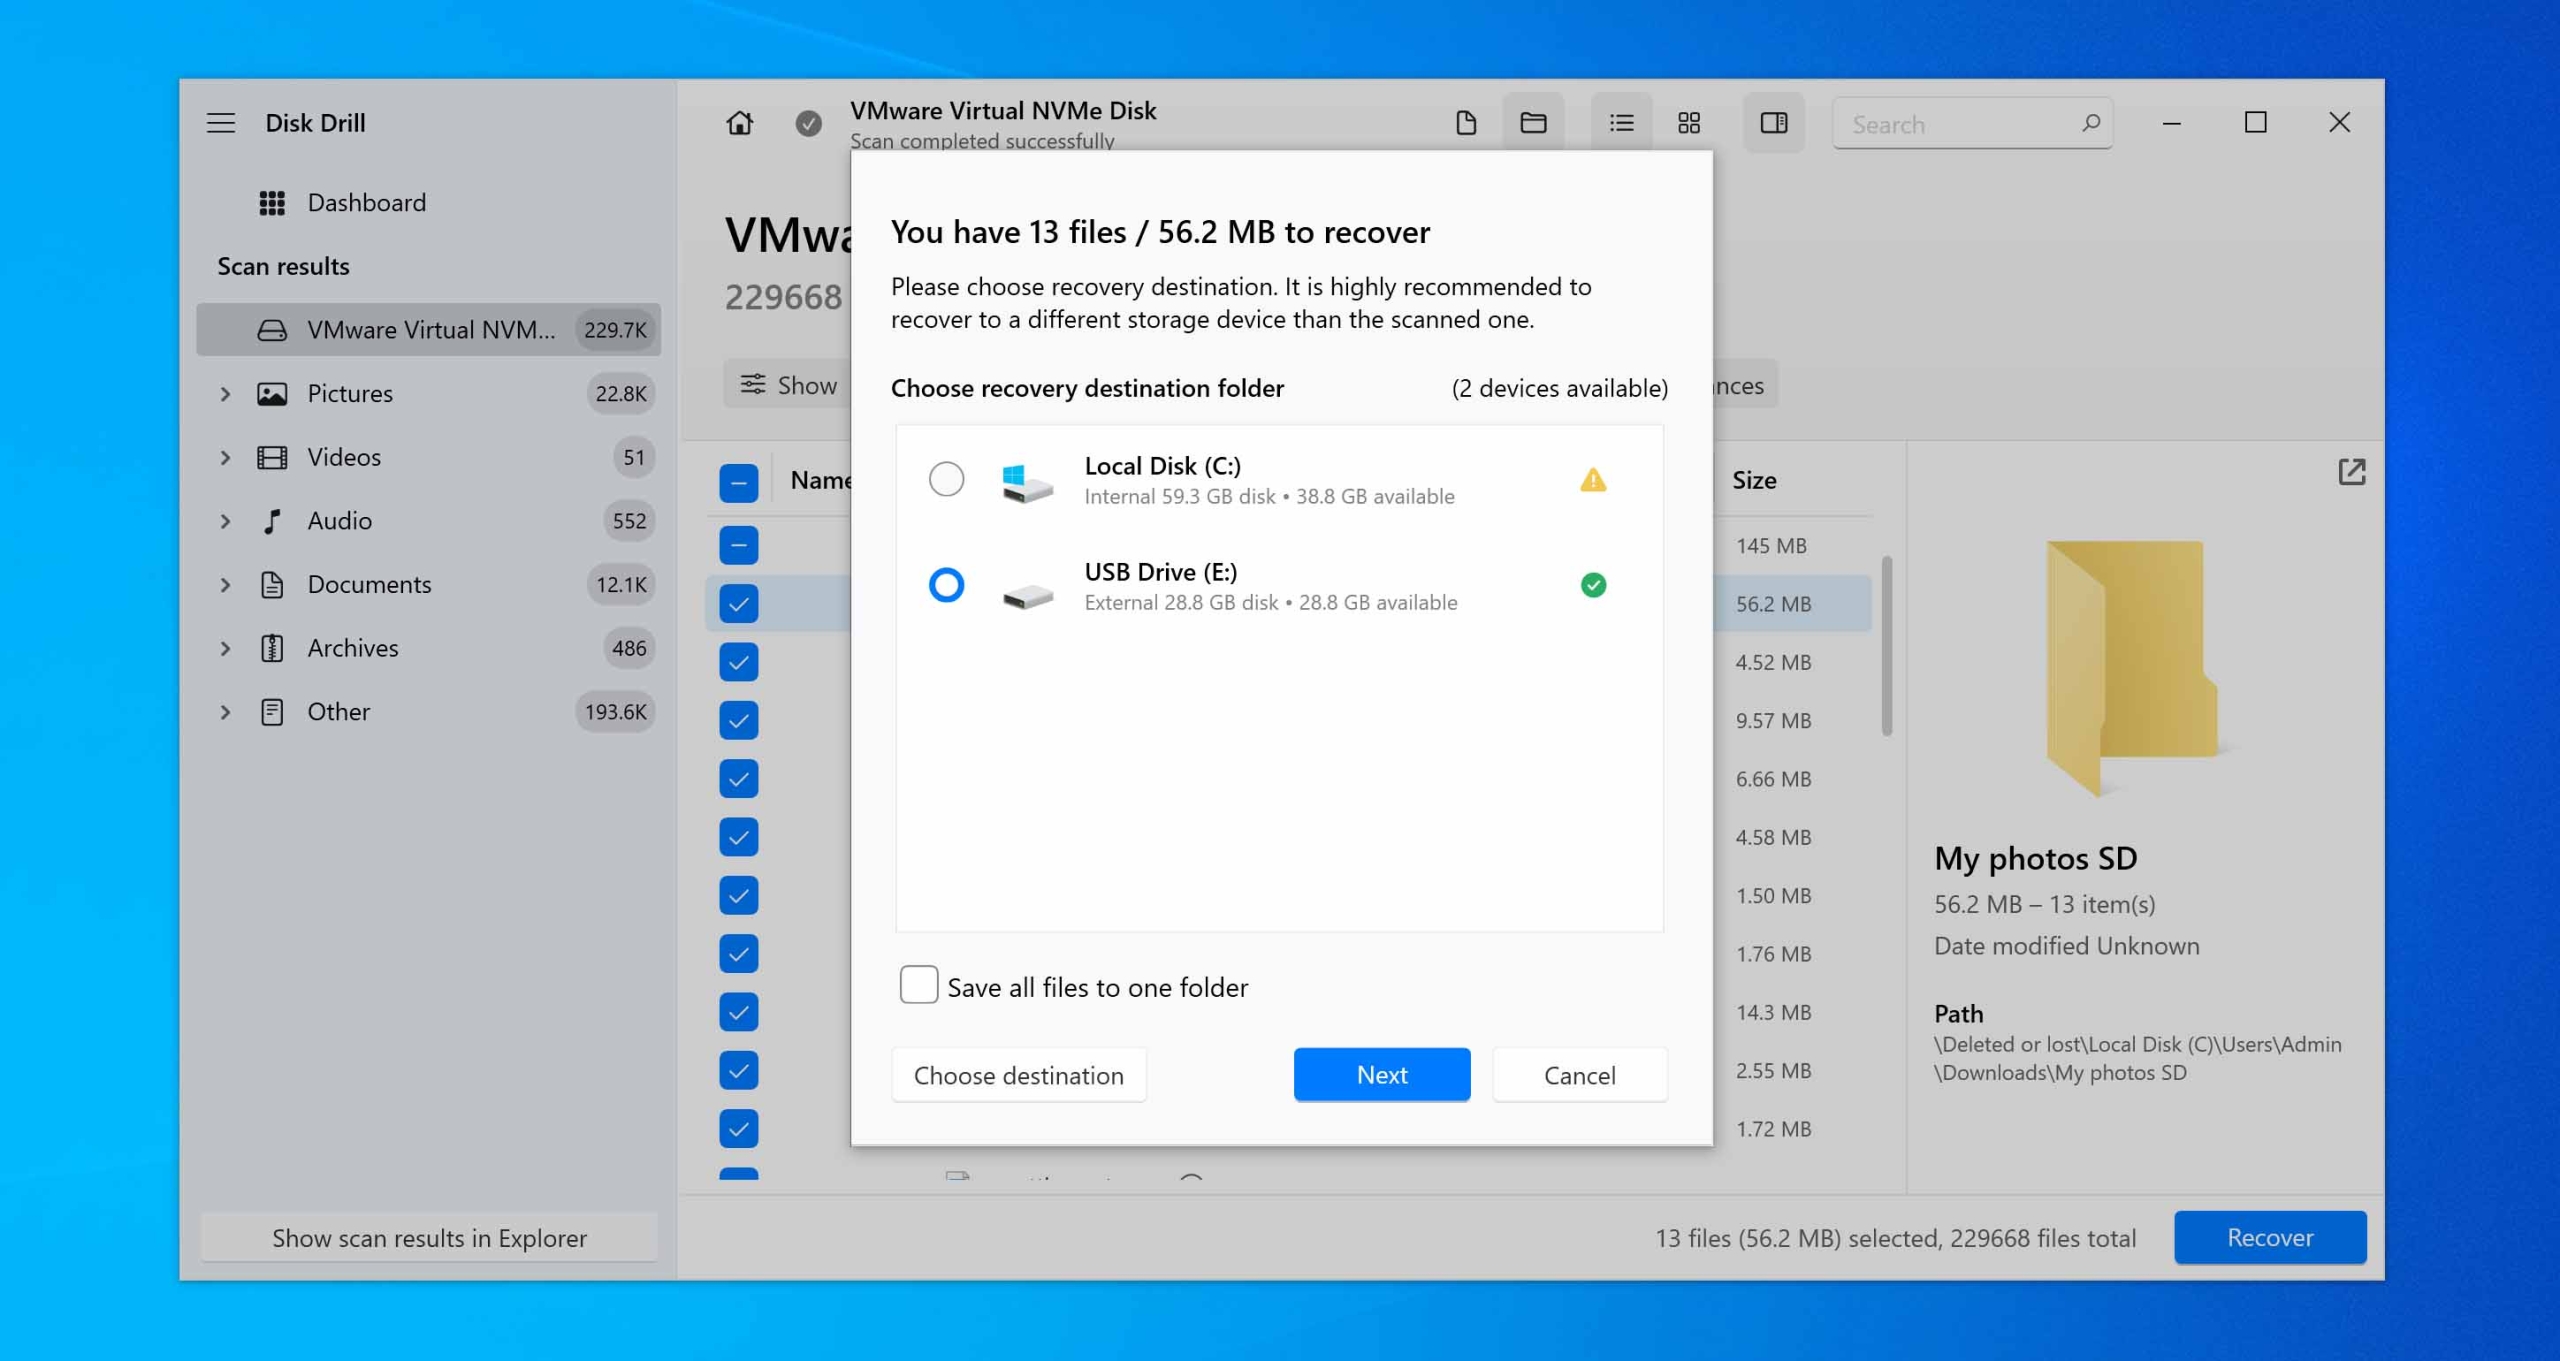
- Select a secure location to save your recovered folder. If you plan to continue scanning, select a different drive to avoid overwriting any existing data. If you’re done, you can save it to the same drive.
- Disk Drill will restore your files. When it’s finished, you’ll get a confirmation message. Click Show recovered data in Explorer if you want to see the restored folder right away, or just close the program if you’re done.


You can recover a deleted folder with Disk Drill for free, but keep in mind the free version lets you recover up to 500 MB of data. If your folder is bigger than that, you’ll need to upgrade to the Pro version to complete the recovery.
If Disk Drill didn’t find the deleted folder you’re looking for, chances are it’s already been overwritten by new data and is no longer recoverable.
Method #3: Recover Deleted Folders with File History
Windows comes with a few built-in backup tools, and one of the main ones is File History. If you’ve set it up, it automatically backs up versions of files and folders in your standard directories, like Documents, Music, Pictures, Videos, Favorites, and Desktop. It takes snapshots of your files at intervals you choose, making it easy to roll back to earlier versions whenever you need.
File History doesn’t automatically back up folders outside of the standard locations unless you manually add them there.
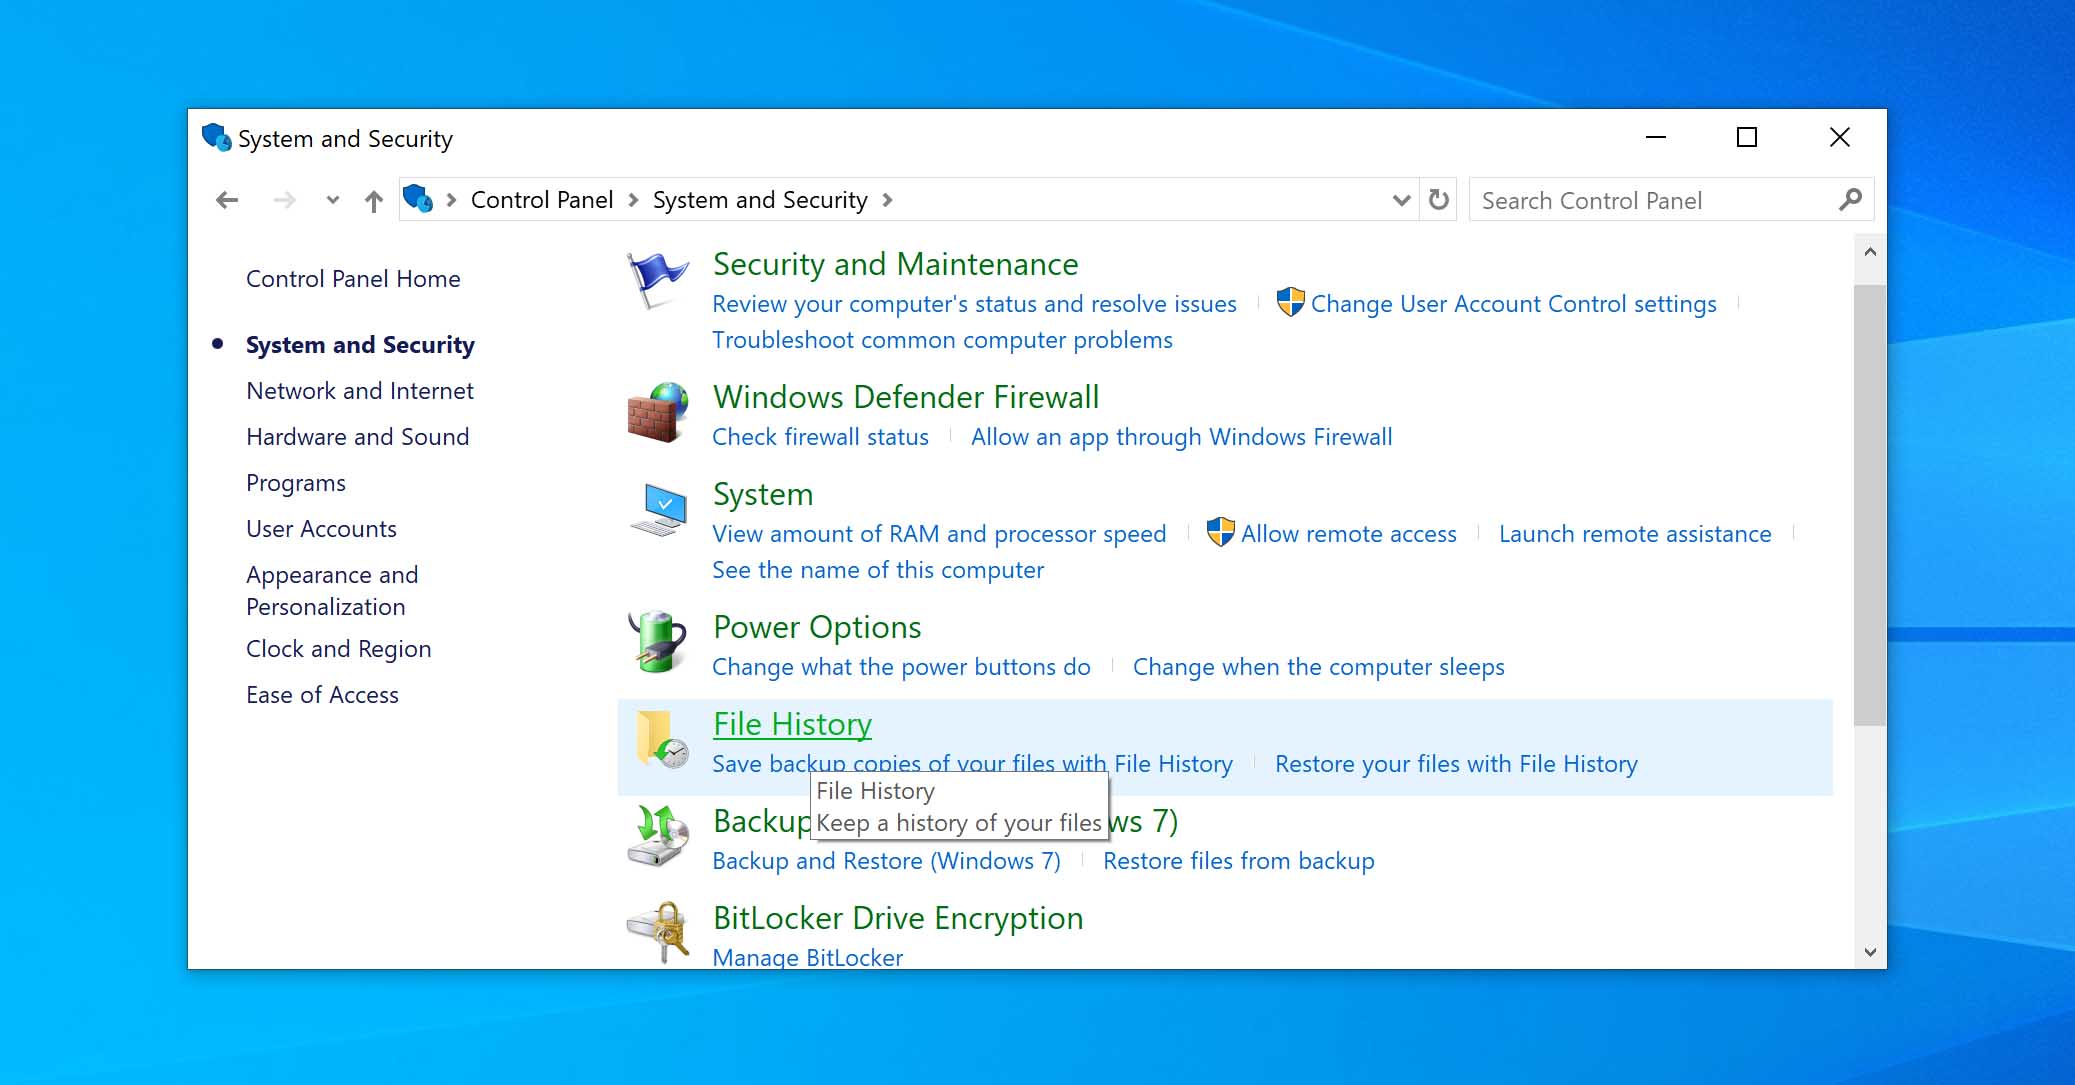
- Open the Control Panel by typing Control Panel into the taskbar search bar and clicking on the result.
- Select System and Security, then click on File History.
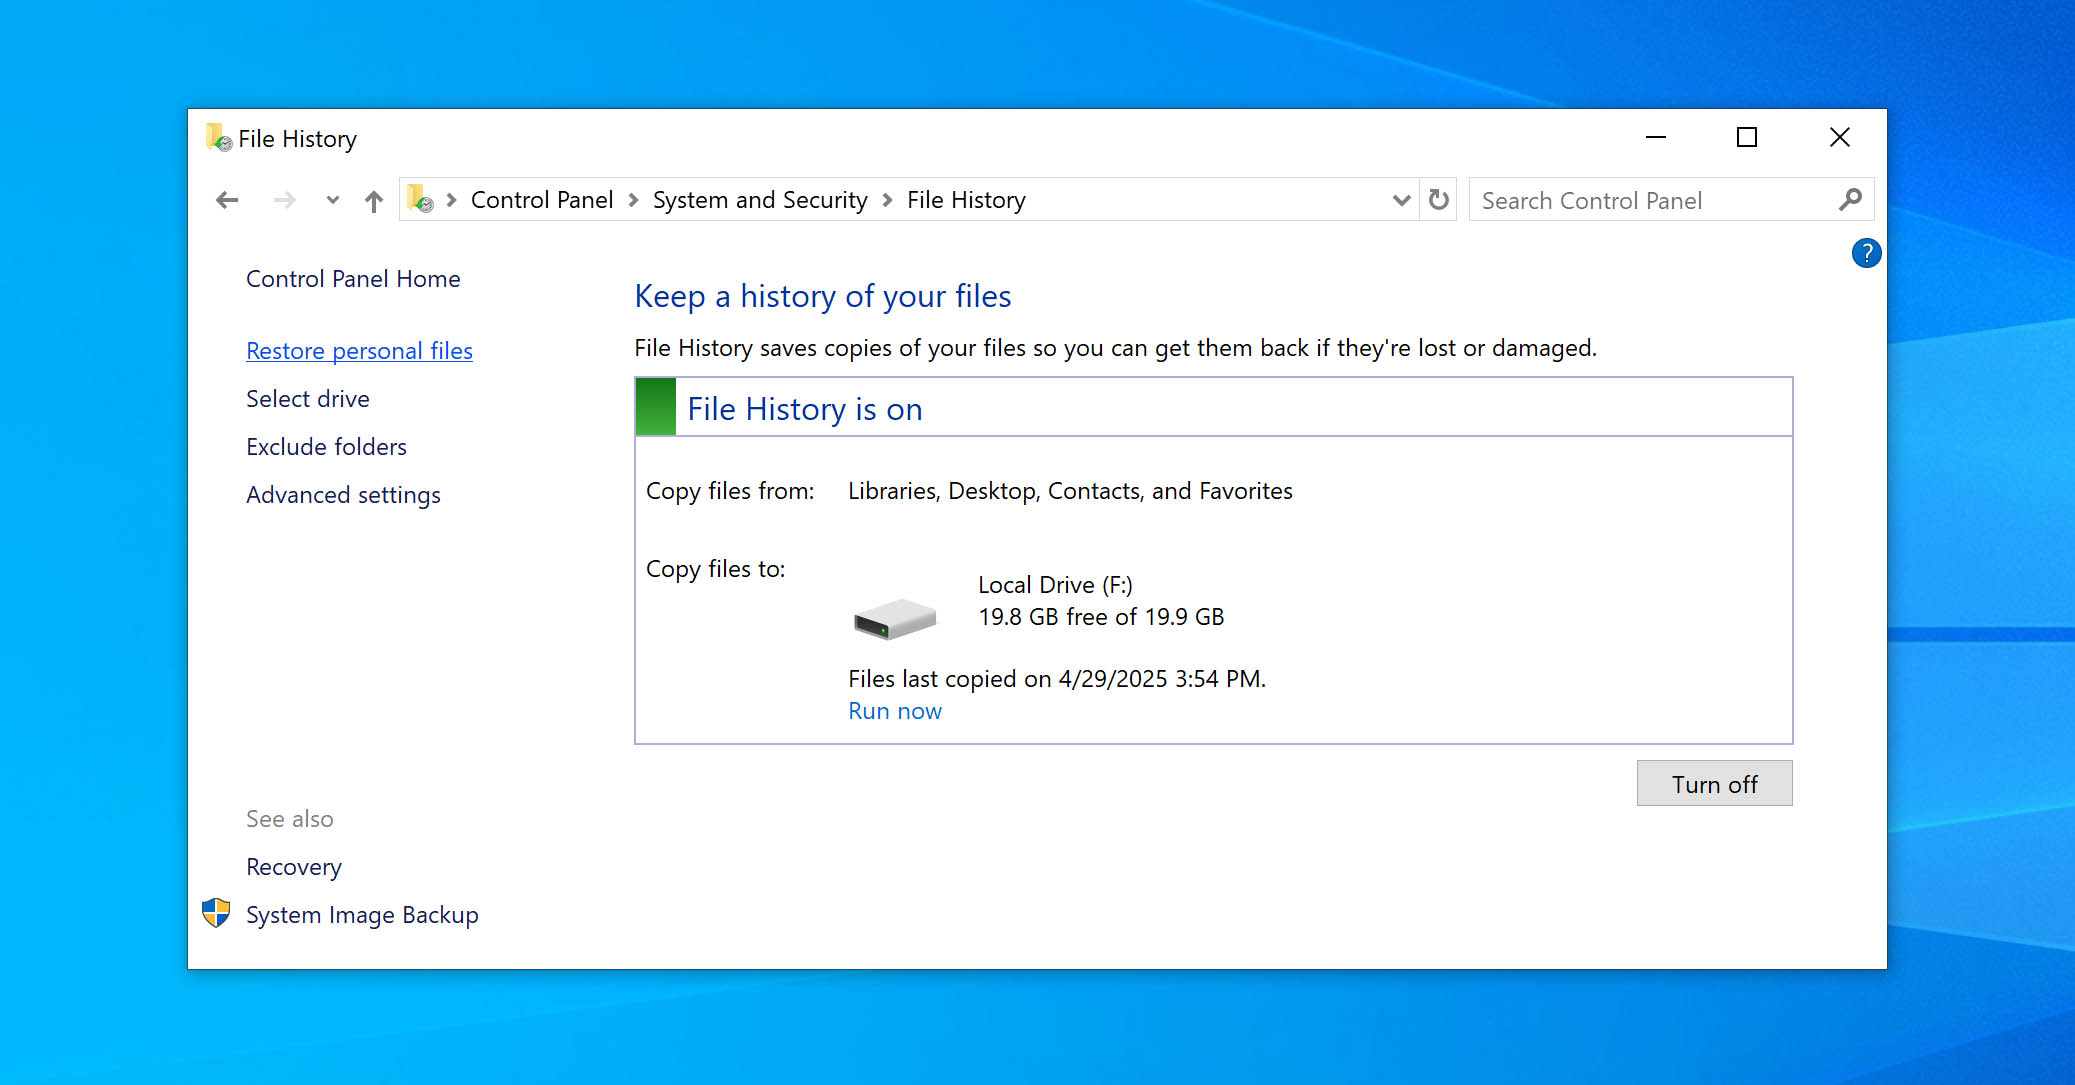
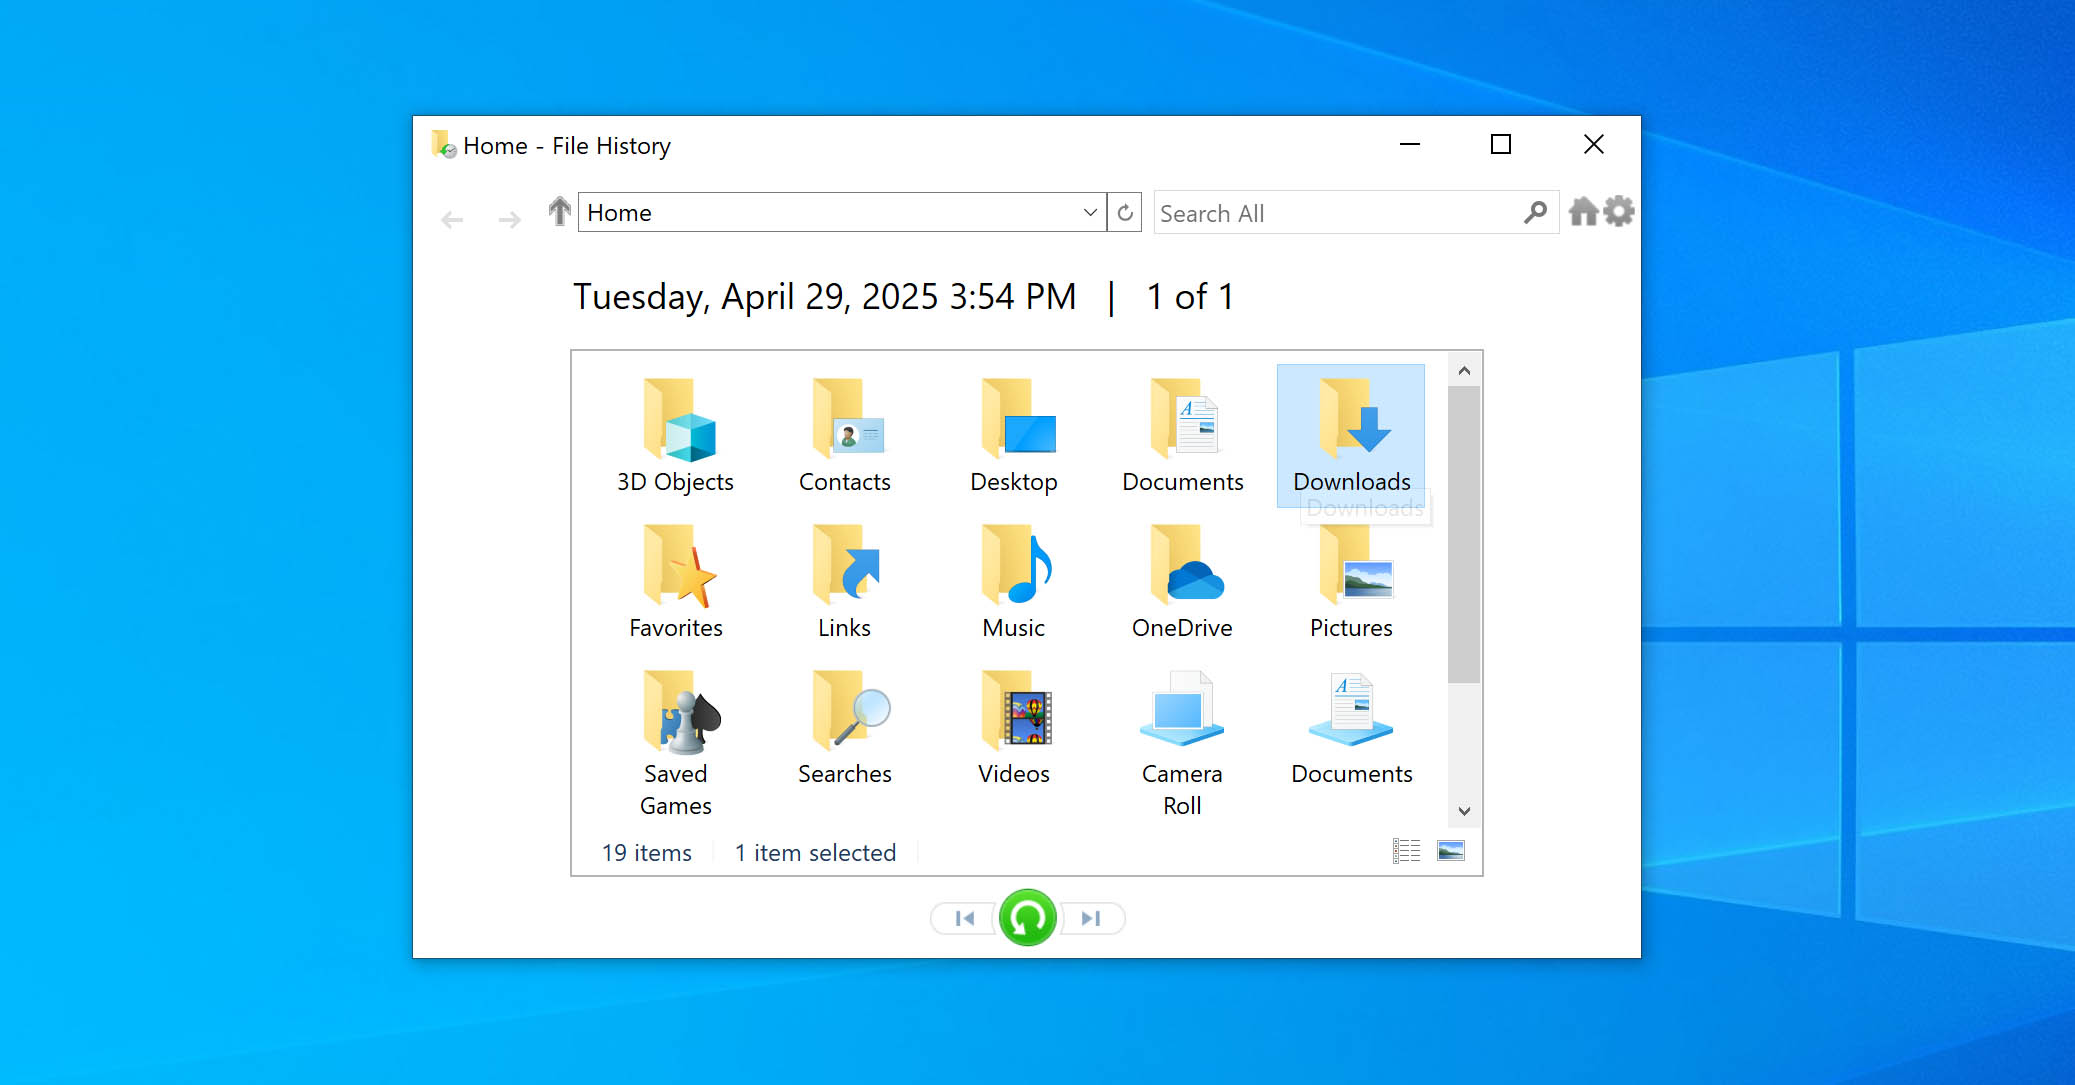
- On the left side of the File History window, click Restore personal files.
- Use the arrows to browse through the backups and find the folder you want to restore.
- Once you find it, select the folder and click the green Restore button at the bottom of the window to send it back to its original location. If you want to restore it somewhere else, right-click the restore button, select Restore to, and choose a new location.
- Follow any prompts that appear to complete the restoration.


Method #4: Restore a Previous Version of the Folder
If you’ve lost or deleted several folders from the same location on your PC, you can use the Previous Versions tool. It’s an alternative way to restore files and folders from your File History backups. With it, you can roll the entire parent folder back to the way it was before those key folders were deleted – all by removing from your saved File History versions.
Here’s how you can get started:
- Click the File Explorer icon on your taskbar or press Windows key + E.
- Navigate to the directory where the deleted folder was located. Right-click the parent folder and select Properties from the menu.
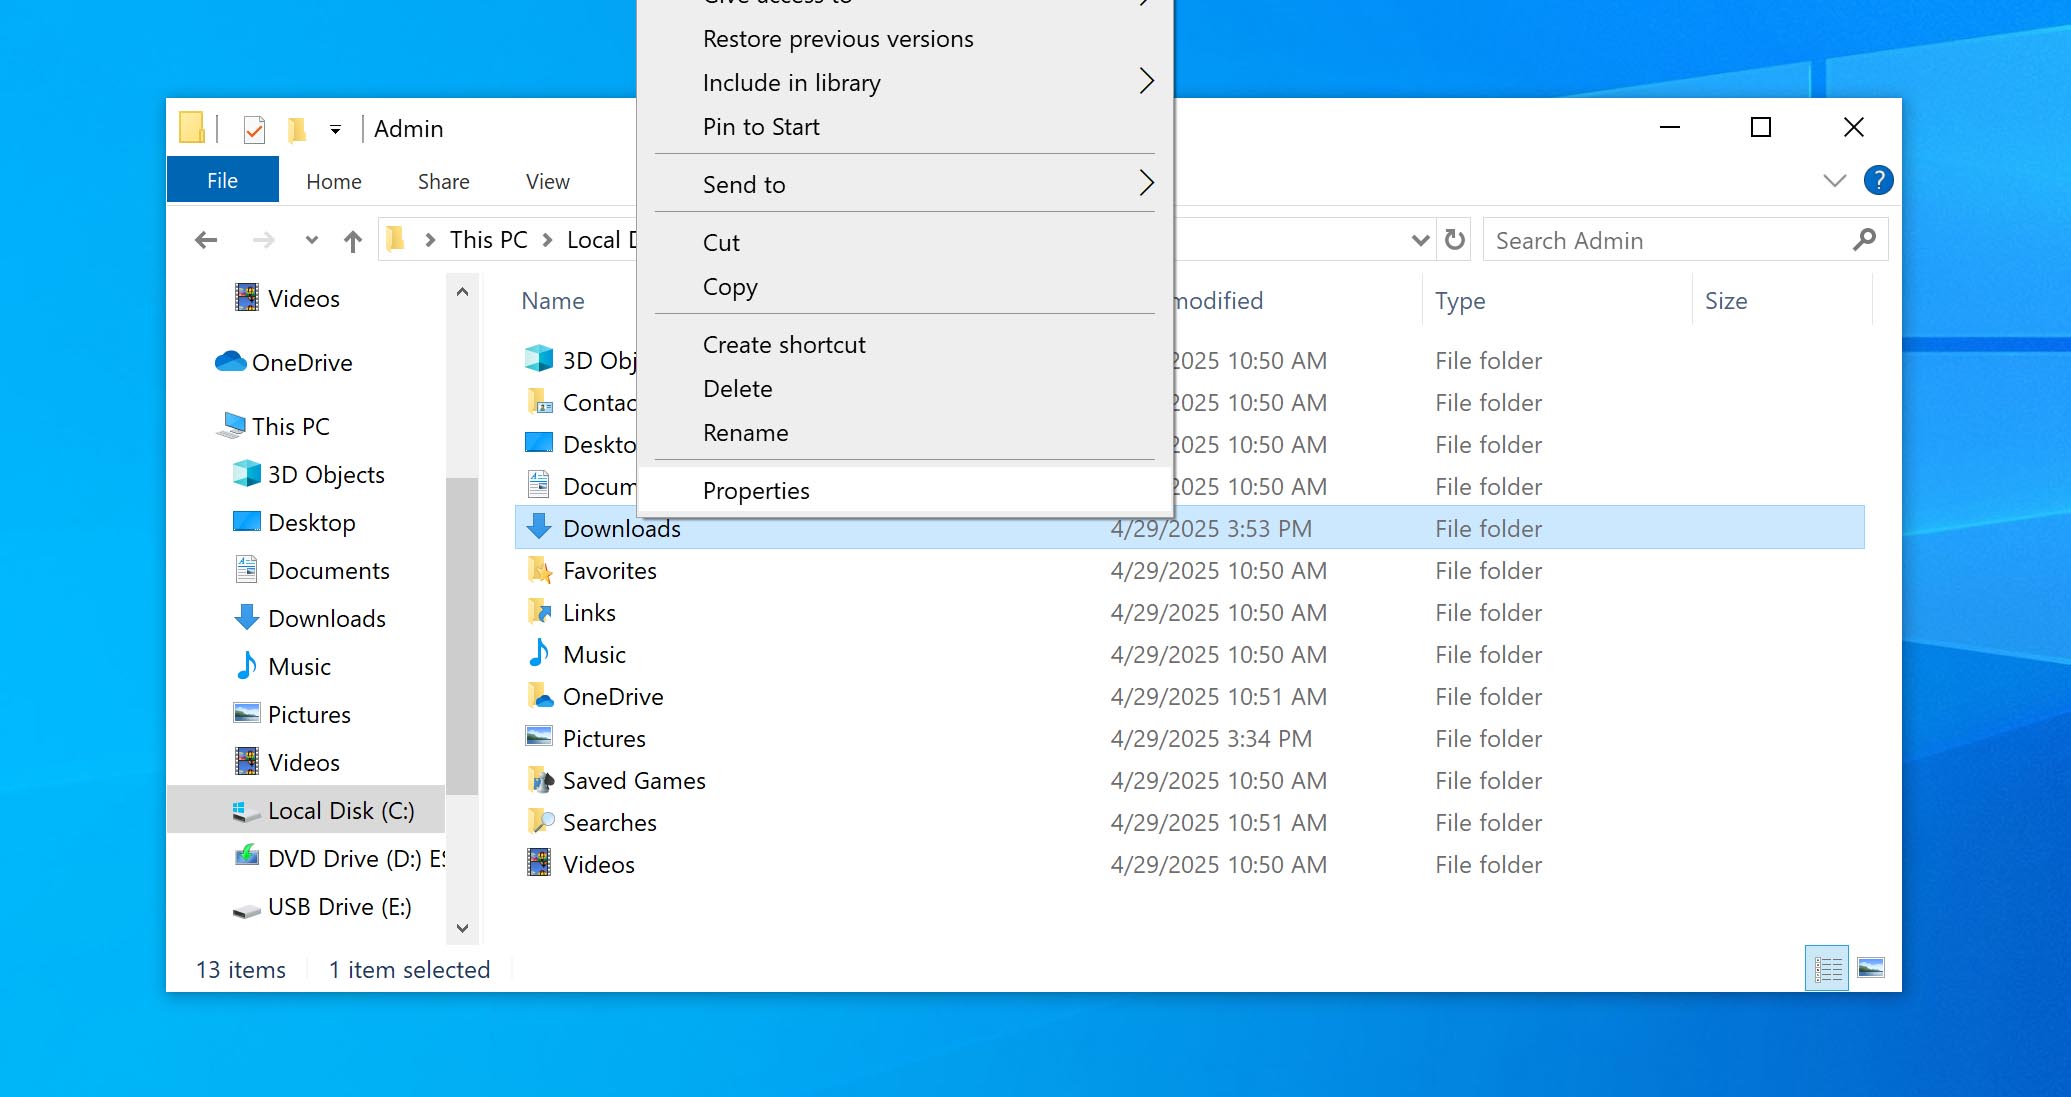
- In the Properties window, click the Previous Versions tab. You’ll see a list of backups, each tied to a different date and time captured by File History.
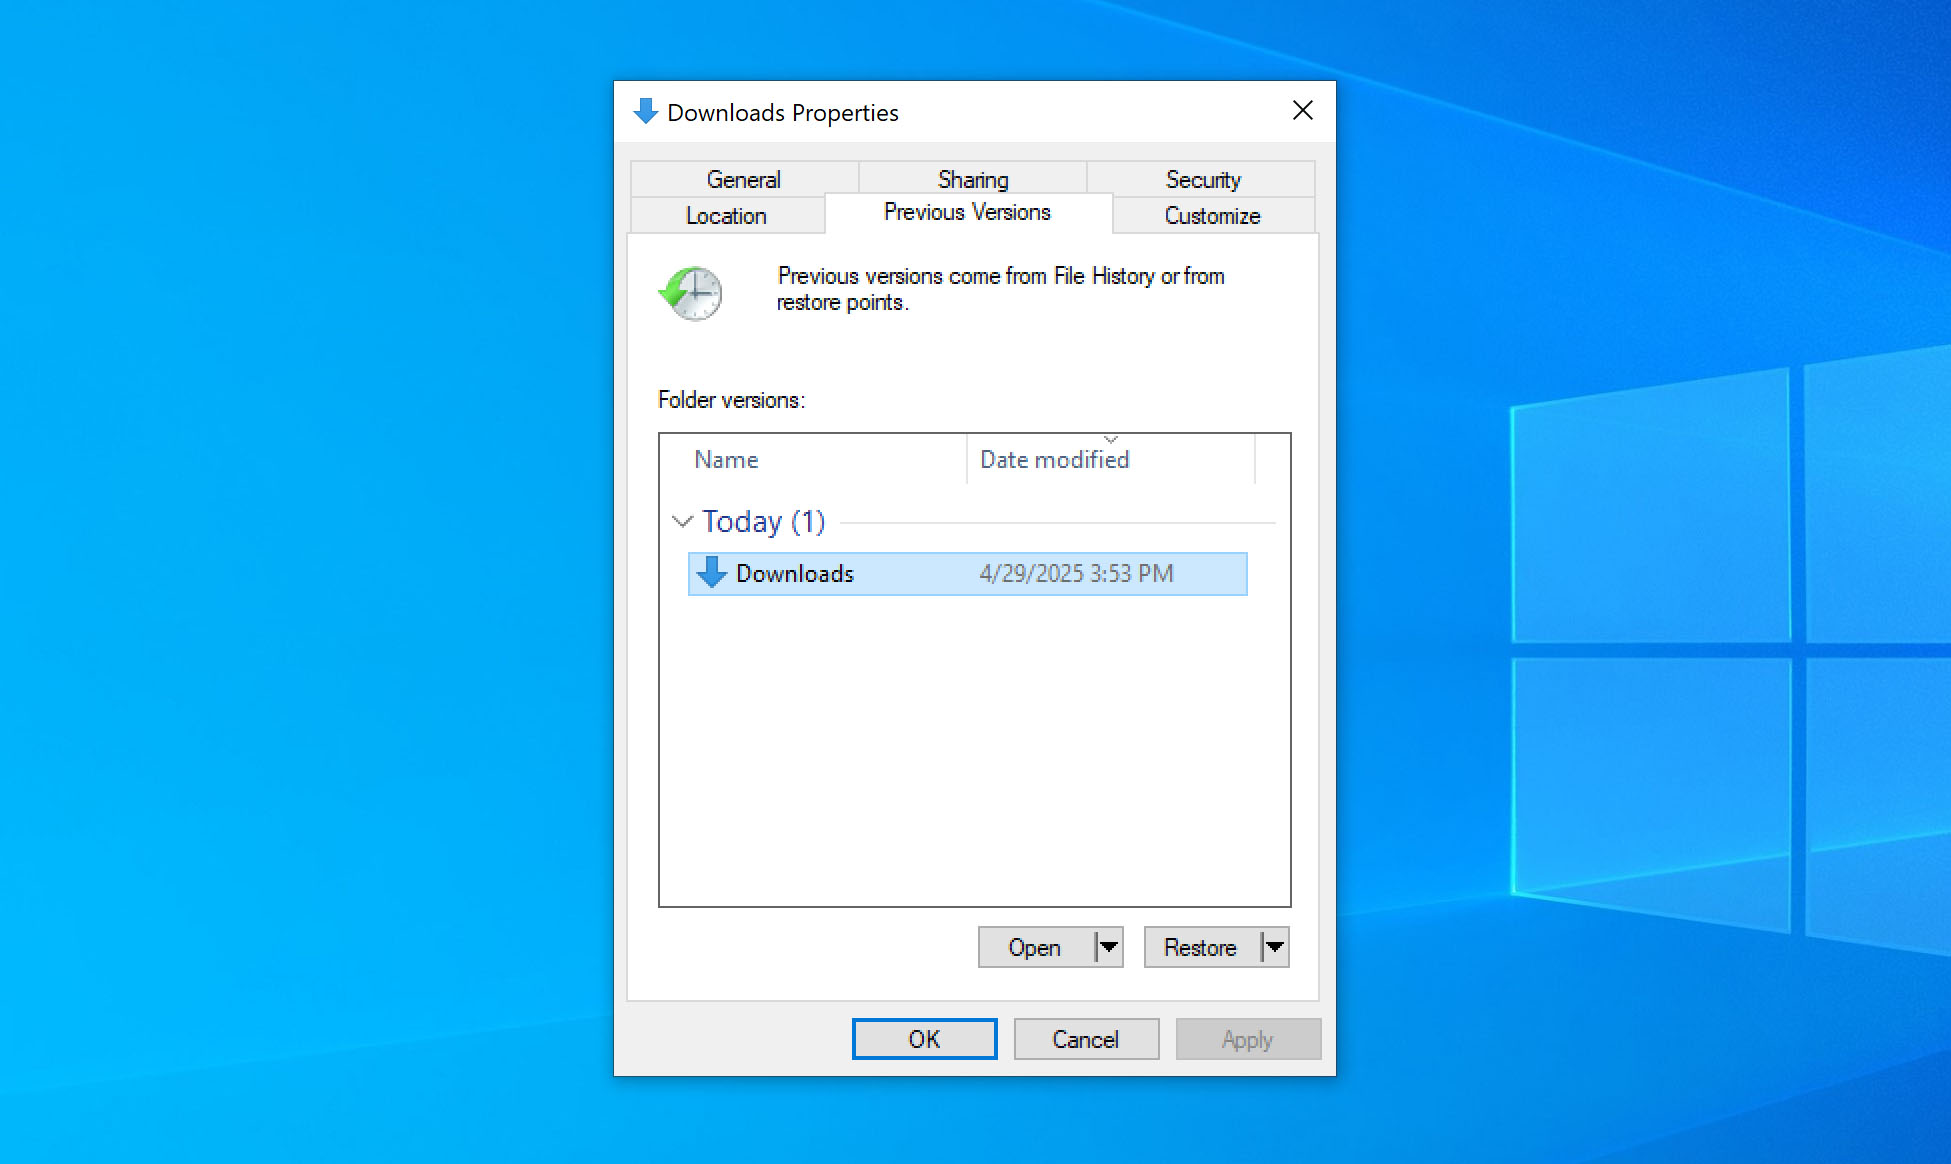
- Review the list and locate a version from before the folder was deleted. You can click Open to preview its contents and make sure it includes the deleted folder.
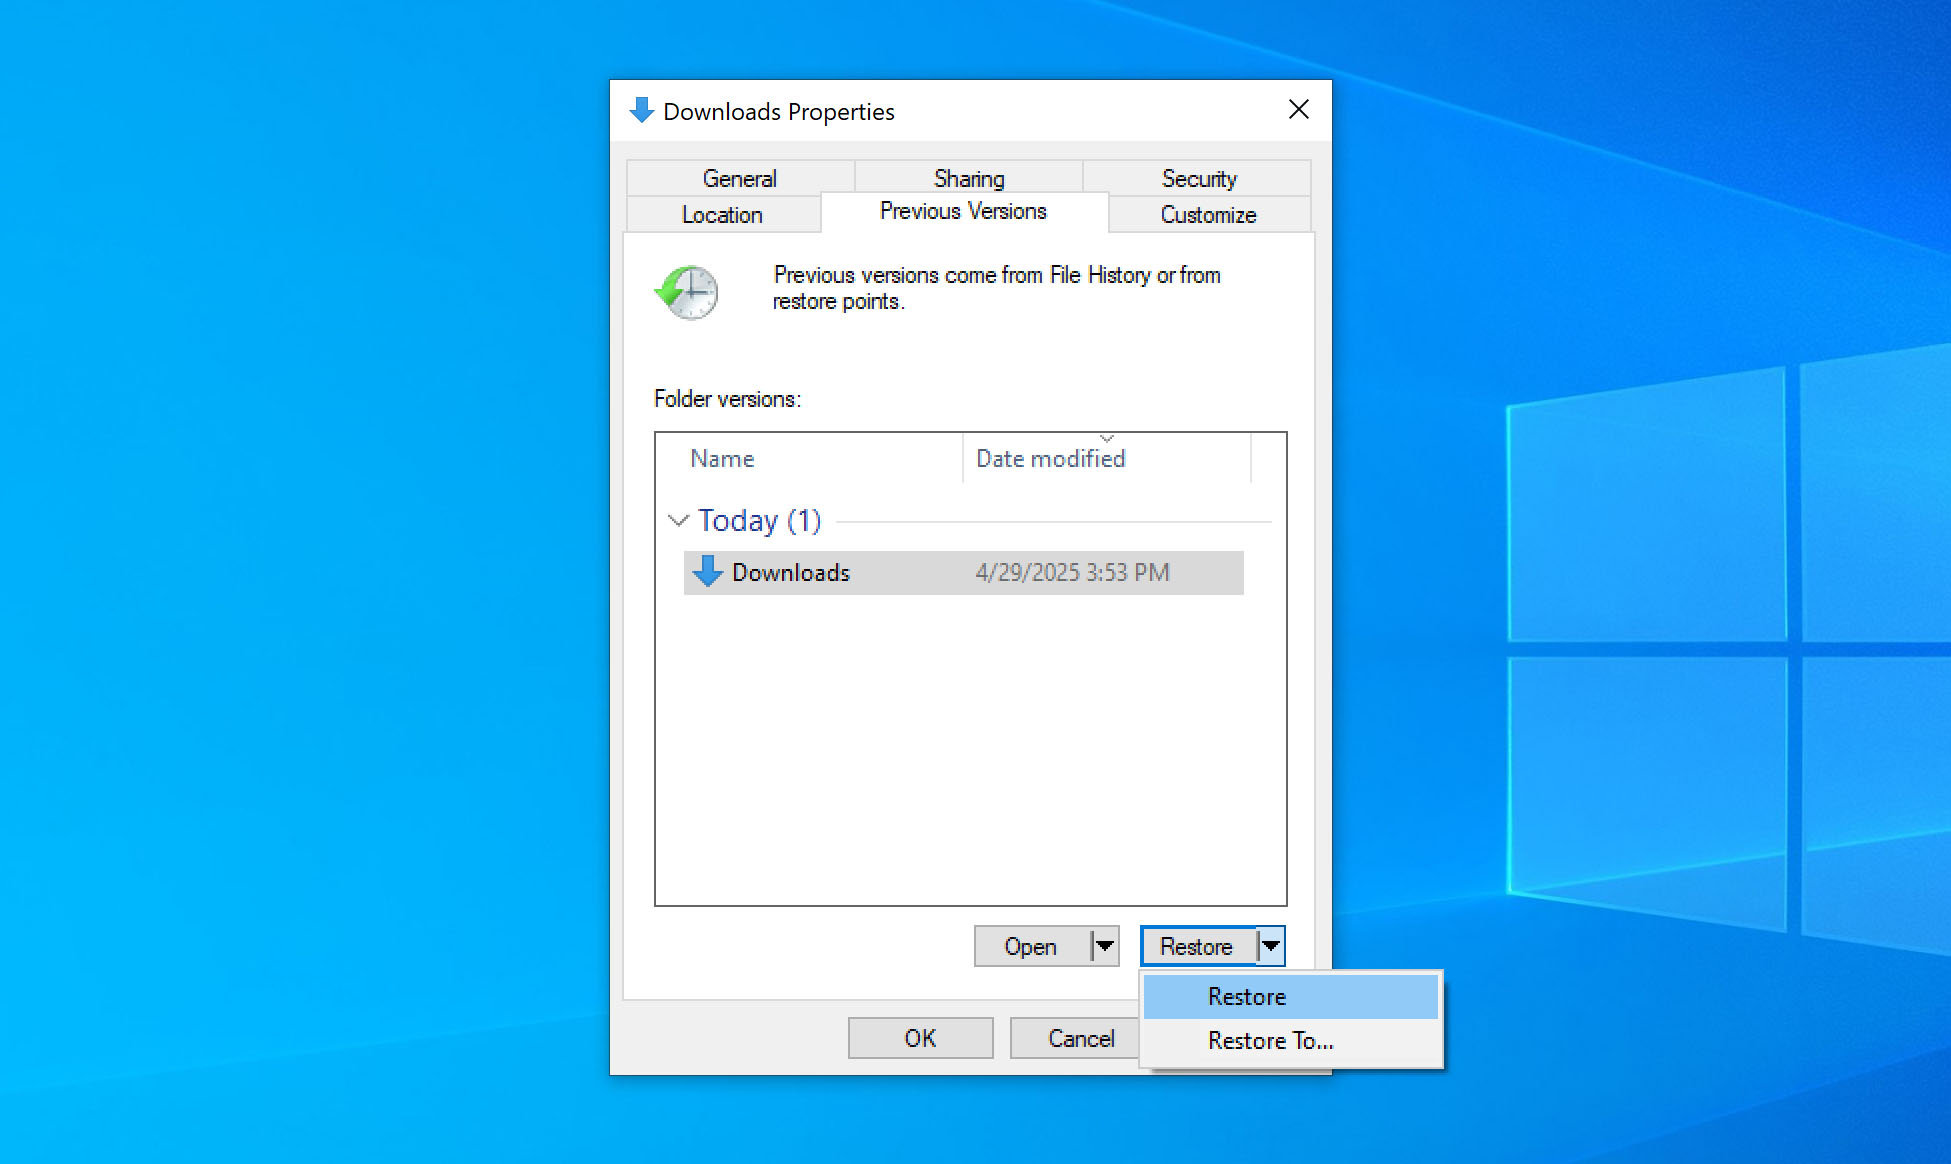
- After you verify it’s the right version, click Restore to overwrite the current folder with the backup, or, if you want to avoid overwriting anything, you can drag and drop the needed folders to a different location.
- Make sure the folder is back where you expected, either in its original spot or the new place you chose.


Method #5: Utilize the Backup and Restore (Windows 7) Tool
Another backup option built into Windows is the Backup and Restore (Windows 7) feature. Despite the name, it’s still available in newer versions like Windows 10 and 11. Microsoft originally created it for Windows 7, but it stuck around because it’s reliable and a lot of people still like using it.
Backup and Restore work quite differently from File History. File History only saves copies of files in the folders you choose, and it runs automatically every hour. Backup and Restore, on the other hand, lets you create a complete system image or back up just the files and folders you pick – and it only runs when you start it or set up a schedule.
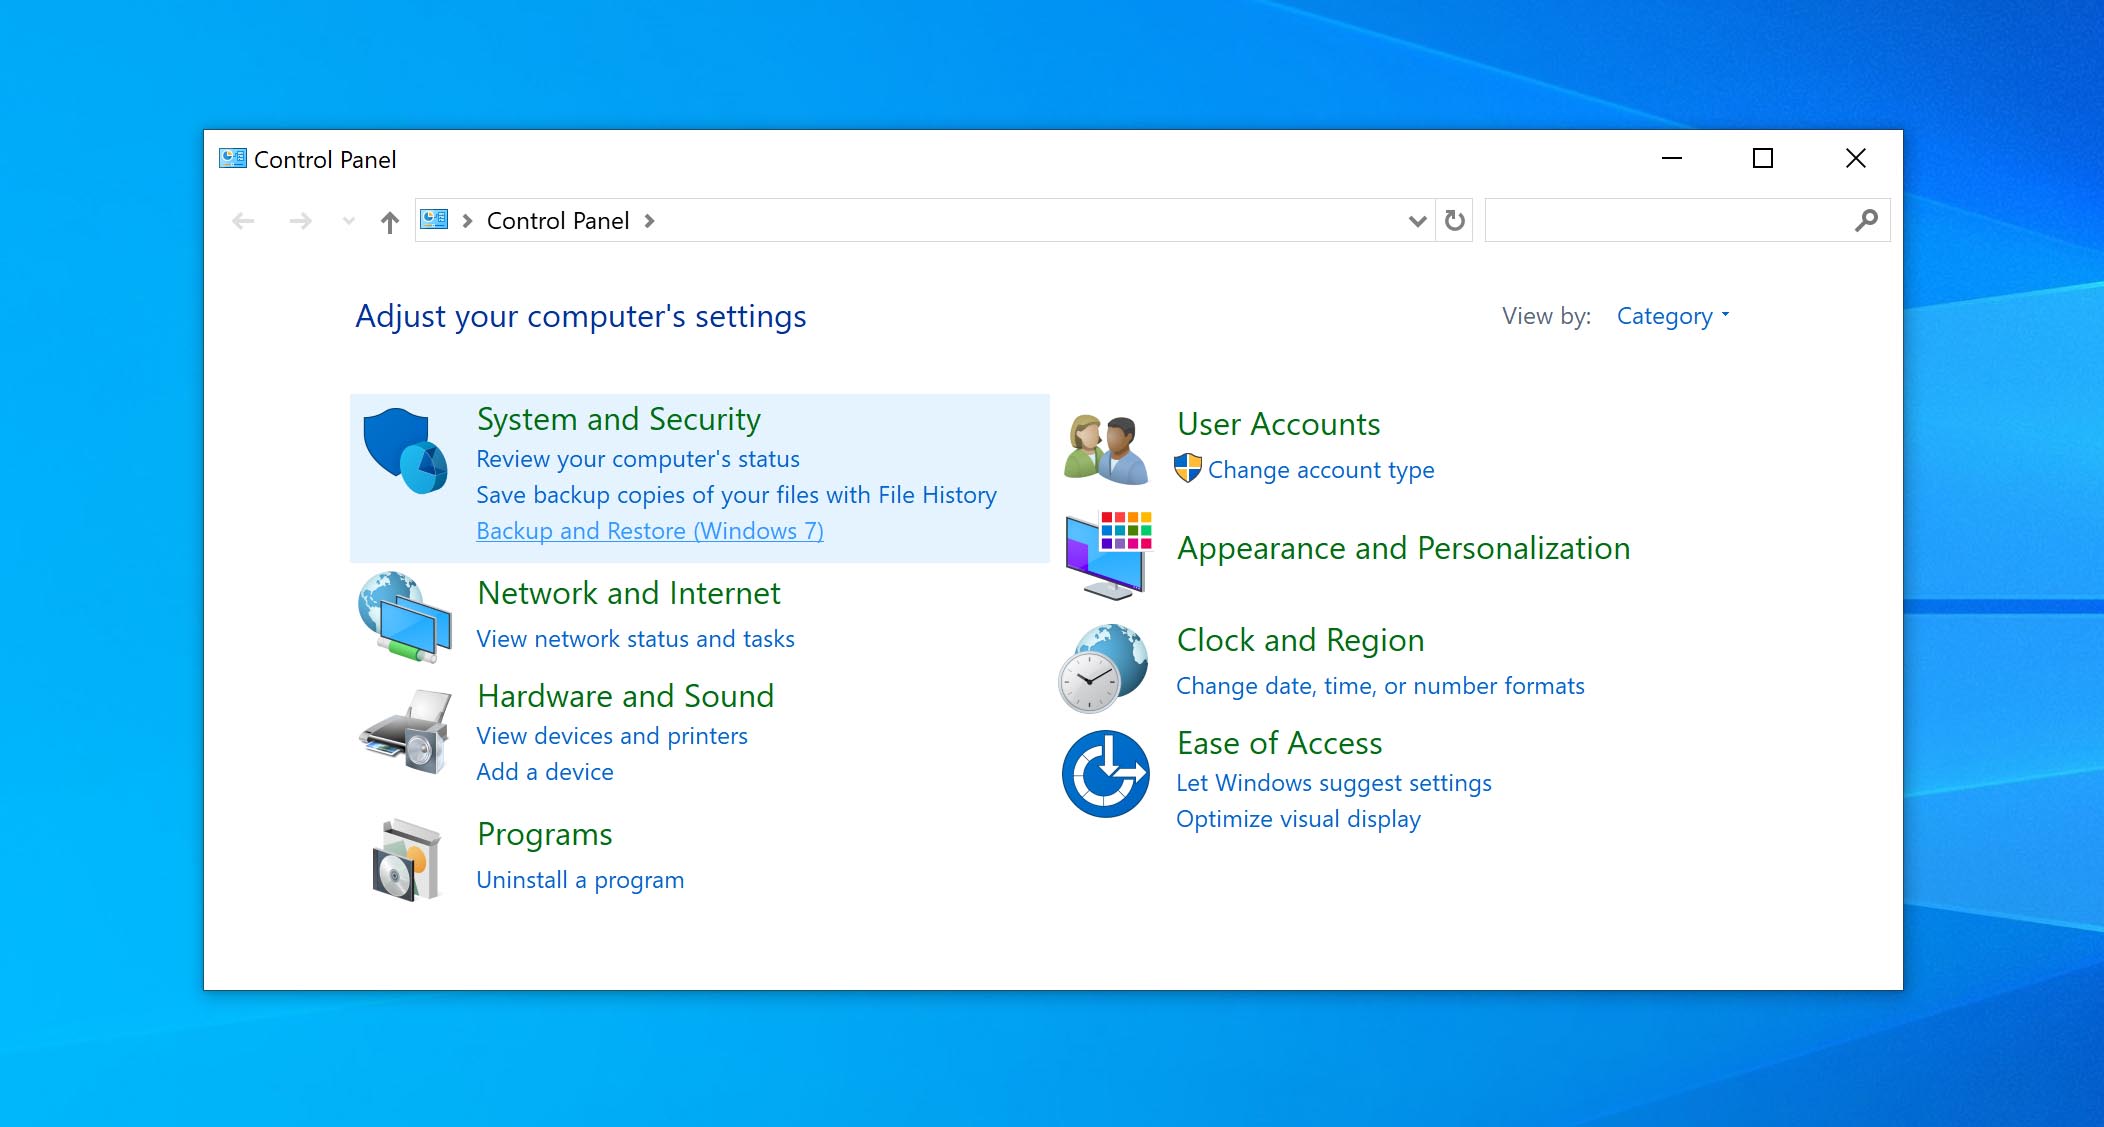
- Press Windows + S to open the search bar, type Control Panel, and hit Enter.
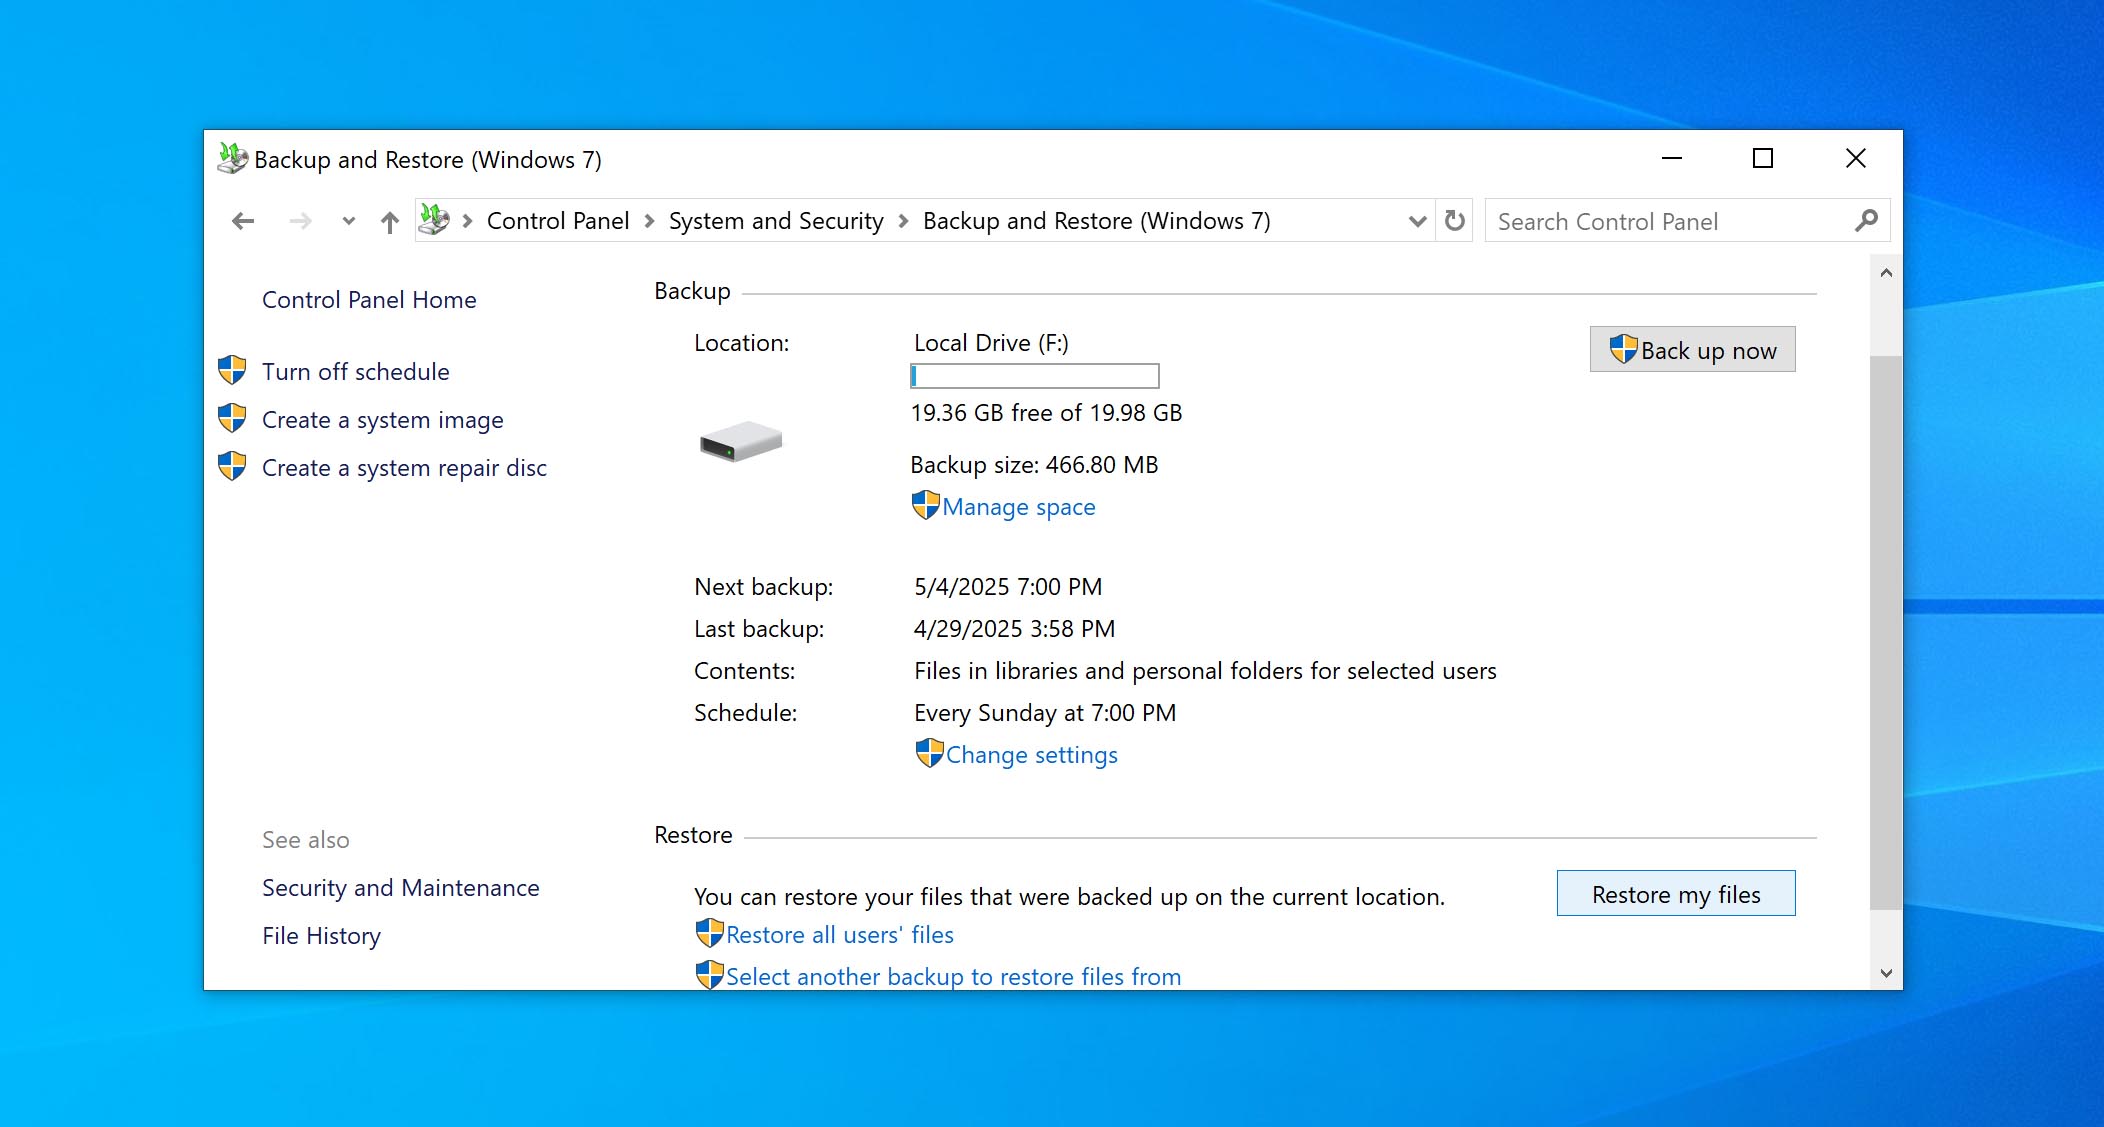
- In the Control Panel, click System and Security, then select Backup and Restore (Windows 7).
- Click Restore my files (or Restore all users’ files if you want to recover files for every account).
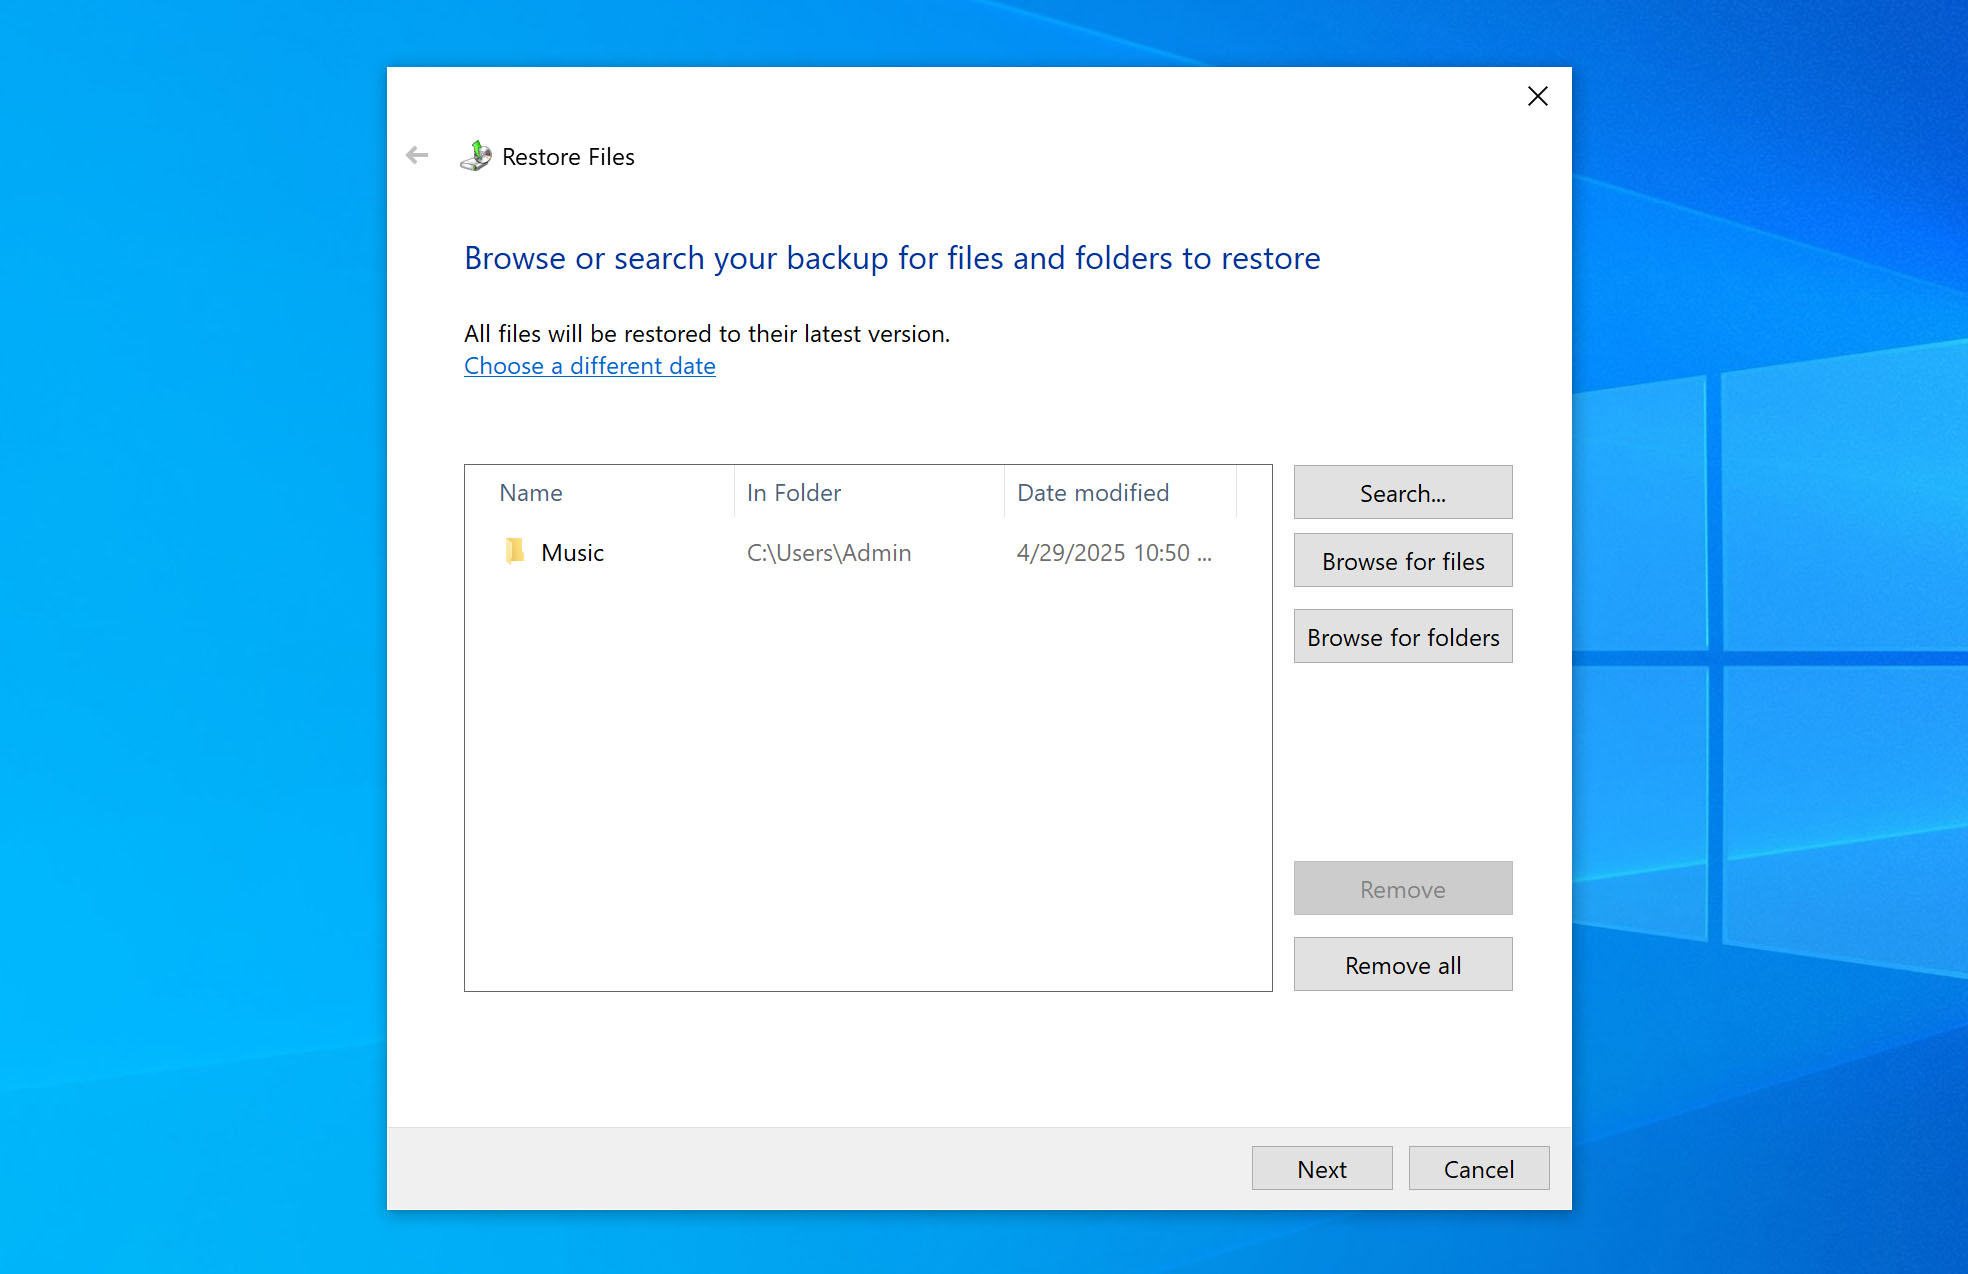
- Click Browse for Folders to restore whole folders.
- After selecting what you want to restore, click Add Folders to add them to the restore list.
- Click Next, then choose In the following location to pick where you want the restored files saved. Click Browse to select the destination folder.
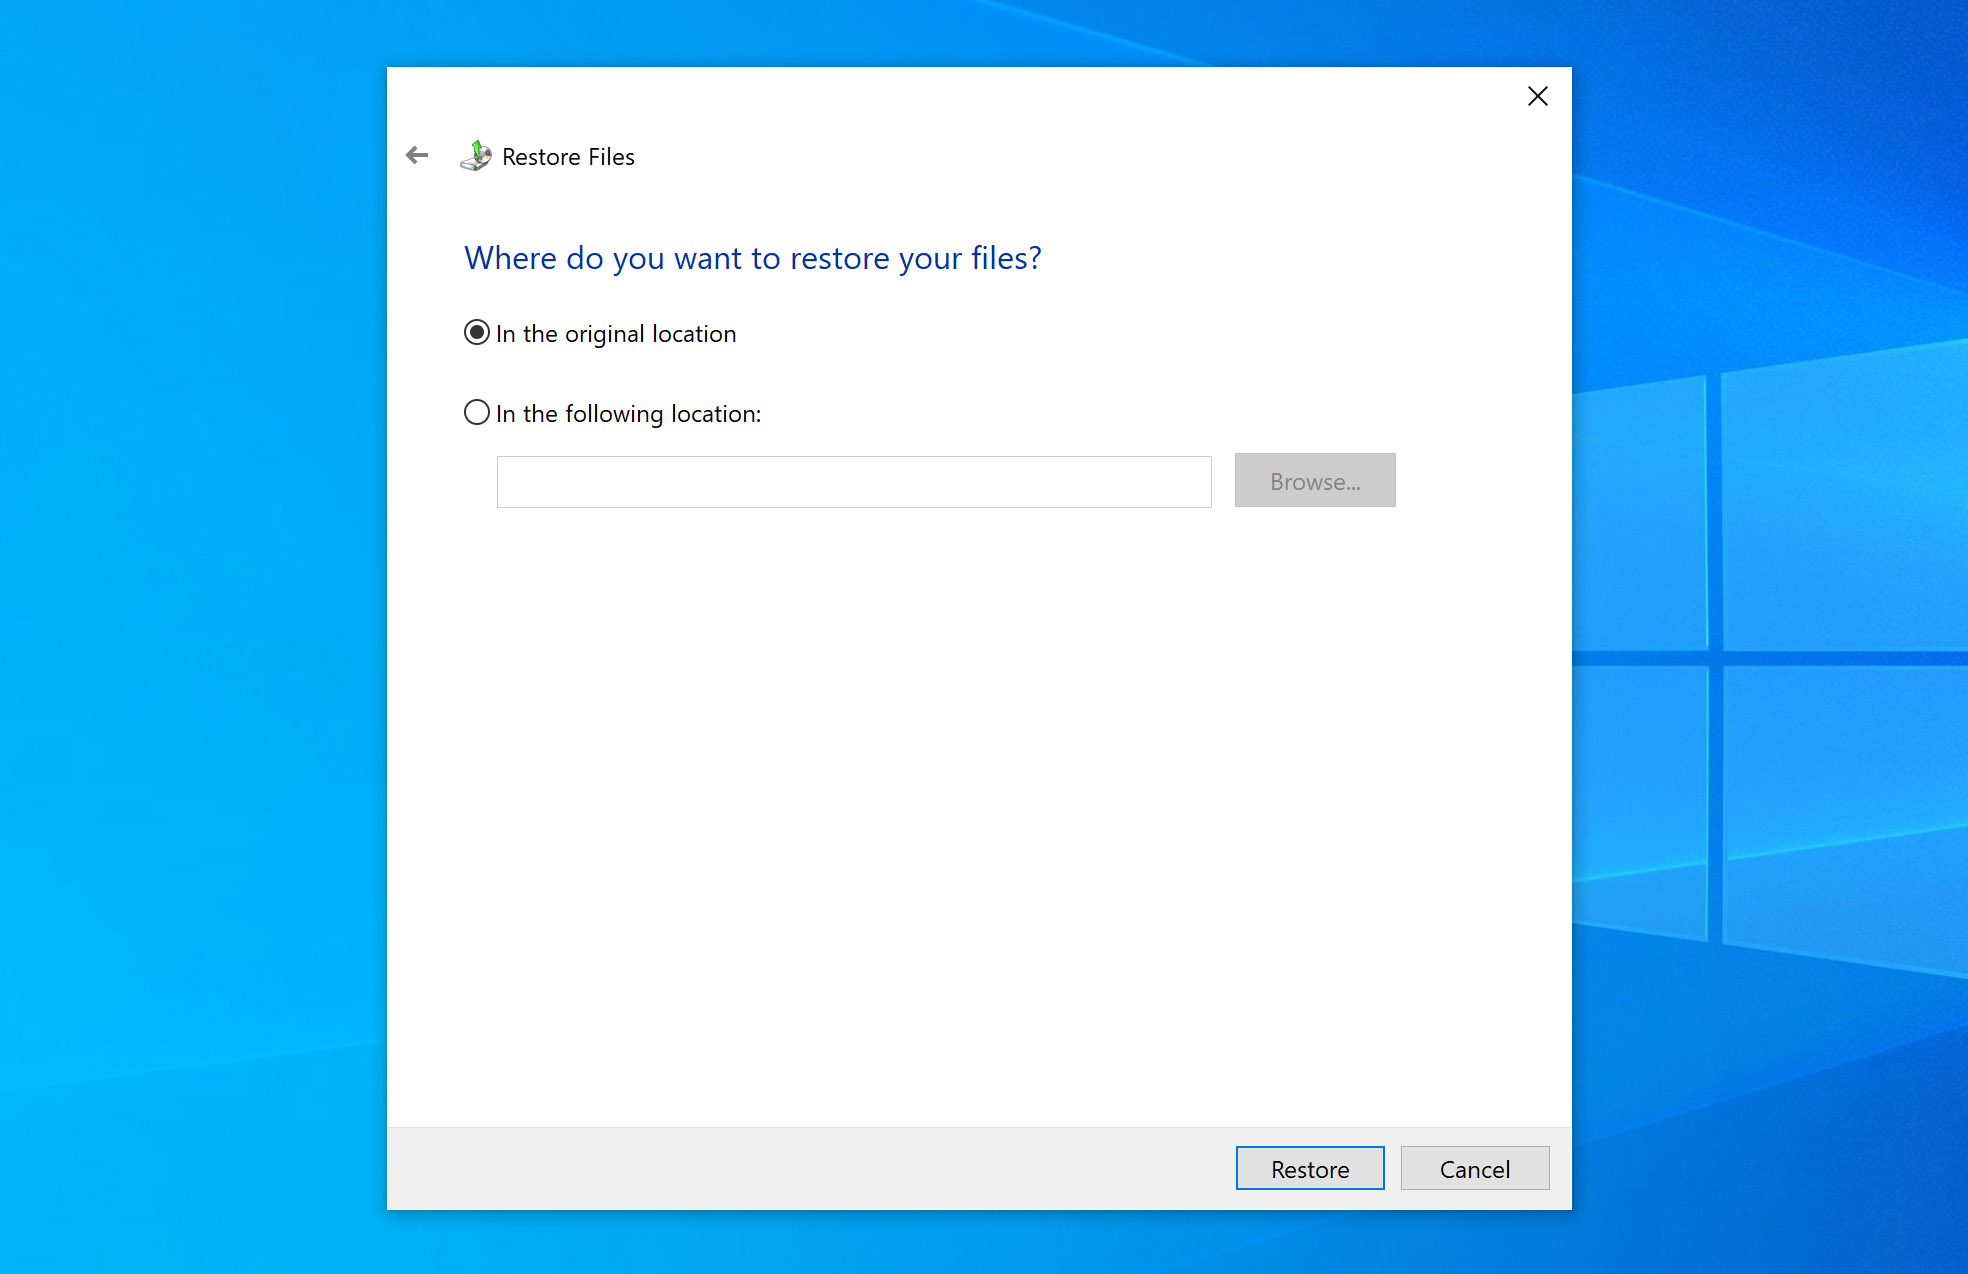
- Follow the prompts and click Restore to start bringing your files back. Once it’s done, click Finish to exit the wizard.
- Go to the location where you restored the files and double-check that everything is there.


This method will only work if you had a backup created before the folder was deleted. If you’ve never used this tool before, it’s not going to help in your case.
Conclusion
Losing a folder isn’t the end of the world – it’s actually pretty easy to fix if you take the right steps.
Here’s a quick recap: first, try Ctrl + Z. If that works, great, you’re done. If not, check the Recycle Bin. If the folder is not there, think about whether you have a backup or whether you need to use data recovery software like Disk Drill. And if you’re using data recovery software, remember that once data is permanently overwritten, recovery becomes impossible, so act quickly and carefully.
FAQs:
- If you had File History or Backup and Restore (Windows 7) set up before the deletion, you might be able to restore the folder from one of those backups.
- If you don’t have a backup, you can use recovery programs like Disk Drill to scan your drive and try to recover the deleted folder.
- If none of the above options work and the folder is really important, a professional data recovery service might still be able to help.