Reading Time: 9 minutesSD cards have become the storage medium of choice for a variety of gizmos, ranging from digital cameras to smartphones and even certain video game consoles. It goes without saying that you’re likely to have some pretty important files on the card at any given time and it’s not uncommon for the memory card to become corrupted and inaccessible.
In this guide, we’ll teach you the different methods you can use to recover files from corrupted SD cards on a Windows machine and discuss the telltale signs of card corruption.
Common Signs of SD Card Corruption
SD card corruption can either be a gradual or abrupt process and there are certain things you can keep an eye out for that can lead you to believe that your card is heading in that direction.
Here are the most obvious signs that your SD card is becoming corrupted:
- 👻 Disappearing Files: Perhaps the most obvious sign that your SD card has become corrupted is if you start noticing some of your files going missing. If some of the data on your card disappears one day out of nowhere, then there’s a good chance that corruption is to blame.
- ⚠️ Error Messages: Another common sign that your card is corrupted is if you start getting error messages when you try to access the storage device on your computer. Some of the usual errors include: “card is not formatted”, “drive is not accessible”, or “data error (cyclic redundancy check)”. Certain apps on your device that rely on your SD card may refuse to function properly as well.
- ✍🏻 Reading and Writing Issues: While write protection can also be a routine cause of reading and writing problems in SD cards, data corruption can also lead to the same thing. It may prevent you from copying files over to the card or accessing the files that are already on there.
- 🔒 Inaccessible Card: If you try to plug your SD card into your PC or laptop and your machine is unable to recognize it, then there’s a very high chance that your card is corrupted.
- 📁 Inconsistent File System: The SD card might report having certain files, but attempts to access them result in errors or nothing at all.
How to Recover Files from a Corrupted SD Card
Just like with corrupted hard drives, the best way to recover corrupted SD cards on your own is by making use of one of the better data recovery programs on the market. It really doesn’t get much better than Disk Drill, thanks to its accessible user interface, fantastic recovery rate, and nifty extra features. You don’t have to invest in it right away either, since the app has a trial version with all of the bells and whistles and a data recovery limit of up to 500 MB.
Before you attempt to recover your data, however, you need to stop using the SD card right away to avoid any further corruption or data loss. Furthermore, you should make a perfect image of the card and try to recover from the backup corrupted SD card instead, as recovering files directly from the storage device could cause you to permanently lose information.
Fortunately, Disk Drill comes with a byte-to-byte backup feature that allows you to create an exact clone of pretty much any storage medium, so you should make use of the tool before jumping into the recovery process.
That being said, follow the instructions below to recover data from corrupted SD cards using Disk Drill:
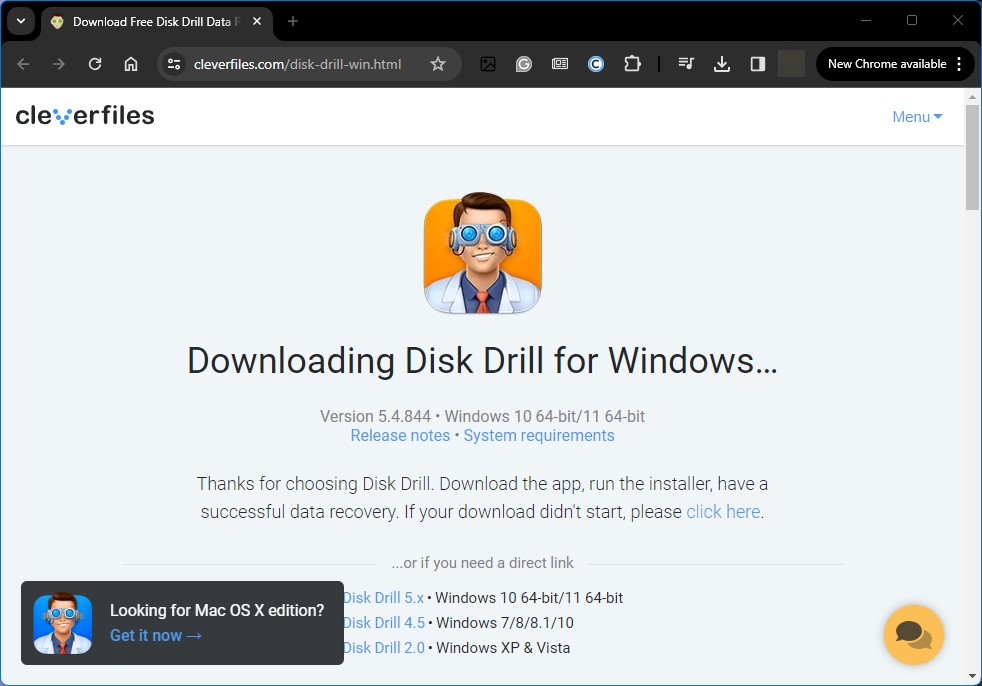
- Download the Disk Drill setup file from the Cleverfiles website and make sure it’s properly installed on your Windows PC or laptop.
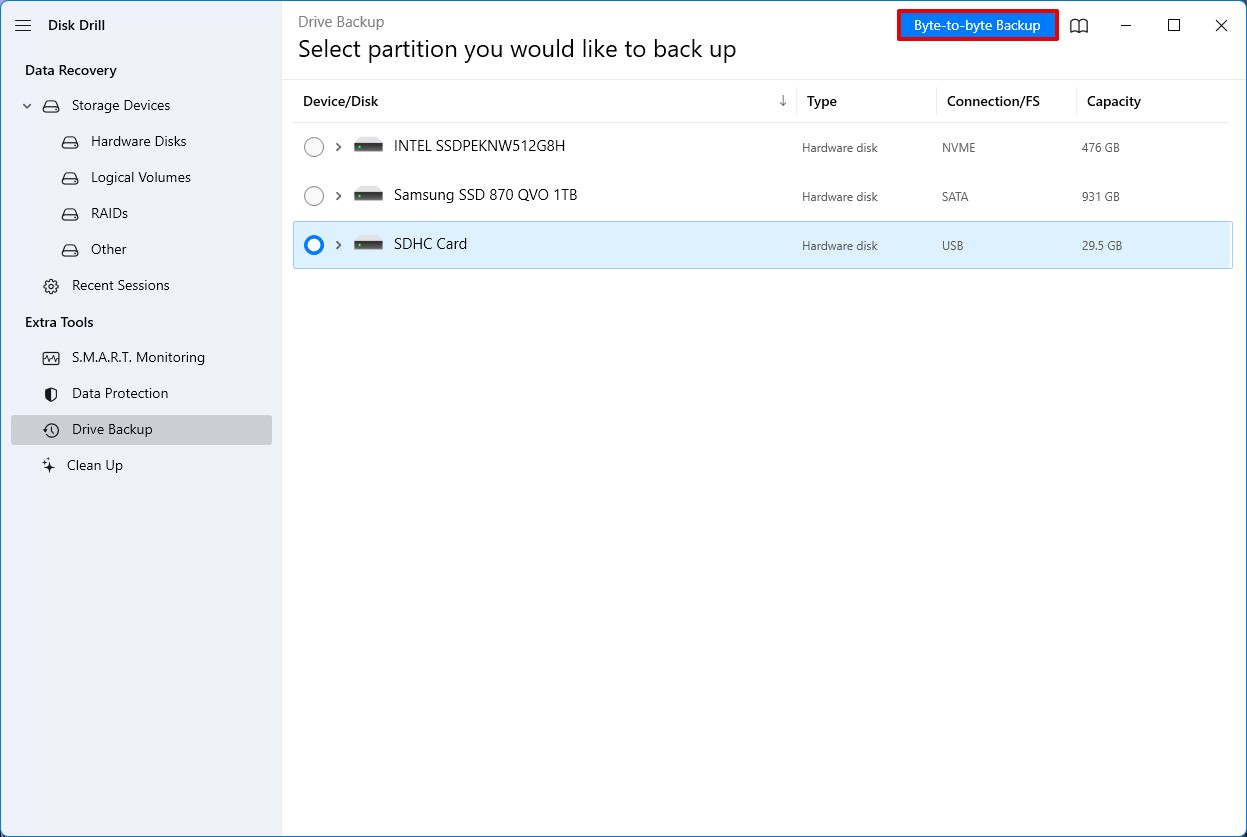
- Launch the app and click the Drive Backup option on the left,in the menu select your SD card, and then press Byte-to-byte Backup.
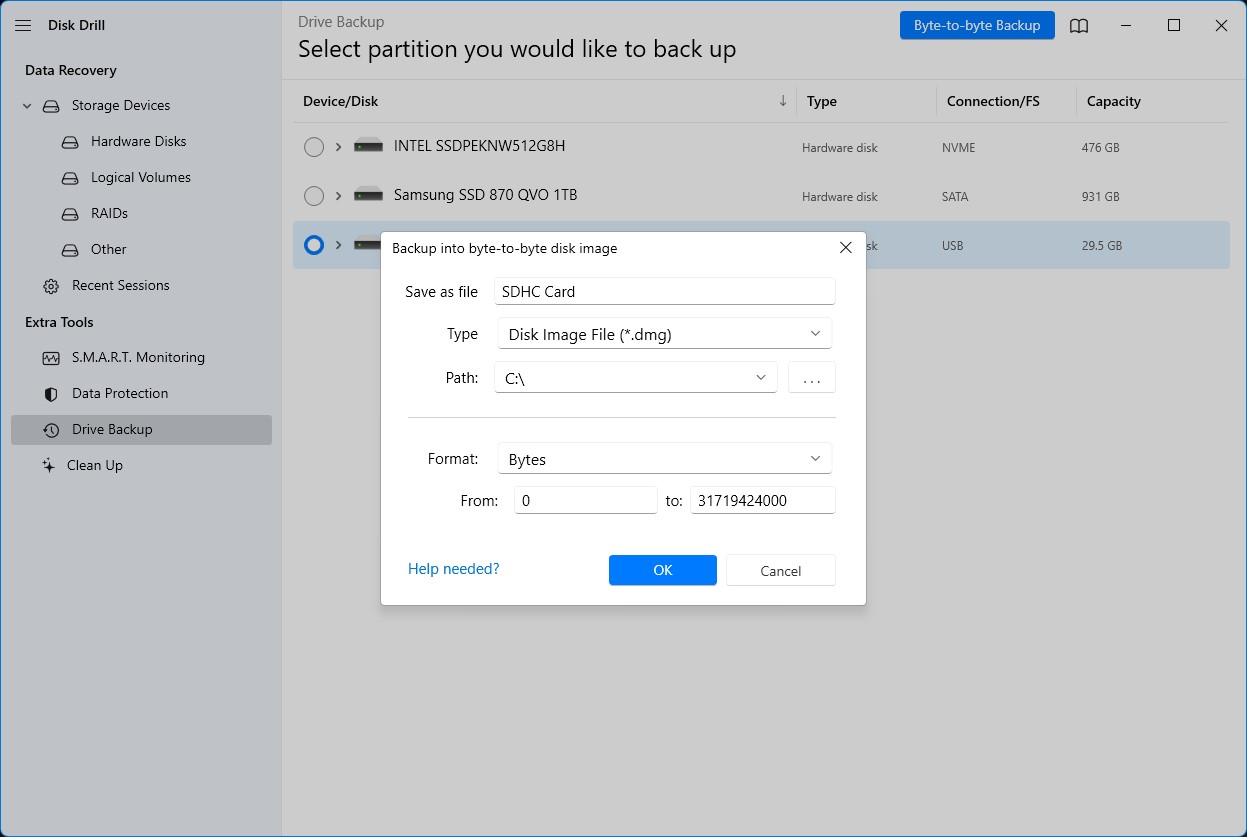
- In the window that pops up specify details of image creation, like format or location to save it, then click OK.
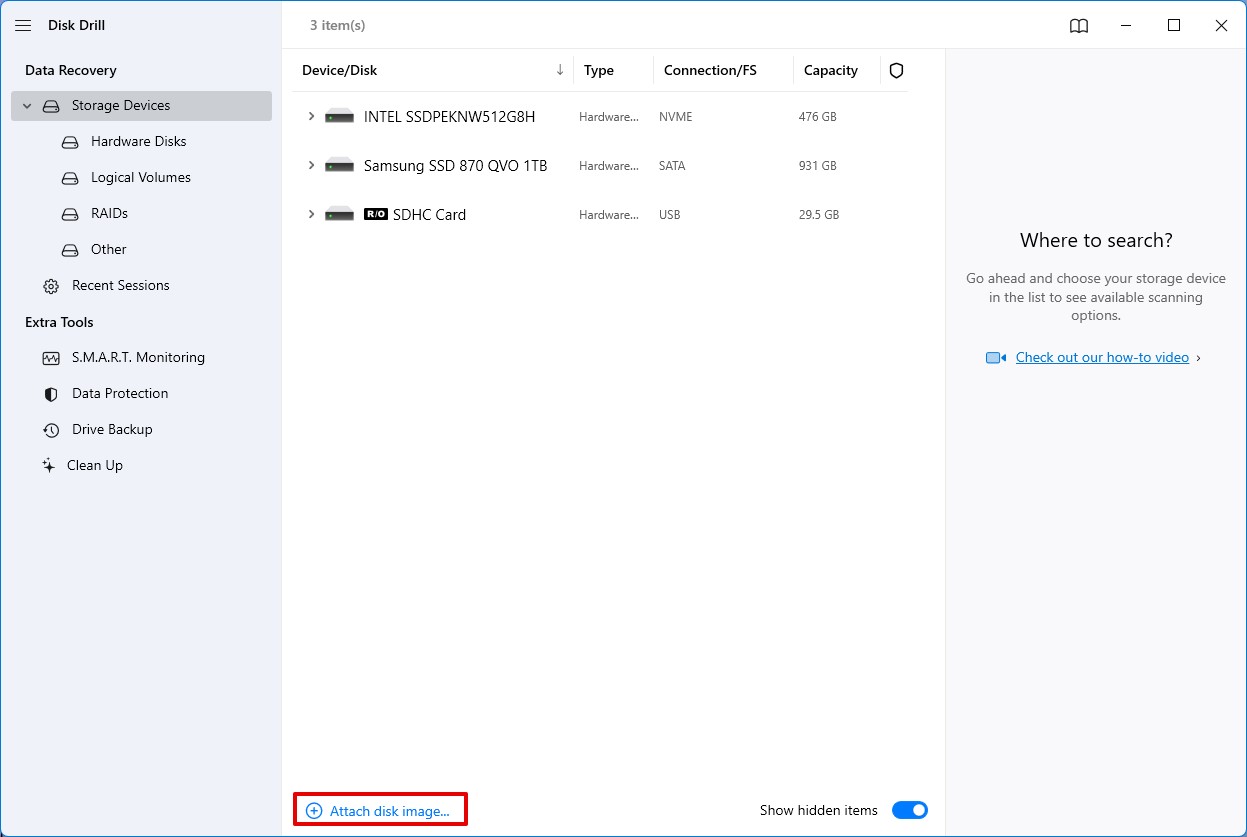
- Now go back to the Data recovery tab and click the Attach disk image link to browse and add the image of your SD card.
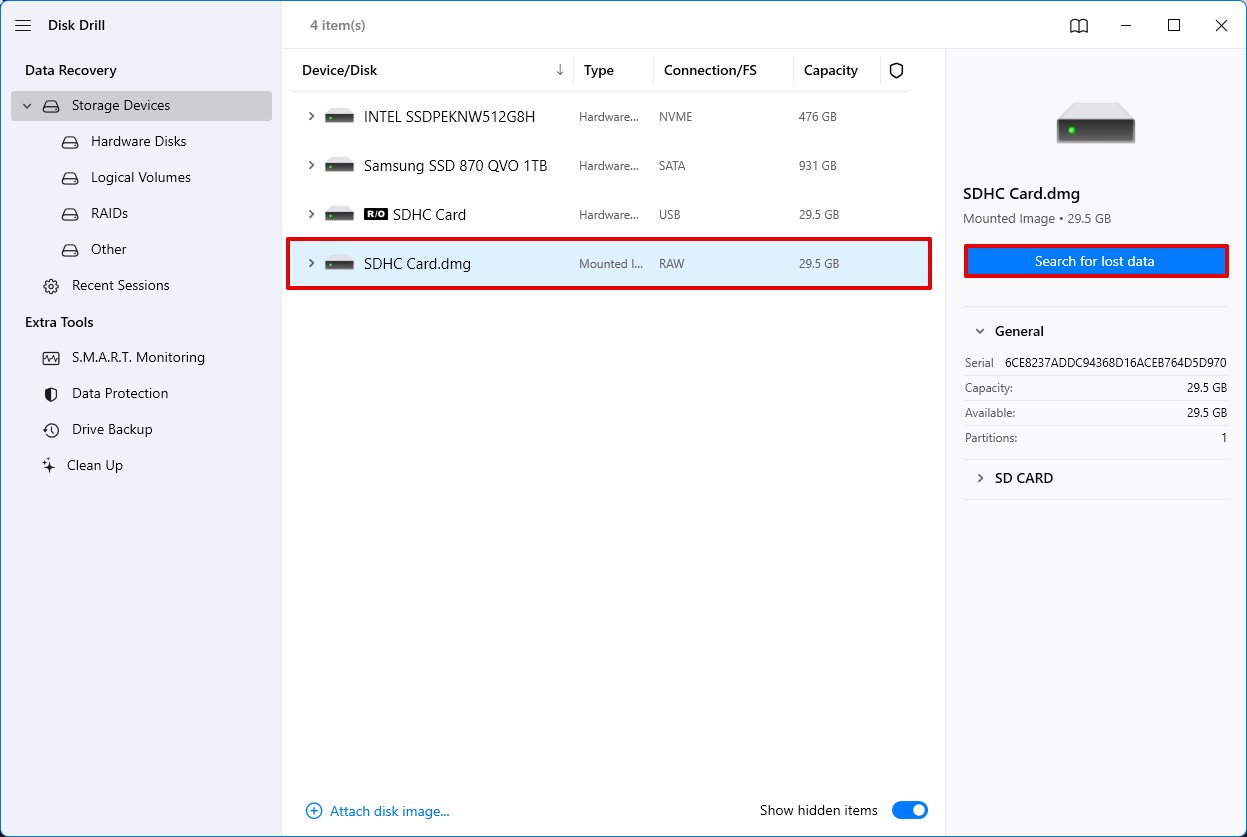
- Once added, the image should appear on the device/disk list. Select it and click the Search for lost data button to proceed.
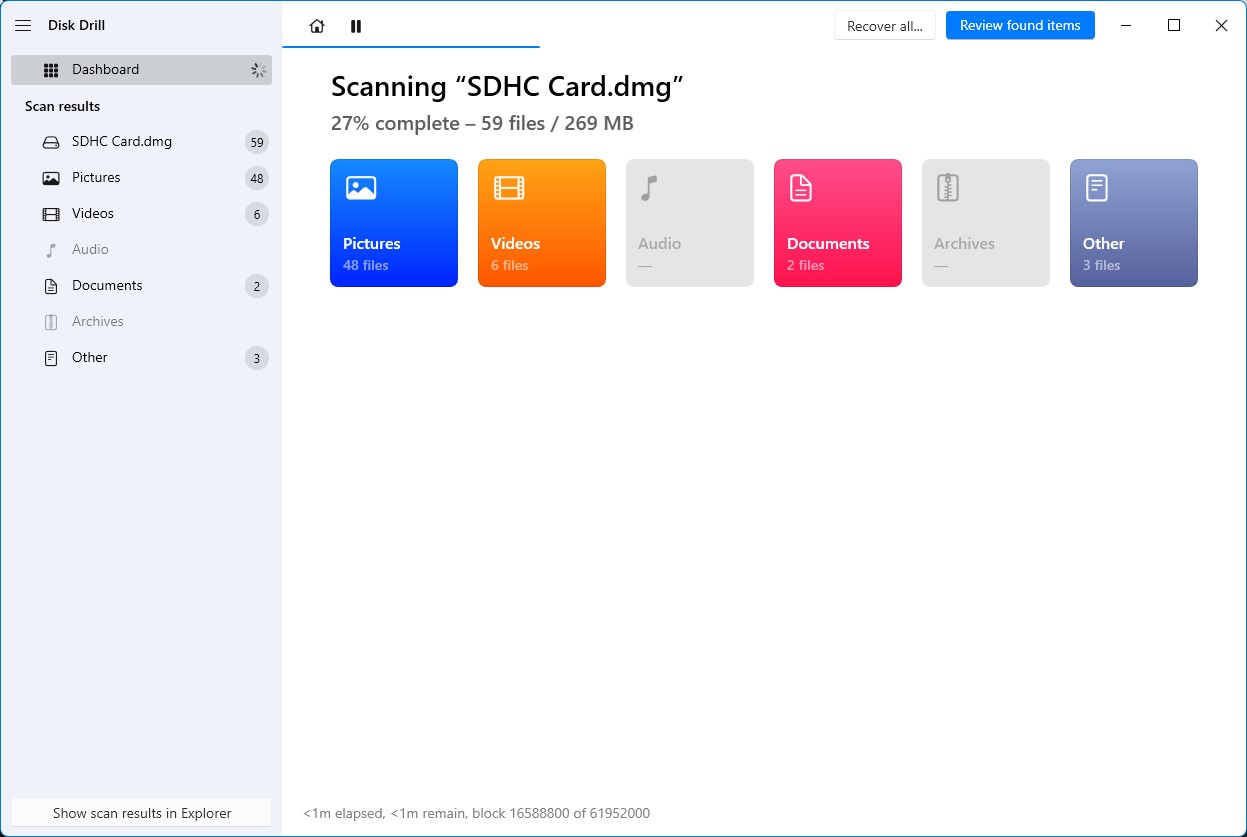
- Disk Drill will start scanning the image of your corrupted SD card for all the files it can recover. In the meantime, you can click the Review found items button on the top-right corner to check out the files that the app has uncovered so far.
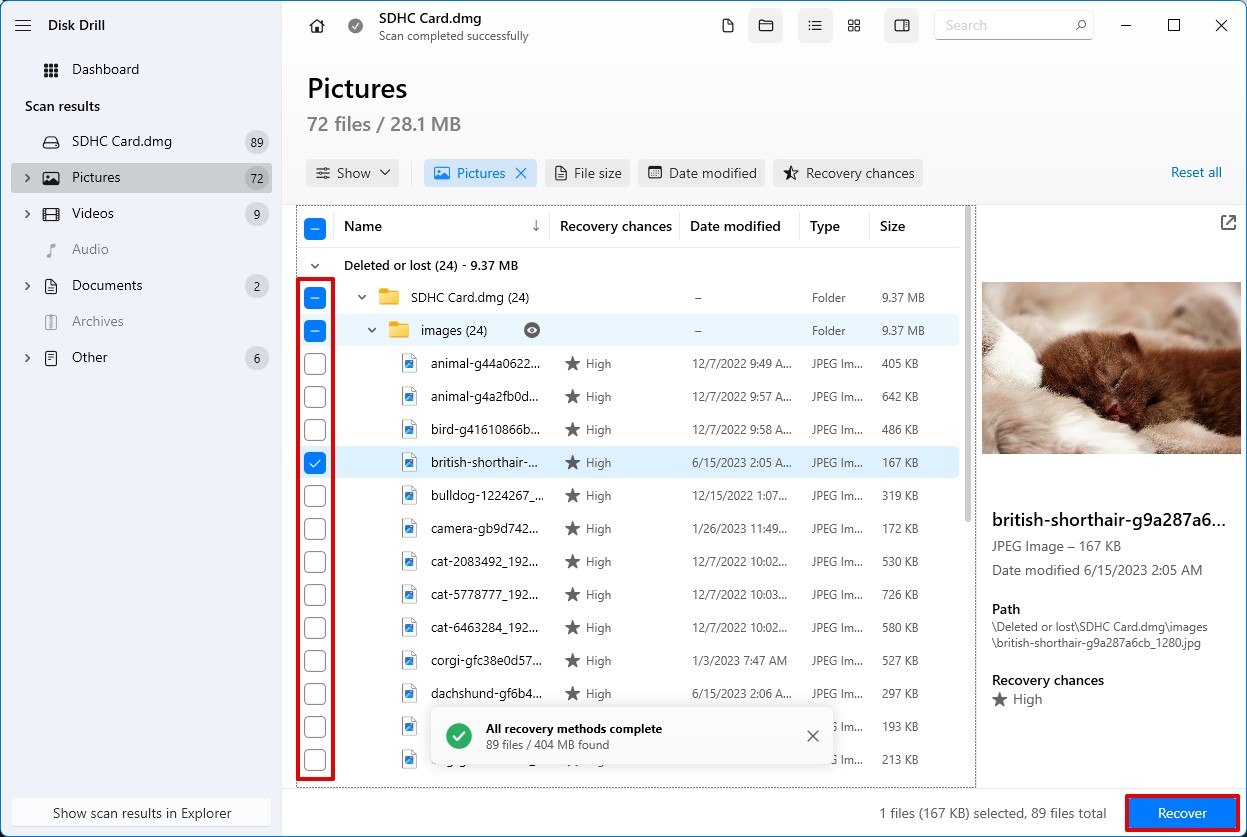
- When you get to the results page, your lost files should appear under the Found files dropdown. You just need to navigate to the right folder, highlight the files you want to retrieve by ticking the checkboxes next to their names, and click the Recover button on the bottom-left to continue. You can also utilize the search bar on the top-right corner to look for particular filenames or extensions.
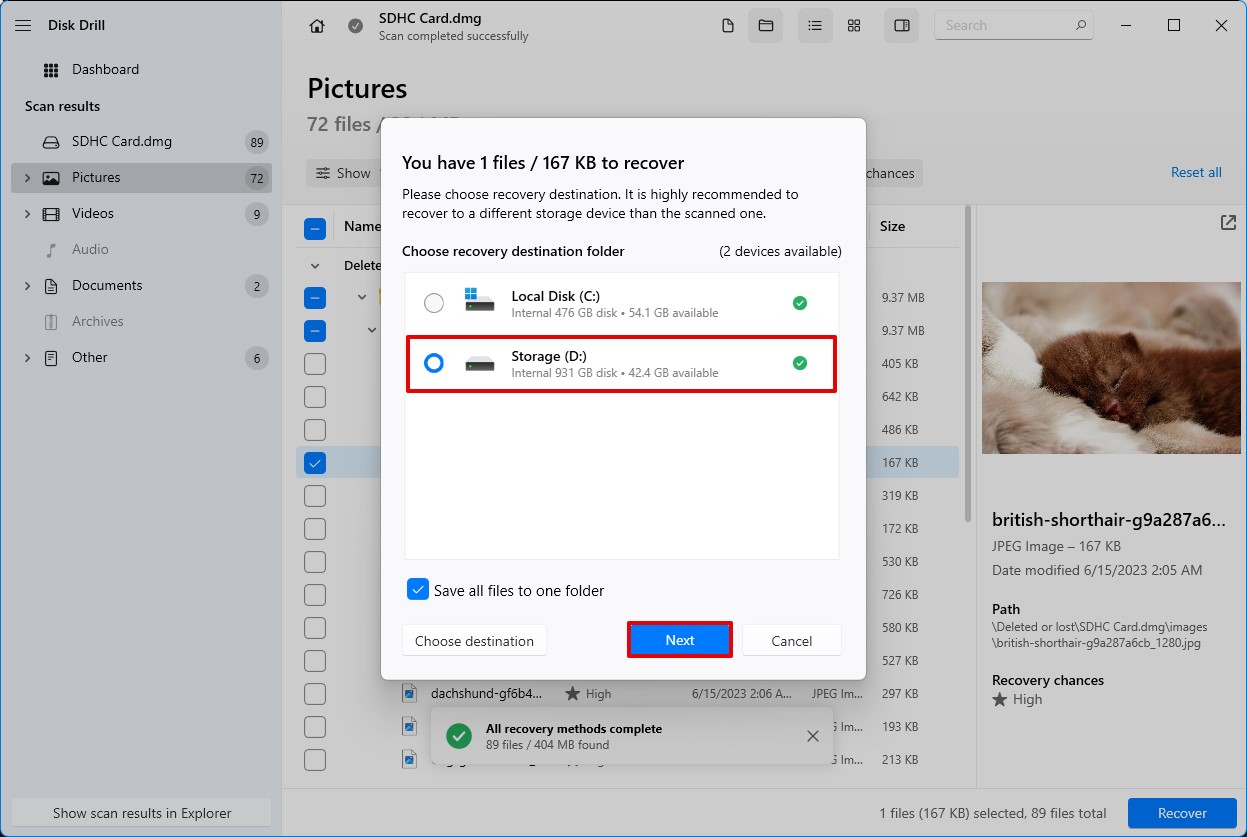
- The last thing you’ll have to do before the recovery begins is to select the destination where your rescued files will be saved. Bear in mind that this has to be on a different storage device that the SD card you’re trying to get back files from. Click Next to finally start attempting to retrieve data from corrupted SD cards.
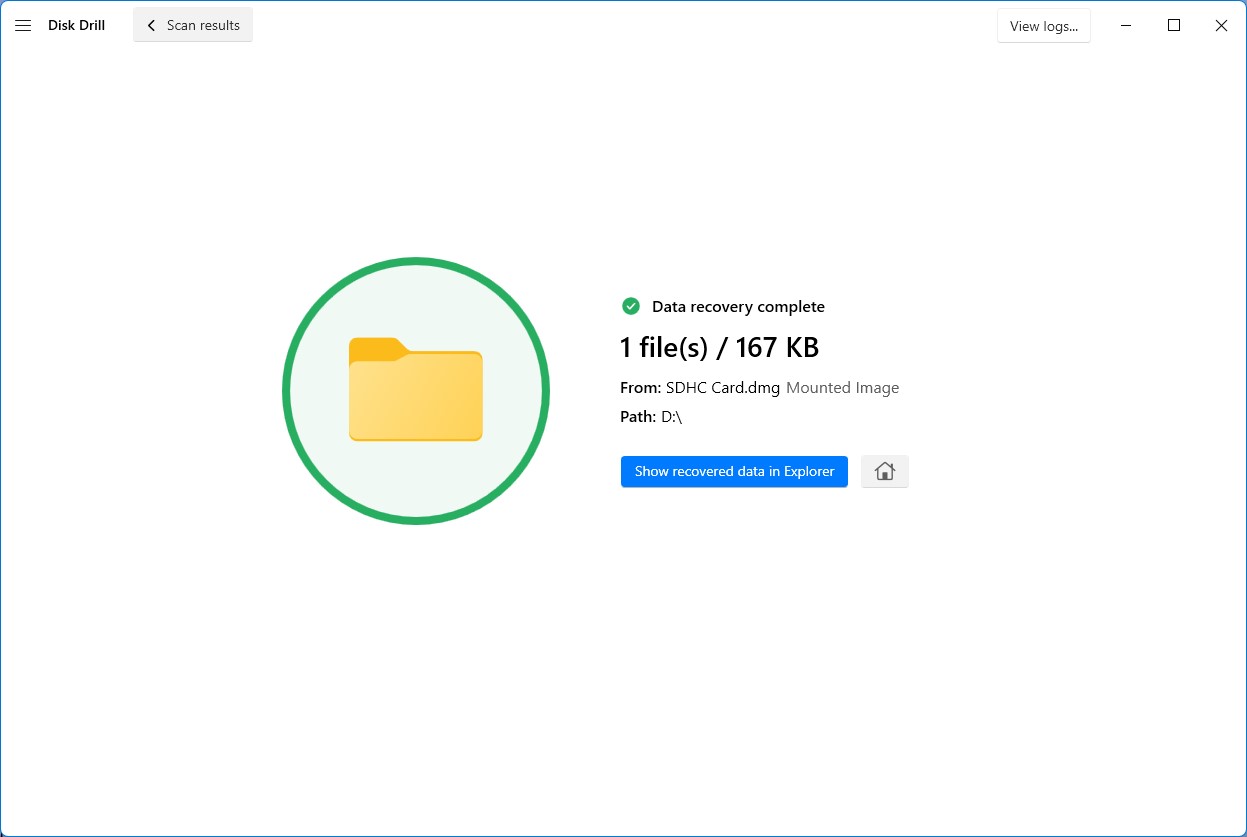
- After the process is complete, you’ll see a Show recovered files in Explorer button. Clicking this will take you to the folder where your recovered files are saved.
How to Fix a Corrupted SD Card on Windows
While corrupted SD card recovery is certainly important, you can also try to fix the card on Windows through a series of tools and techniques. That way, if successful, you’ll be able to access the memory card once more, along with some, if not all, of its contents. There are various ways to restore corrupted SD cards.
Method 1: Run CHKDSK Command
CHKDSK – short for Check Disk – is a Windows tool that verifies the integrity of a storage medium and attempts to repair errors in its file system. It’s a great way to repair compromised storage devices, such as a corrupted SD card.
It has to be run from your Windows Command Prompt, so here are the steps to accomplish that:
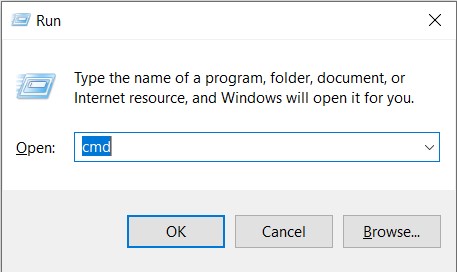
- Press Windows + R to bring up the Run command dialogue box and type and type in “cmd” then press Ctrl + Shift + Enter to run as administrator.
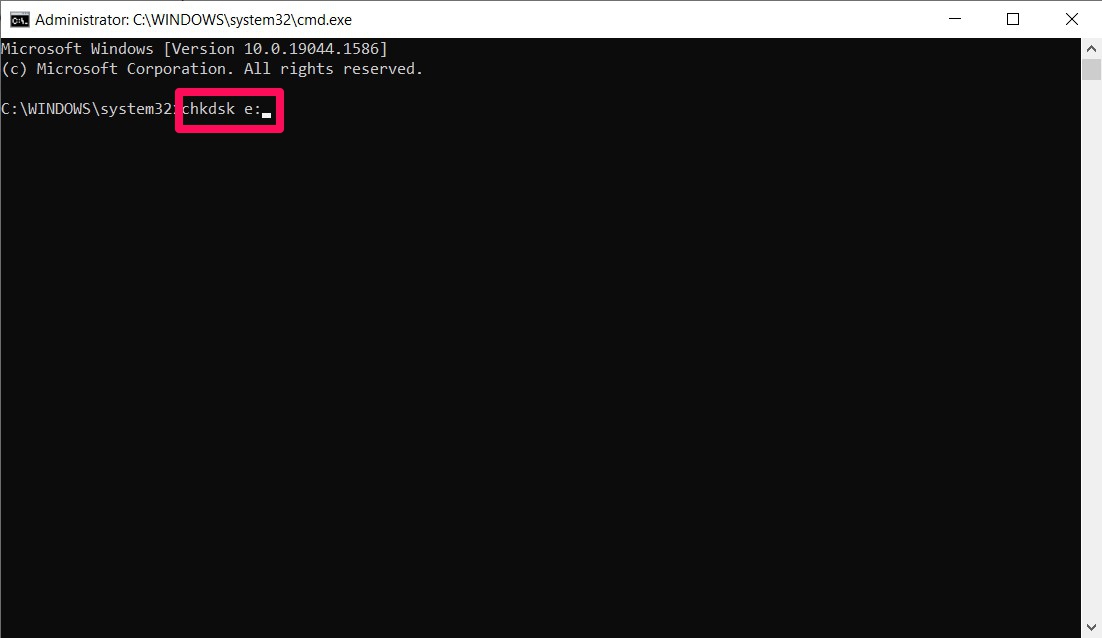
- Key in “chkdsk” followed by the drive letter of your corrupted SD card. In our case, the string was “chkdsk e:”. Hit Enter to execute.
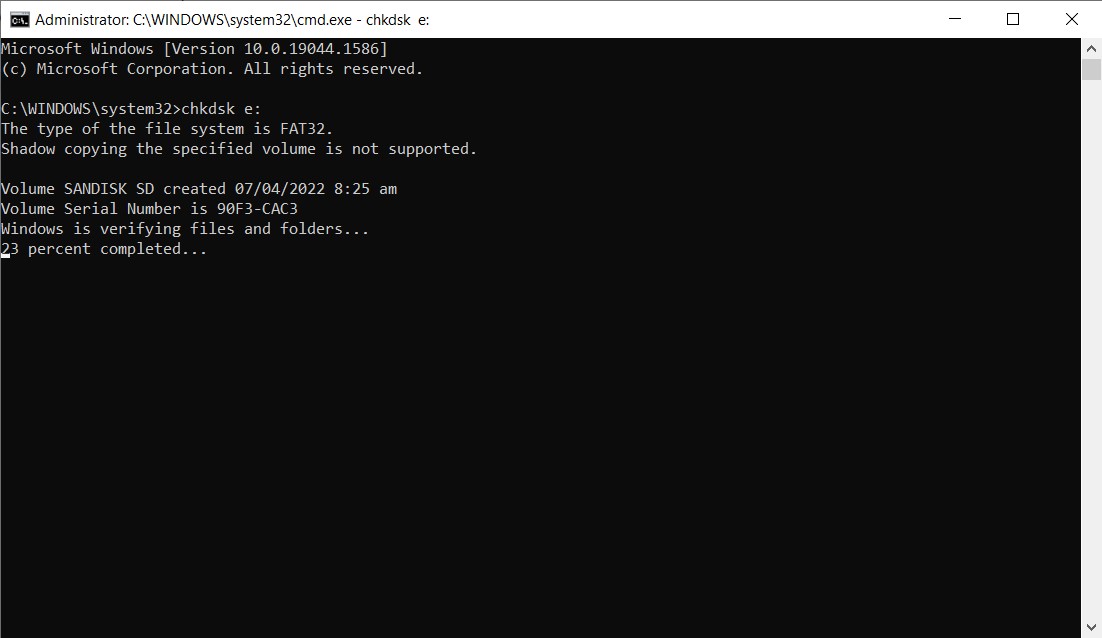
- Chkdsk will now scan for errors and perform any possible repairs.
Method 2: Check the Drive for Errors in File Explorer
This method is essentially chkdsk as well but accessed through Windows File Explorer instead of a Command Prompt. Here’s how to do it:
- Press Windows + E to bring up the File Explorer.
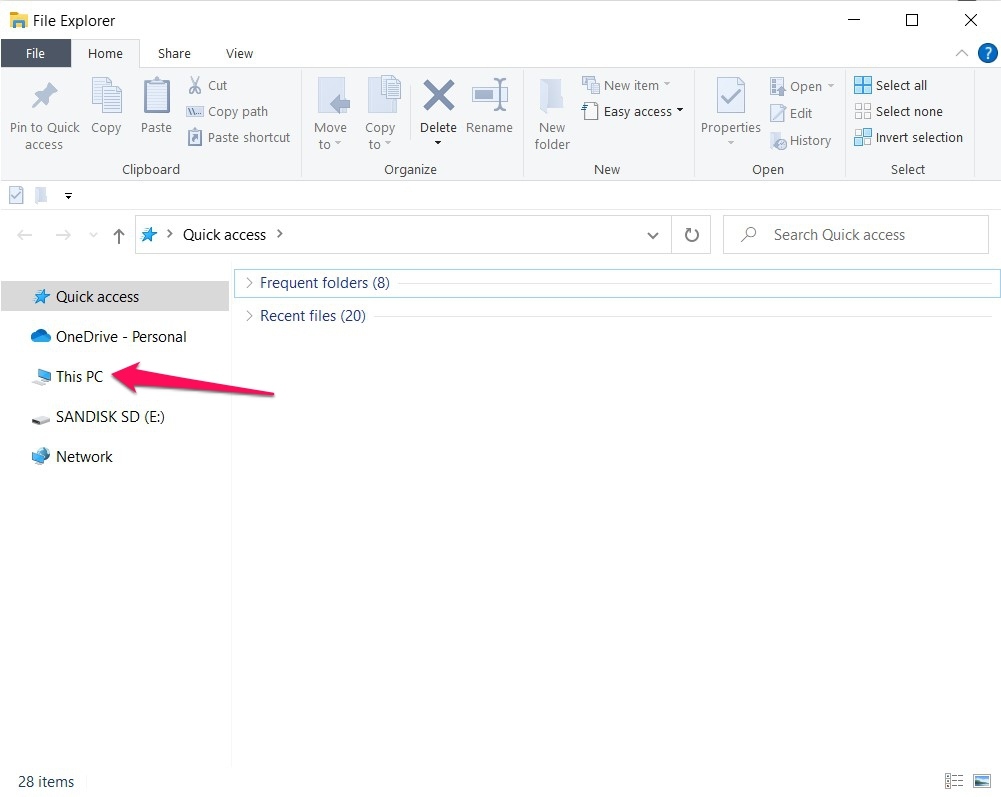
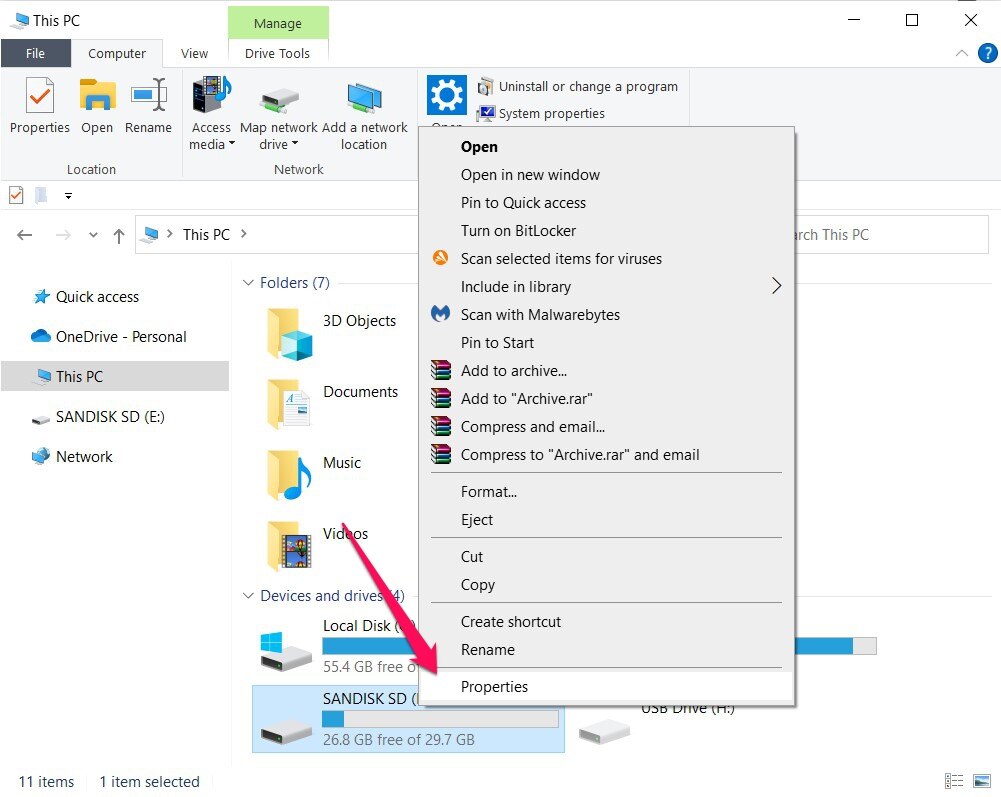
- Navigate to This PC from the left side of the window, then right-click your corrupted SD card and select Properties.
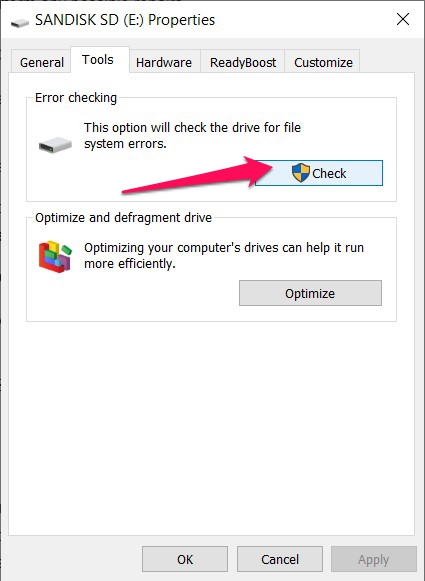
- Head to the Tools tab and click the Check button under Error checking.
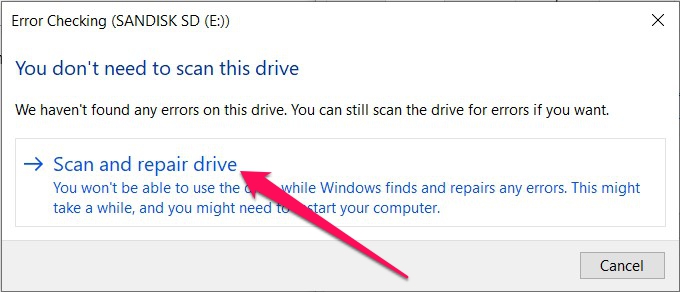
- You might get a pop-up screen asking you to confirm the scan. Just click Scan and repair drive to continue.
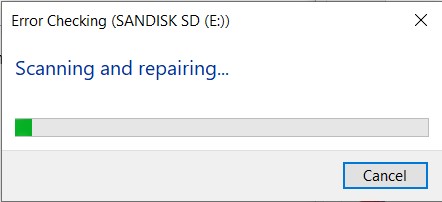
- CHKDSK will now begin scanning the SD card and fixing any errors it comes across.
Method 3: Assign a New Drive Letter
It may sound a bit far fetched, but assigning a new drive letter to your SD card might allow it to become accessible again. The inaccessibility problem may be due to conflicting drive letters with another storage device, which can be remedied by simply assigning it a new one. Here are the steps:
- Type “disk management” into the search box on your taskbar and select the top result.
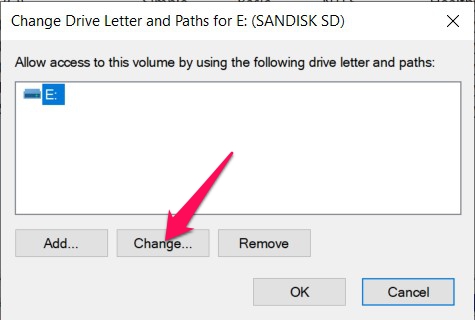
- Right-click your SD card and select the Change Drive Letter and Paths option.
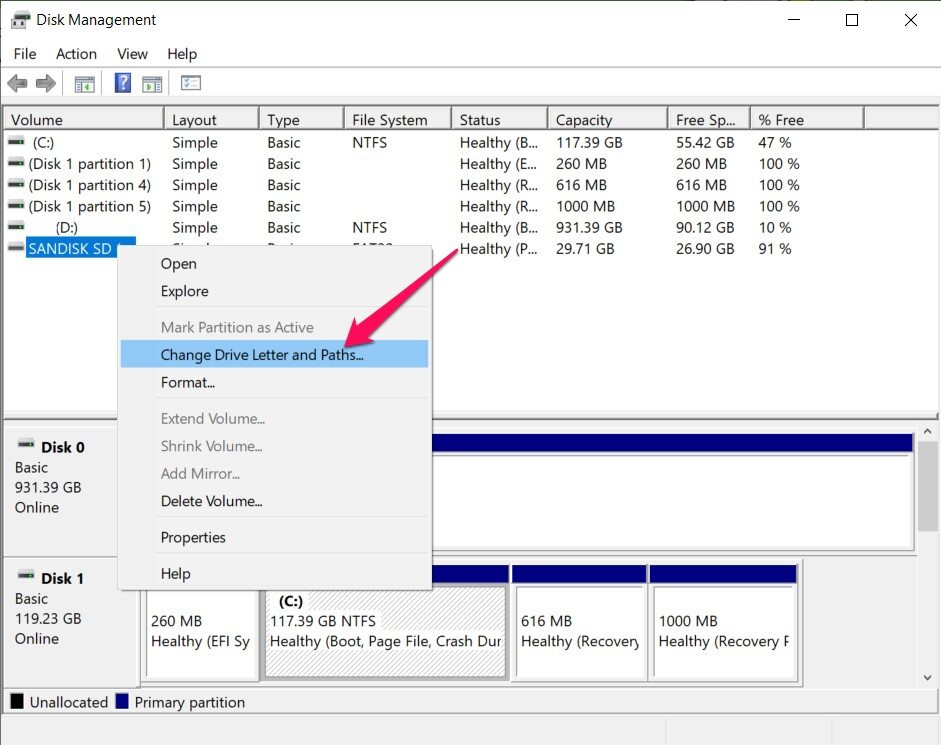
- Click the Change button.

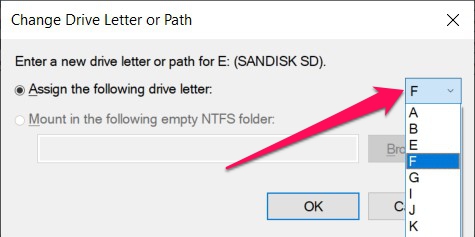
- A pop-up window will appear where you can select a drive letter from the dropdown menu on the right. When you’re ready, click OK.
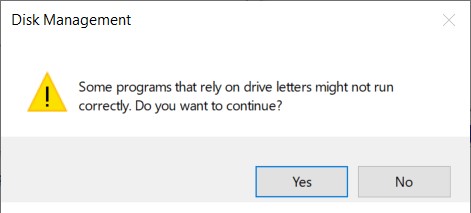
- You may receive a warning prompt asking if you’re sure you’d like to continue. Hit Yes and the drive letter should be changed. You can now check if your SD card can be accessed.
Method 4: Update The Drivers
Sometimes the only thing preventing your SD card from being accessed is a simple driver update. While Windows usually does this automatically, certain devices may require a manual approach. This is how you can update your SD card drivers:
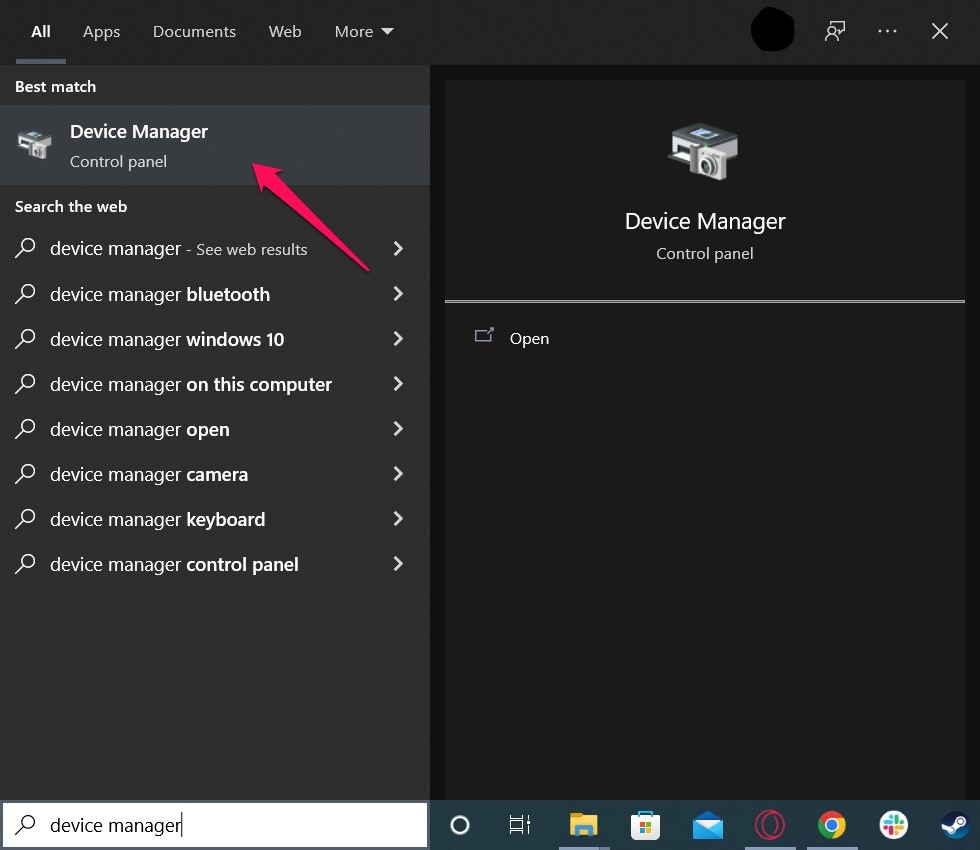
- Type “device manager” into the search box on your taskbar and select the top result.
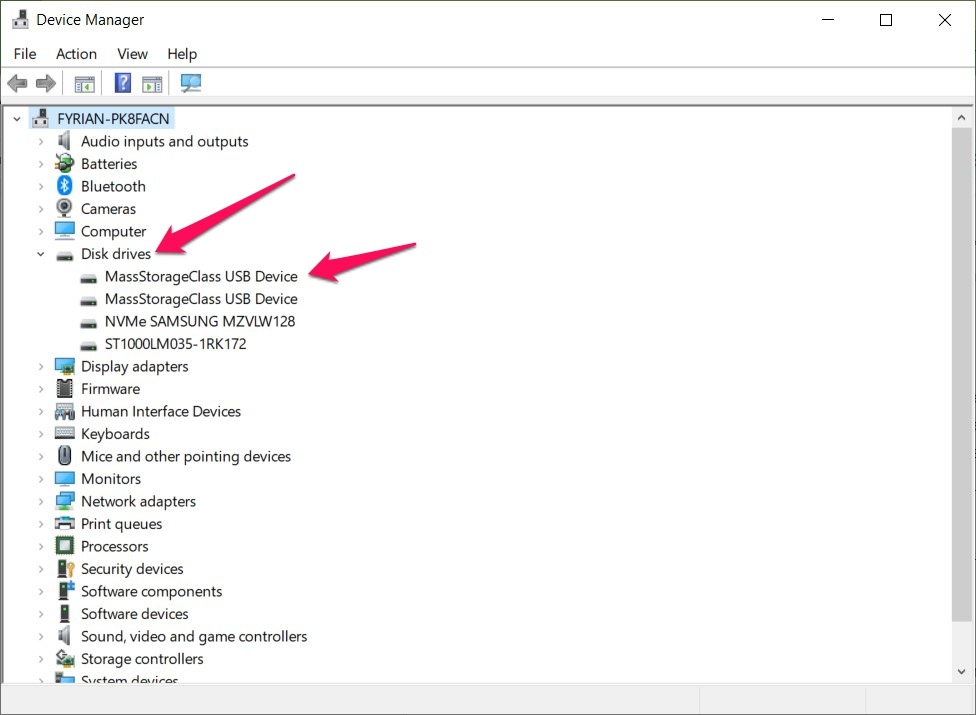
- Search for your SD card from the list of devices. Ours was in the Disk drives category.
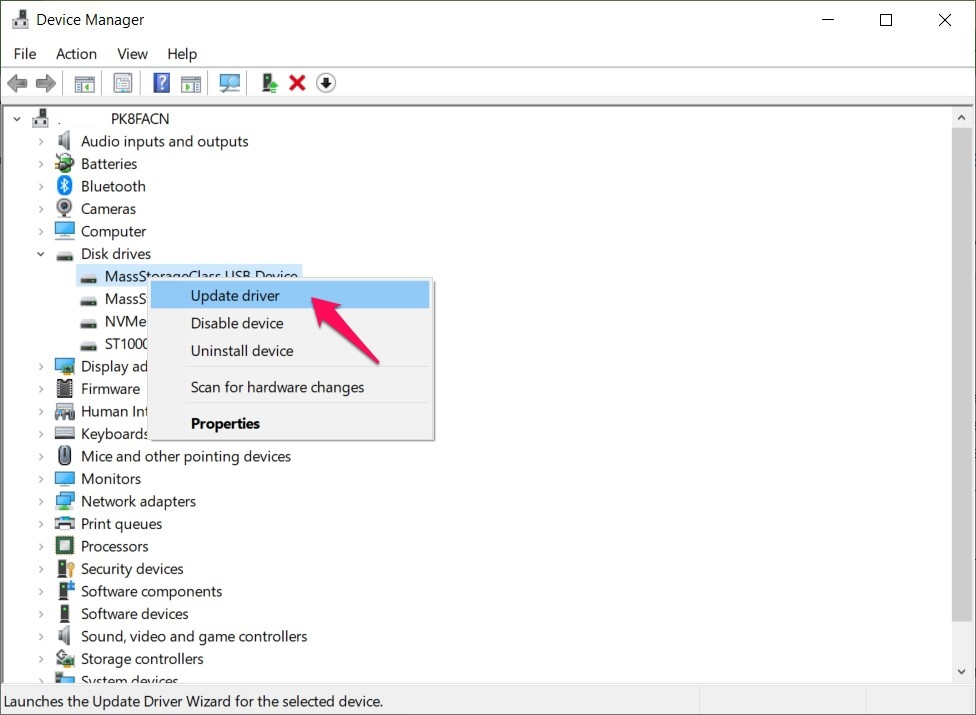
- Right-click the storage device and select Update Driver.
- Choose the Search for drivers automatically option and the device manager will do the rest on its own.
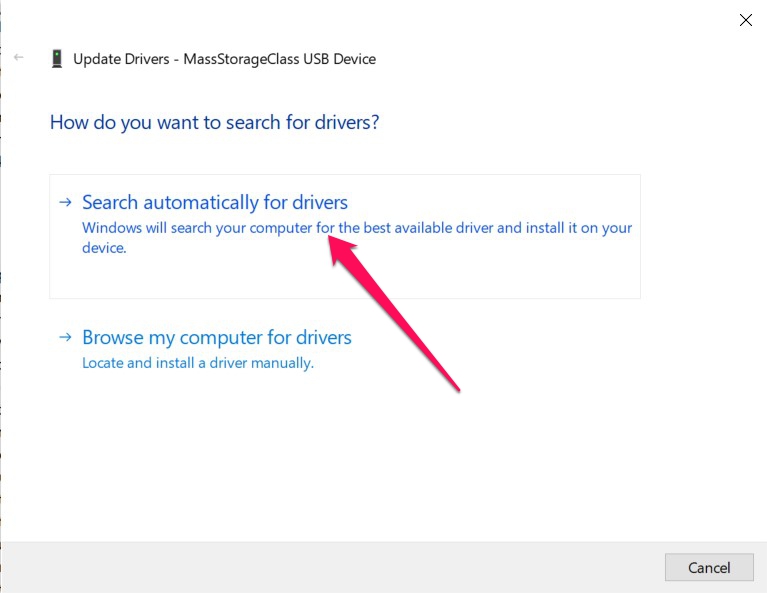
Note: Some memory card or card reader brands require you to visit the manufacturer’s website and download the driver manually.
Method 5: Format The Card
When all else fails, your best bet at fixing your corrupted or damaged SD card is to just format it. Luckily, this is a pretty straightforward process. Just follow these steps:
- Press Windows + E to bring up the File Explorer.
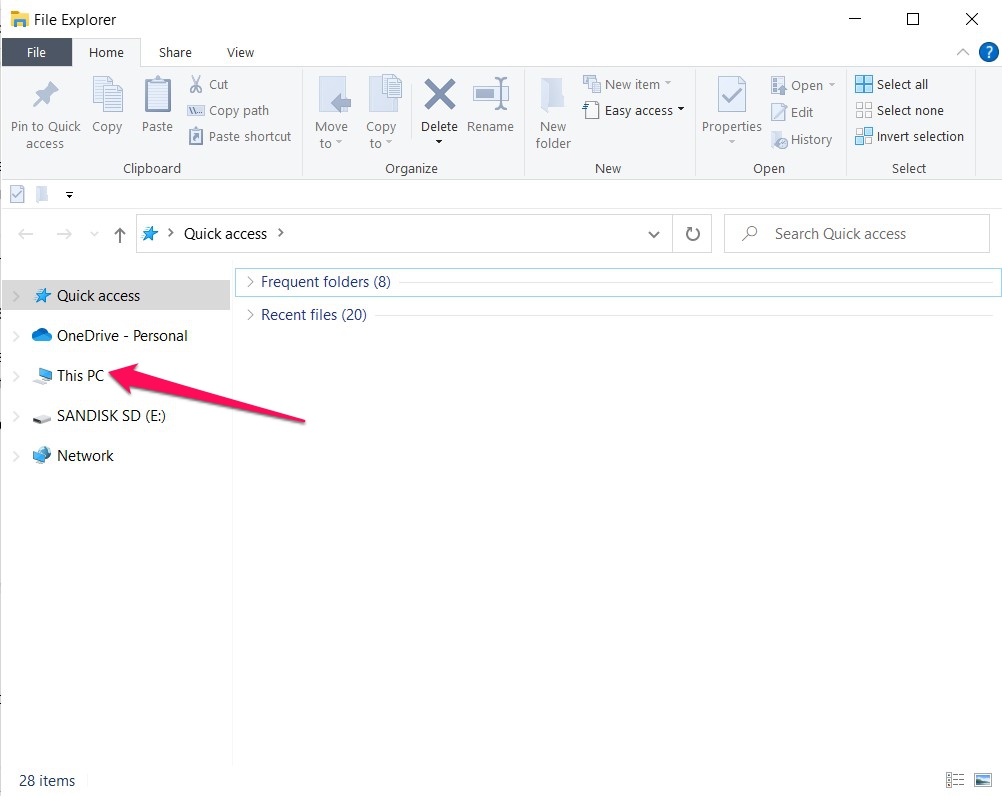
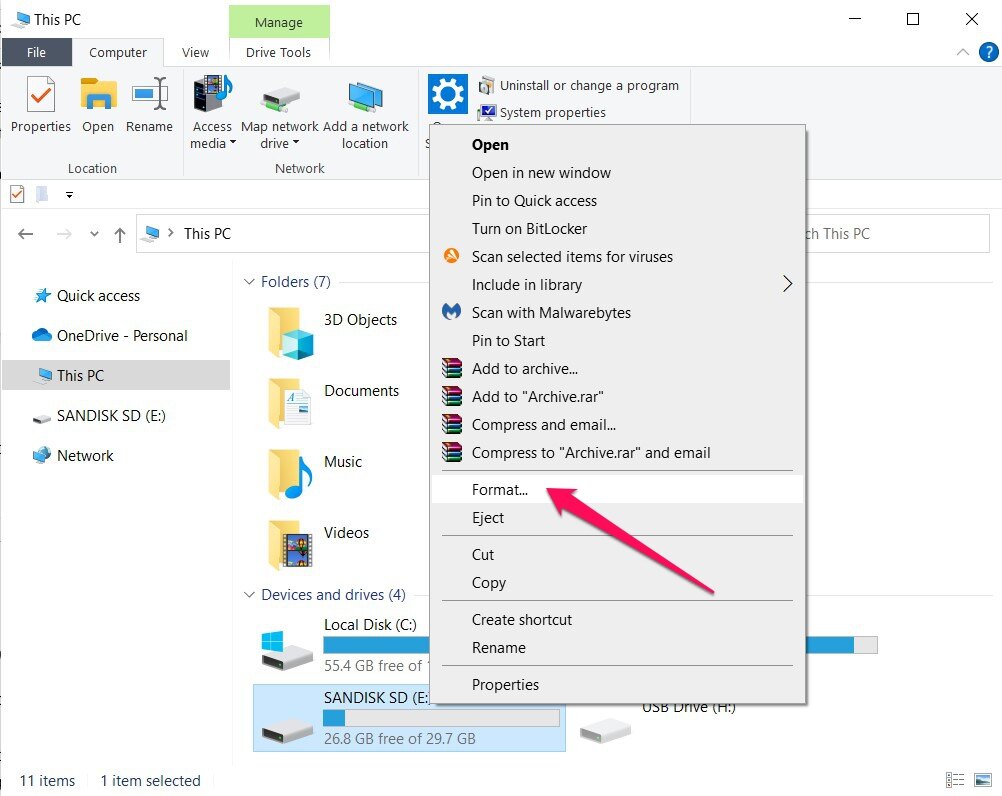
- Navigate to This PC from the left panel, then right-click your corrupted SD card and select Format….
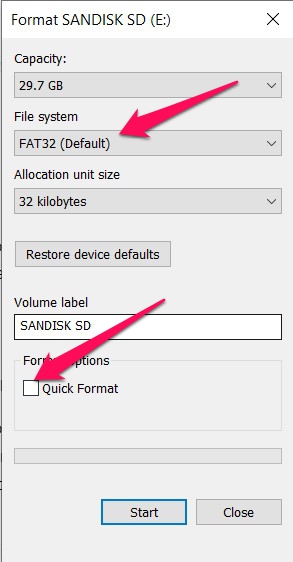
- Choose your file system of choice, make sure Quick Format is unticked, then click Start to complete the formatting process.
Conclusion
While encountering a corrupted SD card can be a frustrating ordeal, recovery is not just a possibility but a likelihood with the right tools at your disposal. Using a reputable data recovery app, making an image of a card, allows you to deal with SD card corruption head-on without risking data loss. Remember, the key to successful data recovery lies in acting swiftly and following the outlined steps meticulously.


