Reading Time: 12 minutesYou will likely have to format your SD card multiple times throughout its lifespan and you’ll often have to do so while there’s still some information on it. The most inconvenient part of formatting any storage medium is the fact that it wipes away all files in the process.
In this article, we’ll teach you how to format an SD card on Android without losing data and we’ll let you know how to do it on Windows machines as well. That way, you can format whenever you want without the fear of losing important information.
Does Formatting an SD Card Delete Everything?
Formatting any storage medium will always result in the deletion of all the housed information, though the recoverability of the files deleted through this process depends on the type of formatting you utilize. Windows, for example, offers a “Quick” and “Full” format. Files deleted through a “Quick” format have a chance to be retrieved, as opposed to a “Full” format where the information is lost for good.
Android devices, on the other hand, usually only offer a “Quick” format on connected SD cards, making data recovery a lot more feasible. As for cameras, they’re more likely to do “Full” formats, so file recovery is far less likely. But keep in mind that it really boils down to the brand and model of your device, as some of them might be exceptions.
How to Back Up a Memory Card Before Formatting
There’s a simple solution for safeguarding information from being deleted by the formatting process. All you have to do is just back up your files. That way, you can format an SD card without losing pictures, music, videos, and other data. There are a few ways you could go about this:
Method 1: Copy Files on Windows Explorer
This method is rather obvious and straightforward. Here are the steps to back up your files using Windows Explorer:
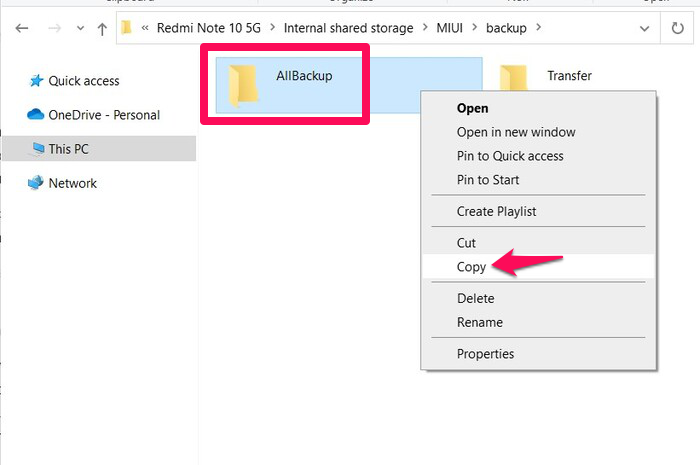
- First, you’ll have to connect your SD card to a computer using a card reader. Alternatively, you can insert the card into the camera or Android smartphone you’re using and connect it to your computer using a USB cable.
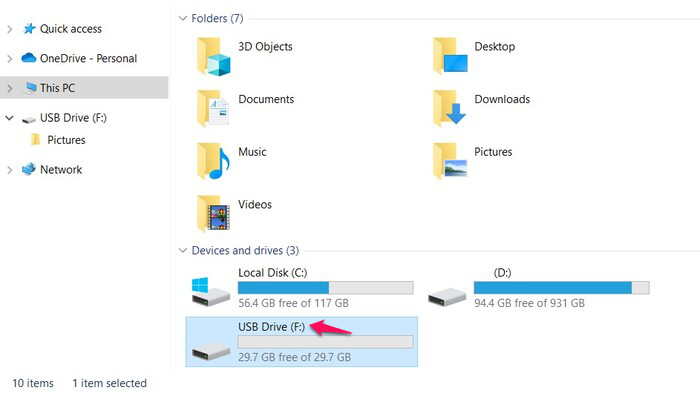
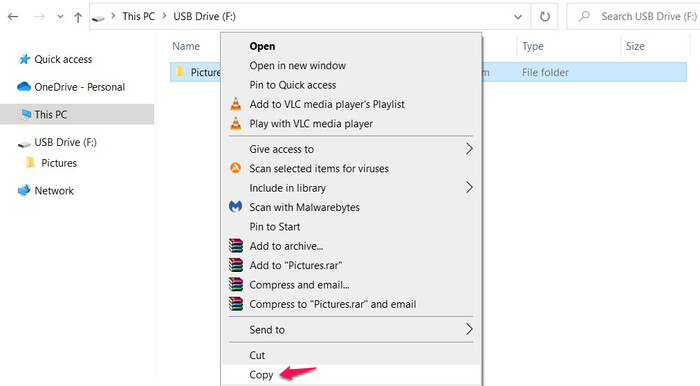
- Navigate to the connected SD card and copy the files you want to back up.
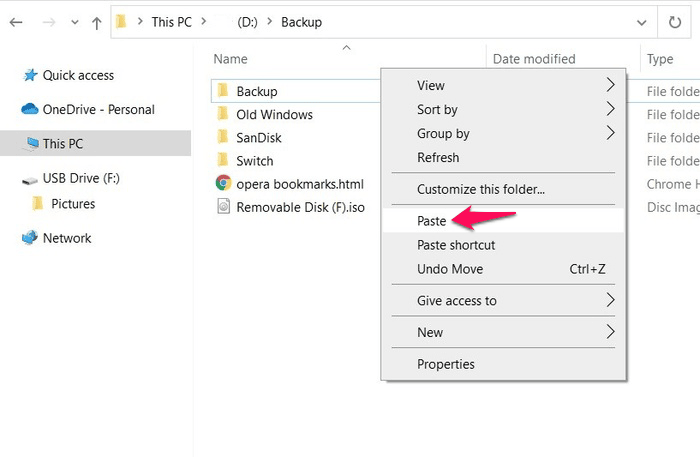
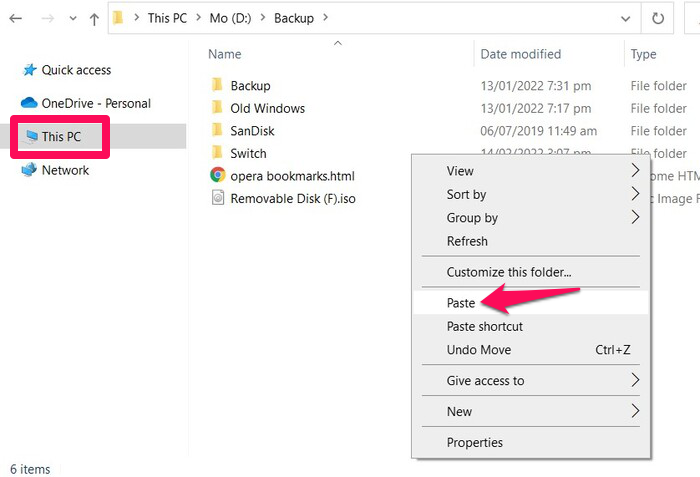
- Head to the location on your computer where you want to store your backup files and paste the data there.


Method 2: Use Third-Party Software to Create a Backup
Disk Drill is not only one of the best data recovery solutions around, but it also comes with a “Drive Backup” feature that lets you create byte-to-byte disk images which you can restore at a later date. It’s the perfect tool for creating a backup image of a failing storage medium. That way, you can attempt to restore data from the image file instead of the actual SD card, reducing the risk of losing more information during the recovery process. Follow the guide below to create backups using Disk Drill:
-
- Download the Disk Drill setup file from their official website.
- Launch the downloaded file and follow the instructions provided by the installation wizard until the program is successfully installed.
- Run Disk Drill and select the Drive Backup option from the left side of the window.
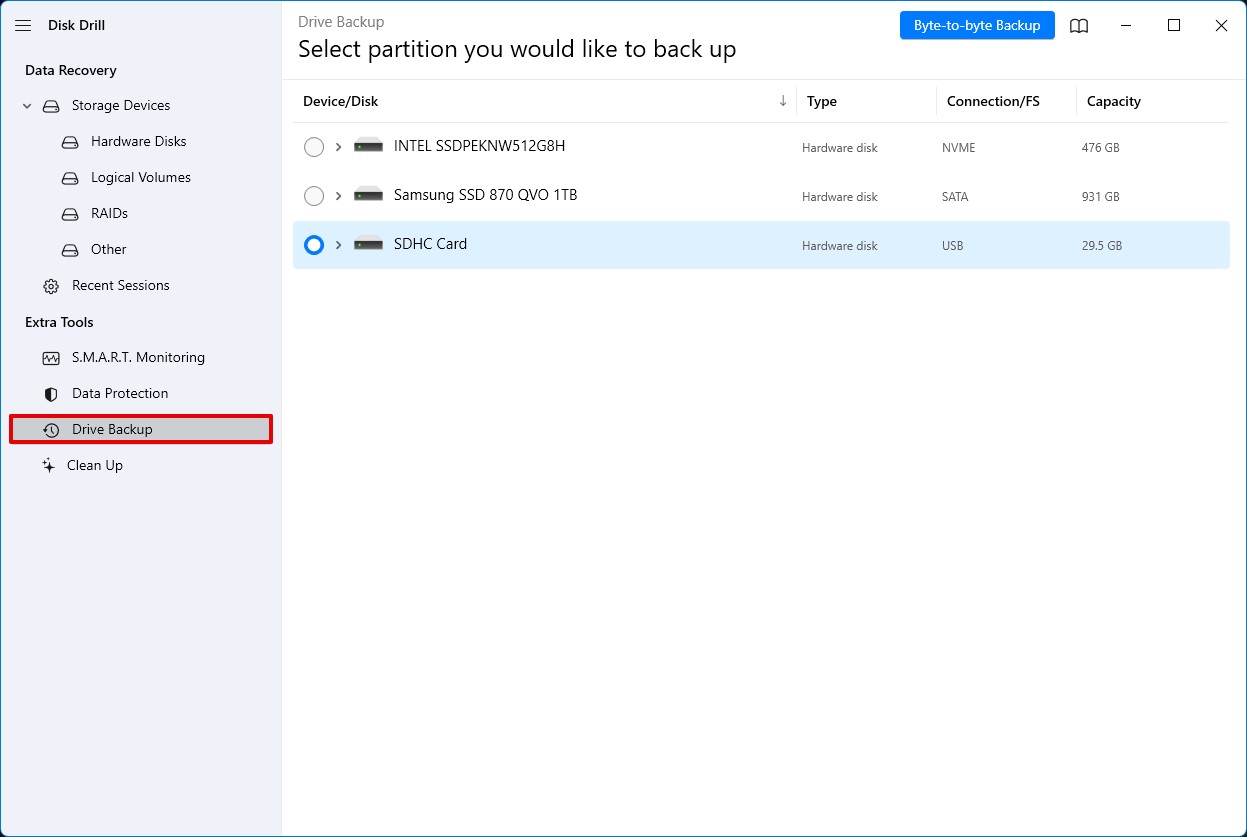
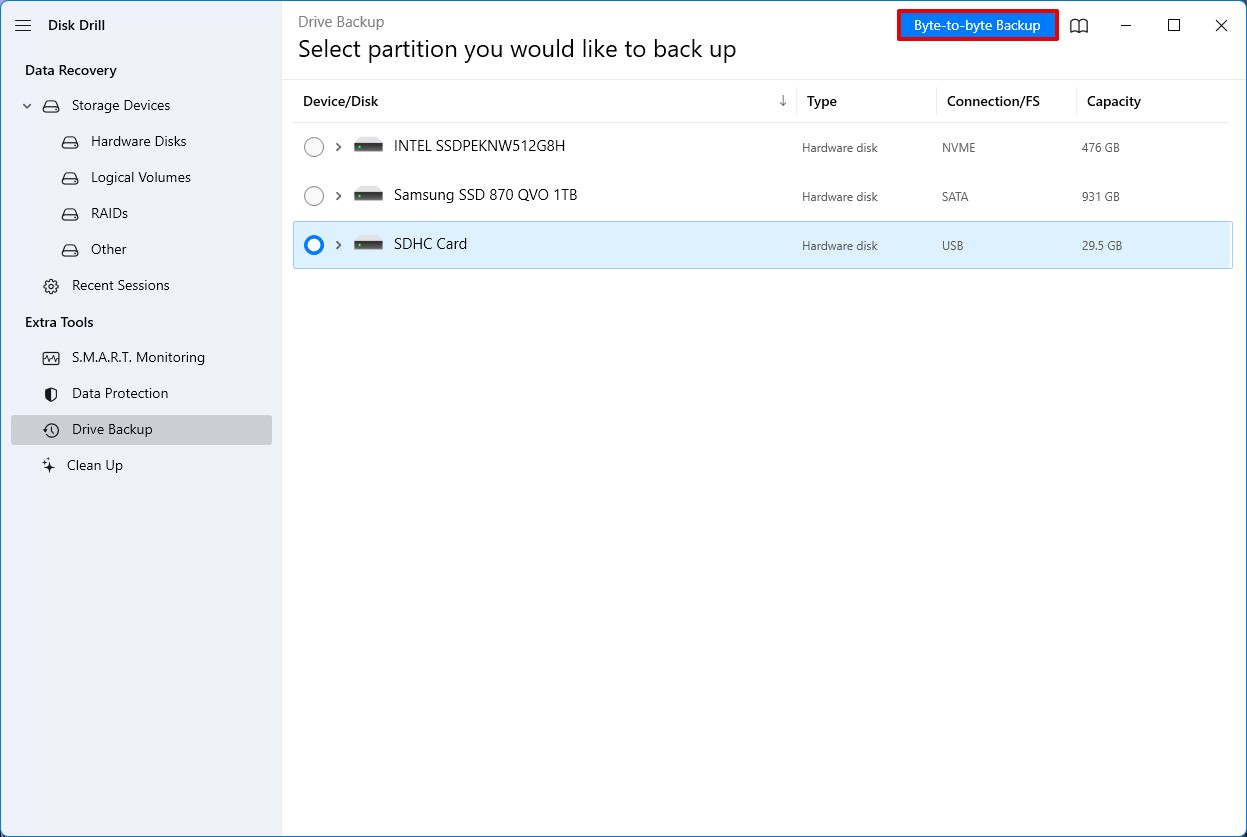
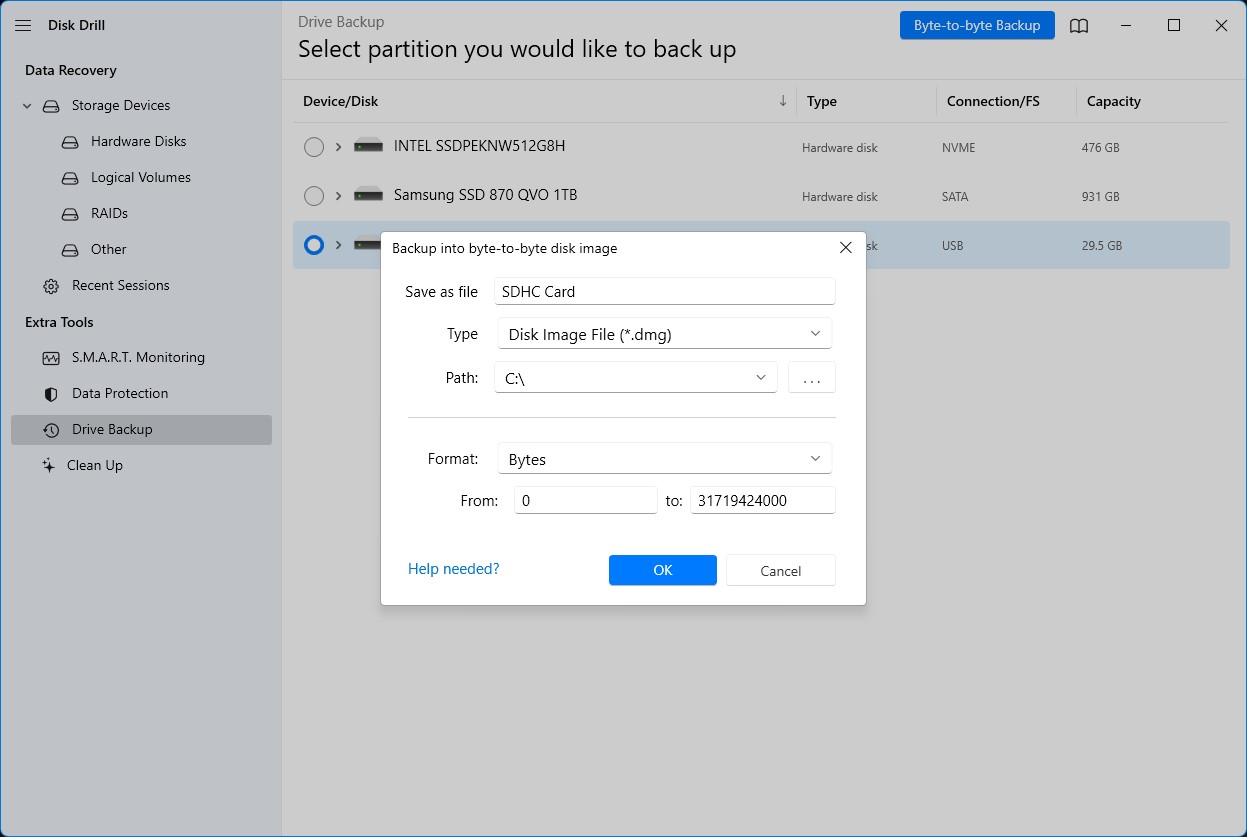
- Select your SD card from the list of available storage mediums and click the Byte-to-byte Backup button on the top-right corner of the window.
- Choose the details of your backup, including file name, image type, save location, and format. Once you’re ready, hit the OK button.
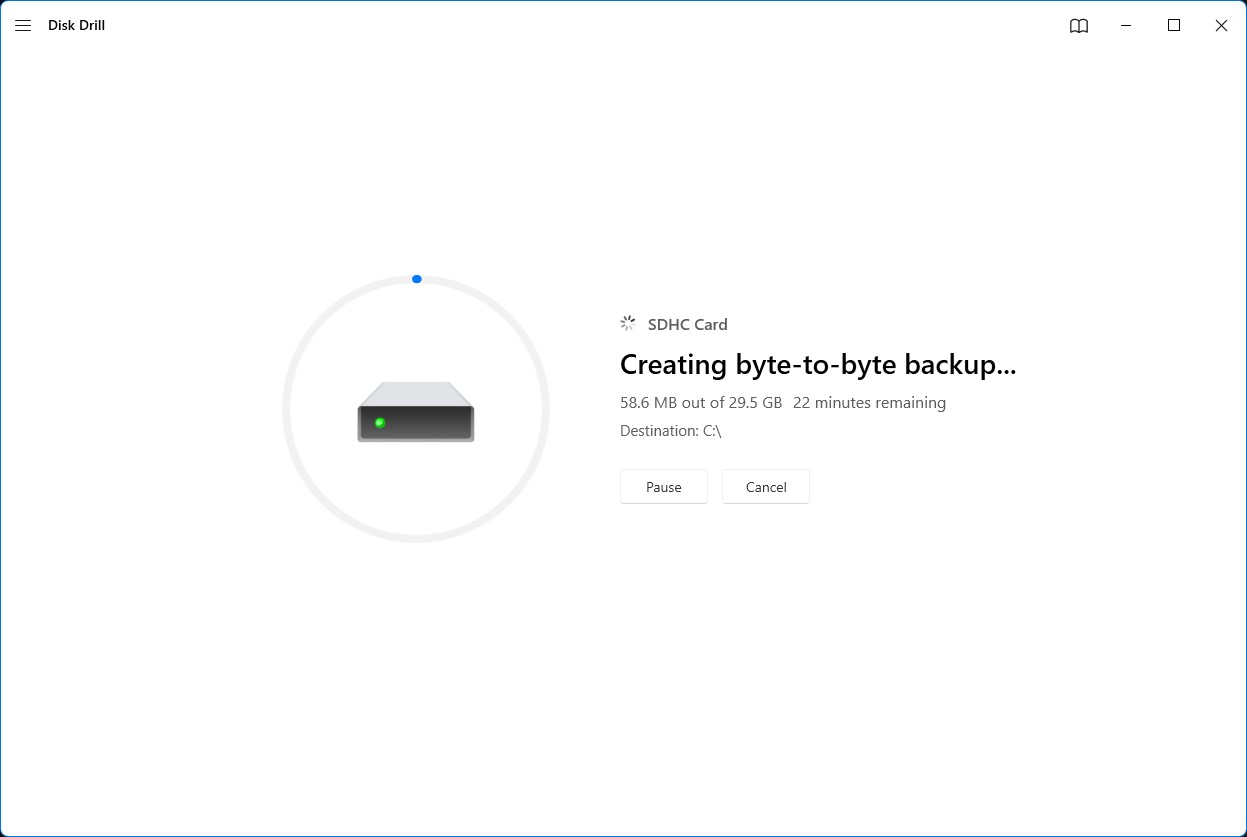
- The program will start creating a backup image of your SD card files. How long this process takes depends on the size of your memory card, as well as its read speed.
Method 3: Utilize the Backup Feature in Android Devices
Most Android devices offer a built-in backup feature that you can utilize to easily copy files from your smartphone or tablet to a computer. The specifics differ between brands and device models, but they usually follow a similar process. For the purposes of this guide, we’ll teach you how to use the backup tool on a Xiaomi Android smartphone.
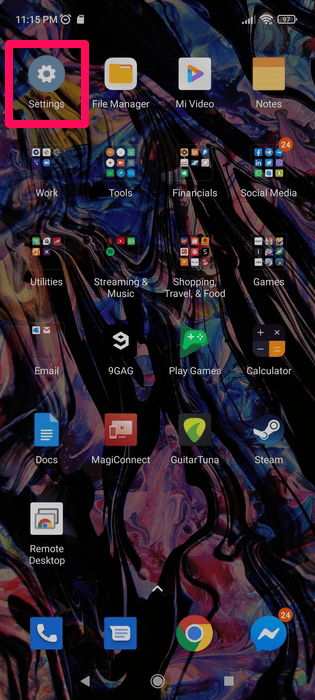
- From the home screen, head to Settings.
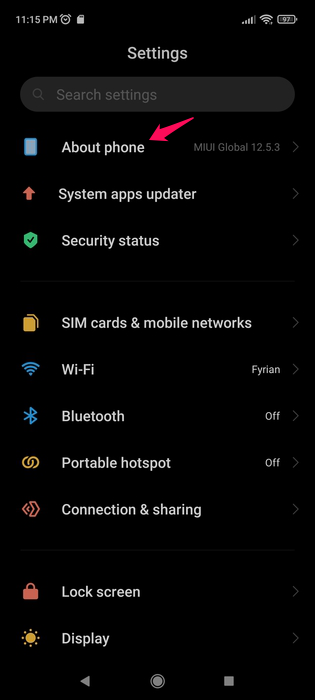
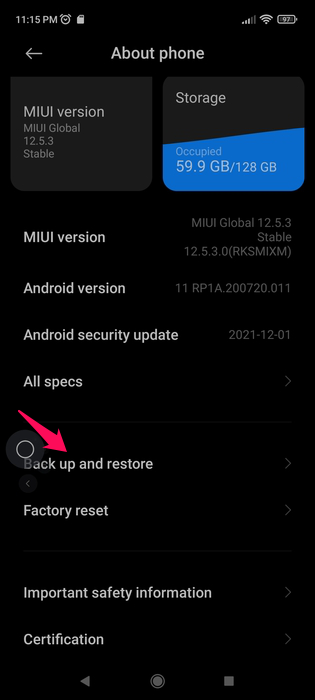
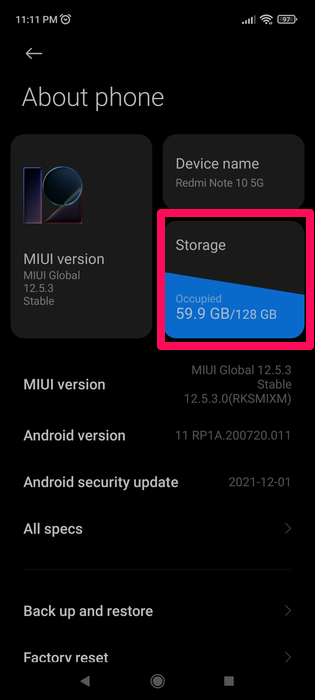
- Select the About phone option. It’s often near the top of the screen.
- Tap Back up and restore.
- You’ll see two options – Mobile device and Computer. Start by choosing the former since you’ll have to create the backup on your mobile device first. You may be asked to enter your PIN.
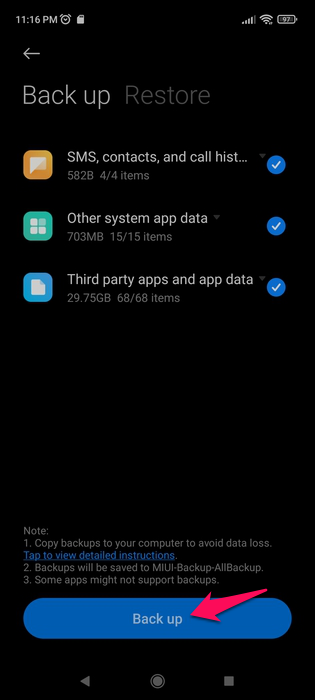
- Select the content you want to back up and then tap the Back up button at the bottom of the screen.
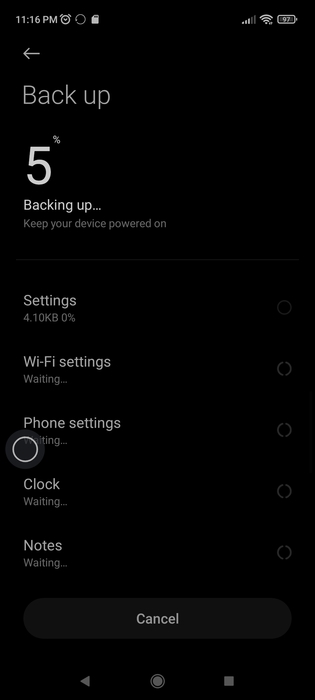
- Your Android device will start creating your backup. The length of time this will take to complete depends on how much data you’re trying to back up and how fast your memory card’s read speed is. Once completed, tap the Finish button.
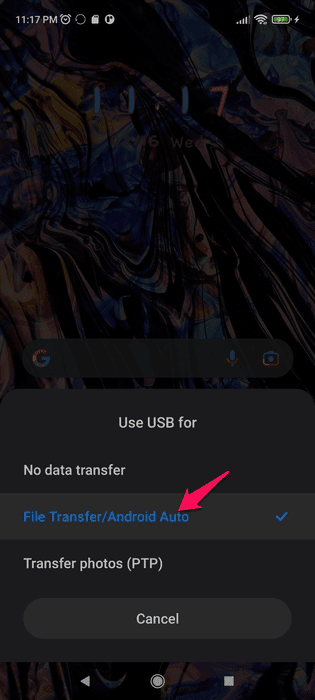
- Connect your Android device to your computer via USB cable and choose the File Transfer connection.
- Navigate to the folder where backups are stored. This differs between device models and brands. For us, it was “MIUI\Backup\AllBackup”.
- Copy the folder inside this directory to your computer.
Note: To recover a backup after formatting, copy the backup folder to the same directory in your Android device. Follow the steps above until step 5 but choose the Restore option instead. Your backup should appear in the form of a date and time. Tap it, select the information you want to recover, and then tap the Restore button along the bottom of the screen.
Method 4: Use the Android Platform’s Cloud Backup Feature
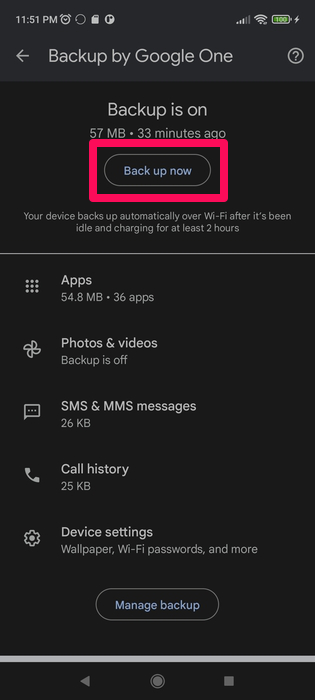
Android devices usually allow you to back up the contents of your device using your Google account. You can do this from your device settings, but an easier way to manage your backups would be through the Google One app. Follow these steps to back up your files with your Google account:
- Head to the Google Play Store on your device and download the Google One app.
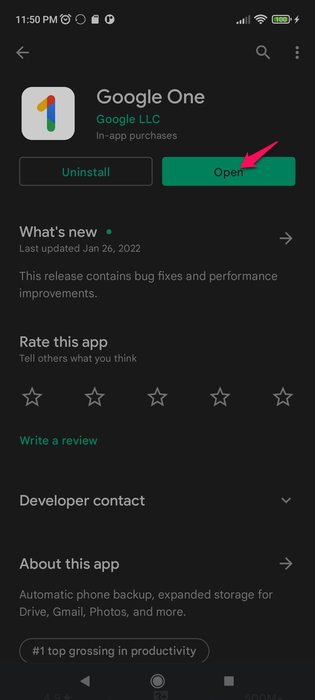
- Launch the app and tap the View details button once you get to the home screen.
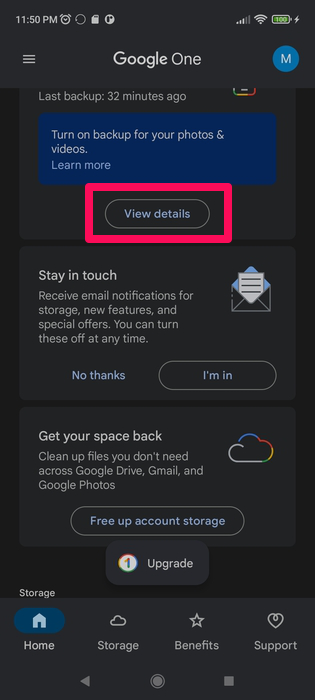
- You can tap the Manage backup button to customize the files you want to back up.
- Tap the Back up now button to begin the backup process.
How to Format an SD Card on Windows PC
There are several ways you can format your SD card on a Windows computer, but they all require you to first connect your SD card to your PC either through a memory card reader or by connecting the device to your machine via USB cable.
Option 1: File Explorer
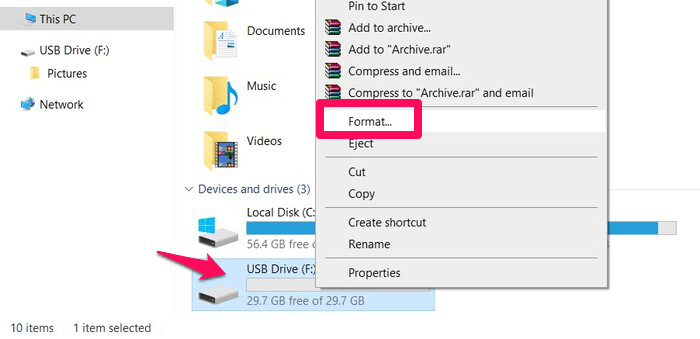
- Head to My Computer, right-click your inserted SD card, and select the Format option.
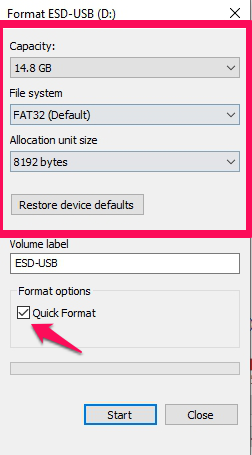
- Select the file system, allocation unit size, and type of format you want to accomplish. Unticking the Quick Format checkbox will force Windows to perform a “Full” format of your memory card.
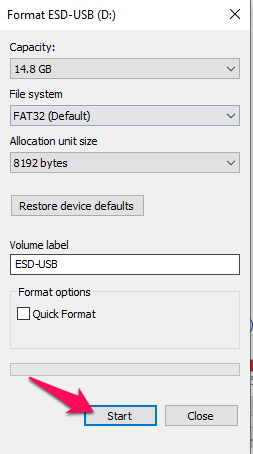
- Click the Start button to begin the formatting process. As its name suggests, “Quick” formats are a lot faster than “Full” ones.
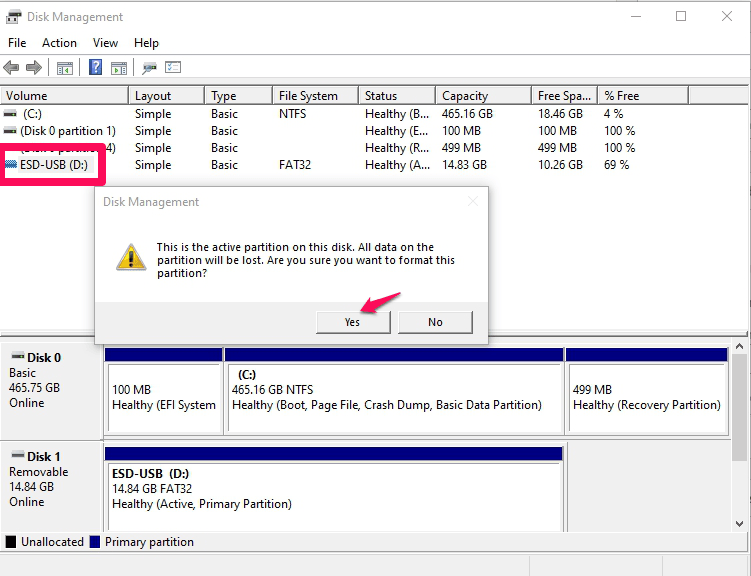
Option 2: Disk Management
- Press Windows + R to open the Run command on Windows, then type in “diskmgmt.Msc” and press OK.

- Right-click your SD card and choose the Format option. You’ll receive a pop-up warning you that all the data will be erased if you go through with this process. Click Yes to proceed.
- Type in your desired name for your SD card and choose the file system, allocation unit size, and format type you want. When you’re ready, click the OK button to complete the formatting process.

Option 3: diskpart in cmd
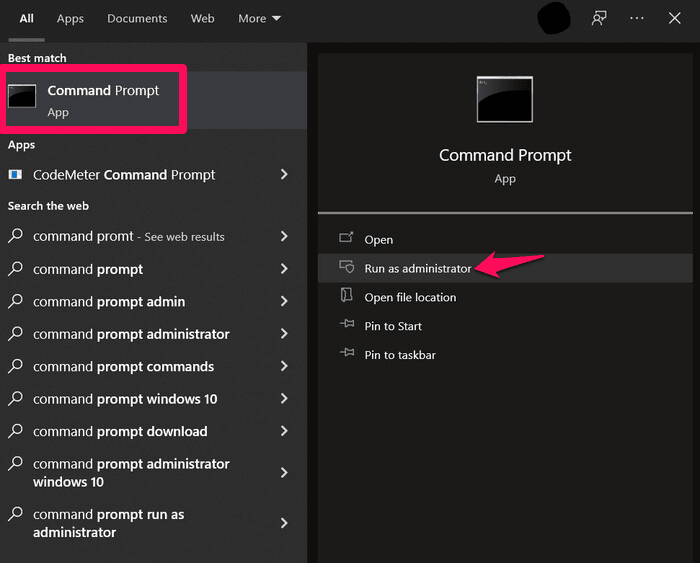
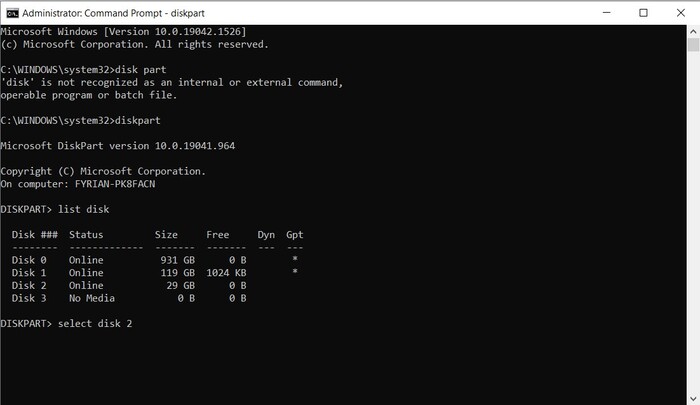
- Type in “command prompt” on the search tool of your taskbar, then right-click the top result and select Run as administrator.
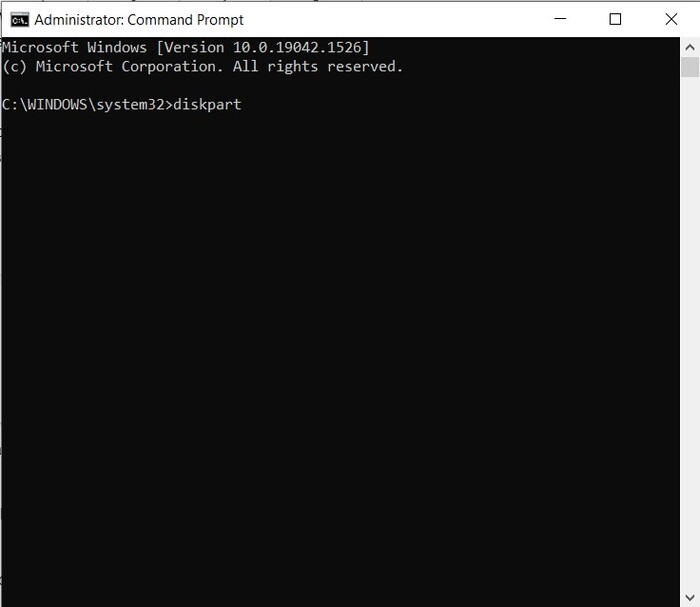
- Type in “diskpart” and hit Enter.
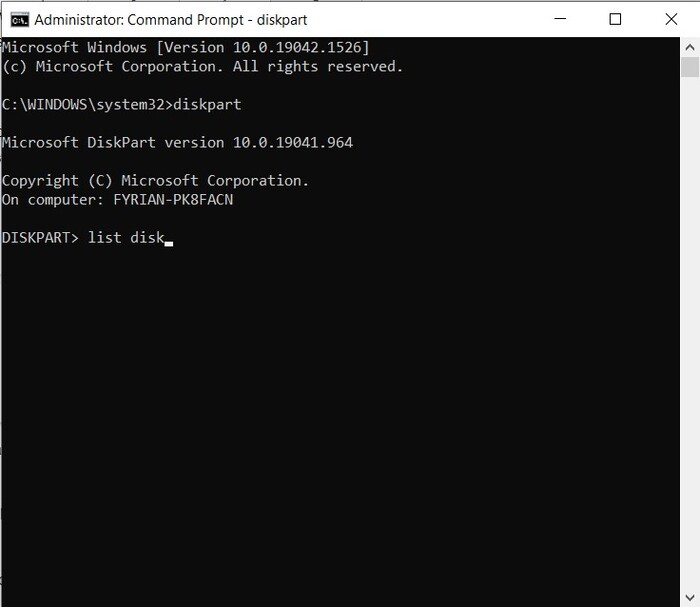
- Type in “list disk” and hit Enter. You’ll see a list of the available storage mediums connected to your computer. Take note of the disk number of your SD card.
- Type “Select (disk number)” and press the Enter key. In our case, the SD card was disk number three, so the command looked like this:
select disk 3
- Type “clean” and press Enter. This will completely wipe the data from your card.
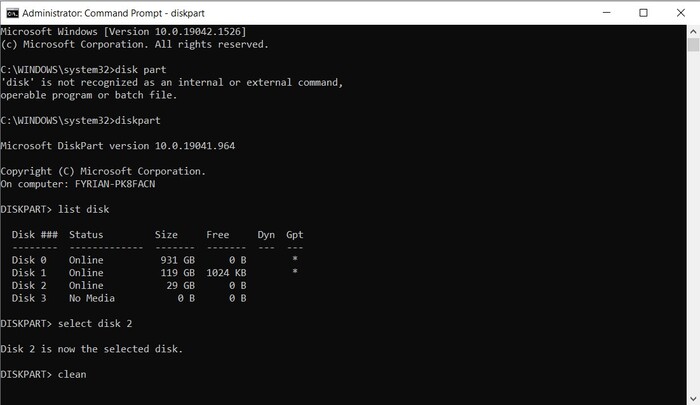
- At its current state, the SD card is no longer accessible. Type in “create partition primary” and press Enter to allow access once more.
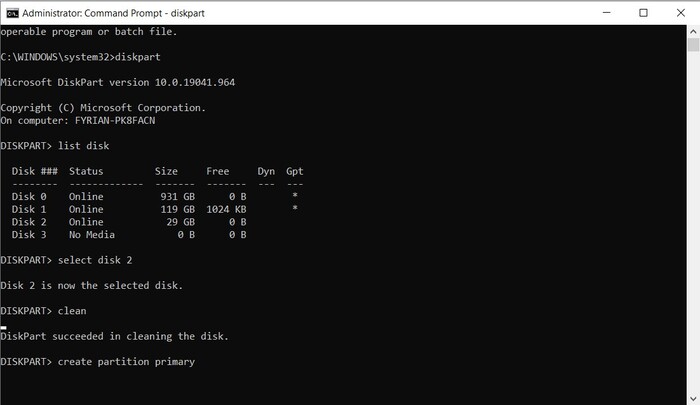
- Use either the “format fs=ntfs” or the “format fs=fat32” to format the memory card in your desired file system.
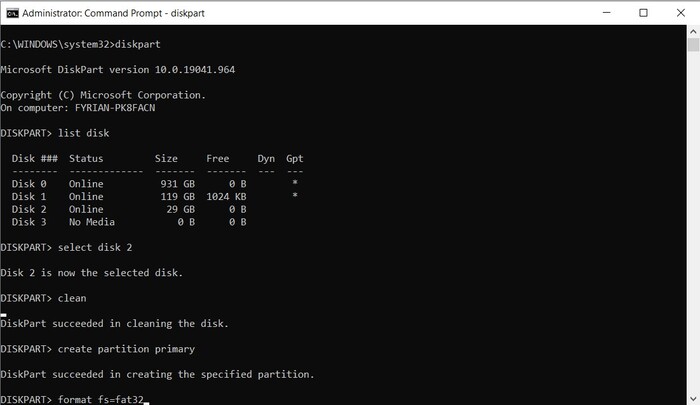
- Finally, type in “assign” followed by the Enter key to give the SD card a drive letter.
How to Format an SD Card on an Android Phone
Just like the backup process, different brands and device models have their own ways of formatting memory cards but they all follow a fairly similar process. Here’s how you do it on more modern Xiaomi Android devices:
- Head to your device Settings.
- Tap About Phone near the top of the page.
- Select Storage.
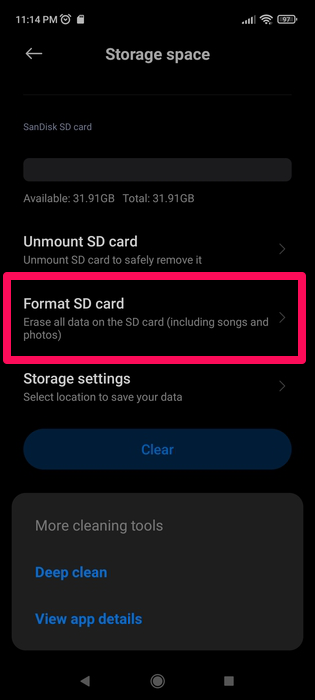
- Scroll down slightly and you’ll see the Format SD card option. Tap it and agree to the cautionary pop-up that follows which warns you that all your data will be erased.
How to Recover Data Lost During the Formatting Process
If you lost important information during the formatting process, you can leverage a quality data recovery program like Disk Drill to potentially retrieve files that disappeared from your SD card. Before you jump into it, we recommend using the app to create a backup image of your memory card as outlined in the backup section above.
That way, you can recover files from the image instead and avoid further data loss in case your memory card fails. Here are the steps for using Disk Drill to retrieve deleted files from an SD card image:
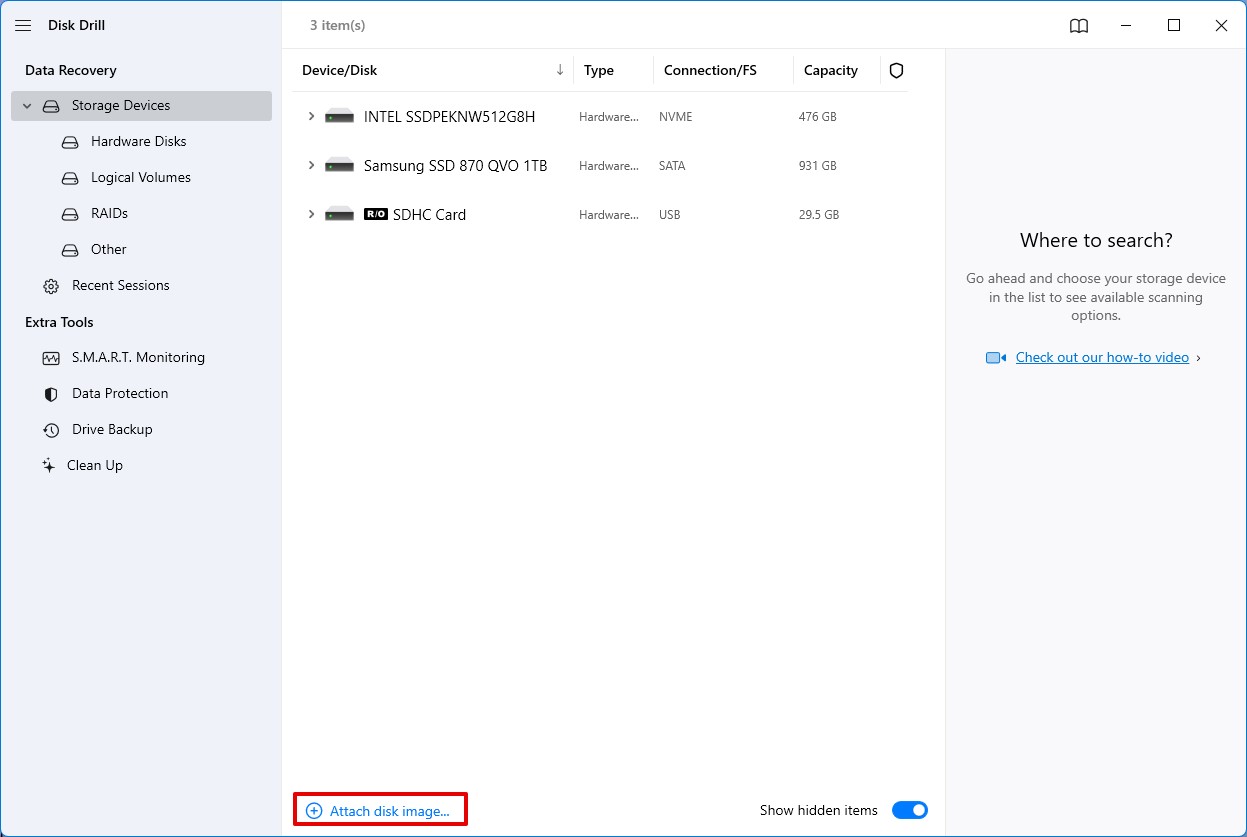
- Launch Disk Drill and click the Attach disk image link under the available storage mediums. This will prompt a pop-up window where you can select the backup file you created for your SD card. Click Open.
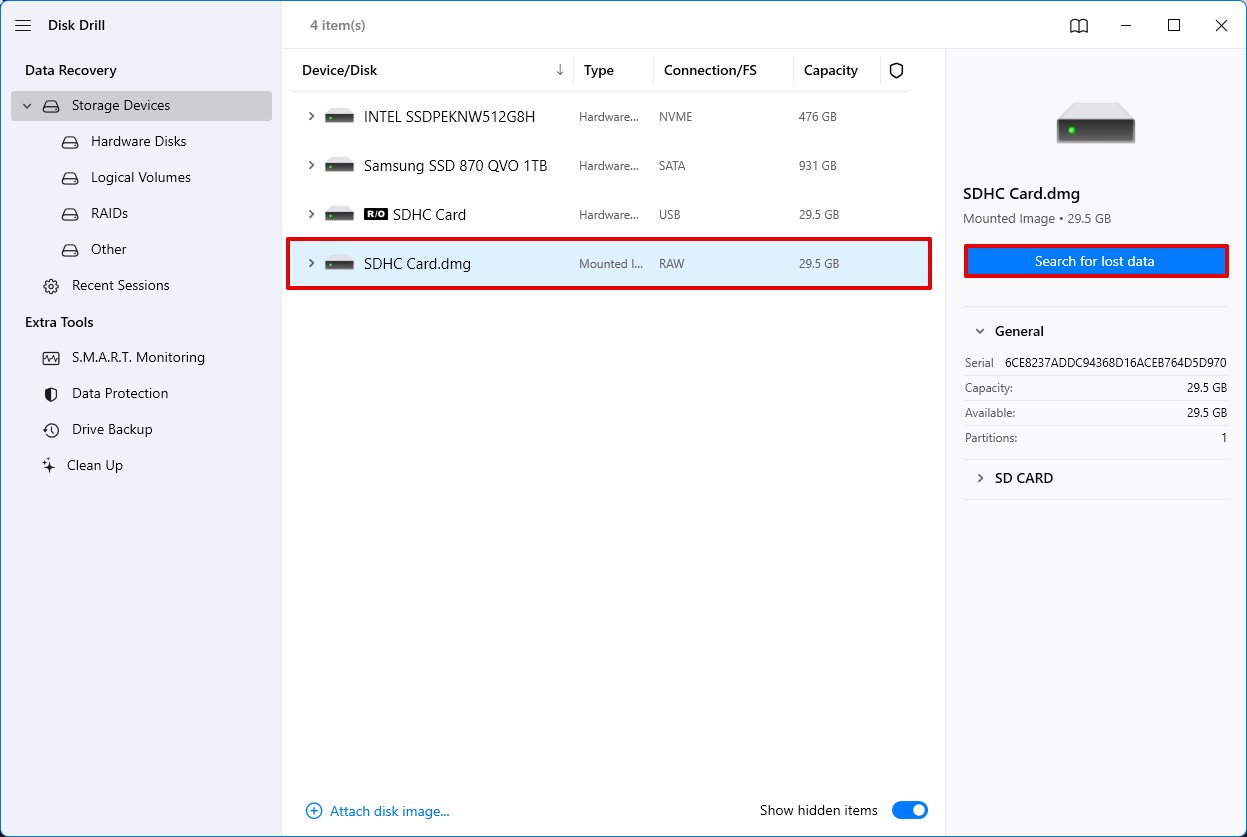
- Once the backup file is selected, it will appear among the list of available storage mediums on the Disk Drill home screen. Select the image and click the Search for lost data button to start scanning.
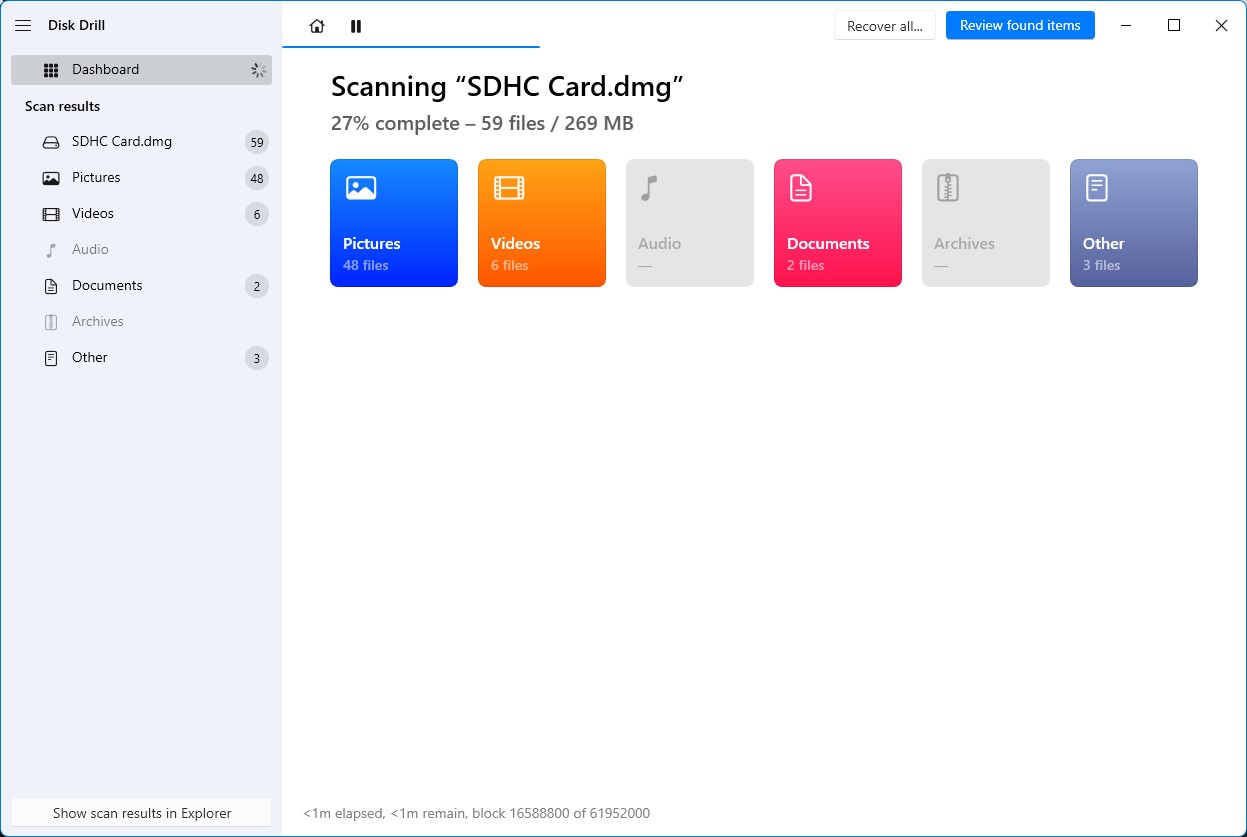
- While the program is scanning, you can click on any of the categories to check out the recoverable files in real time. How long the scanning process takes depends on the size of your memory card and its read speed.
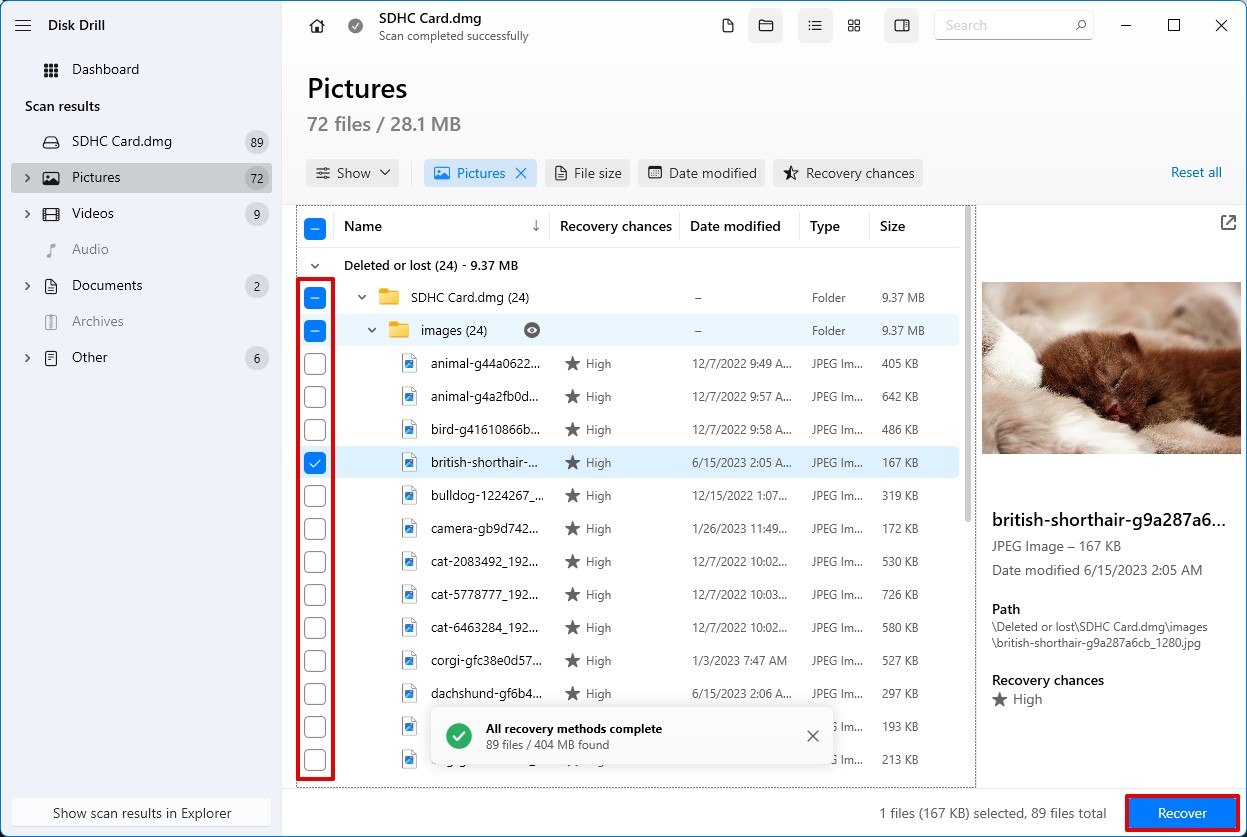
- Once the scan is completed, select the files you want to recover by clicking on the checkbox next to the file name. From there, click the Recover button.
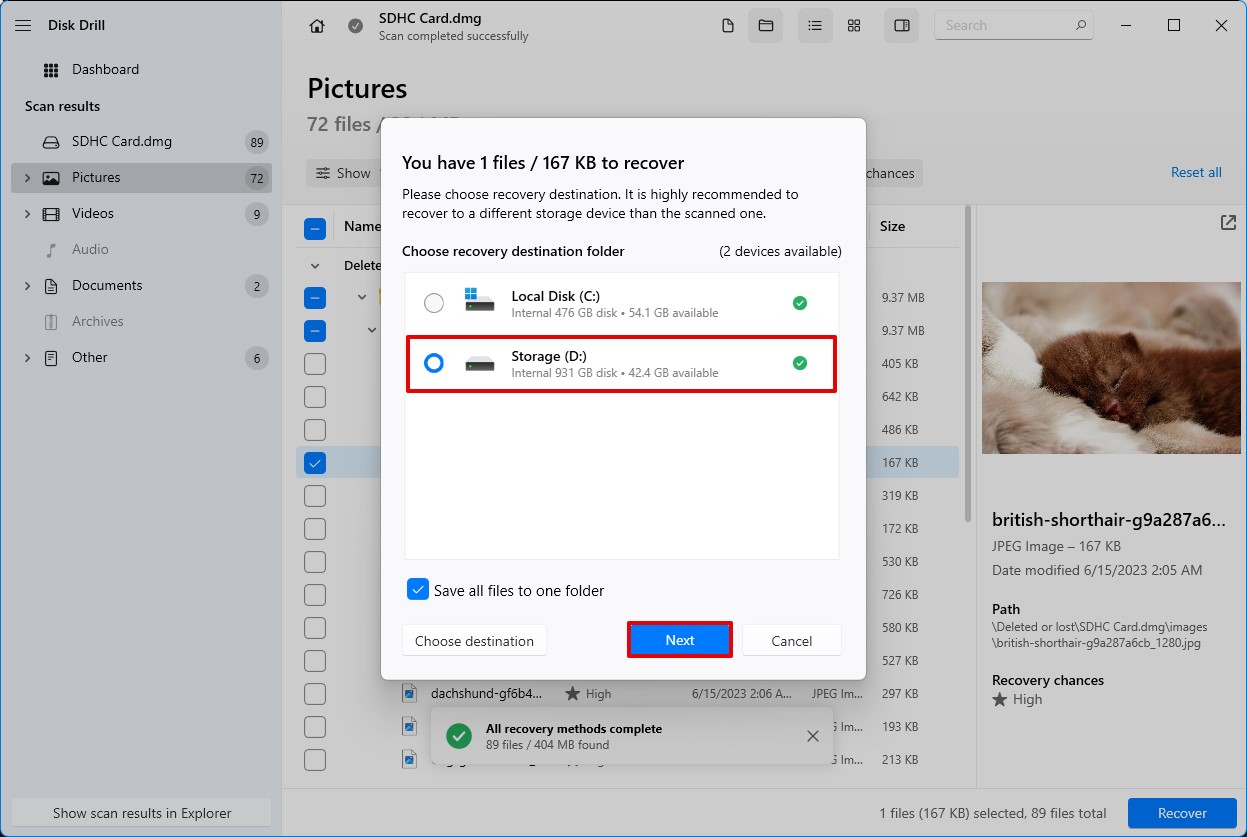
- A pop-up will appear asking you to select the location where you want your recovered files saved. Once you’ve decided, click the Next button.
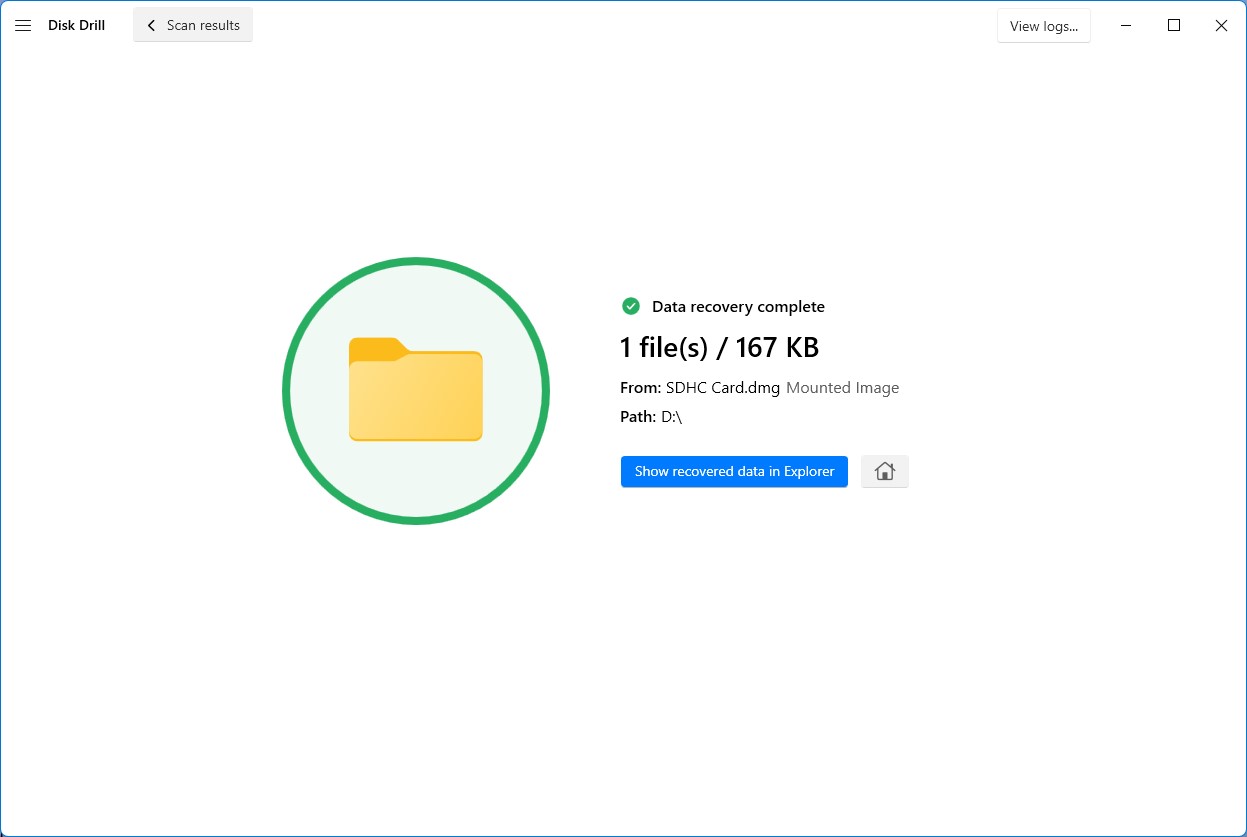
- Disk Drill will now recover your lost files. When it’s done, you can click the Show recovered data in Explorer button and you’ll be taken right to your retrieved files.
What Happens When You Format an SD Card?
Formatting an SD card is the process of configuring it in preparation for initial use and it involves deleting any information currently stored in it.
Formatting erases the existing file system on the SD card. This file system acts like an index, keeping track of where your files are stored. When you format, it’s like erasing that index, making the card appear empty to your device. After wiping the old system, formatting creates a fresh file system. This new system depends on the formatting options you choose (e.g., FAT32, exFAT) and prepares the card for storing data according to that specific format.
Doing so often allows your SD card to create a new file system that can accommodate the device you plan on using it with, whether it’s a digital camera, smartphone, video game console, etc. Other reasons to format an SD card include:
- Fixing a faulty sd card that’s not working as it should – long-term usage of an SD card can result in various writing errors that may arise due to improper disconnection, file transfer troubles, device issues, and more. Faulty cards like these may prove incapable of saving data as they should and formatting the storage medium can generally fix these kinds of problems.
- Emptying out a full memory card so it’s ready for use once more – SD cards were built to store information to the brim, then emptied out and filled up all over again. Once you’ve used up all your free space due to pictures, videos, or music, the best way to empty it out is to format it so that the main folders required are automatically created. Just don’t forget to save important files before committing to the process.
- Regular formatting to maintain sd card health – your memory card will likely go through a whole lot of information throughout its lifetime, as you continue to add and delete various files and folders. Continuously doing so without routinely formatting greatly increases the chances of your files eventually becoming corrupted. Just don’t overdo it, as wear and tear on your card may reduce it’s lifespan.
- Getting ready to use the memory card with another device – most devices have a specific file system that they utilize with SD cards, so you’ll often be required to format your memory card whenever you want to use it with another device. That way, the current file system won’t interfere with the new device and new folders will be created to better accommodate it.
FAQ:
One of the main reasons you should format an SD card is to allow it to create the file systems necessary for use with a specific device, such as a smartphone or camera. To reformat memory cards is also a great way to wipe all the information from them, so you can use them with a clean slate. That being said, it’s a good idea to format the SD card on a laptop, computer, or Android device every so often.There are times when a memory card becomes corrupted or compromised, preventing you from opening the storage medium without formatting it first. What you can do is disregard the request to format your SD card, then enlist the help of third-party software to create a backup image of the storage medium. That way, you can access the files on the card and even potentially retrieve some of the files that were lost due to corruption by using data recovery software.One of the best ways to fix an SD card without formatting is to use the Windows CHKDSK tool. All you have to do is run a command prompt as an administrator, then type in “chkdsk X: /f”. “X:” in this case refers to the drive letter of your SD card. After you hit Enter, CHKDSK will attempt to fix any errors in your storage medium and that might allow you to access your SD card once more without the need for a format. - Download the Disk Drill setup file from their official website.