Reading Time: 11 minutesDeleting the wrong files in Windows 10 can be a major setback. Fortunately, there are many different methods that can help you recover them. In this article, we will explore the top 11 best methods to recover deleted files in Windows 10. Whether you have accidentally deleted a file, emptied your Recycle Bin, or lost data due to a formatting mishap, there’s a good chance that you’ll be able to get your data back.
Top 11 Best Methods to Recover Deleted Files in Windows 10
Let’s take a closer look at the top 11 file recovery methods all Windows 10 users need to know about. With each method, you can address a slightly different data loss scenario, so make sure to try them all before you declare your deleted files to be lost forever.
| Method Name | Brief Description | Probability of Recovery |
|---|---|---|
| Confirm That Your Files Are Really Deleted | Verify if files are actually deleted using the search feature in Windows 10. | Low |
| Undo the Deleted Files with a Keyboard Shortcut | Use the Ctrl + Z shortcut in File Explorer to undo deletion actions. | Medium |
| Look for Your Files in the Recycle Bin | Search for deleted files in the Recycle Bin where files are temporarily stored. | High |
| Recover the Deleted Files from a Backup | Use existing backups, such as disk images or cloud backups, to restore deleted files. | Very High |
| Use the Windows File Recovery Tool | Utilize the command-line tool from Microsoft for recovering files in newer Windows 10 versions. | Medium |
| Download Third-Party File Recovery Software for Windows 10 | Employ powerful third-party software like Disk Drill for comprehensive file recovery. | High |
| Recover Your Files Using the CHKDSK Command | Use the CHKDSK command to repair hard drive errors and recover readable information. | Low to Medium |
| Restore a Previous Version of Your Files from File History or Restore Points | Recover previous versions of files from File History backups or system restore points. | High if backup is available |
| Check All Main Locations Where Temporary Files Are Stored | Look for unsaved data in system and application temp folders. | Low |
| Recover Windows 10 from a System Image | Restore the entire system from a full backup image, not specific to individual files. | Very High |
| Hire a Data Recovery Professional | Engage professionals for complex recovery tasks, especially with physically damaged devices. | High to Very High |
Method 1: Confirm That Your Files Are Really Deleted
Have you ever spent the entire day lamenting the loss of an important item, such as your keys or glasses, only to find the item in your pocket or someplace else you forgot to check? The same thing can happen to you when it comes to digital files, which is why you should always start your data recovery journey by confirming that your files are really deleted.
That’s easy to do thanks to the search feature in Windows 10:
- Launch File Explorer.
- Click the search bar in the top-right corner, type the name of the deleted file, and hit Enter.
- Wait for search results to appear and look for the file.


Don’t remember how the file was called? In that case, you can type any relevant keyword or just file extension. Yes, you will most likely have far more search results to go through, but that’s a small price to pay for a hassle-free recovery of files that you thought to be lost.
Tip: If the file was created recently, then it’s useful to sort the search results by date modified so that the most recently created files are displayed first.
Method 2: Undo the Deleted Files with a Keyboard Shortcut

Windows 10 allows its users to undo recent actions with one simple keyboard shortcut: Ctrl + Z
If you’ve recently deleted the wrong file using File Explorer and left its window open, then you can bring it to focus and press the Ctrl + Z keyboard shortcut to undo the previous action. You can keep pressing the same shortcut again and again to keep undoing your actions, and you can even go in the opposite direction by pressing the Ctrl + Y shortcut.
The only problem with this method is that the entire history of your actions disappears the moment you close the application that was used to perform them. In other words, this method won’t help you undelete files in Windows 10 if you’ve already closed File Explorer or restarted your PC.
Method 3: Look for Your Files in the Recycle Bin
Windows 10 moves deleted files inside a special temporary storage area called the Recycle Bin. Deleted files stay in the Recycle Bin until the user empties it manually or until Windows 10 empties it automatically, which typically happens when you start running low on free storage space and have the Storage Sense feature turned on.
As such, you should be able to find your files in the Recycle Bin if you react quickly enough and don’t delay their recovery too much. Here’s what you need to do:
- Double-click the Recycle Bin icon located on your desktop.
- Locate the files you want to delete and select them.
- Right-click any selected file and click Restore. The files will be moved from the Recycle Bin back to their original locations.
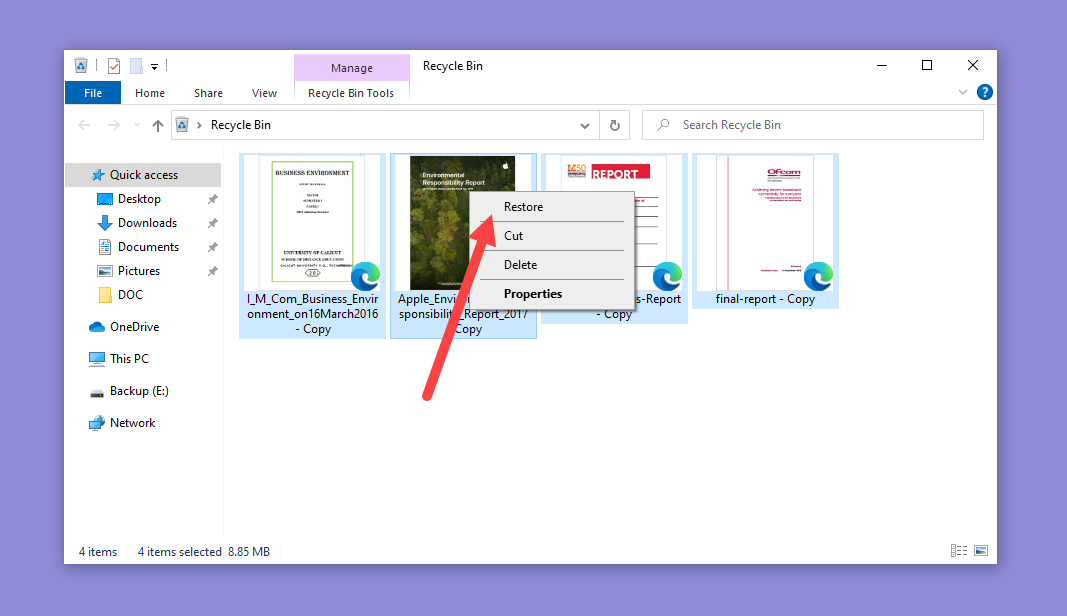

Tip: If your Recycle Bin contains too many deleted files to go through them all manually, then you can use the search bar in the top-right corner to narrow them down.
Method 4: Recover the Deleted Files from a Backup

Backups have always been and always will be the best protection against data loss. If you have an up-to-date backup of the deleted files, then you’re in luck because you can use it to easily recover them. The most common backup types include:
- Byte-to-byte backups: Also known as disk images, this backup type contains the exact copy of all data stored on a storage device.
- Manual backups: Arguably the most common backup type, manual backups are copies of files and folders that are typically stored on an external storage device, such as a USB flash drive.
- Incremental local backups: Incremental backups contain the least amount of data possible to perform a complete restore, and they are created using automatic backup tools, such as the File History utility in Windows 10.
- Cloud backups: OneDrive and Google Drive are great examples of cloud backup solutions that make it possible for Windows 10 users to automatically back up important files to remote servers.
Any of these backup types can be used to recover deleted files, and they all have their distinct advantages and disadvantages that make them suitable for certain data loss situations and unsuitable for others.
Out of the above-listed backup types, OneDrive is the one that users are most likely to have turned on without realizing. This is because OneDrive is integrated into Windows 10 and often enabled by default. If you have been using a Microsoft account to sign in to Windows 10, then you already have access to OneDrive and may have been backing up your files without even knowing it.
To recover deleted files from OneDrive:
- Go to the OneDrive website and sign in with your Microsoft account.
- Locate the files you want to recover. You can use the search bar at the top if needed.
- Select the files and download them to your computer.
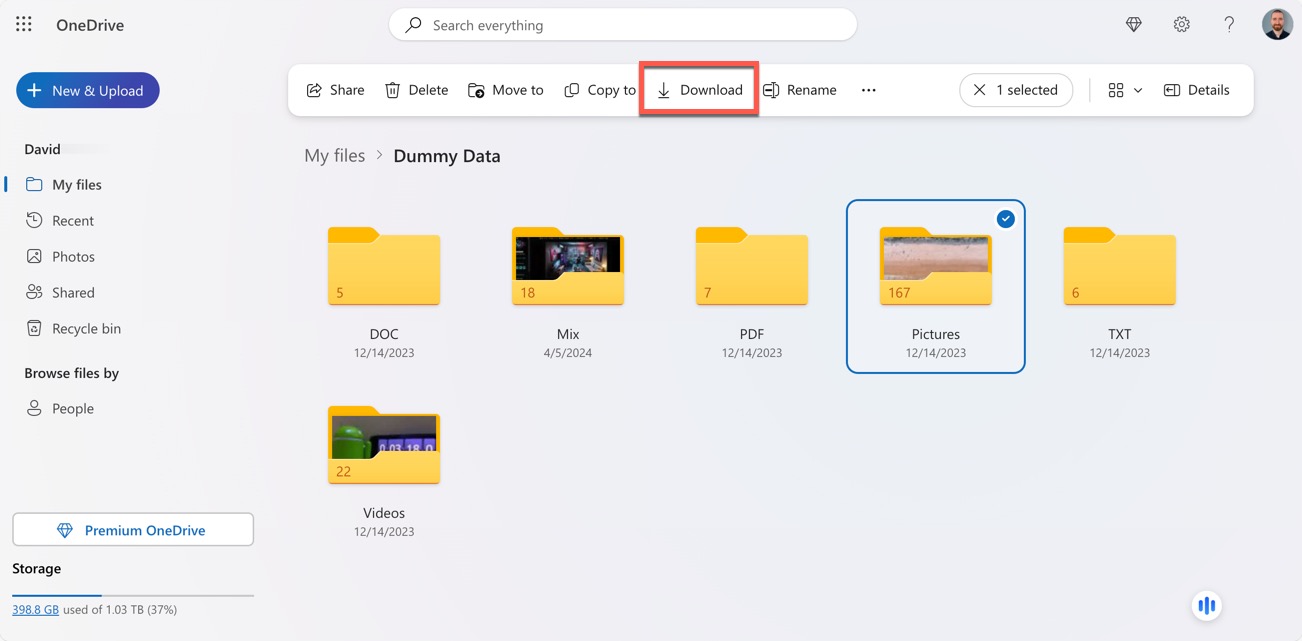

You can also look in the OneDrive Recycle bin to find and restore deleted files. You can then restore them using the corresponding button in the toolbar.
Method 5: Use the Windows File Recovery Tool

In 2020, Microsoft quietly published a data recovery tool called Windows File Recovery to Microsoft Store, which makes it possible to recover lost files on Windows 10 2004 and above. Windows File Recovery is a command-line tool, so you need to familiarize yourself with its syntax to use it:
winfr source-drive: destination-drive: [/switches]
| Parameter | Description | Supported modes |
| Source-drive: | Defines the storage device where the files were lost | All |
| Destination-drive: | Defines the storage device and folder on which to put the recovered files | All |
| /r | Segment mode | Segment |
| /n <filter> | Filter search | Segment |
| /x | Signature mode | Signature |
| /y:<type(s)> | Restores specific extension groups | Signature |
| /# | Displays signature mode extension groups and file types | All |
| /? | Help text | All |
| /! | Display advanced features | All |
For example, here’s the command you need to enter to recover all deleted files from a FAT32-formatted USB flash drive (mounted as drive E) using Windows File Recovery:
winfr E: C: /x
Unfortunately, Windows File Recovery recognizes only 7 major file extension groups (ASF, JPEG, MP3, MPEG, PDF, PNG, and ZIP), so you shouldn’t expect it to deliver the best data recovery results possible, which is where third-party file recovery software for Windows 10 comes in.
Method 6: Download Third-Party File Recovery Software for Windows 10
Microsoft’s Windows File Recovery tool isn’t the only data recovery software that you can use to recover permanently deleted files in Windows 10. There are countless third-party data recovery solutions that go far beyond what Windows File Recovery can do, allowing you to recover virtually any file format from your main system drive, external storage devices, and other locations.
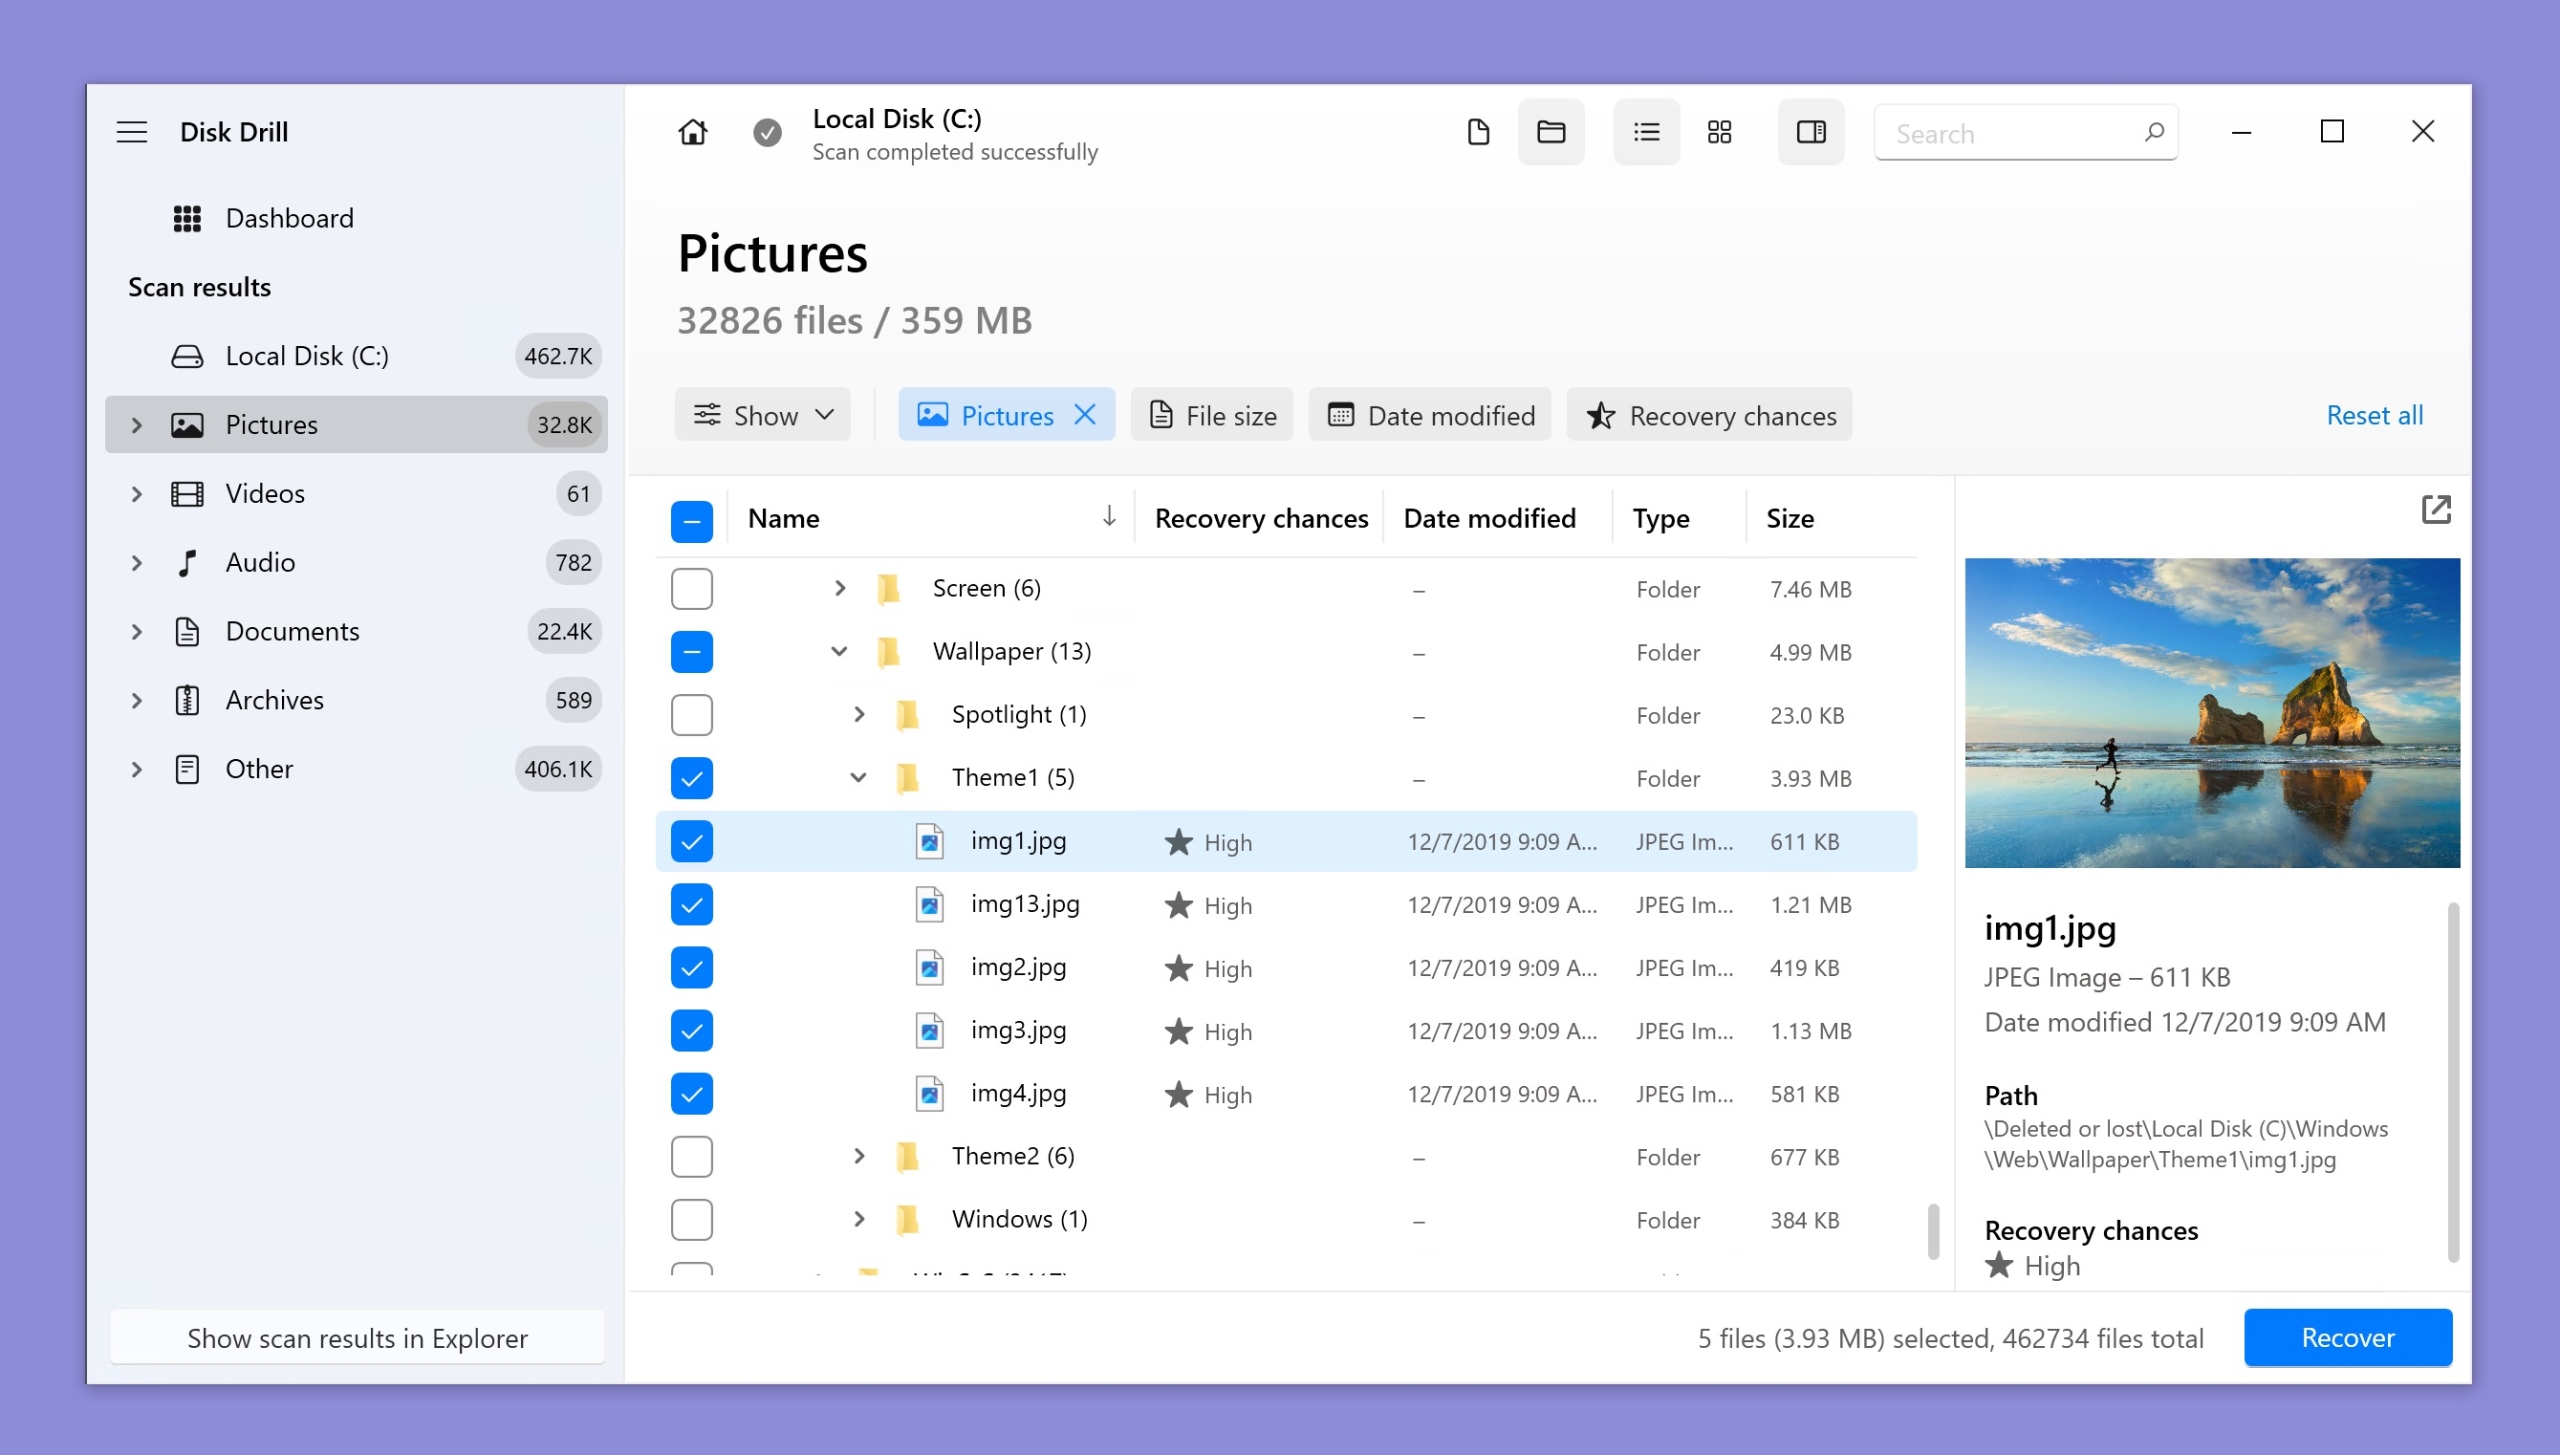
One such solution is Disk Drill, a powerful and user-friendly data recovery tool that stands out for several reasons:
- Excellent support for NTFS file system: Disk Drill is designed to work seamlessly with the NTFS file system used by Windows 10, ensuring optimal recovery results.
- Ability to recognize and recover over 400 file formats: Disk Drill can identify and recover a wide range of file types based on their unique signatures, making it a versatile tool for recovering different types of data.
- Intuitive interface: Disk Drill’s user-friendly interface makes it easy for users of all skill levels to recover their lost files with minimal hassle.
- Extra disk tools: In addition to data recovery, Disk Drill offers several extra disk tools that can help you keep your Windows 10 computer running smoothly.
The free version of Disk Drill lets you recover up to 500 MB of data, which is often enough to recover important documents, photos, and other files. To get back deleted files on Windows 10 with Disk Drill:
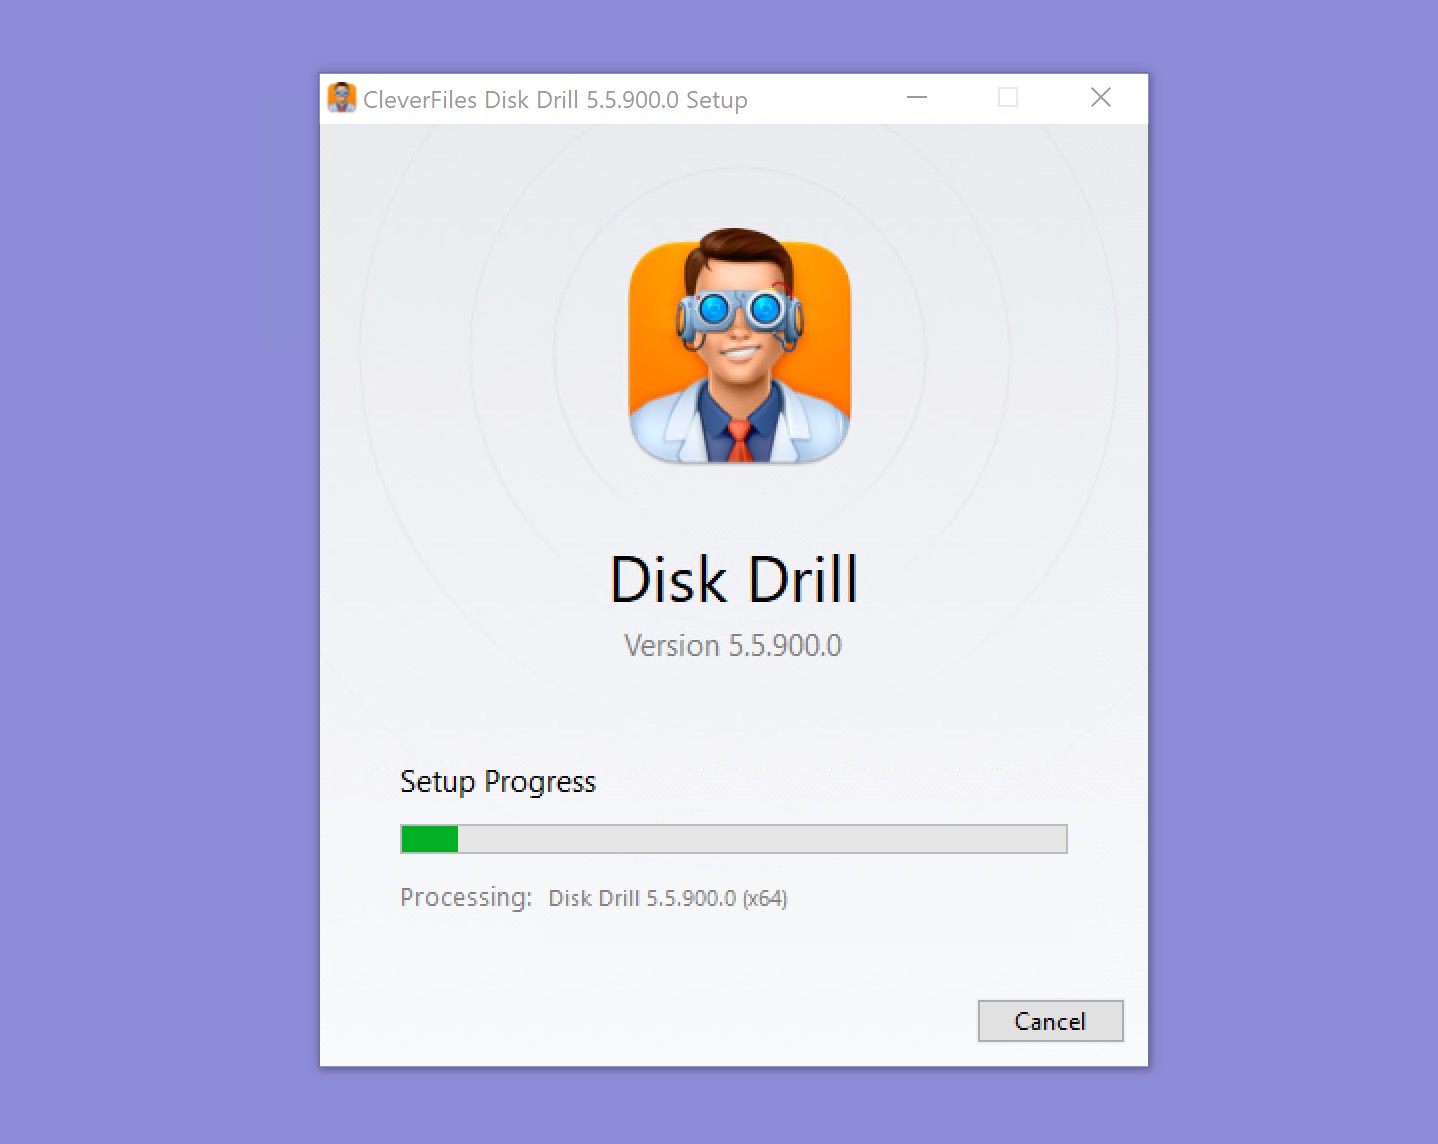
- Download and install Disk Drill.
- Launch Disk Drill and select the storage device where the deleted files were located.
- Click the Search for lost data button to scan the selected storage device.
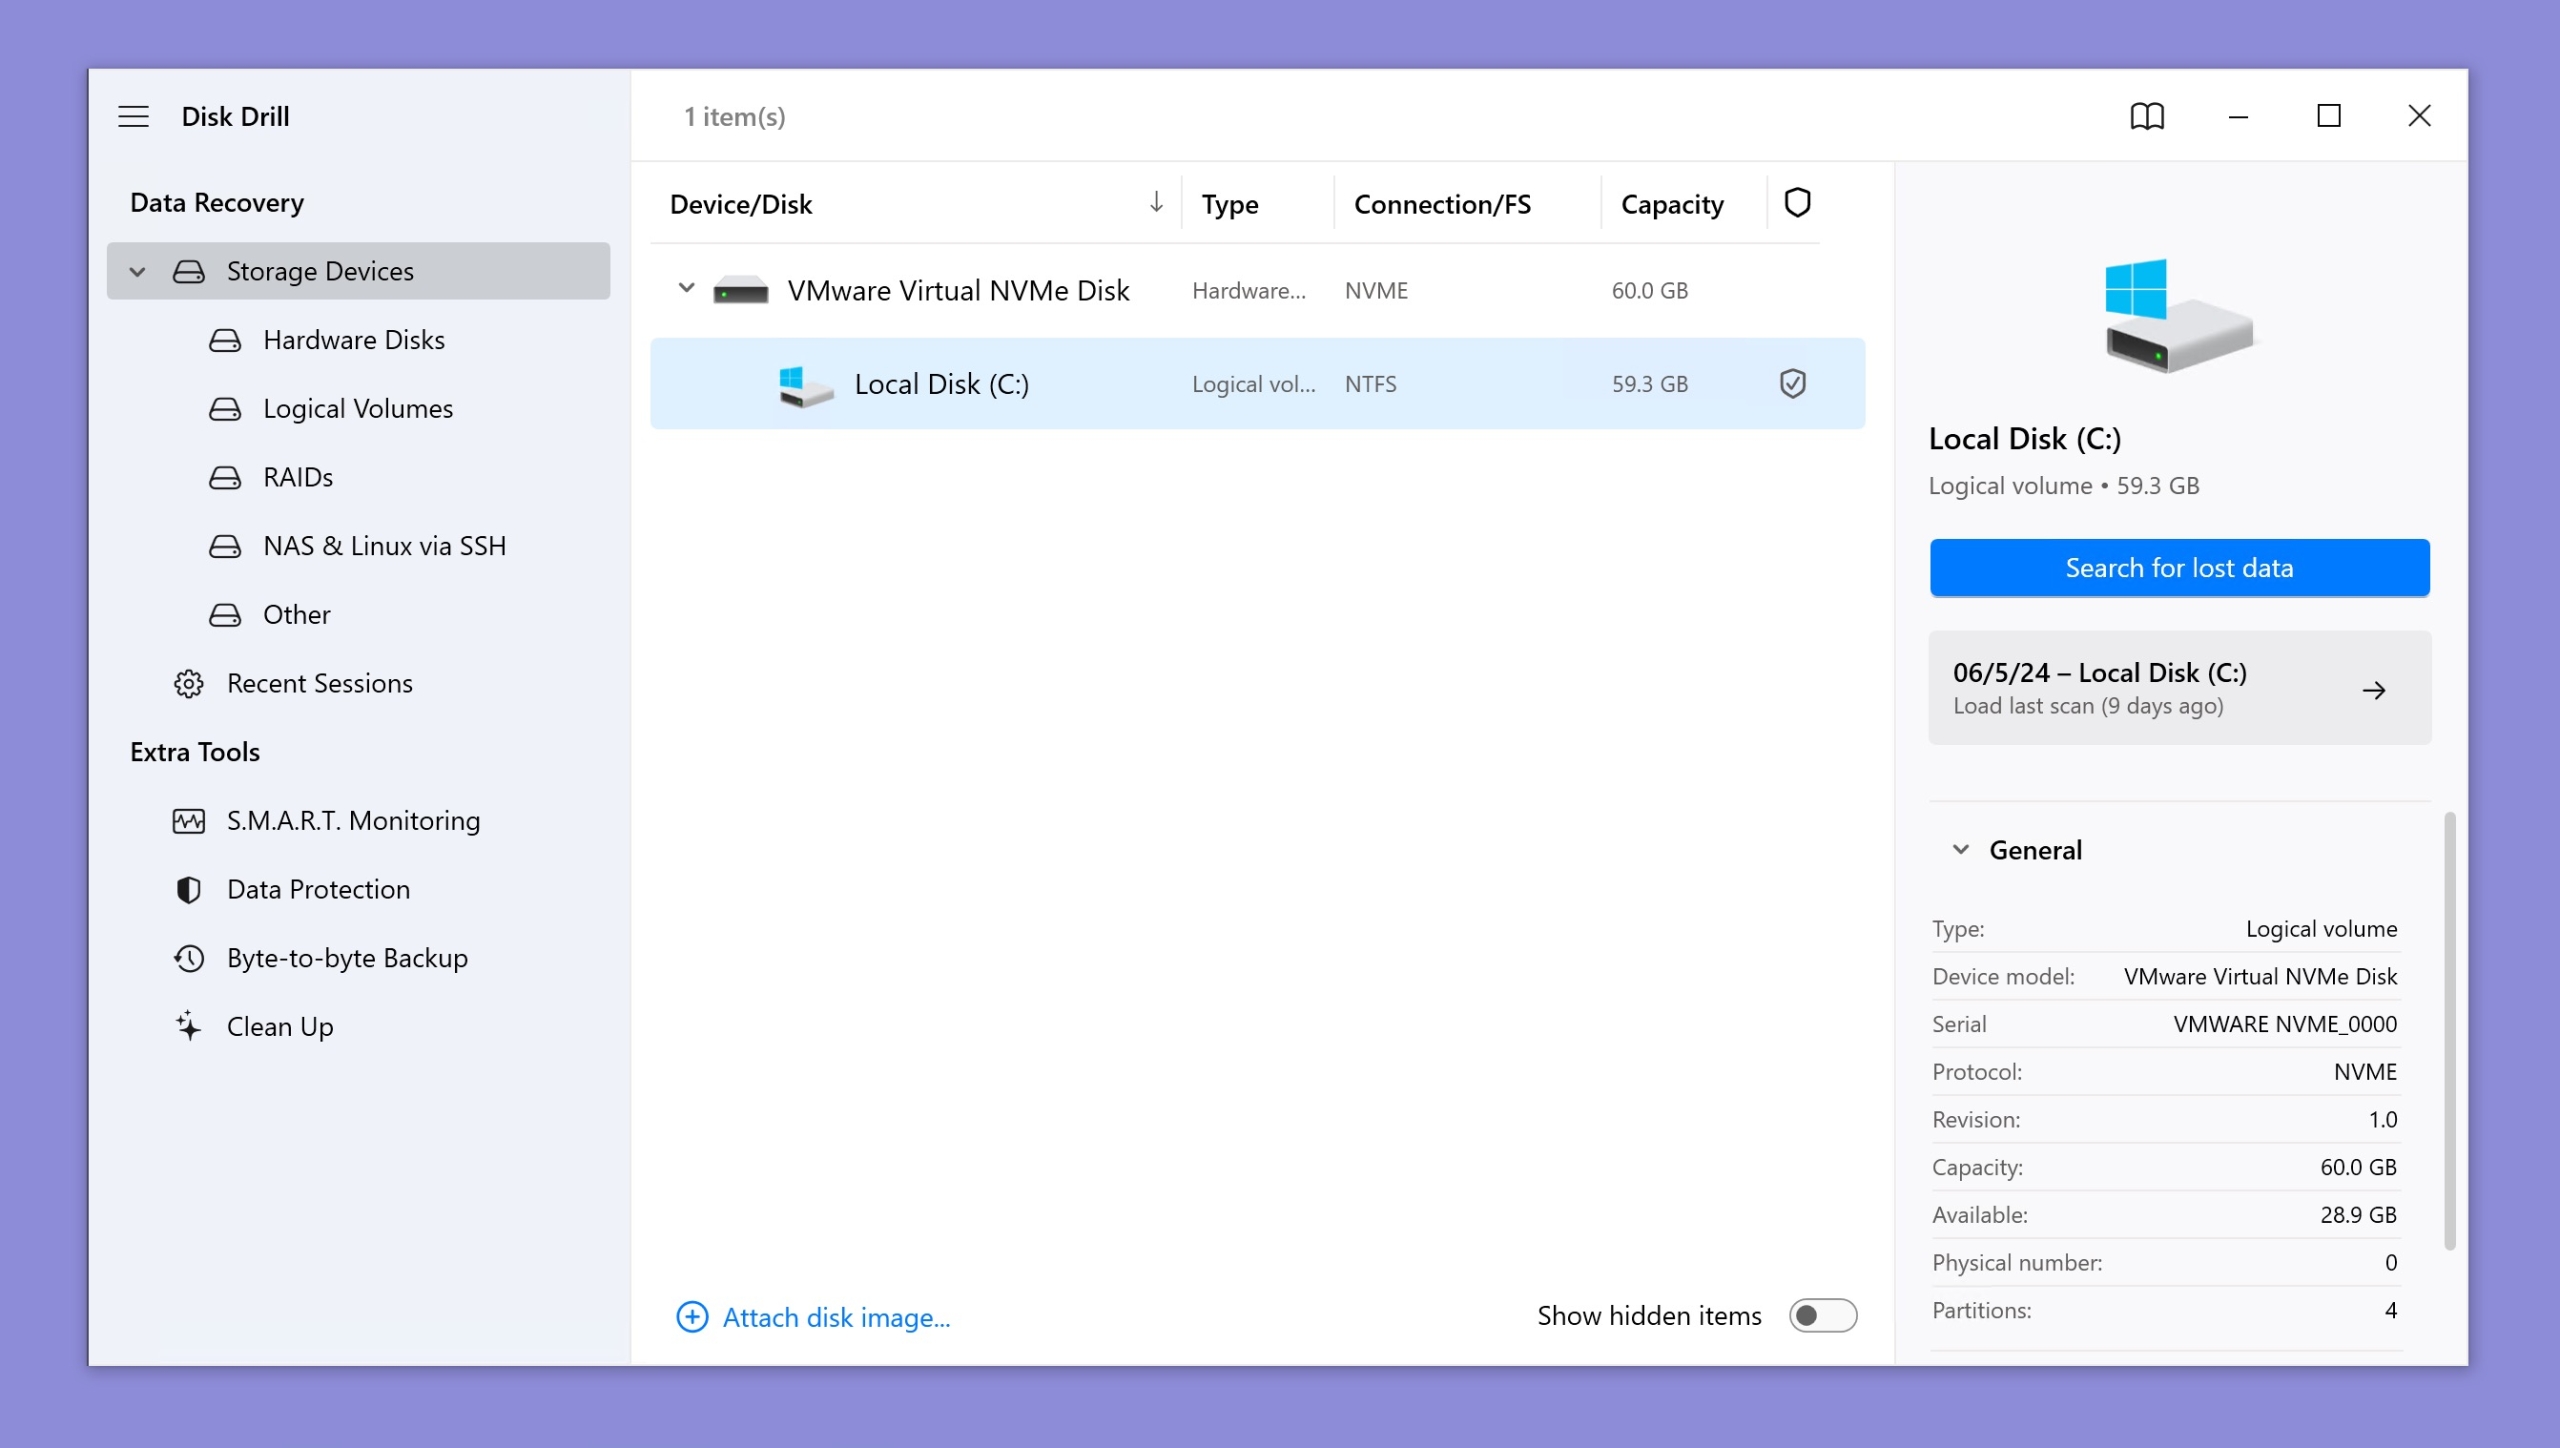
- Click the checkbox next to each file you want to recover.
- Click the blue Recover button at the bottom and specify the recovery folder. Click OK to confirm.


To avoid future loss of important files, we recommend you take advantage of Disk Drill’s data protection and backup features.
Method 7: Recover Your Files Using the CHKDSK Command
CHKDSK (short for check disk) is a command-line tool developed by Microsoft that you can use to check your hard drive for errors and recover any readable information. This handy tool is included in Windows 10, so you don’t even need to download anything.
All you need to do to restore deleted files on Windows 10 using CHKDSK is:
- Press Win + X and select Windows PowerShell (Admin).
- Enter the following command (replace X: with the latter assigned to your storage device):
chkdsk X: /r
- Wait for CHKDSK to finish repairing your storage device. Choose Y if you’re asked if you want to convert lost chains to files.
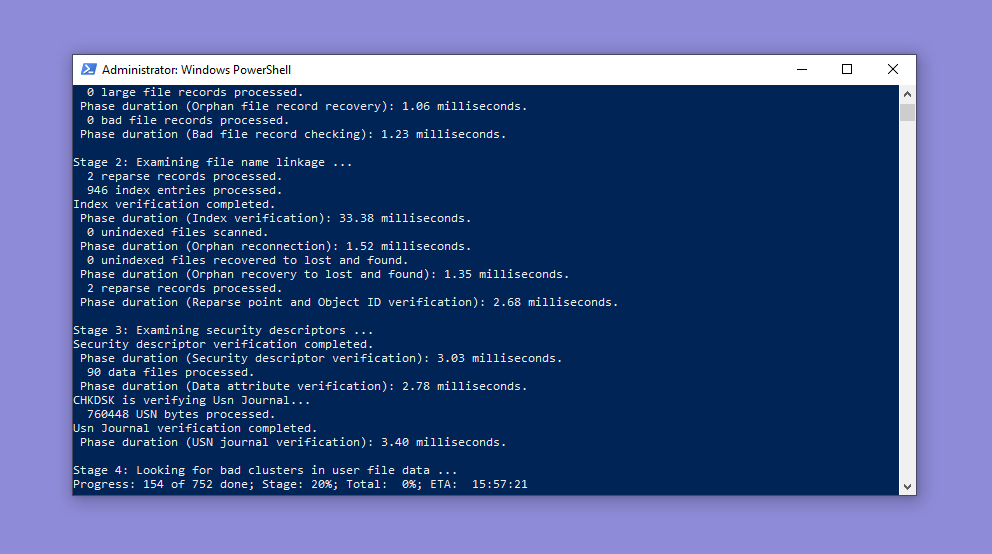

While CHKDSK is unlikely to yield great results, there’s no reason not to give it a try considering that it takes less than a minute to launch it.
Method 8: Restore a Previous Version of Your Files from File History or Restore Points
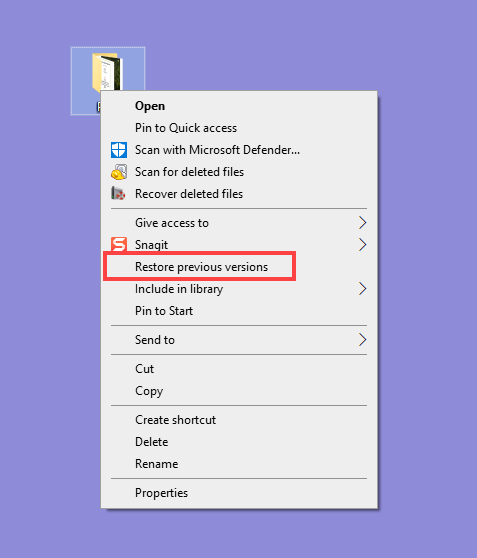
When you right-click a folder or file on Windows 10, you can choose the “Restore previous versions” option from the context menu. This option lets you restore a previous version of the file or folder from a File History backup or a system restore point.
By default, File History backs up the Documents, Music, Pictures, Videos, and Desktop folders, while system restore points include Windows system files, certain program files, registry settings, and hardware drivers.
To recover a previous version of a deleted folder or file on Windows 10:
- Open Windows Explorer and right-click on the folder where the deleted files were located.
- Select Restore previous versions.
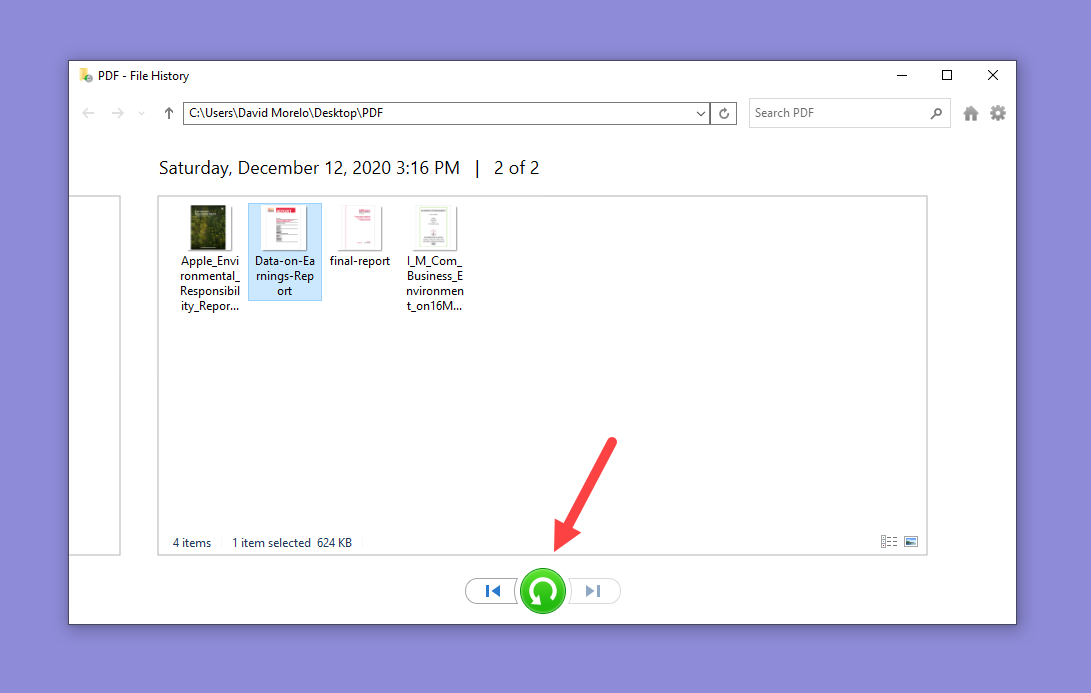
- Select the most relevant File History backup, click the small arrow next to Open and select the Open in File History option.
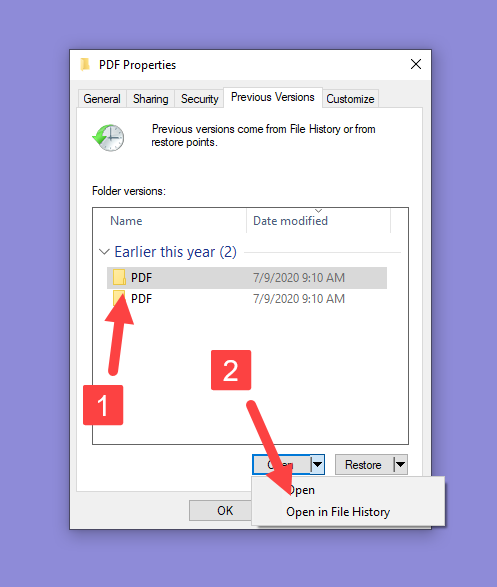
- Select the folder or file you want to recover and click the green Recover button at the bottom of the preview window to recover it.


Unfortunately, this method won’t help you if you don’t have a suitable File History backup or system restore point available.
Method 9: Check All Main Locations Where Temporary Files Are Stored
Some applications like to store files you’re currently working on in the so-called temp folders, which are special folders whose content is automatically deleted at bootup or at regular intervals, leaving the directory itself intact.
Here’s how you can open the main temp folder where applications can store temporary files:
- Press Win + X and select Run.
- Enter the following text into the Run window and click OK:
%localappdata%\Temp

Now go through the temp folder and look for your files. If you find them there, feel free to move them to a safe location.
You should also check %SYSTEMROOT%\Temp, which is the main temp folder of the Windows operating system. Additionally, some applications create their own temp folders, so make sure to check them as well.
Method 10: Recover Windows 10 from a System Image
Windows 10 can create images of the entire system and perform a full restore from them. Since this method doesn’t let you restore individual files, we recommend you use it only after you’ve exhausted all other options.
If you’re ready to start recovering deleted files on Windows 10 from a system image, this is what you need to do:
- Open Start menu, type “settings,” and hit Enter.
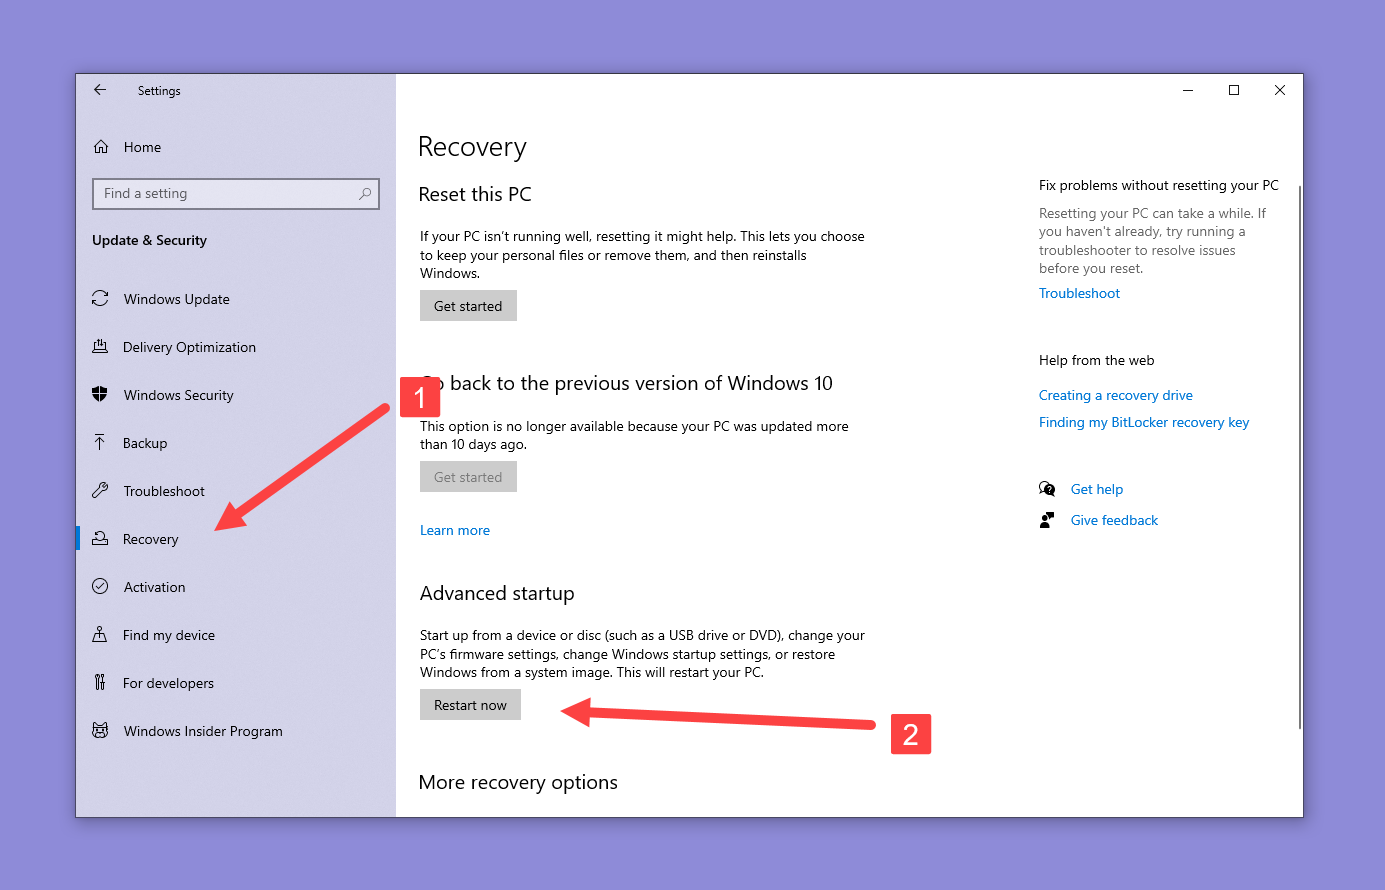
- Select the Update & Security category and choose Recovery from the left pane.
- Click the Restart now button under Advanced startup (your computer will restart, so save everything).
- Go to Troubleshoot > Advanced Options > See more recovery option > System Image Recovery.

- Select a System Image backup file and click Next.
- Choose additional restore options and click Next.
- Review the system image details and click Finish to begin the restore process.


Method 11: Hire a Data Recovery Professional

If you fail to retrieve deleted files from your Windows 10 computer on your own, there’s one last option that you can try: hire a data recovery professional.
In many cases, data recovery professionals can recover permanently deleted files even from physically damaged storage devices because they are equipped with state-of-the-art diagnostic and repair tools.
The best data recovery centers, such as CleverFiles Data Recovery Center, have a recovery success rate of 98%, and they don’t charge customers any money unless they recover their data.
Conclusion
Windows 10 offers a myriad of built-in options to help you recover your precious data, from the trusty Recycle Bin to third-party software like Disk Drill. So, the next time you find yourself staring at an empty folder in despair, take a deep breath and remember that you have the power to bring your digital world back to life by following our comprehensive guide on how to recover deleted files in Windows 10.