
Reading Time: 6 minutesDespite Microsoft’s decision to remove the ability to create ReFS partitions from most Windows versions years ago, many users still rely on this file system. And as we all know, where there’s data, there’s data loss. Fortunately, it’s still possible to recover data from an ReFS partition on Windows. In fact, it’s easier than ever thanks to modern data recovery tools.
Is ReFS Data Recovery Even Possible?
ReFS, short for Resilient File System, was designed with data protection in mind. ReFS achieves this through automatic integrity checking and data scrubbing. In simple terms, it constantly monitors your files for corruption and can often fix issues on its own without the need for manual ReFS volume repair using tools like chkdsk.
But just because data loss caused by corruption is much less likely to happen on ReFS partitions, it doesn’t mean that the file system is immune to data loss. Users can still lose files due to:
- Accidental deletion or overwriting
- Formatting errors
- Power outages during write operations
- Hardware failures
- Malware attacks
The good news is that multiple effective recovery methods exist for ReFS data recovery. These include preventive techniques like using the Recycle Bin and restoring from backups, as well as specialized data recovery software designed for retrieving lost data after an incident has occurred (even if no backups exist and the files are no longer present in the Recycle Bin).
Since preventive measures are typically already in place (or should be), it’s usually best to start with these options when attempting to recover lost data.
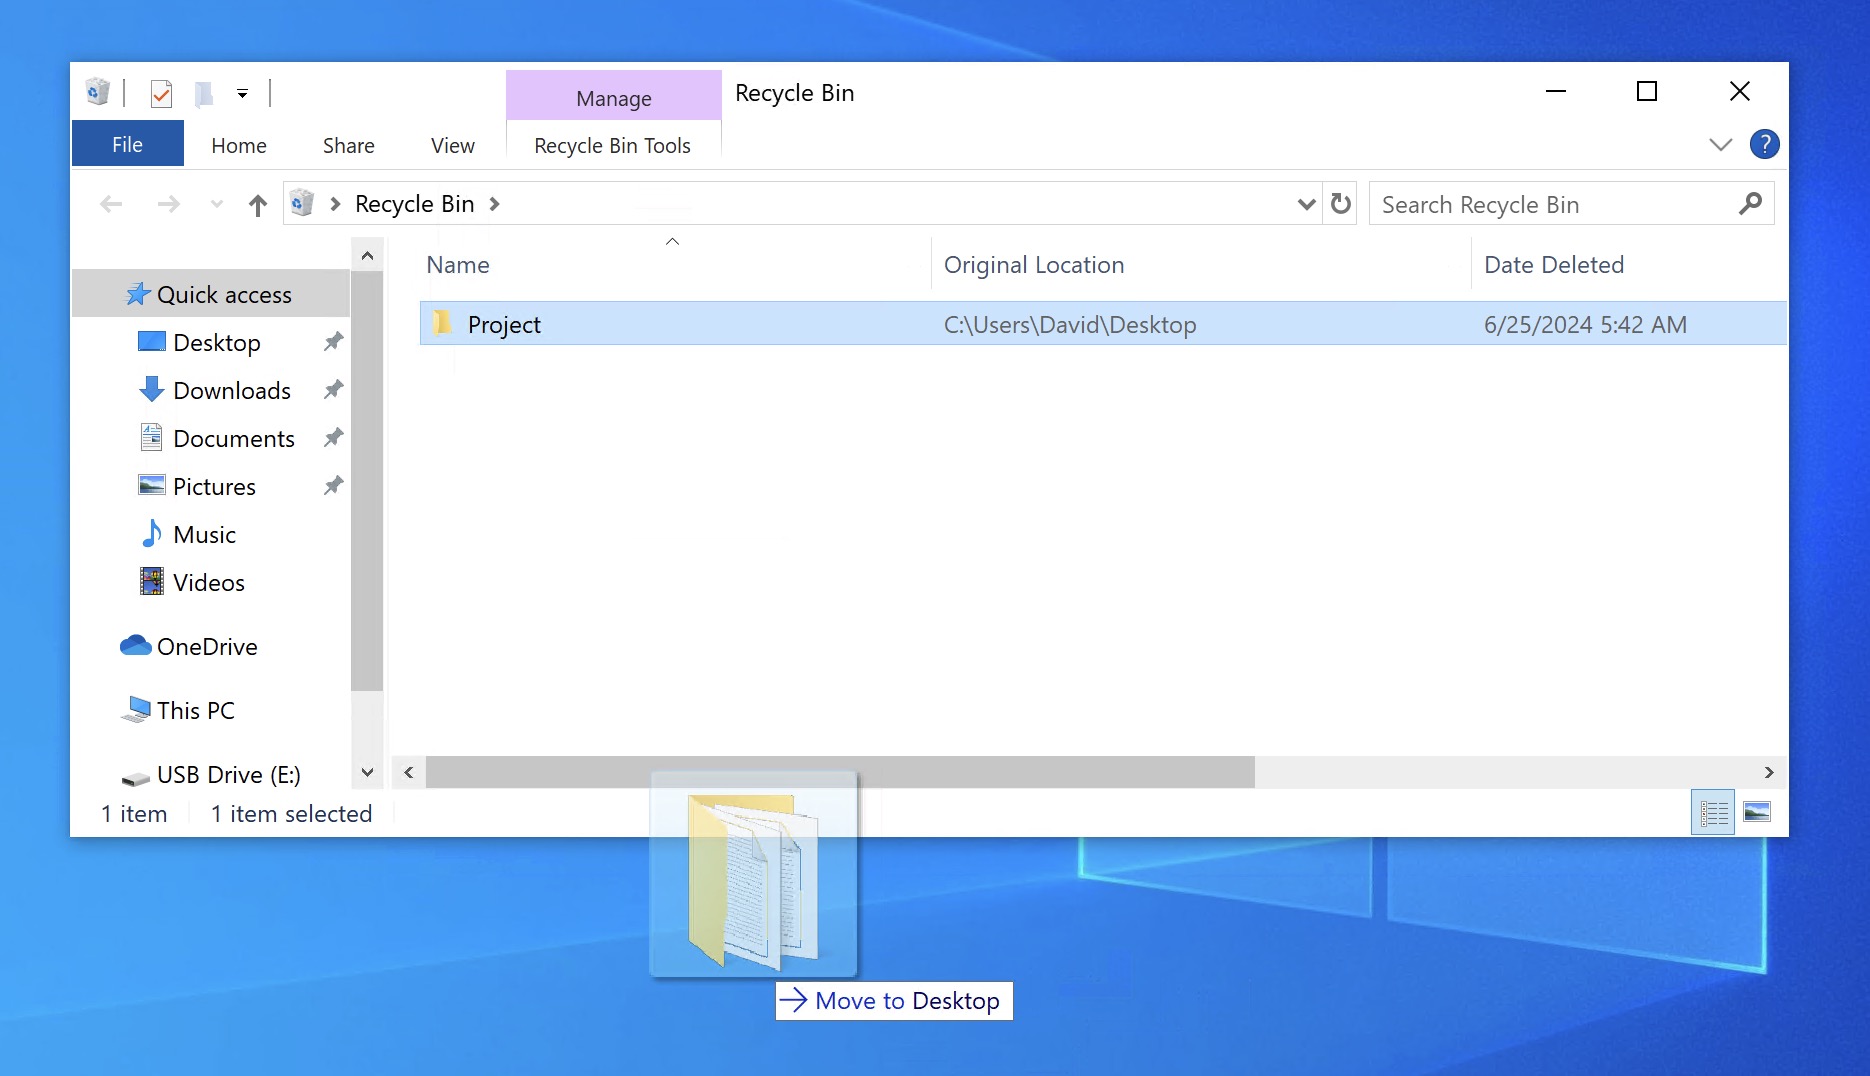
Solution 1: Recycle Bin
Your first stop should be the Recycle Bin. Files deleted from internal ReFS partitions typically end up here, and recovery is as simple as dragging them to a new folder:
- Open the Recycle Bin by double-clicking its icon on your desktop.

- Locate the file or folder you want to restore.
- Drag and drop the file to a new location.


Solution 2: Prior Backups
Unfortunately, the Recycle Bin won’t help you recover files that have been overwritten on an ReFS file system, and it also won’t contain files that have been compromised by malware. So, if the Recycle Bin comes up empty, it’s time to check your backups. When we say backups we mean:
- any cloud backups you’ve set up using a service like OneDrive, Google Drive, or Dropbox,
- manually created backups on external drives,
- backups automatically created using the File History feature.
If you still can’t find your missing files, then it’s time to move on to ReFS recovery software.
Solution 3: Data Recovery Software
When preventive techniques fail, it’s time to turn to specialized ReFS data recovery software, which is designed to locate and retrieve permanently deleted or otherwise lost files that are still physically present on your storage device (they haven’t yet been overwritten by new data).
Data recovery software is available from many different vendors at various price points (here’s a comparison of the best data recovery software). For ReFS recovery, we recommend two solutions: a freemium option called Disk Drill and a free option called PhotoRec.
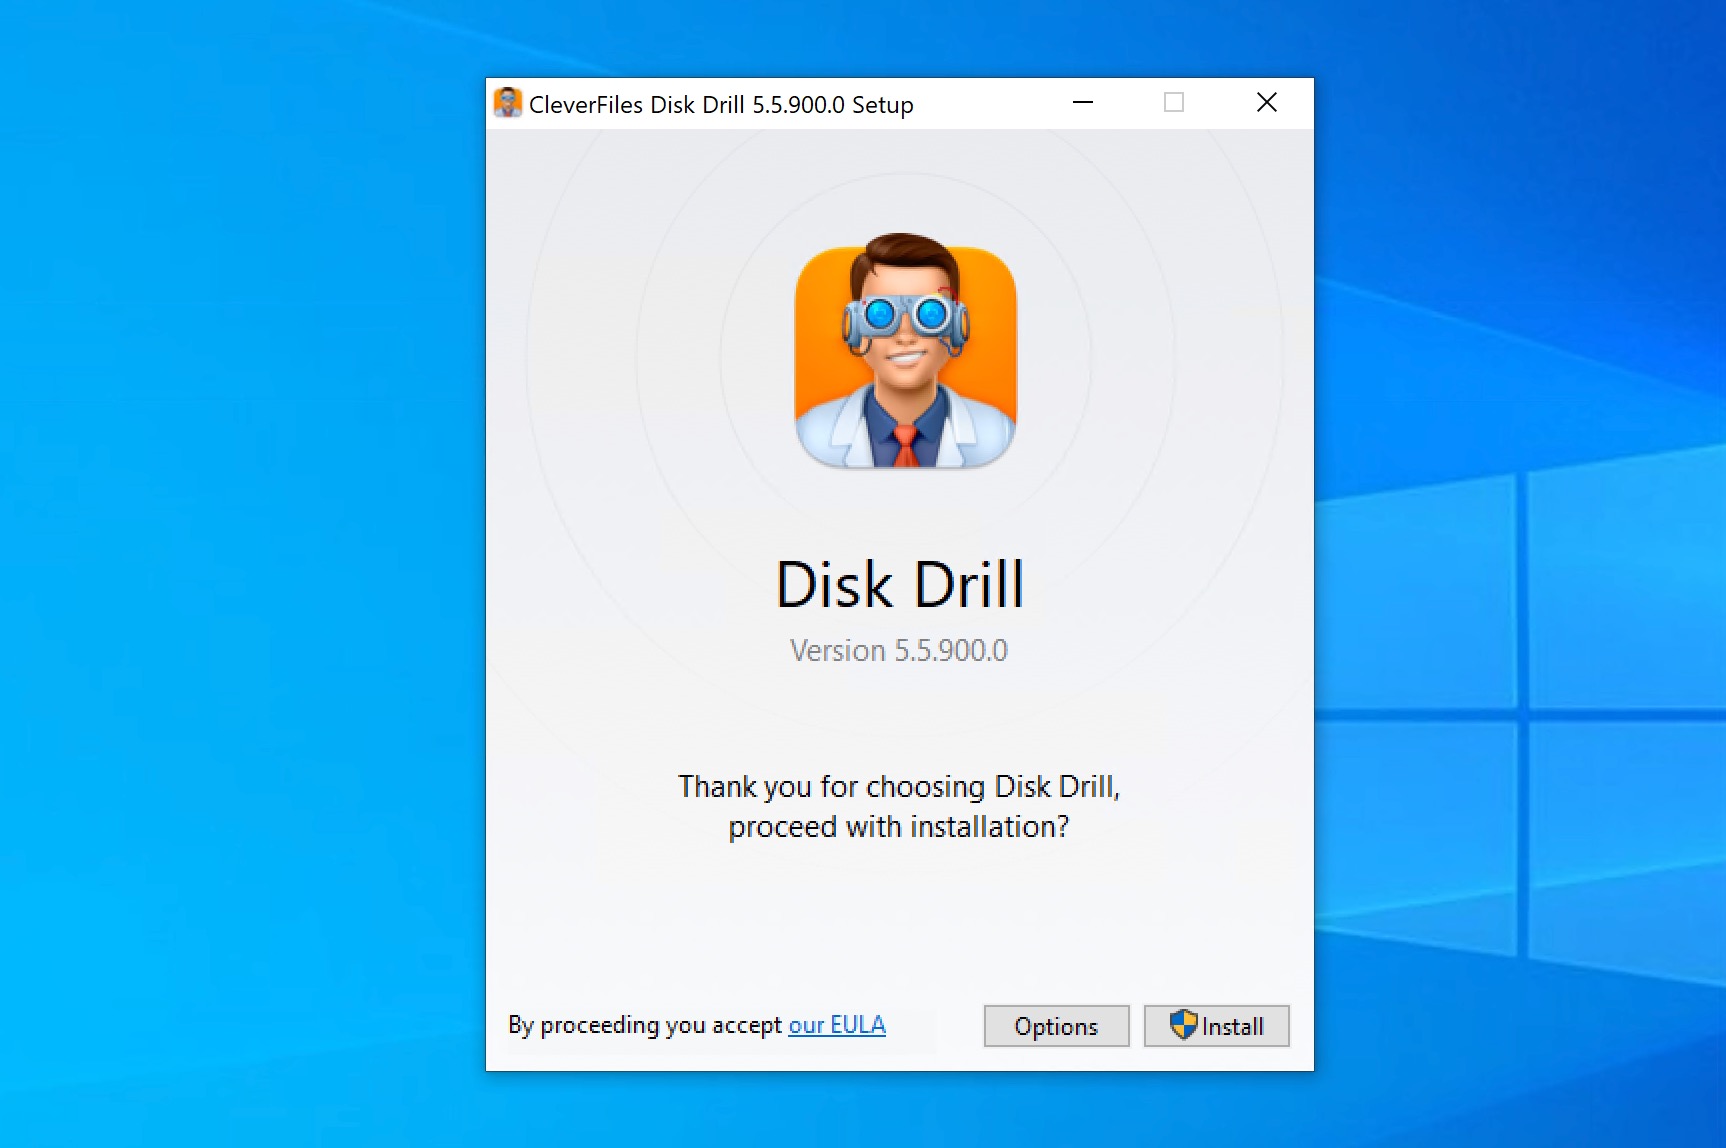
Option A: Disk Drill
Disk Drill is a highly popular and well-rated data recovery software application that offers an intuitive user interface, making it incredibly easy to perform ReFS recovery.
Thanks to its support for over 400 file formats, Disk Drill can recover just about any file from your ReFS partition, even if the entire ReFS volume is showing as raw.
The free version of Disk Drill can retrieve 500 MB of data from your ReFS partition, and it can verify the recoverability of an unlimited number of files, so you can check if purchasing a Disk Drill PRO license is worth it.
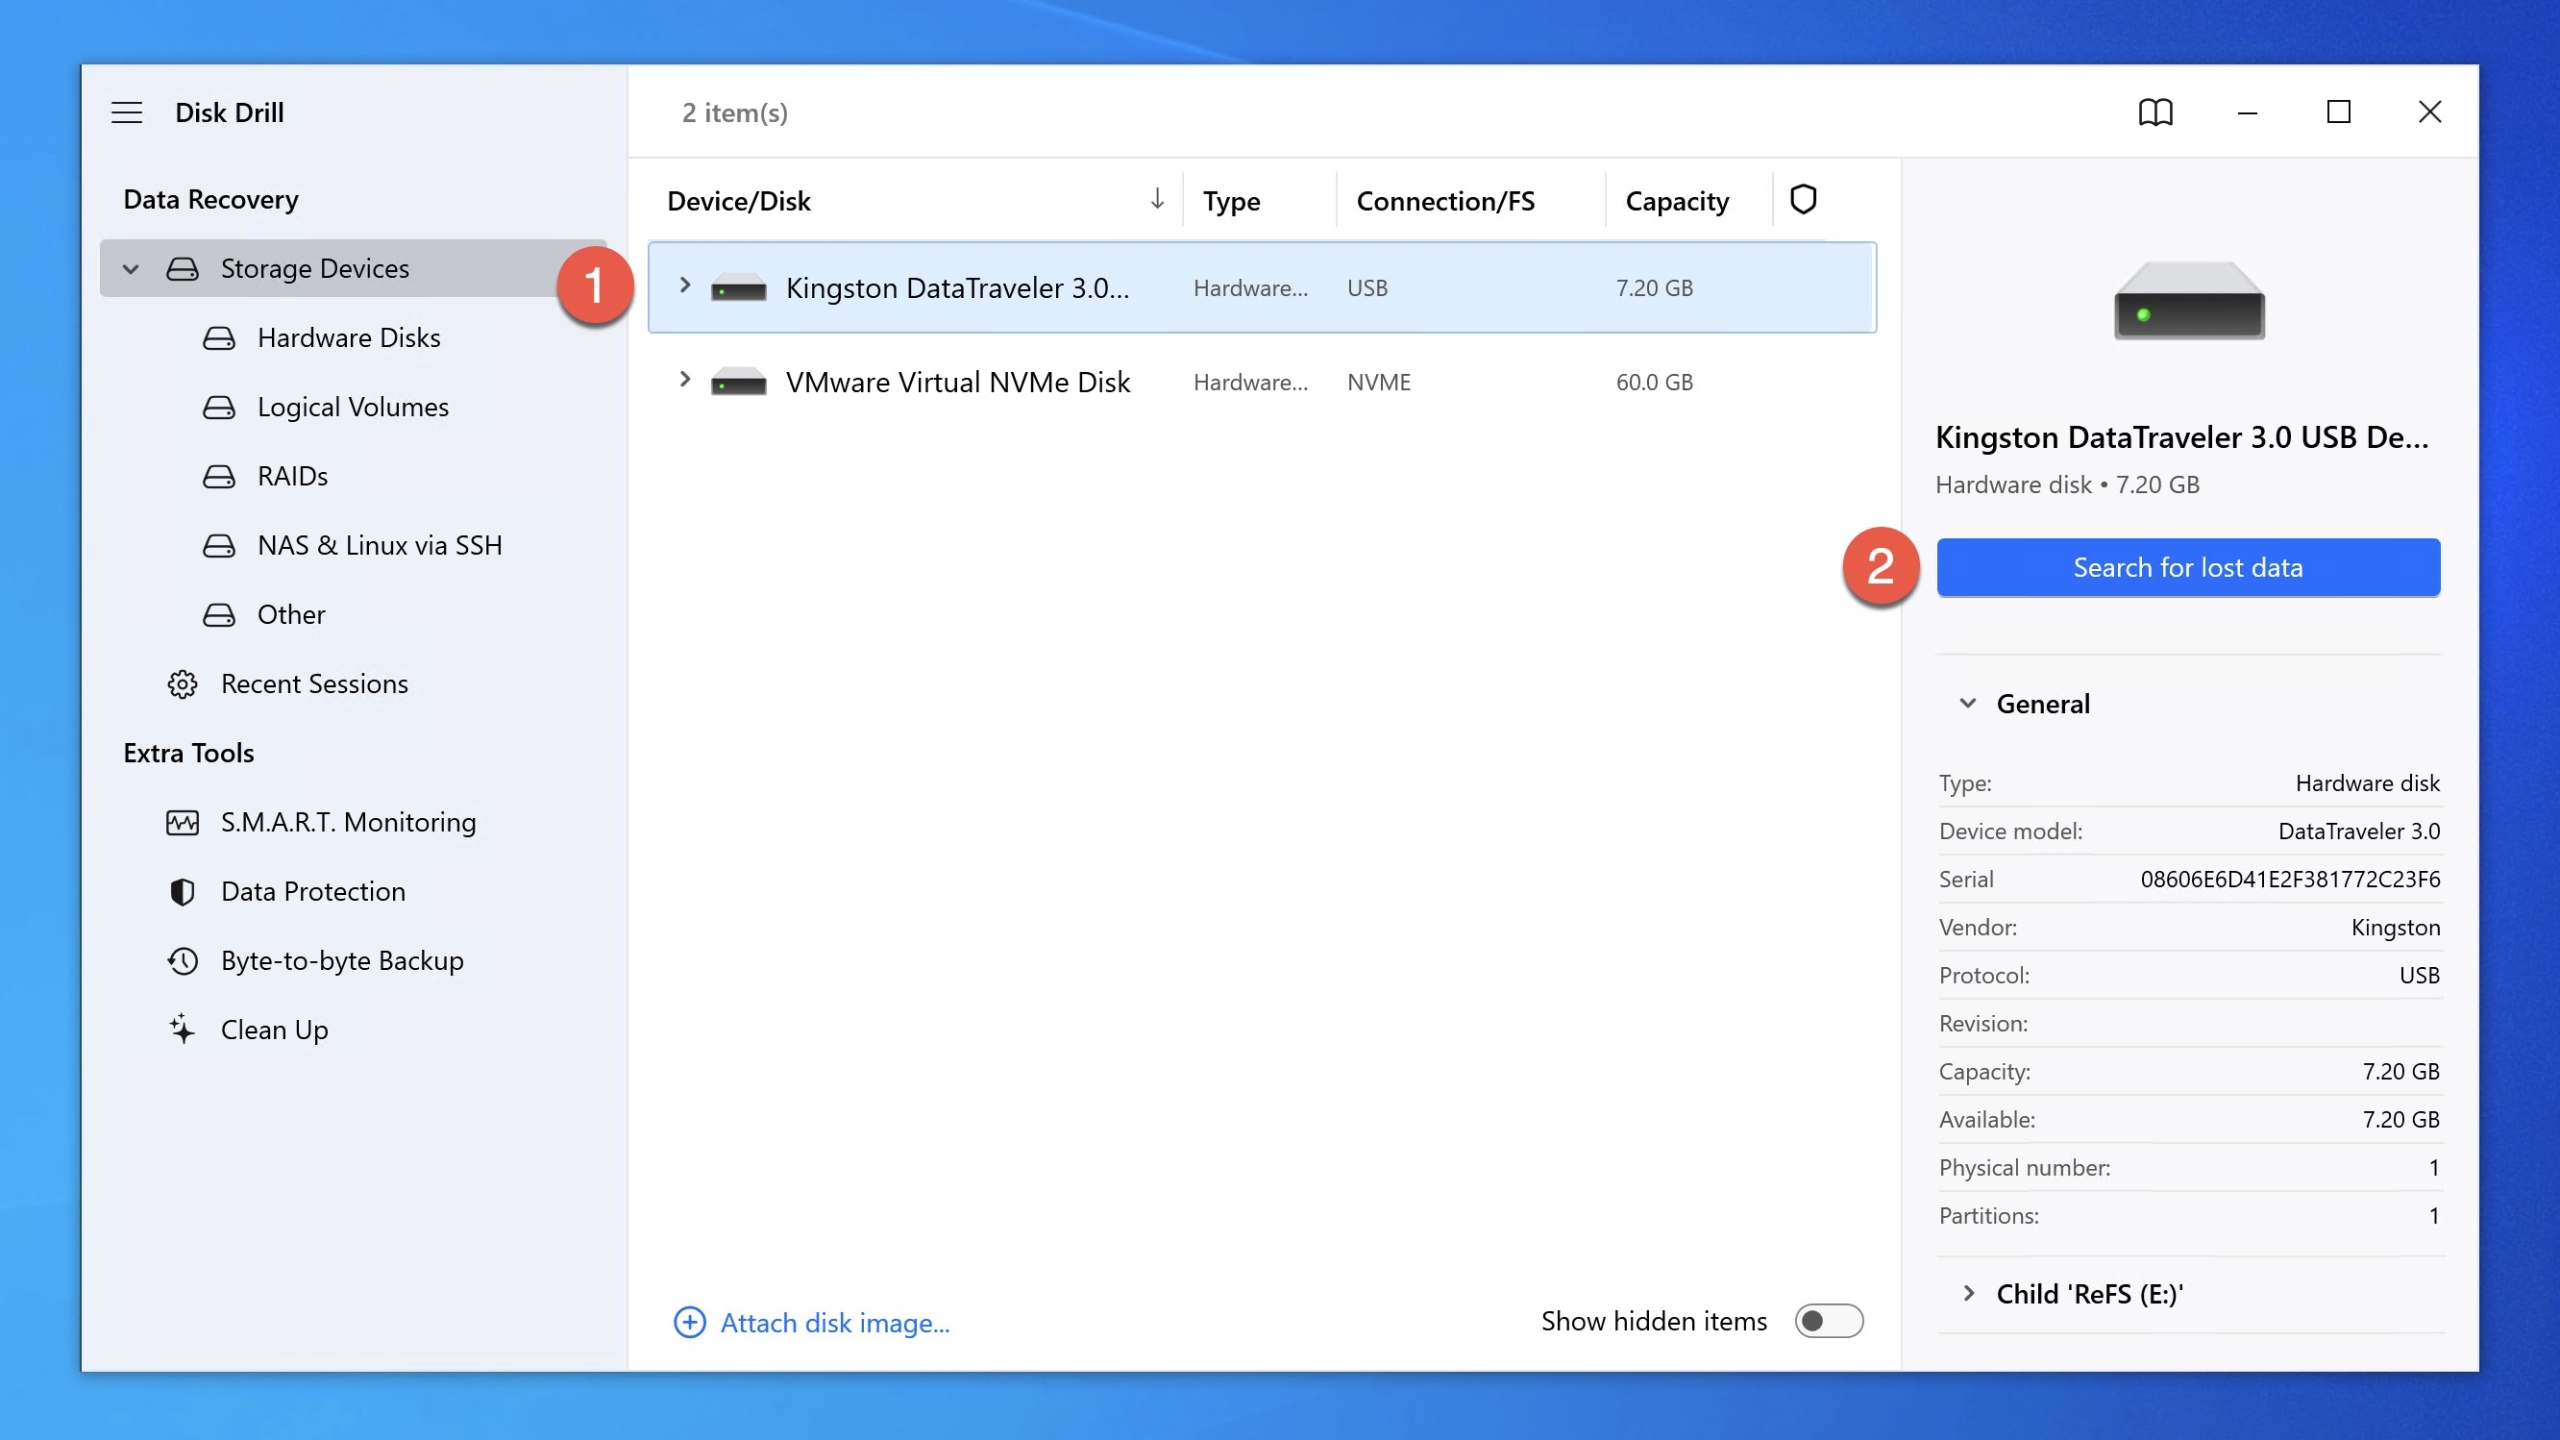
To perform ReFS data recovery with Disk Drill, follow these steps:
- Download and install Disk Drill from the official website.
- Launch Disk Drill and select the storage device that’s home to your ReFS partition. If your storage device has multiple ReFS partitions, then you can select the one affected by data loss to save time, but it’s generally better to scan the entire storage device.
- Click the “Search for lost data” button to begin scanning. Disk Drill will keep you informed about the data recovery progress. The application will also give you the option to browse the results with scanning continuing in the background (another great way to save time).
- Select the files you want to recover. Use the preview feature to check if you’re recovering the correct files and apply scan result filters if you’re looking for specific files.
- Click the Recover button and select a safe destination (not on the same ReFS partition).
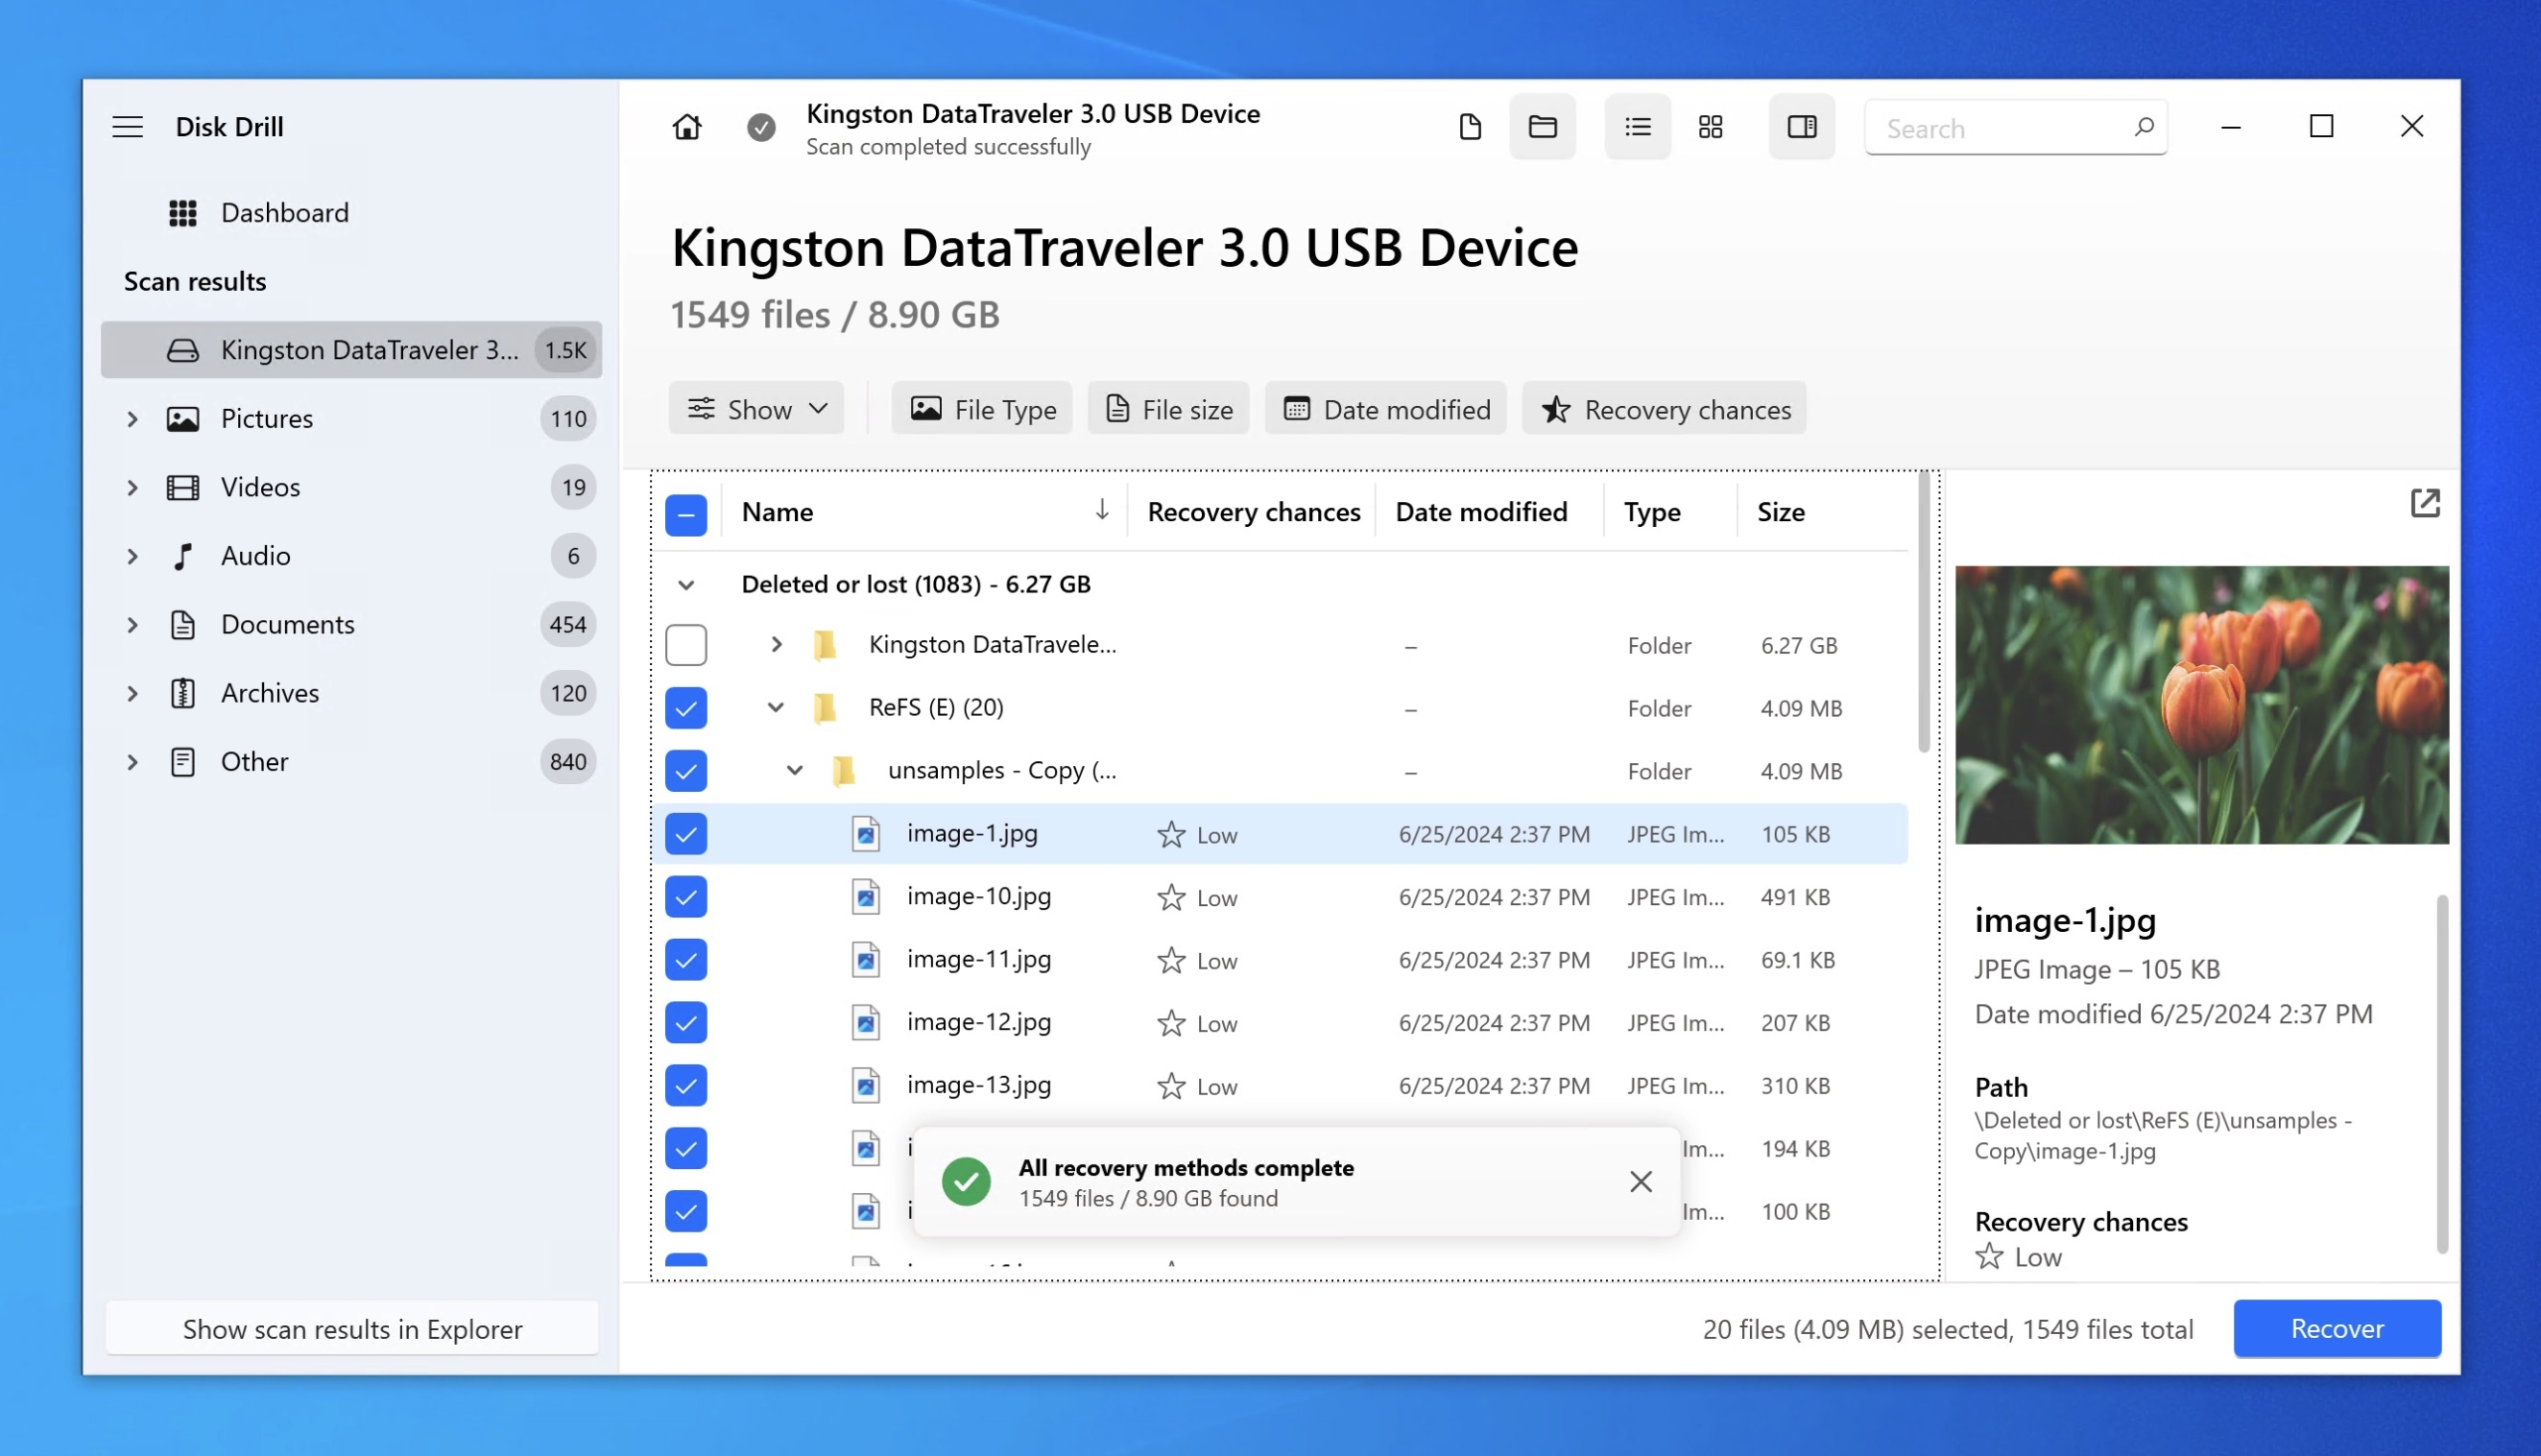


Just like that, your lost files from the ReFS partition will be restored to your chosen location, and you can access them using File Explorer.
Option B: QPhotoRec
QPhotoRec is a solid alternative to Disk Drill for those who would like to recover an unlimited number of files lost from an ReFS partition without paying and don’t mind making some sacrifices in terms of performance and usability.
Since QPhotoRec is basically a simple graphical user interface for PhotoRec, it can recover the same number of file formats (about 300 file families—not limited to just photos) by reading the ReFS partition sector by sector and looking for known file signatures.
Unfortunately, there’s no ability to preview files before recovery, and you also can’t choose which files to recover. Indeed, QPhotoRec will always recover all found files, so you better have a recovery destination with plenty of free storage space ready if your ReFS partition is on the larger side.
Here’s how to recover data from an ReFS partition using QPhotoRec:
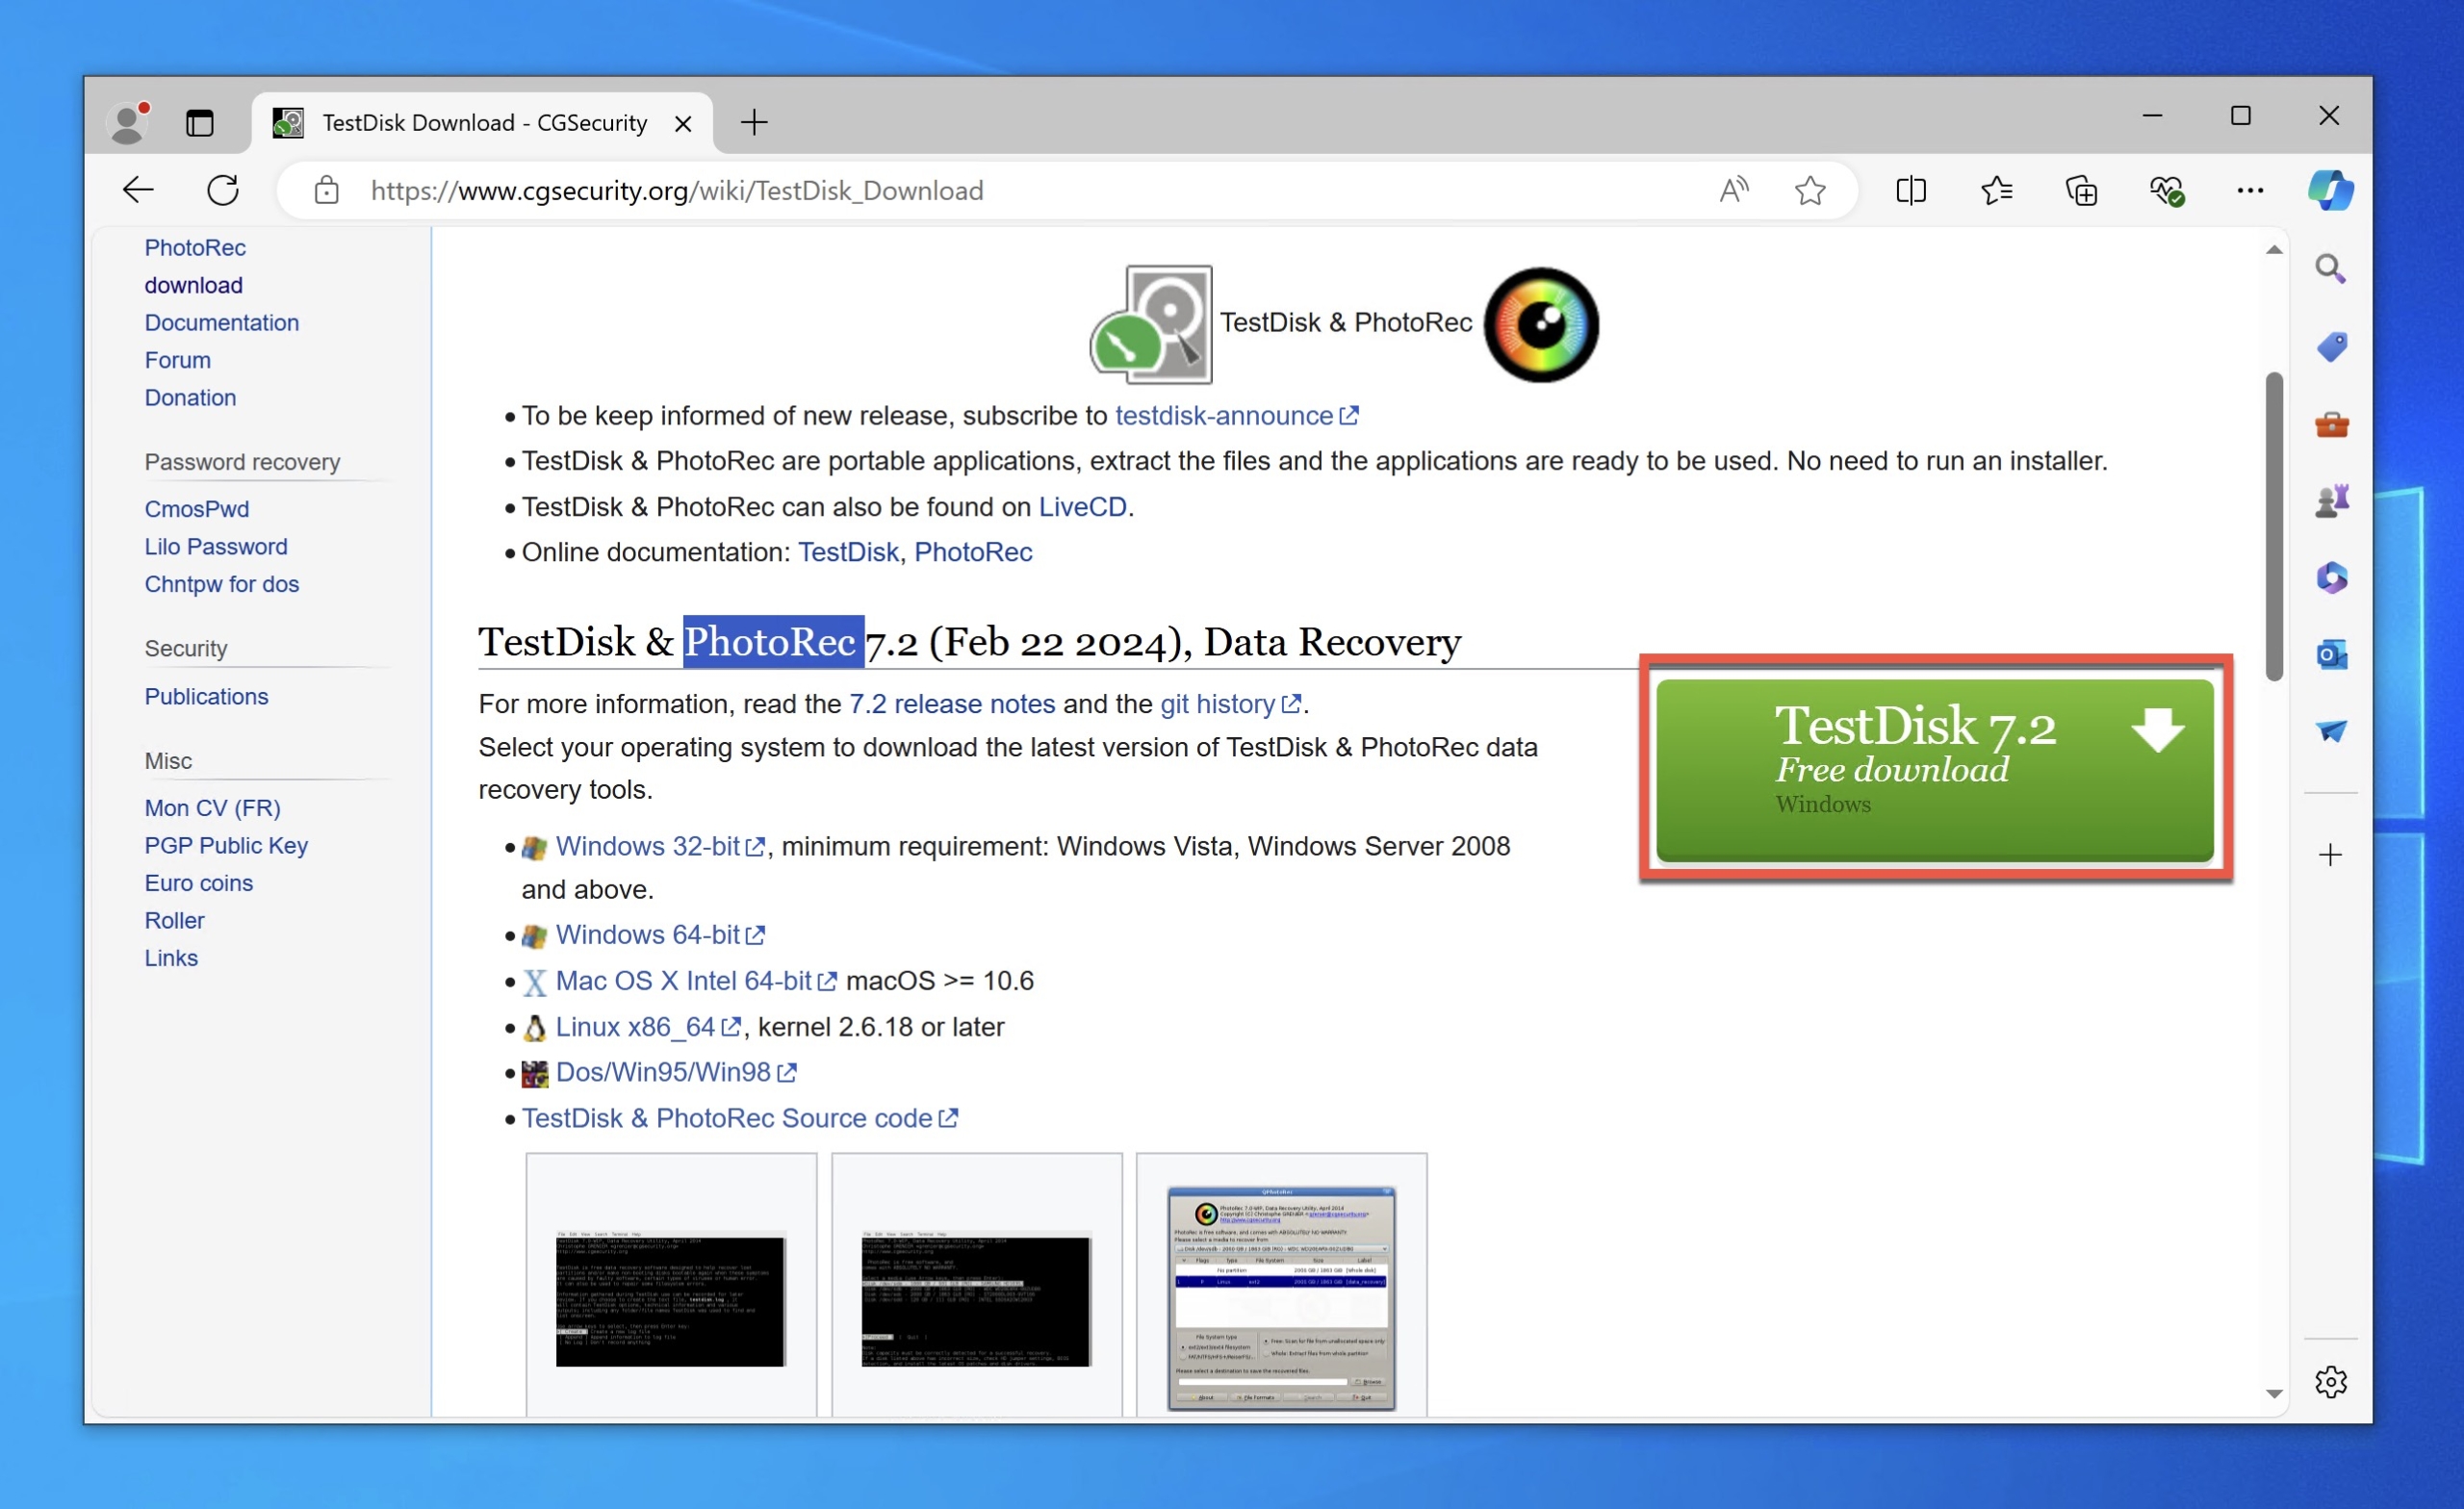
- Download the TestDisk archive from its official website (it also contains PhotoRec and QPhotoRec).
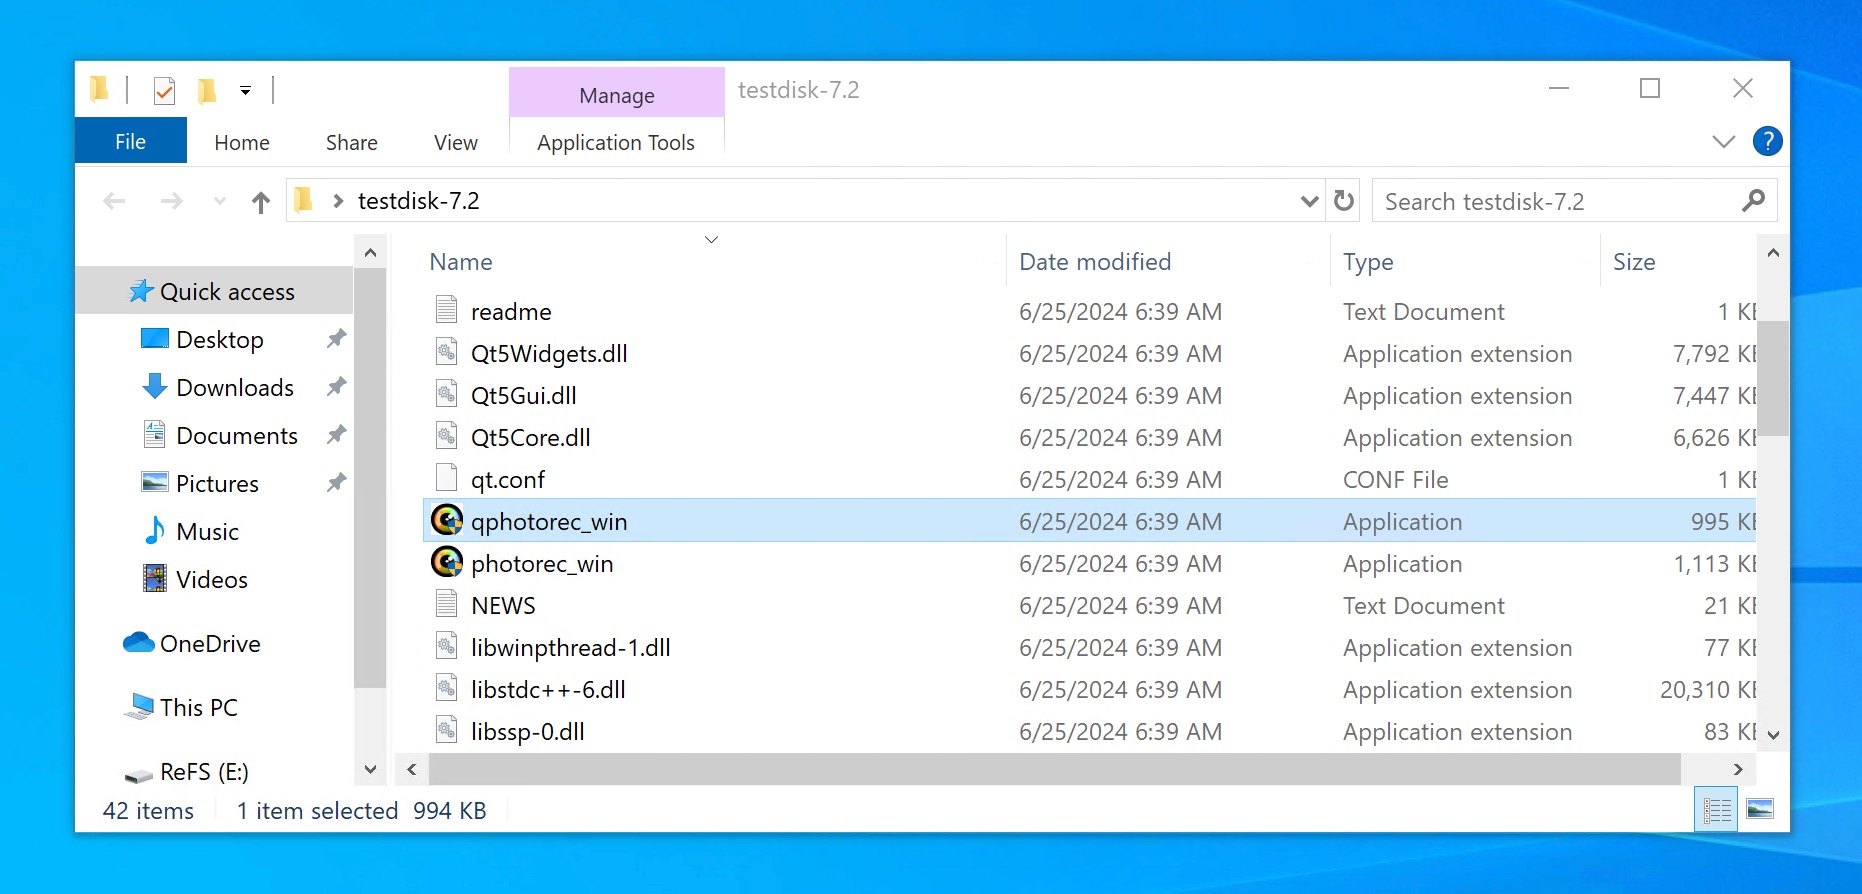
- Unpack the TestDisk archive and launch the QPhotoRec executable.
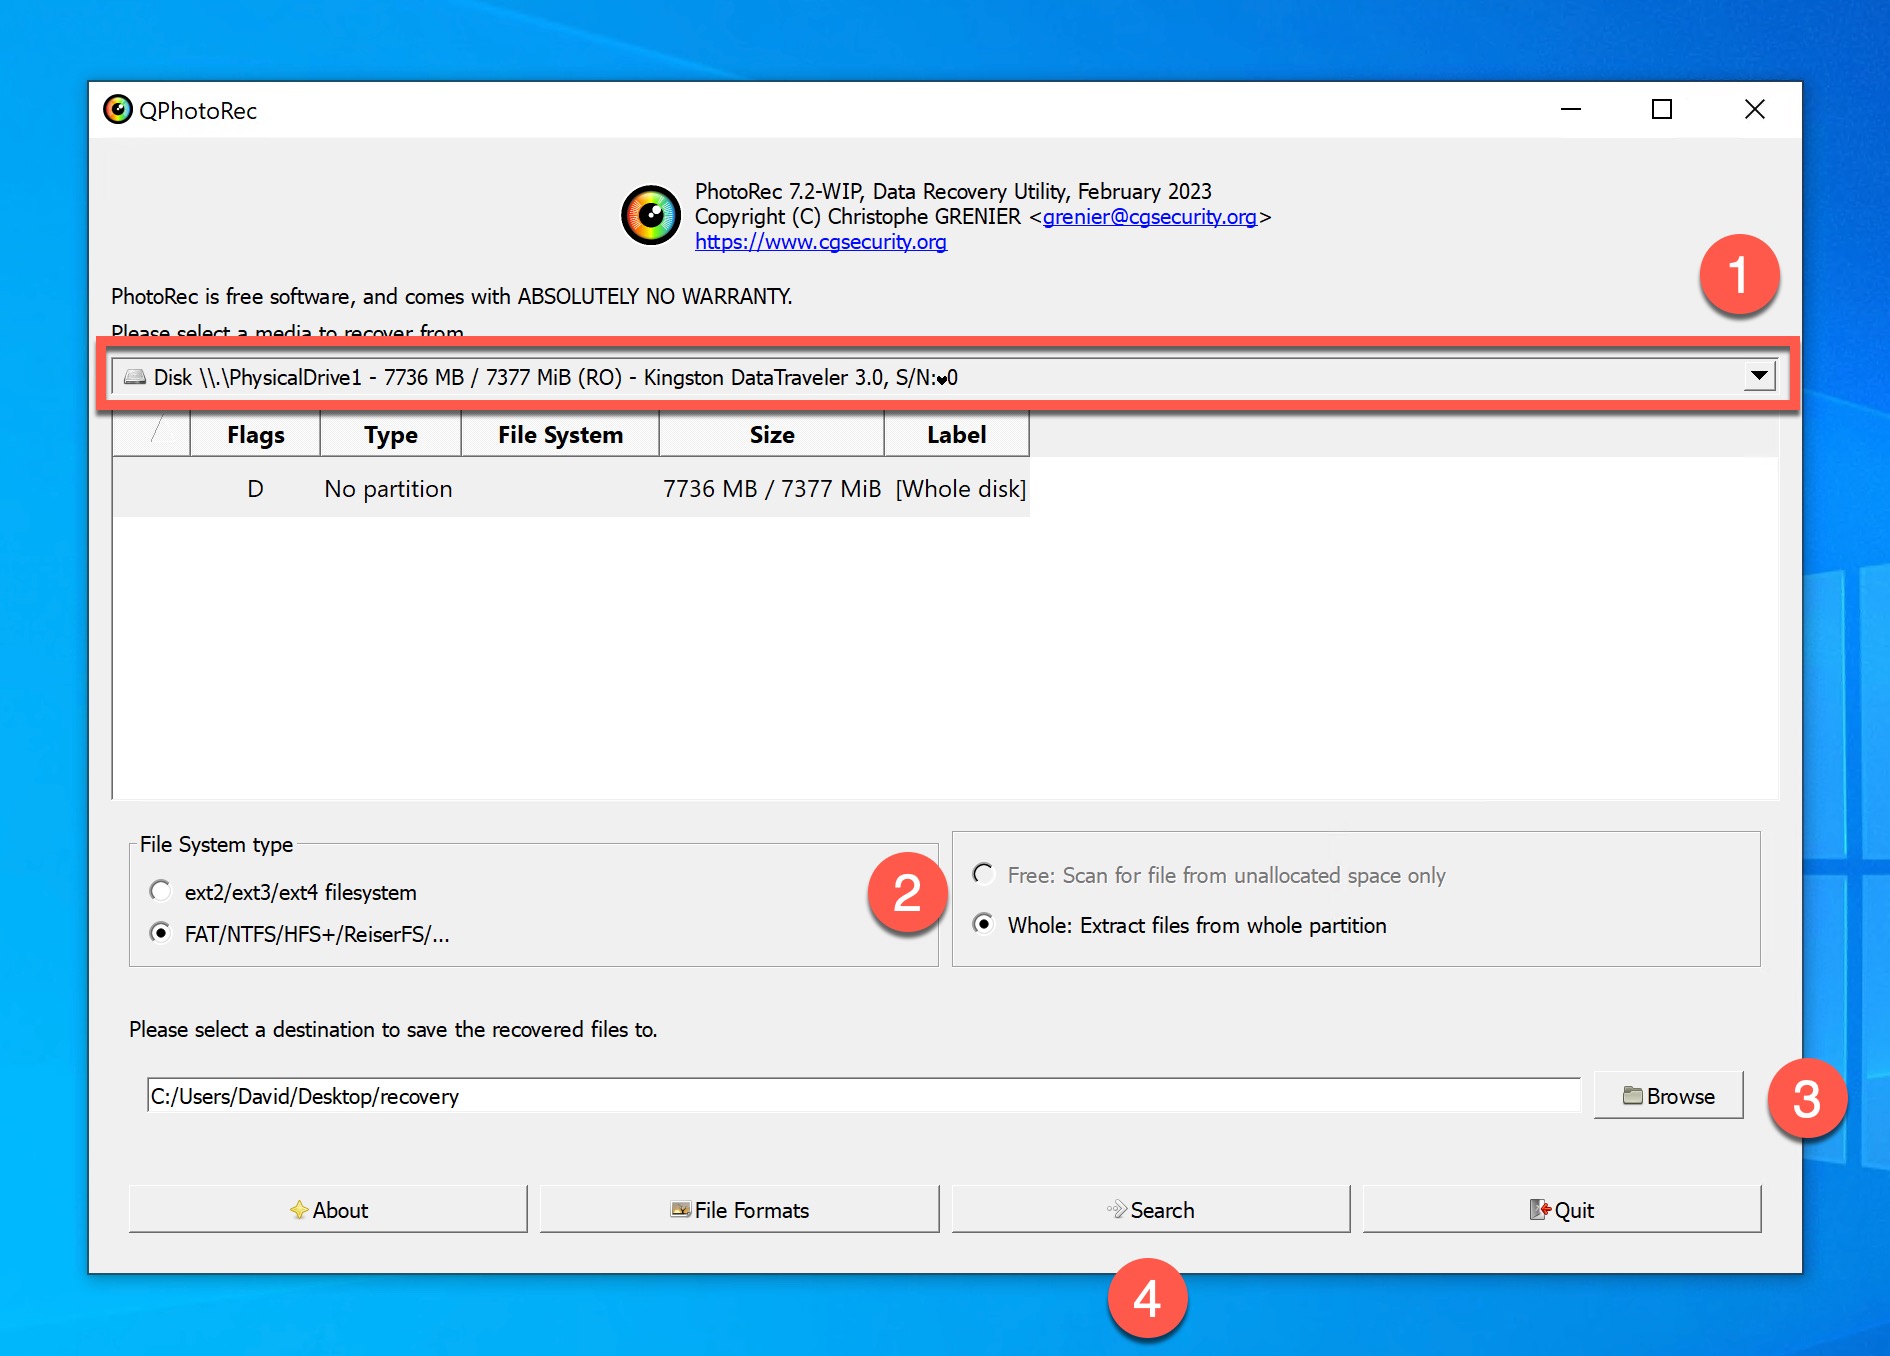
- Select the storage device that contains your ReFS partition.
- Choose to scan the whole partition.
- Don’t mind the file system selection option. QPhotoRec will recover your data based on file signatures, so it doesn’t matter.
- Specify the recovery destination. Remember that you need to have plenty of free storage available for QPhotoRec to successfully recover and save your files.
- Click the Search button and wait.


As you can see, the recovery process isn’t that much more complicated compared with Disk Drill, but the inability to preview and select specific files for recovery can make the process more time-consuming and storage-intensive.
Conclusion
Data loss on an ReFS partition can still occur despite its built-in data protection features. When preventive recovery techniques like the Recycle Bin and backups fail, turning to specialized ReFS data recovery software is often the best (and only) solution. Disk Drill and QPhotoRec are two effective tools for recovering lost data from an ReFS partition. While Disk Drill offers a more user-friendly experience and better performance, QPhotoRec is a free alternative that can recover an unlimited number of files with some sacrifices in terms of usability and performance.