
Reading Time: 4 minutesA fast scan time is one of the most desirable qualities of a data recovery program. However, scanning entire storage drives to find recoverable data, is a time-consuming process. In this article, we’ll take a look at Disk Drill’s scan times on various storage devices, as well as factors that influence scan speeds and some time-saving tips when recovering data.
How Long Does It Take Disk Drill to Scan
To test the scan times for Disk Drill, we performed a full data recovery scan (using All Recovery Methods) on several storage devices of varying sizes.
Before we list the scan results, it’s important to realize that these numbers are not absolute. There are many factors that can alter the scan times.
Scan times using Disk Drill:
| Storage Device and Capacity | Disk Drill Scan Time |
| USB Flash Drive 4 GB | 5 minutes |
| USB Flash Drive 16 GB | 7-8 minutes |
| M.2 SSD 512 GB | 30-50 minutes |
| Hard Disk Drive 2 TB | 3 hours |
| Hard Disk Drive 10 TB | 9 hours |
The table above makes it clear that scan speeds are heavily reliant on the size, and type of storage device. But, there are other factors at play too, that can significantly increase or decrease the scan speeds in Disk Drill. We delve more into these, in the next section of the article.
Factors That Affect Scanning Process
Disk Drill is a program that is regularly updated, along with data recovery algorithms in general. But, the factors listed below impact scan times no matter what program or device you are using. It’s advisable to keep all these points in mind, to increase scan speeds and make your data recovery experience smoother.
Factors that affect the speed of Disk Drill’s data recovery scans:
- 🔌 Type of Connection: The connection interface is of substantial importance when it comes to the speed of a data recovery scan, since different connections support different read and write speeds. For example, a storage drive connected using SATA III or USB 3.0 will take less time to scan when compared to a device with the same storage capacity, connected using SATA II or USB 2.0.
- 🗃️ Storage Capacity: Naturally, larger drives take more time to scan, because there are more sectors to scan and larger amounts of recoverable data.
- 💽 Disk Corruption: If the drive is corrupted, there may be frequent interruptions and slowdowns in the data recovery scan. While Disk Drill can resume the scan after such interruptions, it’s recommended that you use the Byte-to-byte backup feature of the program to create and scan the disk image of the affected drive. This will ensure there are no interruptions, while preventing further damage to the drive. Additionally, bad sectors on your disk drive can potentially cause unexpected delays in the scanning process.
- 📈 Number of File Systems: File Systems influence the scan time for Disk Drill. Specifically, the greater the number of file systems used on the hard drive the more the time taken to scan the drive for recoverable data.
- 🧩 Disk Fragmentation: If it has been a long time since you defragmented your hard drive, your data recovery scan may be slower than usual. A highly fragmented disk drive has slower read/write speeds and may also heat up more than usual.
What to Do If Disk Drill Takes a Long Time to Scan?
Disk Drill scan speeds will usually fall into the time frames listed in the Scan Times table, provided the factors that affect scan speeds are in check. But, if you still observe that the Disk Drill scan time is substantially more than the numbers listed in our Scan Times table, you can use the tips listed below to save more time, when recovering your data:
- Use Original Adapters and Readers: The quality of your card readers and adapters affect the performance of your storage device. Thus, ensure that you use original or high-quality adapters and readers for better performance, which will translate into faster scan times.
- Faster Connection Ports: If your storage drive supports faster ports, like USB 3.0 and SATA III, always use those connectors instead of older, slower iterations of the ports.
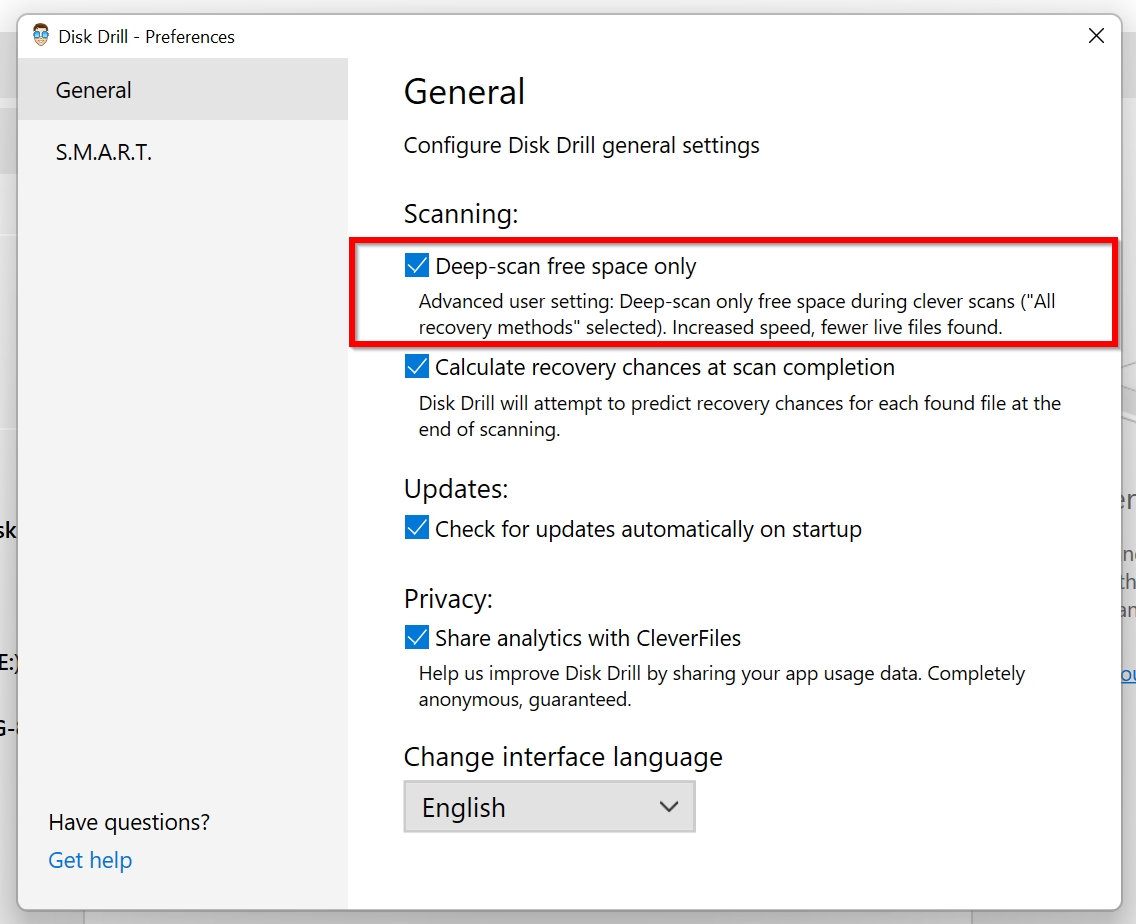
- Deep Scan Only Free Space: Disk Drill has a feature that enables the program to only Deep Scan the free space on your storage drive. When your files are deleted, the storage location or sectors of the files are marked as empty, but the files are still available until they’re overwritten. Thus, it makes sense to Deep-scan this free space to retrieve these files, instead of deep scanning the occupied sectors of the drive as well. To check if the feature is enabled, go to Disk Drill’s Preferences and see if the option is enabled:
- Choose an Appropriate Scan Type: By default, Disk Drill will use all scan types to find recoverable data as it finds the most amount of recoverable data. However, you can select options such as Quick Scan, if the data you’re looking for was only recently deleted and there’s no additional damage to your drive. A detailed explanation of each scan type, and how it works, is available on Disk Drill’s scanning FAQs page.
- Preview Files Before the Scan Is Over: Disk Drill has a nifty feature that allows you to preview files while the scan is underway. Simply click on Review found items during the scan process to view the discovered files until that point. Check if you can preview them. If the relevant files are listed and previewable, simply pause the scan and recover them. You don’t need to wait for the entire scan to be over.