Reading Time: 11 minutesIf you noticed strange behavior on your hard drive and suspect corruption, you face a serious problem. You must recover your data as soon as possible, while the files remain accessible and not completely lost. But how do you do it without causing more damage to the disk?
In this article, we will explain everything clearly – how to recover data from a corrupted hard drive, whether internal or external, and provide several fixes to get your disk back to normal.
How to Recover Data From a Corrupted Hard Drive
When a hard drive gets corrupted, it stops working the way it should – you can’t open it or reach any of your files. But the data is still there. You need the right tools and methods to get it back.
Below, we will outline two recovery methods. The first is a DIY option if you’re confident and want to attempt recovery on your own. The second is a safer, hands-off alternative if you’d rather let the professionals handle it.
Method #1: Perform a DIY Data Recovery From a Corrupted Hard Drive
If you’re tackling recovery yourself, you should select software with a powerful signature-scan mode. When a file system is seriously corrupted, some tools can’t even see what’s left. A solid signature scan digs through the raw data to spot file patterns – without it, you might come up empty-handed. Before you start the recovery process, open Disk Management and check that Windows recognizes your corrupted drive and displays the correct size. If it doesn’t show up properly or the capacity looks wrong, skip this method and move on to the next one.
Disk Drill is perfect for this task. It utilizes a signature scan mode that searches for data based on known file patterns, allowing it to identify approximately 400 file types, from documents and photos to videos and more. With Disk Drill, you’ll get top-notch recovery rates and a clean, user-friendly interface. Among its useful features is the byte-by-byte backup, which clones your drive exactly, allowing you to scan the copy instead of the original. That way, you can retry as many times as you need without ever risking the original data.
If you scan the original drive directly, the recovery tool has to read every sector, which can put extra stress on a disk that might already have bad sectors, and that raises the risk of a complete failure. Cloning a backup first lets you recover your data safely without wearing out or risking the original drive.
- Download Disk Drill and install it on a different disk, not the one you plan to recover. Use an external USB drive or another internal disk with enough space.
- Launch Disk Drill. From the left-hand menu, select Byte-to-byte Backup.
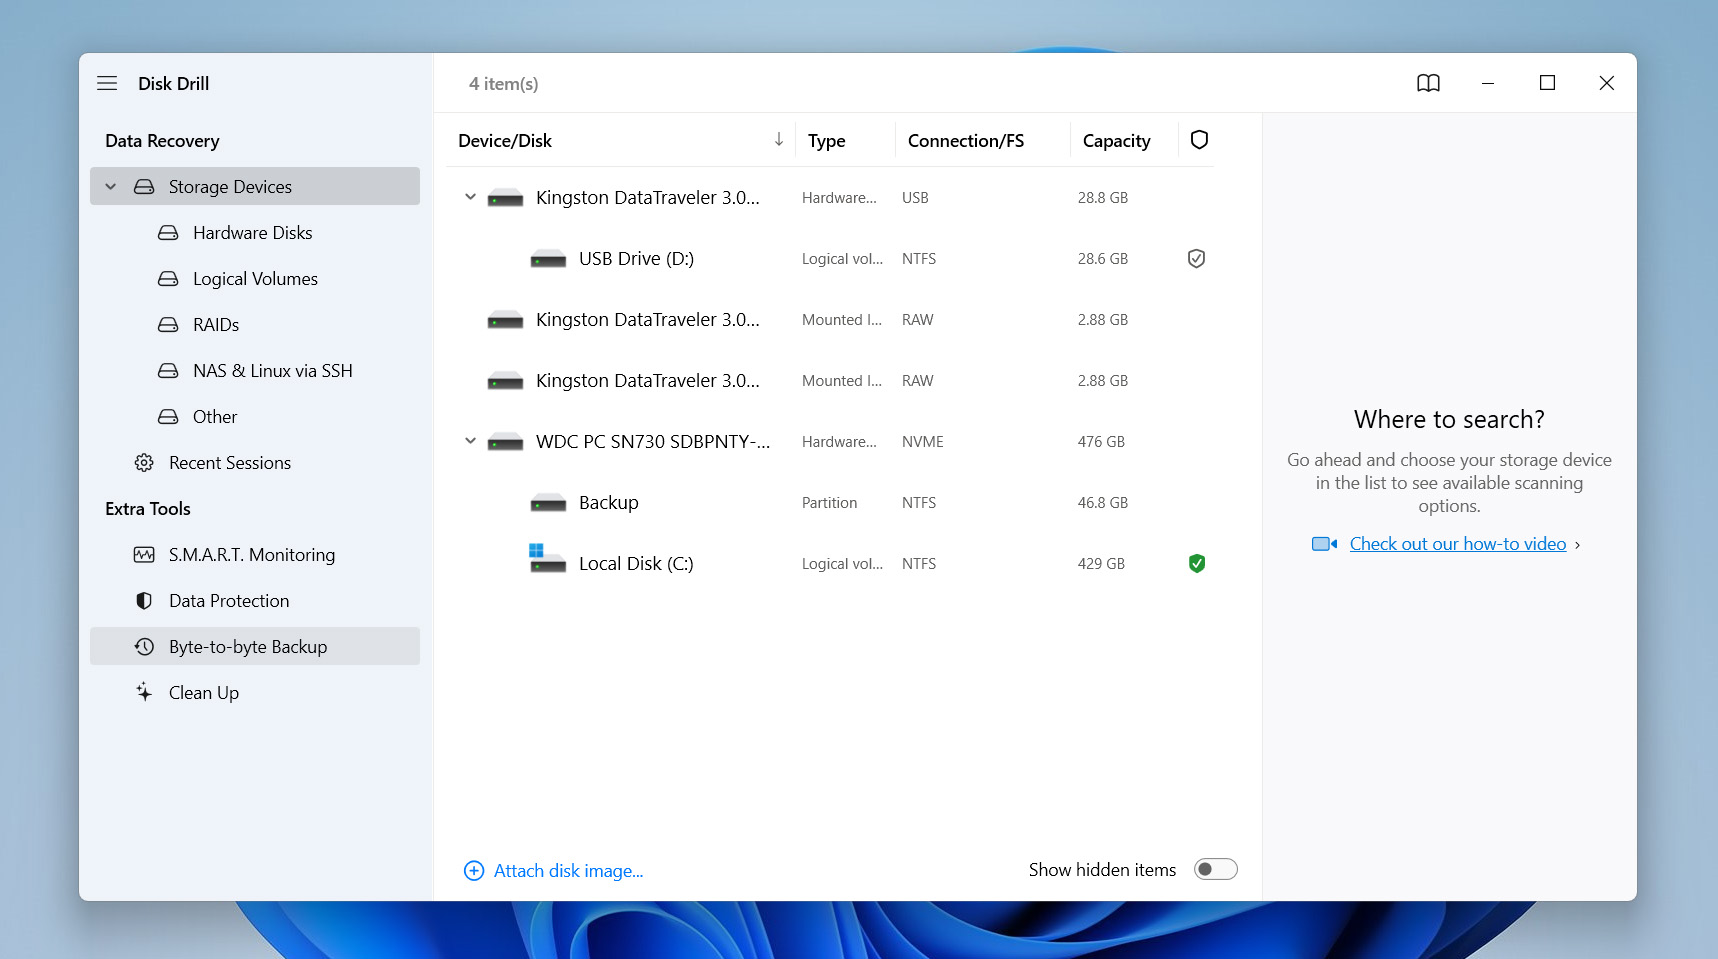
- Find your corrupted hard drive in the list. Click the Byte-to-Byte Backup button to begin the process.
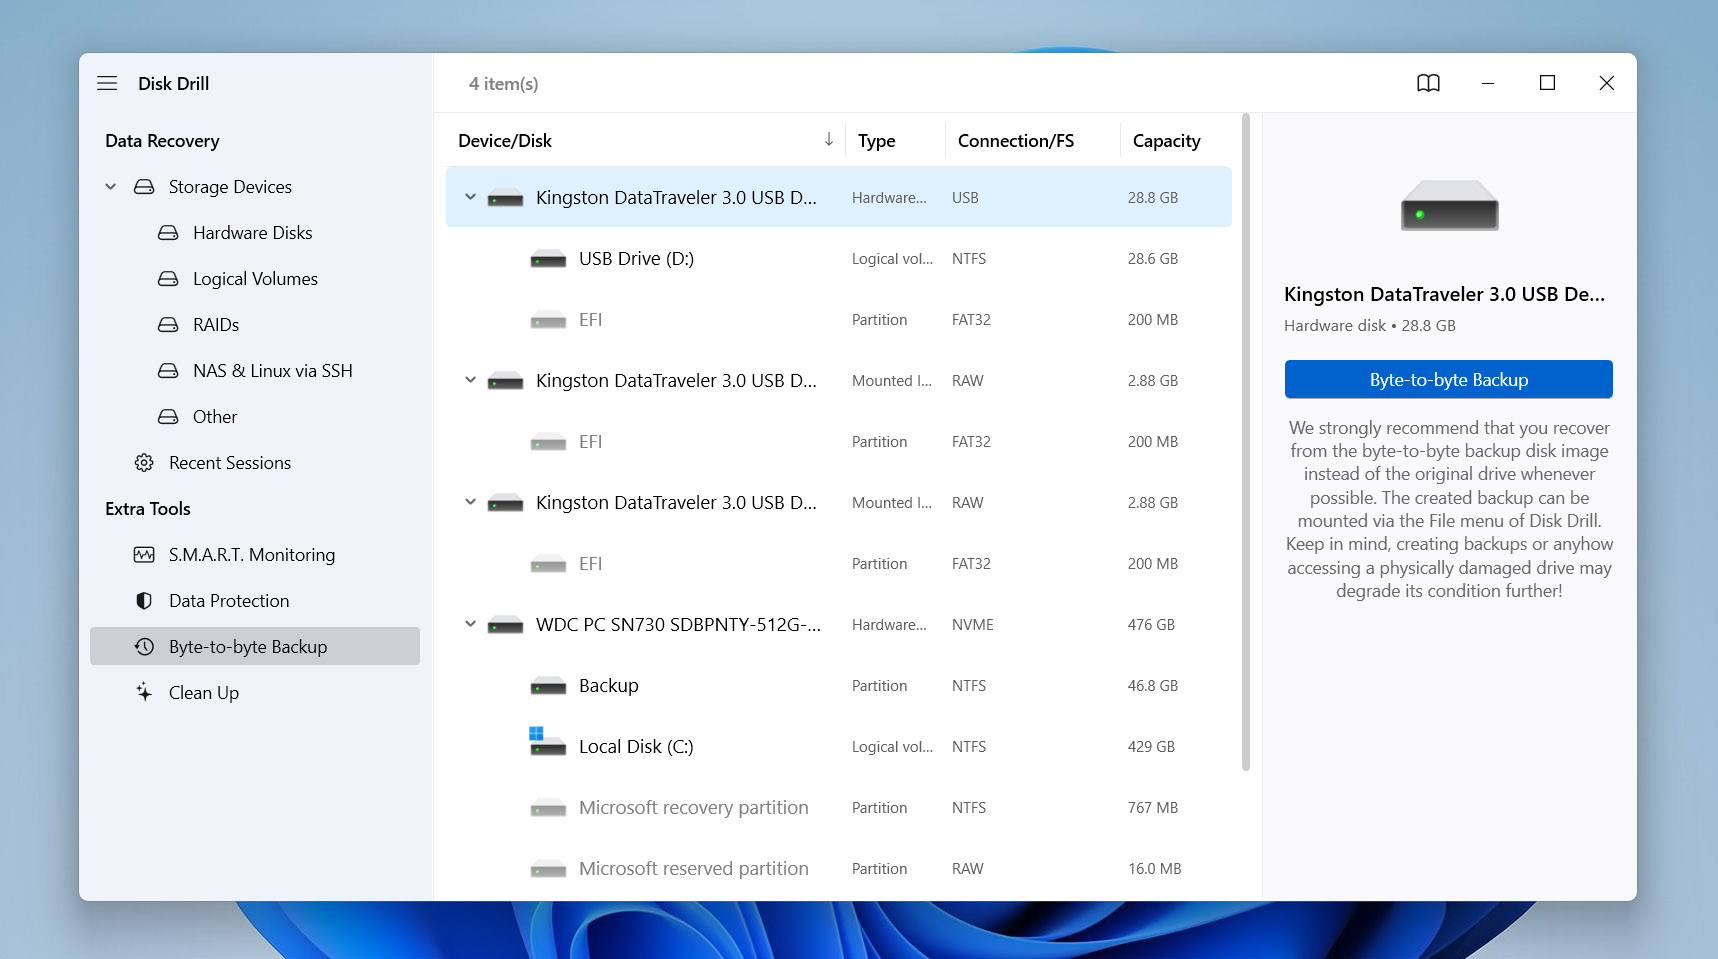
- When the settings window appears, choose a location to save the backup. You have to select a different drive from the damaged one and confirm that it has sufficient free space. Click OK to start.
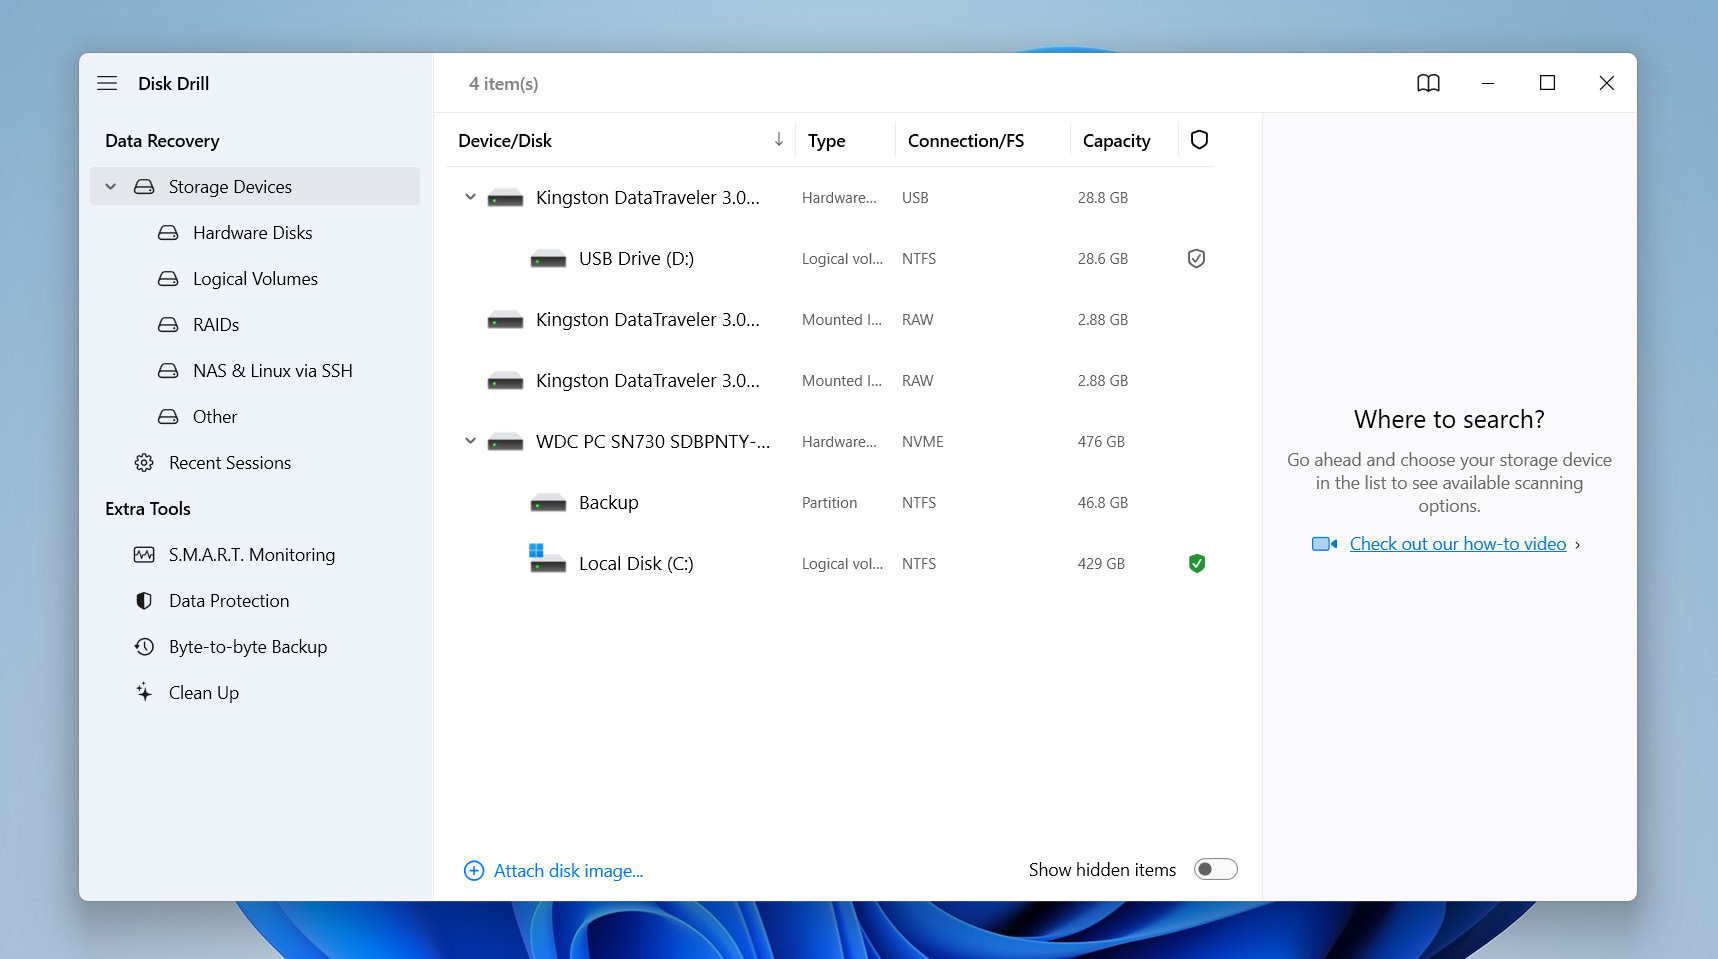
- Wait for the backup to complete. The time depends on the drive’s size. Once it finishes, Disk Drill will show a confirmation message. Click the home icon to return to the main screen. Then go to the Storage Devices section to begin recovery.
- At the bottom-left corner, click Attach disk image. Select the backup file you created earlier. Disk Drill will add it to the list of available devices.
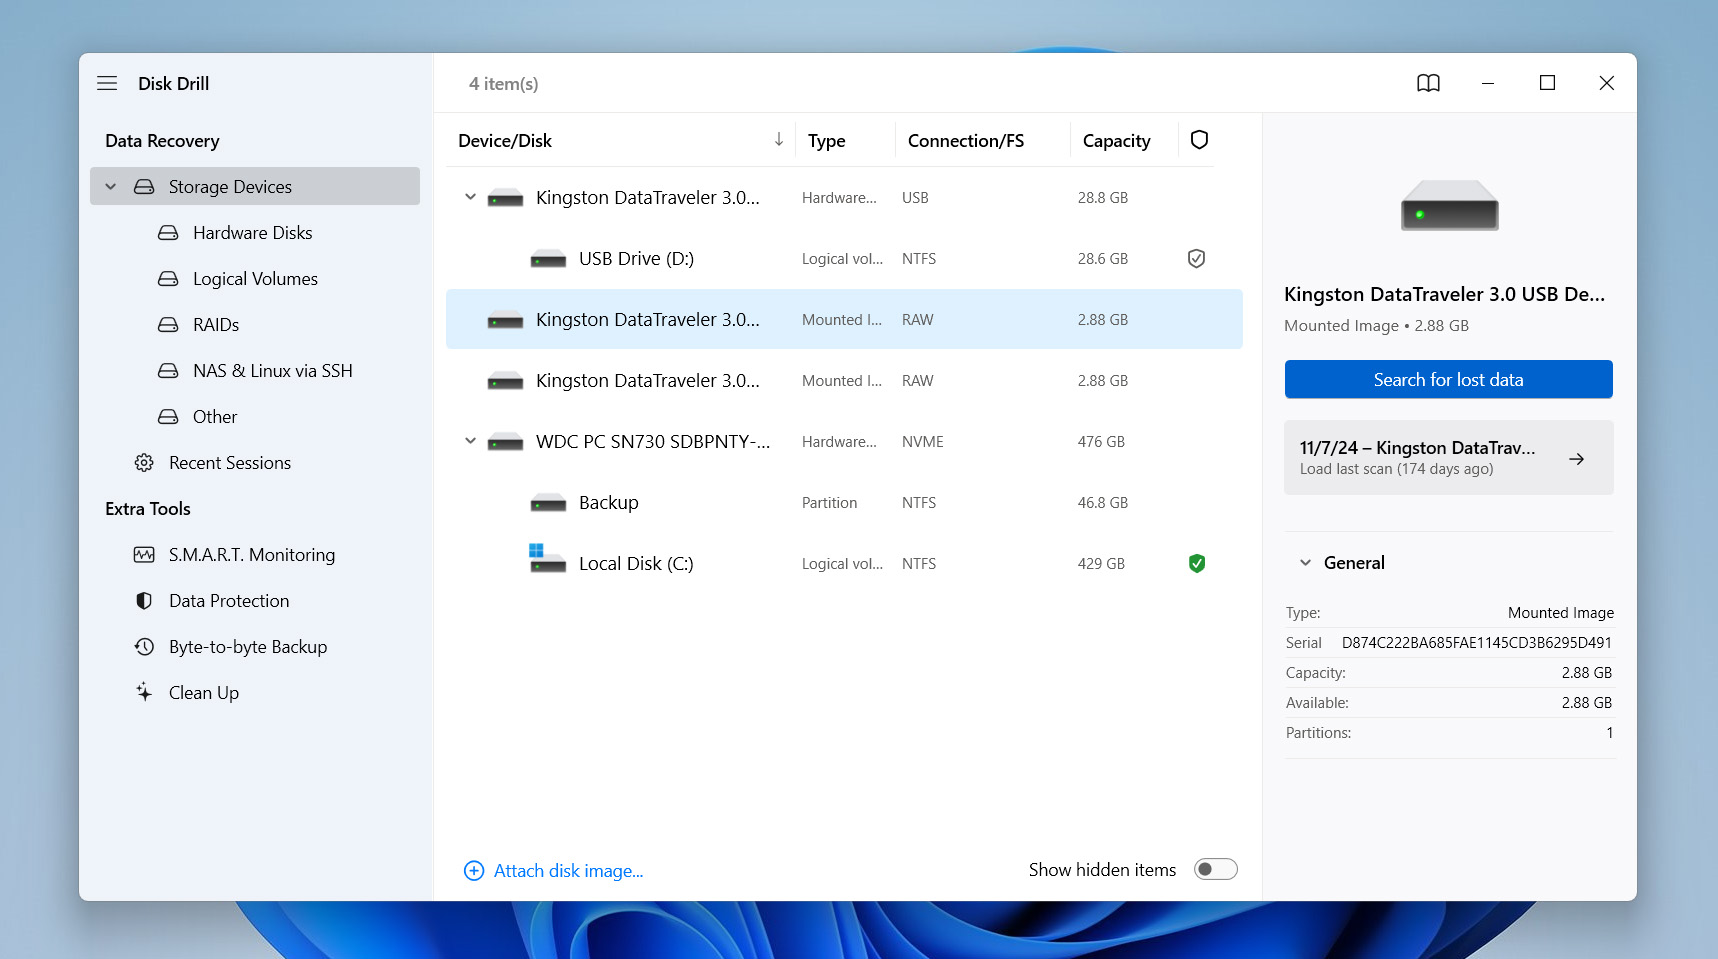
- Choose the disk image and click Search for lost data.
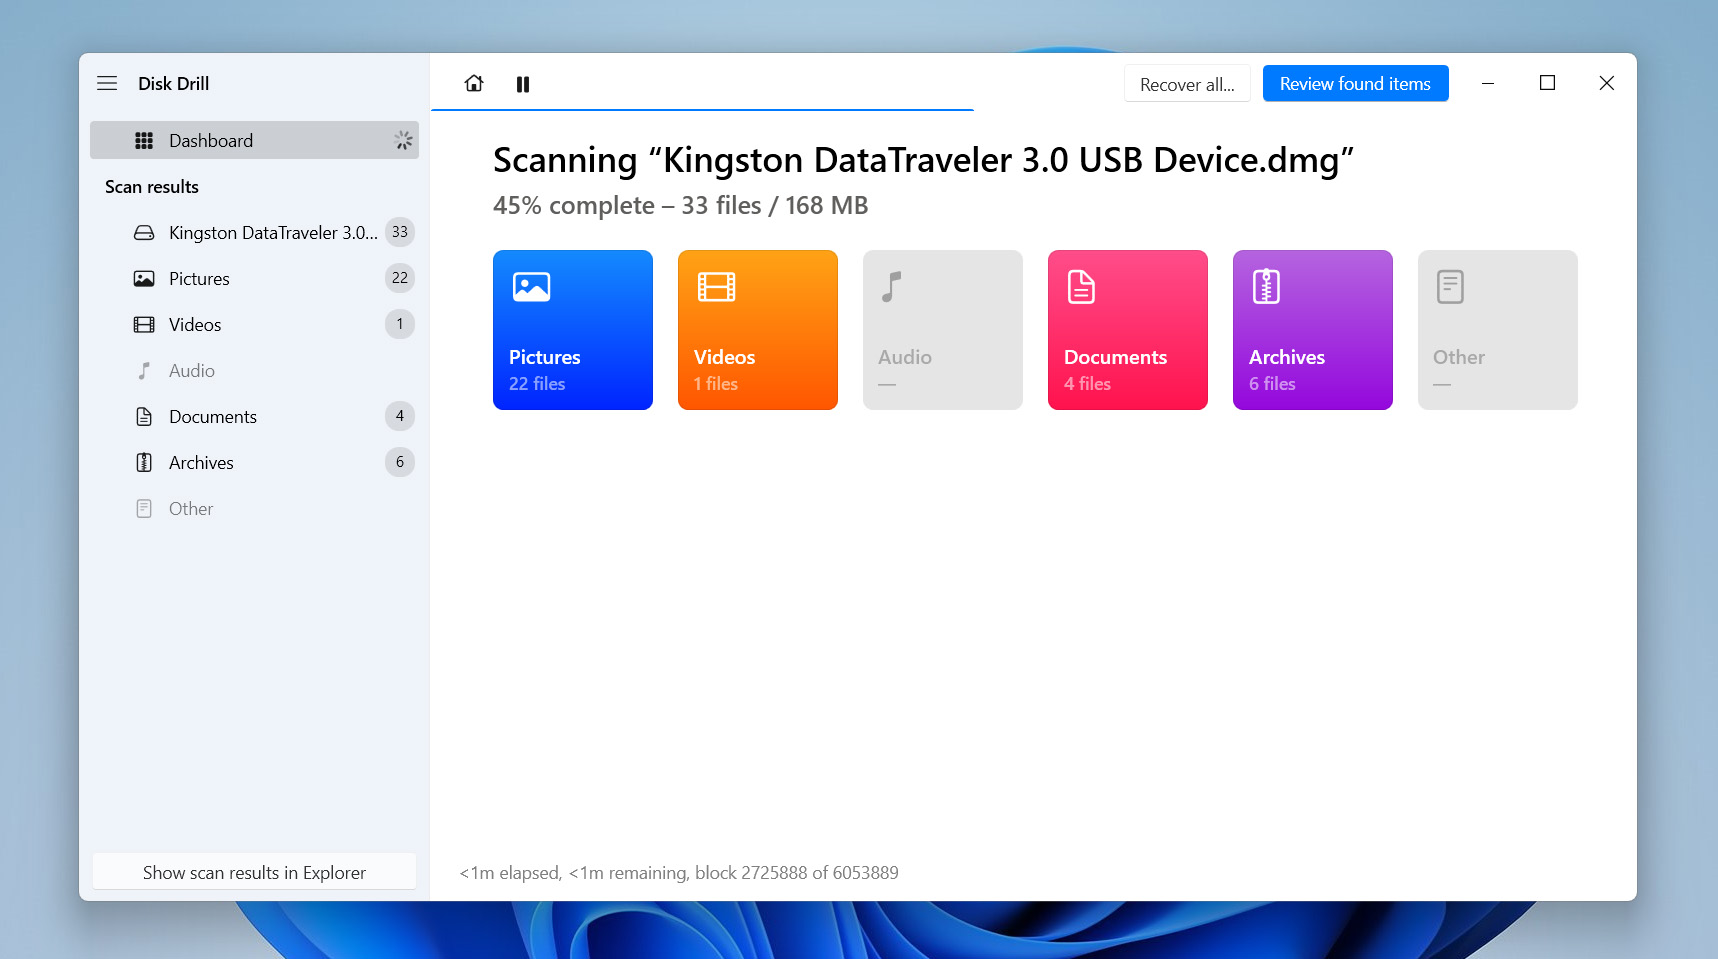
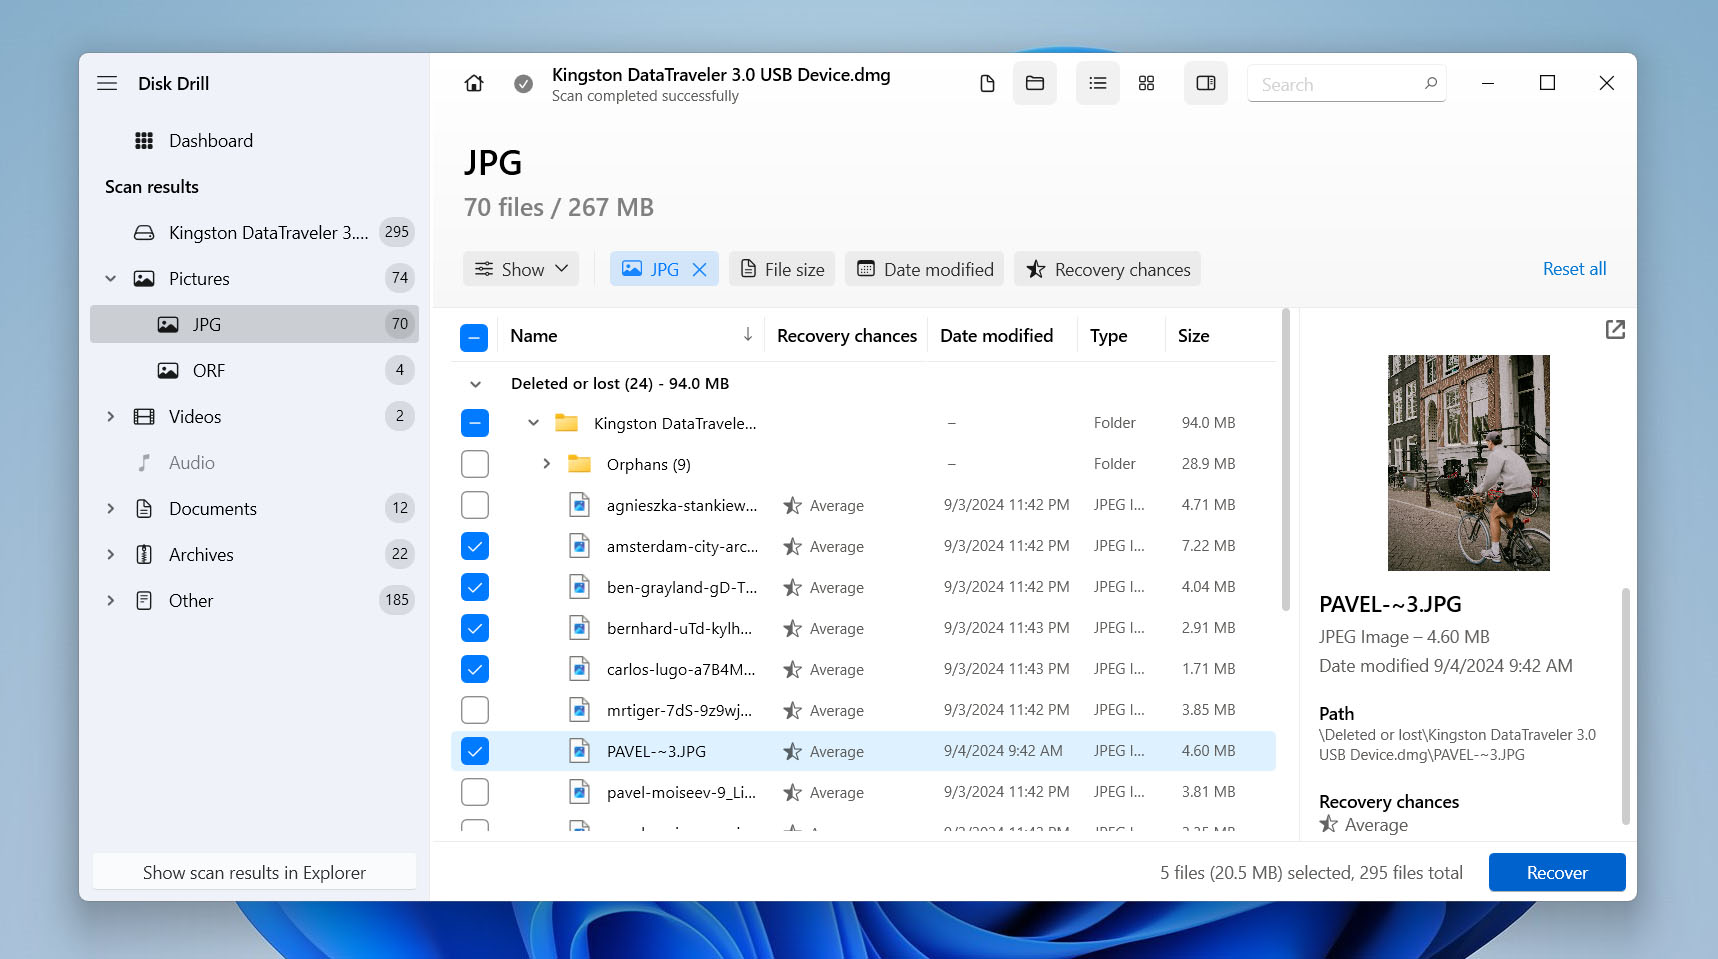
- Disk Drill will scan the image. Although you can start recovering files while it scans, we recommend waiting for the scan to finish. When done, Disk Drill will mark each file with a recovery chance – high, average, or low.
- Use the filter options to narrow the results. Select file types, such as pictures, videos, or documents, or use extensions like JPG, MP4, or DOC to find exactly what you need.
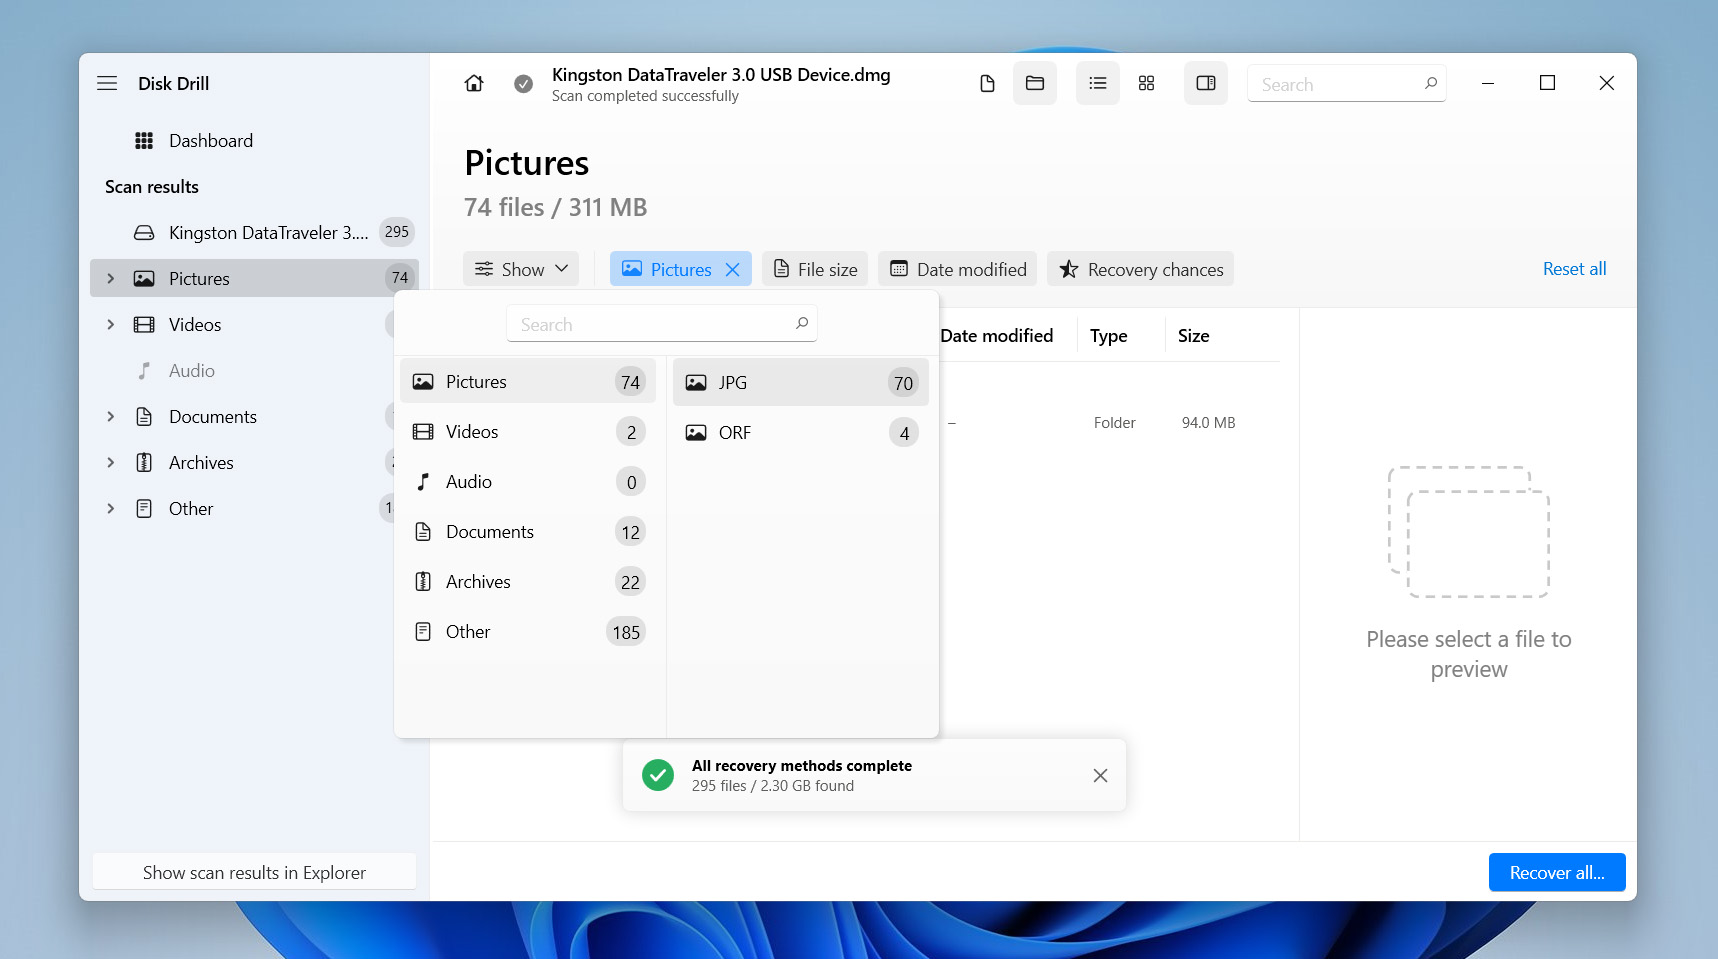
- Review the list of files. Check the boxes next to the ones you want to recover. When ready, click the Recover button.
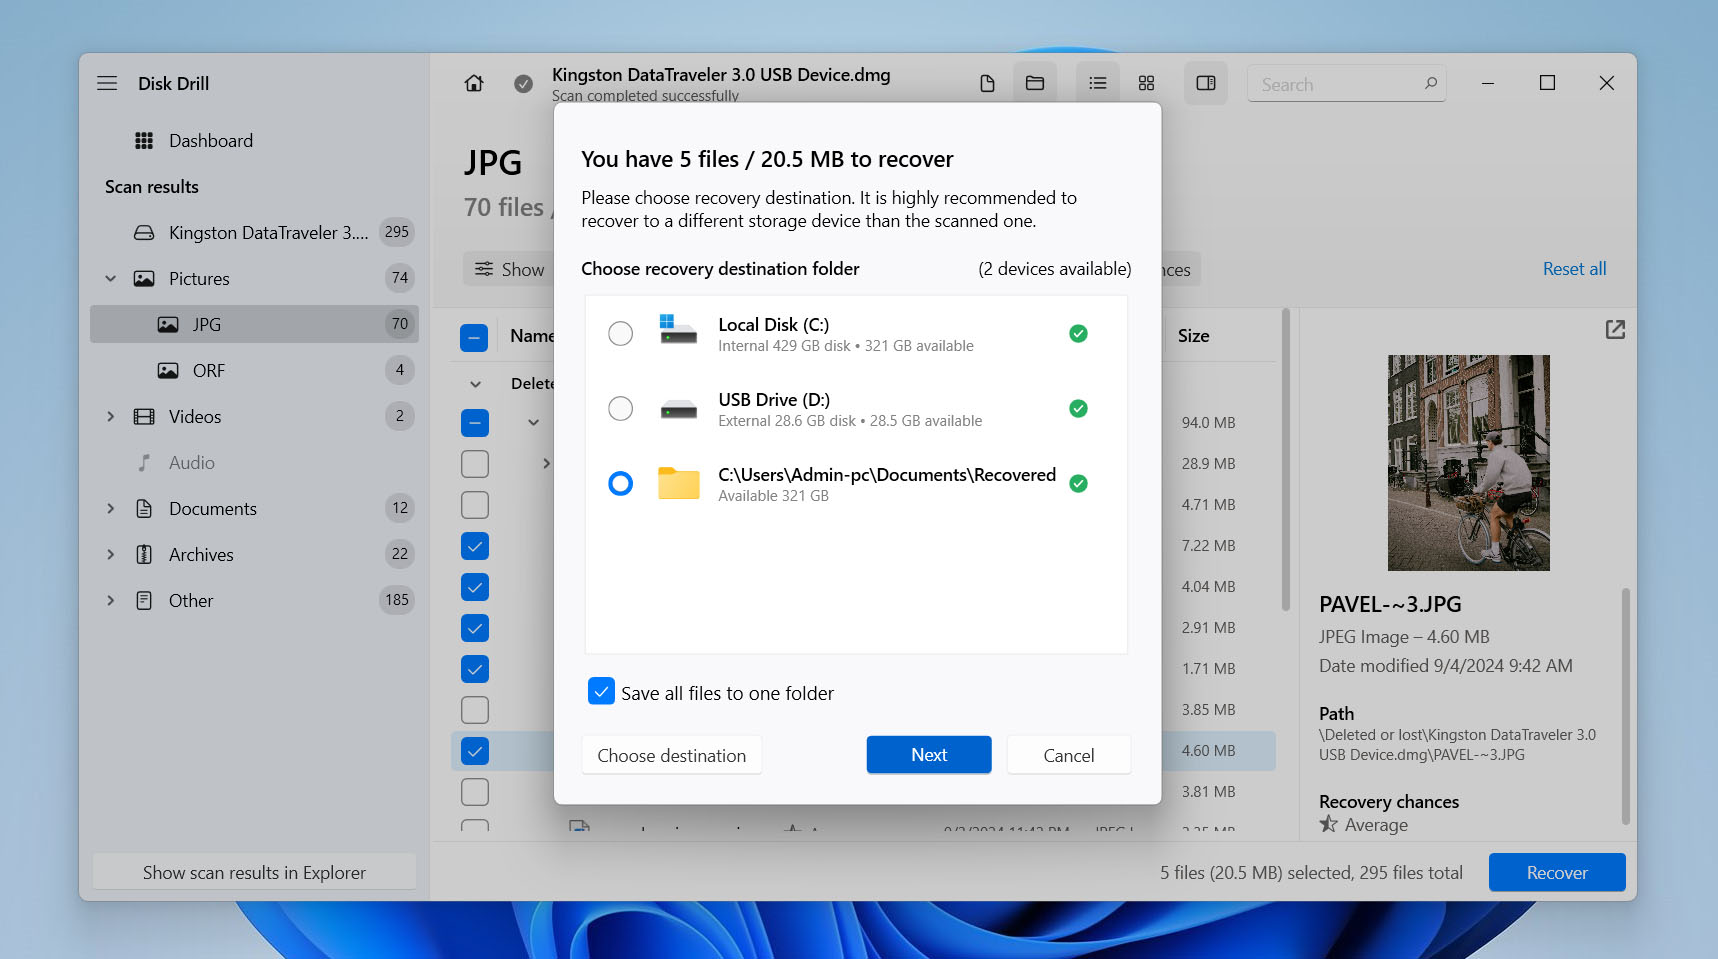
- A pop-up window will appear. Choose a location to save your recovered files. Disk Drill will show a green check mark next to safe drives. Select one and click Next.
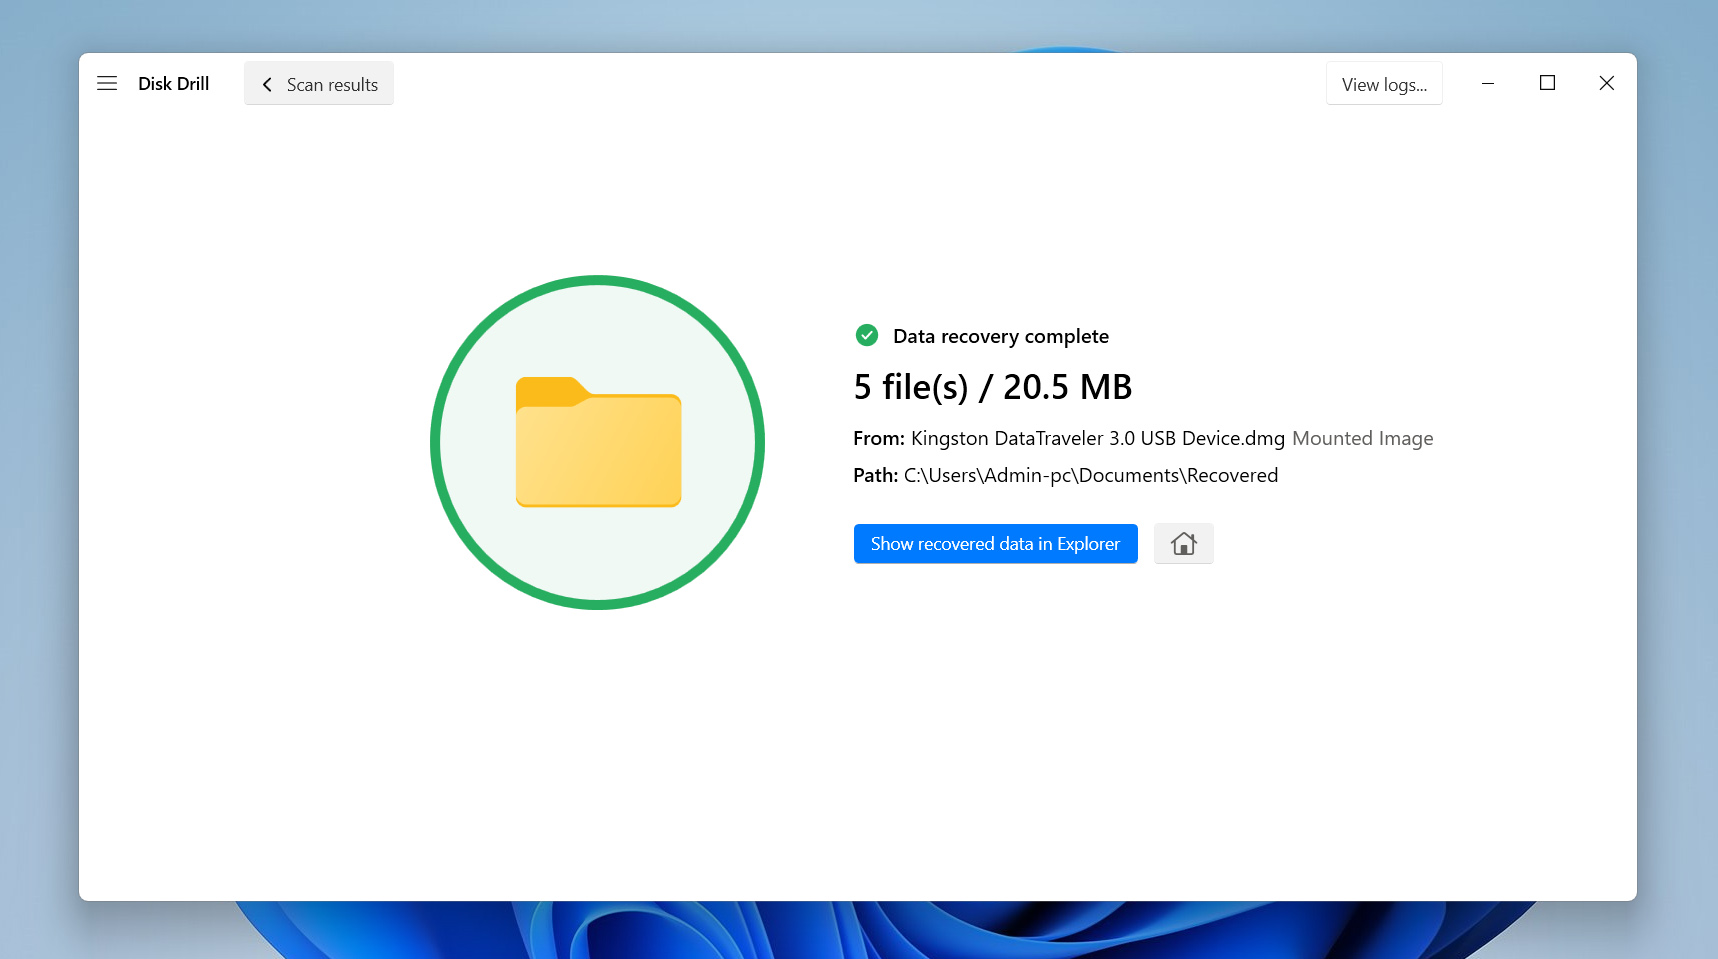
- Disk Drill will recover your selected files. Once done, it will show a summary of the recovered data. You can click Show recovered data in Explorer to open the folder or close the program and view the files later.


Disk Drill allows you to create a byte-by-byte backup, scan it, and recover up to 500 MB of data at no cost. This limit may be enough for some users. If your files exceed it, you will need to upgrade to the Pro version to continue.
Method #2: Contact a Professional Data Recovery Service
In certain situations, it is advisable to contact a professional data recovery center to maximize your chances of success. These cases include situations where you do not feel confident enough to begin the recovery process yourself, when a hard drive shows signs of physical damage, when severe corruption affects critical data, or when the drive does not appear in Disk Management at all.
A professional service, such as the Cleverfiles Data Recovery Center, has the tools required to work with failed hard drives. These specialists recover data in controlled environments and rely on experience gained from handling various failure scenarios.
If you do not know which service to choose, use the following tips:
- Search for recovery services near your location. This reduces delivery time and minimizes the risk of additional damage during transport. If nothing trustworthy appears nearby, expand your search, but prioritize quality over distance.
- Always check reviews from past clients. Look across different platforms to spot patterns in feedback. Avoid trusting any service with only perfect five-star reviews, as they may have paid for them or manipulated them.
- Read the service terms carefully. Prefer companies that offer a free initial consultation. This step allows them to assess the corruption and estimate the likelihood of recovery before you commit to anything.
- Look for a “no data, no fee” policy. This protects you from paying for unsuccessful results. You only pay when they recover your data.
- Ask about the return method. Some services send the recovered files digitally, while others provide them on a new hard drive or return them to the original, repaired device.
How to Fix a Corrupted Hard Drive on Windows
If the corruption on your hard drive comes from logical errors, you can often repair it and restore the drive to a working state. However, some repair actions may cause data loss.
Never attempt to repair a corrupted hard drive before trying to recover your data. Always prioritize recovery to prevent permanent file loss. Once you have saved everything important, you can proceed to repair solutions that help restore the disk’s structure.
Method #1: Check Your Disk for Errors with Windows Tools
If your hard drive shows signs of corruption, slow performance, or unreadable files, it may be suffering from logical errors. These include bad sectors, file system inconsistencies, or cross-linked files. Windows provides a built-in utility called CHKDSK (Check Disk), which scans your drive for such issues and attempts to fix them.
However, if your drive already contains damaged sectors or unstable data, CHKDSK may worsen the problem by modifying the drive during the repair process. In some cases, it removes unreadable or corrupted files, which leads to permanent data loss.
- Press Win + S to open the search bar. Type cmd into the search box.
- Right-click Command Prompt from the results, then select Run as administrator.
- In the terminal window, type the following command: chkdsk C: /x /r. Replace C: with the letter of the drive you want to scan. The /x switch forces Windows to dismount the drive before scanning, the /r switch tells CHKDSK to find bad sectors and recover readable data. Press Enter to run the command.
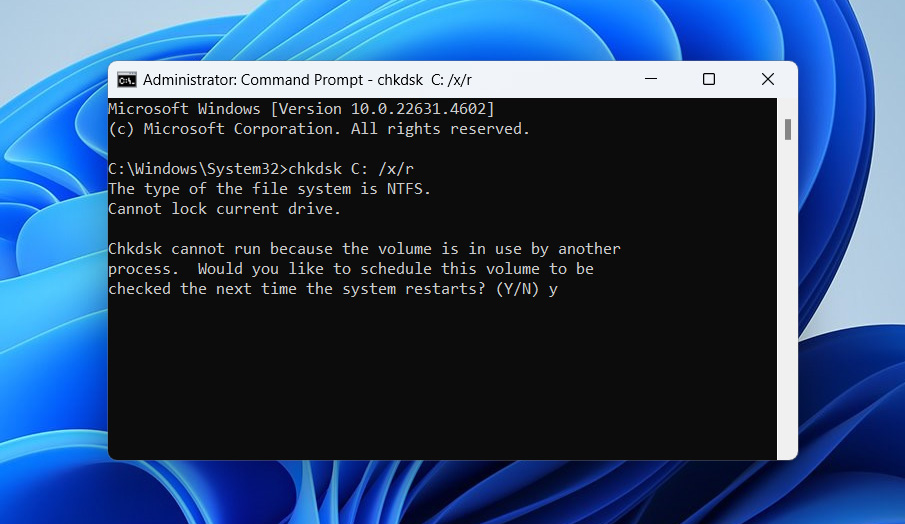
- If Windows asks you to schedule the scan for the next restart, type Y and press Enter. Wait for the scan to complete. The tool will display a report of what it found and whether it fixed any problems.

- If you have more than one partition, repeat the process for each drive letter separately.


Method #2: Check the Hard Drive for Errors Using a More Advanced Method
If you want to fix a corrupted hard drive and basic tools like CHKDSK fail to help, try third-party software explicitly designed for advanced hard drive analysis. Programs like this scan the disk at a low level, identify bad sectors, and sometimes repair them directly. In comparison, Windows Check Disk offers only limited capabilities.
One of the most popular tools for this task is Victoria. This free utility detects mechanical and logical issues, checks S.M.A.R.T. parameters, and runs surface-level repair processes. Victoria works with internal and external HDDs and SSDs, although repair functions primarily apply to hard disk drives.
- Download Victoria from the official site or a trusted source.
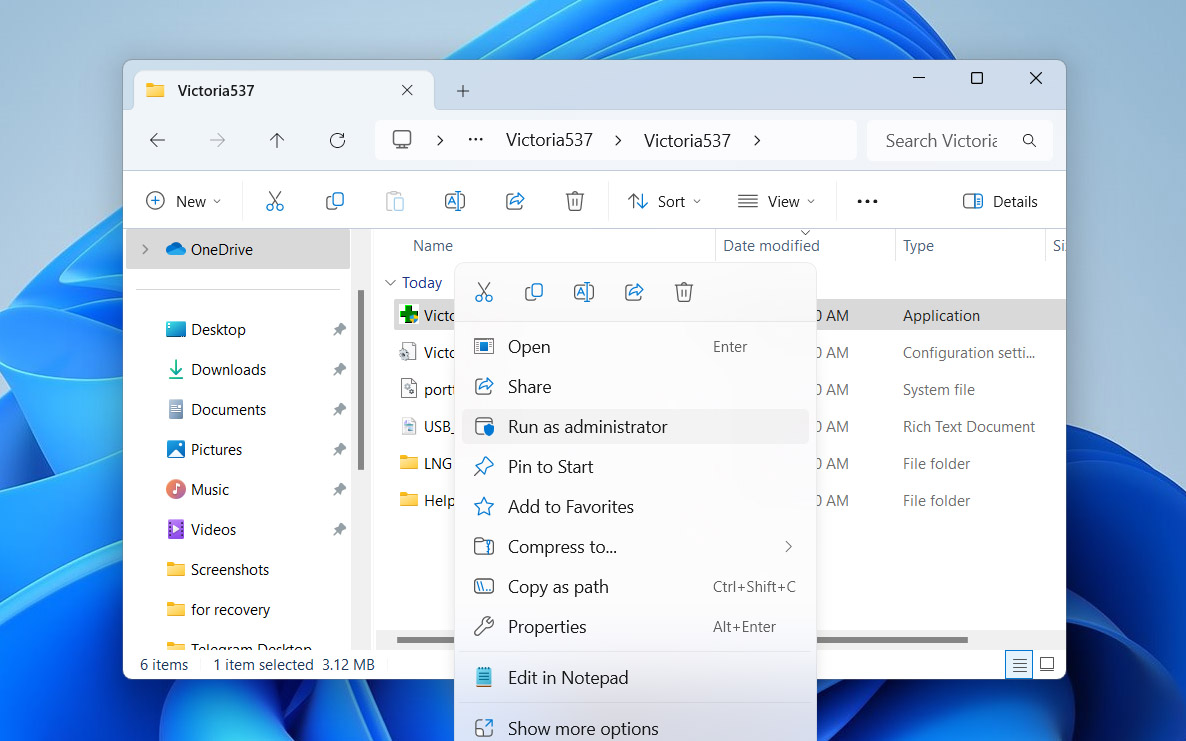
- Extract the files and run Victoria.exe. Make sure to right-click and choose Run as administrator.
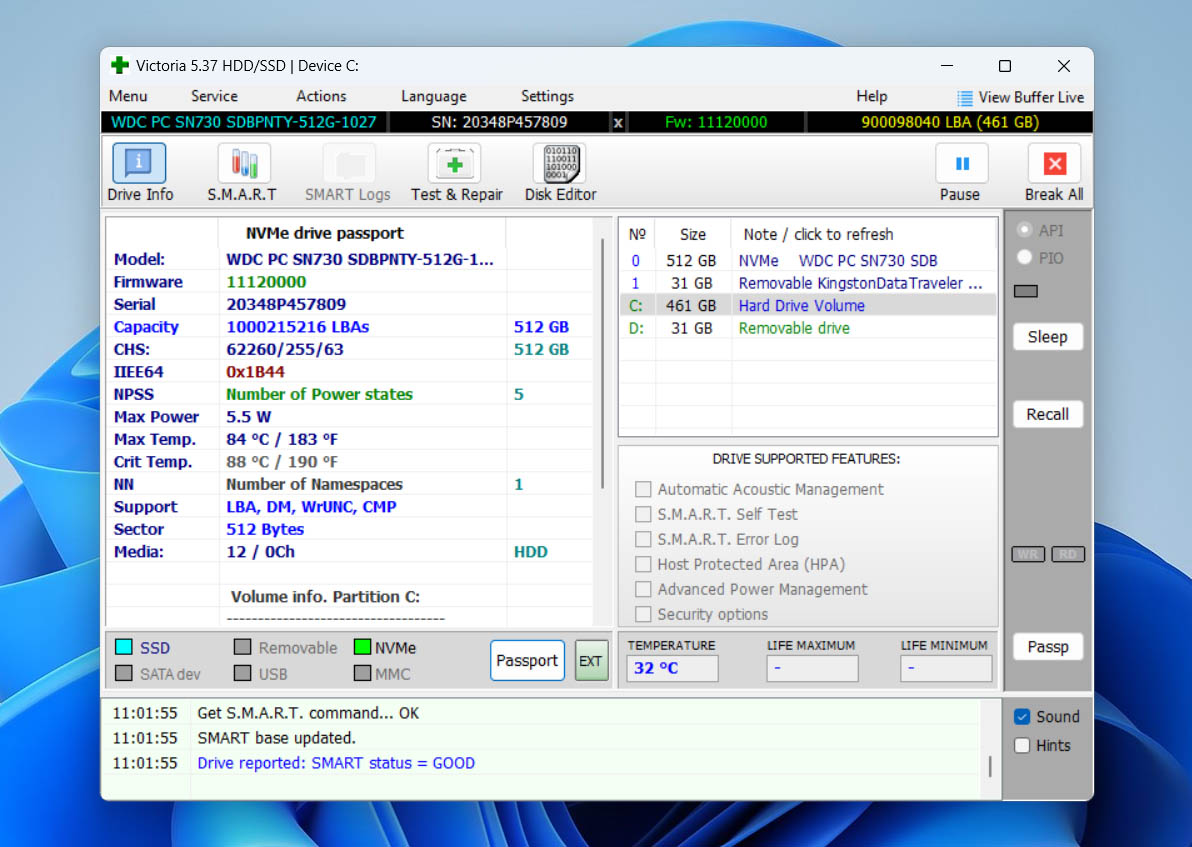
- In the menu on the top right, pick your corrupted hard drive. You should see the drive details like model number and capacity show up.
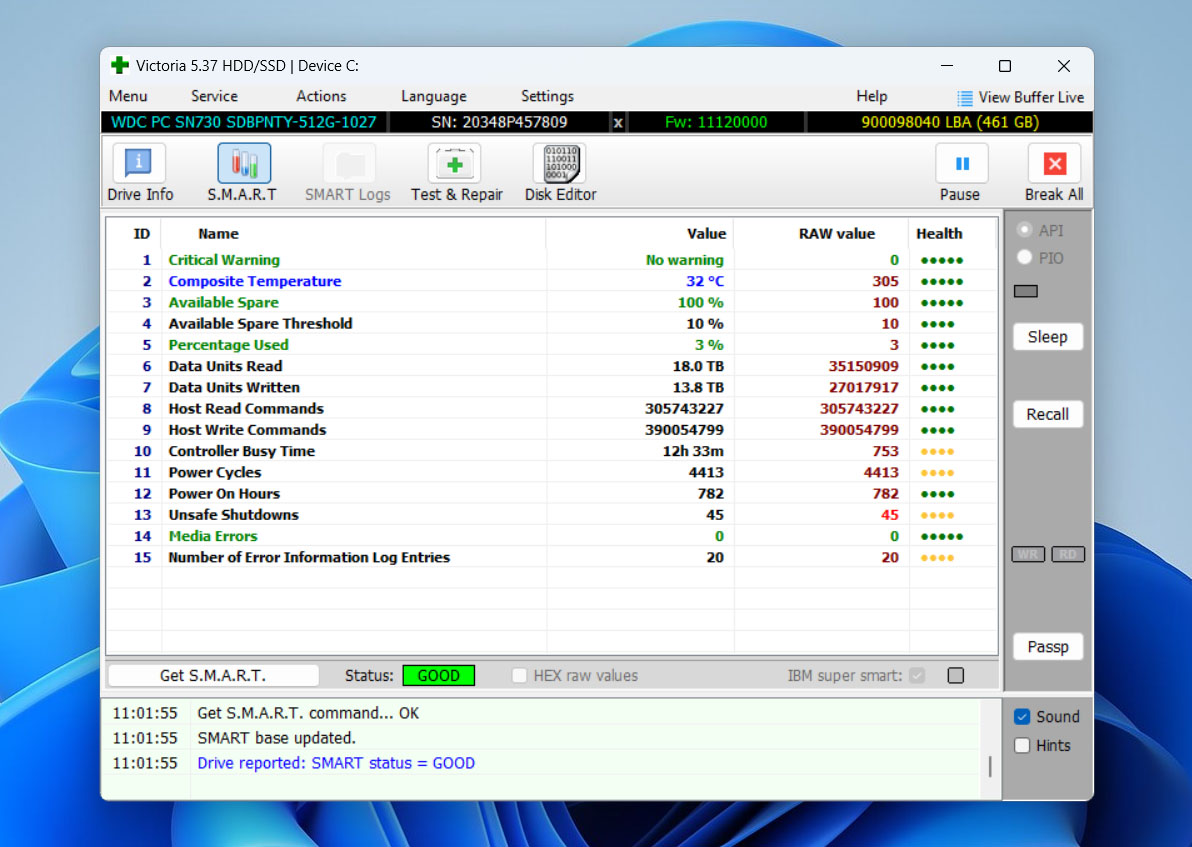
- Click S.M.A.R.T. Look through the health stats, especially Reallocated Sectors Count, Current Pending Sector Count, and Uncorrectable Sector Count. High numbers here may point to serious or growing surface issues.
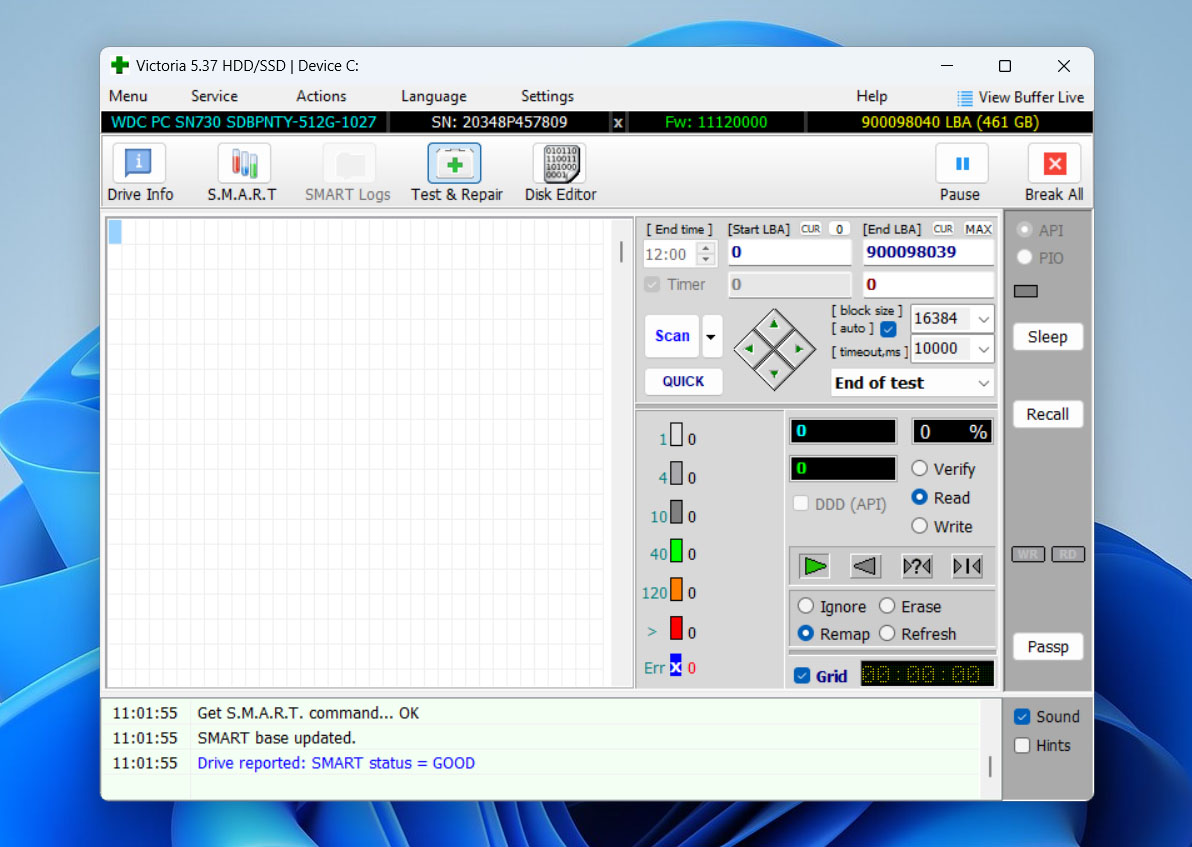
- Switch to the Tests tab – this is where you’ll check for surface problems and try to fix them.
- Under Test mode, choose one of the following: Ignore – runs a read-only scan, Remap – tells the drive to replace bad sectors with spares (works on HDDs), Erase – overwrites sectors to reallocate them (this will wipe your data, use only if you mean to). Click Scan in the bottom right to begin the scan.
- You’ll see a real-time color map showing sector read speeds: green = good, yellow/orange = slow, red/brown = damaged or unreadable. Let the scan run – it may take a while depending on the drive’s size and condition. If you choose Remap, Victoria will try to fix any bad sectors it detects.
- If Victoria detects too many bad sectors or is unable to complete the repair process, stop using the disk immediately. In such cases, repair may require a professional service or a hard drive replacement.


Method #3: Run an Antivirus Program
In some cases, hard drive corruption may result from viruses or malicious scripts. These threats often come from unreliable websites, suspicious email attachments, pirated software, or bundled installers. Malware can damage file structures, hide data, or block access to entire partitions.
To check for and remove such threats, you can use Windows’ built-in antivirus software included with modern versions of Windows. It detects and eliminates common threats and runs with system-level access.
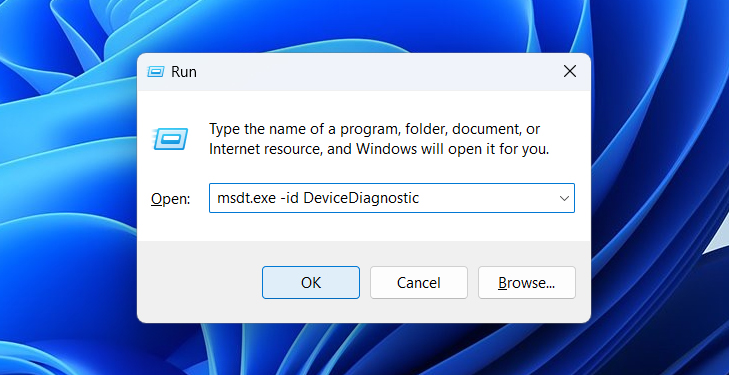
- Press Win + R to open the Run dialog box. Type the following command: msdt.exe -id DeviceDiagnostic and press Enter.
- The Hardware and Devices Troubleshooter window will appear. Click Next to let Windows scan for common issues.
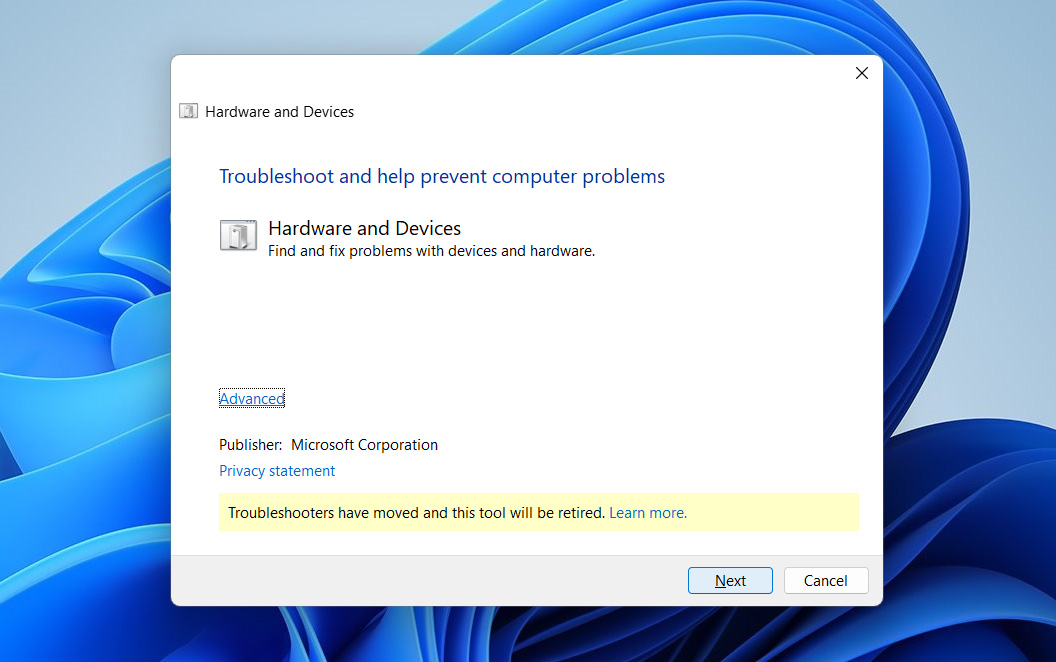
- Follow the prompts. Windows will check for hardware errors, driver conflicts, and problems possibly caused by malicious activity.


If you already trust and use a third-party antivirus solution, feel free to run a full scan with it instead. Most reputable antivirus programs provide strong protection and often detect issues that built-in tools might miss.
Method #4: Reformat Your Corrupted Hard Drive
If none of the previous methods help, or if the file system structure on your hard drive is too damaged to repair, you should reformat the drive. This process deletes all data, removes the corrupted file system, and replaces it with a clean, working one. Once completed, the disk becomes usable again, and you can store new files on it without issues.
There are several ways to format a hard drive in Windows. The methods vary by interface, but they all produce the same result. To keep things simple, we will show the easiest way, using File Explorer.
- Press Win + E to open File Explorer, then click This PC on the left sidebar.
- Find the drive you want to format under Devices and drives, right-click it, and choose Format… from the menu.

- In the format window, set the File System to NTFS (best for most Windows users). Leave Allocation unit size on Default. Add a Volume label if you want to name the drive.
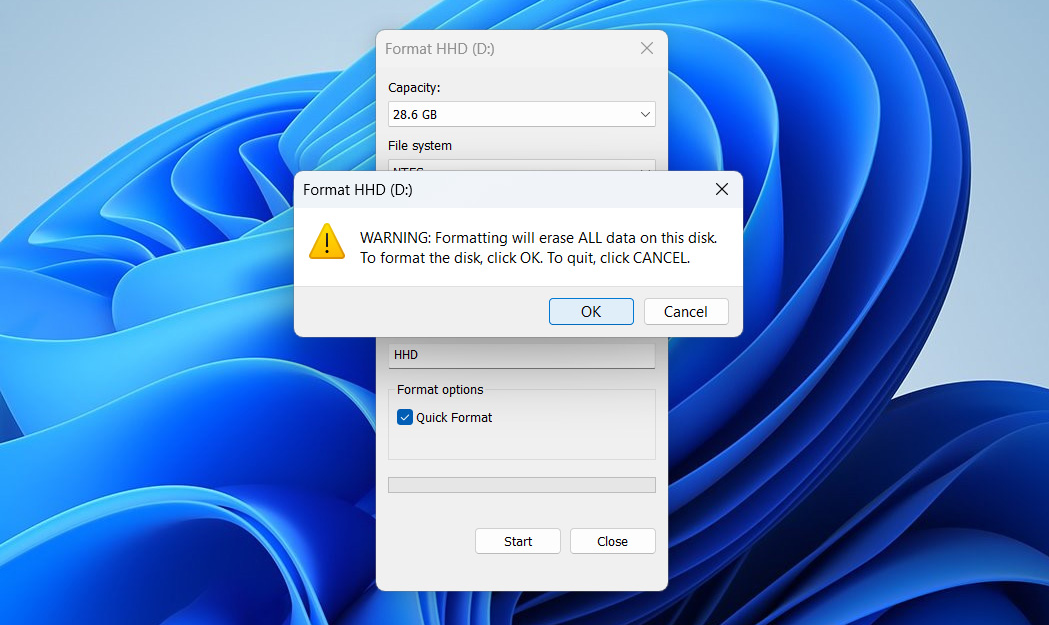
- Confirm that Quick Format is checked unless you want a thorough clean, which takes longer. Click Start to begin.

- You’ll get a warning that all data will be erased – click OK to confirm.
- Wait for it to finish. Once it’s done, Windows will let you know the drive is ready to go.


Can You Notice Hard Drive Corruption Prematurely?
When a hard drive begins to fail, you will typically notice several changes in its behavior. These issues appear at both the user interface level and within the file structure. If you have already experienced data loss, chances are you overlooked earlier signs of corruption.
Below is a list of the most common symptoms. So if you recognize them early, next time you’ll know to act fast – before your hard drive completely fails:
- 📂 Files or entire folders randomly disappear, and sometimes they only return after a reboot. If saving, opening, or accessing files is hit-or-miss, your file system may already be malfunctioning.
- 🔎 At startup, you get scary errors like ‘Boot device not found,’ ‘ Operating system missing,’ or ‘Hard drive failure detected.’ Those aren’t harmless pop-ups – they’re red flags.
- 💿 If you’re trying to open your drive in File Explorer but are told you don’t have permission, the drive’s unavailable, or you need to format it first, that means Windows can’t read the file system properly.
- 📊 Modern drives utilize S.M.A.R.T. to monitor their own health. If Windows or a third-party tool flags a S.M.A.R.T. warning, take it seriously – it’s detected internal errors that could lead to total failure.
- 🐌 Your PC is slow, especially when you open big files or move data around. Long load times and transfer delays often indicate underlying disk issues.
- Blue screens and forced restarts can happen if Windows can’t read critical system files.
- 🔈 On mechanical HDDs, listen for faint clicking or grinding noises. Those sounds usually mean the read/write head or the platter itself is failing.
Conclusion
When you face the issue of a corrupted hard drive, it not only affects your PC’s performance but also puts all your data at risk. If you delay recovery, you may lose everything stored on the drive. That’s why you must first restore your files and then proceed to fix the disk itself.
We recommend trying the DIY recovery method described in this article. Use Disk Drill or a similar alternative if the drive still responds and appears in your system. The steps we provided are detailed enough to guide you through the process, and this method will cost far less than hiring a professional recovery service.
If your hard drive is in critical condition, you may have no choice. You must either accept the data loss and replace the disk or contact a professional recovery center to attempt a complete restoration. This decision depends entirely on your situation – how important the data is, the current state of the disk, and your available resources.
Once you recover the files, you can proceed with a complete fix. In most cases, formatting the drive resolves system-level corruption and gives the disk a fresh start.