
Reading Time: 6 minutesYou defragmented your hard drive to boost your PC’s performance, but now some files are missing? Are you sure these files were deleted as a result of the – and not before? In this article, we will examine whether defragmentation can cause data loss, what defragmentation actually does, and how it works. If you’re curious about any of this, keep reading.
Does a Hard Drive Defragmentation Delete Files?
Defragmentation is a process that tidies up scattered data on your disk. When files become fragmented on a hard drive, they are split into pieces and saved in different parts of the disk. Over time, this slows things down because your system has to work harder to gather all those pieces. Defragmenting reassembles those fragments into a single location, allowing everything to run more smoothly. It doesn’t delete anything – it just rearranges the data to boost performance.
If you notice missing files after defragmenting your hard drive, it doesn’t necessarily mean the process deleted them. They could’ve gone missing before or even after defragmentation. Data loss typically occurs when an interruption, such as a power outage or system crash, interrupts the process while the tool is transferring files. That can lead to file corruption or loss. But under normal conditions, defragmentation simply boosts performance without messing with your files.
How to Recover Files After Hard Drive Defragmentation
Sometimes it’s tough to know if defragging really caused your files to disappear or if something else happened, maybe you deleted them earlier by accident, or didn’t check every folder. To cover all the bases, here are three standalone recovery methods.
If you lost files before running a defrag, your recovery window might be smaller. Defragging shuffles data blocks around, and in the process, it can overwrite the leftover bits that recovery tools and services need. To give yourself the best chance, stop using the drive as soon as you notice files are missing and proceed to one of the recovery methods below.
Method #1: Run Data Recovery Software to Scan the Hard Drive
When you delete something from your hard drive, it doesn’t disappear right away. Windows just marks the space as available and hides the file from view, but the data itself is still on the disk until you overwrite it. To get it back, you’ll need to use a data recovery tool that digs up and rebuilds those hidden bits.
We’ve tried just about every popular Windows recovery software out there, and Disk Drill is hands-down the best. Experts and user reviews consistently put it at the top, thanks to its powerful feature set that handles almost any data-loss scenario. Not sure if defragging wiped out your files? Disk Drill has you covered – it works with every Windows file system and, if it runs into corruption, it automatically switches to a signature scan that ignores the broken structure and finds your data by its unique patterns.
Here is how you can use Disk Drill to recover files:
- Visit the official Cleverfiles website and download Disk Drill.
- Run the setup wizard to install the program, but make sure you put it on a different drive than the one you’re trying to recover.
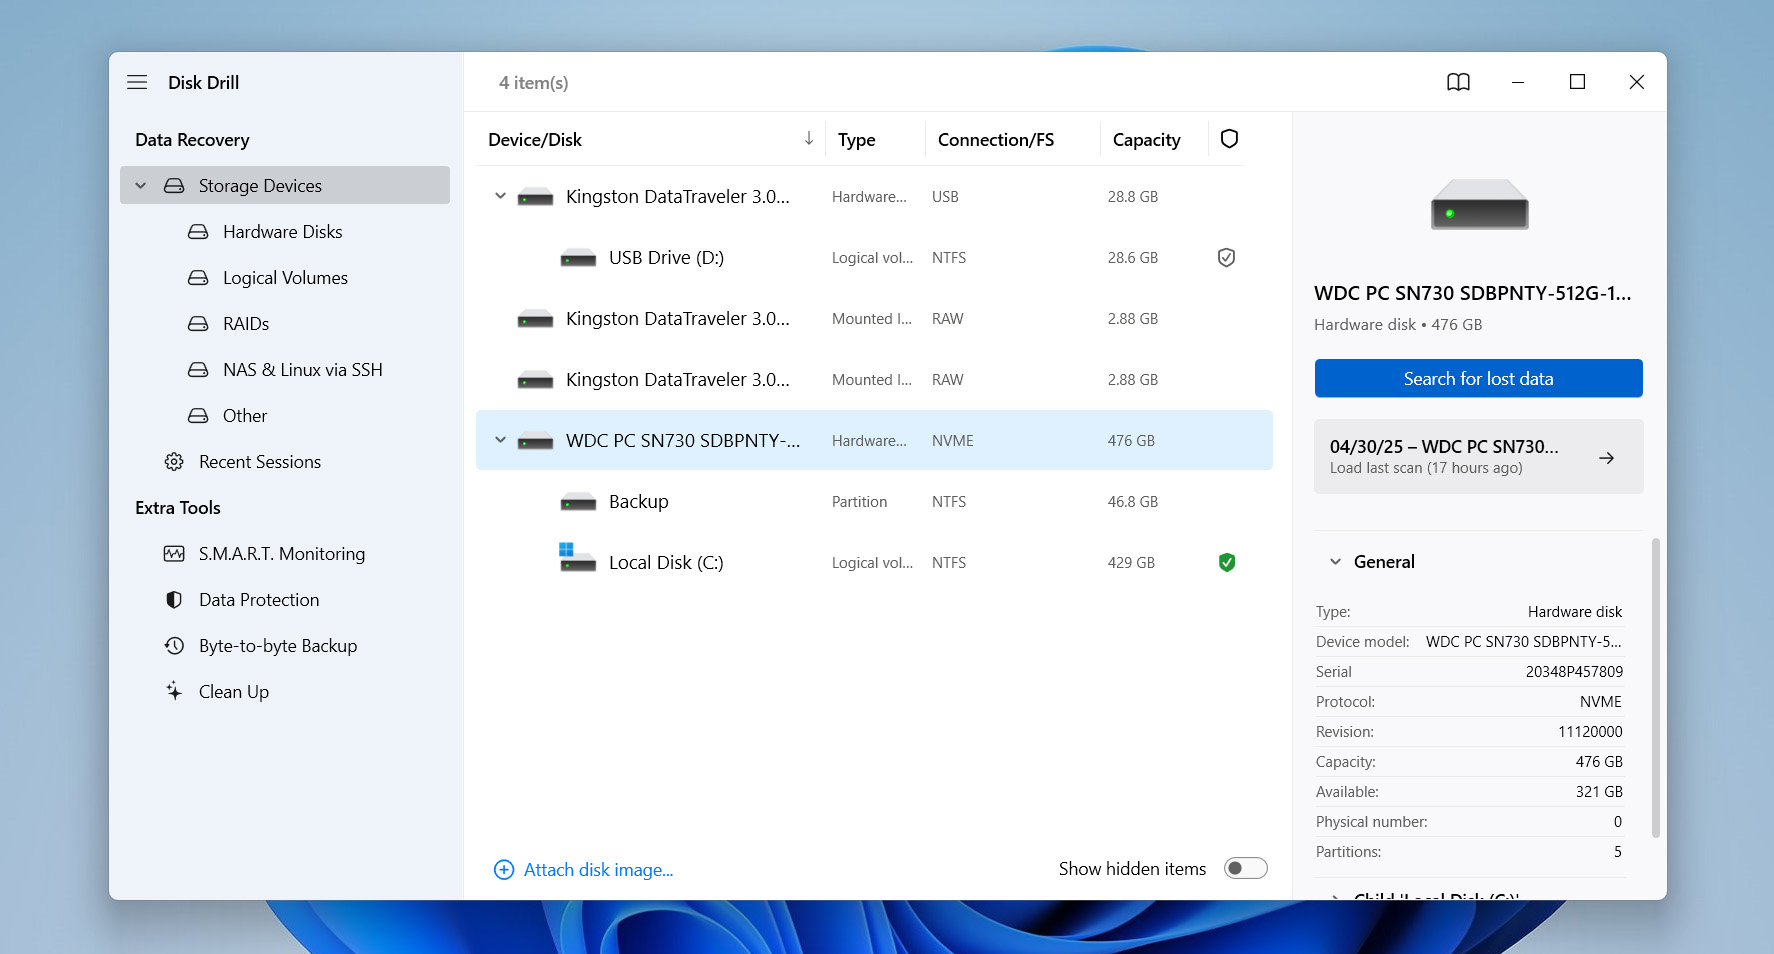
- Open Disk Drill. On the main screen, select the drive where defragmentation occurred. Click the Search for lost data button at the bottom-right corner of the window to begin.
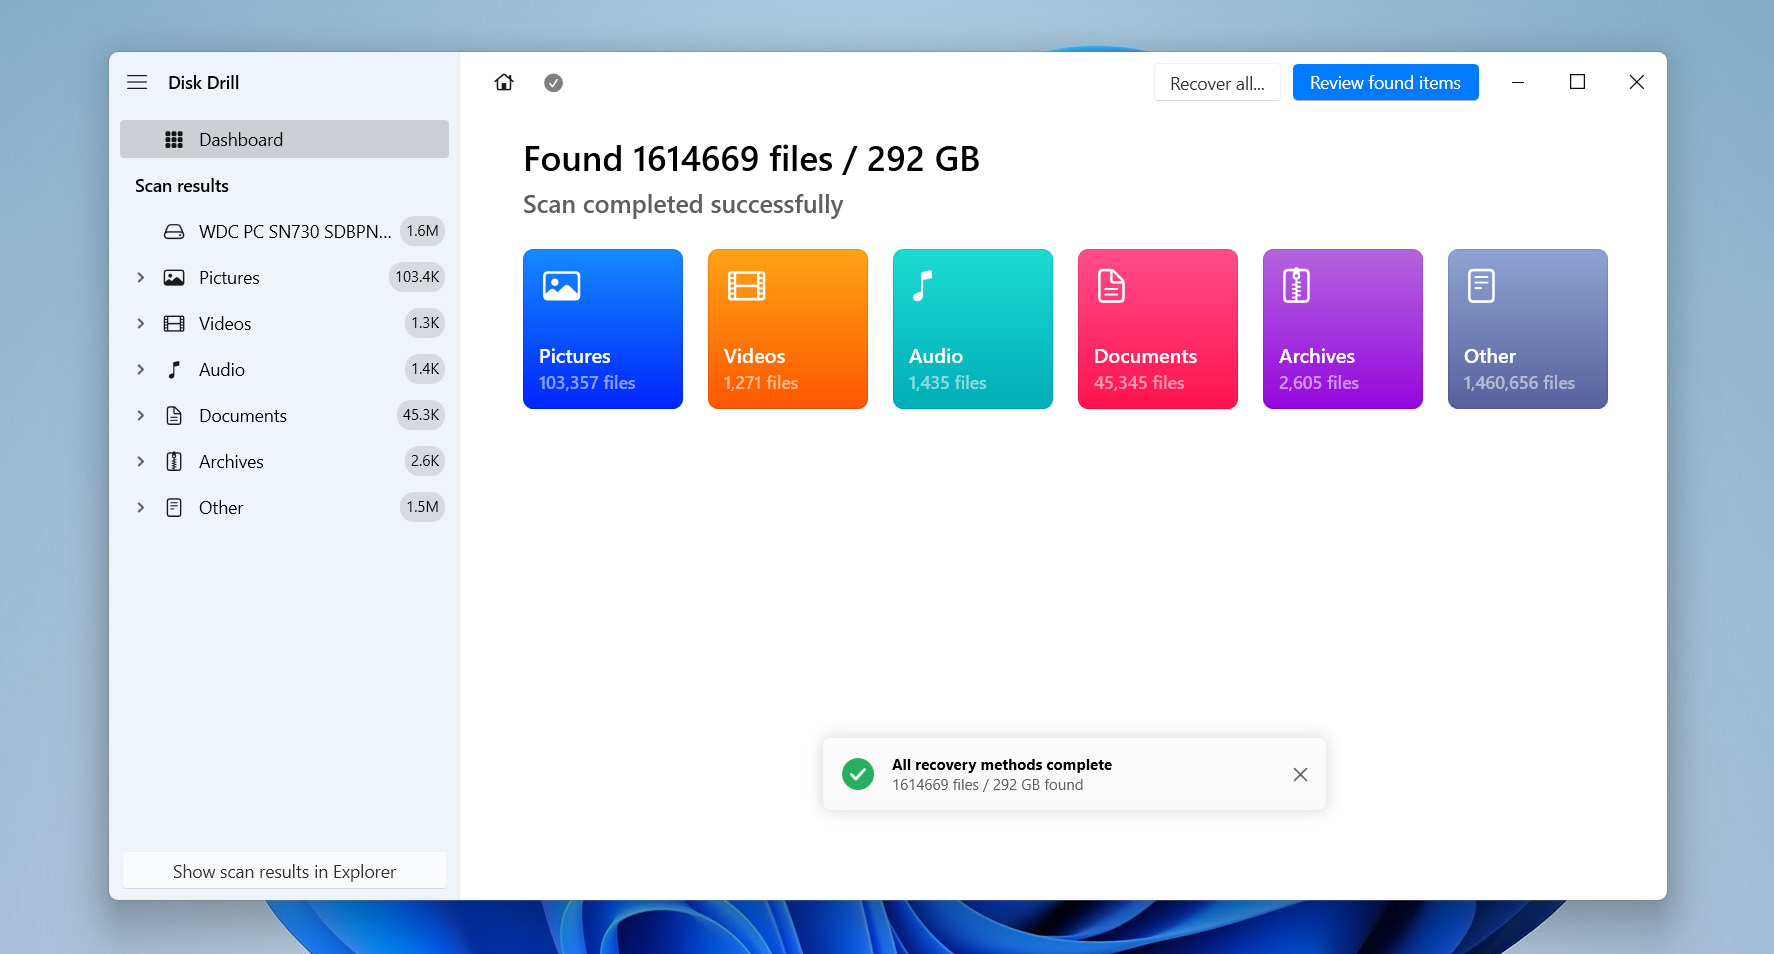
- Wait while Disk Drill scans the drive. It will organize found files by category – Pictures, Videos, Audio, Documents, and Archives. When the scan completes, click Review found items to examine the results. You may also click Recover all… to restore everything at once.
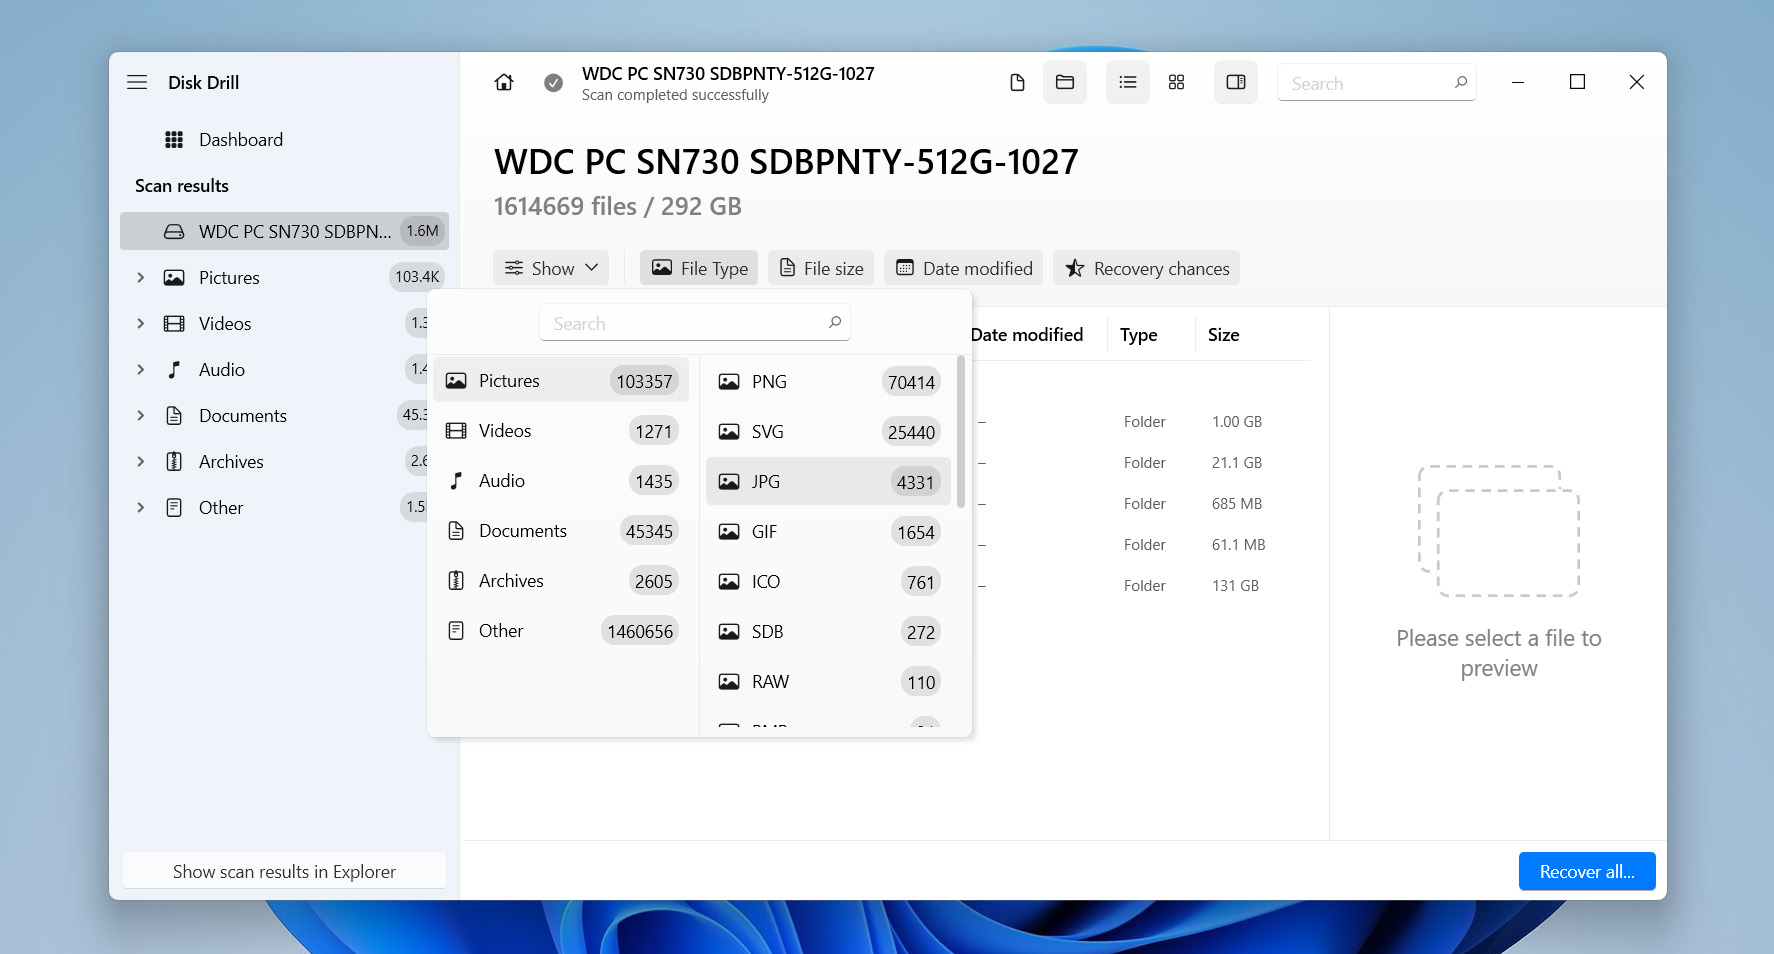
- To recover specific files, use the sorting and filtering options. You can narrow results by file type or extension.
 If you know the file name, type it into the search bar at the top-right corner. You may double-click any file to preview it. Disk Drill supports preview for most Windows-compatible file formats.
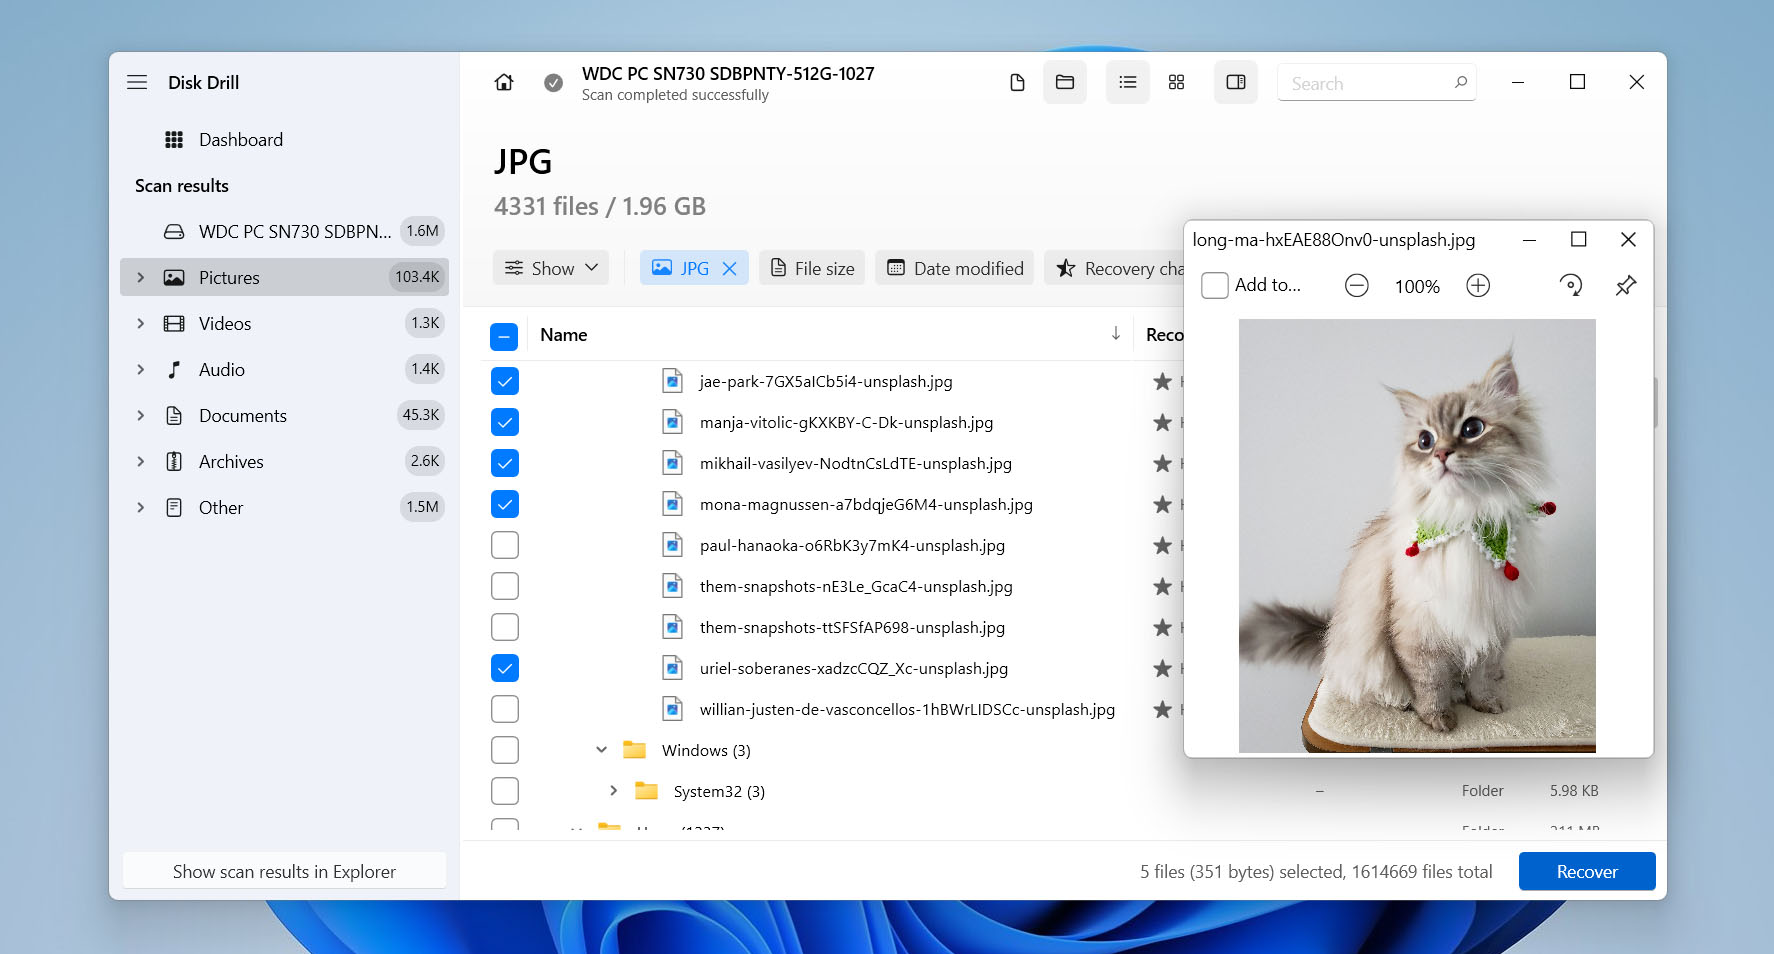
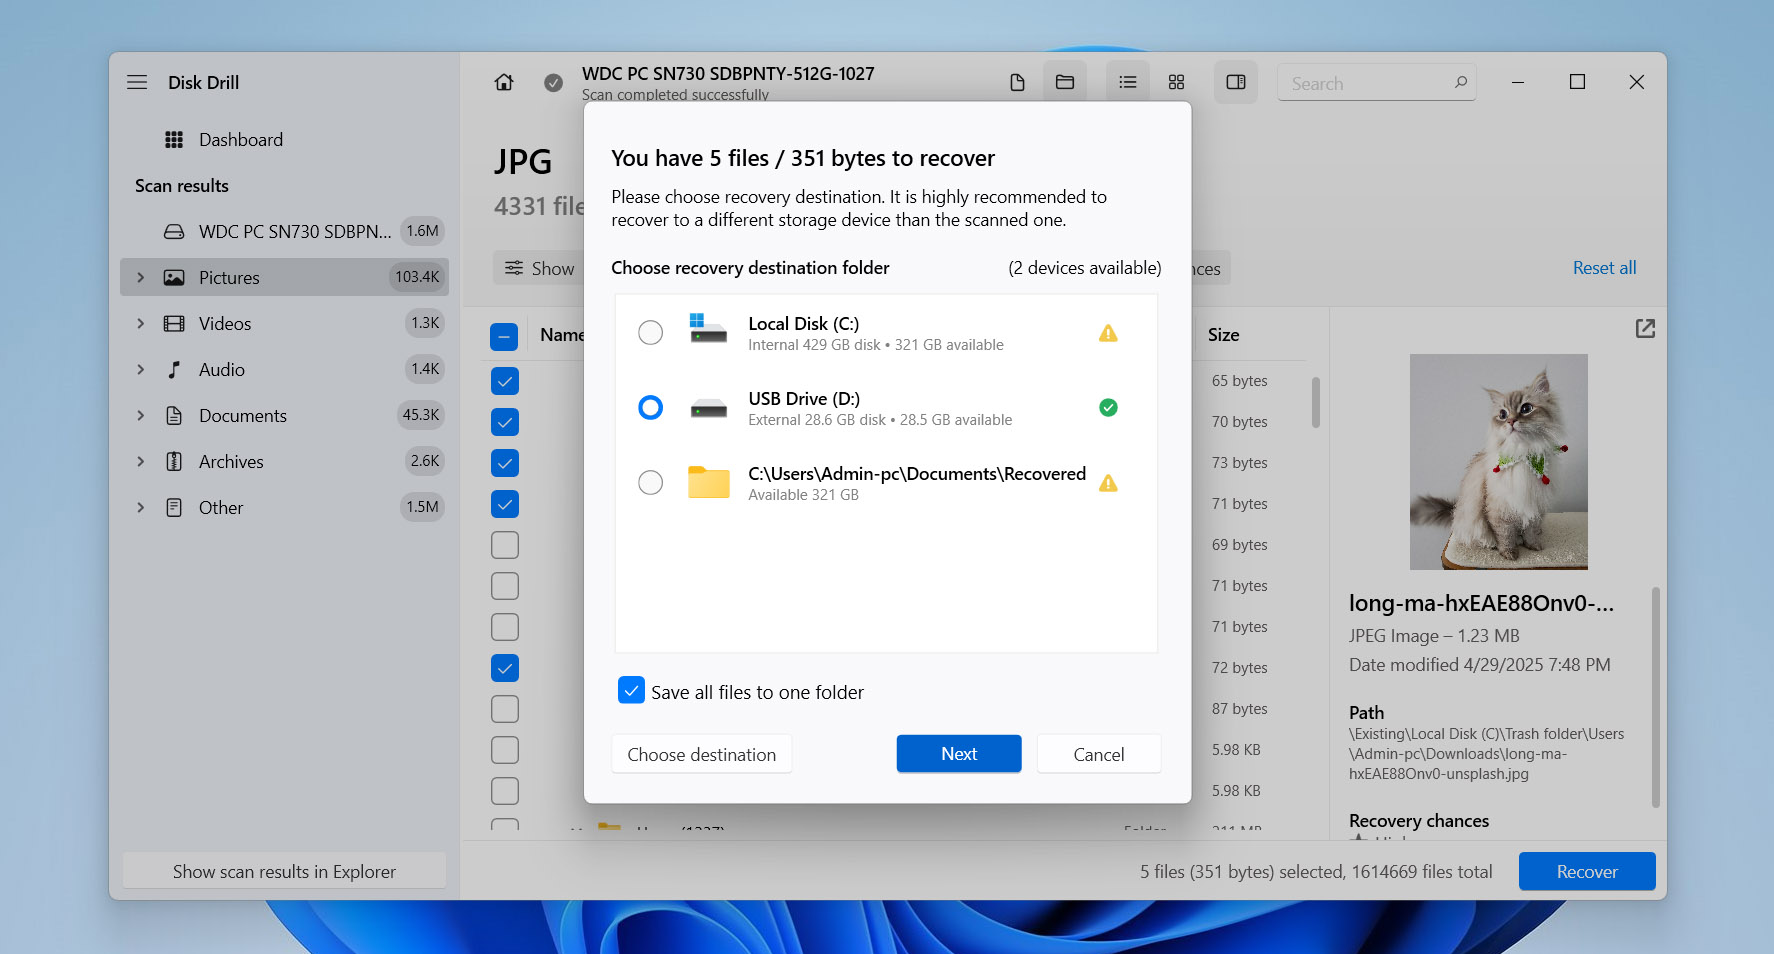
- Check the boxes next to the files you want to recover. Then click Recover.
- A new box will ask where to save the recovered files. Choose a location on a different drive or partition than the one you scanned. Click Next to continue.
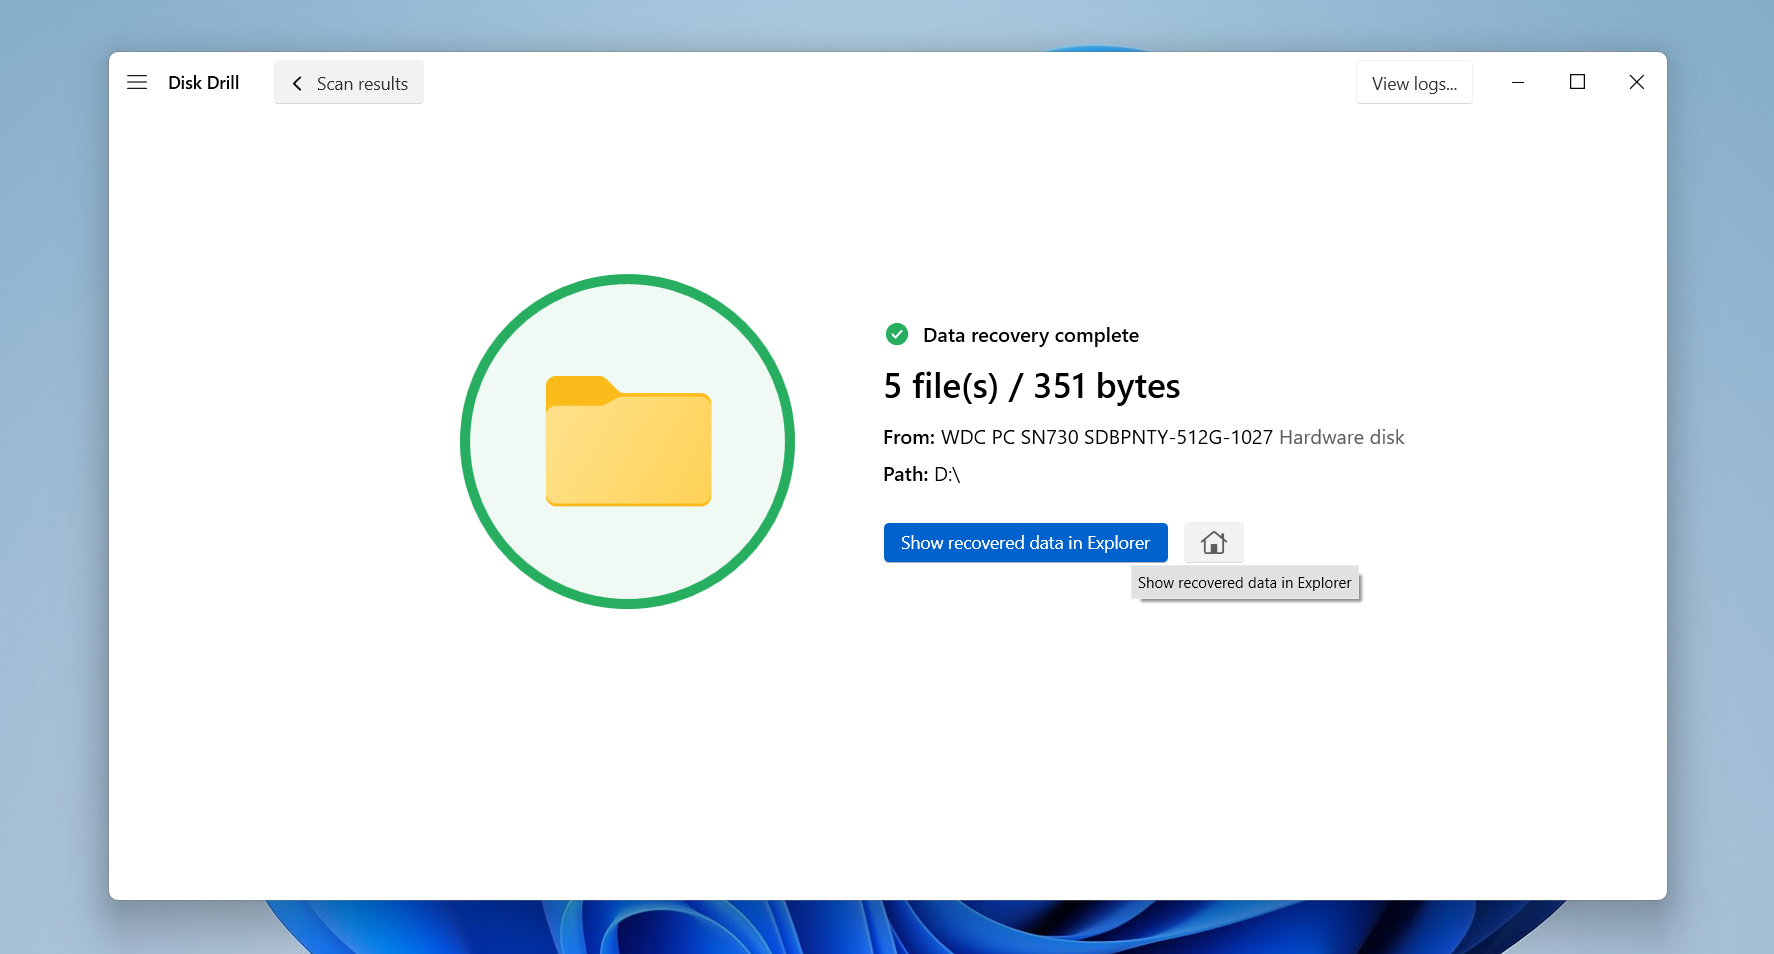
- After recovery completes, click Show recovered data in Explorer to open the folder with the restored files or close the software.


 If you know the file name, type it into the search bar at the top-right corner. You may double-click any file to preview it. Disk Drill supports preview for most Windows-compatible file formats.


Keep in mind, Disk Drill allows free recovery of up to 500MB of data. If the selected files exceed this limit, you must upgrade to the Pro version before continuing.
Method #2: Use a Snapshot Created in File History
Another way to get files back, whether they went missing before, during, or after a defrag, is to use File History. It’s built right into Windows and automatically snaps your files at set intervals, saving those copies to an external or network drive. You can roll back to an earlier version if something goes wrong, and because it pulls from the backup copies, your current files stay untouched and safe.
To use this method, you need to have had File History set up and running before you lost your files, and those missing files have to be in one of the folders it backs up (Desktop, Documents, Downloads, Pictures, Music, or Videos). If that’s the case, you’re in luck: File History snapshots give you a solid shot at getting your data back.
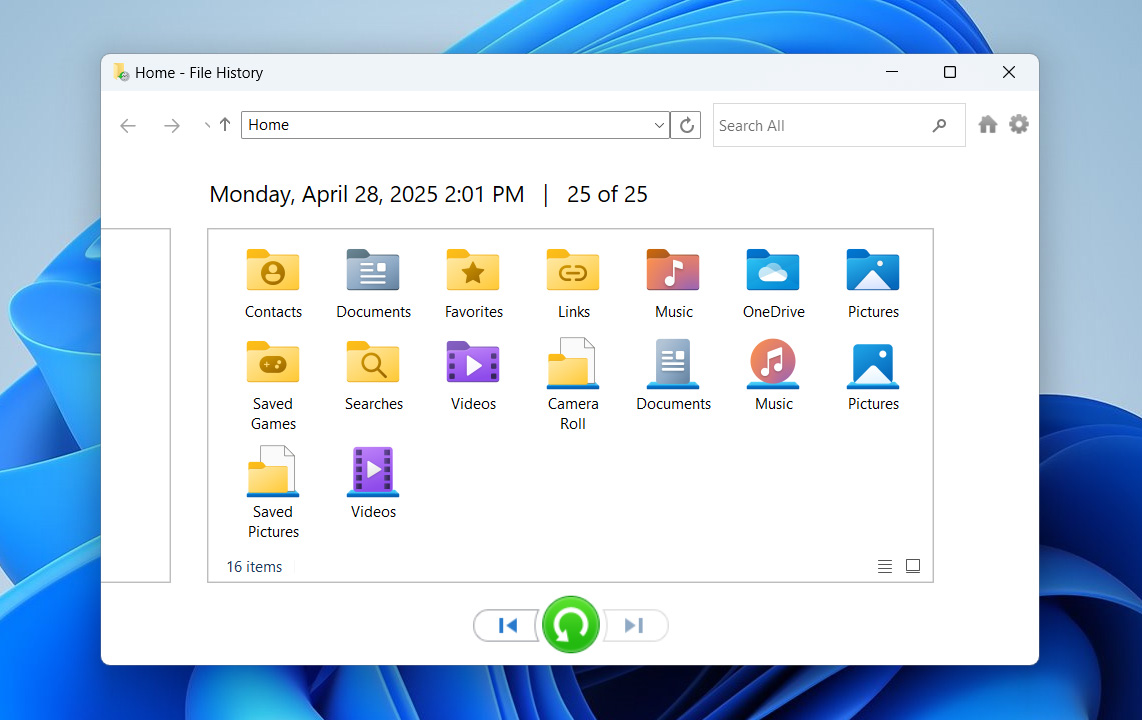
- Connect the external drive or network storage where File History saves the snapshots.
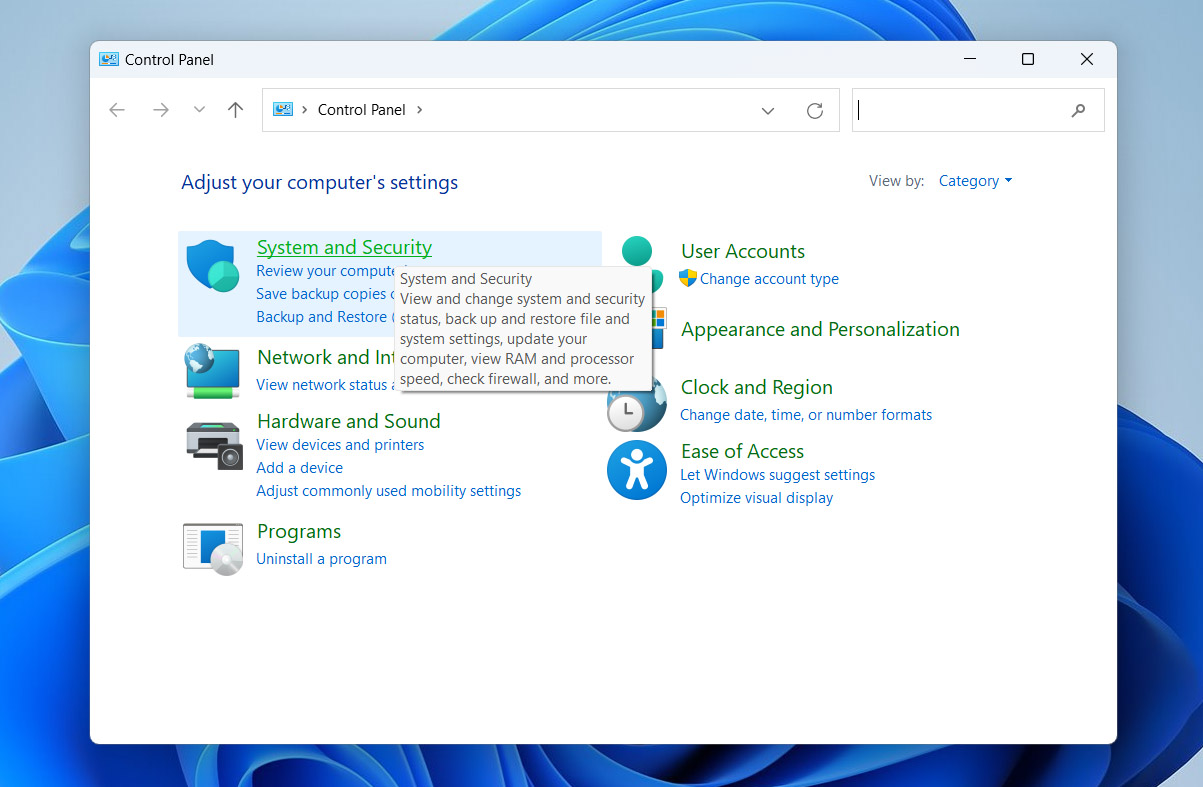
- Press Win + R, type Control, and press Enter to open the Control Panel.

- Click System and Security.
- Under File History, click Restore personal files in the left-hand menu.
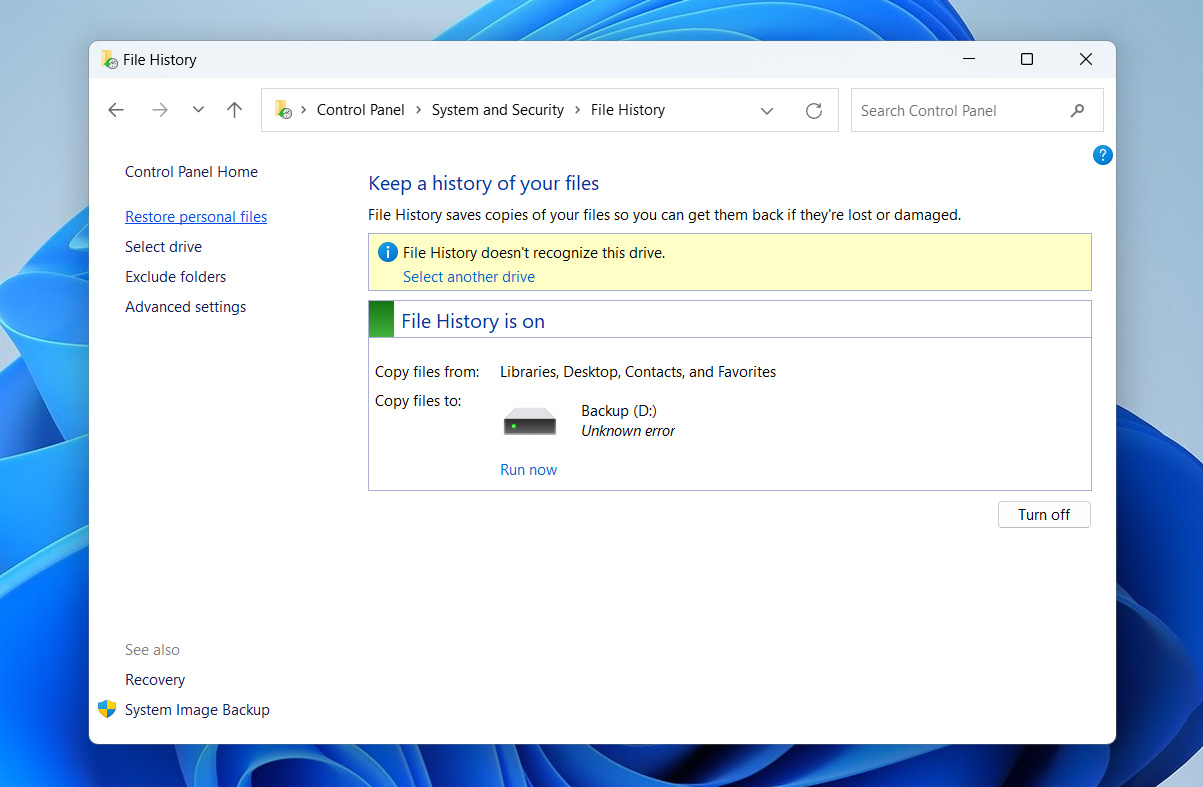
- Wait for the File History window to load. It will show the backed-up folders and available versions. Use the navigation arrows at the bottom to move between different backup dates.
- Open the folder where the lost files were originally stored. Select the files or folders you want to restore.
- Click the green Restore button to recover them to their original location.
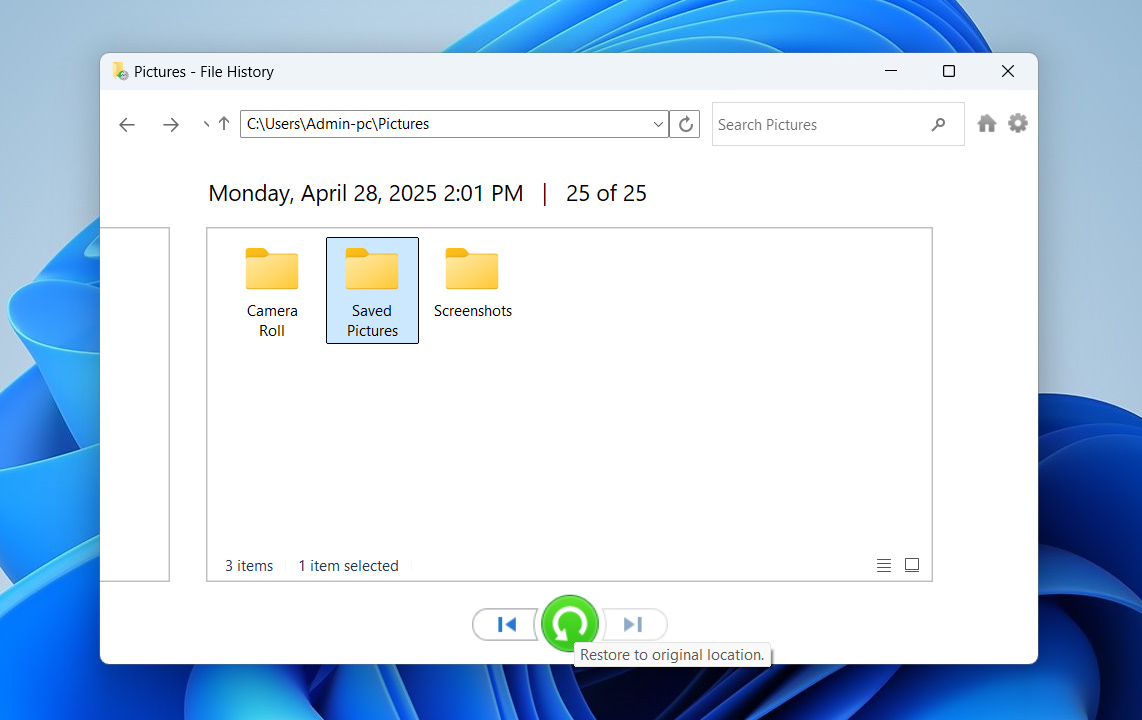
- If Windows asks whether to replace existing files, choose whether to replace them, skip them, or keep both copies.


Method #3: Turn to Professional Data Recovery Centers
If you don’t feel confident using DIY methods to recover files lost after hard drive defragmentation, you can contact a professional data recovery center. These services employ specialists who handle data loss on a daily basis. They work with drives affected by power failures, physical damage, software errors, and failed defragmentation. Their experience often gives them an advantage compared to standard methods.
To begin, find a reputable data recovery center near you. Check online reviews and ratings, then reach out to a few. Ask if they offer a free initial consultation, as many will inspect your drive and give you a recovery estimate at no charge. Once they’ve evaluated your situation, they’ll outline the plan and let you decide if you want to move forward.
Keep in mind that even professionals cannot recover overwritten data. Once your system stores new information in the space that held your deleted files, the original data becomes permanently lost. No tool or expert can retrieve it at that point. That’s why you should stop using the affected drive immediately after you notice data loss. The sooner you act, the better your chances of full recovery.
Conclusion
Usually, defrag won’t delete anything, as it just rearranges scattered fragments to speed up access. As long as your disk is healthy and the process runs uninterrupted, your files won’t disappear or get erased.
Even if a power outage or crash interrupts the defrag process, today’s tools, including Windows’ built-in defragger, have your back. They first copy each file fragment, verify it, and only then overwrite the original. But if your file system is already corrupted or the drive has bad sectors, defragging can actually make things worse. You could end up with new logical errors, corrupted directories, or even damaged files. In that case, you might have to reformat the drive to get it working again. If that happens, check out our guide on how to format a drive without losing your data.
One last heads-up: never defrag an SSD. Unlike HDDs, SSDs don’t get any speed boost from it – in fact, running a defrag adds extra wear and shortens their lifespan. Since SSDs can read data equally fast from any spot, shuffling it around does nothing but hurt your drive.