
Reading Time: 6 minutesLosing your photos is a surefire way to induce anxiety. Your photos could carry all the memories from your exciting foreign vacation or worst, a wedding. The good thing is, you can easily recover accidentally deleted photos. In this article, we’re going to help quickly recover jpg files, and walk you through each step that you’d need to follow to regain access to your cherished memories.
What is JPEG and How Does it Differ from JPG?
There is no difference. Many have this common, very logical question as to what is .jpg format and how it’s different from .jpeg. They are two names for the same file extension.
The reason that this file extension has two names is that earlier versions of Windows OS and file systems didn’t allow file extensions that were more than three characters. Therefore, users couldn’t save an image with a .jpeg file extension. This is why Windows used .jpg instead of .jpeg.
However, newer versions of Windows, just like UNIX and Mac, do accept four-letter file extensions. If you try changing a .jpeg file to a .jpg file on Windows, just out of curiosity, you’ll be able to open the file just fine.
How to Recover Deleted JPEG files?
Sometimes, you mistakenly remove a folder containing photos from your PC thinking it doesn’t have any important files. Or, maybe you format your hard drive without creating a backup of your photos. If you’ve lost a few .jpg images, we’re going to walk through the jpg recovery process so you can get any accidentally lost jpg files back.
We’ll use Disk Drill Data Recovery for recovering jpg files. But before getting started, make sure that you’ve selected a drive where you’ll recover the pictures. This drive should be different from the one where the photos were stored earlier because recovering overwritten files can be a little harder.
Ready to recover? Let’s go:
- Download and install Disk Drill. The first step in your jpg recovery process is downloading Disk Drill. The free version of Disk Drill allows recovering 500MB worth of data and allows access to nifty features like Data Protection and Drive Backup. Once the setup file completes downloading, launch the file and follow the installation wizard’s instructions.

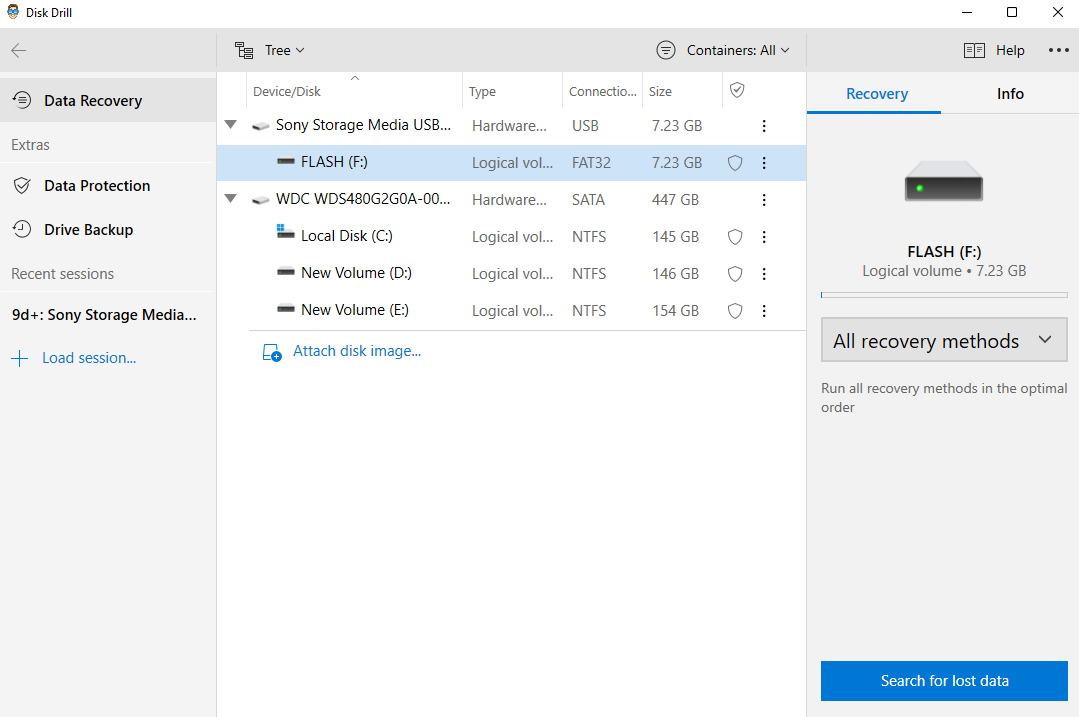
- Launch Disk Drill and select the relevant partition. You can select the partition where you had stored your lost jpg files right from Disk Drill’s main screen. The partition you select may be an internal or external hard drive, an SD card, or a flash drive.
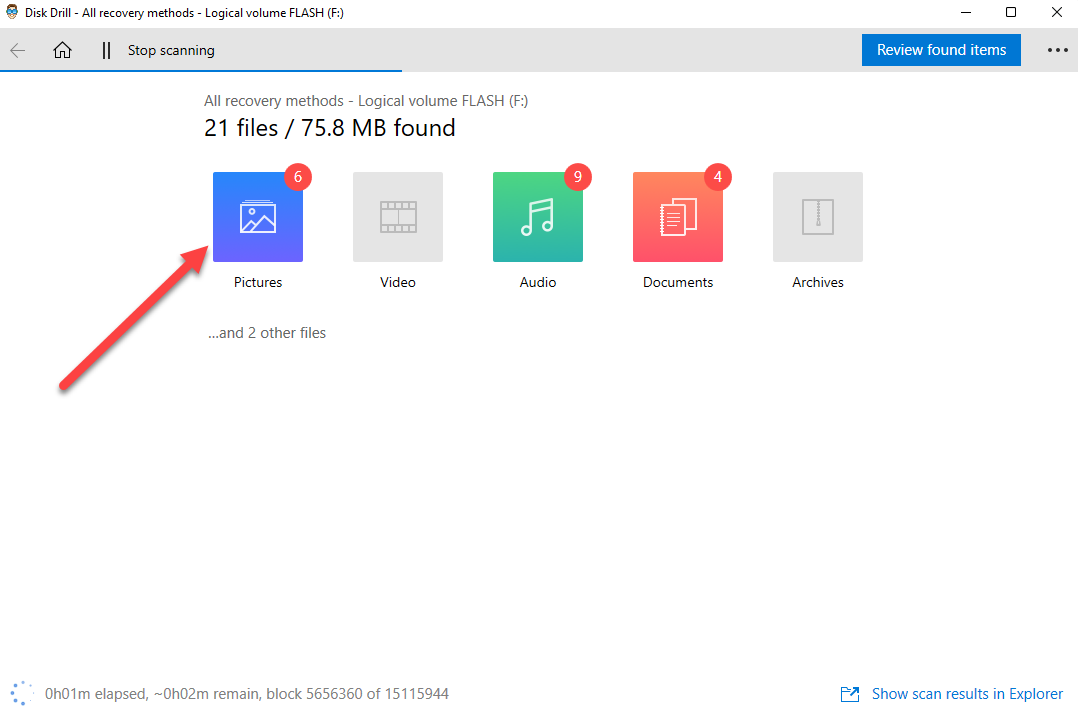
- Select the recovery method and start the scan. Once you’ve selected a drive to recover lost jpg files from, select the recovery method. If you want to use the default option (i.e., “All recovery methods” option) set by Disk Drill, simply press the Search for lost data at the bottom-right of the app. Alternatively, you can choose to run a quick or deep scan based on your preference or needs by selecting the relevant option from the drop-down at the right of the app.

- Let Disk Drill scan the partition. As the scan progresses, you’ll see the files that Disk Drill finds in real-time. So, as it starts finding images, you can open the Pictures category and see which images are being found on the partition.
 If during the scan, you want to preview the images that the scan has found, you can click on the preview button.
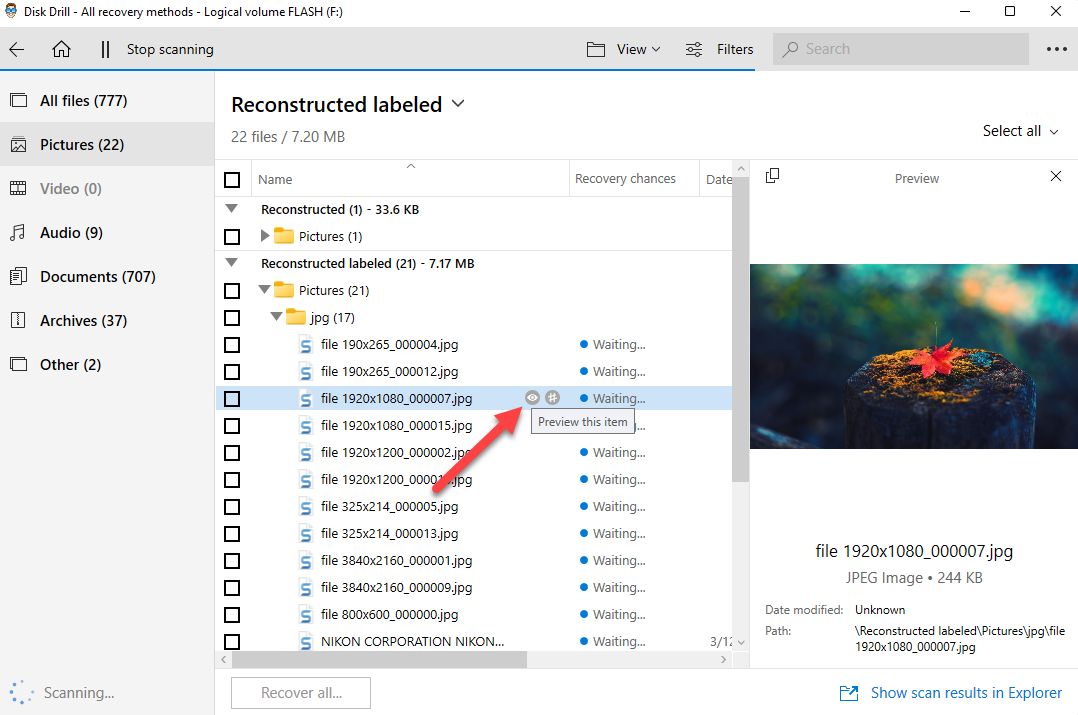 Once you’ve identified the jpg images you were looking for, you can start your jpg file recovery.
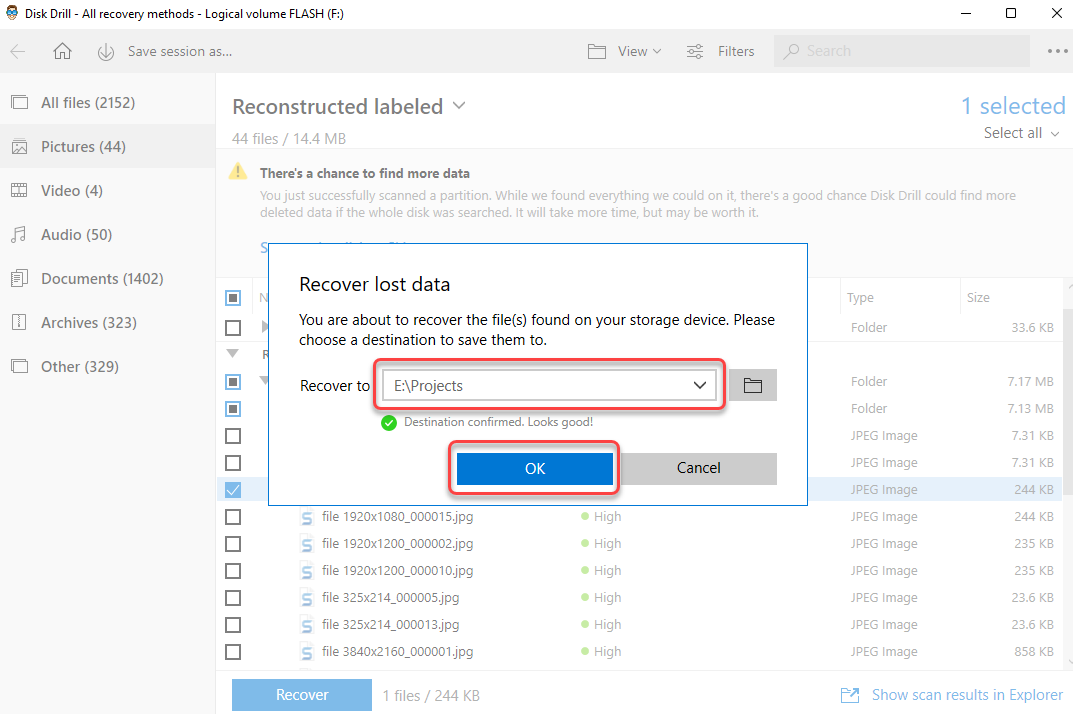
 - Start recovering jpg files. You can start recovering your jpg files after identifying them using the preview option. Select all jpg files that you’d like to recover from the list by clicking on the checkbox beside their name, and click on the Recover button at the bottom. Disk Drill will ask you for a location where you’d like to recover the files. Ideally, you’d want to choose a location in a different partition from which you’re trying to recover lost jpg files.
 That’s the end of the jpg recovery process. After recovering jpg files, navigate to the location you chose for recovering, and you’ll find your images there.


 If during the scan, you want to preview the images that the scan has found, you can click on the preview button.
 Once you’ve identified the jpg images you were looking for, you can start your jpg file recovery.
 That’s the end of the jpg recovery process. After recovering jpg files, navigate to the location you chose for recovering, and you’ll find your images there.
Tip: We recommend using Disk Drill’s data protection and backup features to ensure that you don’t lose important files in the future.
How to Repair Corrupted JPEG Files?
A jpg file can be corrupted for several reasons like corruption in image data, a virus attack, a corrupted file system, or bad sectors on the storage device. If the jpg files you recover had been affected by any of these reasons before they were deleted, the lost jpg files you recover will also be corrupted.
Fortunately, there are several things you can do to repair corrupted JPEG files.
1. Change the Image Format
If you’re unable to open an image after recovering it, changing the image format might help. Changing the jpeg file extension to another image file extension like png. To do this, you need to select the file name, press F2, and change the extension from .jpg to .png.

Or, you could just use an online jpg to png converter. Just upload your file, hit the convert button, and the tool will do the rest for you.
2. Repair JPEG File with An Image Editor
Another way to repair a corrupt JPEG file is using an image editor like Photoshop. Often, just importing the jpg file into the image editor does the trick. Once you’ve imported it, save the file with a different name, and check if that fixed your jpg file.
3. Repair JPEG File with Hex Editors
If the reason you can’t open the JPEG file is that its header is corrupt, you can use a hex editor to fix it. The process is long and a little technical though.
Open the file in a hex editor, and if you don’t have one, use an online hex editor. Import your file into the editor and search for FF DA. If the search returns no results, your file can’t be repaired.

If it does return results though, look for the final result for the search query. Note down its address.
Next, run another search for FF D9. You could also just scroll to the bottom, and you’ll find FF D9 at the end. When you find it, copy the entire block starting the FF DA you noted the address of earlier up to FF D9, and press Ctrl+ C. Open a new file in the hex editor, and paste the text block here, and save it as ‘xyz.jpg’.
Now, import another jpg file into the hex editor that you captured using the same camera and in the same resolution and orientation. Again, search for FF DA, and this time, copy everything before the last FF DA you find. Now, paste this into the new image you created. Make sure that you’re at offset 0 when you paste.
When done, export the image and you should now be able to open it if the damage to the file was limited.
Wrapping Up
Hopefully, you were able to recover all the deleted jpg files successfully. The process is pretty straightforward when you use a tool like Disk Drill. If you’ve lost some photos, don’t panic just yet. Run a scan, and if the photos were deleted recently, there’s a good chance the scan will find them and you’ll be able to recover them in a few minutes.