
Reading Time: 6 minutesTemp files can protect your files if a program crashes since they can be used to recover data. However, their existence is fleeting, and unless there’s some trouble they are deleted by the same program that created them in the first place, which can be troublesome in certain situations. Here, we will give you an overview of what exactly temp files are, discuss where they can be found, and show you the most effective methods of recovering temp files.
What Is a Temp File?
Temp files just as the name suggests are temporary files used by different programs as intermediate storage for data before it is written in the permanent file on our hard drive. In some cases, they can also be used for recovery if their program crashes. This is a protection feature that is built into certain programs, like Adobe Photoshop, and can save us in a pinch.
I’m sure many of us have experienced being able to recover a Microsoft Office document after an unfortunate crash. This is thanks to temp files keeping changes we made to the document allowing Office to quickly rebuild the document based on these instructions. They are usually deleted after the application that created them is closed properly, but in some cases, it may prevent us from recovering some valuable data, for example when the document is closed without being saved.
Location of Temp Files in Windows 10
Accessing temp files is easy in Windows 10. They are stored in one of two locations in Windows 10. These are:
- C:\Windows\Temp
- C:\Users\username\AppData\Local\Temp
Simply browse to either of these locations using Windows Explorer if you want to view temporary files.

Another option for opening C:\Users\username\AppData\Local\Temp is by pressing Win + R and running the %temp% command.

Is it Possible to Change the TEMP Folder
While those discussed above are default locations for the temp folder in Windows, there are ways to move it to your desired location for example to make it easier to find Excel temp files. Follow these steps to easily move the temp folder:
Step 1. Browse to System and Security in the Control panel.

Step 2. Next, browse to System.

Step 3. In System, go to Advanced System settings.

Step 4. Now, in the window that pops up, go to the Advanced tab and select Environment Variables.

Step 5. In both the User variables and System variables section, you will need to edit both the TEMP and TMP variables.

Step 6. You will need to edit the Variable value field that shows up after selecting Edit to reflect the path that you want to be your new temporary file location.

How to Recover Temporary Files in Windows 10
If you checked the temp folder in Windows 10 but files are already gone, the best chance that you have for recovering them is using data recovery software. Data recovery software allows you to recover files even if they are deleted from your computer’s recycle bin or ‘permanently deleted’.
One of the best data recovery applications available on the market is Disk Drill because it blends professional-level functionality with accessibility to users with any level of computer proficiency. It can recover more than 400 different file types and even has lots of additional functionalities, like backup or cleanup.
Recovering Temporary Files in Windows 10 with Disk Drill
To use Disk Drill to recover deleted temp files, follow these steps:
Step 1. To get started, download Disk Drill and install it on your computer. On opening Disk Drill, you will be asked for admin permissions so that Disk Drill can run its advanced data recovery algorithms on the system hard drive.
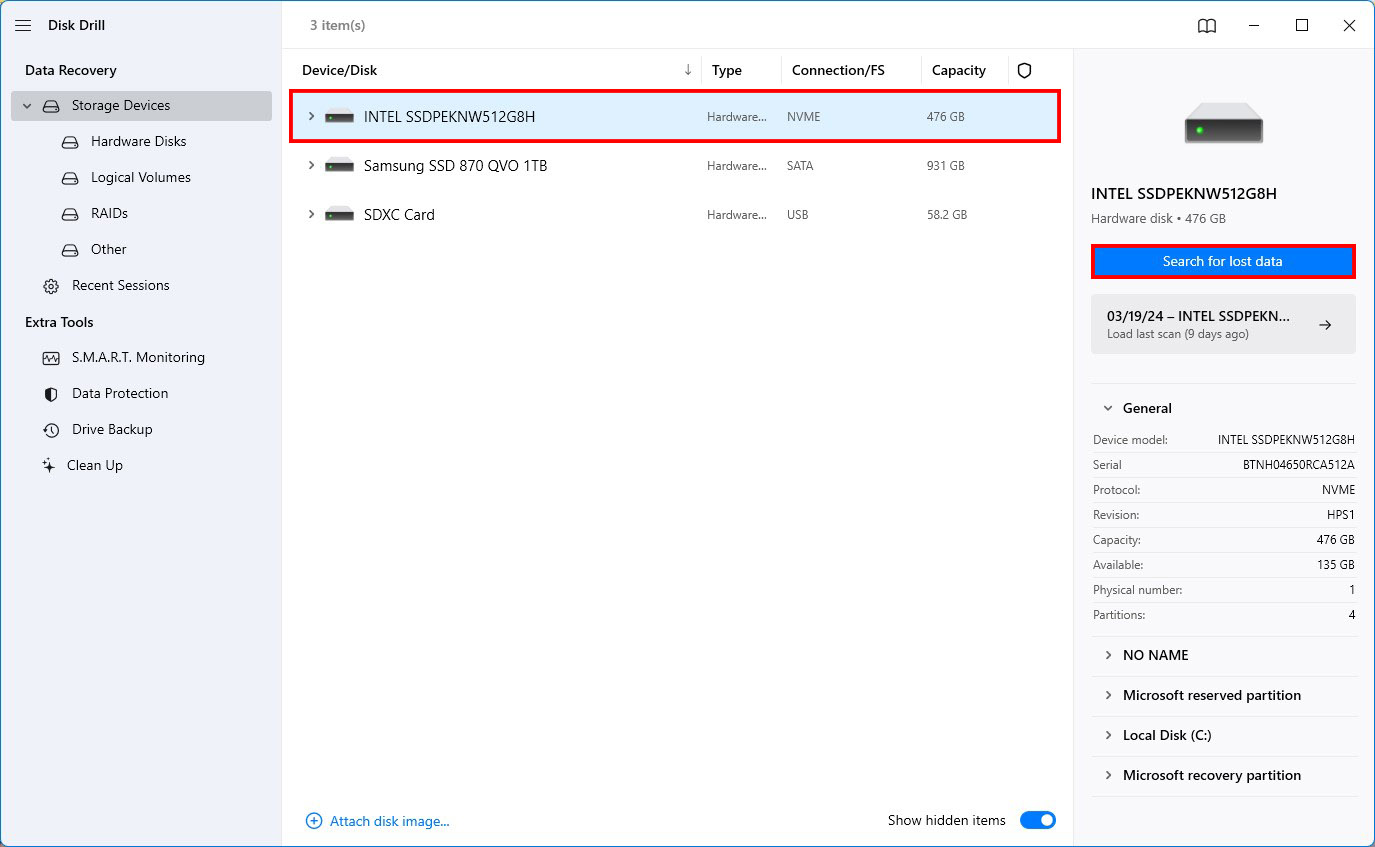
Step 2. After opening Disk Drill, select your system drive and then click on “Search for lost data.” Disk Drill will run all recovery algorithms one by one on your drive to ensure that you find as many files as possible.
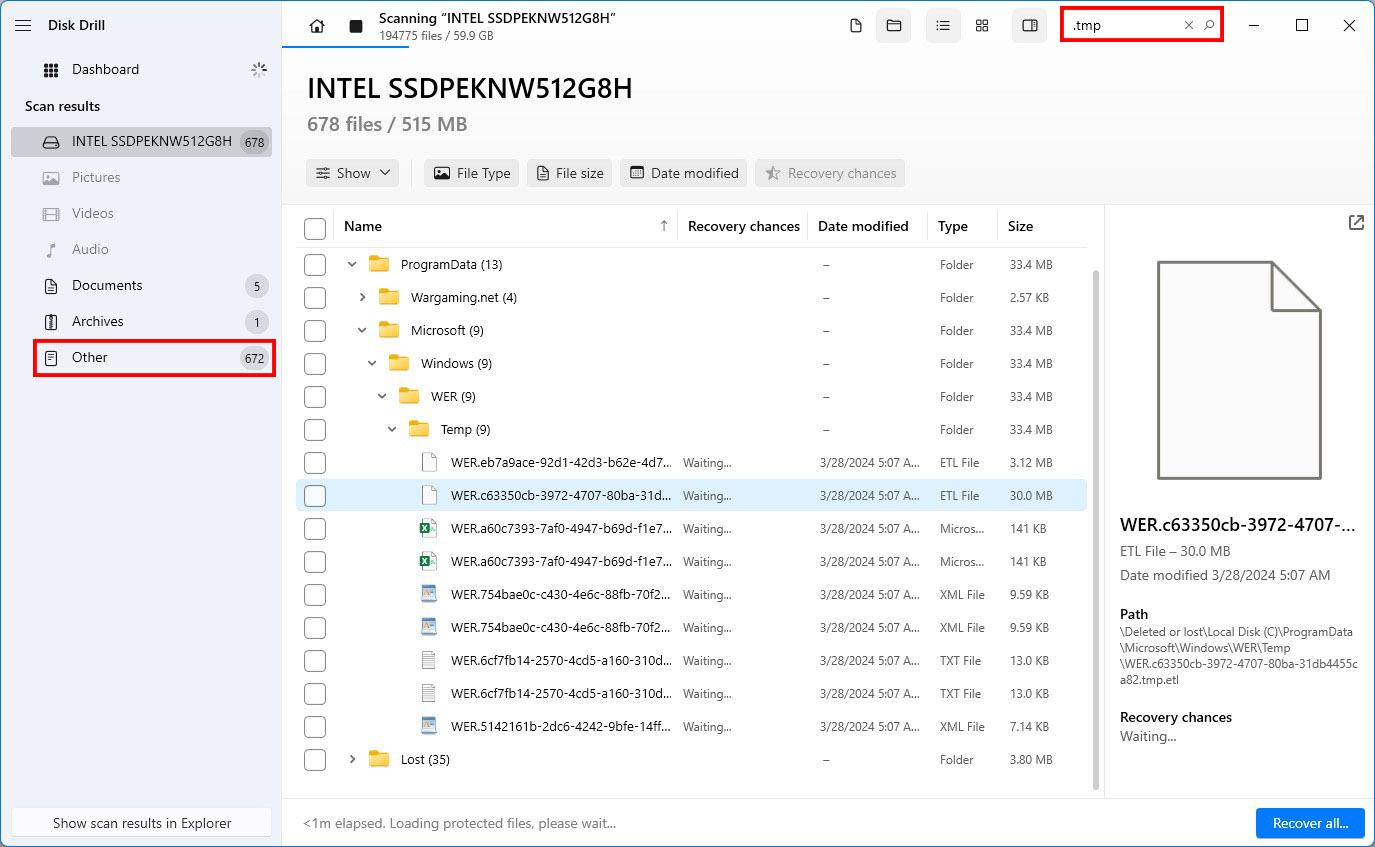
Step 3. After the scan is done, you’ll be presented with a list of files that can be recovered. This includes hidden temporary files that you’re after. You can either manualy search for temp files in the other category, or use the search window by typing “.tmp” or “.temp” to filter out only temporary files
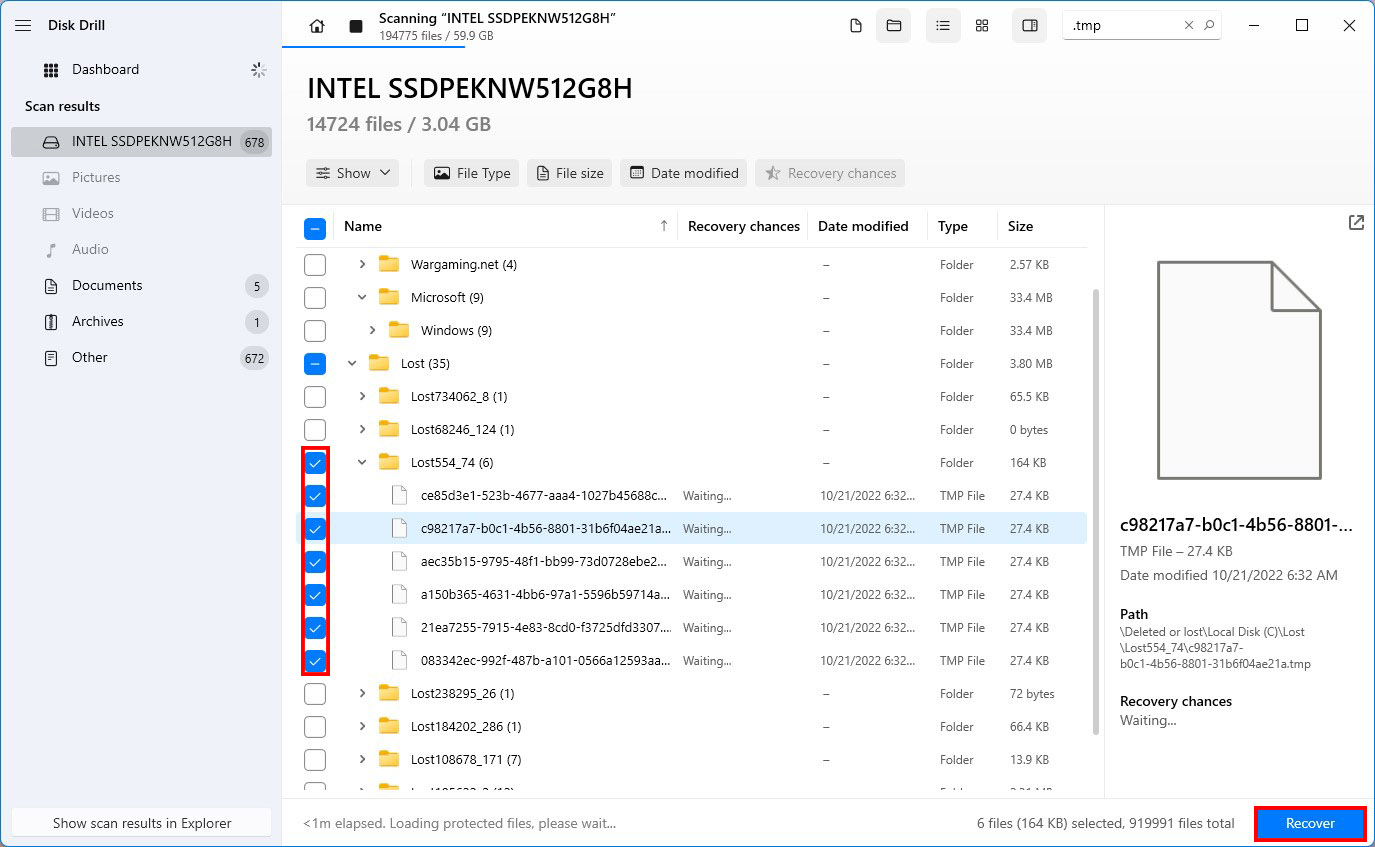
Step 4. After reviewing the files, you can choose the ones that you want to recover and then hit the “Recover” button.
Step 5. The last step is to select the recovery location, it’s best to select the location on a different drive, to avoid overwriting found files during the recovery process, click “Next” and then just wait for recovery to proceed.
Recovering Temporary Files in Windows 10 Using File History
If you have File History set up on your computer with your temp file folder included, then you can restore temp files if needed. Follow these steps to restore temp files with the File History feature:
Step 1. Open the Settings app and then go to Update & Security > Backup. Select Restore files from a current backup.

Step 2. You can now browse to your temp file folders and you will be able to select the files that you want and then choose to restore them. After selecting the files that you want to restore, click the green Restore button.

Wrapping Up
It can be easy to overlook the importance of temporary files. They back up information temporarily whenever we use an application. They can also be used as a kind of overflow if there isn’t enough memory available when running an application. If you find yourself in the unfortunate situation of having to deal with deleted temp files, data recovery software can help you recover them.