Reading Time: 6 minutesYour SD card is bound to go through a few formats in its lifetime and it’s not uncommon for people to want to backtrack the formatting process after it’s already been completed. Perhaps they forgot to back up the files on the card or the format may have been premature altogether. Either way, this guide is dedicated to teaching you how to unformat SD cards on a Windows machine using the best tool for the job, and the different precautions you should take right after the format has taken place.
Is It Possible to Unformat an SD Card?
Technically, there is no such thing as an “unformat” for your SD card. After formatting, the new file system is written over the metadata of the previous one, overwriting the previous structure by which the system could access the files. Physically overwritten memory cells cannot be restored, so unformatting is impossible. However, you can still recover your files from an SD card in some situations, and the factors that affect this are described below:
- If the SD card was subjected to a quick format, the actual file content isn’t immediately destroyed – only the metadata is replaced. This means that many files can still be recovered with a powerful data recovery tool, especially if it supports many file types in a signature scan.
- If you have performed a full format, it not only replaces the file system metadata, but also overwrites all sectors and scans for damaged blocks. If the process is completed completely, the chances of recovery are gone. However, if the full format was interrupted before it was completed, there may still be fragments of data on the card that can be recovered.
Some cameras and SD cards support the SD_ERASE command, which is designed to speed up future write operations by actively erasing data blocks after format. This command behaves similarly to the TRIM function on SSDs, and it can make recovery completely impossible, even after a quick format, because the controller proactively overwrites the data.
So, while you can’t unformat, it is still possible to recover your files under certain conditions.
What To Do After Accidentally Formatting an SD Card
If you’re going to attempt the recovery of lost files after an SD card format, there are a few things you should keep in mind:
- The first thing you should do right after the format is to completely refrain from using the SD card. Copying new files to the card or even just accessing it could lead to the old data being overwritten or lost.
- You should start the data recovery process immediately after the format. This will help you avoid any further data loss.
- Avoid installing any sort of recovery software or other programs directly on the SD card. This could cause you to lose some of the information that you’re trying to recover from the card.
- Consider creating a perfect backup image of your SD card right after the format, similar to USB or compact flash recovery. That way, you can attempt data recovery from the image instead of the card itself, which minimizes the risk of losing more information through the rescue process.
How to Unformat an SD Card With Disk Drill
The best way to unformat SD cards is through the use of data recovery software, and one of the best ones on the market is Disk Drill. It is a solid option thanks to its ease of use, strong recovery rate, and a free version that includes all features with a 500 MB recovery limit.
Since SD cards are frequently used in cameras and drones, standard recovery methods – especially signature-based scans – often return broken or incomplete files. That’s because these devices tend to save photos and videos in fragmented chunks, making it harder to reassemble the data correctly after formatting. To address this, Disk Drill 6 introduces a new Advanced Camera Recovery module. This feature recognizes the technical characteristics of various camera brands and models, then intelligently reconstructs files from fragmented data, resulting in far more reliable recovery, often without corruption. Follow the instructions below to unformat memory cards with Disk Drill:
- Download and install Disk Drill from the Cleverfiles official website.
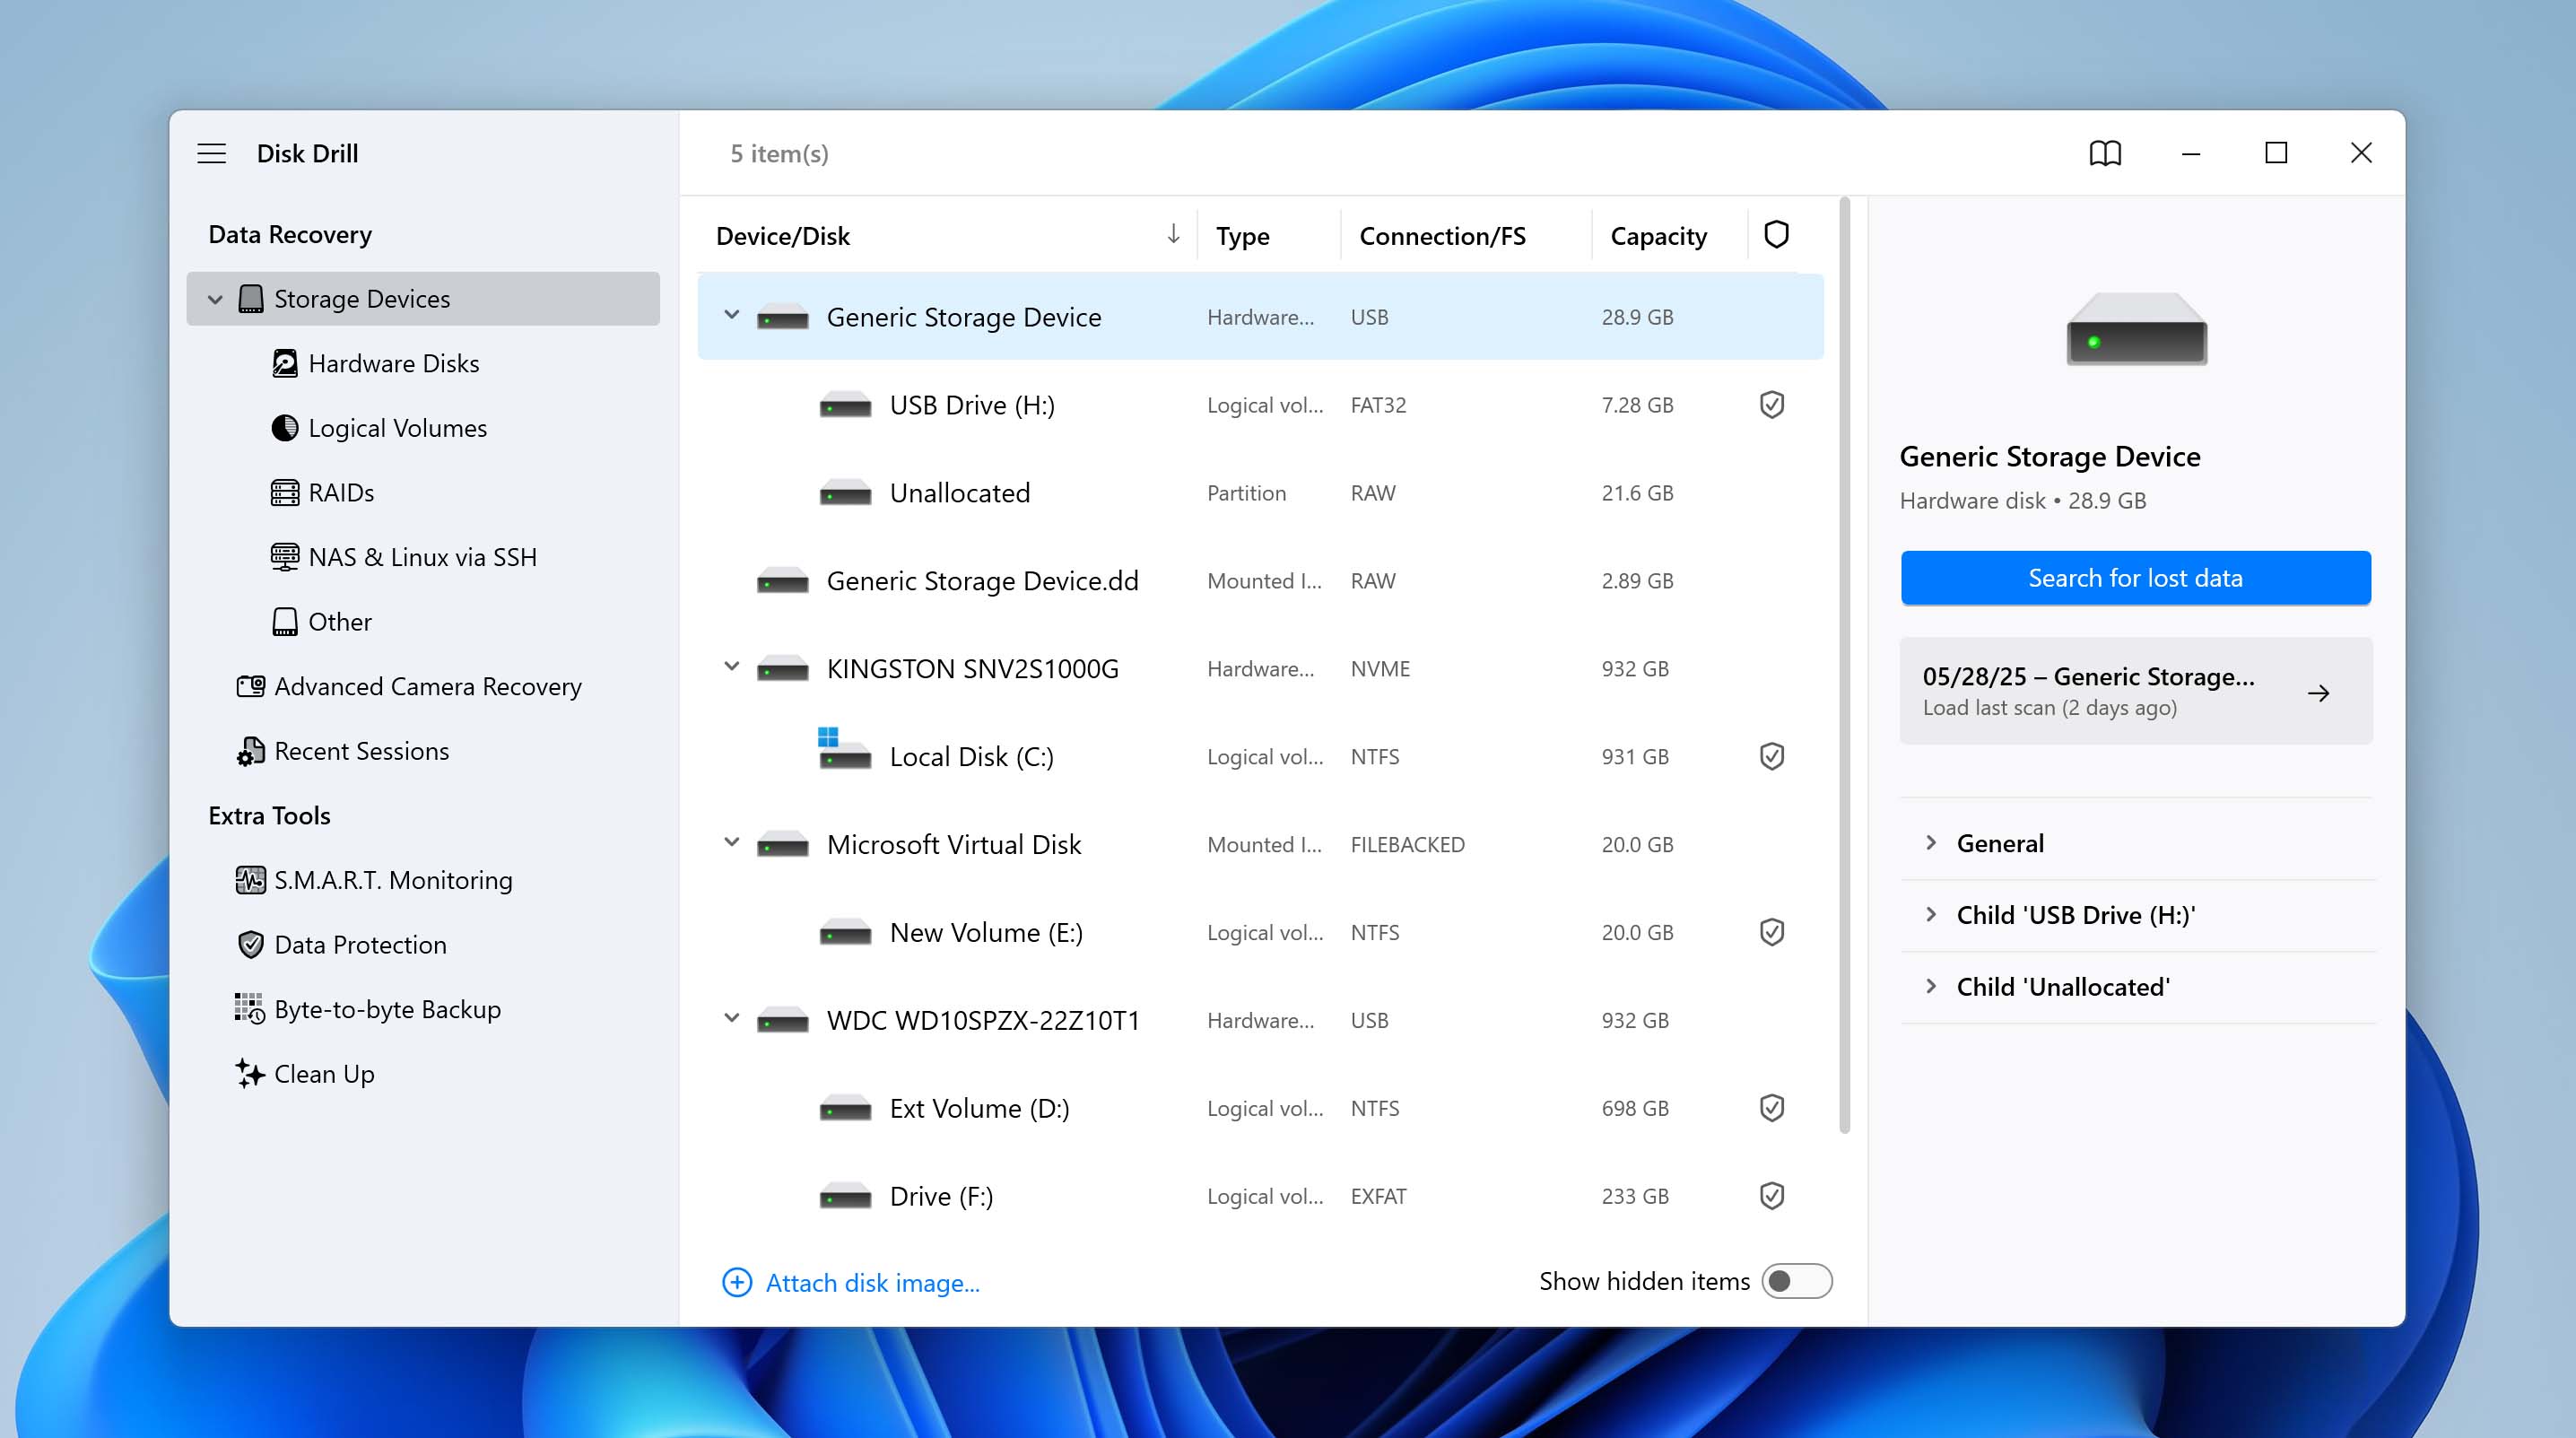
- Make sure your SD card is connected to your computer through a memory card reader, then launch Disk Drill. Select your card from the list of available devices and click the Search for lost data button to proceed.
- In the pop-up window, select Advanced Camera Recovery if your SD card is from a camera or a drone; otherwise, select Universal scan.

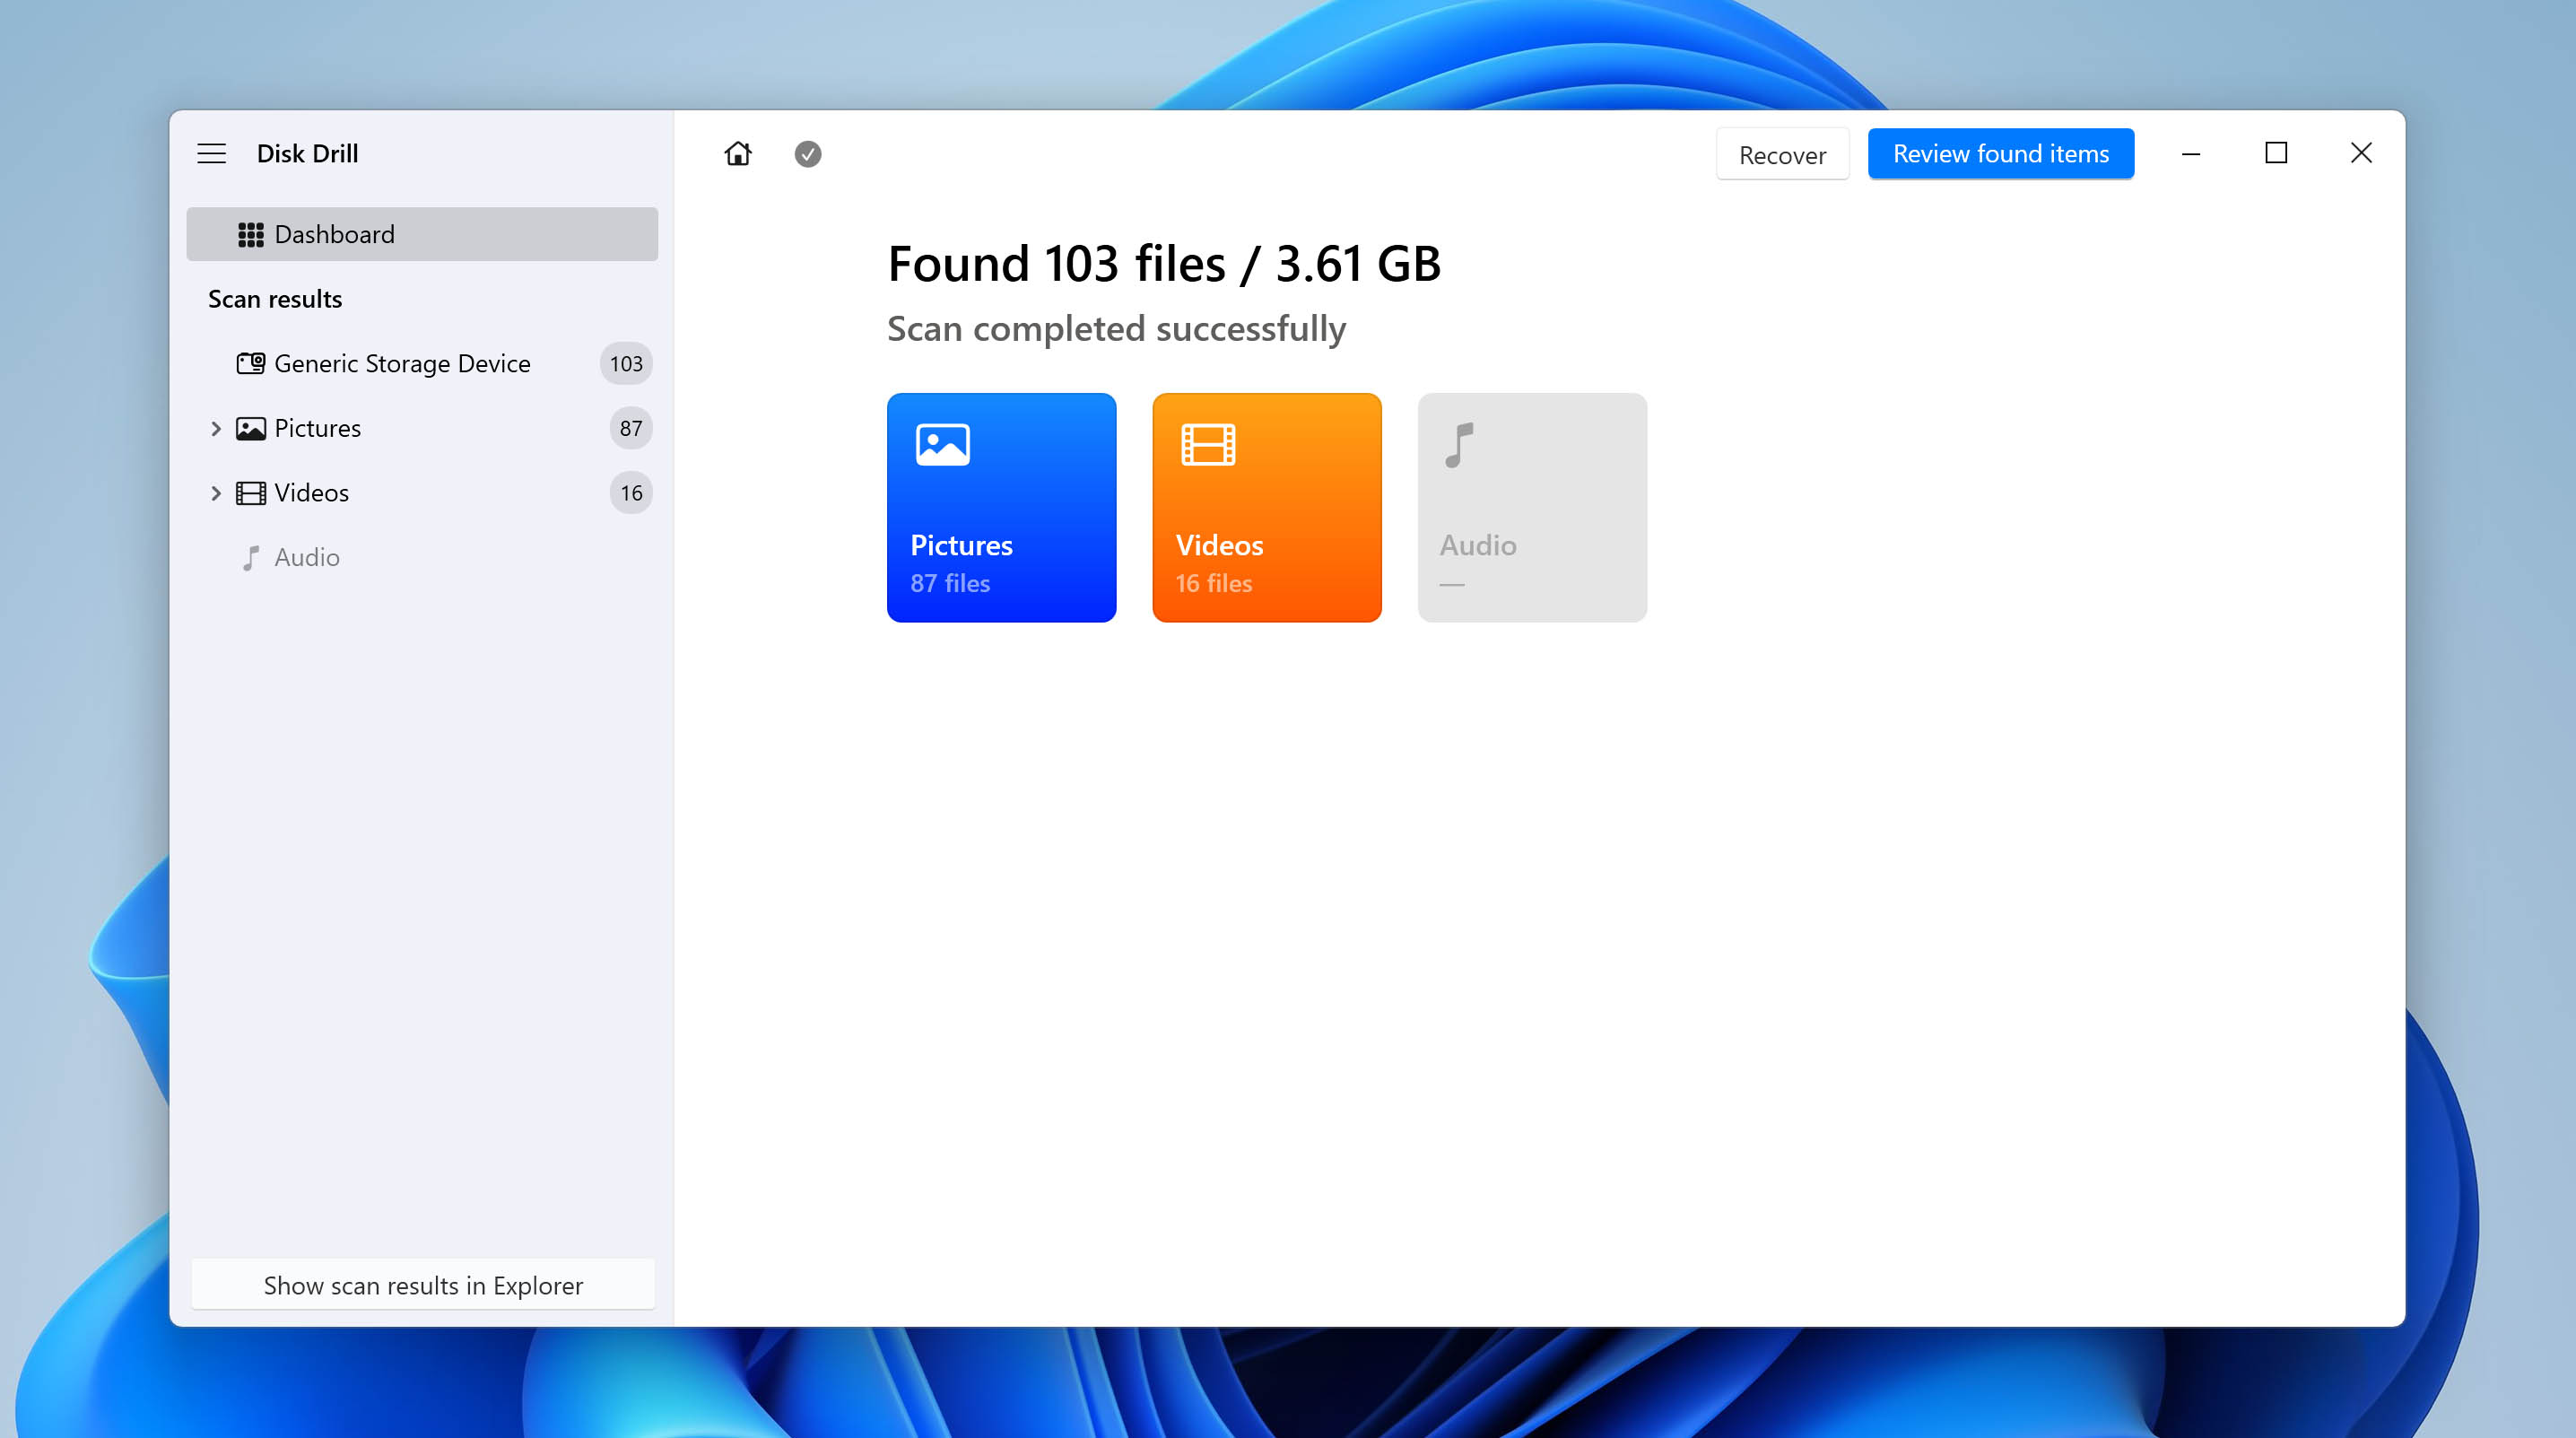
- The program will now begin scanning for any recoverable data on the SD card. After the scan, click on the Review found items button in the top-right corner of the window to see the found items.
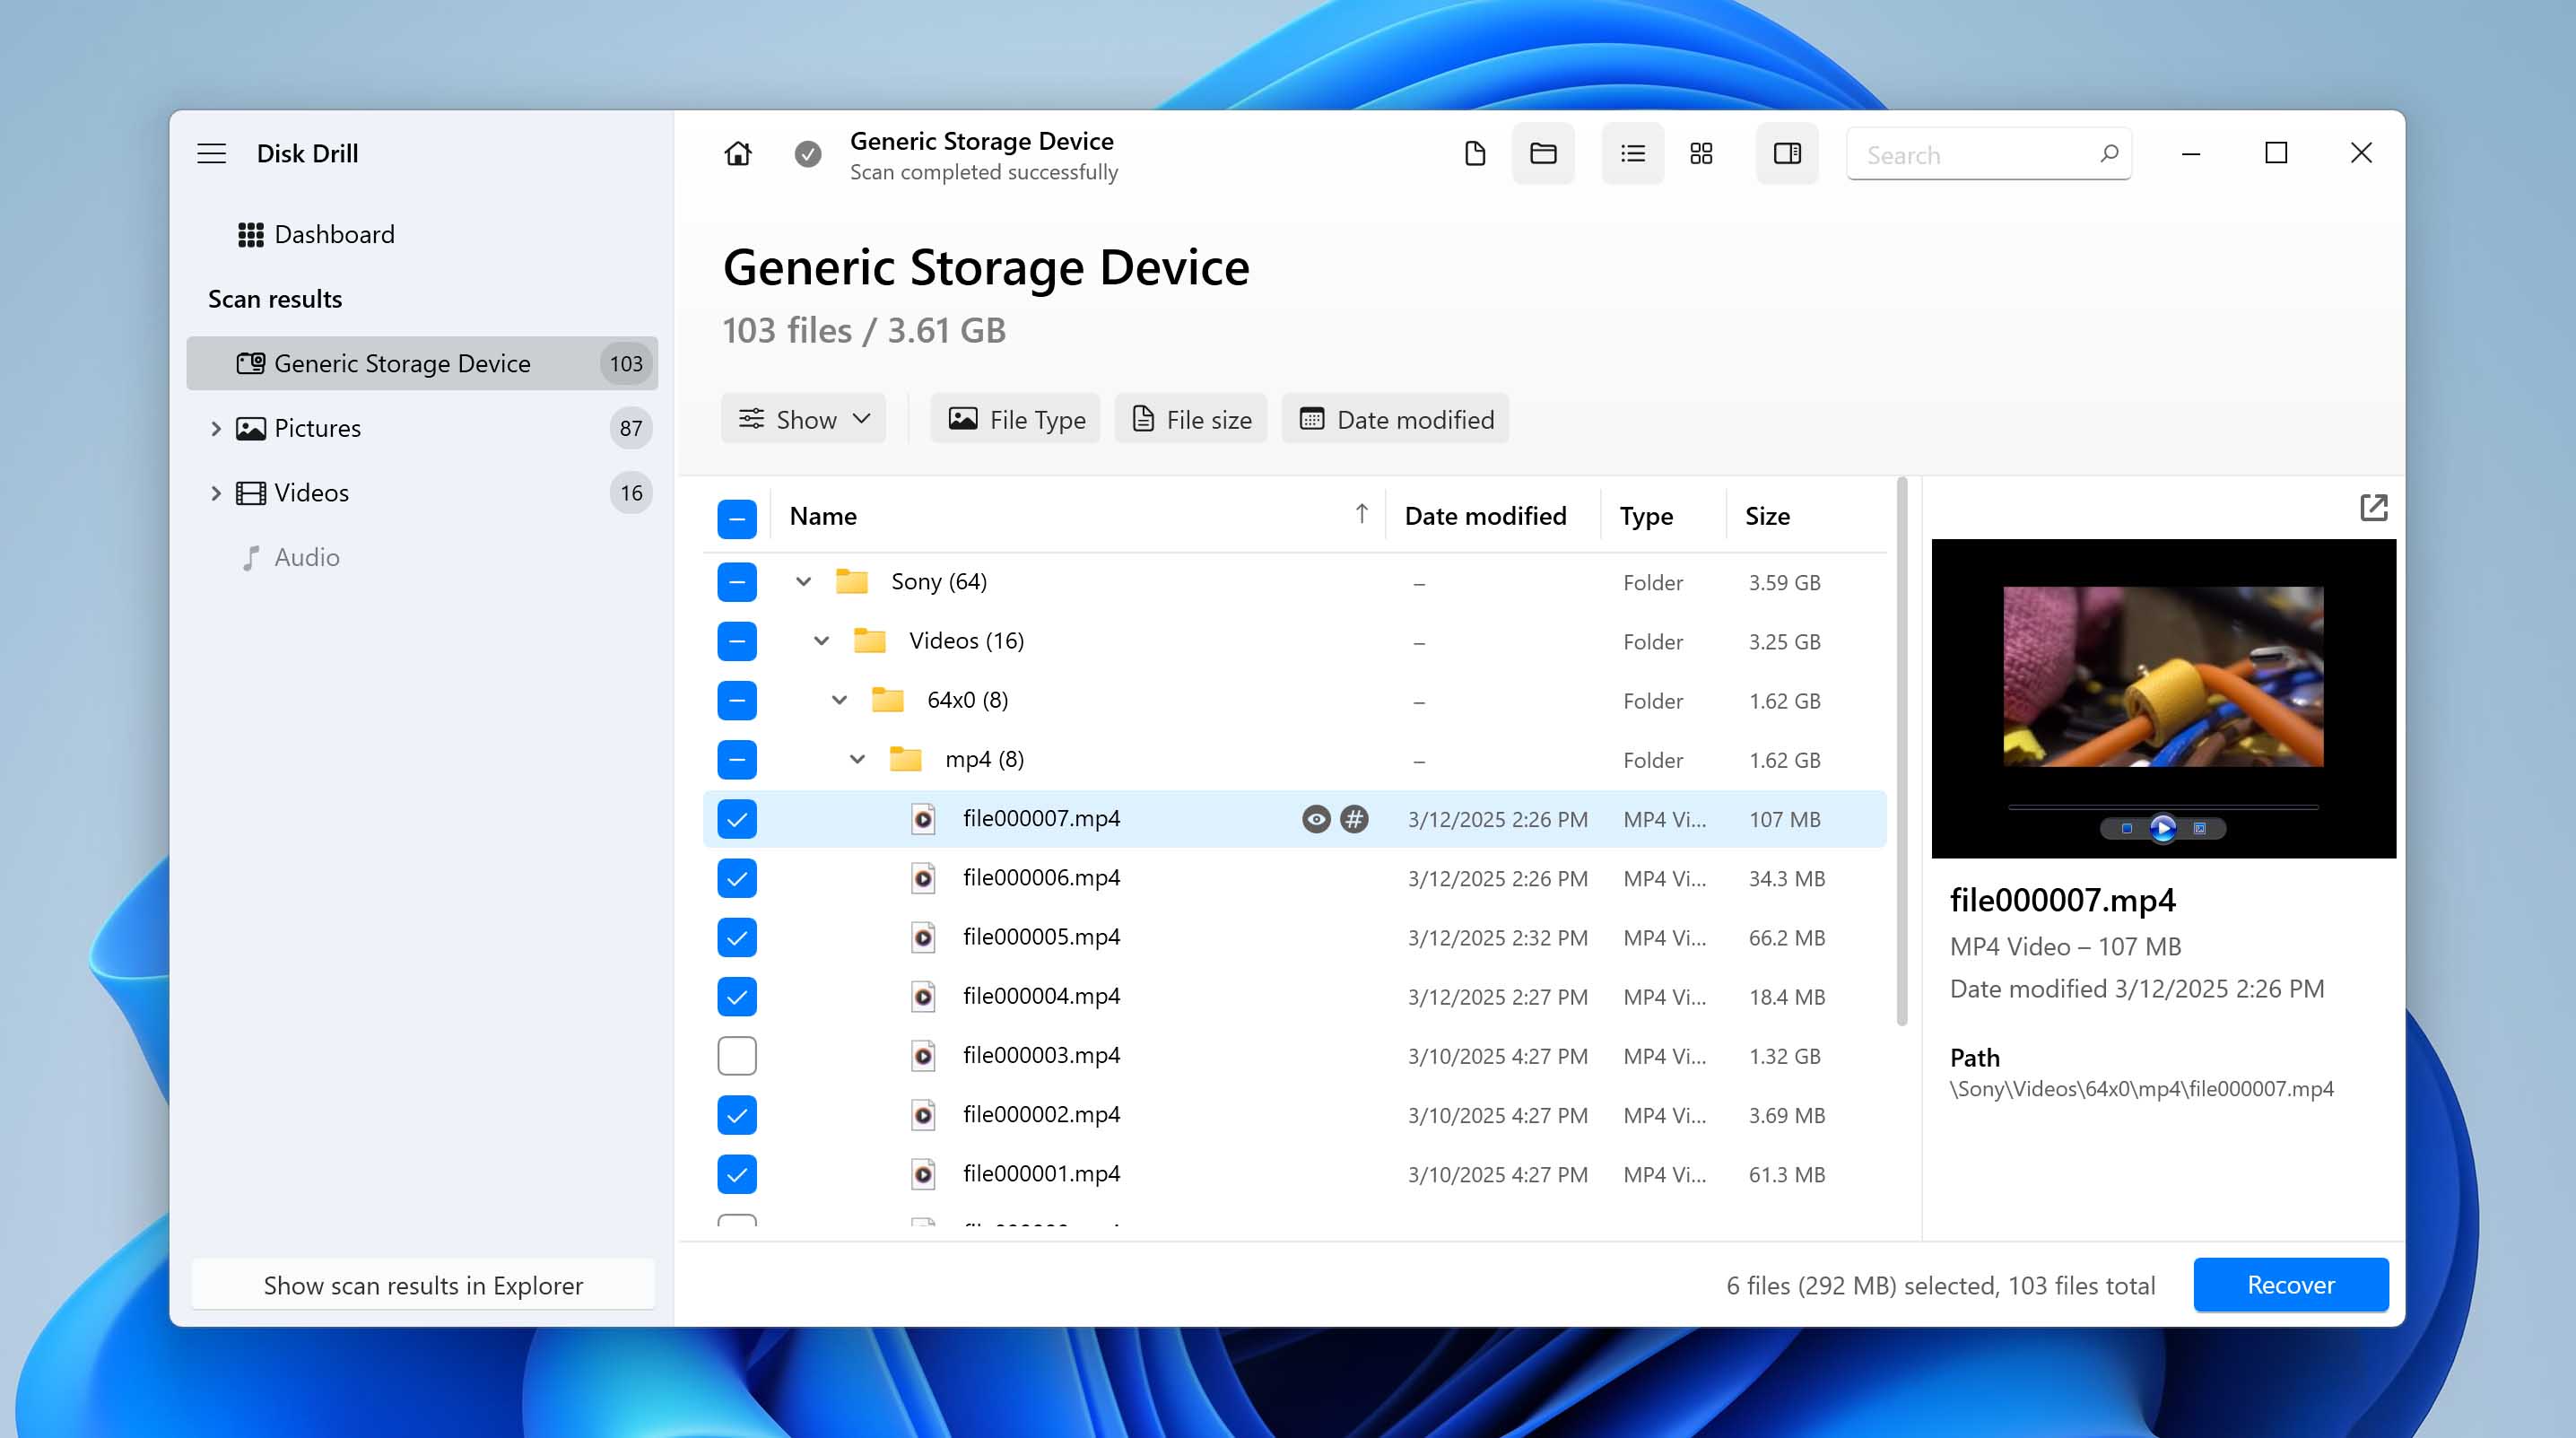
- On the results page, lost files that can be recovered are usually found under the Found files dropdown. There are categories on the left side of the window that you can use to narrow your search to specific kinds of files. Once you’re done highlighting all the files you want to recover, click the Recover button at the bottom of the window to continue.
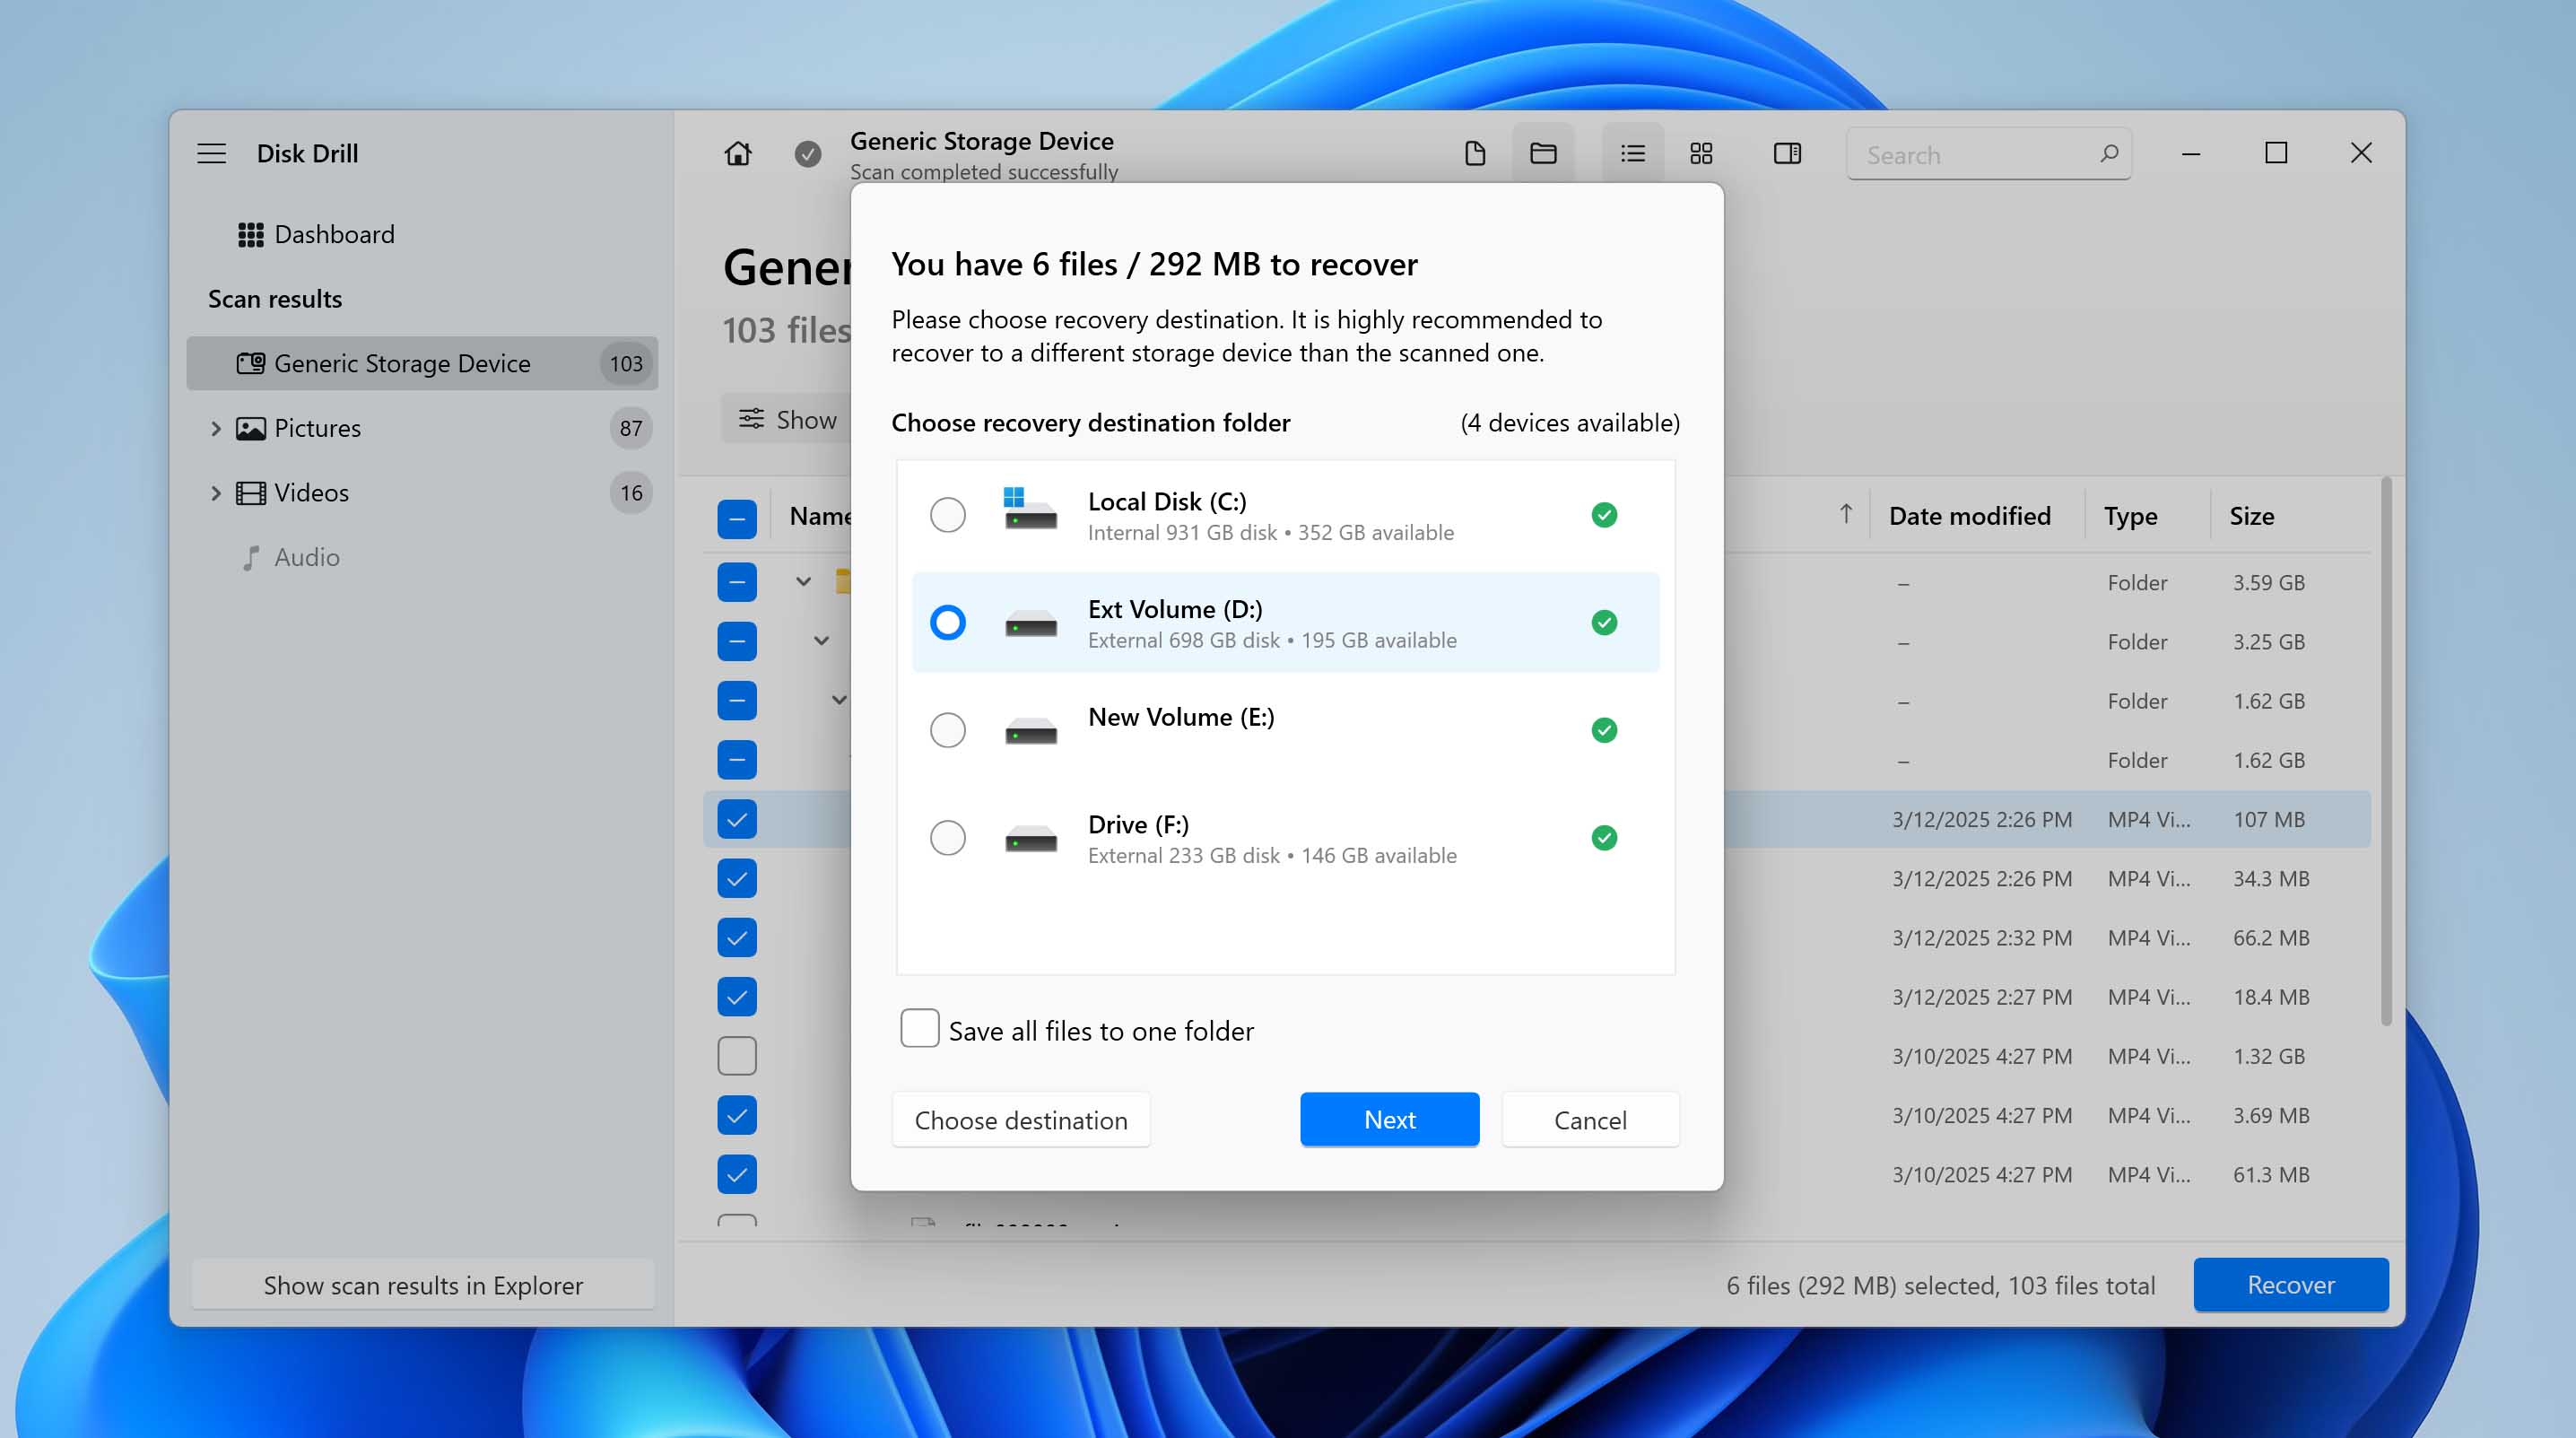
- A pop-up will appear, asking you to select a storage location for your recovered files. Bear in mind that this directory has to be on a different storage medium than the one you’re recovering from. When you’re ready to move on to the final step, click the Next button.
- Disk Drill will now recover the selected files. Once the recovery process is complete, you’ll see a “Show recovered data in Explorer” button that you can click to access your recovered files directly.


How to Change the Format of an SD Card
You cannot undo the changes once you have formatted your SD card, but you can modify its format again – the file system used – to the previous one. This can also keep your SD card at peak performance and prevent future file corruption. Here’s how you do it in File Explorer:
- Insert the SD card into the card slot on your PC. If it doesn’t have one, consider using an SD card reader that connects via USB.
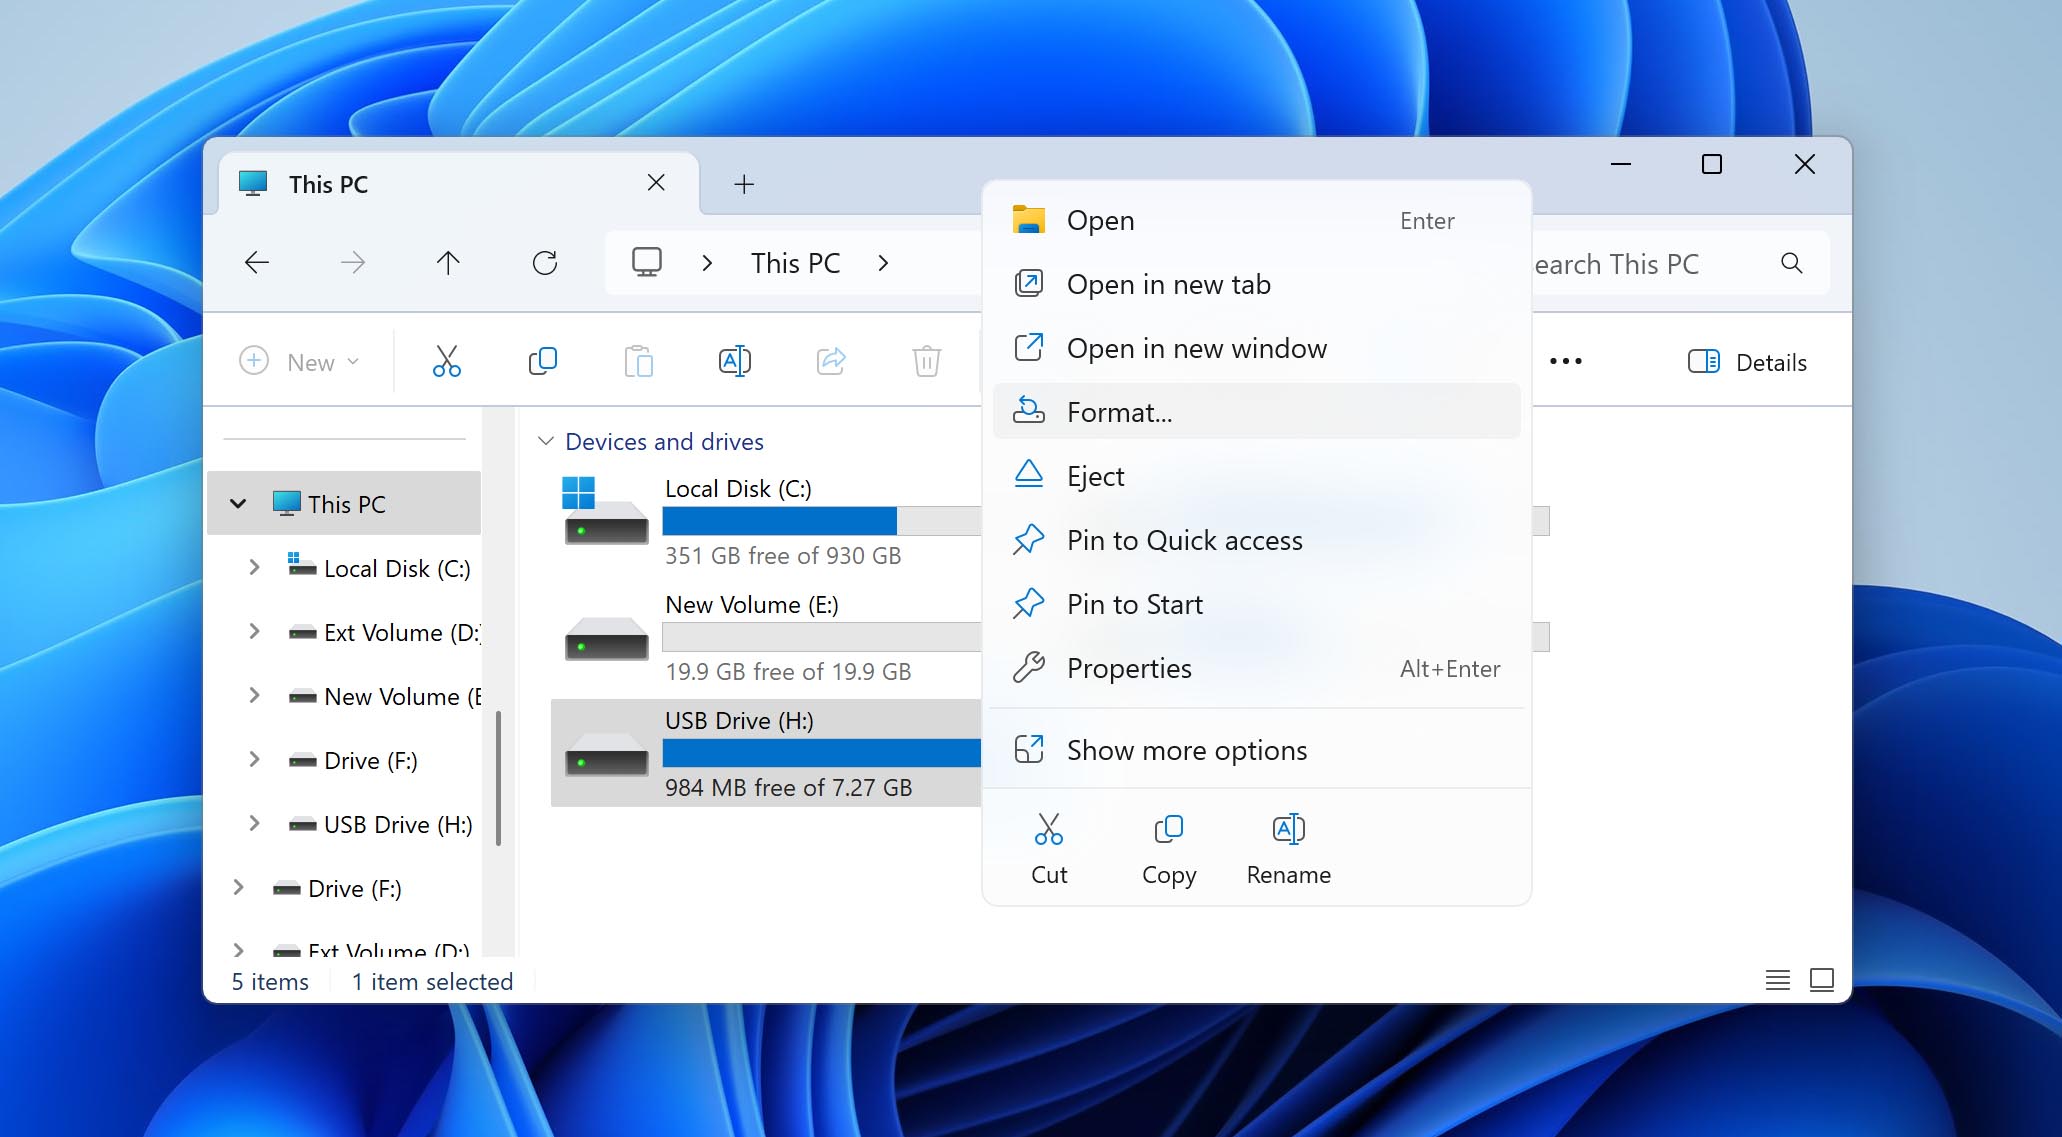
- Next, launch File Explorer on your computer. Go to the This PC folder and right-click your SD card. Choose Format from the displayed context menu.
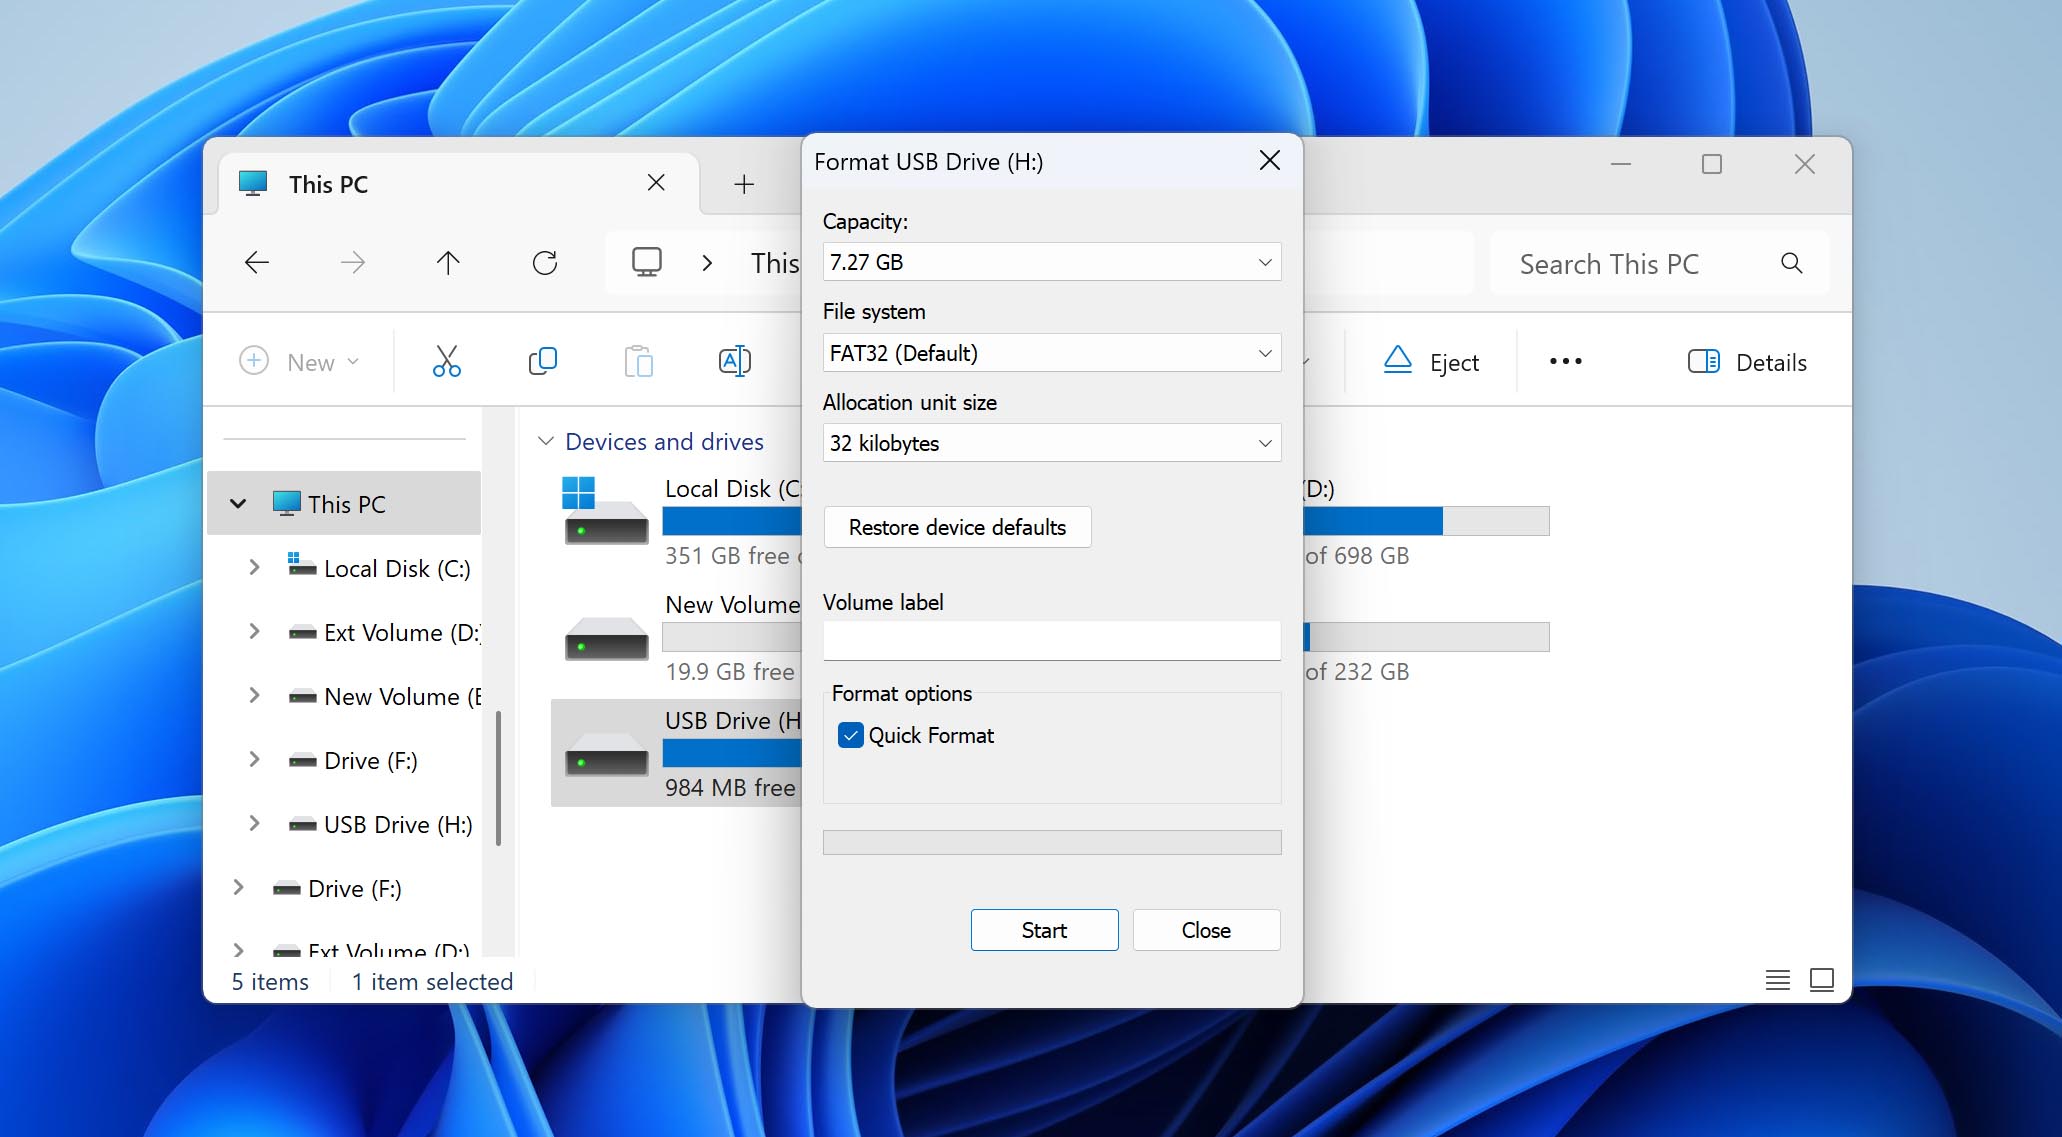
- The Format menu will appear on your screen. From the File system drop-down, choose either exFAT or FAT32. These two systems work best on portable and Android devices.
- Select 4096 bytes under Allocation unit size. Then, to ensure the recoverability of data in the future, make sure to enable Quick Format under Format options. Click Start.
- Finally, to confirm your formatting options in the warning prompt, click OK.


Conclusion
With Disk Drill, you can unformat your SD card after accidental formatting, regardless of whether it was used in a portable console, camera, or drone, thanks to the new Advanced Camera Recovery module. But it’s important not only to fix the problem, but also to prevent it in the future. To do this, follow these tips:
- Always create backups of your SD card files right after you transfer or edit them.
- Double-check the card’s contents before confirming any format action.
- Use the write-protect switch (if available) during important file transfers.
- Safely power off devices before removing the SD card to avoid data corruption.
FAQ:
- Open the Drive app on your phone.
- Locate your SD card backups from your Drive folders.
- Select your files and tap ፧ More > Download.