Reading Time: 6 minutesWhen Windows detects a critical hard drive issue on your computer, it typically displays the “Windows has detected a hard disk problem” error message. Fixing this issue can be a breeze or simply impossible, depending on what caused it. However, you should back up your data, no matter what fix you decide to use.
What Does “Windows Detected a Hard Disk Problem” Mean?
Most modern hard disk drives (HDDs) and solid state drives (SSDs) come with a monitoring system called S.M.A.R.T (Self-Monitoring, Analysis and Reporting Technology). When S.M.A.R.T detects a critical issue with your storage device, it will typically display a hard drive failure message such as “Windows detected a hard disk problem.”

The exact reasons for hard disk failure are usually unclear. The most common reasons include mechanical failure, logical errors, and malware infection. In any case, it’s advisable to back up all your data at this point, because the hard disk can fail at any time.
The error message pop up will ask you to immediately back up your data or remind you later. It’s recommended you immediately back up your data by copying important files to an external storage device. Also, the error message will frequently pop up in a few minutes, as long as Windows still detects the HDD issue.
Upon encountering the error, you should take actions such as:
- Immediately back up all your important data.
- Assess whether your HDD is actually failing. Watch out for symptoms such as weird clicking noises, random disappearance of data, and an overall slow computer. If the HDD is indeed corrupted, take immediate steps to recover a corrupted hard drive.
- If your HDD is older than 5-6 years, you should replace it because it is likely that the drive is failing due to normal wear and tear.
- Get the HDD checked by an expert. Sometimes, the error can be a false alarm due to a S.M.A.R.T malfunction.
How to Recover Data From a Failed Hard Drive
If you notice that your data is missing after you encountered the error, you should attempt data recovery as soon as possible. The ideal way to do this, is to use a third-party data recovery program, such as Disk Drill.
A standout feature of Disk Drill is byte-to-byte backup. This feature allows you to create a disk image of your entire hard drive and scan it for missing data. Most professional data recovery use a disk image to recover your data. Scanning the physical disk can stress it even further and escalate data loss.
Here is how to recover missing data using Disk Drill’s byte-to-byte backup feature.
Create a Disk Image
- Download and install Disk Drill for Windows. It’s recommended that you download and install Disk Drill on an external storage device, such as a USB drive or external HDD.
- Connect the storage device to the affected computer, and then run Disk Drill.
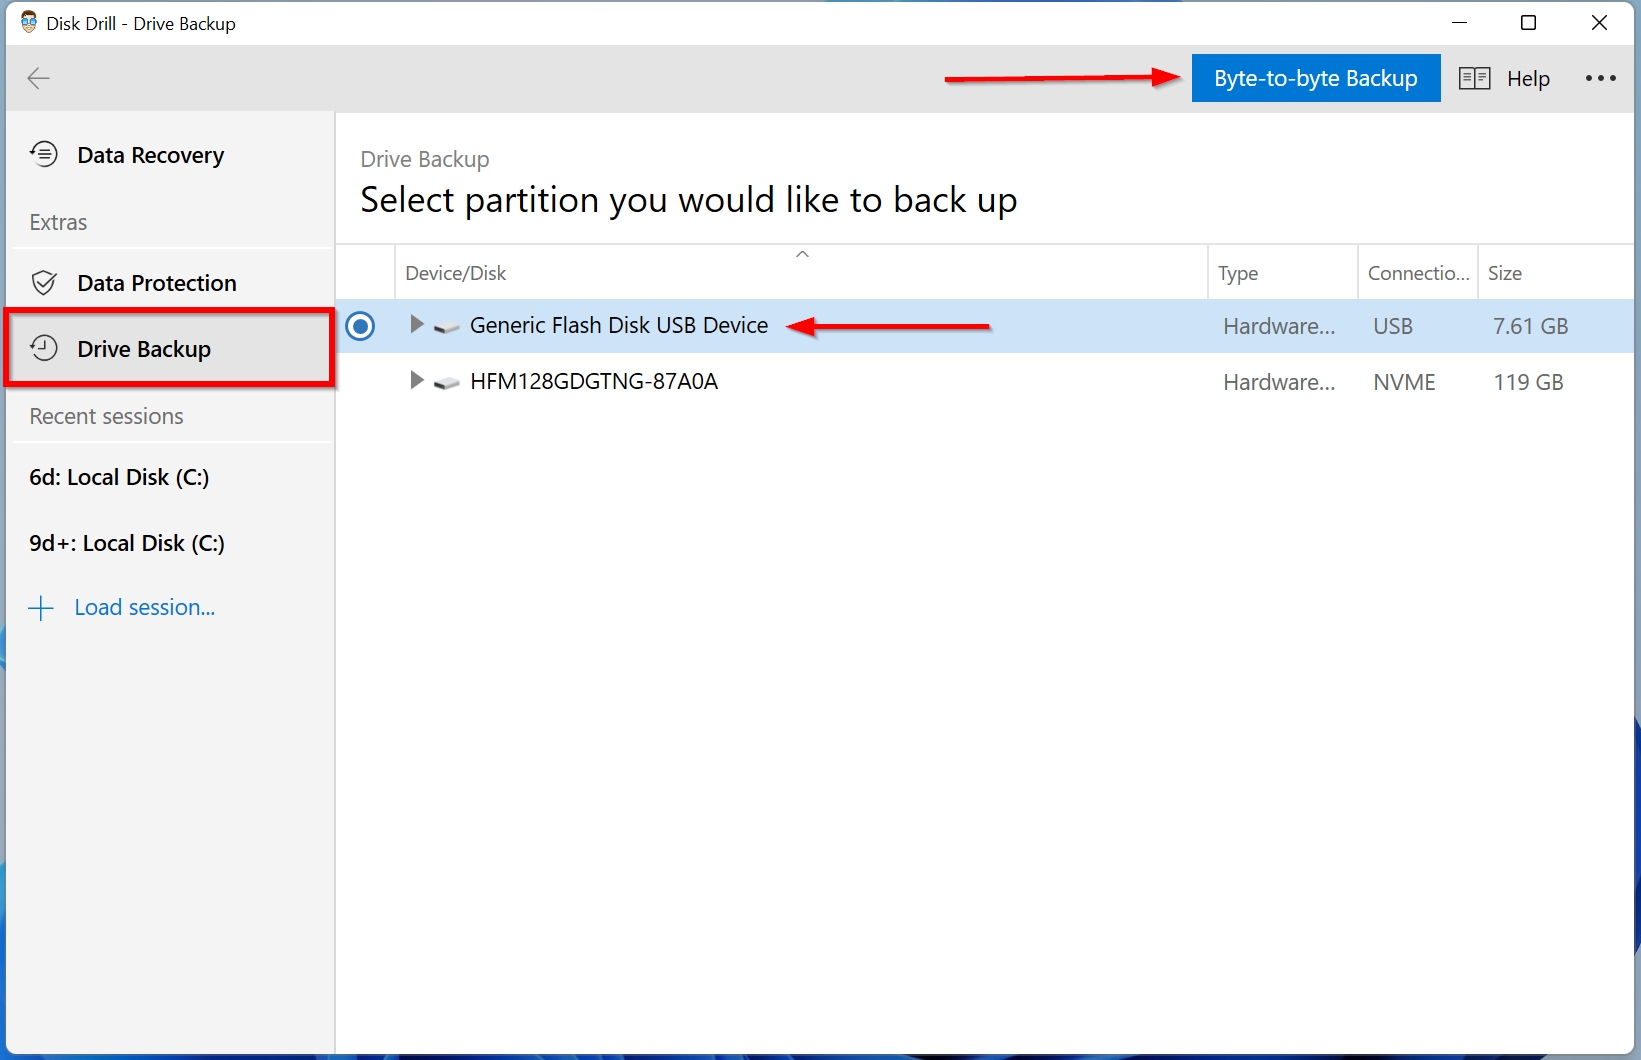
- On the home screen, click on Drive Backup, under Extras on the left navigation pane.
- Select your hard disk drive, and click on the Byte-to-byte backup button. If data loss occurred from a specific partition, just select that particular partition. As an example, we will be creating a disk image of a USB drive. The process is the same for any kind of storage device.
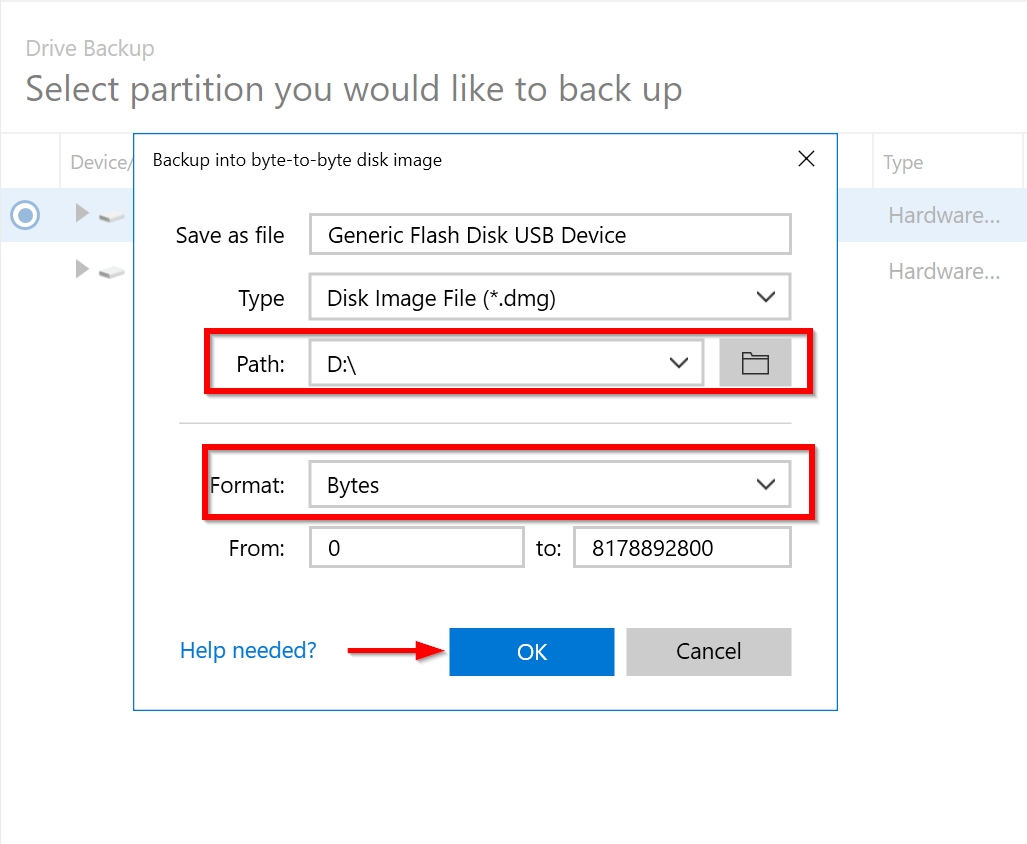
- Select a storage directory for the disk image. Make sure you have enough free space for the same. Don’t save the disk image on the same partition or HDD.
- Ensure that the Format option is set to Bytes.
- Click on OK.
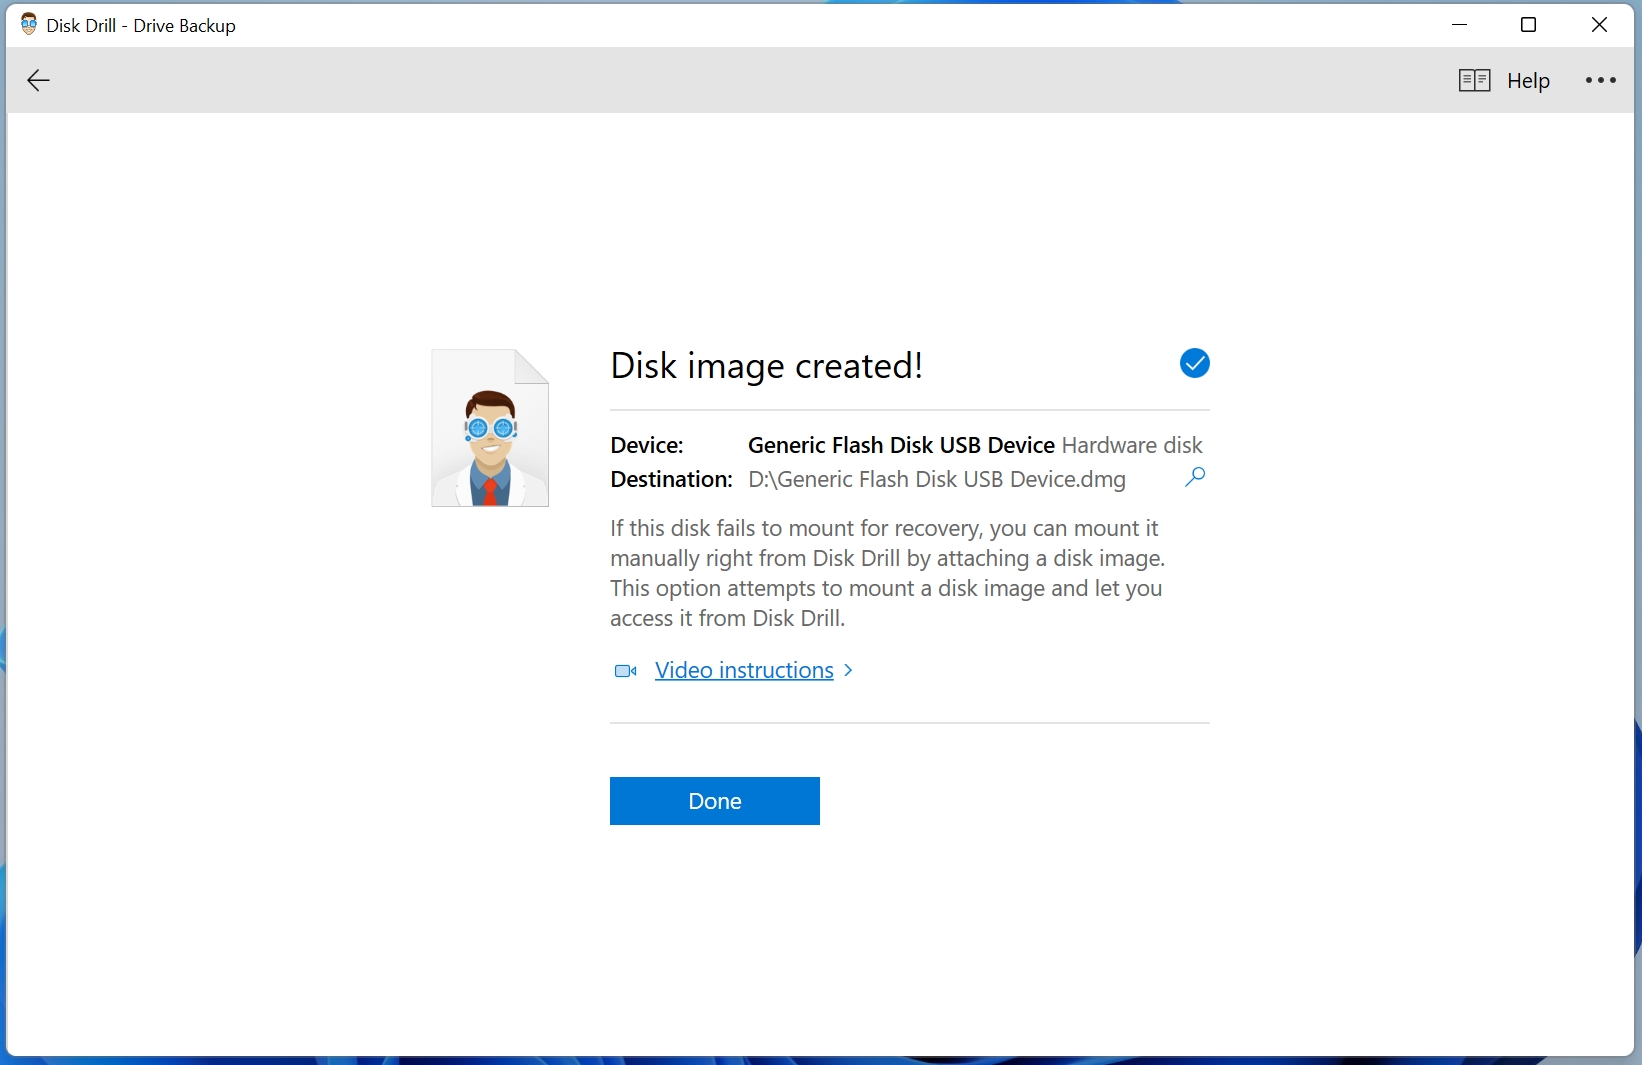
- Wait for Disk Drill to finish creating the disk image.

- Click on Done, after Disk Drill has finished creating the disk image.
Scan the Disk Image
- Open Disk Drill.
- On the home screen, click on the Attach disk image option.
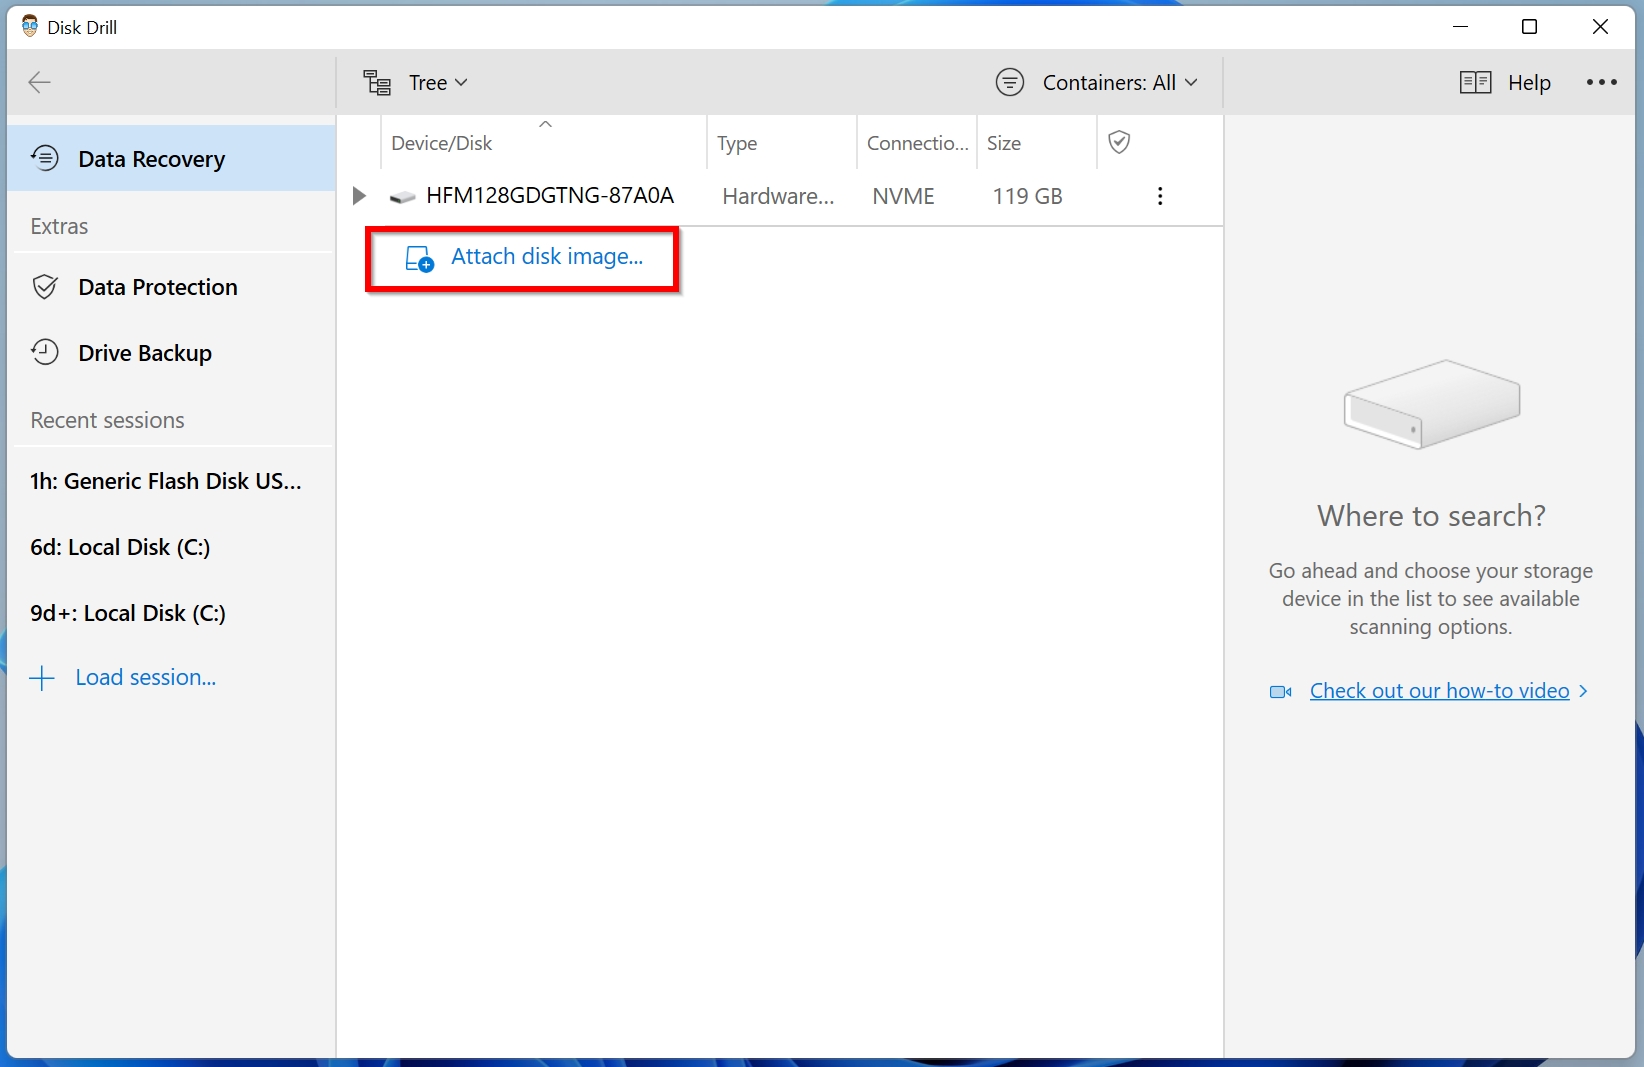
- Browse for the disk image you created in the previous section and click on OK.
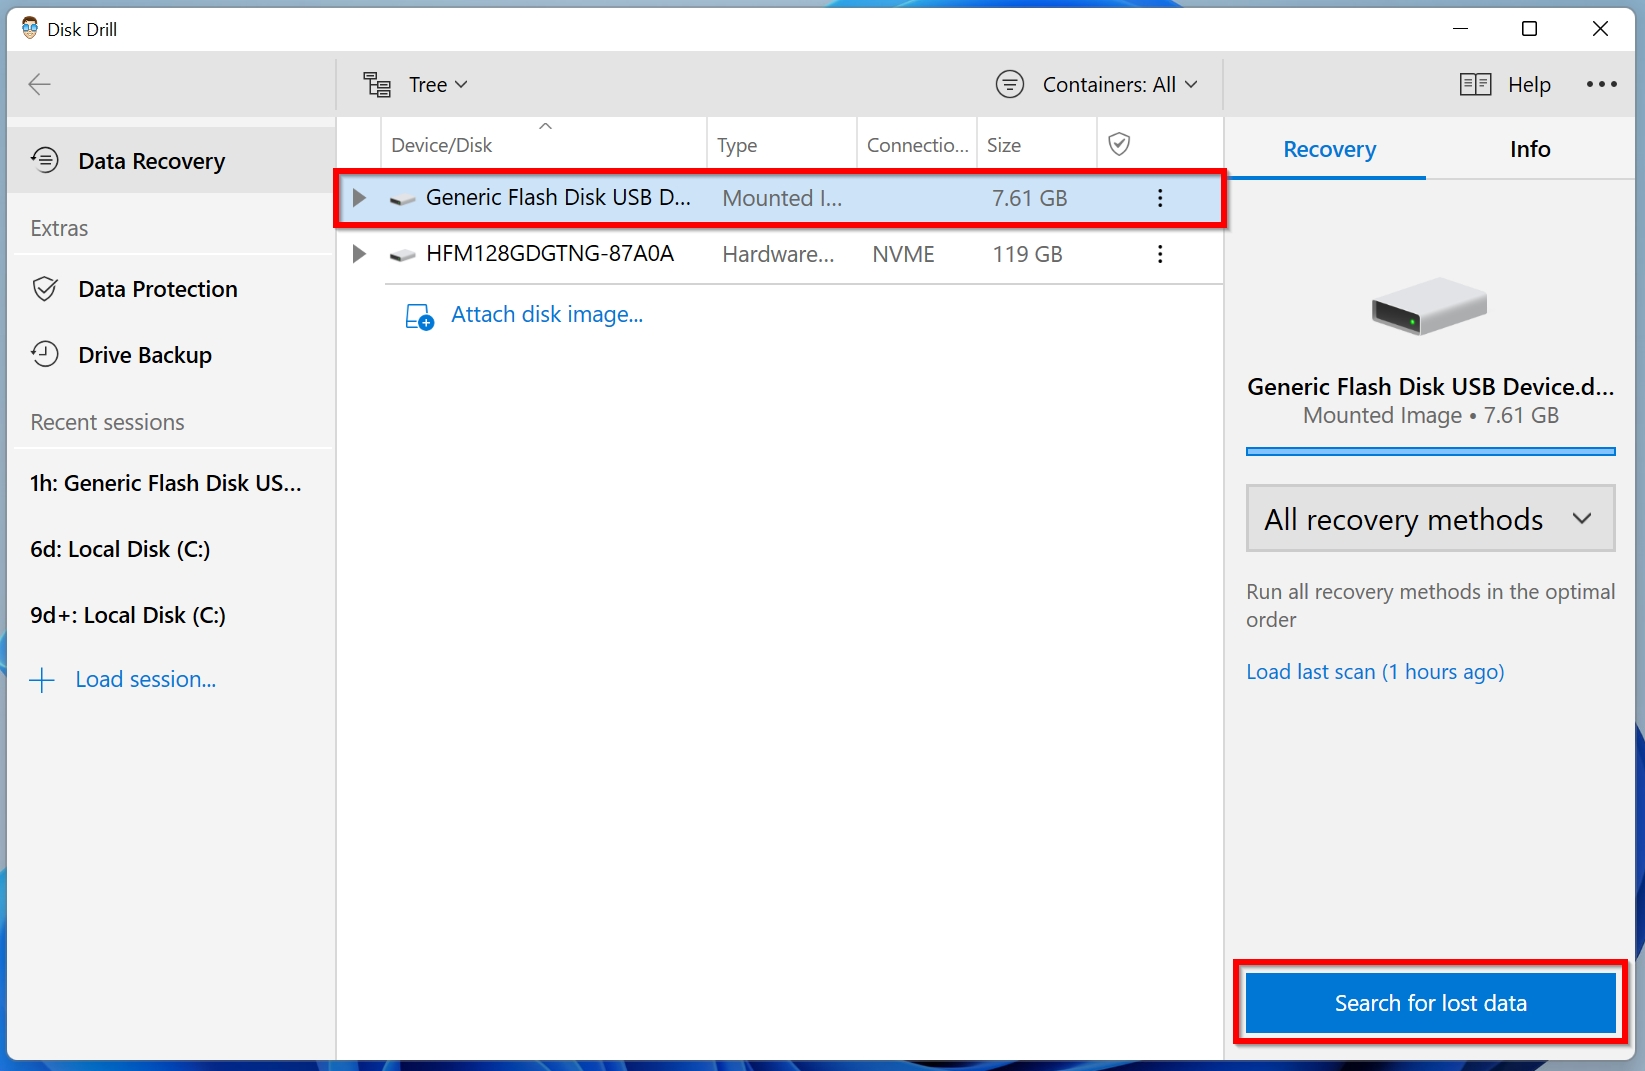
- Now, select the disk image in Disk Drill.
- Click on Search for lost data.
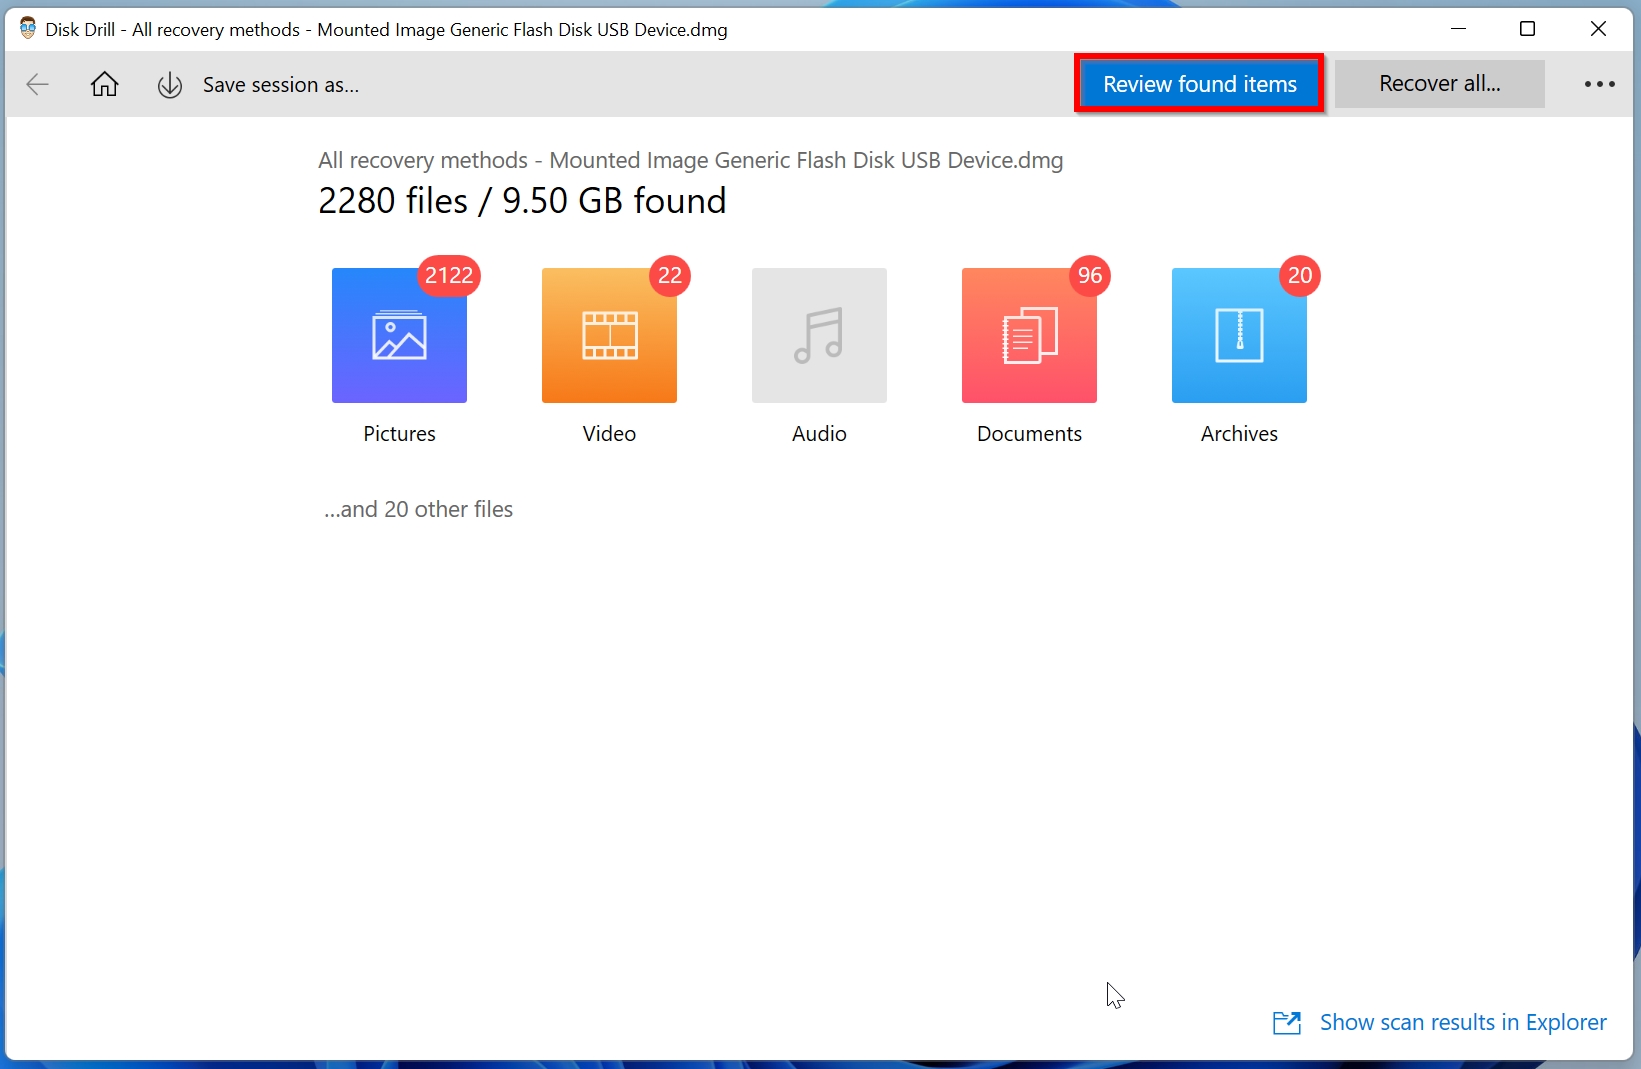
- Wait for Disk Drill to finish scanning for lost data.
- Once the scan is complete, click on Review found items.
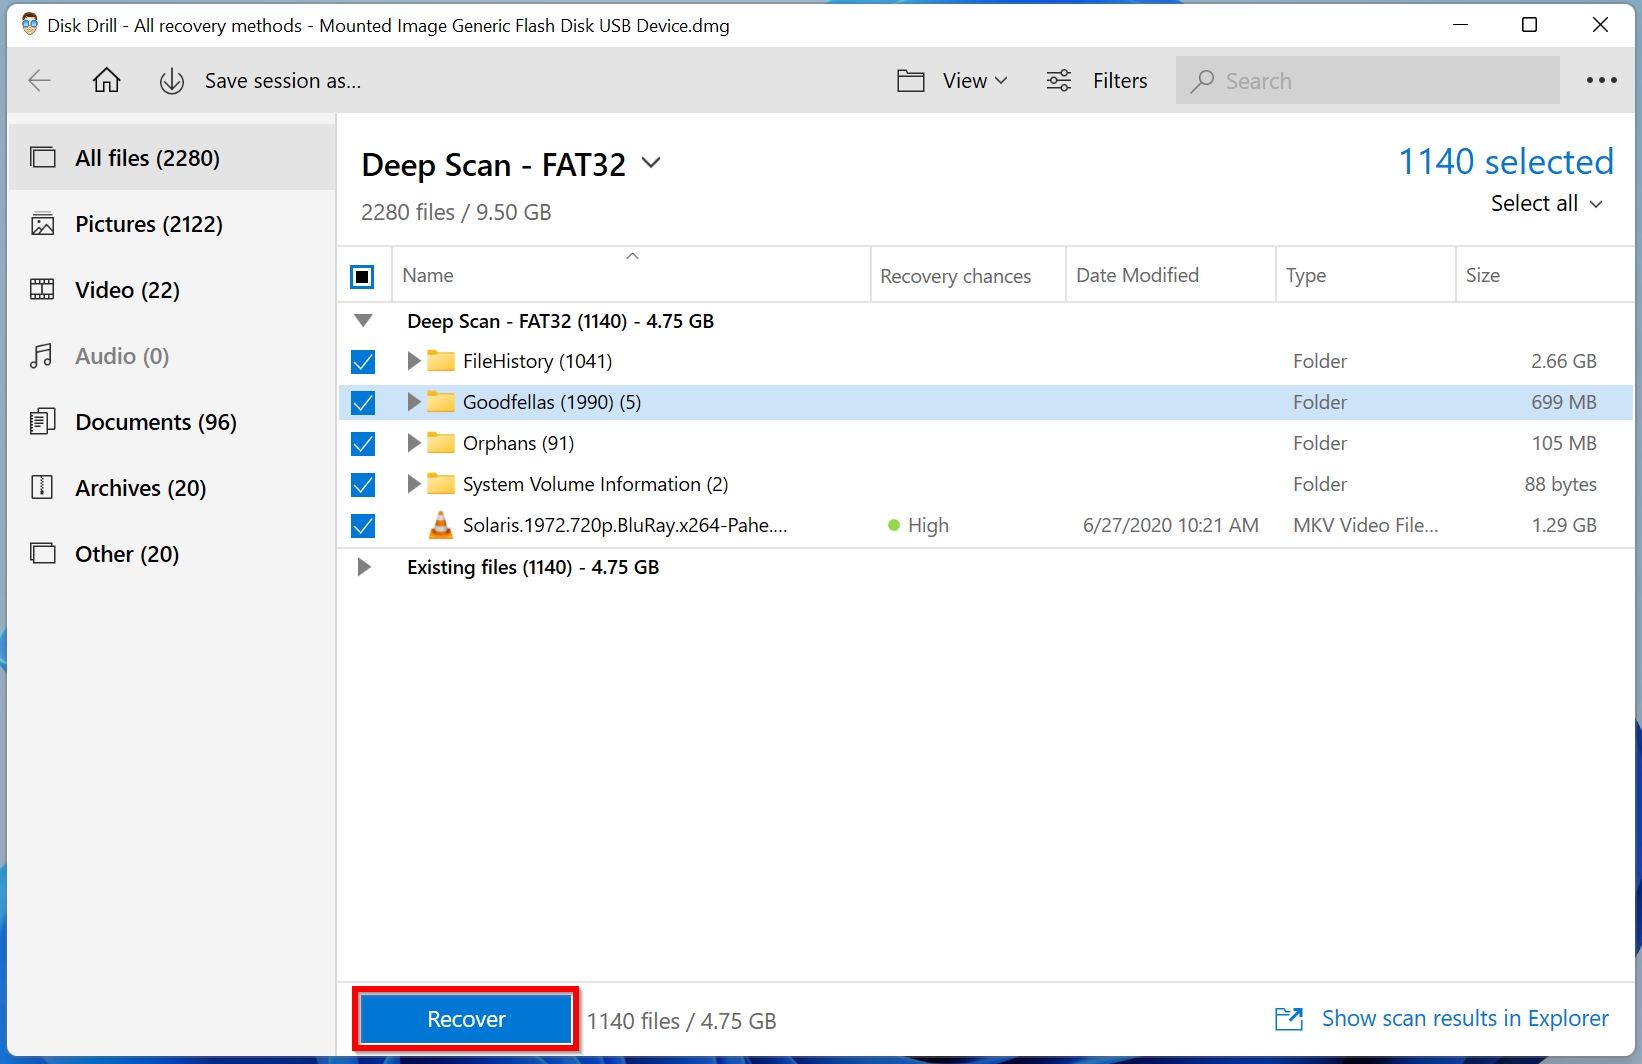
- Now, select all the files you want to recover.
- Click on the Recover button.
- Select a recovery destination. Ensure you choose one that is located on the external storage device.
- Click on OK.
How to Fix “Windows has Detected a Hard Disk Problem” Issue
How to fix a hard disk problem? Well, Windows comes with some in-built utilities that can help you diagnose and fix hard drive issues. Two of these utilities are SFC and CHKDSK.
SFC is short for System File Checker, and it checks and fixes corrupt system files. CHKDSK is a dedicated to fix hard drive errors on your computer. It’s worth running both these utilities to try and fix your hard drive before discarding it.
Note: In most cases, both SFC and CHKDSK will not be of much help after you encounter the “Windows has detected a hard disk problem” error message. The error message usually appears when the HDD is just about to fail.
How to Run SFC
- Type cmd in Windows search.
- Right-click on Command Prompt > Run as administrator.
- In the Command Prompt console, type sfc /scannow and press Enter.
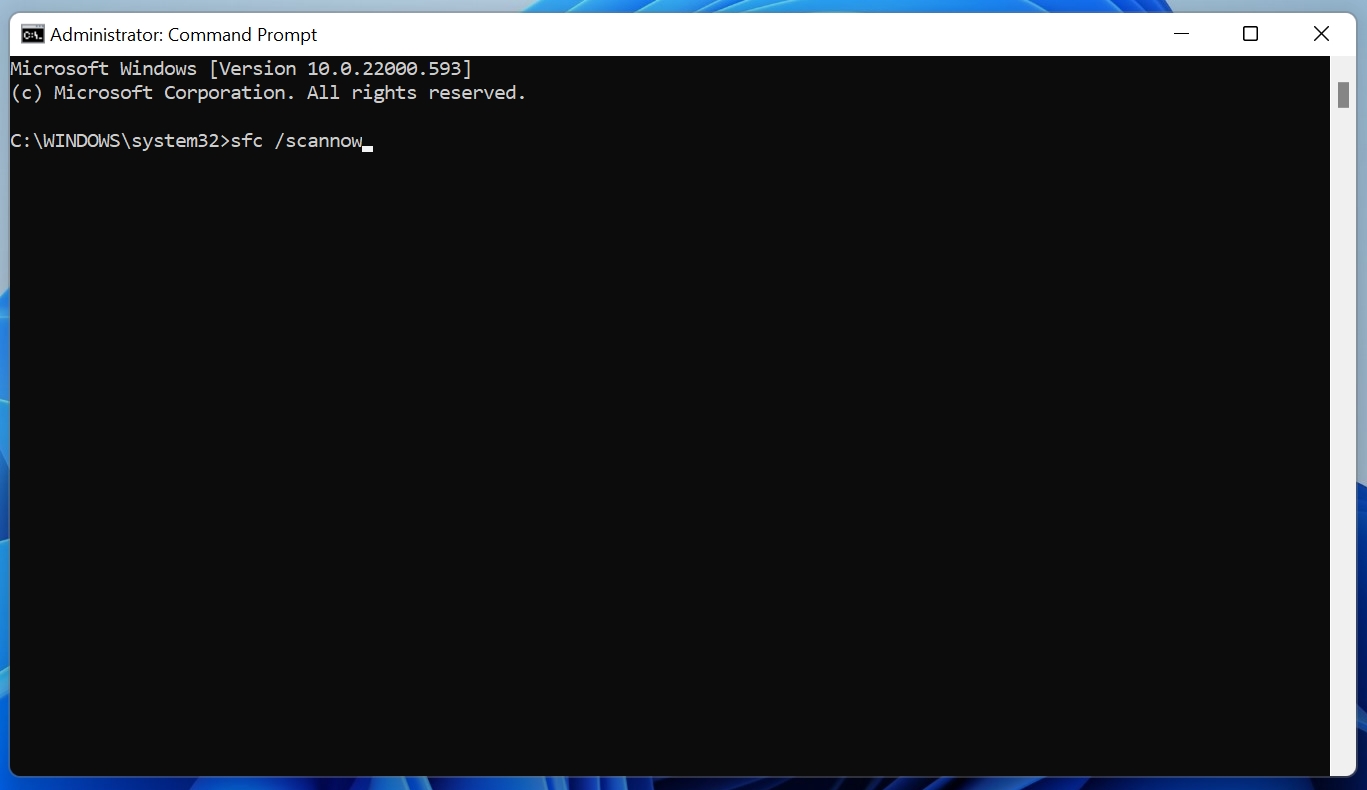
- Wait for Windows to finish scanning.
- After the scan, reboot your computer and check if the error persists.
How to Run CHKDSK
- Again, run Command Prompt as administrator using steps 1 and 2 in the previous section.
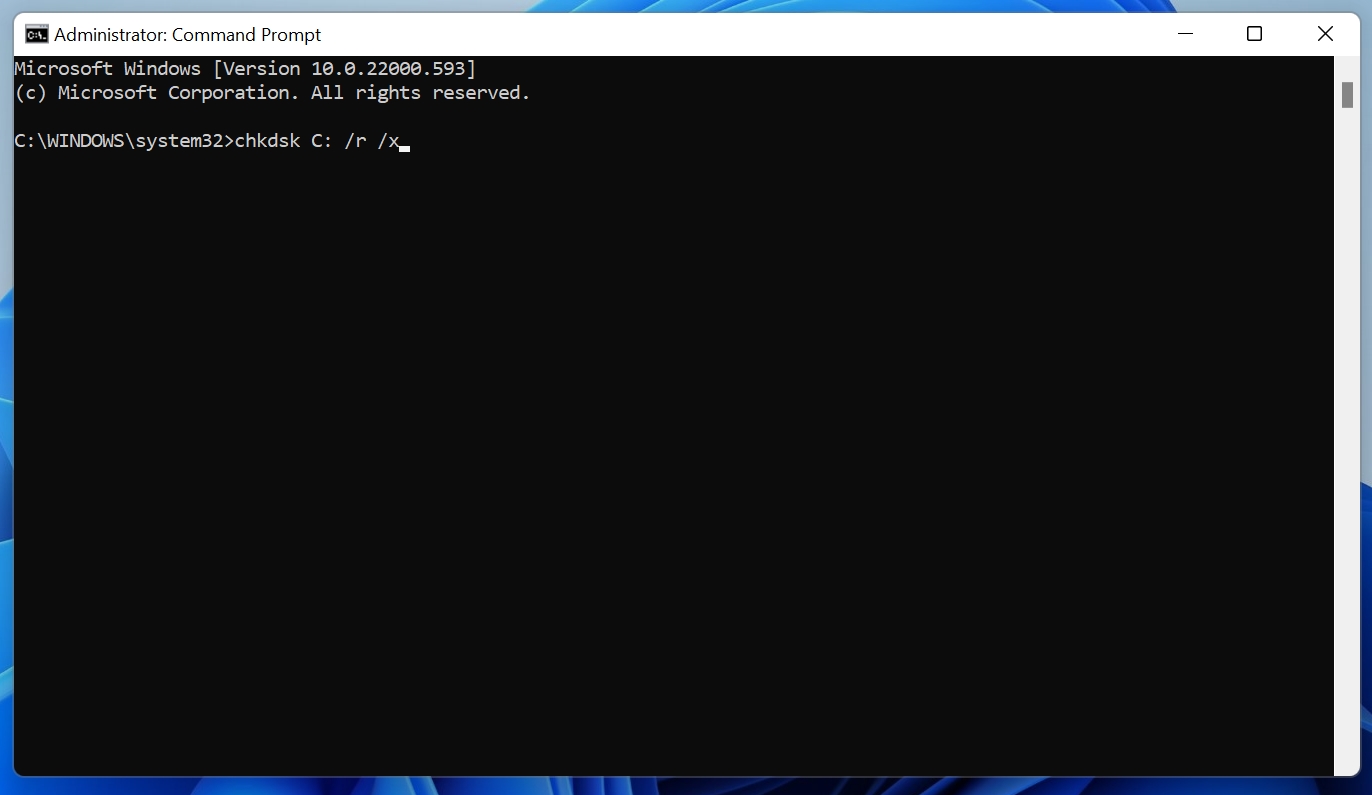
- In the console, type the following command:
chkdsk C: /r /x
This command will check and repair hard drive related errors in the C: partition of your computer. If you have multiple partitions, you will have to run the command again for each partition, replacing “C:” with the letter of the concerned partition.
- Wait for Windows to finish scanning and repairing the hard disk drive.
- Reboot your computer.
Conclusion
The “Windows has detected a hard disk problem” error can appear at any time. You can lessen your chances of ever facing this error by replacing your HDDs every 5 years, and by employing measures that prevent malware infection. Furthermore, back up your data frequently to prevent data loss even if you come across this error.
FAQ
- Firstly, you should run an automatic disk check to look for any errors that may be causing the issue. You can do this by opening the Run window (Windows+R) and typing in 'chkdsk' followed by the drive letter of the affected drive. This will scan your drive for errors and repair them if possible.
- Additionally, it is also worth considering running a full system scan with an anti-virus program to make sure your system is free from infections.
- Finally, you can try booting into safe mode and running System Restore to roll back any changes which may have caused the issue.