Reading Time: 5 minutesIf you notice that the My Pictures folder on your computer is missing, it could be due to a multitude of reasons. These include accidentally deleting the folder, moving it to another location, or it may simply be hidden. In this article, we’ll take a look at how you can restore the folder and recover missing files from the My Pictures directory.
What Is My Pictures Folder on Windows
The Pictures folder on Windows is where user photos are stored by default. It has a unique icon that can be used to differentiate it from other directories. Essentially, Windows lets users customize folders to store specific types of files, and the Pictures folder is customized by default to house image files.
The Pictures folder acts as a library, and you don’t necessarily need to store pictures in the C: drive, which is the default partition for the My Pictures folder. You can right-click on Pictures > Properties > Location, and choose a target destination to store photos that are saved in the Pictures folder.
How to Find My Pictures Folder
The default location for the Pictures folder in Windows is: C:\Users\<username>\Pictures. You can simply open File Explorer, type in the aforementioned address in the address bar, and press Enter. Replace <username> with your unique username. This will directly take you to the My Pictures directory.
Just to be safe, ensure you have Hidden Items ticked in Windows Explorer. To do this, simply open File Explorer, click on View > Hidden Items.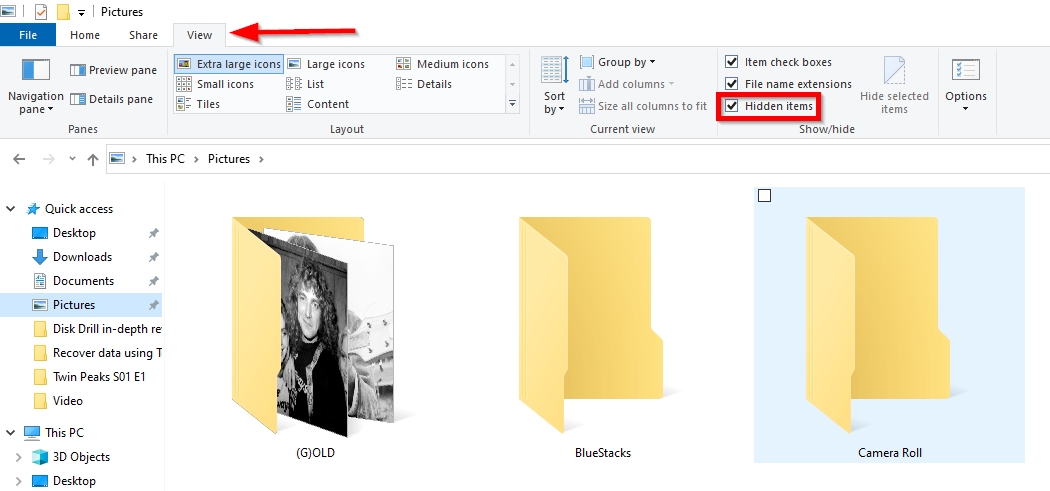
If you have File Explorer pinned to your Taskbar, right-click on it and then click on Pictures. However, you’ll only see it if Pictures was pinned to Quick Access (by default, it is pinned). Alternatively, you can simply search for the directory in Windows Search (Windows Key + S).
How to Restore My Pictures Folder
If you notice that the My Pictures folder is missing in Windows 10, there are a few fixes you can employ, to restore it. Importantly, all these fixes will restore the Pictures folder, but they will not get back any lost data from the folder (except when restoring the folder using the Recycle Bin). We will cover data recovery from the Pictures folder in Windows 10 in the next section.
Method 1: Check the Recycle Bin
It’s quite possible you may have accidentally deleted the My Pictures folder. If it was not deleted using the Shift + Delete shortcut, you can locate the directory in Windows Recycle Bin and restore it from there.
This will also restore all the files that were stored in the Pictures folder at the time of deletion.
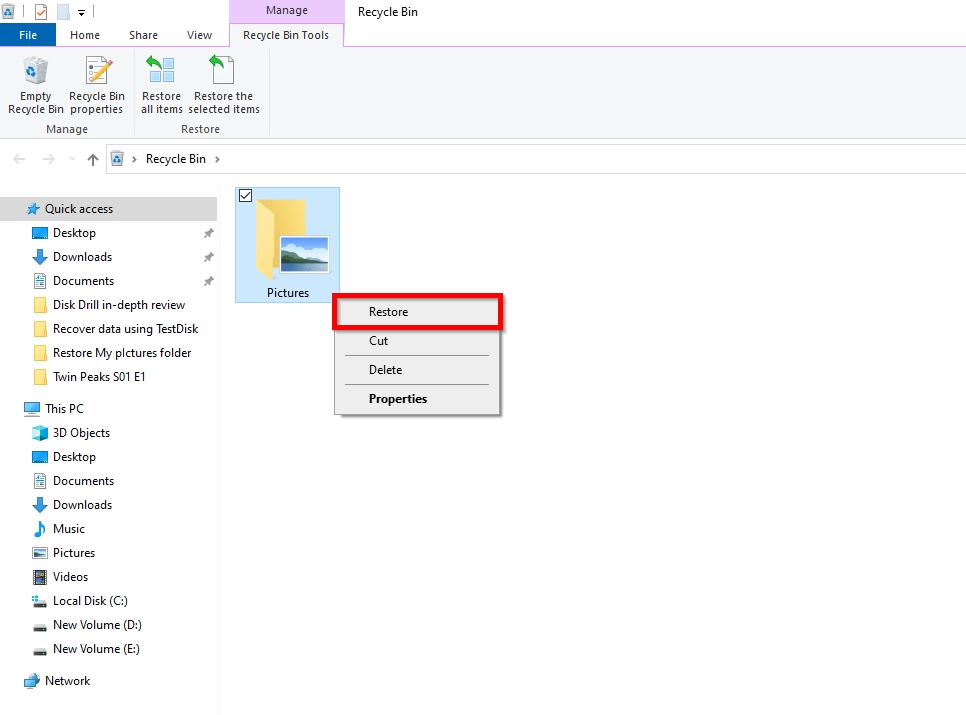
- Open Recycle Bin using the desktop shortcut.
- Locate My Pictures and right-click on it.
- Click on Restore to restore the folder to its original location.
Method 2: Use a Command Line to Restore the Pictures Folder
- Press Windows Key + R to open the Run application.
- Type shell:My Pictures in the text box and hit Enter.
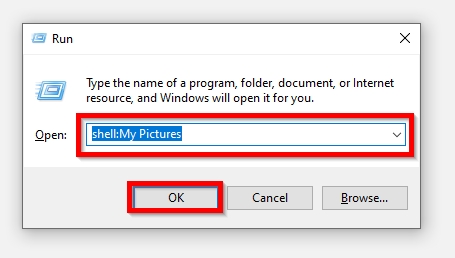
- This will open the My Pictures folder in Windows Explorer. It should also restore the folder in the Start menu. You may need to reboot your PC.
Method 3: Reset Quick Access Folders View
In some instances, the Pictures folder could disappear from Quick Access, making it difficult to access. To resolve this, simply reset the Quick Acces folders view:
- Open File Explorer and right-click on Quick Access.
- Click on Options.
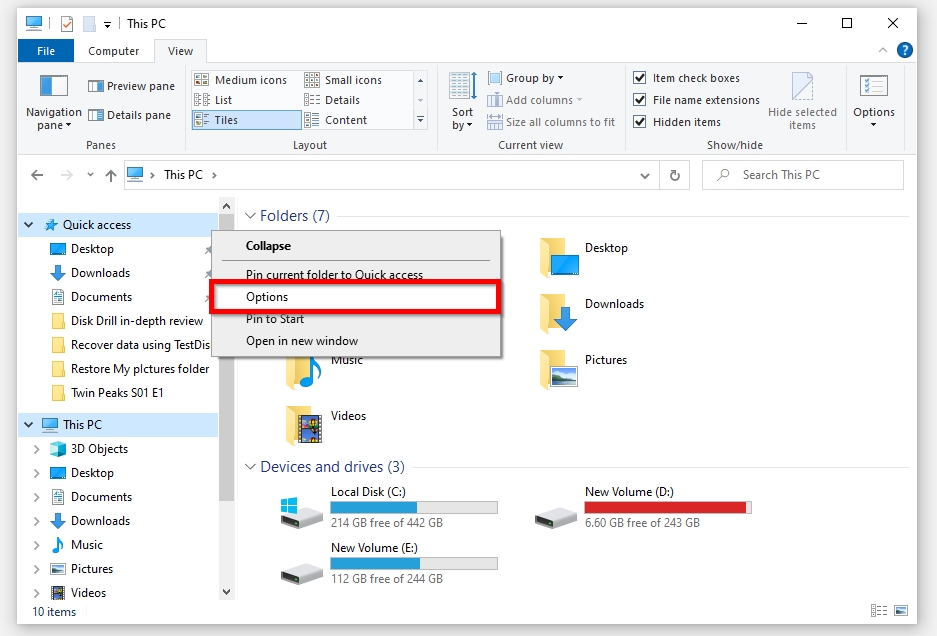
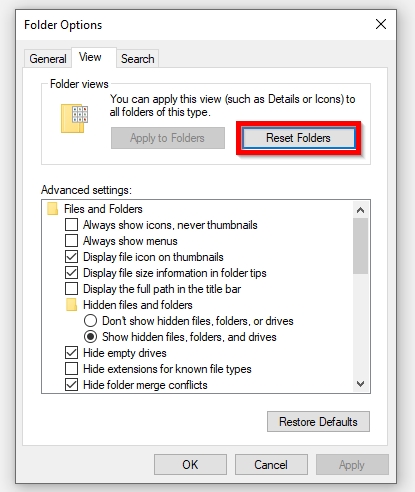
- Navigate to the View tab and click on Reset folders.
Note: You can also use the shell:My Pictures command to open the Pictures folder, and then simply drag the folder from the address bar to the Quick Access pane to the left to pin it there.
Method 4: Restore My Pictures Folder in Windows 10 Using the Registry Editor
The Registry Editor can be used to find the My Pictures folder, and subsequently change the location of the Pictures folder in Windows 10. However, editing the Registry can have a negative impact on your PC, if done incorrectly. So ensure that you follow the steps carefully:
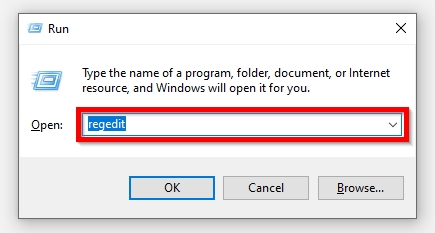
- Press Windows Key + R, to open the Run program.
- Type regedit in the text box and hit Enter.
- In the Registry Editor, use the left pane to navigate to
HKEY_CURRENT_USER\SOFTWARE\Microsoft\Windows\CurrentVersion\Explorer\Shell Folders
- Locate the My Pictures entry and double-click on it.
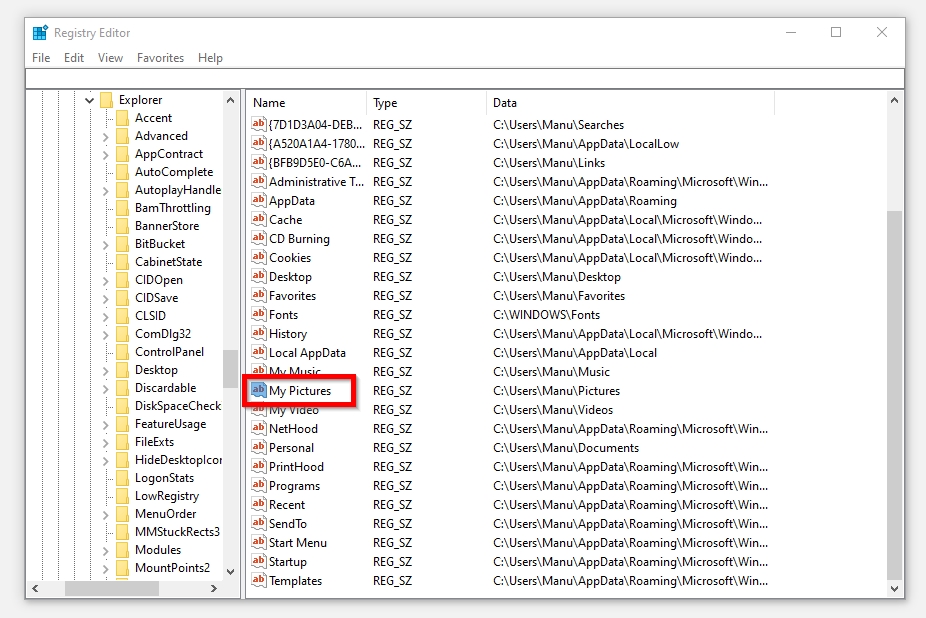
- Under Value data, check if the location is C:\Users\<username>\Pictures.
- If it’s not, edit the value to the location mentioned in the previous step, replacing <username> with your actual Windows username.
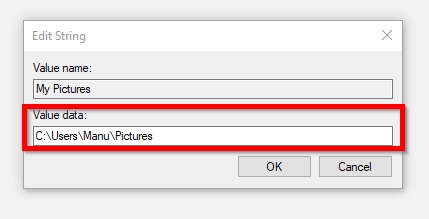
- Click OK.
- Close the Registry Editor and reboot your PC.
How to Recover Deleted Files from My Pictures Folder
As mentioned earlier, if you deleted files from the My Pictures folder, you won’t be able to recover them, simply by restoring the directory, unless it was in the Recycle Bin.
To recover missing photos from the Pictures folder in Windows 10, you can use a third-party data recovery program like Disk Drill. Not only is it easy to download, install, and operate, Disk Drill also offers exceptional data recovery rates, along with a free trial of up to 500 MB of data recovery (for Windows users) that provides unparalleled peace of mind.
Let’s see how easy it is to recover your missing photos using Disk Drill:
- Download Disk Drill and run the installer.
- Simply click on Install to begin the installation. Ensure you have administrator privileges.

- After installation, launch Disk Drill.
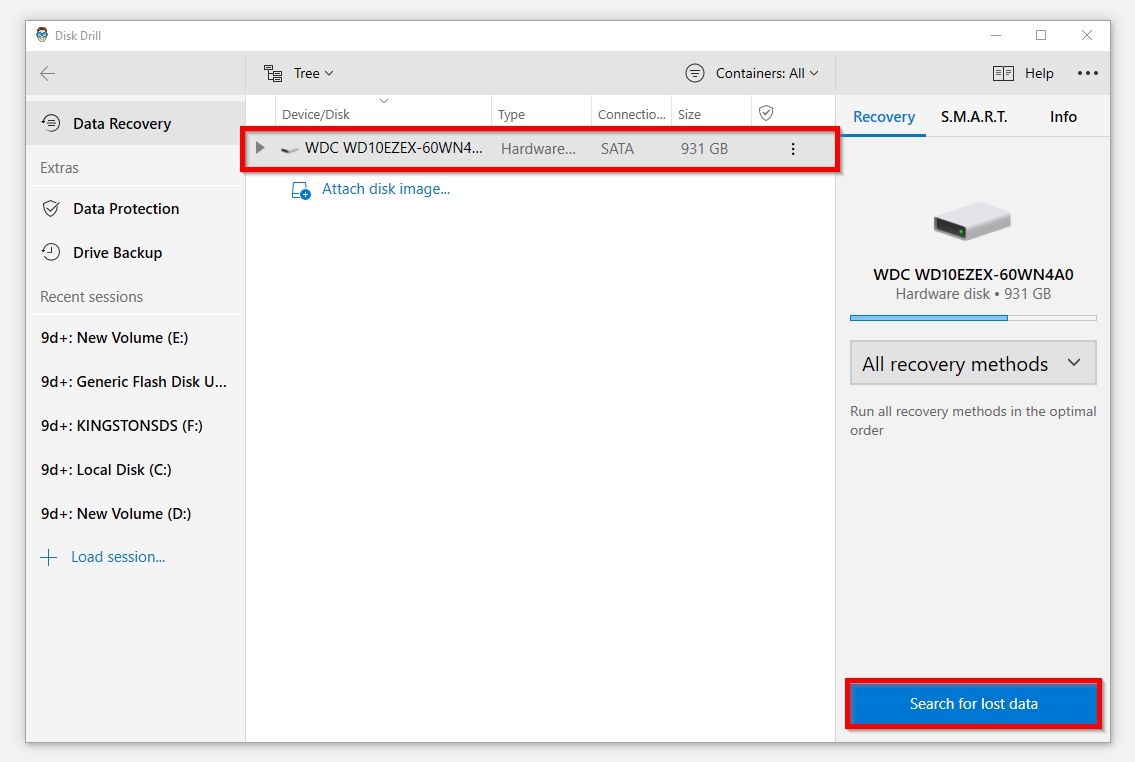
- Select your storage device from the list. Click on Search for lost data.
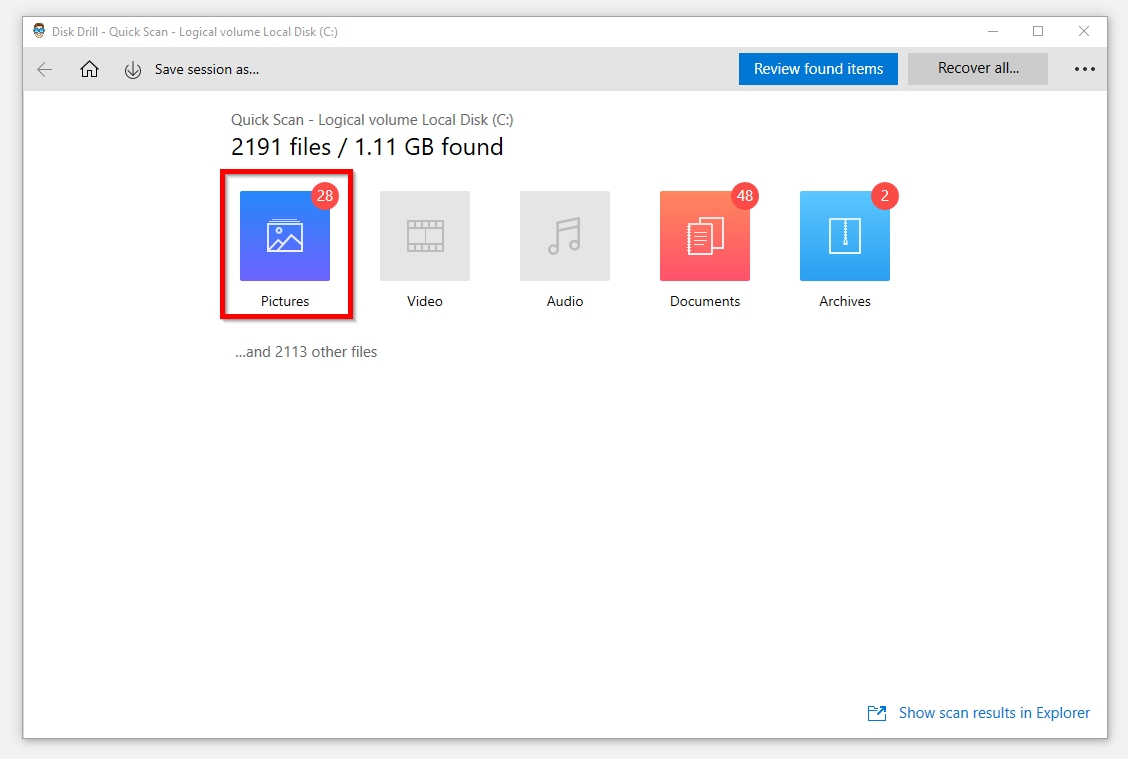
- Wait for Disk Drill to finish scanning the hard drive.
- Since you want to recover photos, simply click on Pictures in the scan complete screen.
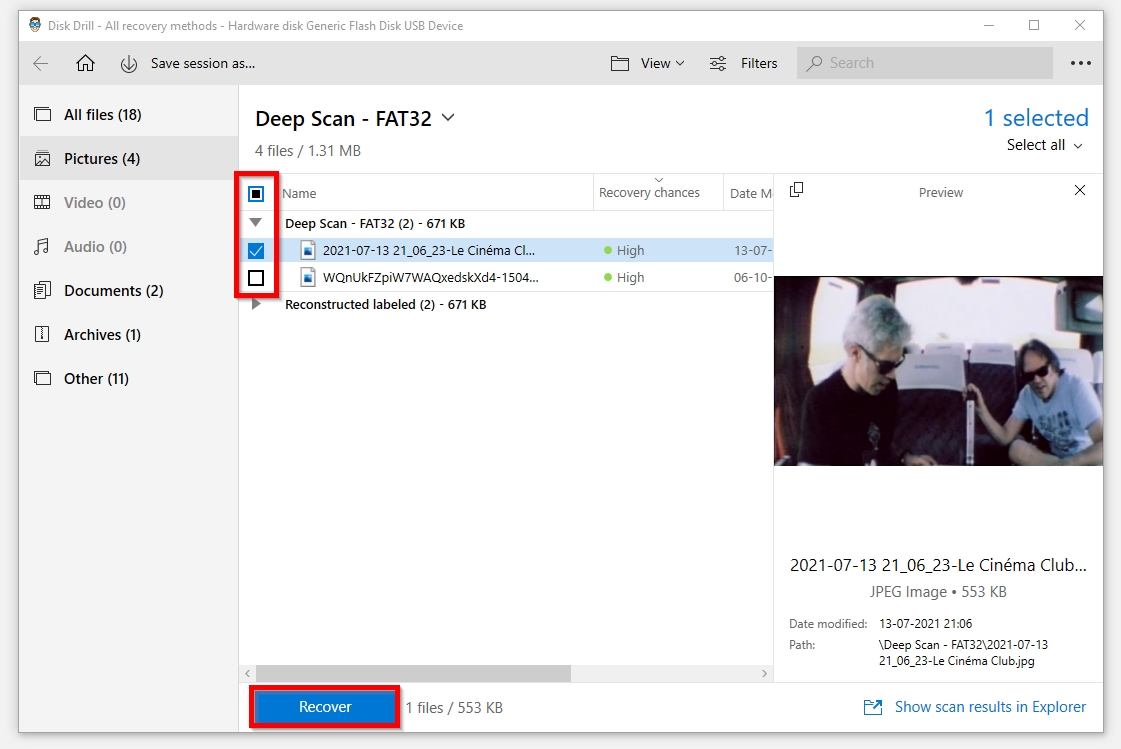
- Select the photos you want to recover. To see a preview of the photo, simply double-click on it. Disk Drill will also display recovery chances next to each file.
- Click on the Recover button.
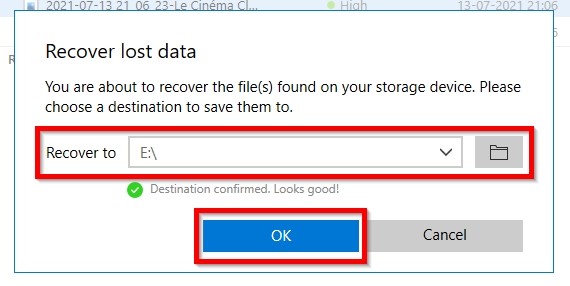
- Select a recovery location for your files. Click on OK.
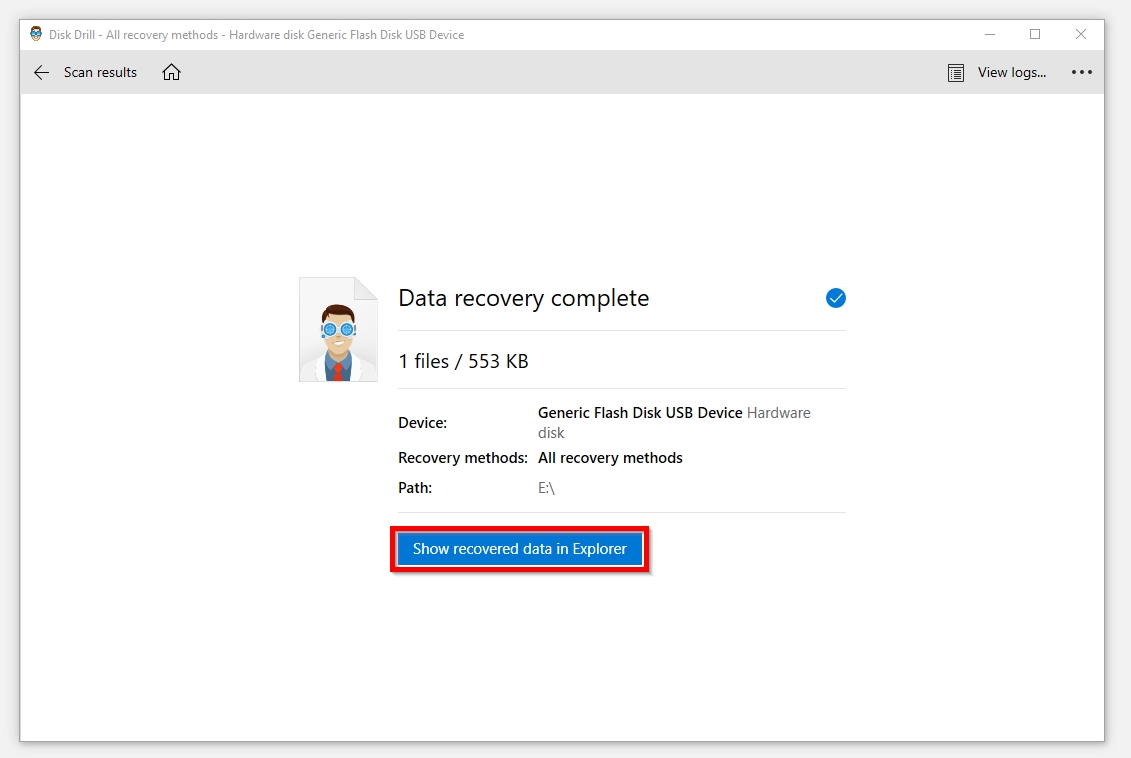
- When the data recovery is complete, click on Show recovered files in Explorer to view them using Windows Explorer.