Reading Time: 9 minutesIf your external hard drive doesn’t show up when you plug it in, you’ve got a problem. It could be something simple, like a bad cable, or more serious, like a corrupted file system. While you’re troubleshooting why Windows won’t detect it, your data is at risk. That’s why you should first recover the critical files and transfer them to a functioning device before you apply any fixes.
How to Recover Data from a Hard Drive That Is Not Detecting
When your PC won’t recognize the external drive, you’ll need solid recovery software to get your files back. As a corrupted file system is often the culprit (but not always), and when that happens, some tools are usually unable to help. Therefore, you need to find a program that bypasses the operating system and scans the external hard drive directly.
Disk Drill meets these requirements. Many users choose it to handle various data loss situations, including cases where a hard drive fails to boot. The software supports around 400 file formats, offers a simple interface, and recovers most types of files without complications.
Before you proceed, make sure that your external hard drive appears in Disk Management and shows the correct size. If your PC does not respond to the drive at all – no sound, no notification, no appearance in Disk Management – then DIY recovery will not help. In this case, skip the rest of this guide and contact a data recovery center for assistance.
- Download Disk Drill for Windows from the official website and follow the installation instructions.
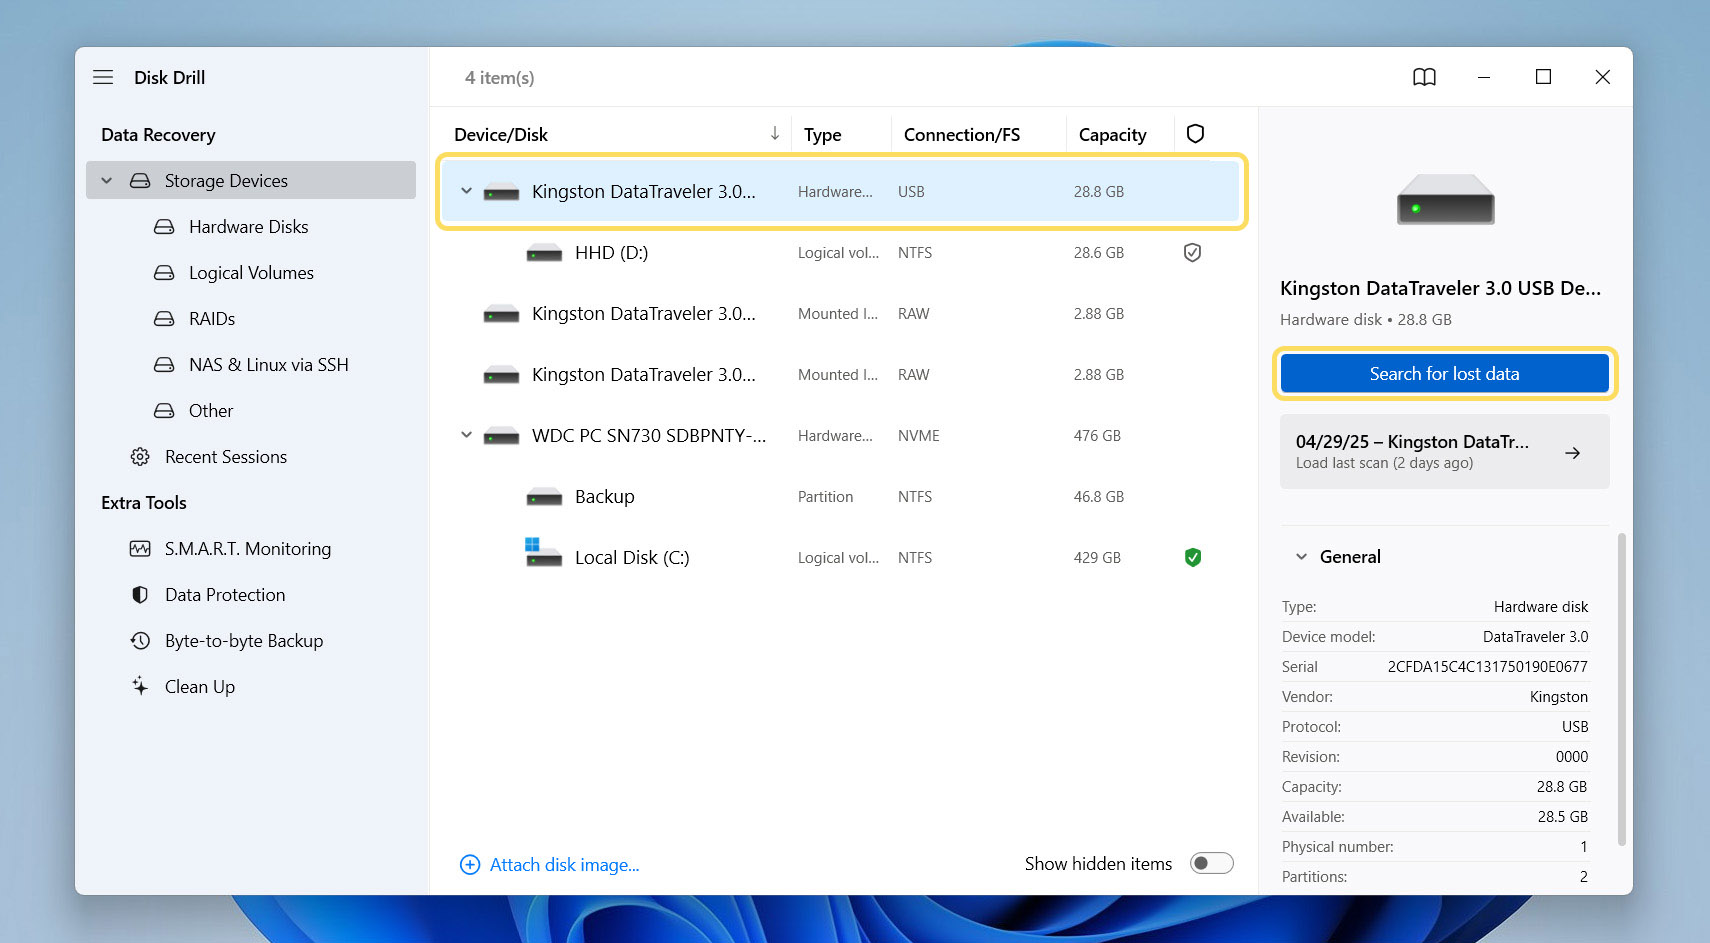
- Connect your external hard drive to the same PC and launch Disk Drill.
- Check the list of available devices. If Disk Management recognizes the drive, Disk Drill will also list it here. Select the correct hard drive and click Search for lost data.
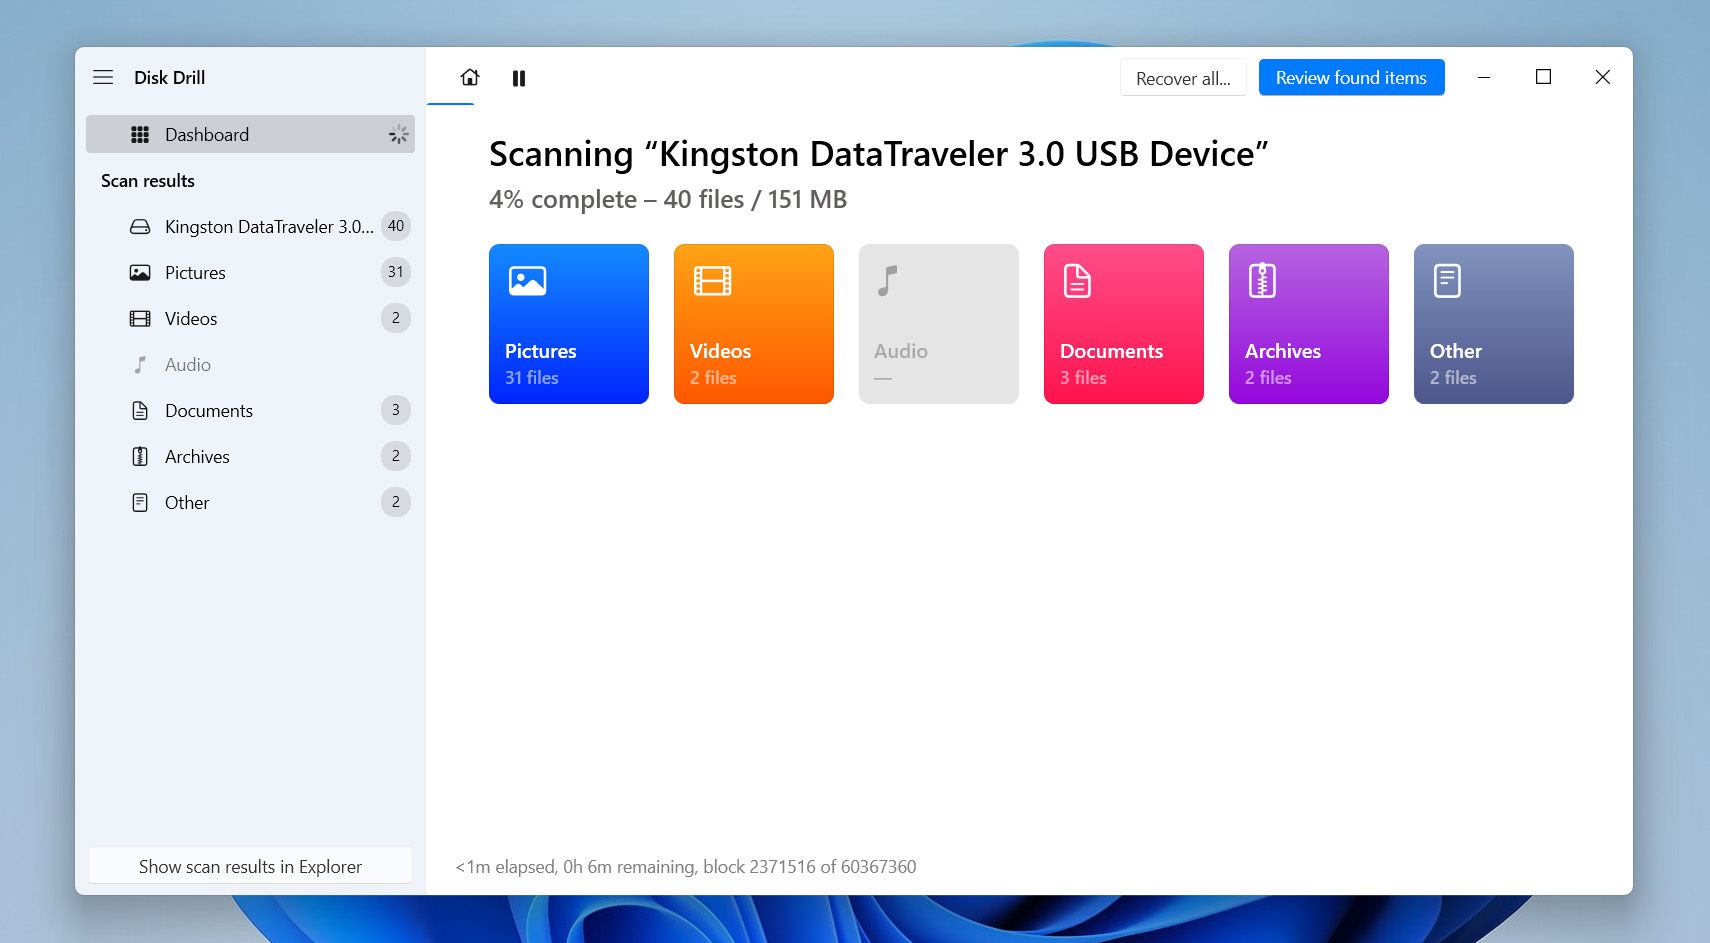
- You can begin recovering files before the scan completes, but we recommend waiting until the process finishes to view the full list of recoverable items.
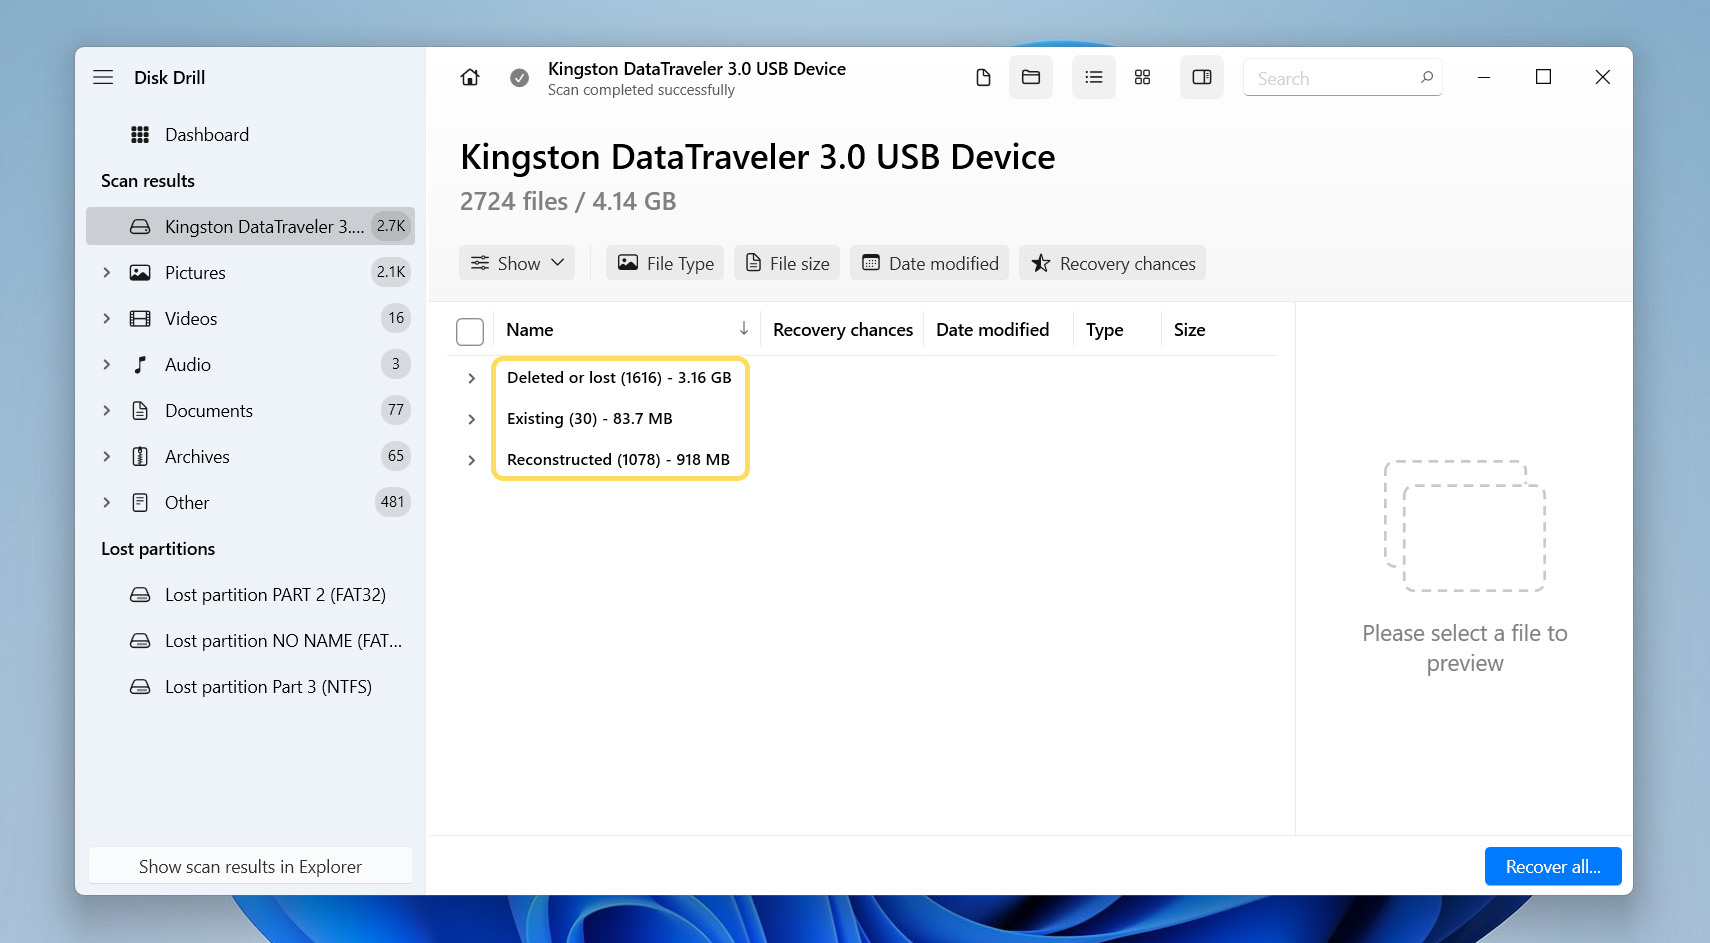
- After the scan, click Review found items.
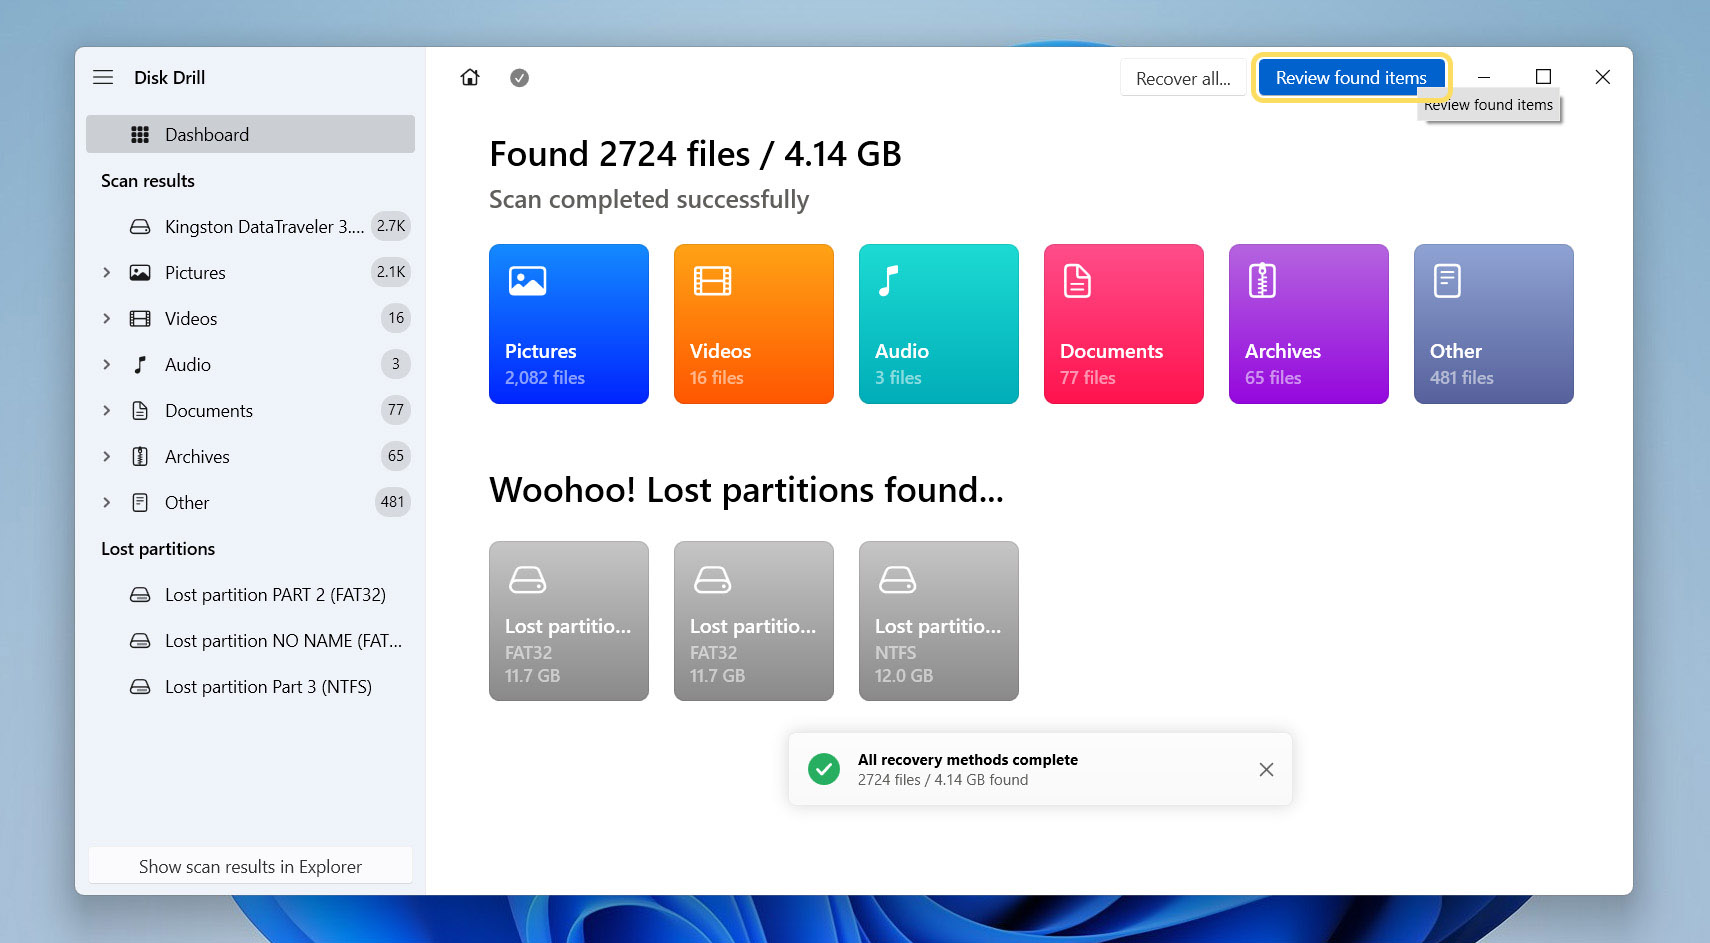
- Disk Drill will sort the files into three categories: deleted or lost, existing, and reconstructed. Open each tab to explore the results if needed.
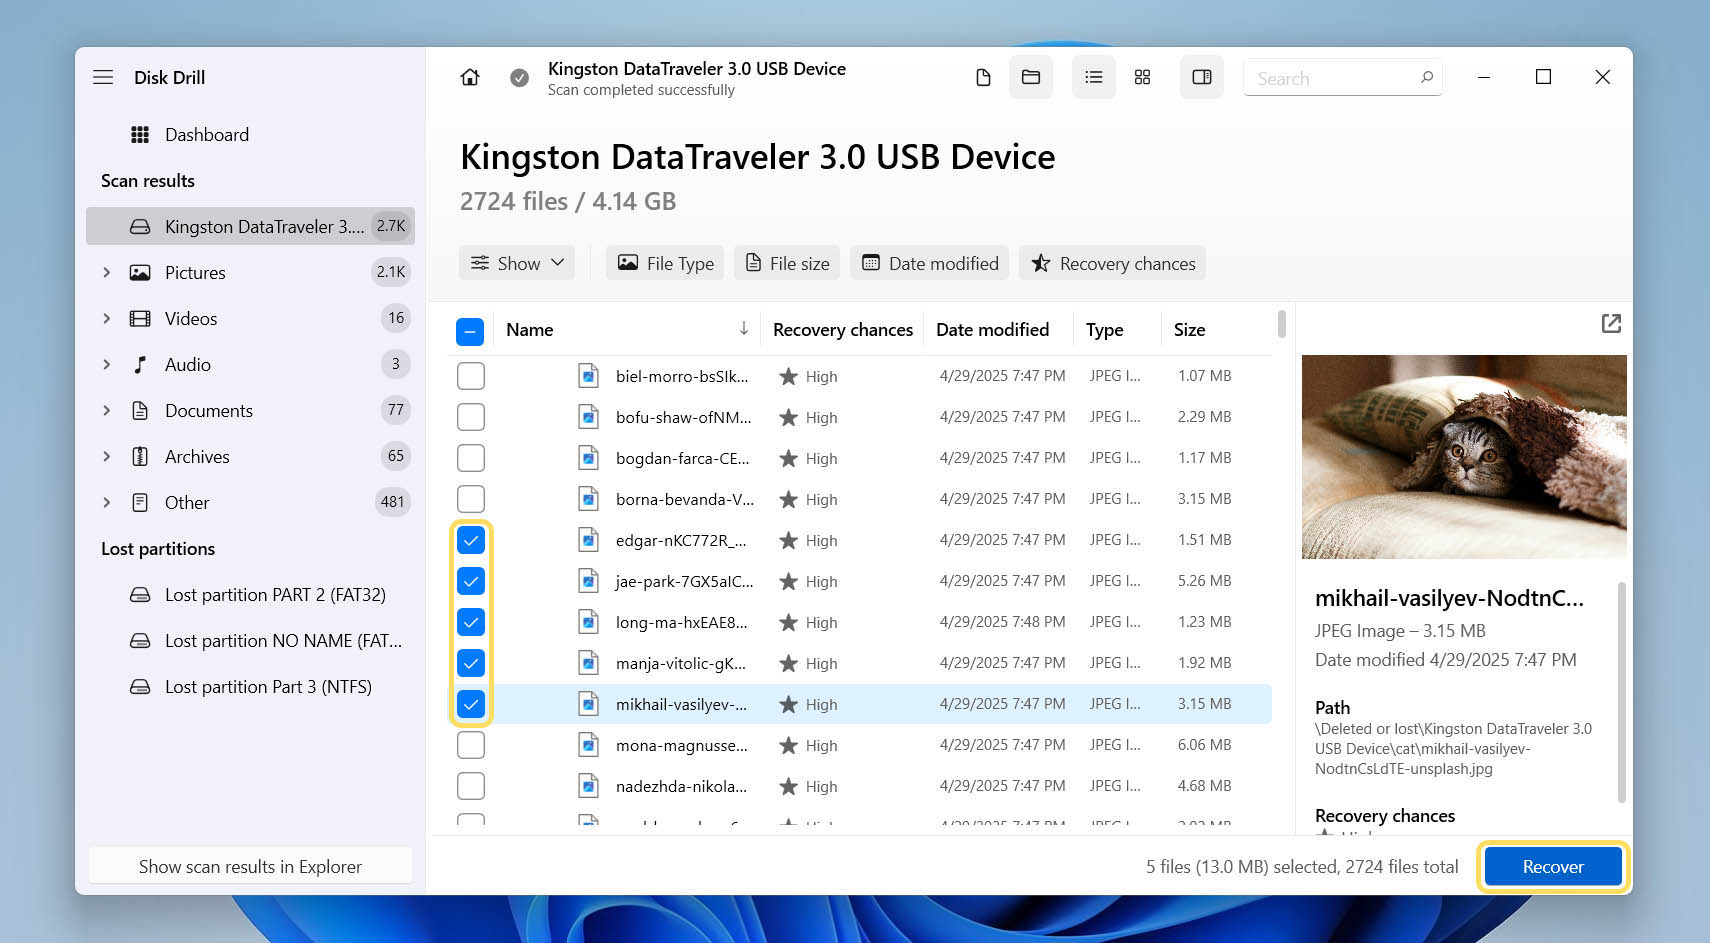
- Use the preview function to identify files if the names seem unclear. Select the checkboxes next to the items you want and click Recover.
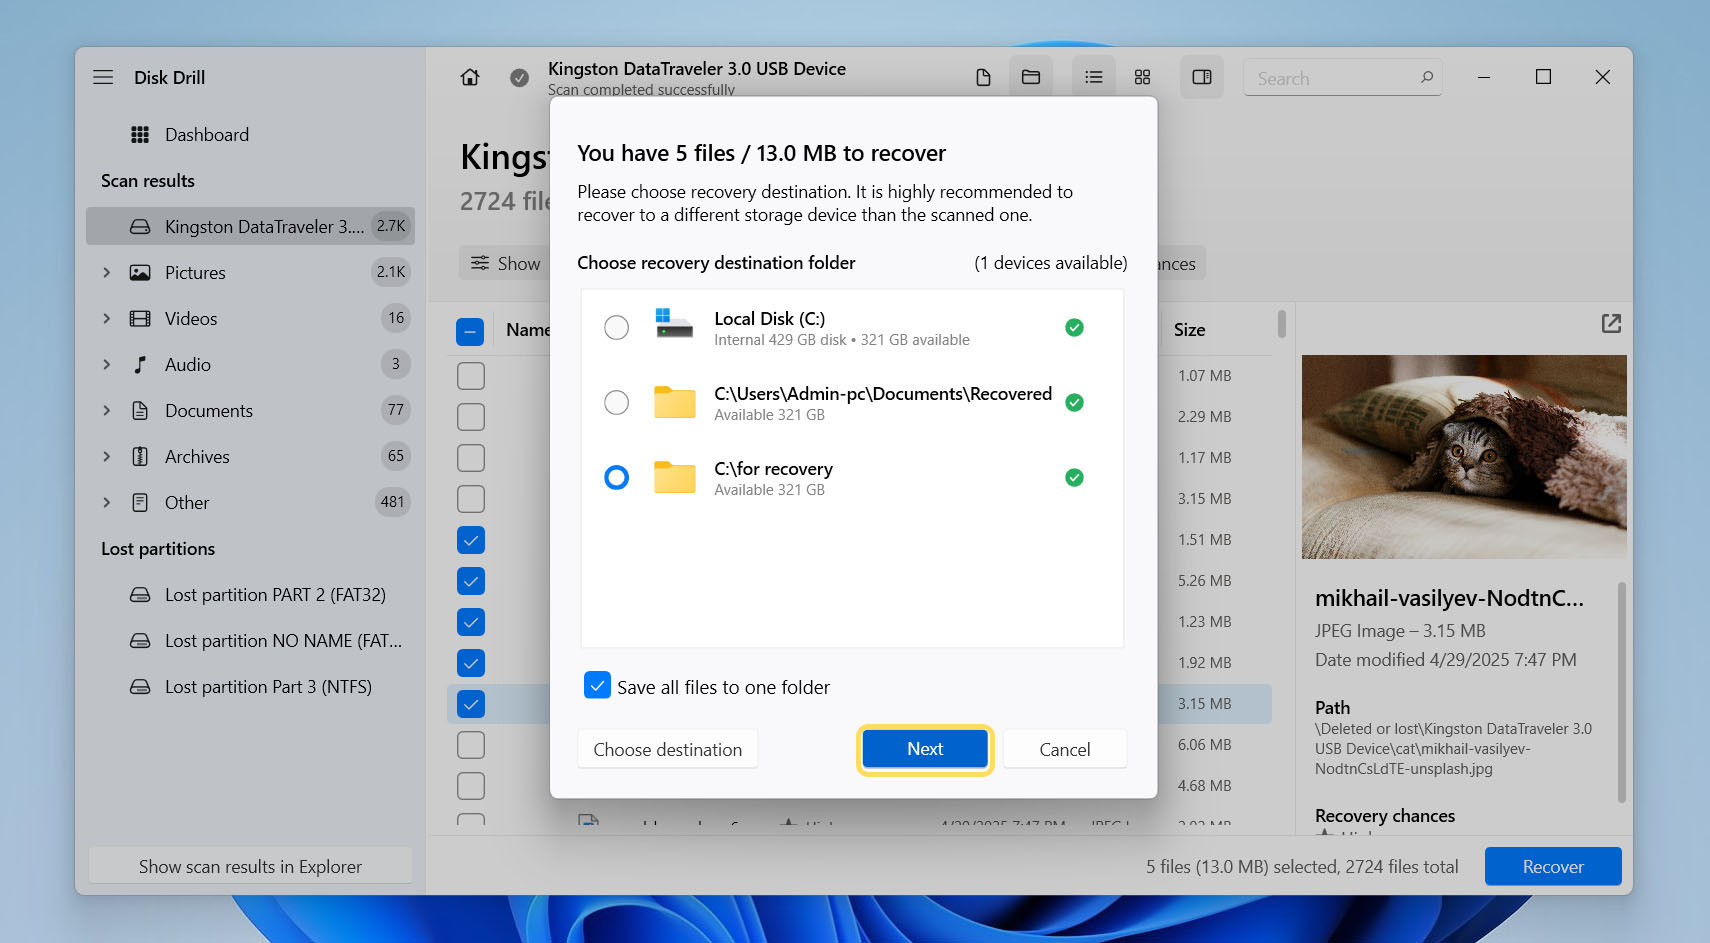
- Choose a recovery destination. You must select a different drive that your PC recognizes correctly. Then click Next to begin the recovery process.
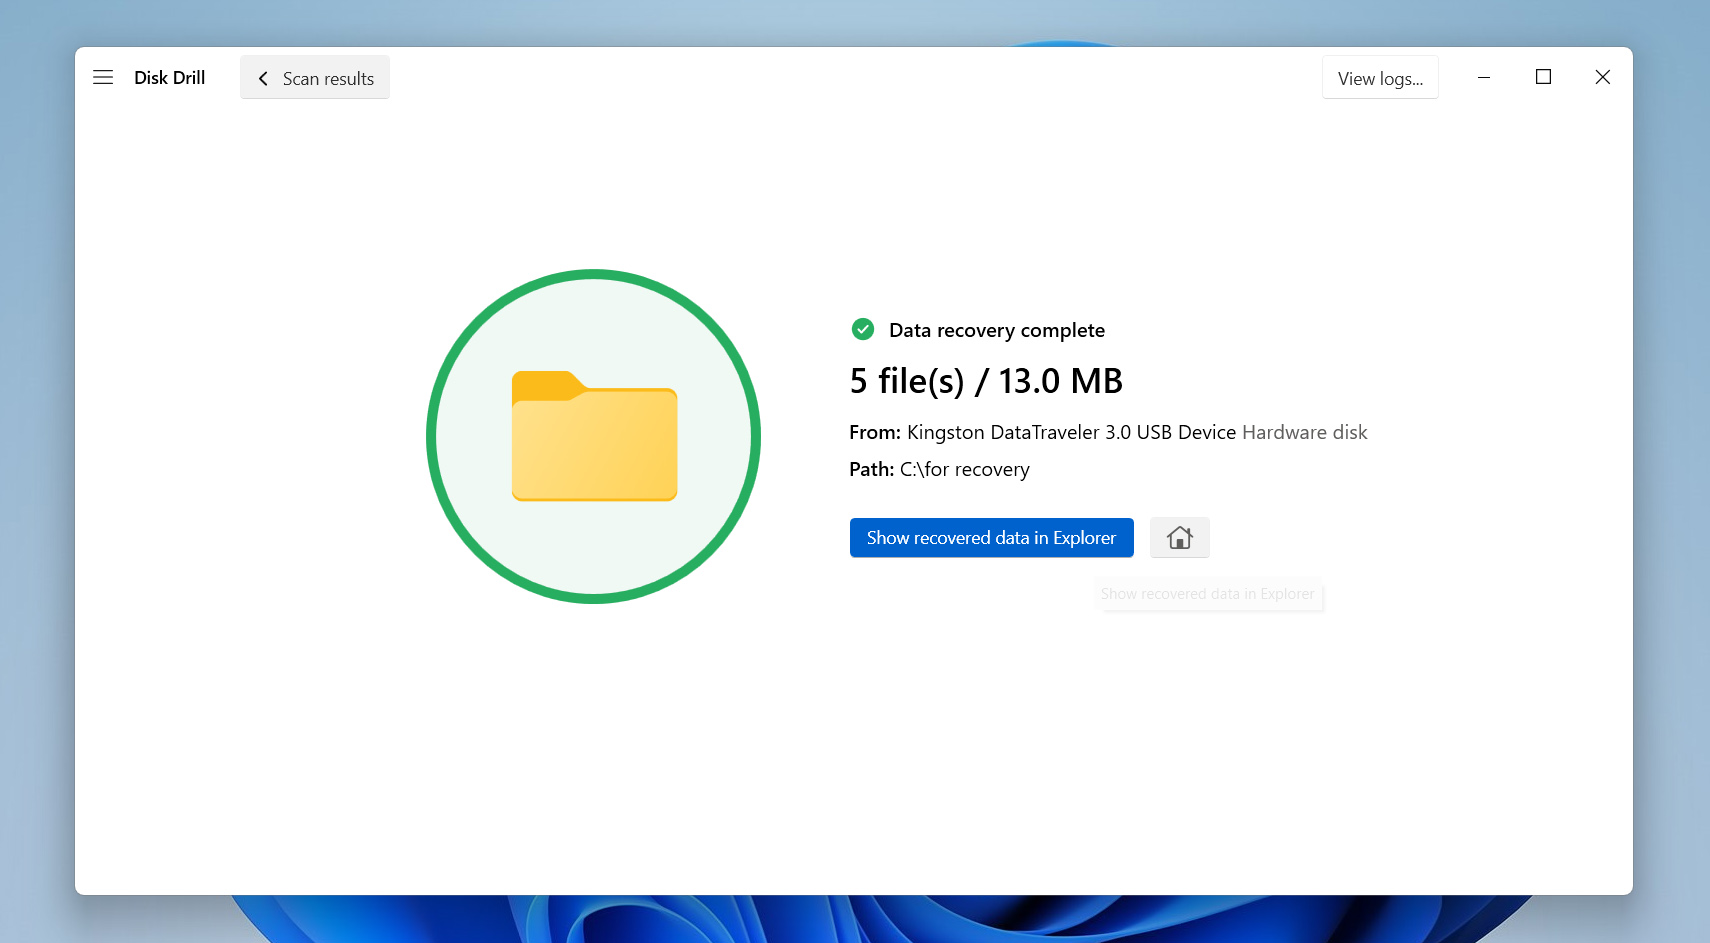
- Wait for Disk Drill to copy the selected files to the new location. When the process is complete, your recovery is finished.


Disk Drill offers 500MB of free data recovery. If your file selection stays within this limit, you can complete the recovery at no cost. If the total exceeds 500MB, you will need to upgrade to the Pro version to continue using the software.
How to Fix a Hard Drive Not Being Detected by Windows
If you have already recovered your data, you can now attempt to restore your external hard drive to a working state. Below, we list several solutions that may help bring the drive back to normal. We recommend that you follow the steps in the order shown. This way, you will check the most likely and harmless causes first and move toward the more advanced or potentially destructive methods only if necessary.
If you skipped the recovery section and came straight to the fixes, check that your external hard drive appears in Disk Management and shows the correct size. Most of the upcoming steps utilize this tool, so your drive must be registered at that level for any of these solutions to work.
Method #1: Try a Different Port, Cord, or Computer
An undetected hard drive issue does not always indicate a problem with the drive itself. Other components often cause the issue. Every time you connect external storage, multiple parts, such as ports, cables, and the computer’s hardware, must work together. A failure in any of these parts can prevent the system from recognizing the device.
Start by testing different USB ports on your computer. If you have used a USB 3.0 port before, switch to a USB 2.0 port, or vice versa. If you connected the drive through a USB hub, bypass it and plug the drive directly into your PC. Also, check the cable. A faulty or incompatible cable often blocks the connection. Replace it with another one and try again. If the drive still does not appear, connect it to a different computer. This step helps determine whether the issue lies with the drive or the original system.
If this check solved the problem and your external hard drive now appears in File Explorer, you took the easiest possible path. If the issue remains, move on and try the next methods in the list.

Method #2: Check the Volume Letter and Change It If Necessary
Windows assigns a unique letter to every storage device it recognizes. These volume letters, like C, D, E, or F, help the system and the user identify and access each drive. The primary internal hard drive usually holds the letter C, while external drives receive the subsequent available letters.
If two devices share the same letter, Windows may fail to mount one of them correctly. For example, if your internal drive already uses the C letter and your external drive tries to use the same one, the system may block it. This conflict can prevent the external drive from appearing in File Explorer, even though the system detects it in the background.
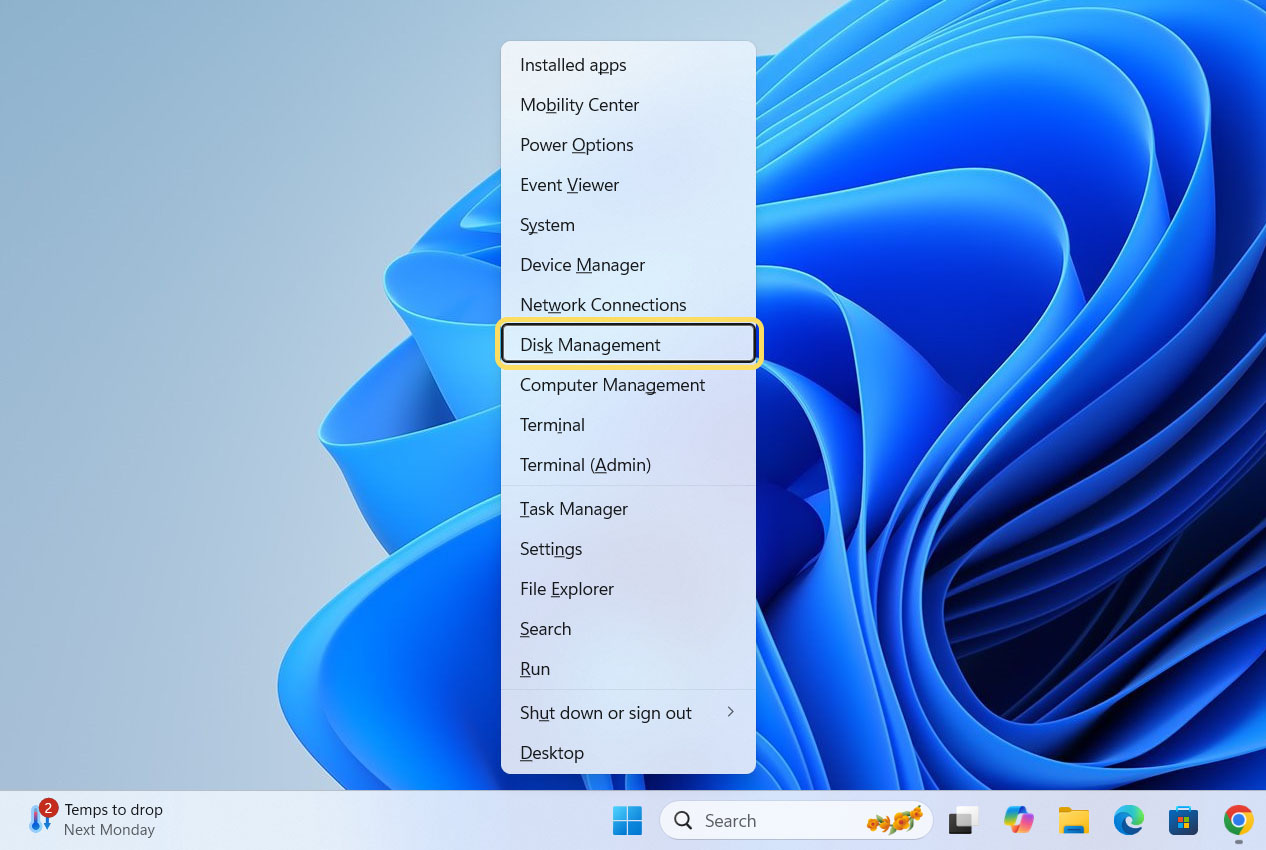
- Hit Win + X and pick Disk Management from the menu.
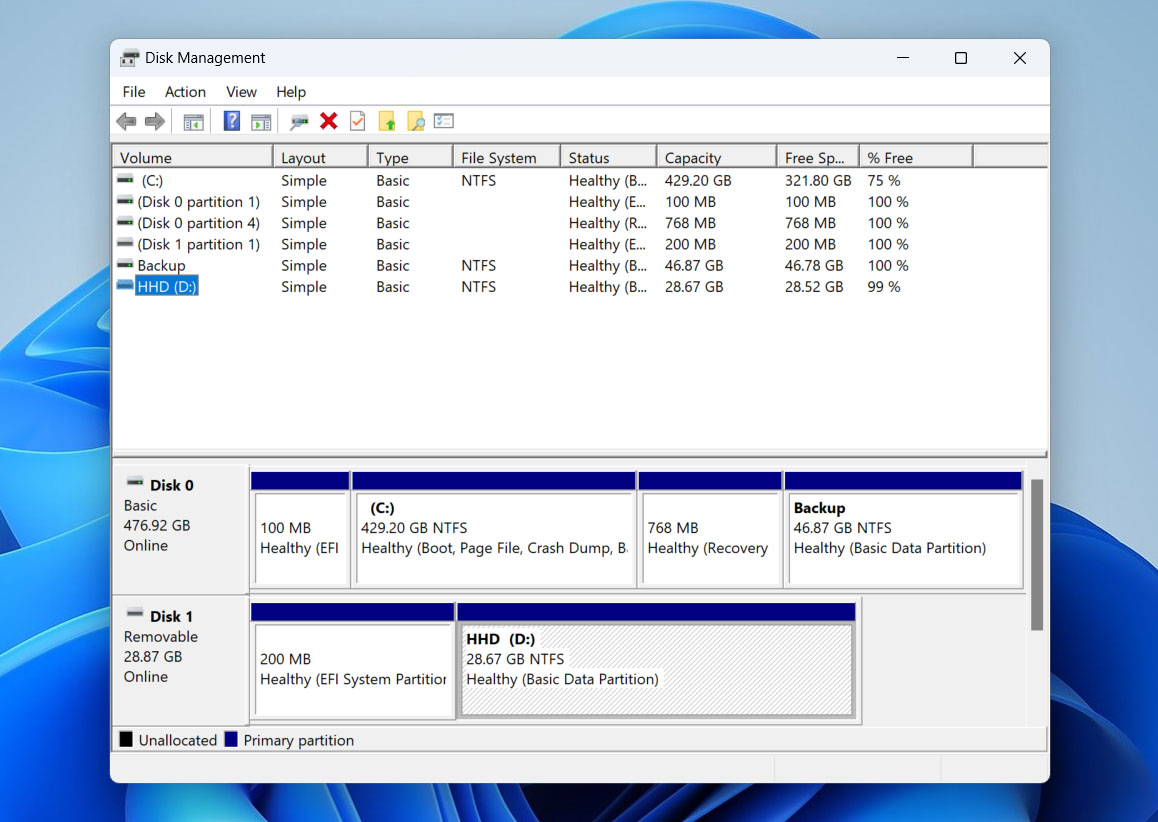
- Wait for your storage devices to pop up. Find your external drive, it’ll show up with the right size and a Healthy status but no drive letter (or a conflicting one).
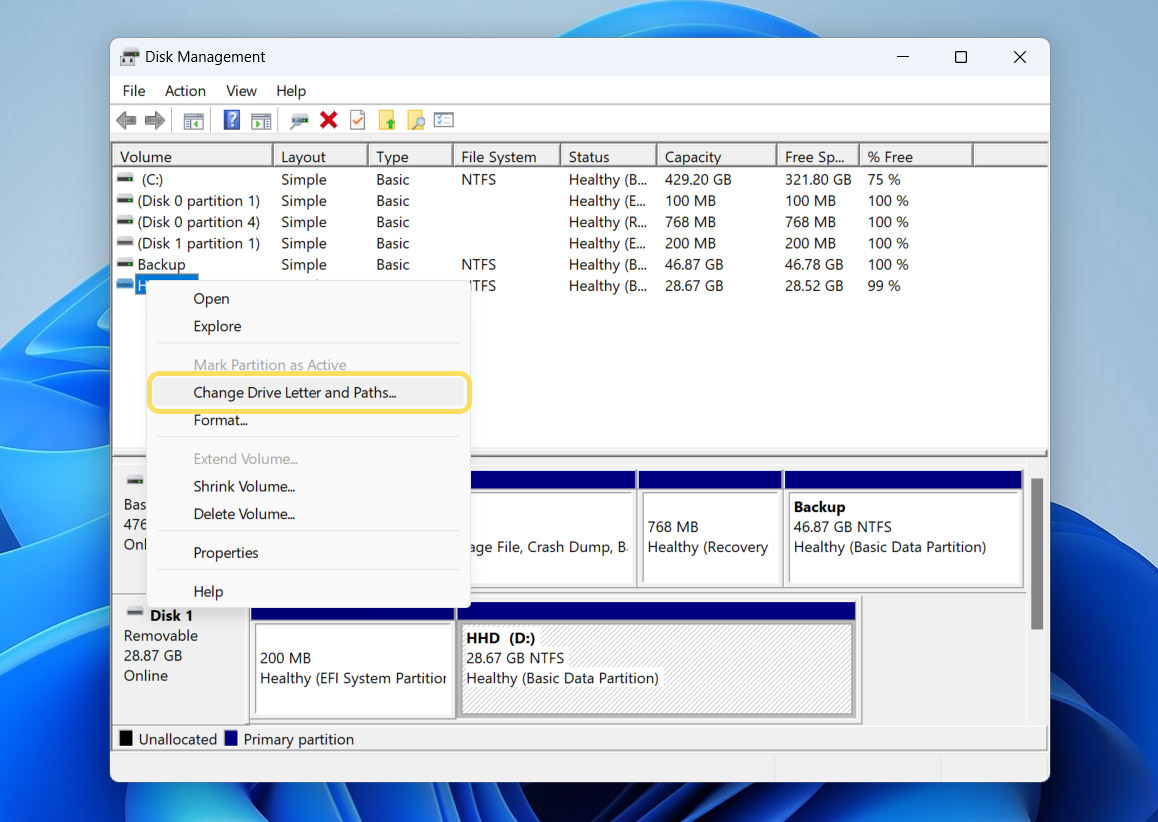
- Right-click its volume and select Change Drive Letter and Paths.
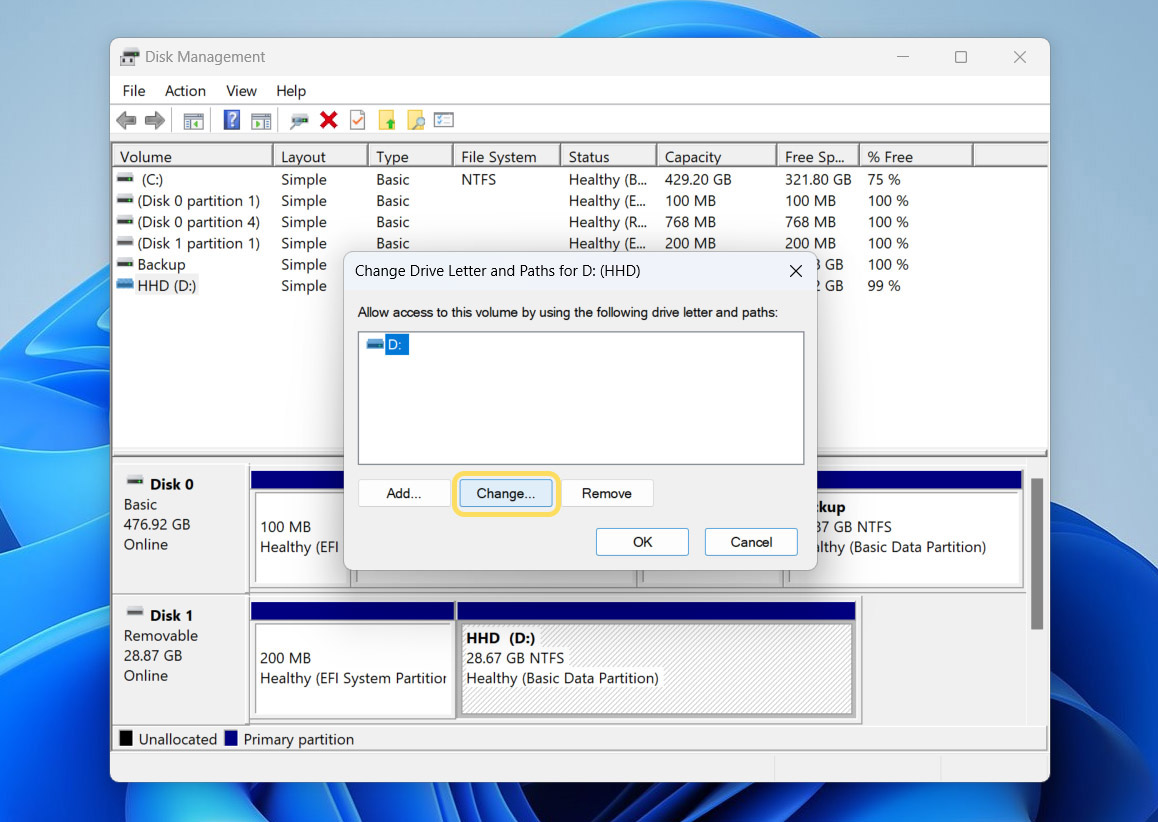
- In the dialog that opens, click Change.
- Pick a new drive letter from the dropdown (just avoid letters already in use).
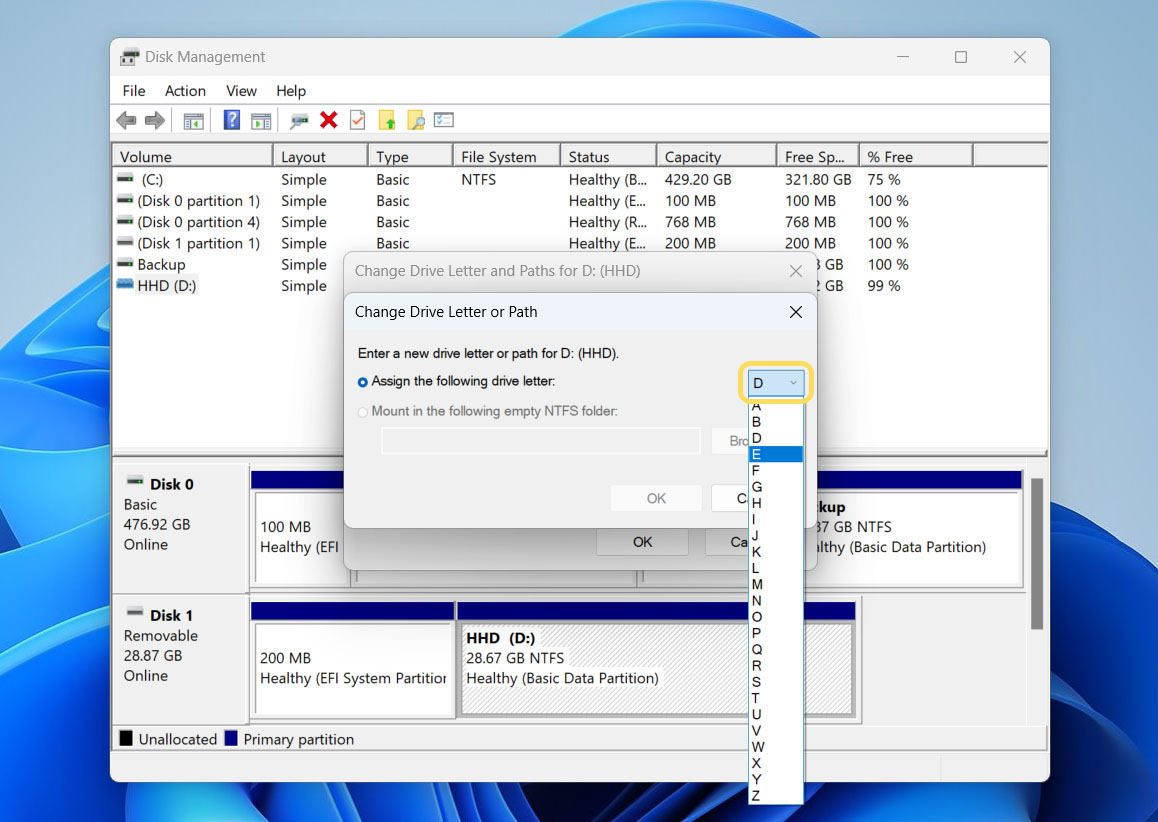
- Click OK, then hit Yes when prompted to confirm.
- Close Disk Management, then open File Explorer. Your external drive should now show up with its new letter.


Method #3: Recover a Lost Partition If the Drive Shows as Unallocated
If Disk Management shows your external drive as Unallocated, it means that Windows does not recognize any defined partition on it. No partition means no drive letter and no file system, so it won’t pop up in File Explorer. This usually happens after you yank the drive out without ejecting it, botch a format, botch a resize, or if malware got at it. Sometimes the partition table just gets corrupted, so Windows thinks the space is empty, even though your data could still be sitting there.
To attempt to restore the lost partition, use TestDisk, a free and open-source partition recovery tool. It works at a low level and often rebuilds the partition structure without damaging your existing files. TestDisk does not rely on Windows to identify the disk and can detect drives even when the OS cannot assign them a letter.
However, writing a partition back to the drive carries a risk of overwriting files. Before using TestDisk, stop and return to the first section of this article if you have not yet recovered your data.
- Visit the official TestDisk download page and download the archive corresponding to your operating system.
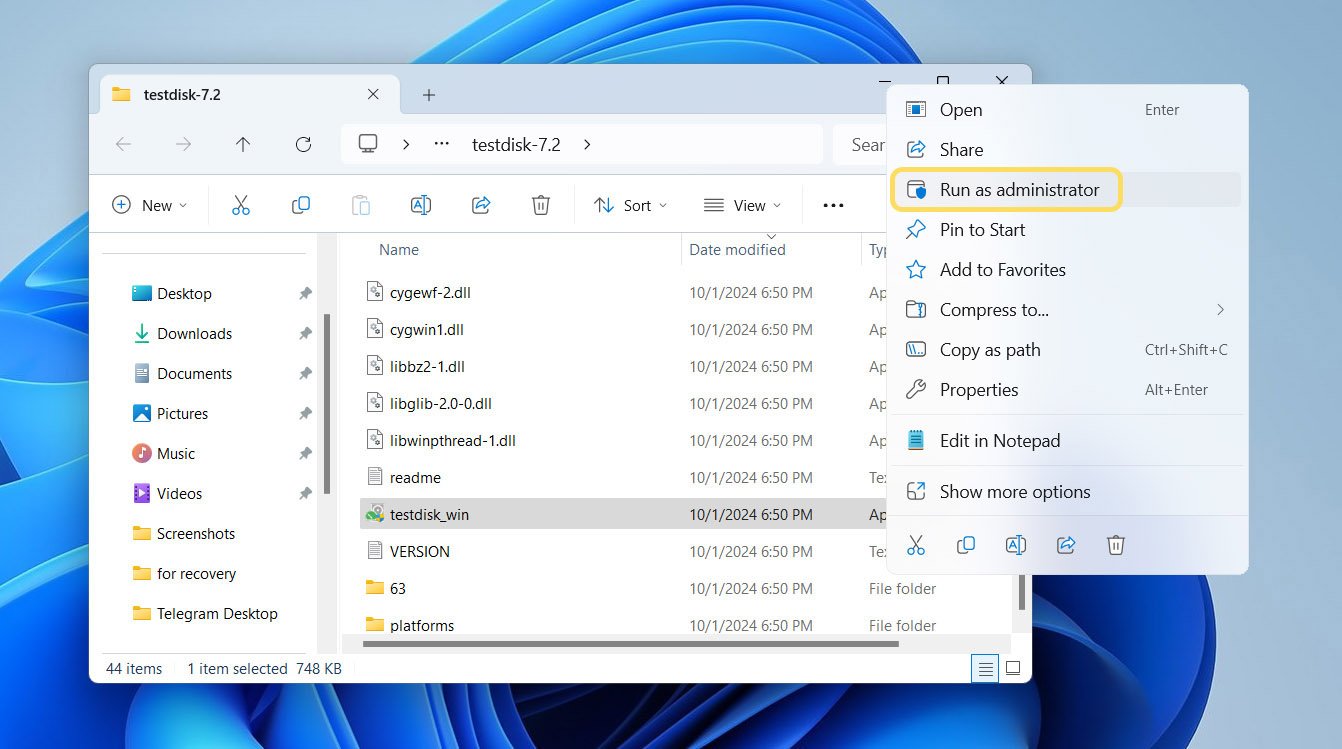
- Unzip the files, then right-click testdisk_win.exe (on Windows) and choose Run as administrator.
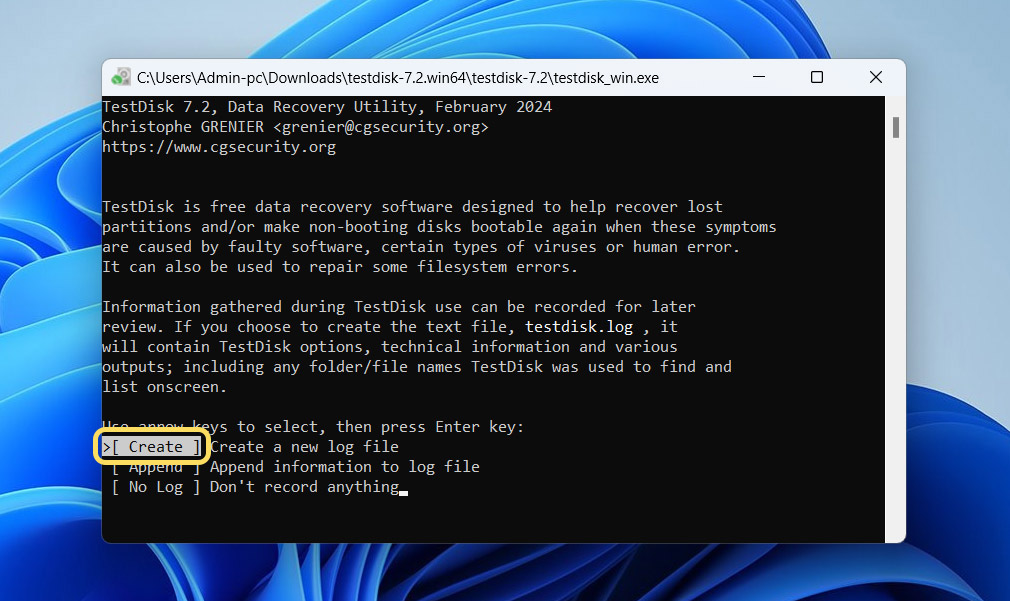
- When it asks about a log file, select Create.
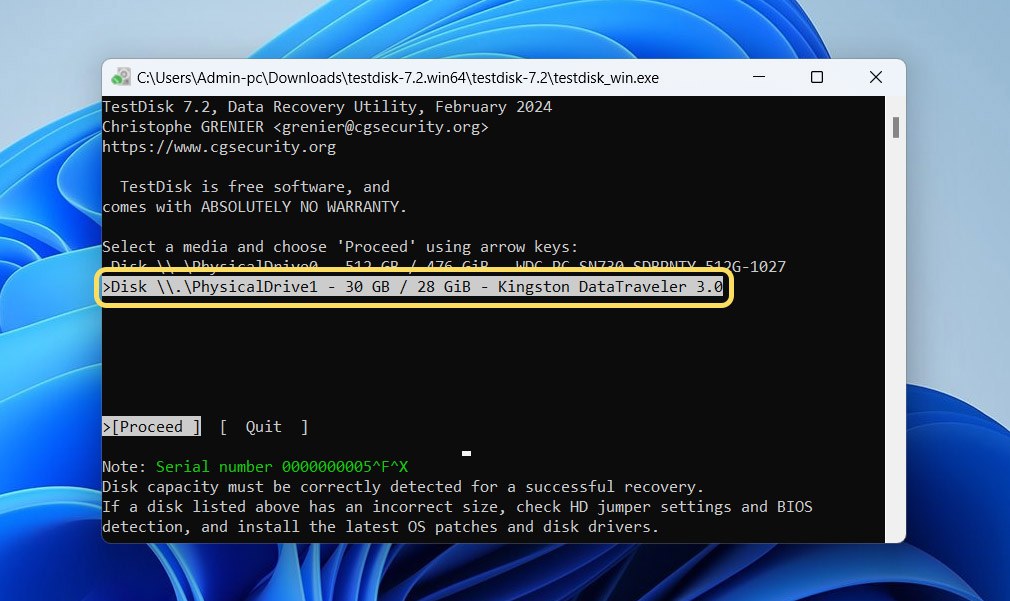
- From the list of drives, select your external hard drive – use the size and name to be sure it’s the right one.
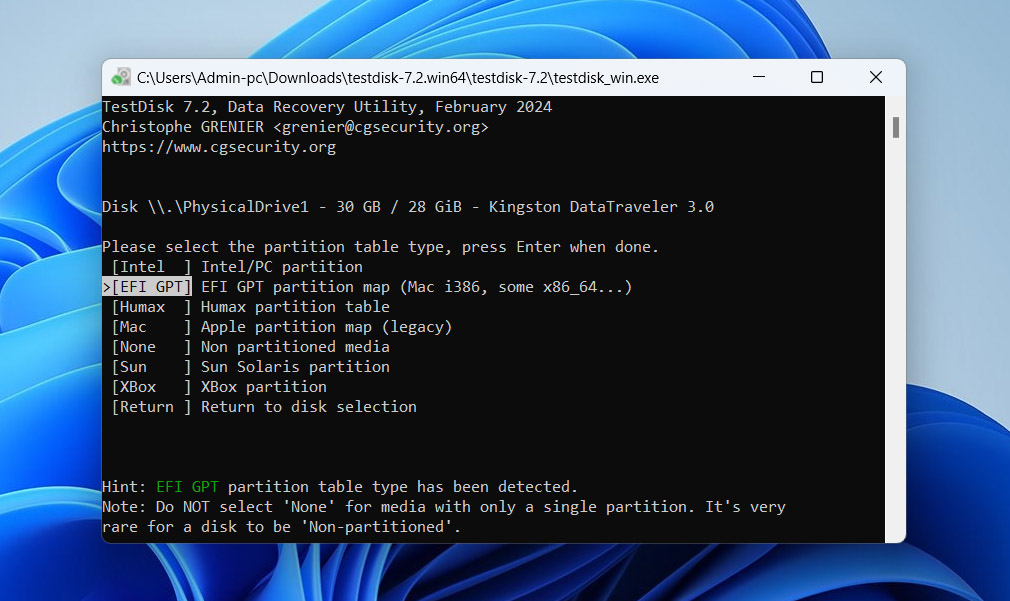
- Select the partition table type. Most Windows drives use the Intel (MBR) type, but if your disk uses GPT, choose EFI GPT.
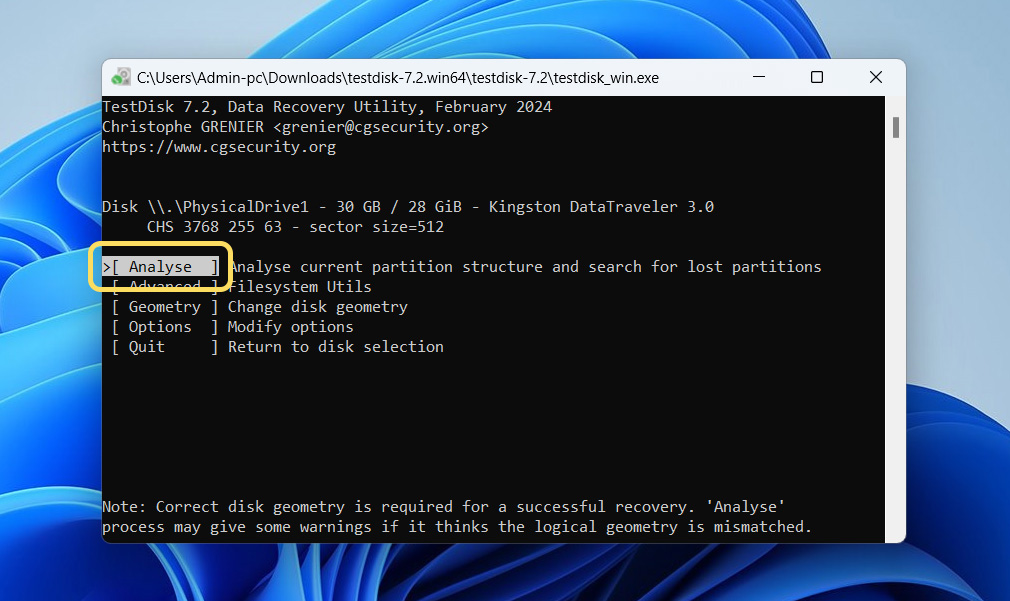
- Hit Analyse to scan the disk structure, then choose Quick Search to look for lost partitions.
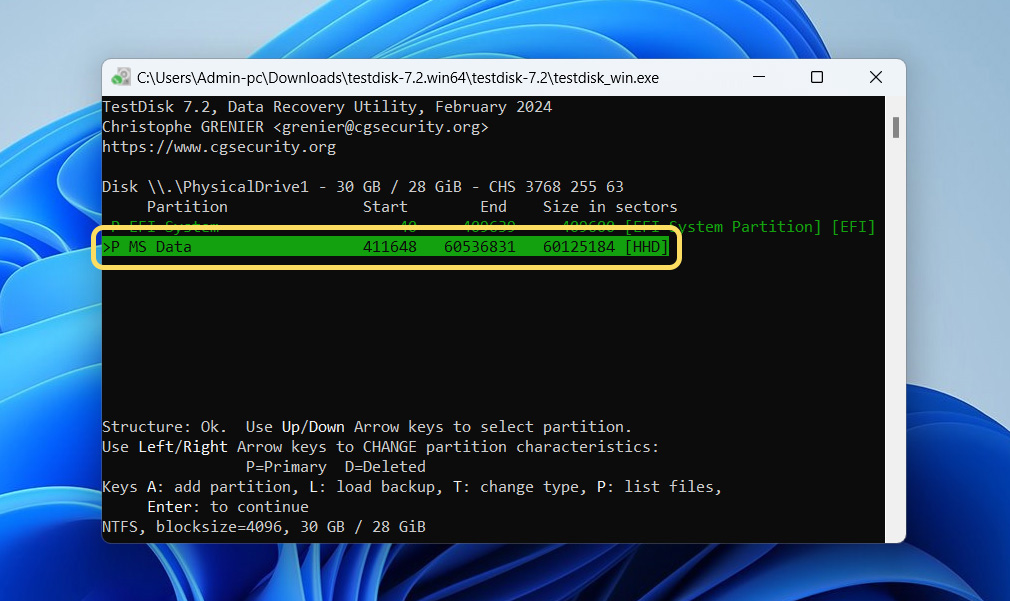
- If you see your missing partition, highlight it and press P to list its files. If your data shows up, you’ve found the right one.
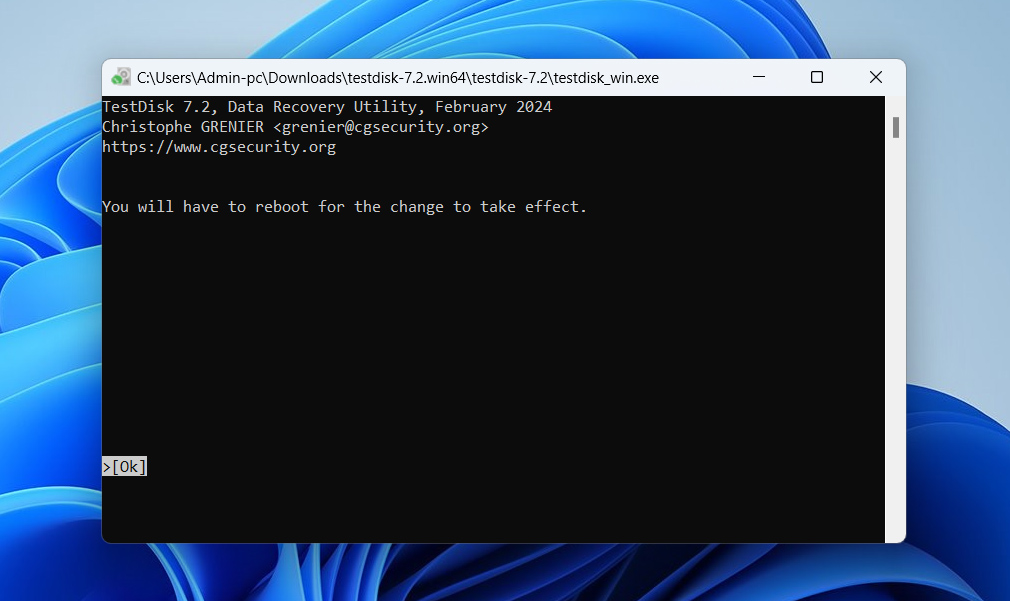
- Press Enter, then select Write to restore the partition table.

- Confirm when prompted, exit TestDisk, and reboot your PC. Your drive should now be accessible again.


Method #4: Initialize Your External Hard Drive
If you plug in a brand-new external drive or if an existing drive’s Master Boot Record (MBR) gets corrupted, Windows might list it as Not Initialized in Disk Management. That means you can’t assign a drive letter, access any files, or even see a file system. Until you initialize it, the drive is unusable.
Initializing a disk sets up its basic partition table so Windows can recognize and use it. It doesn’t erase your data, unless you go ahead and format or create new partitions afterward. But if the drive held files before, initializing could overwrite critical info, so only do this once you’ve backed up or recovered any existing data, or if the disk is brand-new and empty.
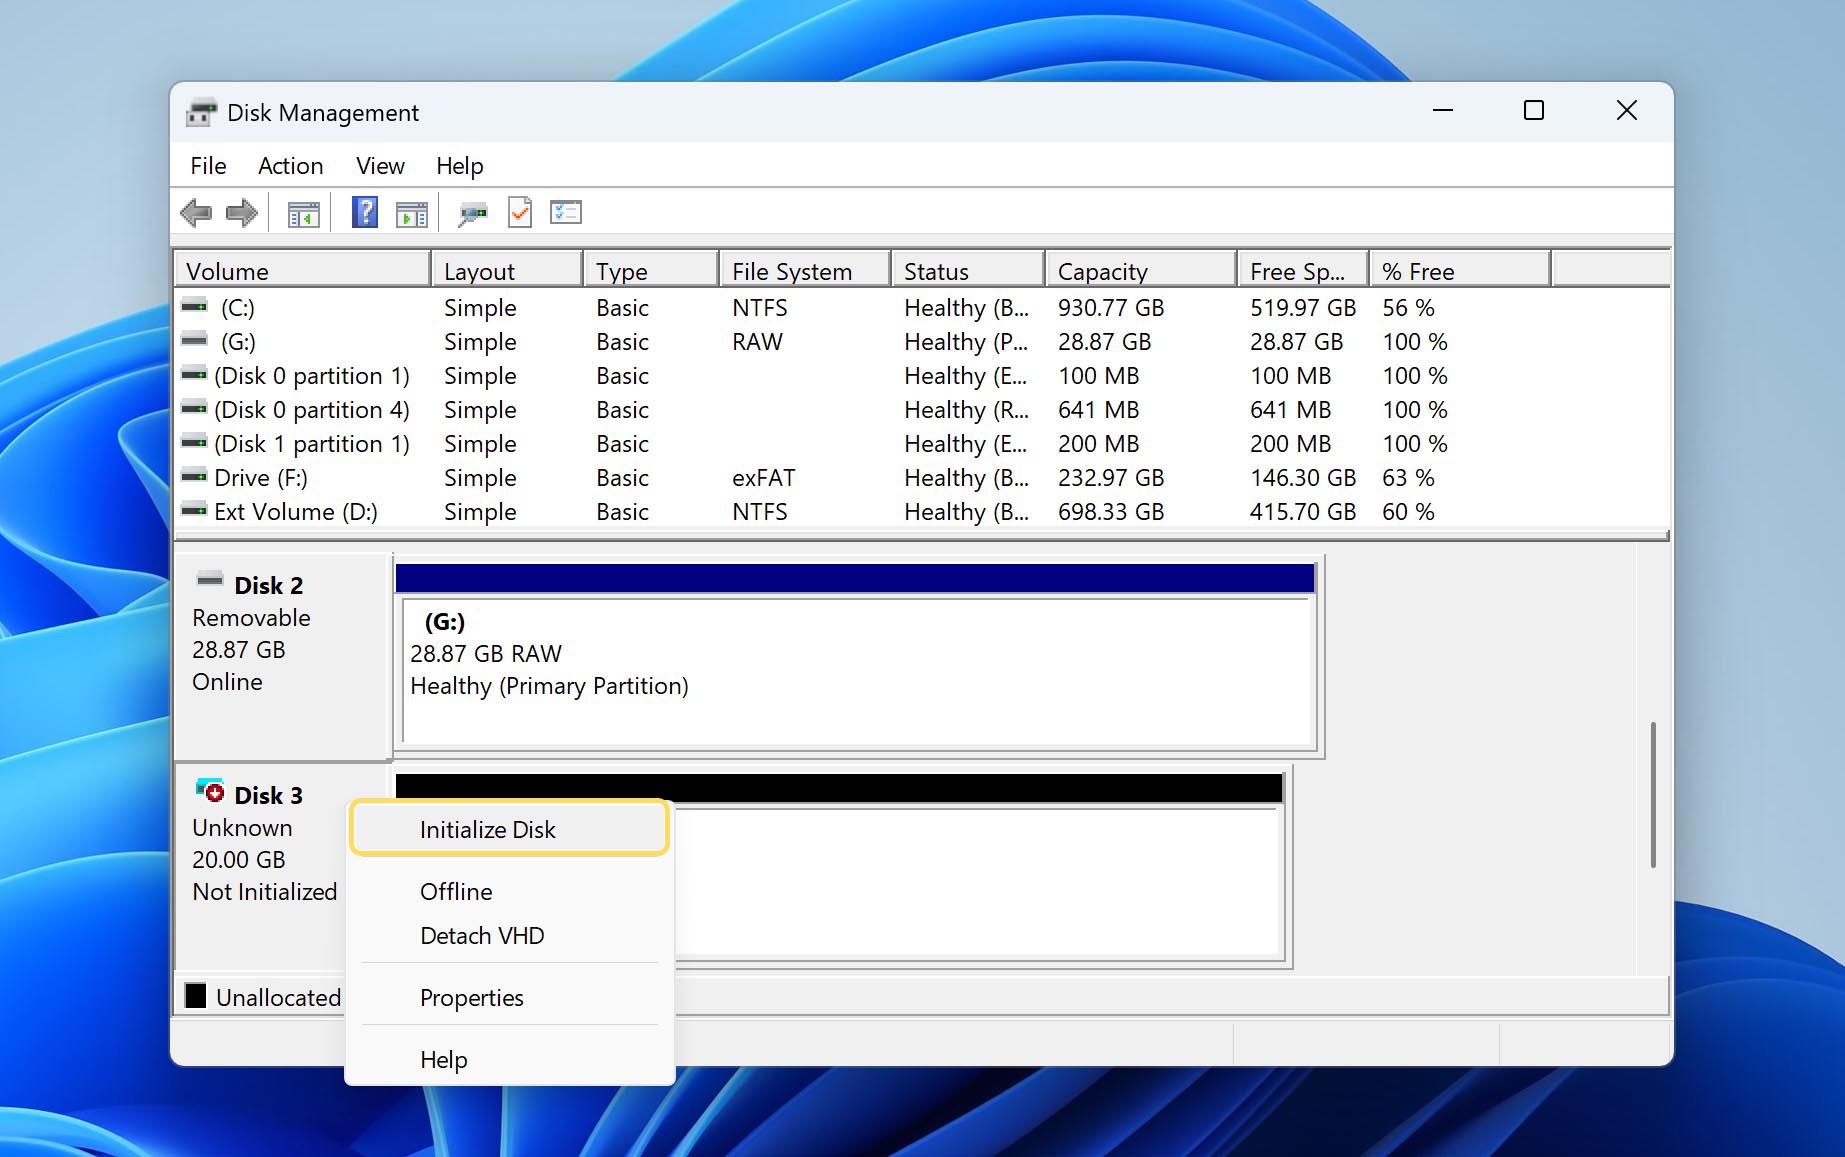
- Hit Win + X and pick Disk Management.
- In the bottom panel, locate your external drive – it will display ‘Not Initialized’ but show the correct capacity.
- Right-click where it says Disk 1 (or whatever number) and choose Initialize Disk.
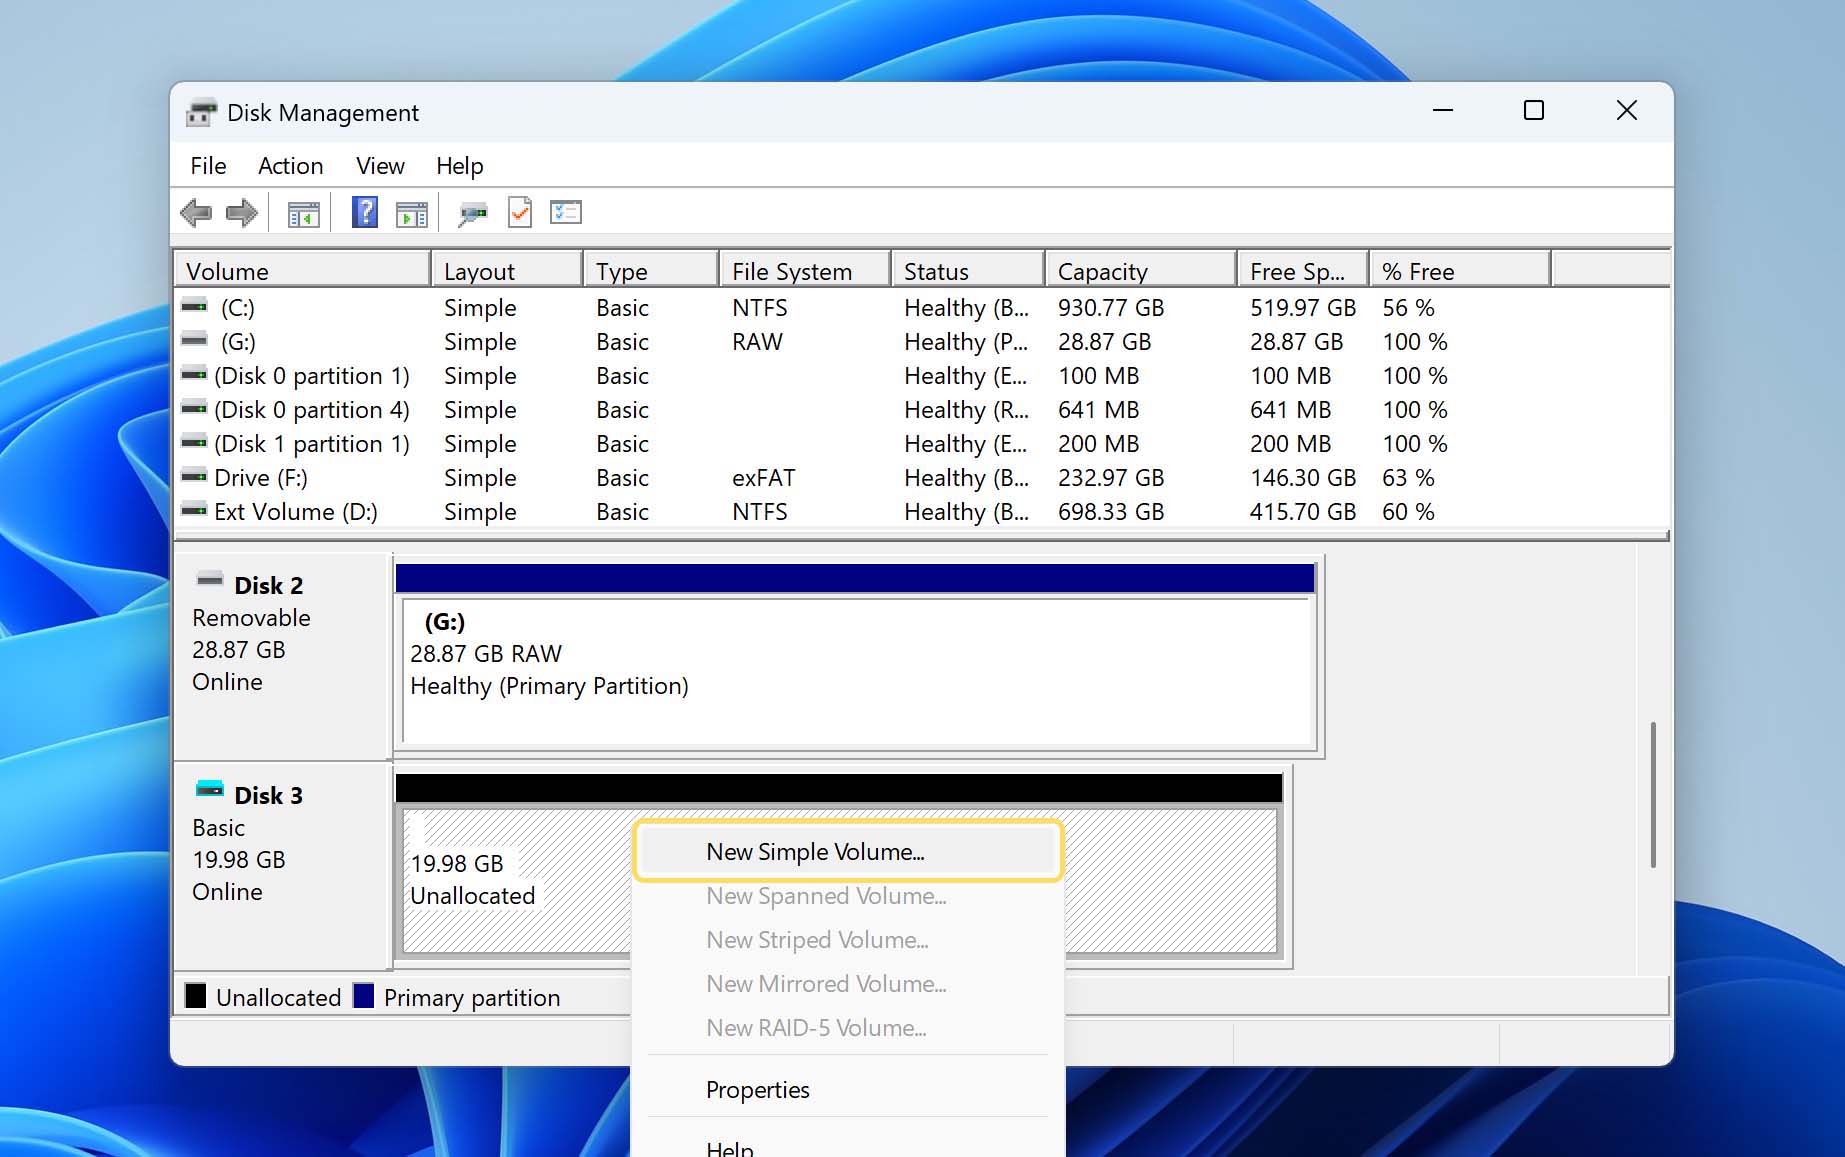
- Pick your partition style – MBR for max compatibility, or GPT if you’ve got a newer system or a large drive. Click OK.

- The disk will now show as Unallocated. Right-click that unallocated space and select New Simple Volume.
- Walk through the wizard: set the volume size, select a drive letter, and choose your file system (NTFS is typically the best option).
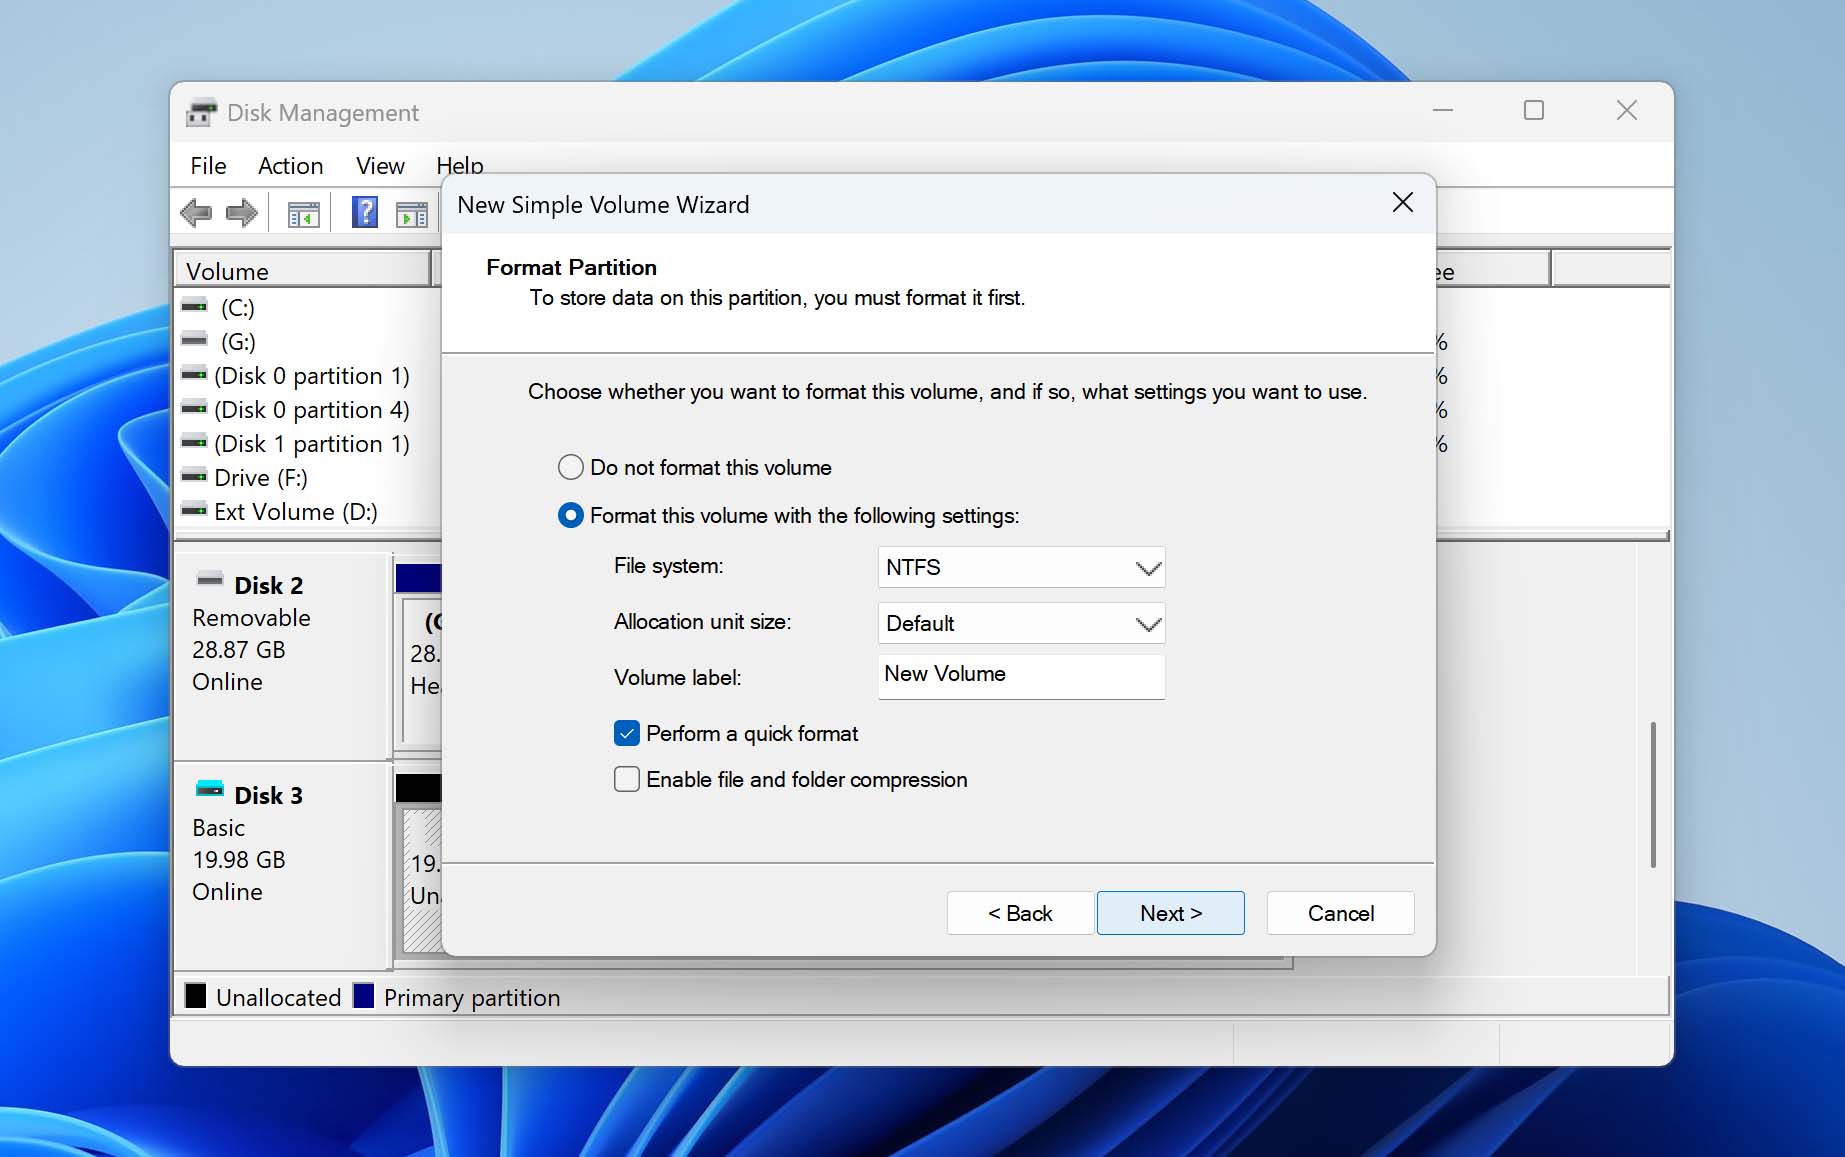
- Finish up and let Windows format the drive, then you’re good to go.


Final Words
External storage devices like hard drives are supposed to make our lives easier. But sometimes, issues like an undetectable disk can take place. But with the help of data recovery software, previously created backups, and professional data restoration services, it’s possible to recover data from a hard disk that is not detecting.