
Reading Time: 9 minutesFor over 20 years, Sony’s Cybershot digital cameras have been a popular choice for both casual users and photography enthusiasts, offering affordability and high-quality images. However, like any digital device, Cybershot cameras are susceptible to accidental deletion and data loss. Fortunately, there are proven methods to recover deleted pictures from Sony Cybershot cameras, and we cover the most effective ones in this article.
Why Files Might Disappear from Sony Cameras

There are various reasons why your precious photos may disappear from your Sony camera:
- 🗑️ You may have accidentally deleted them while reviewing or organizing photos directly on your camera.
- 🛑 An SD card might be failing due to age or accumulated bad sectors, which can result in corrupted or missing data.
- 👾 A virus could have infected a memory card if it was previously connected to a malware-infected computer, making your photos inaccessible or corrupt.
- ⤴️ If an SD card was disconnected while files were still being written or transferred, it could lead to corruption and data loss.
- 🔋 Your camera’s battery may have died during the writing process, interrupting file creation and potentially causing photos to vanish.
- 🧹 Formatting an SD card without backing up your pictures will erase all data, including any important images.
- ⚙️ There might be issues with your camera’s firmware, which in rare cases can malfunction and cause photo corruption or deletion.
The good news is that all these data loss scenarios have one thing in common: the photos are usually not permanently gone. In the next section, we will guide you through the process to recover lost photos from a Sony Cybershot Camera.
How to Recover Photos Deleted from Sony Camera
In case some important photos have been deleted from your Sony Cybershot camera, there’s no need to panic. Recovering these photos is often possible with the help of software, backups, or professional help. We’ve broken down each of these methods to help you better understand them.
Option 1. Recover Deleted Files with Disk Drill
Think of data recovery software as a digital archaeologist. When you delete a photo, it’s not immediately erased from the memory card. Instead, the space it occupies is marked as available for new data. The photo remains invisible to the camera or PC, but the data still exists. Data recovery software scans the memory card, searching for this “lost” data and copying it to a safe location.
Among the various data recovery programs available, Disk Drill stands out as one of the best solutions for recovering deleted pictures from Sony Cybershot cameras. Here’s why:
- 🌅 Supports all Sony photo formats: The main reason why it’s such a good choice is the fact that it supports all photo file formats used by Sony Cybershot cameras, including Sony Alpha RAW File (ARW). In fact, Disk Drill can recover about 400 different file formats, allowing it to recover just about any file stored on your camera’s memory card.
- 💾 Compatible with all memory cards and file systems: Disk Drill supports all memory card types and file systems used by Cybershot cameras. It is important that the memory card is connected directly, as when connected via the camera, access is provided via MTP, which limits the required memory access.
- 🔍 Professional results with a few clicks: The application’s user-friendly interface makes the recovery process simple, even for those without technical expertise.
- 🎥 Includes video recovery module: In version 6, Disk Drill introduced a new Advanced Camera Recovery (ACR) module, specially designed to recover fragmented video files from memory cards used in Sony cameras and other brands. This is particularly useful for restoring high-definition videos recorded across multiple data blocks, which traditional recovery tools often fail to handle properly.
Here’s how to use Disk Drill to recover deleted files from Sony memory sticks or other camera SD cards:
- Head to the Cleverfiles website and download the Disk Drill installation file. Once downloaded, launch the installation file and follow the instructions until the software is successfully installed.
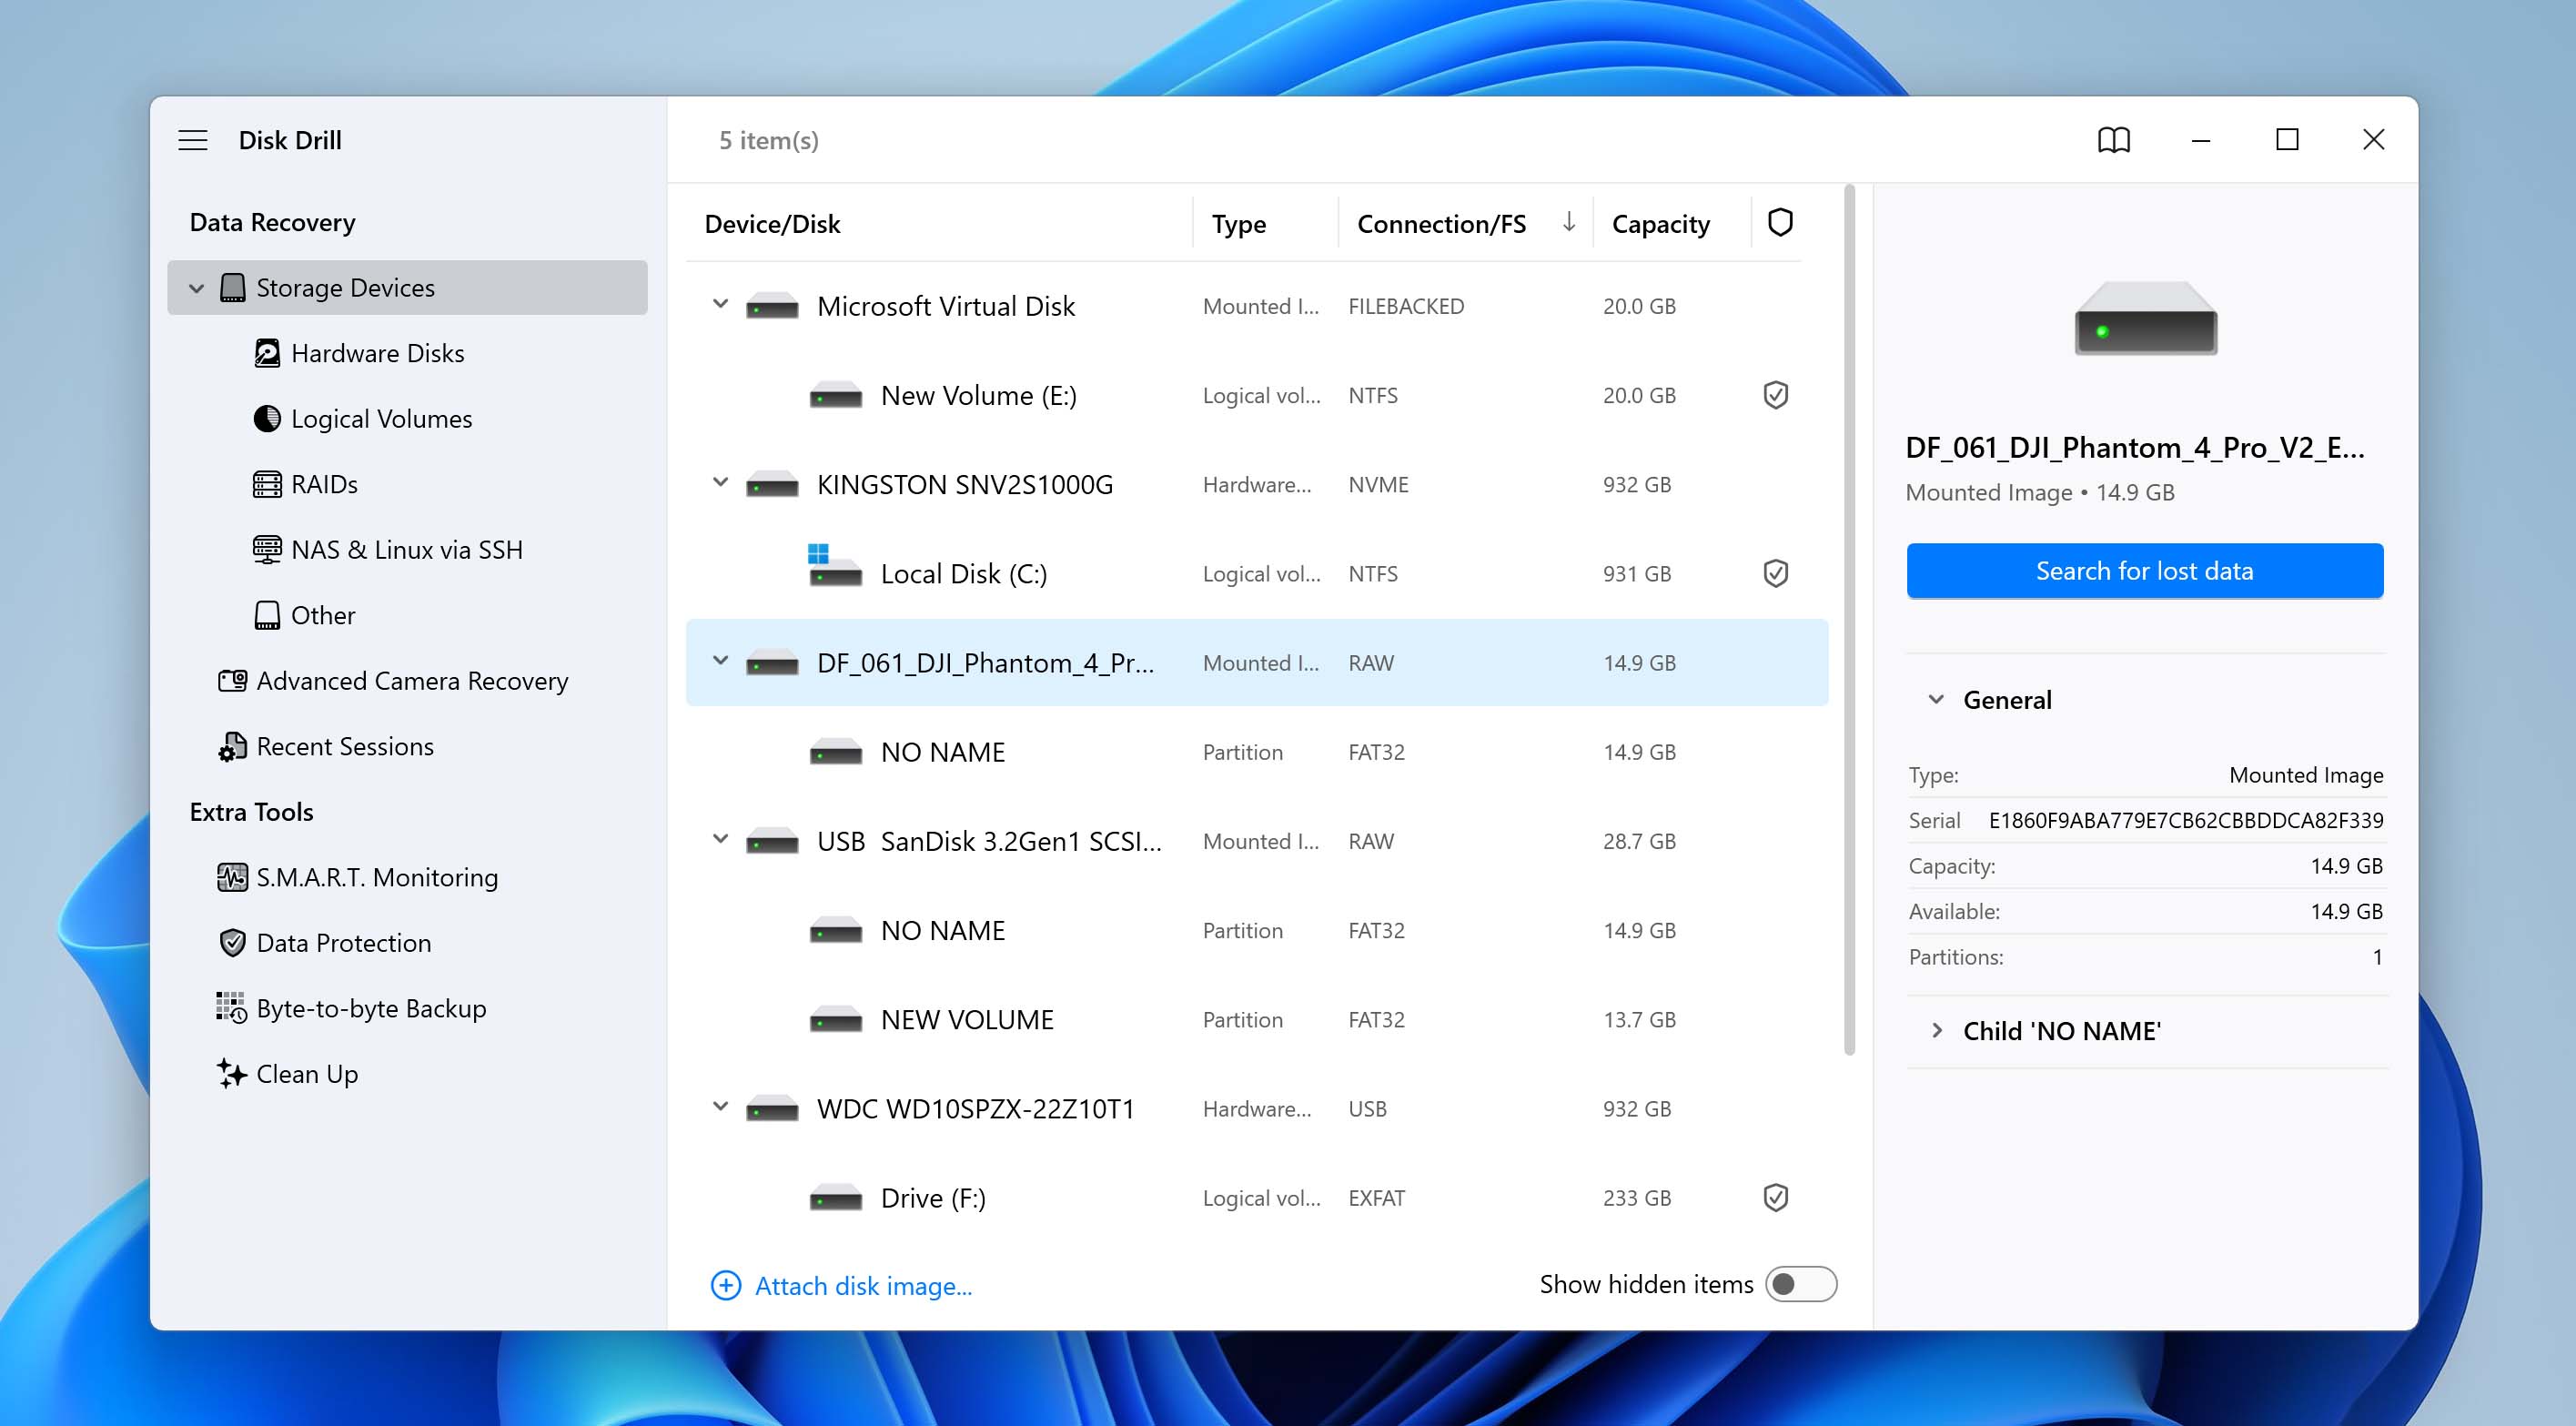
- Connect the camera’s SD card to your PC or laptop through an external card reader if your machine doesn’t have a built-in one. From there, launch the app, select your SD card from the list of available storage devices, and click the Search for lost data button.
Note: If your memory card is corrupted, you’re better off creating a backup image of it first and then attempting the recovery from the image instead. You can do this by using Disk Drill’s Drive backup feature. Then, you can add the image to the list of recoverable drives through the Attach disk image option.
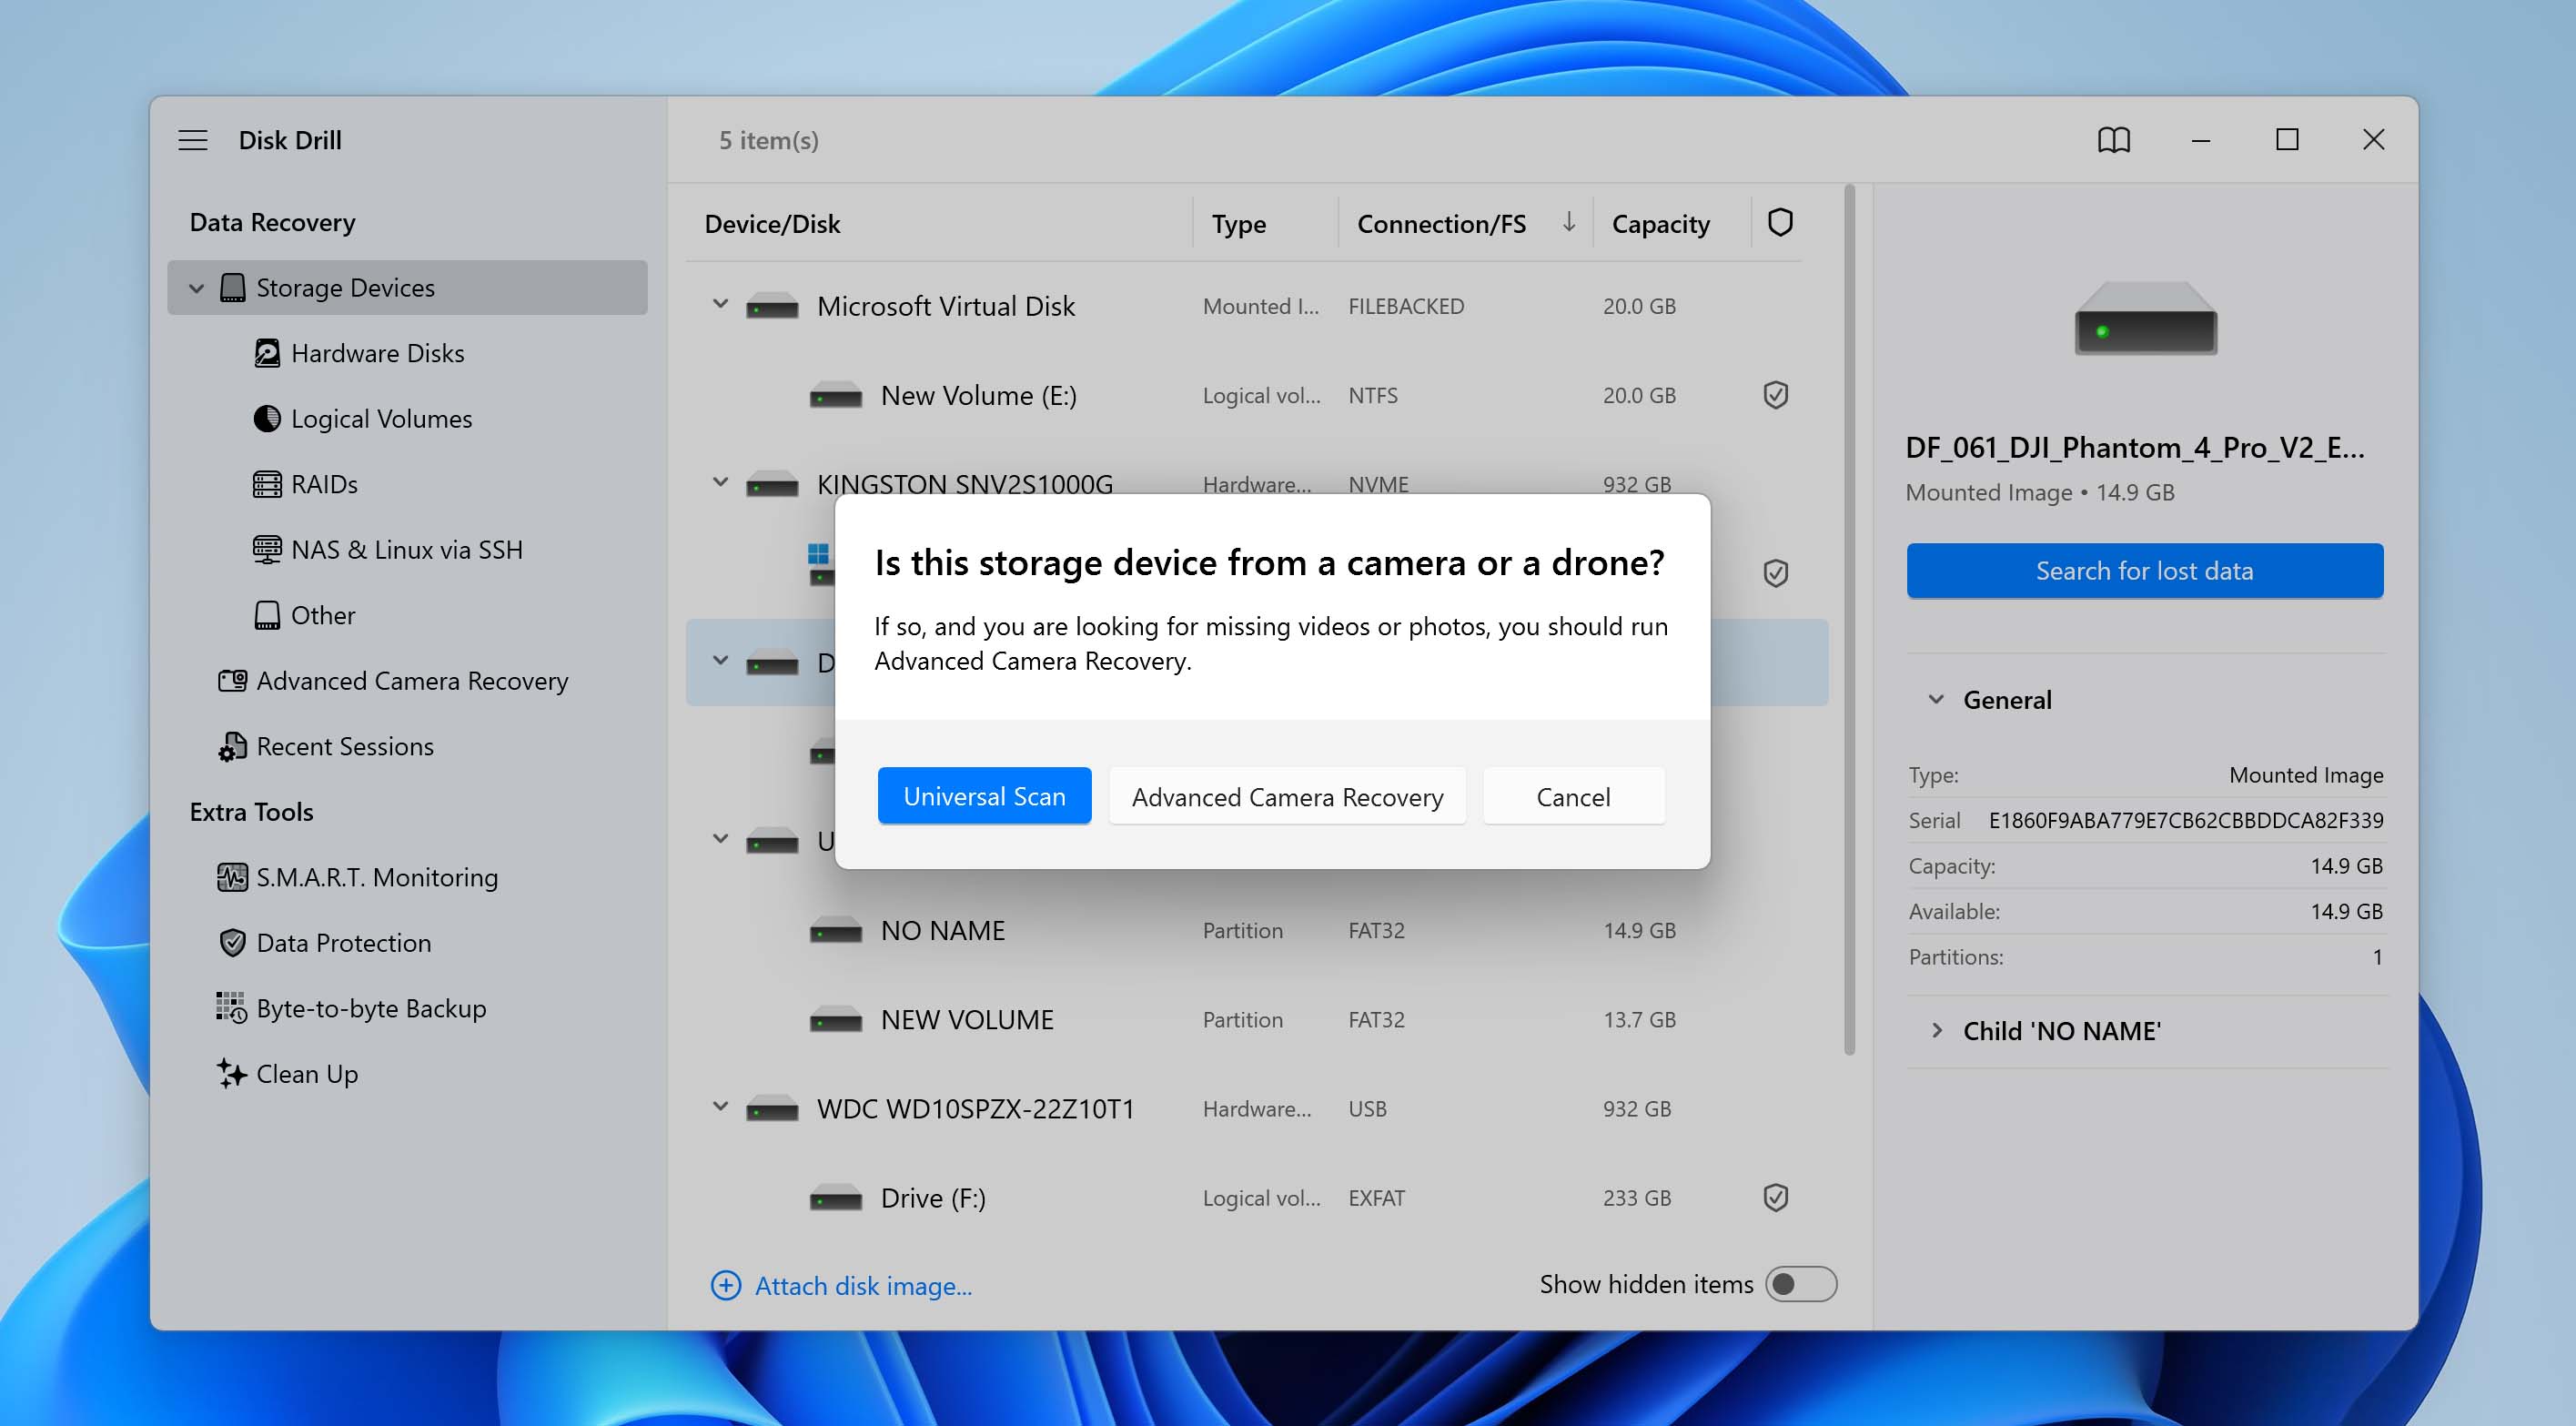
- In the pop-up window that appears, select the Universal scan option to find deleted photos. If you need to recover videos from your Sony camera, the best option would be to select the Advanced Camera Recovery scan option. Disk Drill will now begin scanning your memory card. This may take some time, depending on the size of the card. Once the scan is complete, click the Review found items button.
- On the results page, click the Pictures category on the left side to show only image files. You’ll find your deleted photos under the Deleted or lost and/or Reconstructed category. You can preview any image file before recovery to decide if the file is important and to verify its recoverability.
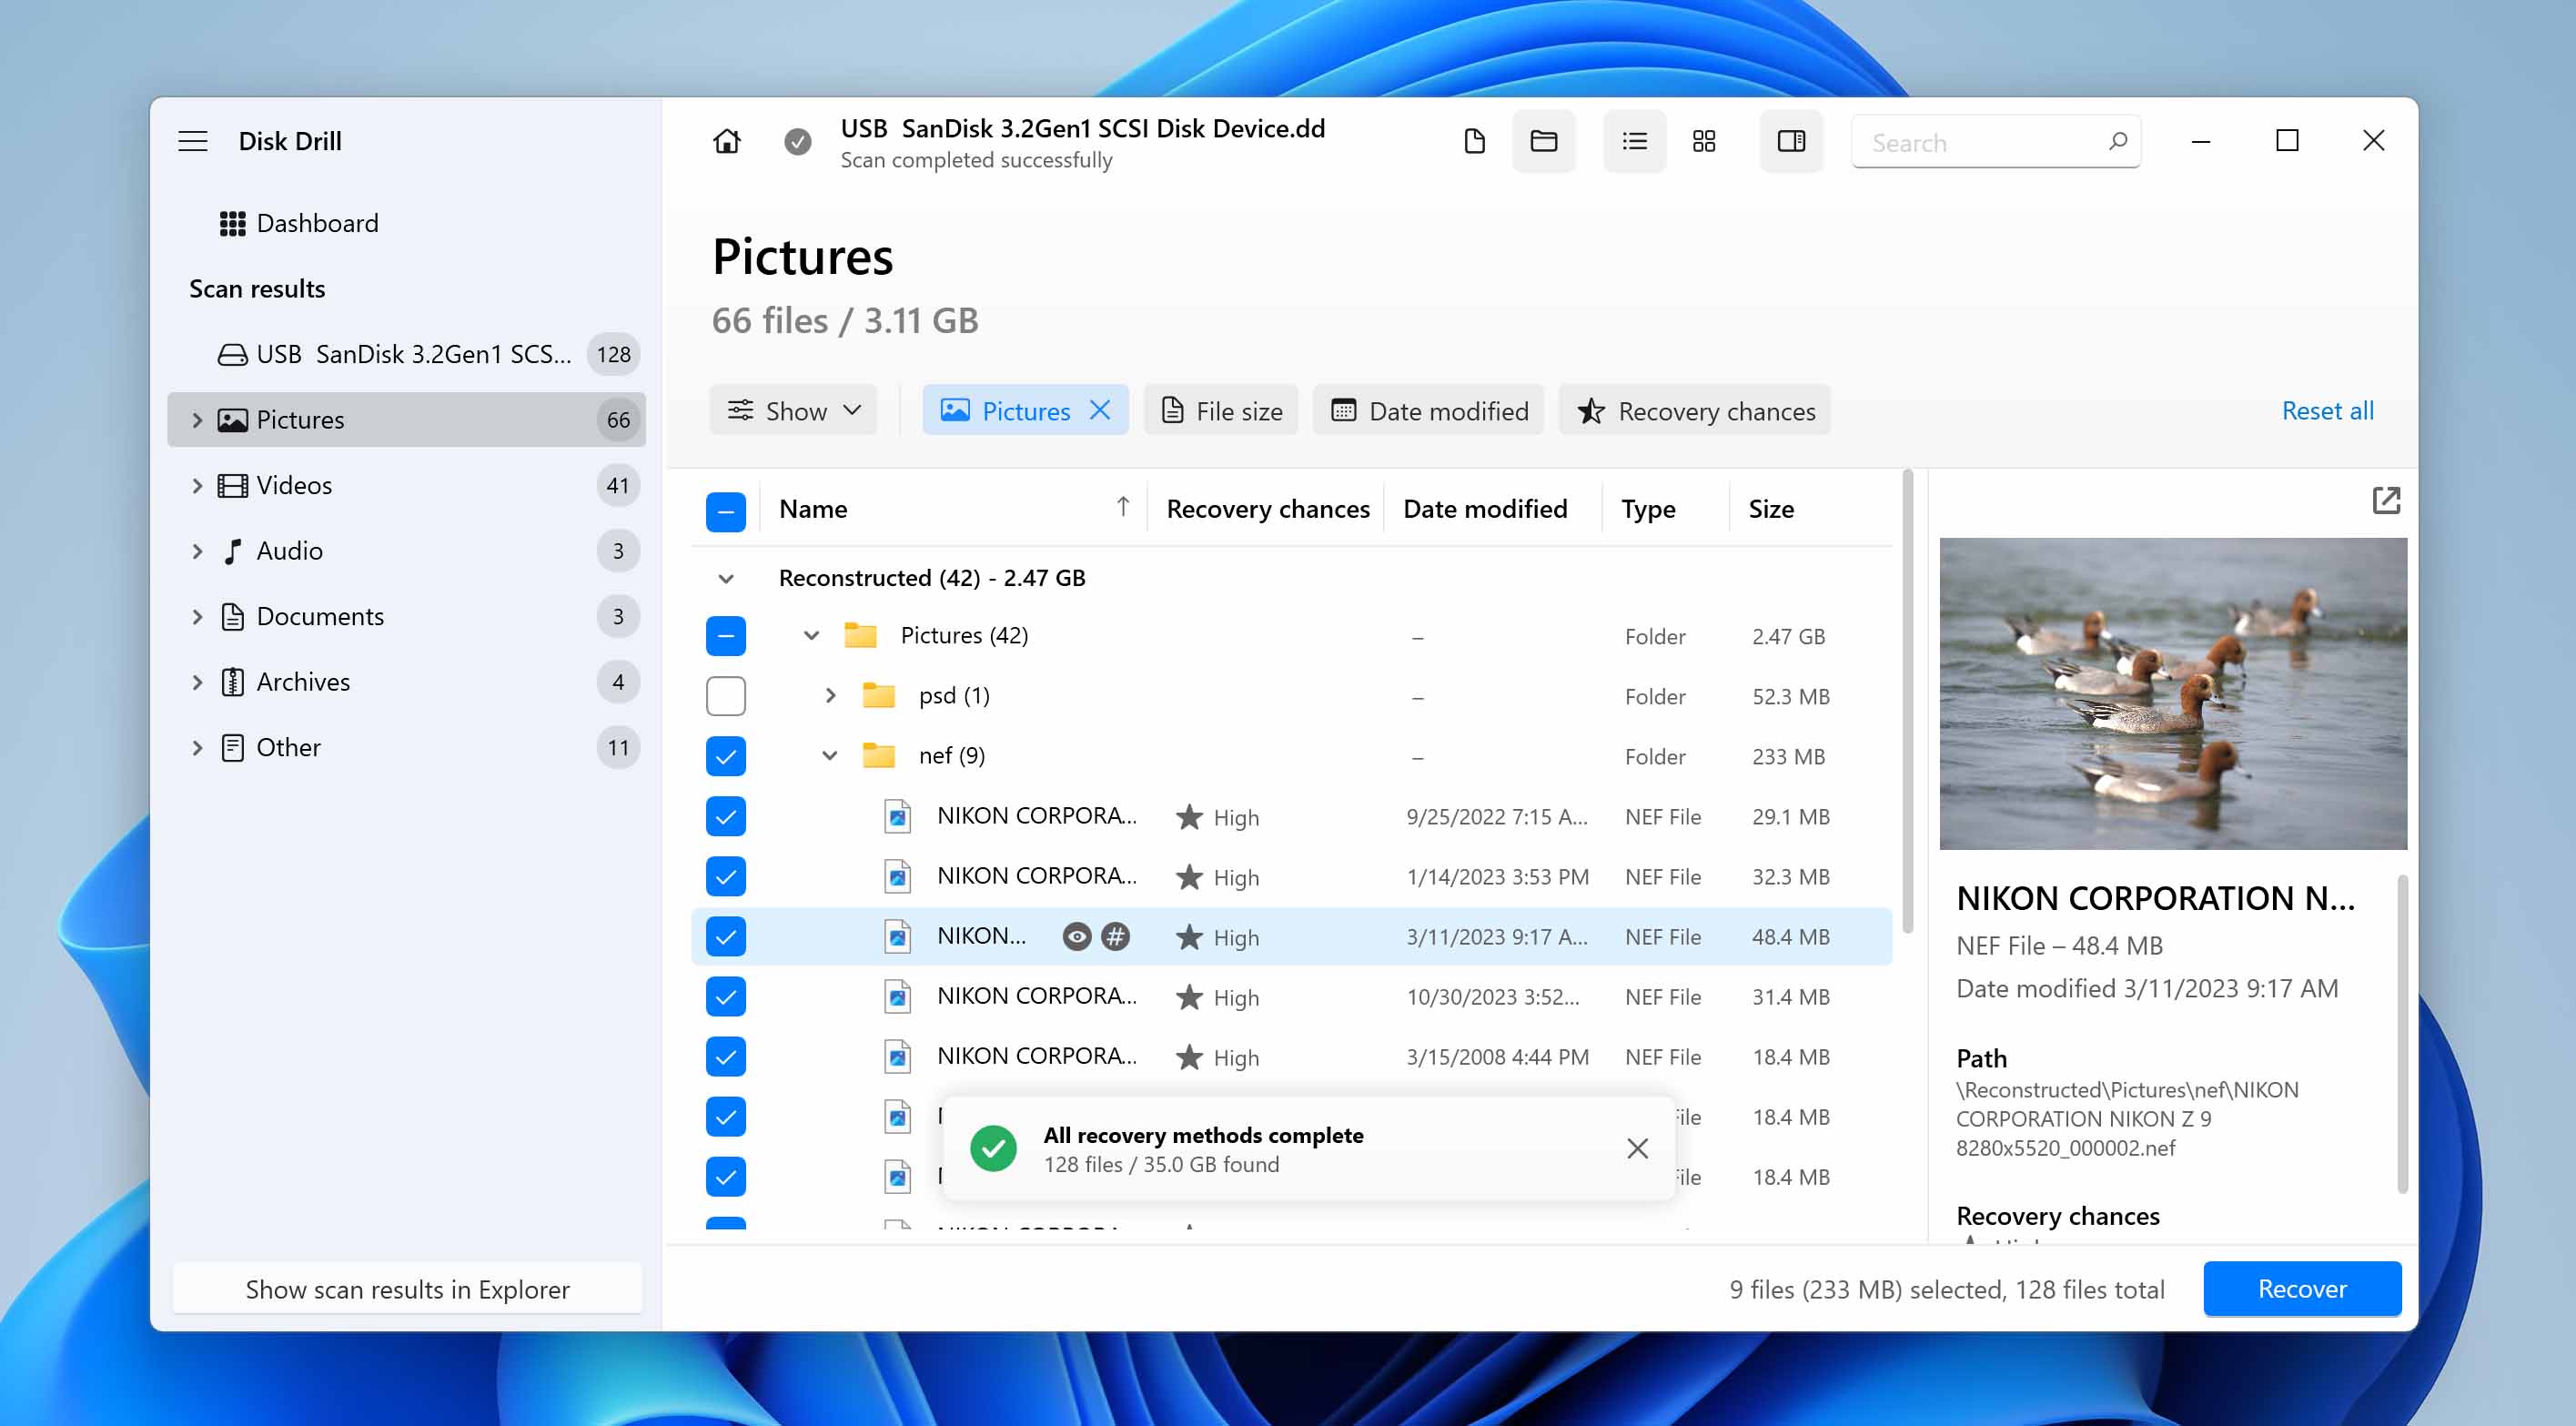
- Whenever you find a file you want to recover, you need to tick the checkbox on the left of the photo’s file name to add it to the recovery queue. Once done, you can click the Recover button to continue.
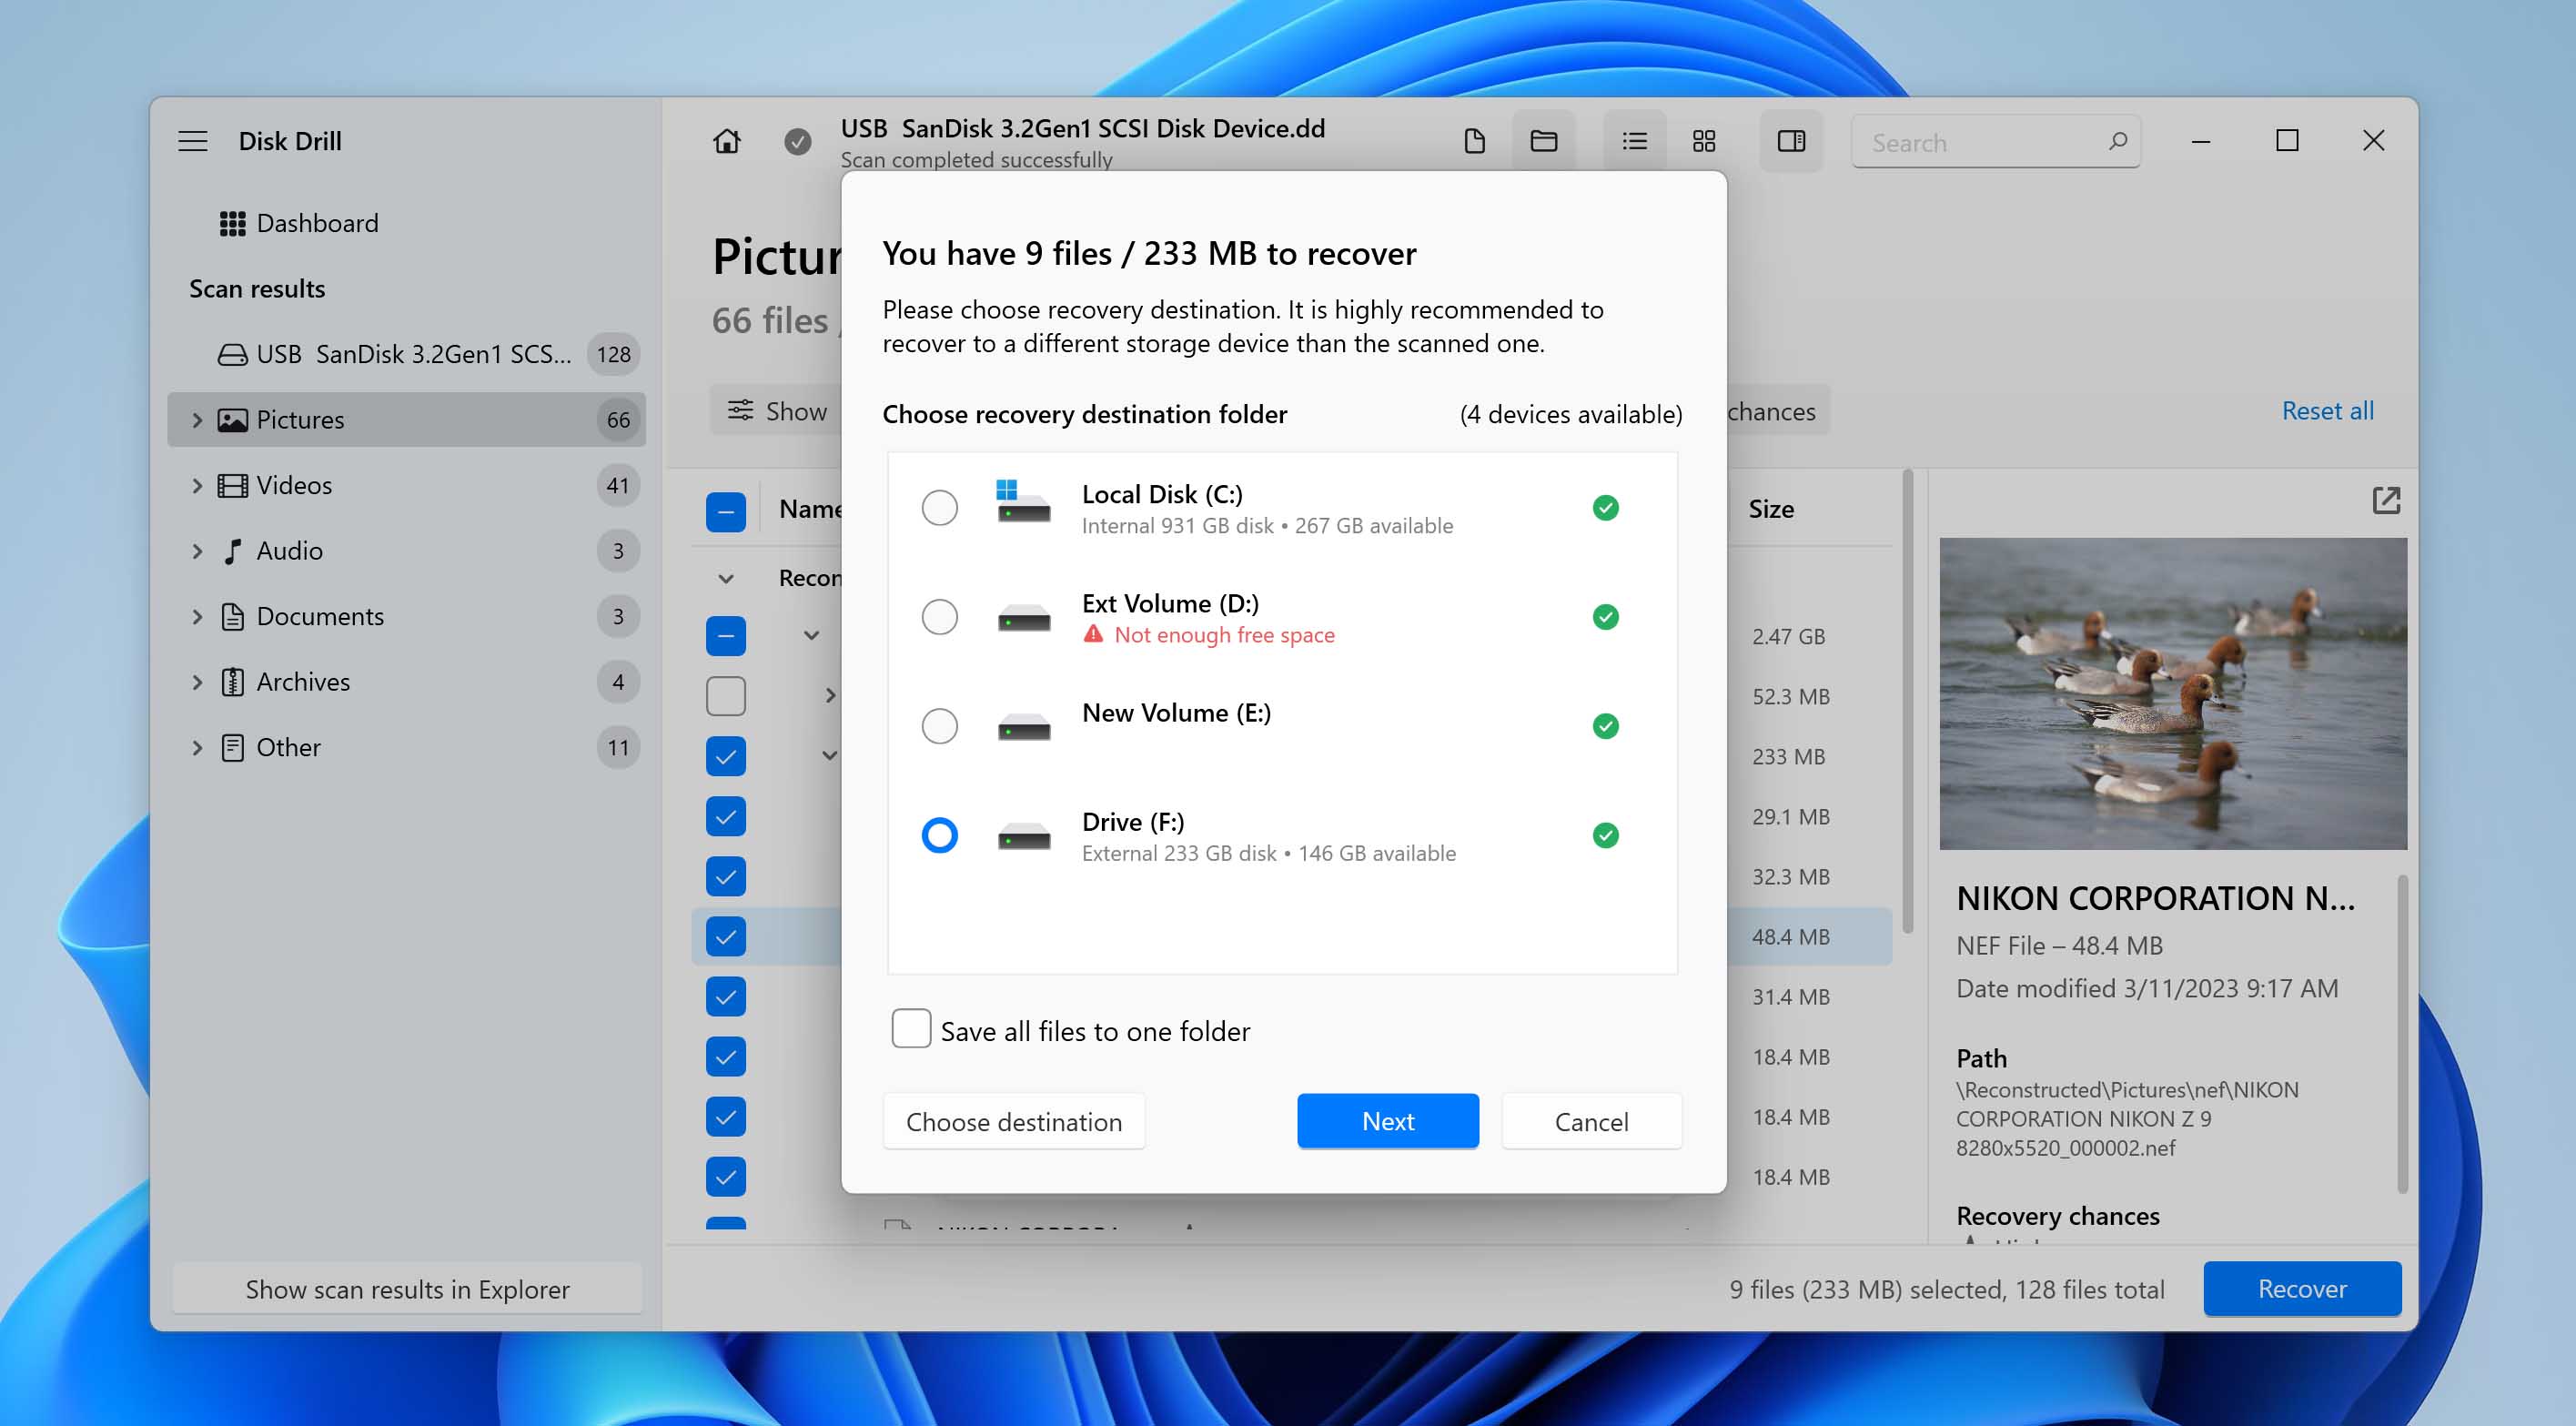
- You’ll get a pop-up asking you to choose a directory where the recovered files will be saved. Make sure the destination you pick is on a different storage device than the memory card you’re recovering pictures from. Otherwise, you’ll get an error. Click Next to proceed.
- Disk Drill will now try to recover your pictures. When the process is done, you’ll see a button labeled Show recovered files in Explorer. Click it, and you’ll be taken directly to the folder where your rescued images are located.


The free version of Disk Drill for Windows allows you to recover up to 500 MB of photos and other data. If you need to recover more, you can upgrade to the Pro version of Disk Drill, which offers unlimited data recovery. The best part is that you only need to pay once for a lifetime license, making it a cost-effective solution for recovering your precious photos and files.
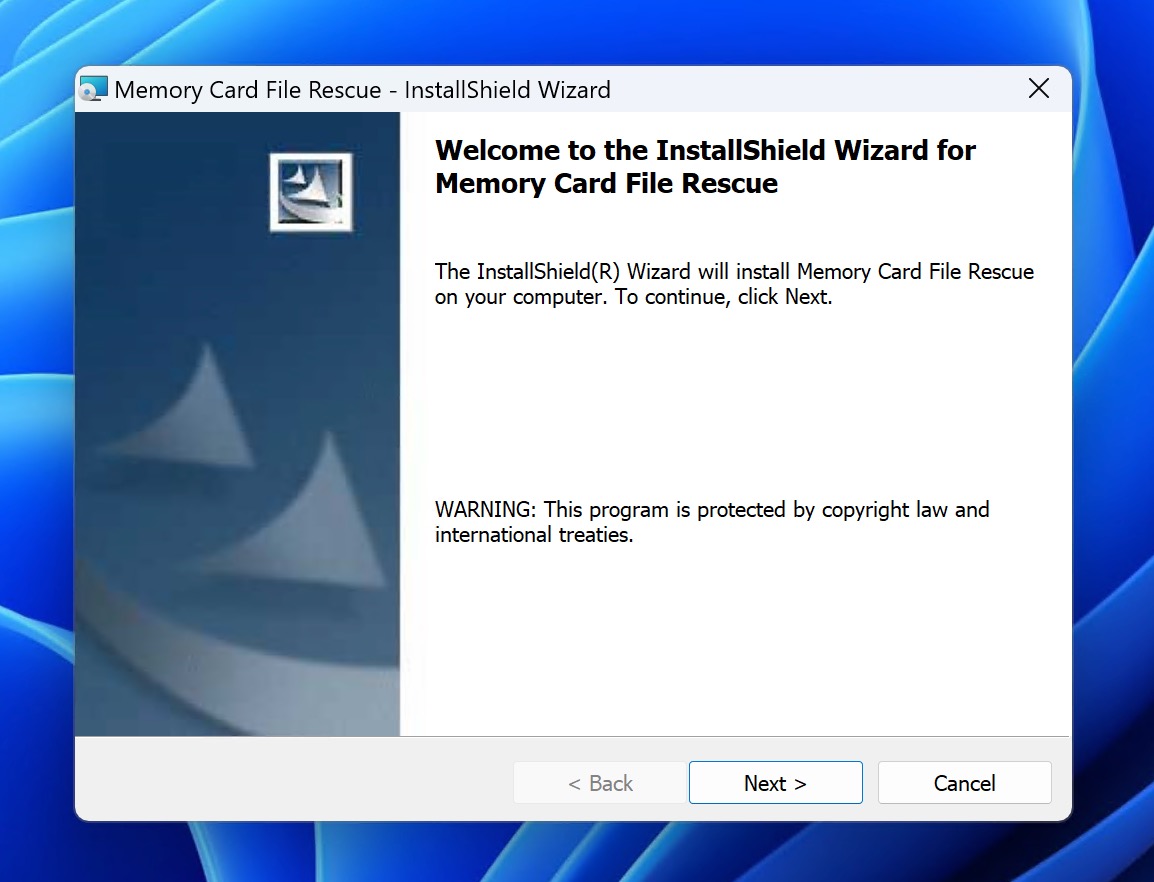
Option 2. Scan Your Memory Card Using Sony’s Memory Card File Rescue
Sony offers a free data recovery software called Memory Card File Rescue, designed specifically to recover files created by Sony cameras.
This tool is tailored to work with various Sony memory media, including CFexpress Type A and B Memory Cards, XQD Memory Cards, SD Memory Cards, Memory Stick™, and even Sony External SSD SL-M series. Naturally, Sony’s Memory Card File Rescue can recover the multimedia file formats used by the company’s cameras.
Unfortunately, Sony’s Memory Card File Rescue hasn’t been updated since 2020. However, the software still works, so it’s worth considering, especially given its free price.
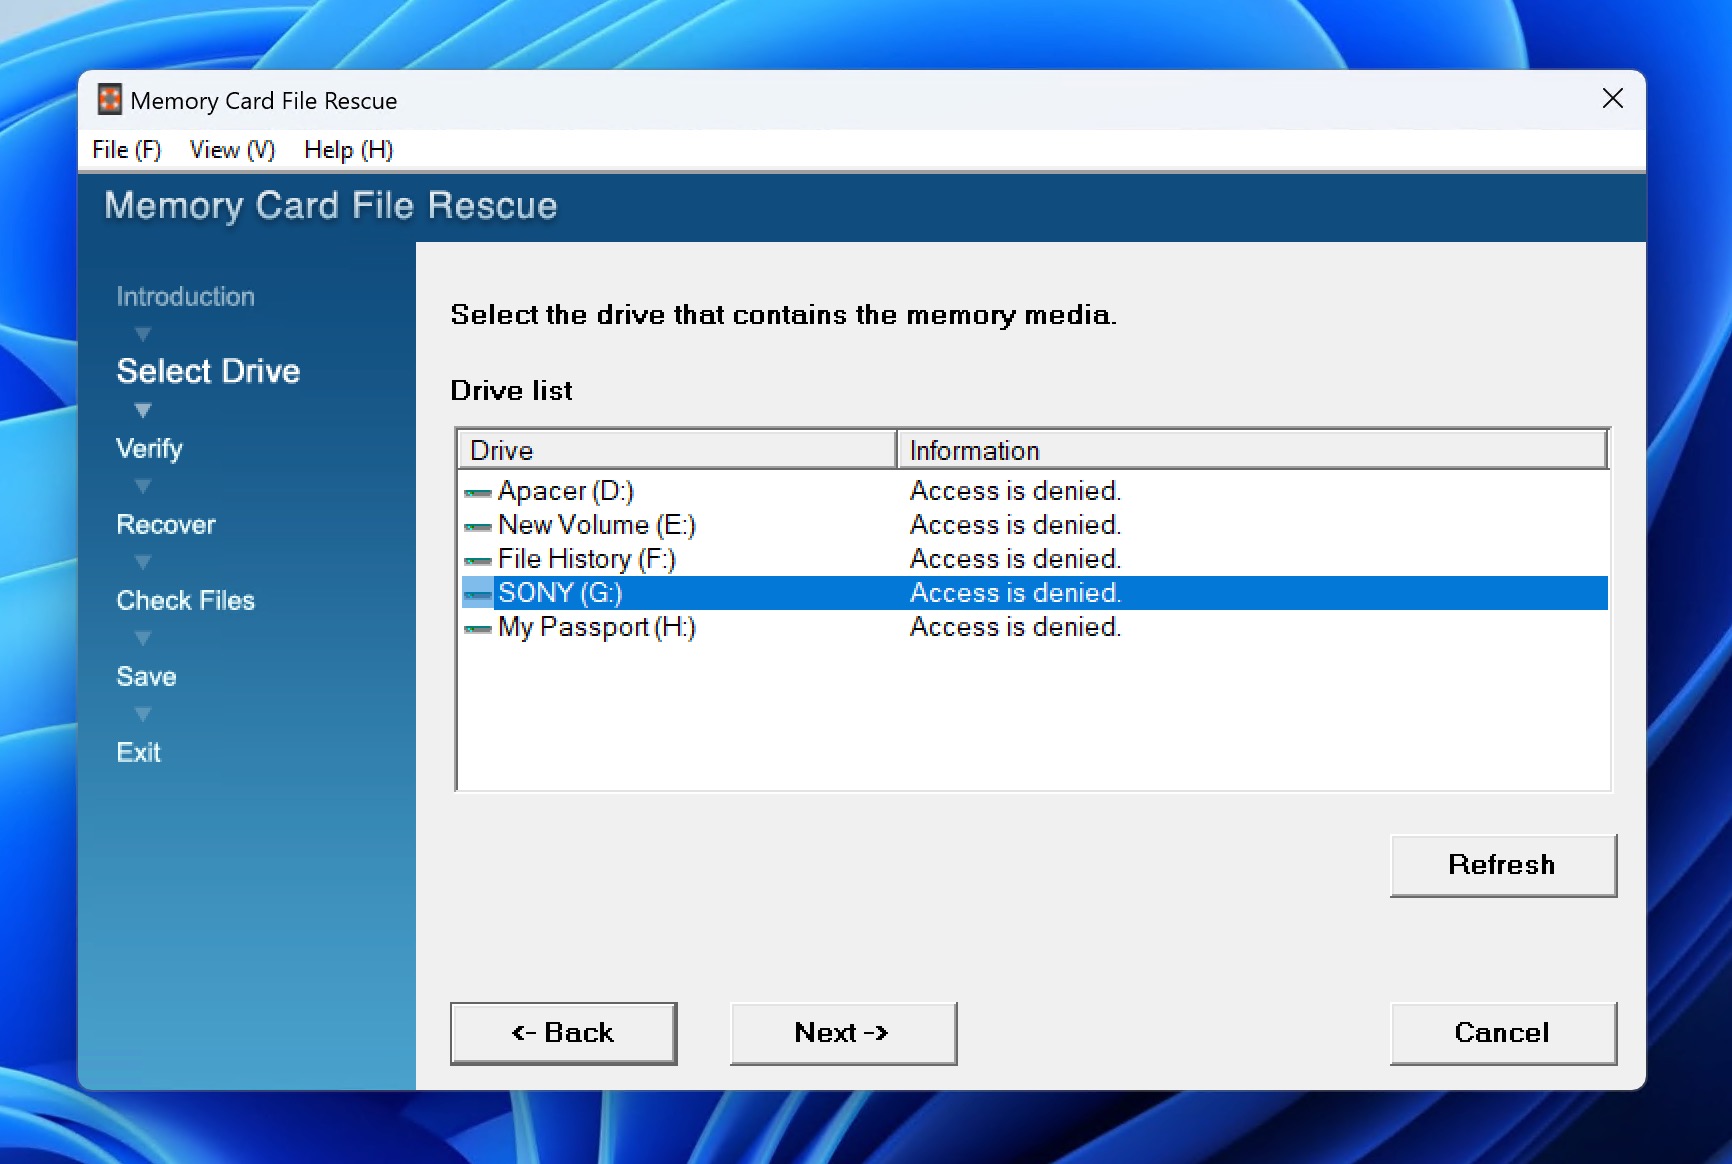
To use Sony’s Memory Card File Rescue, follow these steps:
- Go to the Download page and download the software for your operating system. You will be asked to enter the model name and identification code of the memory card you want to recover.
- Connect your Sony camera or memory card to your computer using a USB cable or card reader.
- Launch the Memory Card File Rescue software and select the device you want to recover files from. If the application shows “Access is denied” message next to your camera or memory card, click Next anyway. You will most likely be able to proceed without any issues.
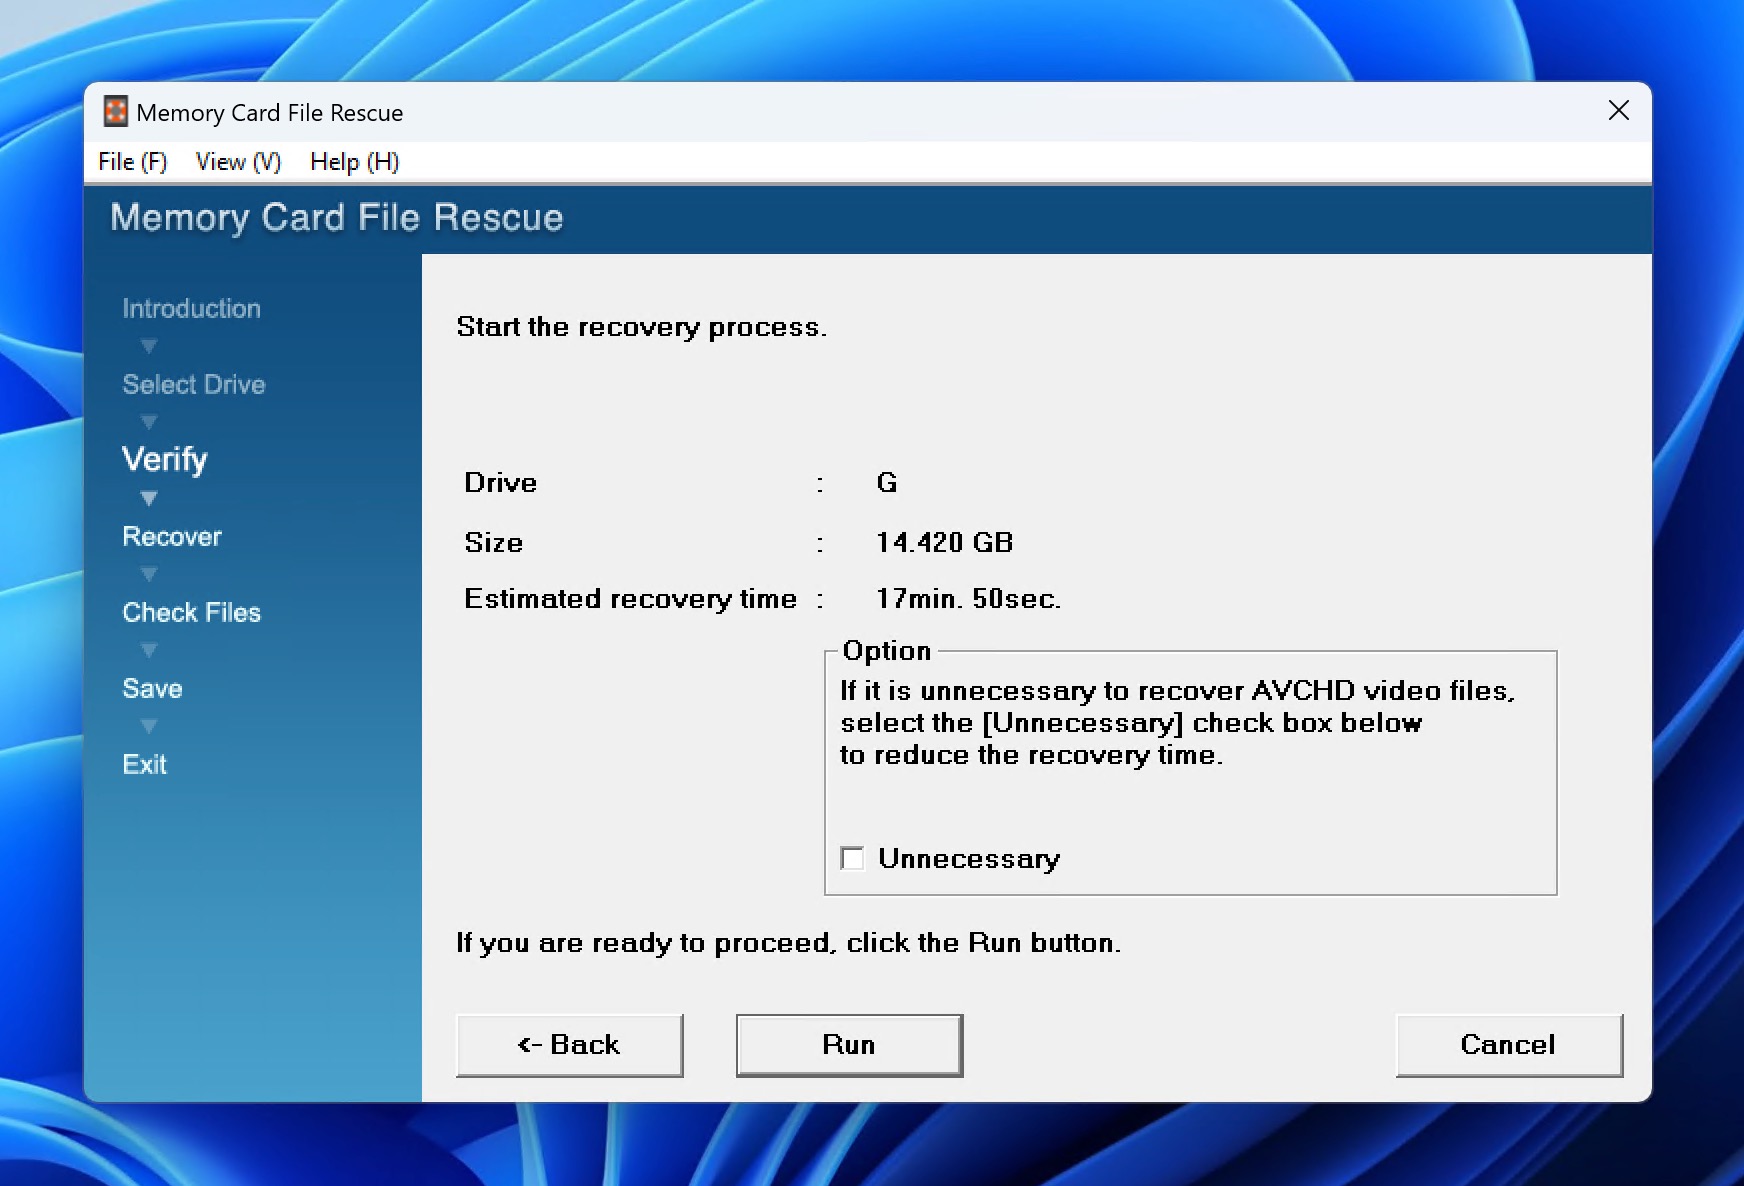
- Verify your recovery settings and click Run to proceed.
- Once the scan is complete, preview and select the files you want to recover.
- Click the “Recover” button to save the files to a safe location on your computer.


Know that the software isn’t known for its speed, so don’t expect it to deliver results as quickly as Disk Drill.
Option 3. Restore Your Data from a Backup
If you regularly back up your photos, you may be able to recover your deleted pictures from a backup without the need for data recovery software. This is often the quickest and most reliable way to restore your lost images, as long as you have a recent backup available.
Note: We’ve ranked this method third because, in most real-world cases, users lose their Sony camera data before they’ve had a chance to transfer the photos to a PC, let alone create a backup. That’s why software-based recovery tends to be the more practical first step.
When searching for backups of your Sony Cybershot camera photos, don’t forget to look for them in these locations:
- Local backups: Check your computer or external hard drives for any backup folders containing your photos.
- Cloud backups: If you use cloud storage services like Google Photos, iCloud, or Dropbox to automatically back up your data, your deleted photos might still be available there.
- Social media sites: Have you shared the photos taken with your Sony Cybershot camera on social media? Then you can download the lost images from there (most likely in a smaller resolution, but that’s still better than nothing).
Option 4. Contact Professional Data Recovery Services
If you’ve tried using data recovery software, but still haven’t been able to recover your deleted photos from your Sony Cybershot camera, and you don’t have backups, then you can consider professional data recovery services.
Professional data recovery services have access to enterprise-grade recovery software, which often boasts more powerful capabilities compared to consumer-level programs. Additionally, they possess the expertise to diagnose and repair physical damage to memory cards, such as broken connectors, which can render data inaccessible to DIY software.
Of course, professional data recovery services can be quite expensive, with prices ranging from a few hundred to several thousand dollars, depending on the complexity of the recovery. However, if your deleted photos are irreplaceable and have significant sentimental or monetary value, the cost may be worth it.
How To Prevent Data Loss From a Sony Camera in the Future
While you now know that there’s a reliable way to recover lost or deleted files from your Sony Camera, it’s still best if you avoid data loss altogether. After all, it’s not like there are any data recovery programs that have a 100% success rate. So, to minimize the chances of data loss in the future, follow these tips:
- 🖨️ Create backups regularly: One surefire way to mitigate data loss is to routinely create backups of the photos in your Sony camera. That way, even if your memory card fails or you delete some images accidentally, you’ll have copies of the files on another storage medium.
- 🦠 Install anti-virus/anti-malware programs: Hooking up your Sony camera’s SD card to a susceptible computer may lead to the card becoming infected with a form of malware or virus. This, in turn, could cause your photos to disappear or become corrupted. To avoid this, make sure to have quality anti-virus/anti-malware programs installed on your machine at all times and always keep them updated.
- 🧹 Keep your PC/laptop clean: Dust buildup is an inevitable part of owning a computer, especially if it’s a desktop PC. Cleaning your computer regularly is vital because, if left unchecked, dust buildup can cause your machine to heat up. If the heat reaches critical levels, it may cause some of your drives and other components to fail. This includes any backups you may have of your Sony camera pictures.
- 🍹 Drinks should be kept away: It may sound like a no-brainer, but you’d be surprised by the number of people who lost perfectly good devices due to an acscidentally toppled glass of water. In addition, liquids can severely damage your computer, along with any Sony digital camera Cyber Shot photo backups. They can also ruin both your Cybershot camera and the memory card inside it. That being said, drink your liquids elsewhere.
Conclusion
Sony’s Cybershot cameras, like all devices that store data, are not immune to its loss. However, the good news is that the data usually still exists on your SD card, and with the right recovery methods, you can often retrieve it. In this article, we’ve explained why Disk Drill is our top choice for Sony Cybershot data recovery and provided detailed instructions on how to use it. We’ve also covered several alternative solutions, namely Sony’s Memory Card File Rescue software, previous backups, and professional data recovery services. Hopefully, one of these solutions will be able to retrieve your lost photos.