
Reading Time: 10 minutesA simple reboot can fix numerous common issues on your computer. Whether it’s installing a new program or updating Windows, rebooting is essential for your PC. But, what if you restarted the PC and everything is gone? Maybe you had some important photos that are no longer there after a reboot. While there are several reasons why data loss may occur after a reboot, the good news is that your files can be recovered. Use our guide to find out how.
Does Restarting My Computer Delete Everything
No, restarting your computer does not delete any of your personal files. Technically, when you restart your PC, the operating system performs a controlled shutdown and startup sequence. This clears temporary cache files, closes all active processes, and resets certain system states – but none of these actions target your saved data, such as documents, pictures, or installed programs.
However, other reasons can lead to unexpected data loss after a reboot. For example, malware infections, the use of a temporary user profile, or a corrupt or failing hard drive can cause files to disappear. Additionally, if you forget to save projects or documents you’re working on before restarting, any unsaved changes will be lost when the system clears active memory.
Luckily, the reason your computer seemingly deleted everything after a restart, can be easily determined. The next section explores the common reasons for file deletion after restarting and their symptoms.
Why Did My Computer Restart and Delete My Files?
If your computer restarted and deleted your files, it was caused by one of the reasons explained in this section. Most of these problems can be resolved in little to no time, and don’t require a lot of technical knowledge.
Storage Sense in Windows
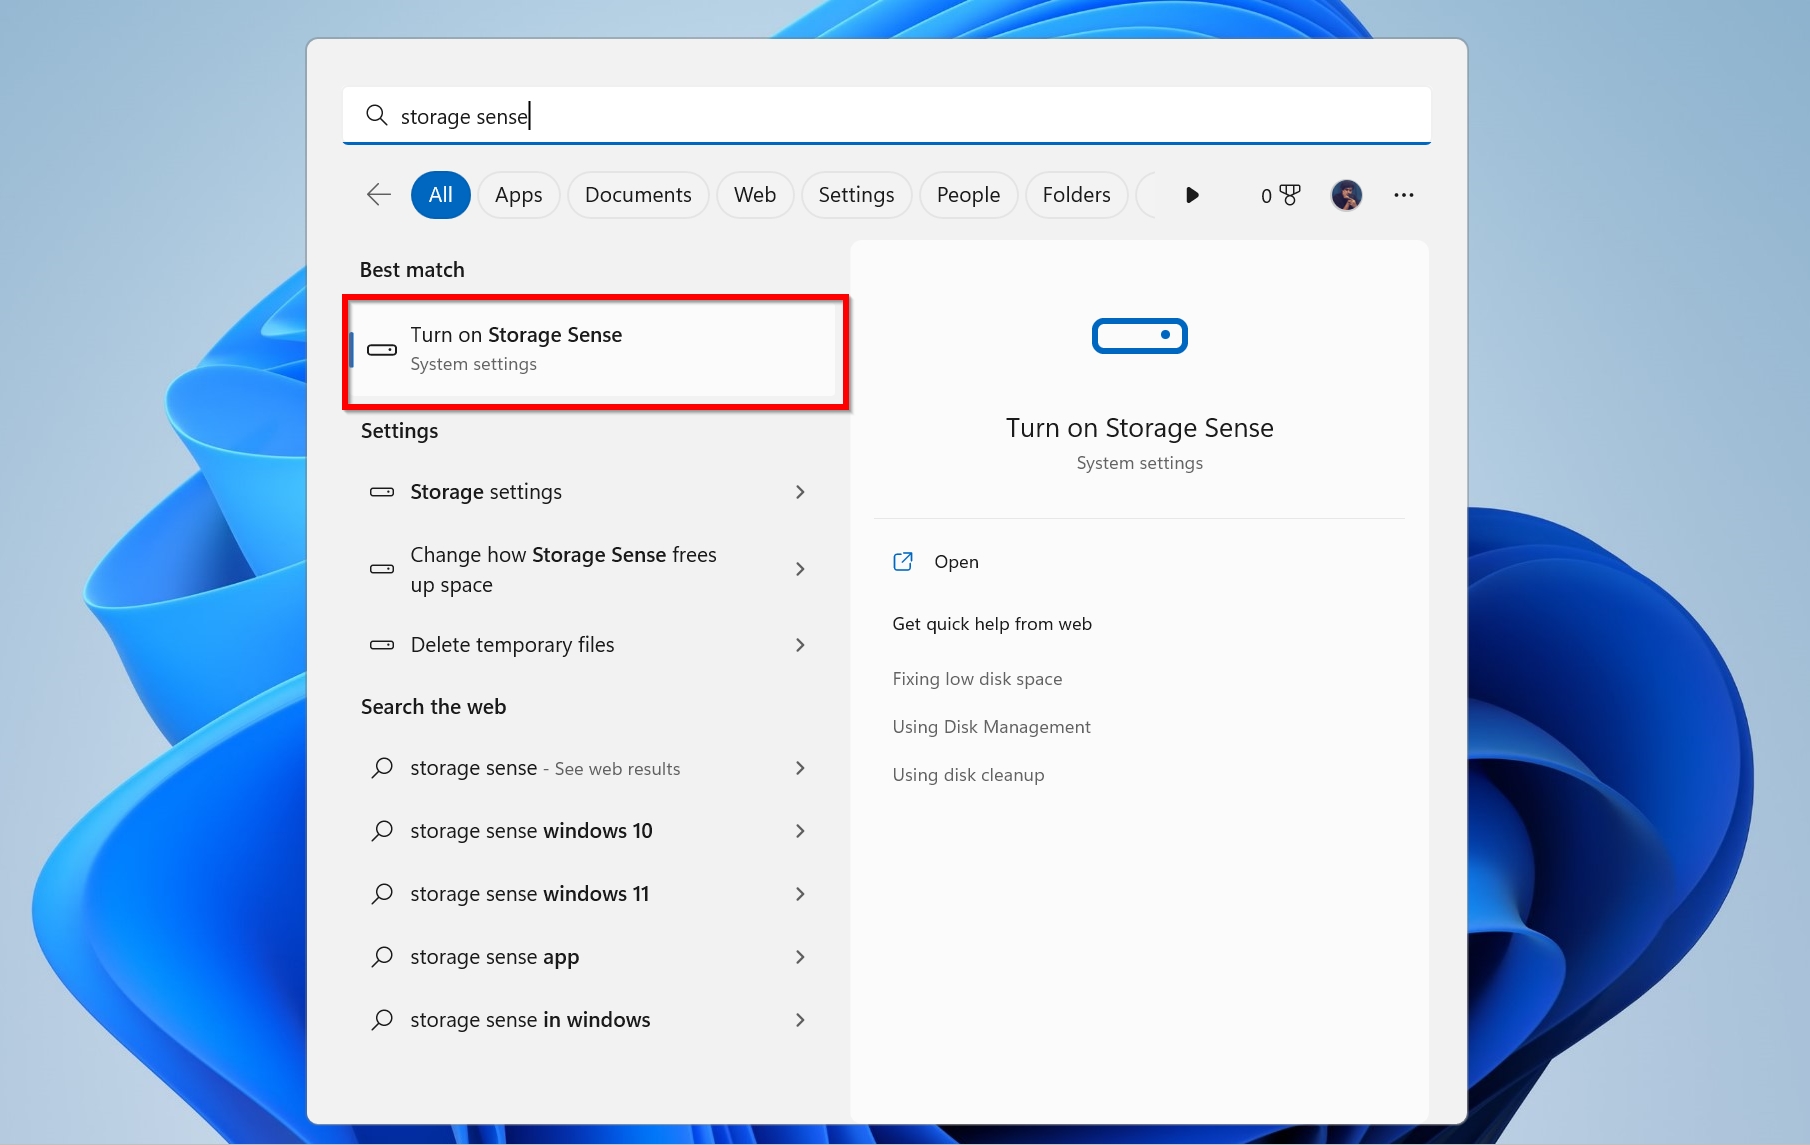
For better storage space management, Windows 10 and 11 come with a feature called Storage Sense. It automatically cleans up temporary internet/application files and files from the Recycle Bin. Depending on its configuration, it may delete files from the Downloads folder as well.
If you’re reading this, it’s unlikely that you’re looking for missing files from the Recycle Bin, but you’ve probably noticed after a reboot that downloads you were sure were saved have disappeared. You can prevent Storage Sense from automatically removing these files by following the steps below.
- Search for “storage sense” in Windows Search (Windows Key + S) and click on Turn on Storage Sense from the search results.
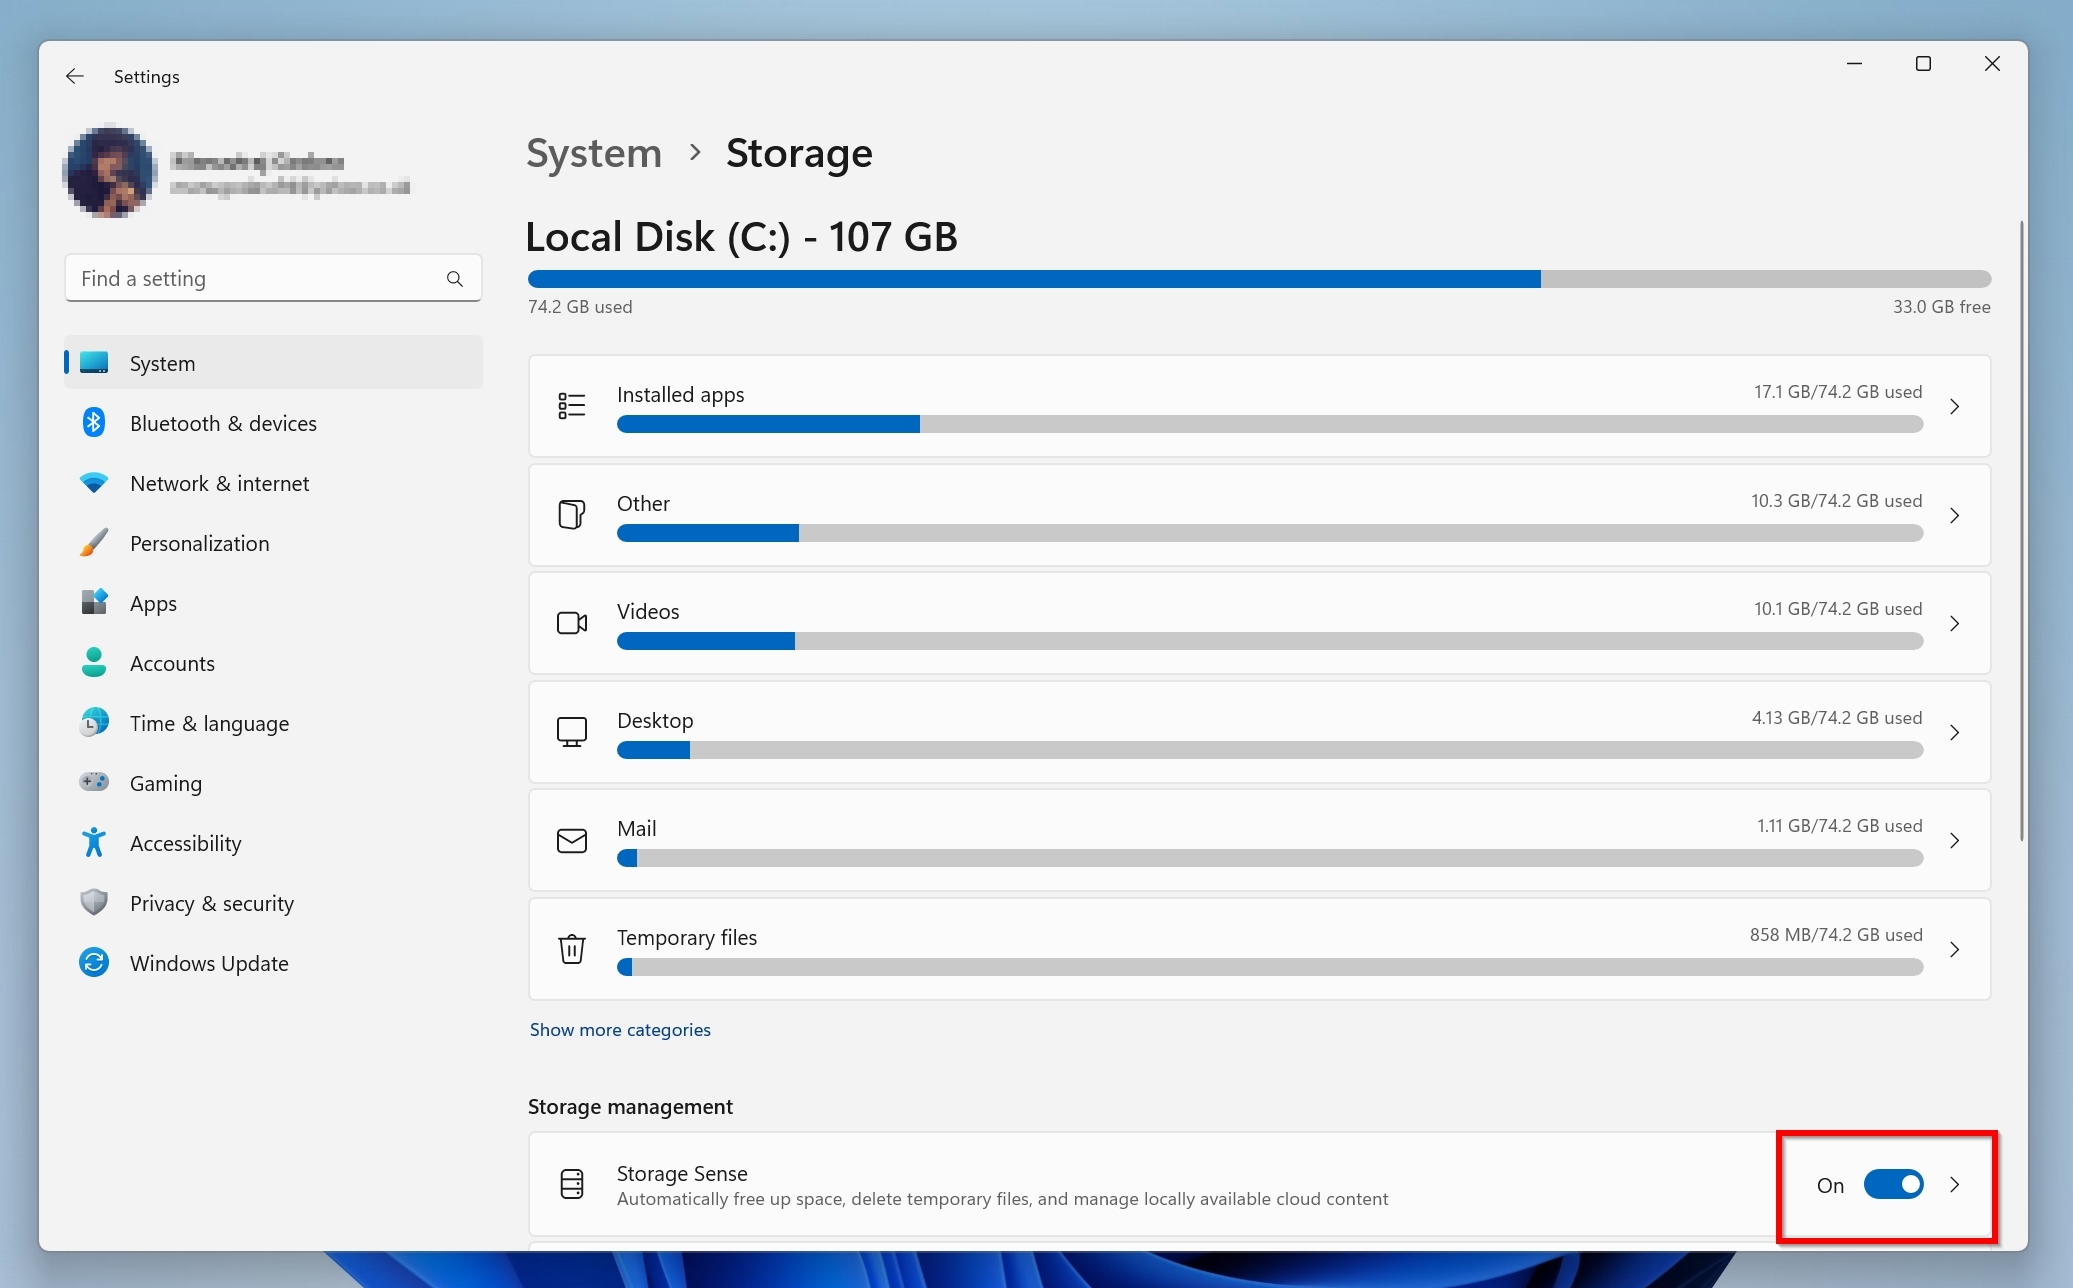
- Scroll down and switch the Storage Sense slider to Off.


Note: These steps won’t recover files that were already deleted. To get them back, you’ll need to use one of the recovery methods described later in this article.
Microsoft Defender is Deleting Files
Microsoft Defender can falsely flag safe files as malware, and quarantine or delete them. If you notice that Windows 10/11 keeps deleting specific programs and documents after a restart, consider adding an exception for them in Windows Defender.
Here is how you can stop Windows Defender from deleting your files:
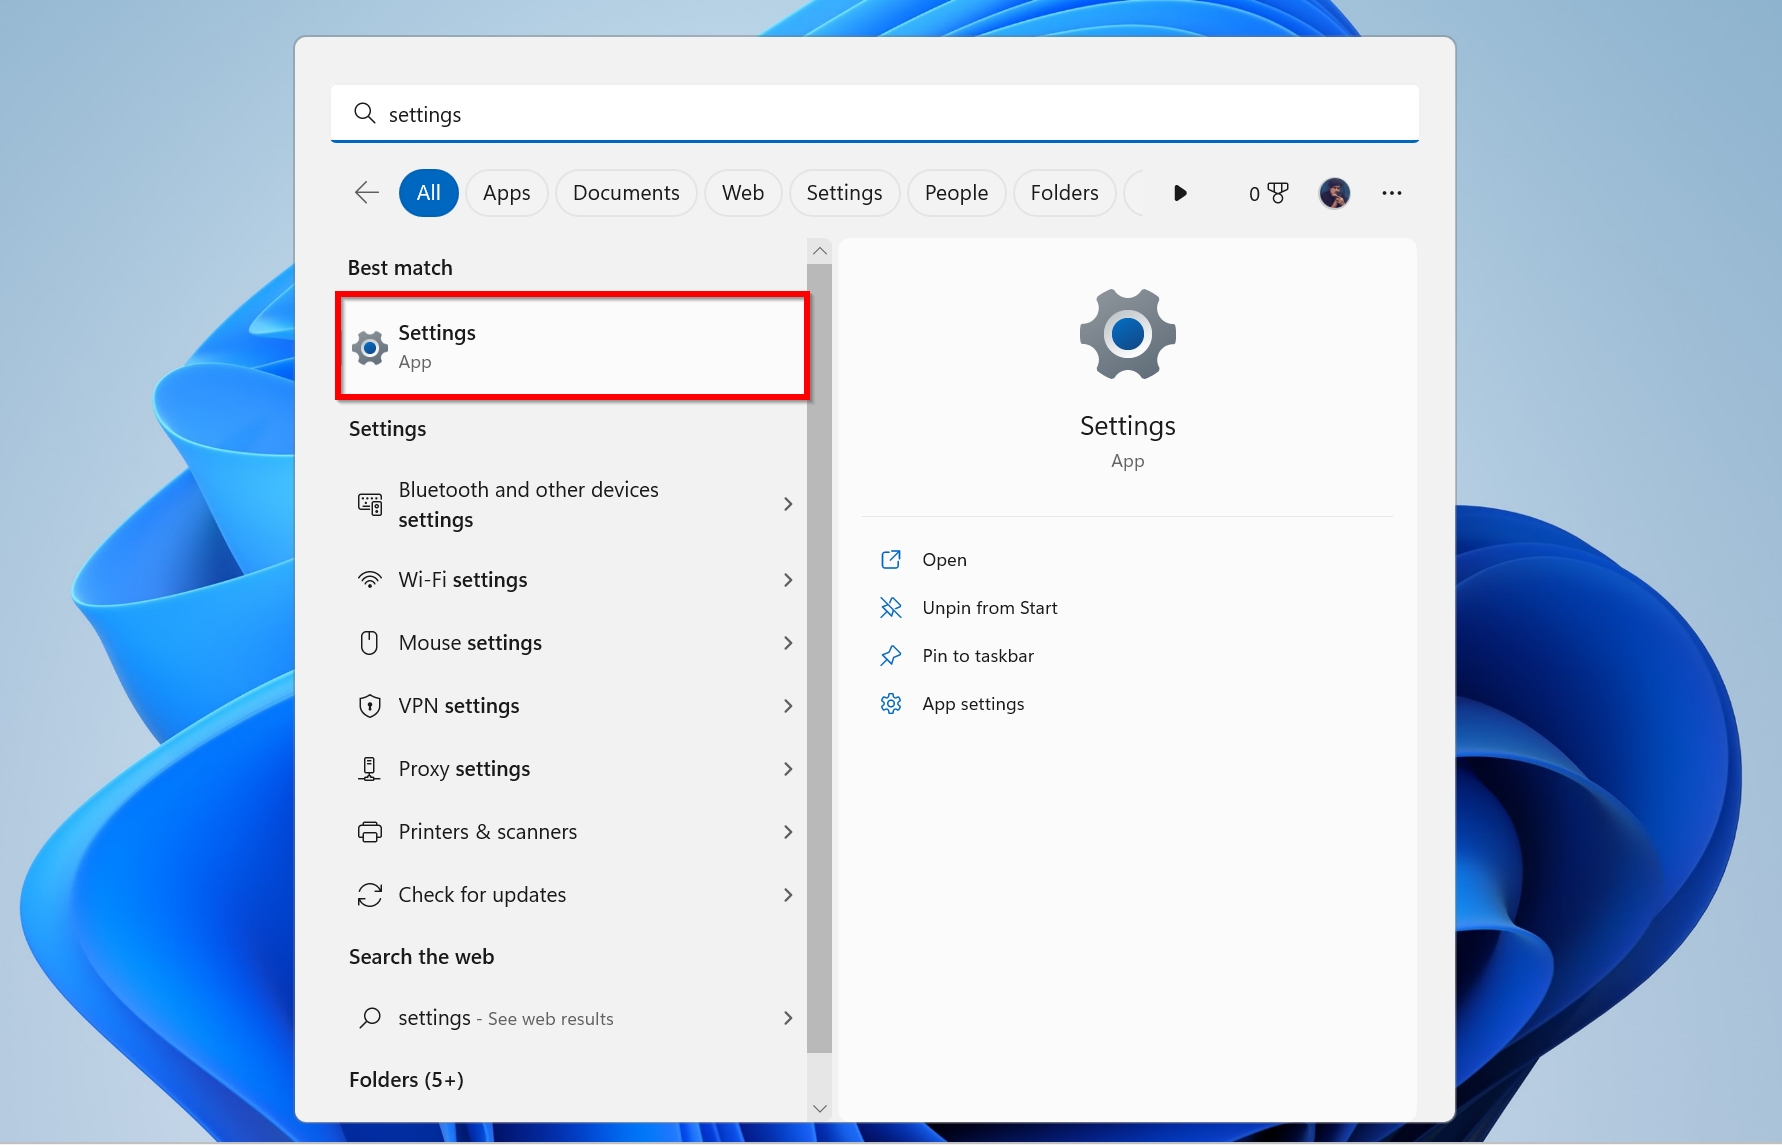
- Click on Start > Settings.
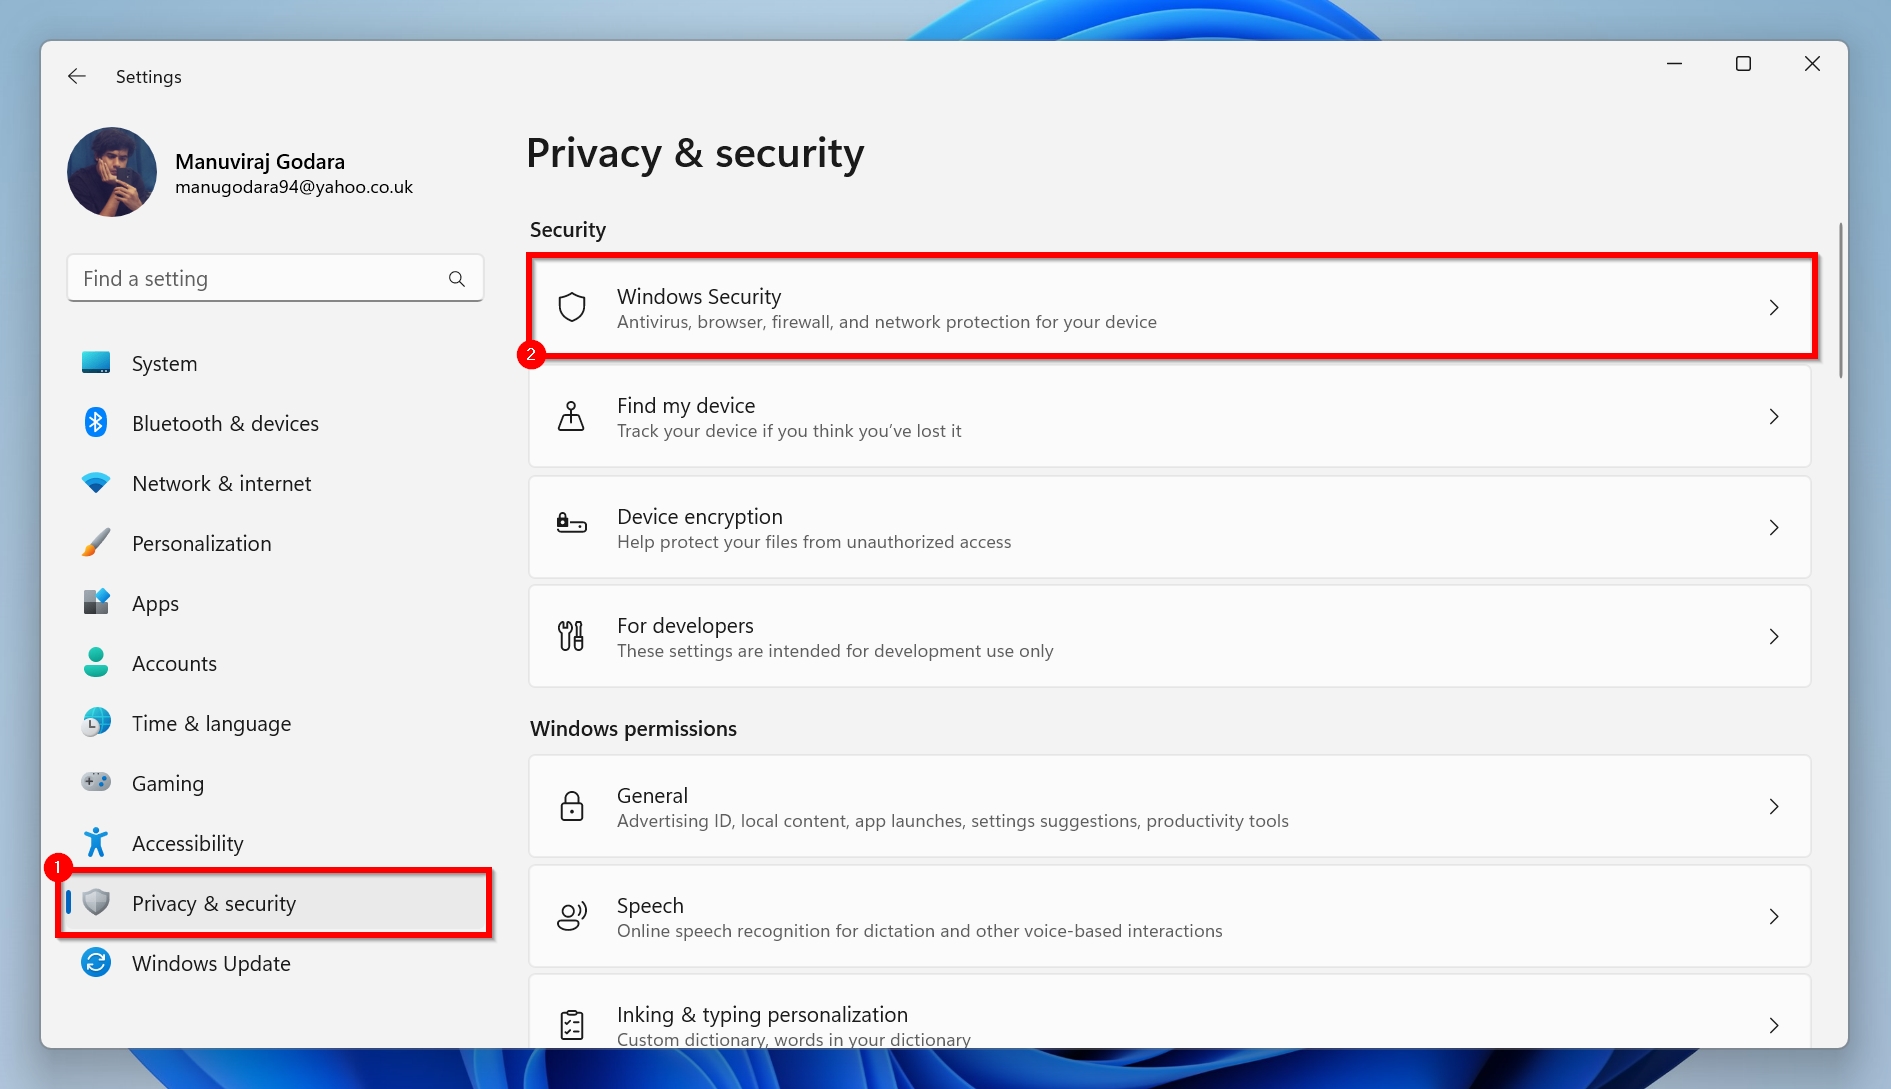
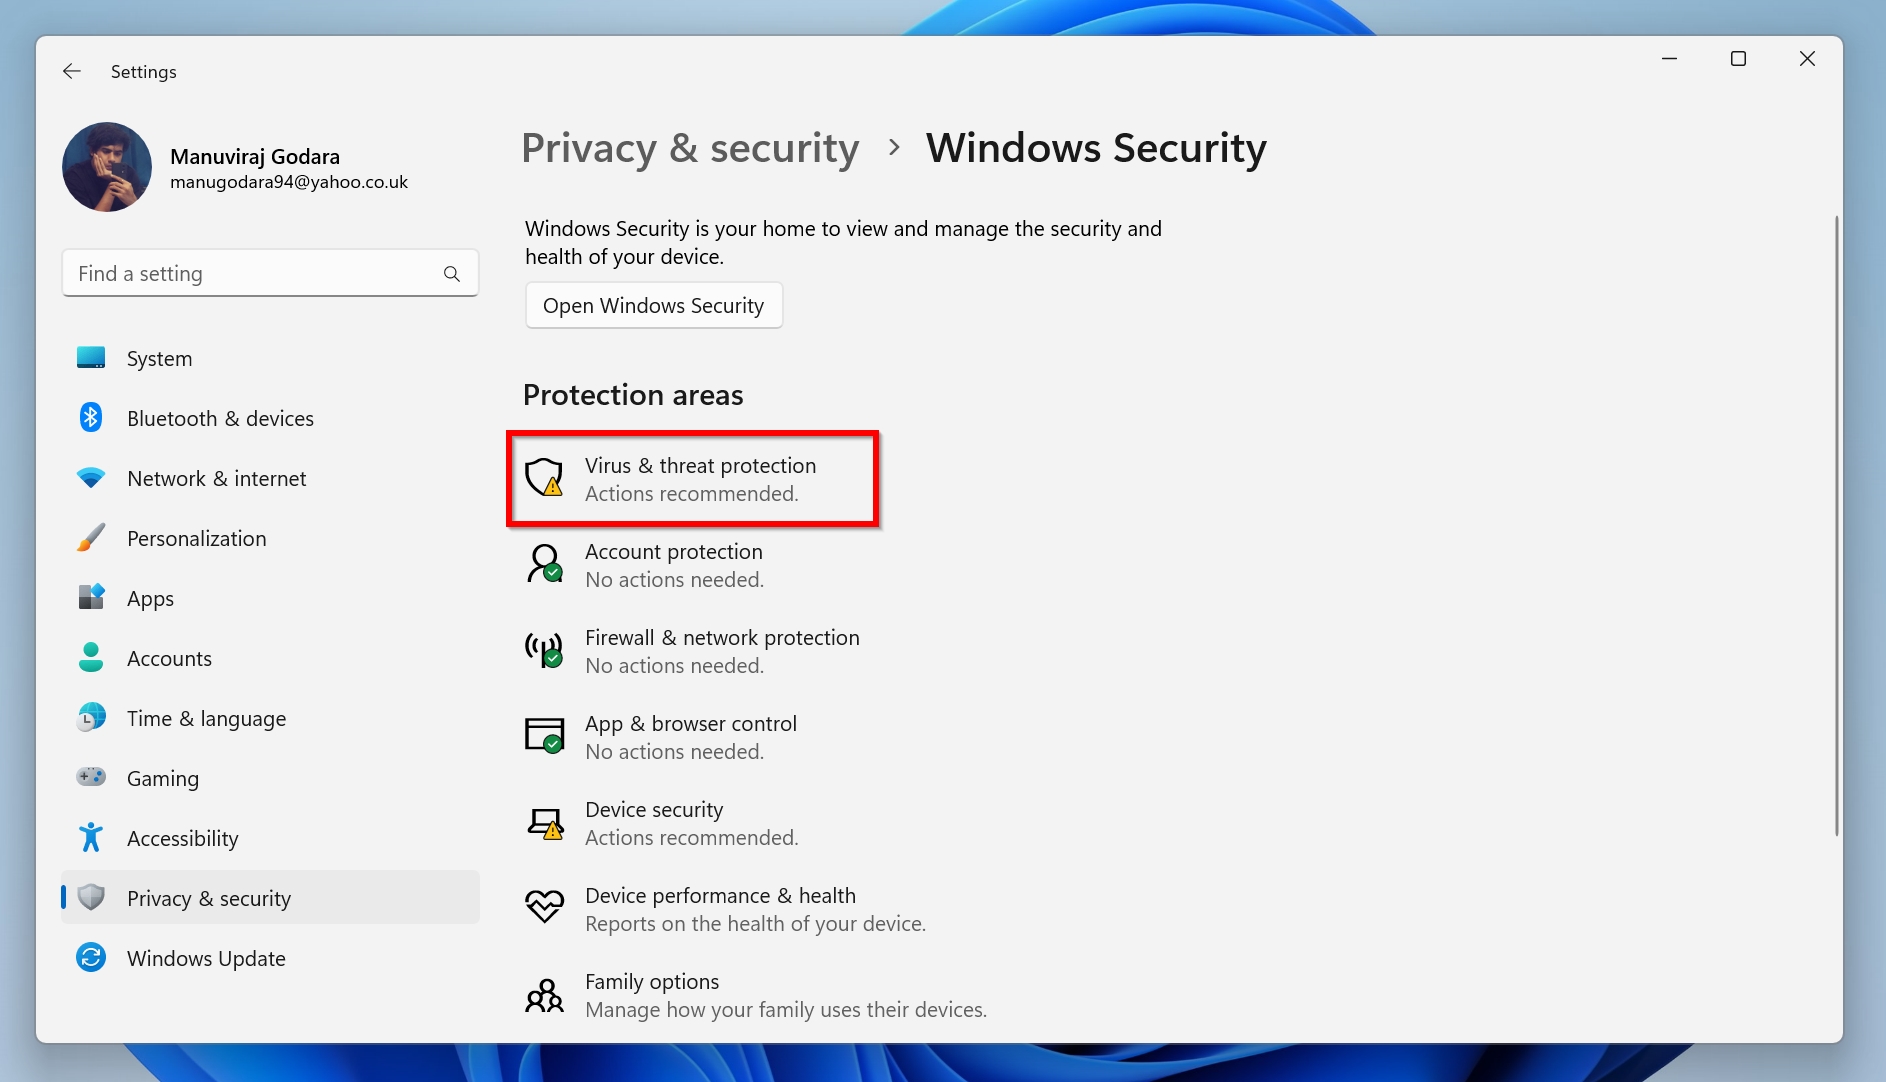
- Click on Privacy & security and then choose Windows Security.
- Now, click on Virus & threat protection.
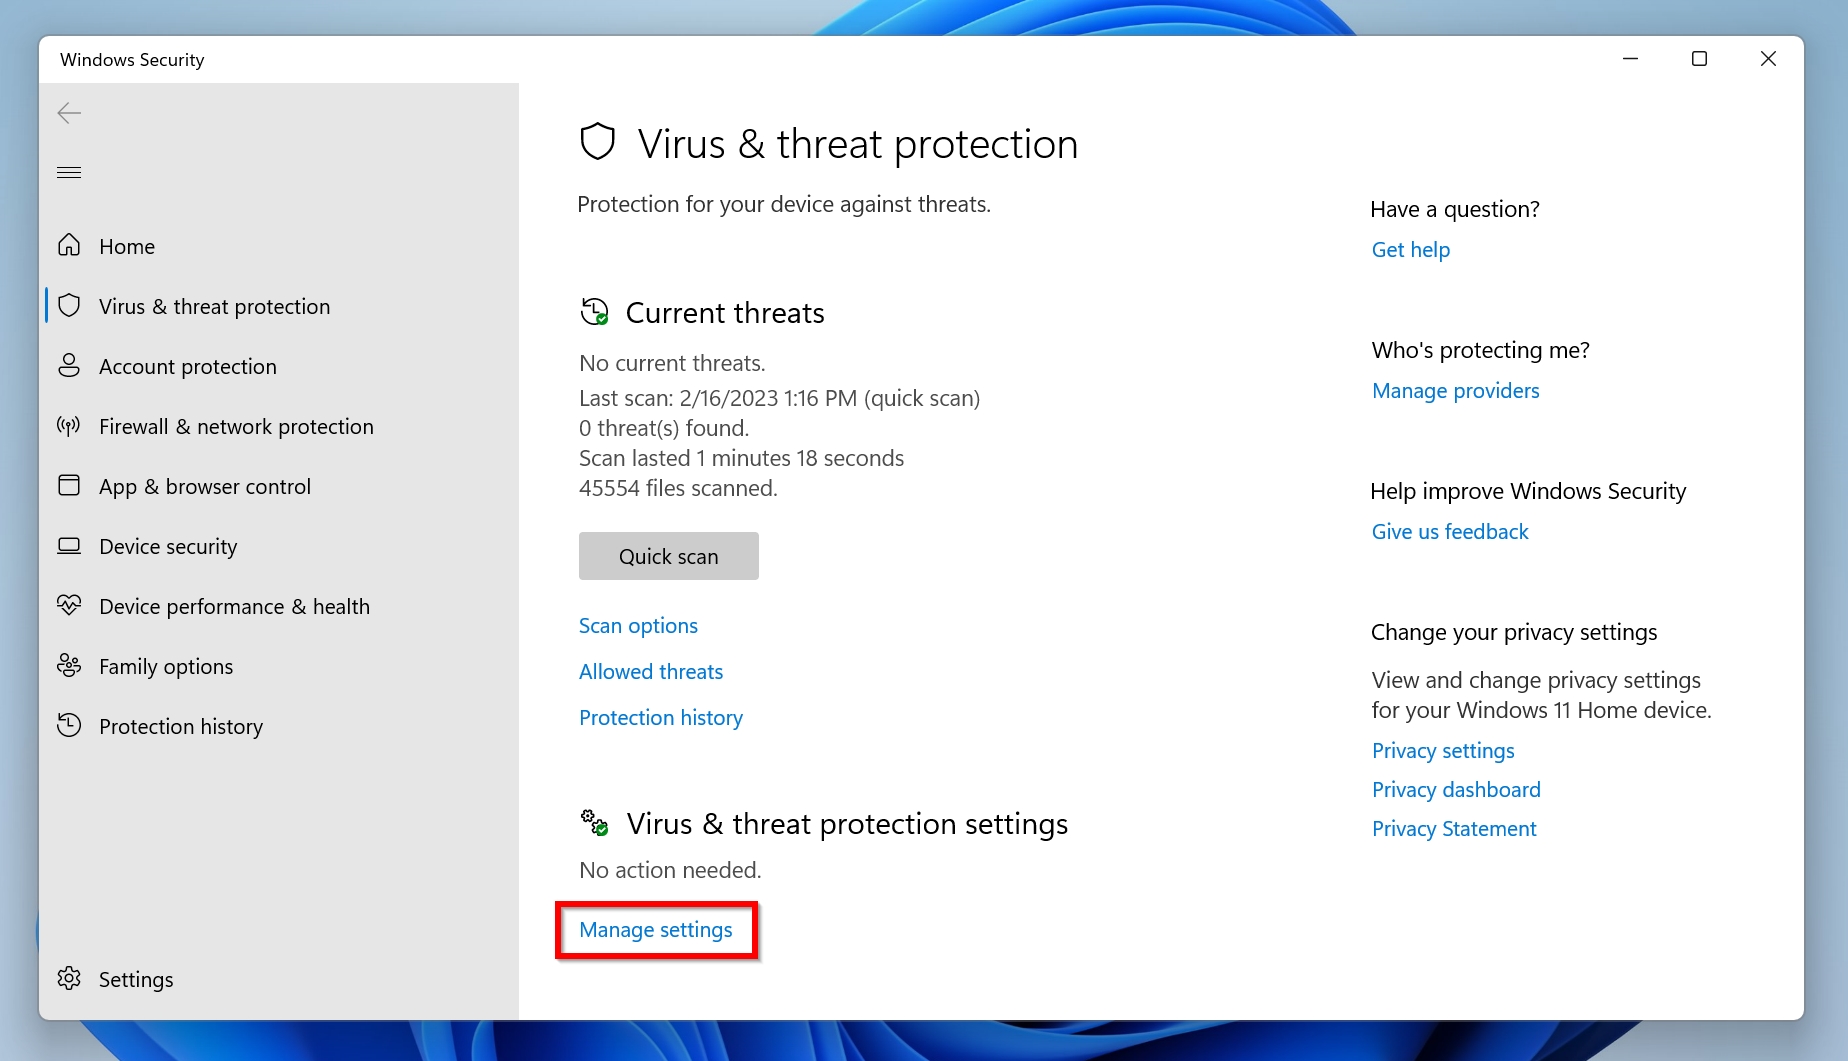
- Under Virus & threat protection settings, choose Manage settings.
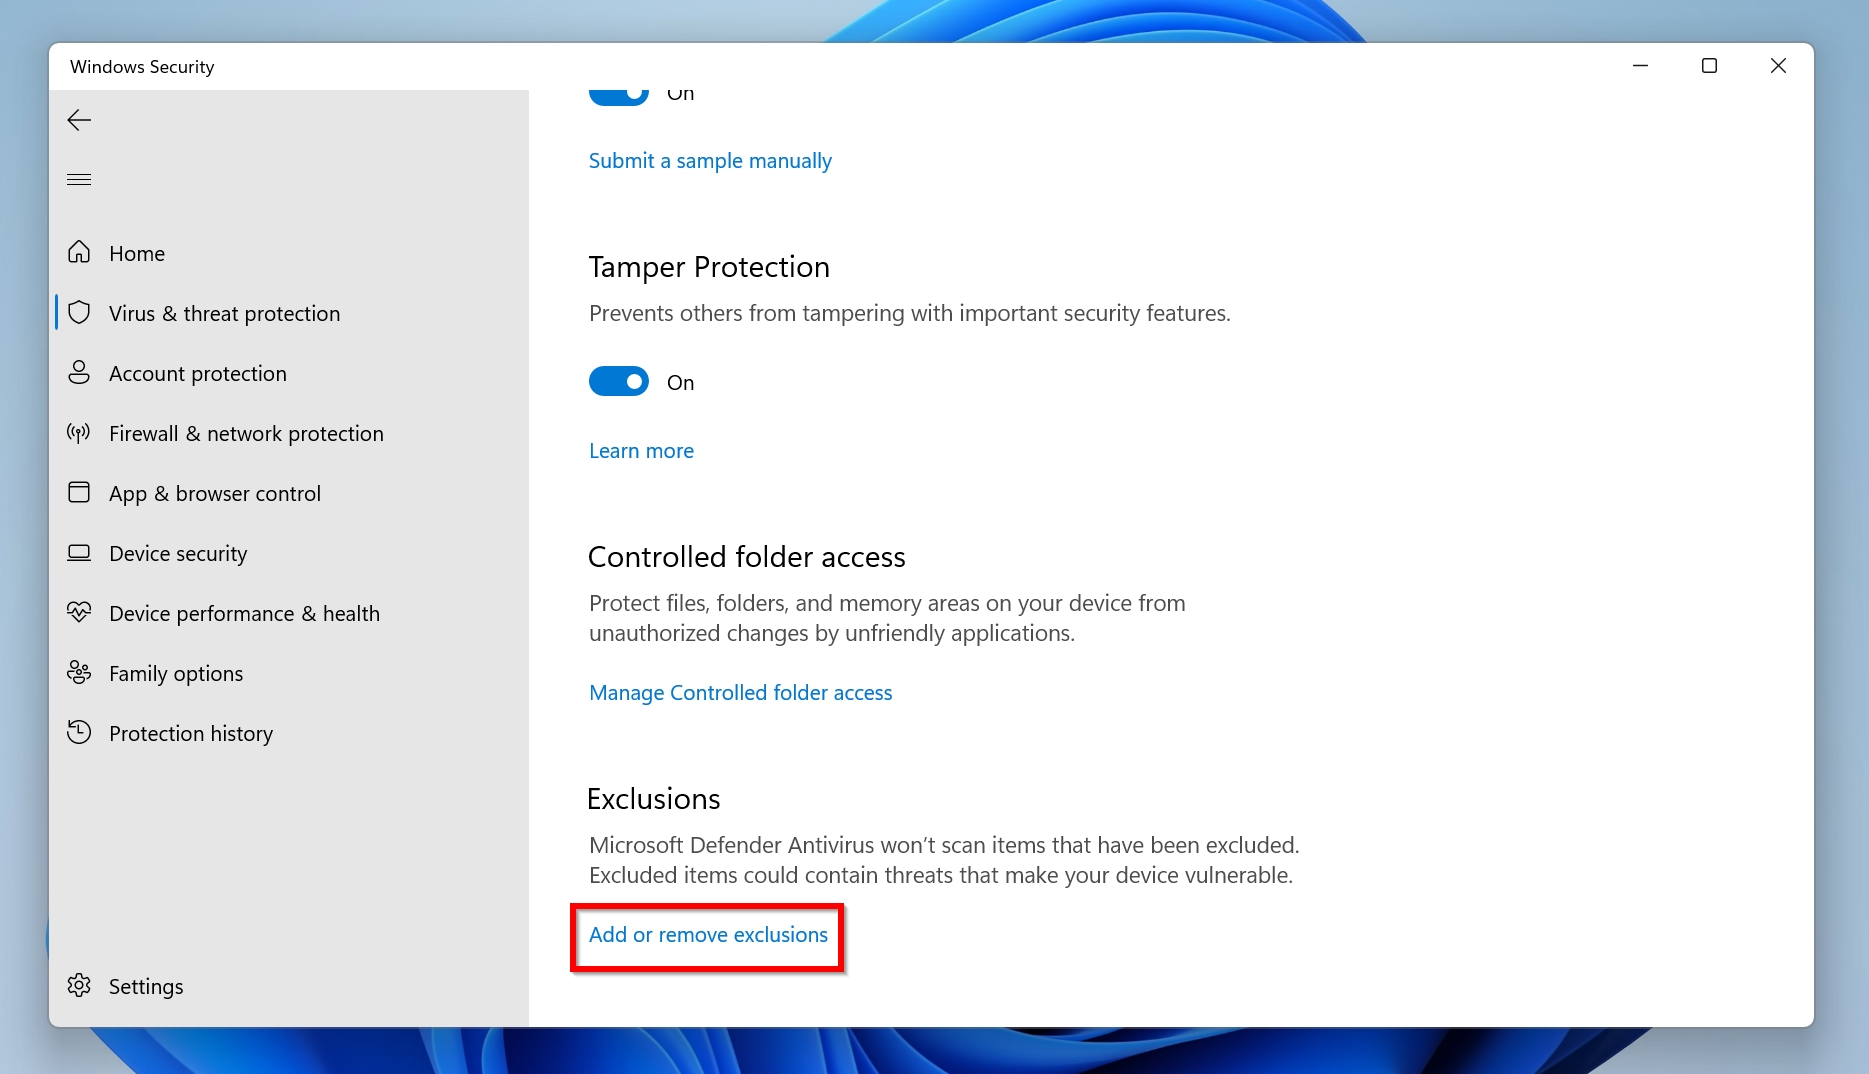
- Scroll down to Exclusions and then click on Add or remove exclusions.
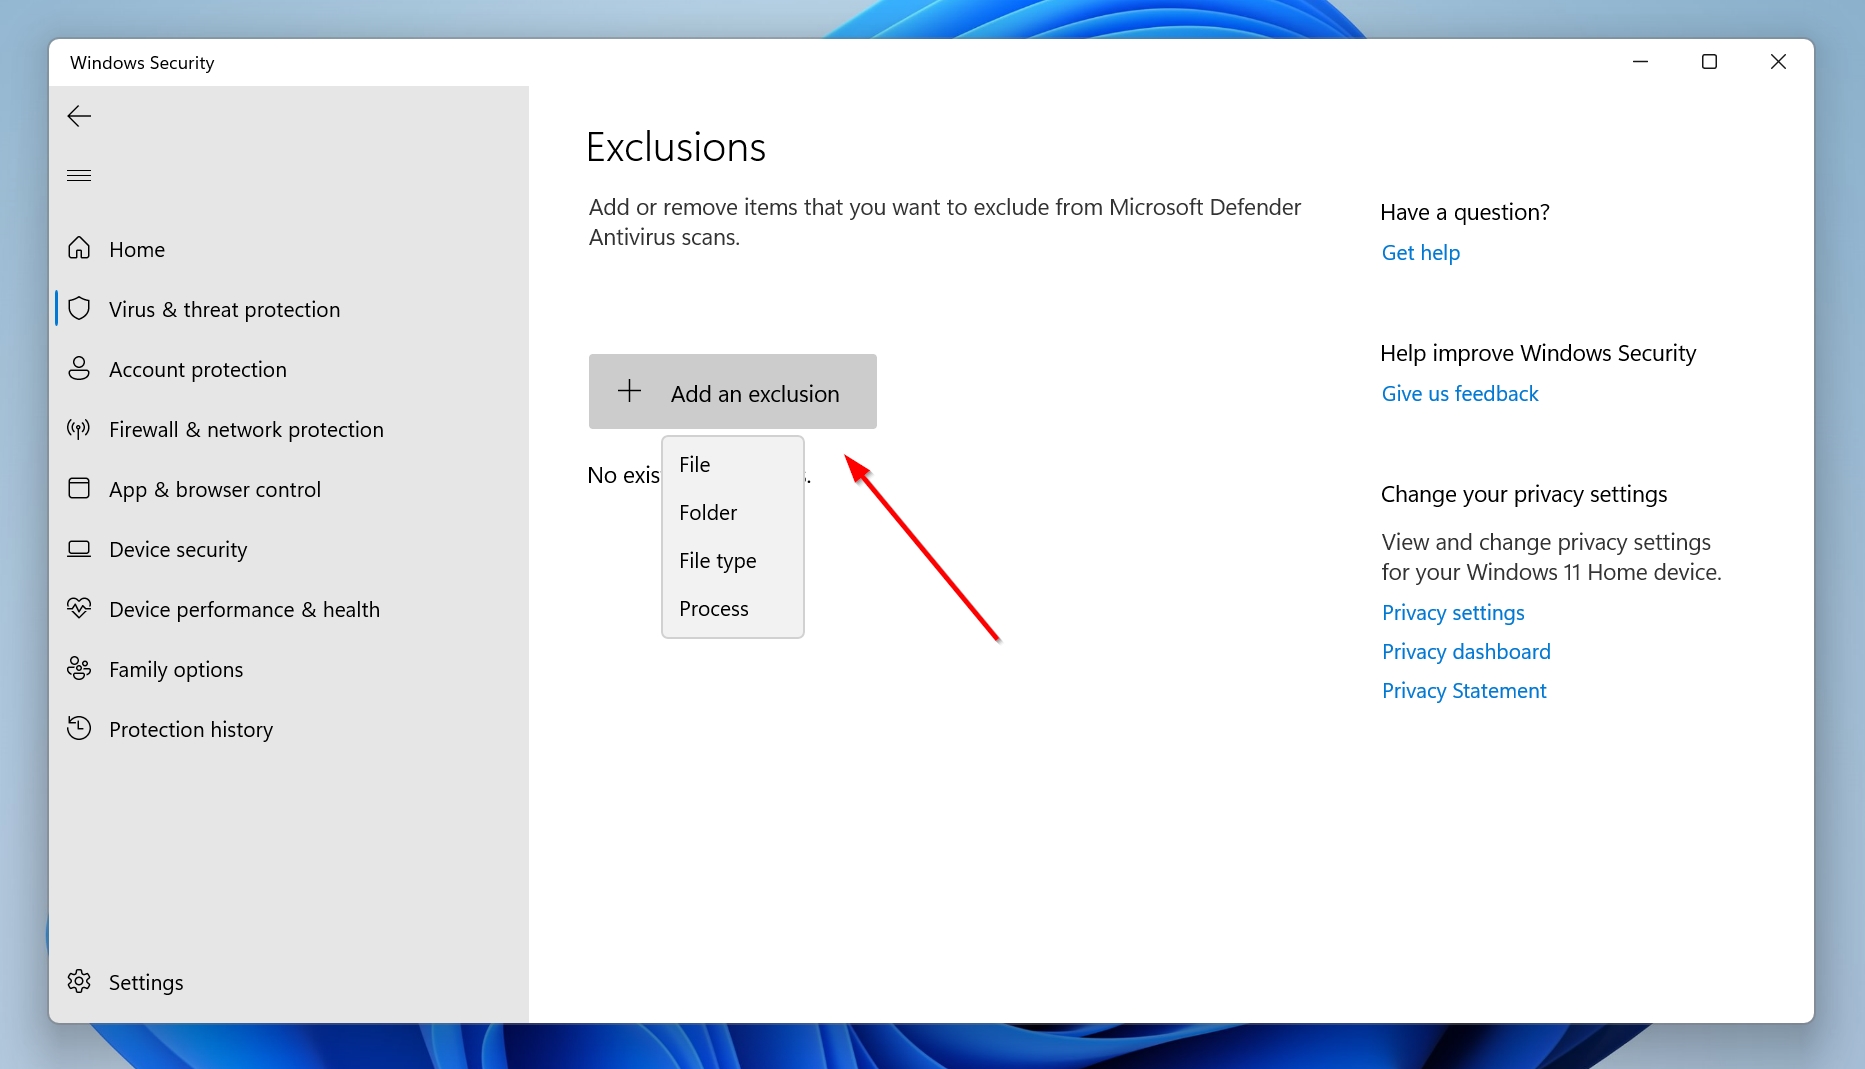
- Finally, click on Add an exclusion, then choose the file, folder, file type, or process you want to exclude from Windows Defender.


After you add the folder, file type, or process you want to exclude, you can check whether Windows Defender quarantined any of your files. To do this, open Protection History from the Windows Security dashboard. If you find your files listed there, you can restore them directly from Protection History.
Temporary User Profiles
Sometimes, especially after a Windows update followed by a reboot, the system may fail to load your regular user profile and instead log you into a temporary, empty one. When this happens, it may look like all your files and settings have disappeared, but they’re actually still on your drive under your normal profile. Any files you create or save while you are in a temporary profile will be deleted once you log out or restart.
If you suspect this is the case, all you need to do is switch back to your regular user profile. Logging back into your main account will restore access to all your files and settings as they were before. If you are having trouble with this, then here are a few ways to fix the temporary profile issue on your computer.
Malware Infection
If you notice files are being deleted from a particular partition, your computer is likely infected with malware. A PC that is restarting randomly, and performing slower than usual likely has a virus or other malware present in it.
To secure your PC and remove malware from your PC, scan it using Windows Defender:
- Type “security” in Windows Search (Windows Key + S), and click on Windows Security from the search results.
- Click Virus & threat protection on the Windows Security dashboard.
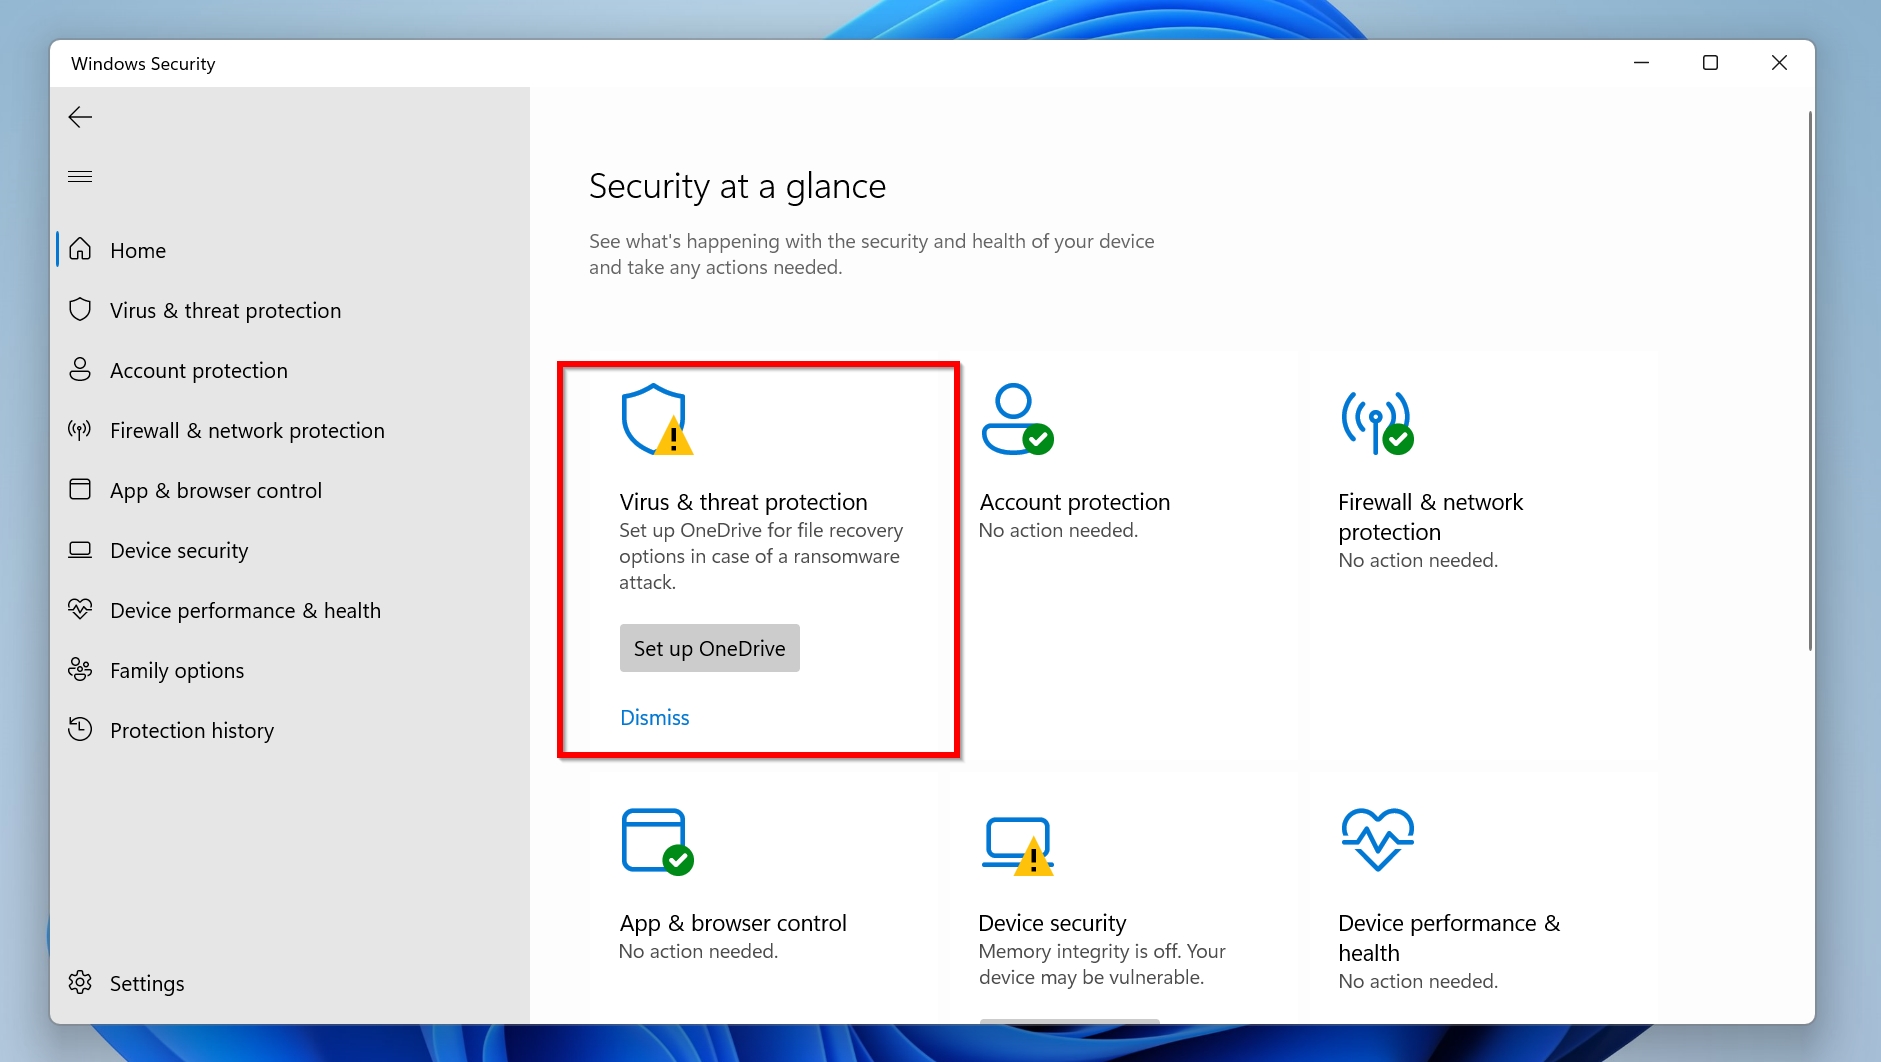
- Under Current Threats, click on Scan options.
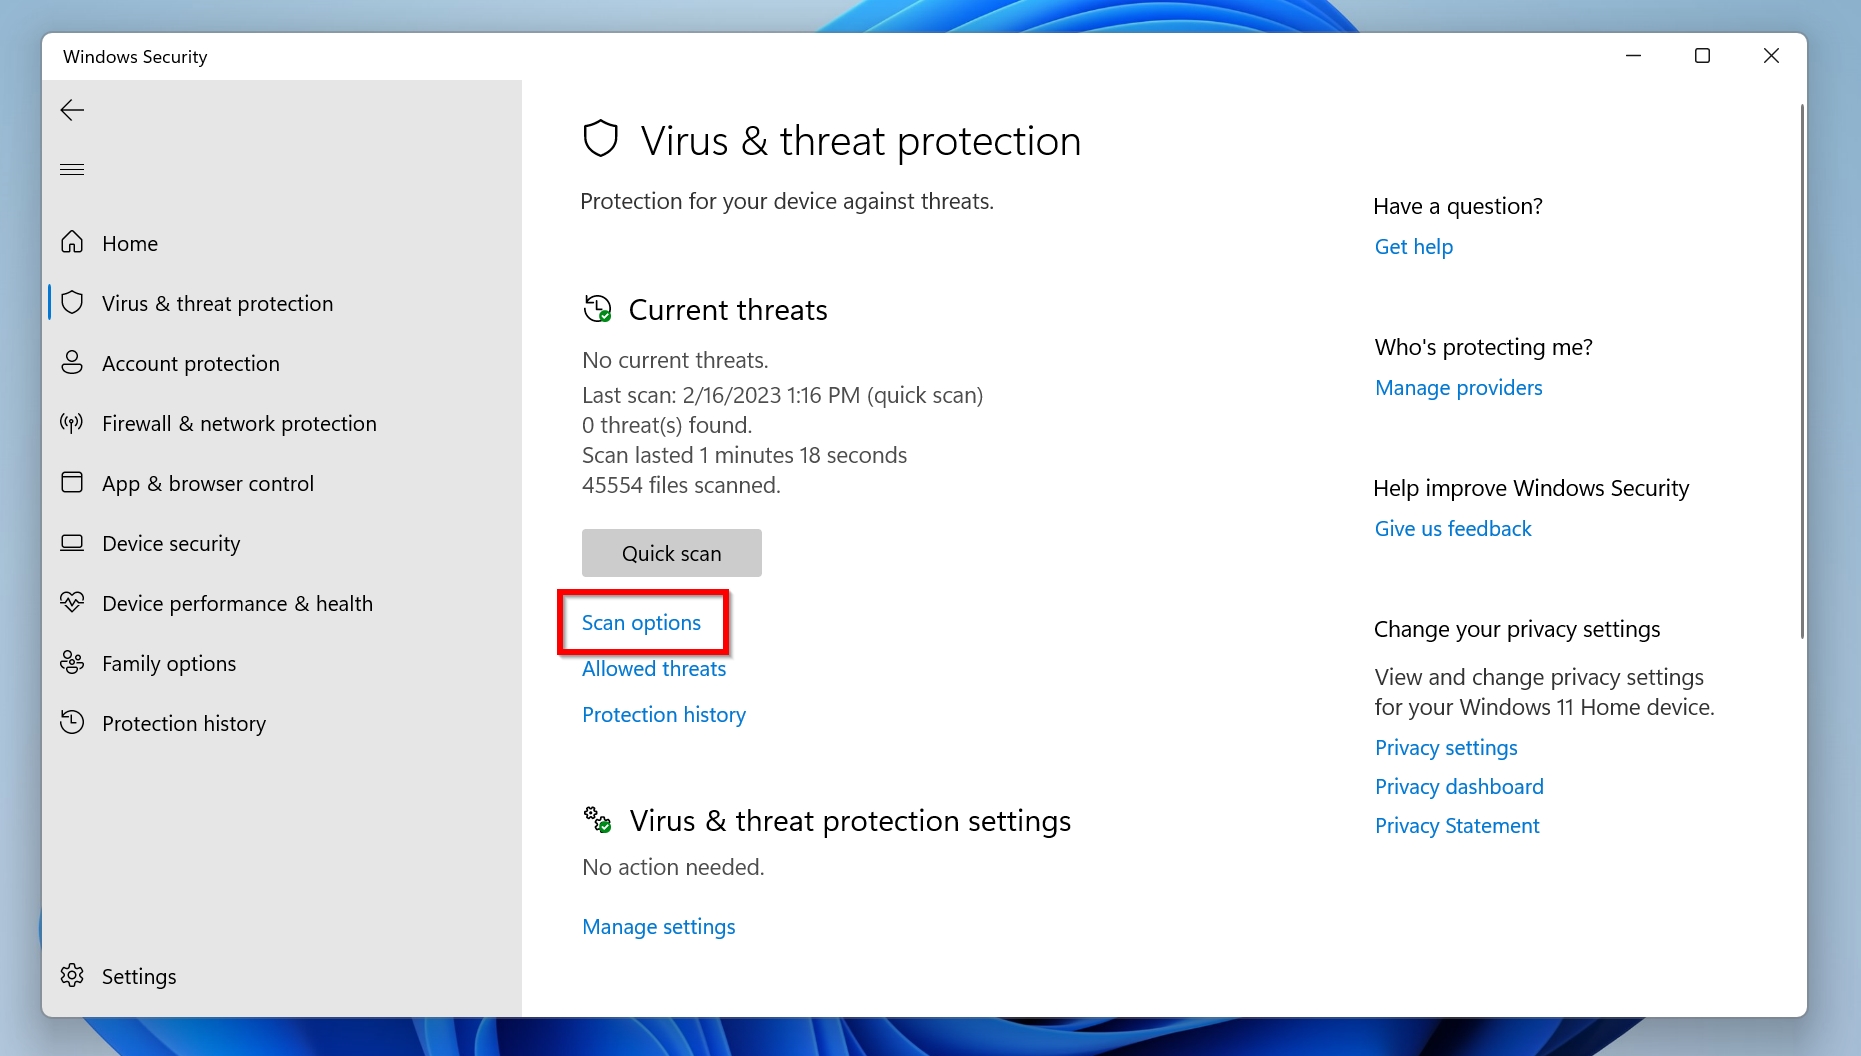
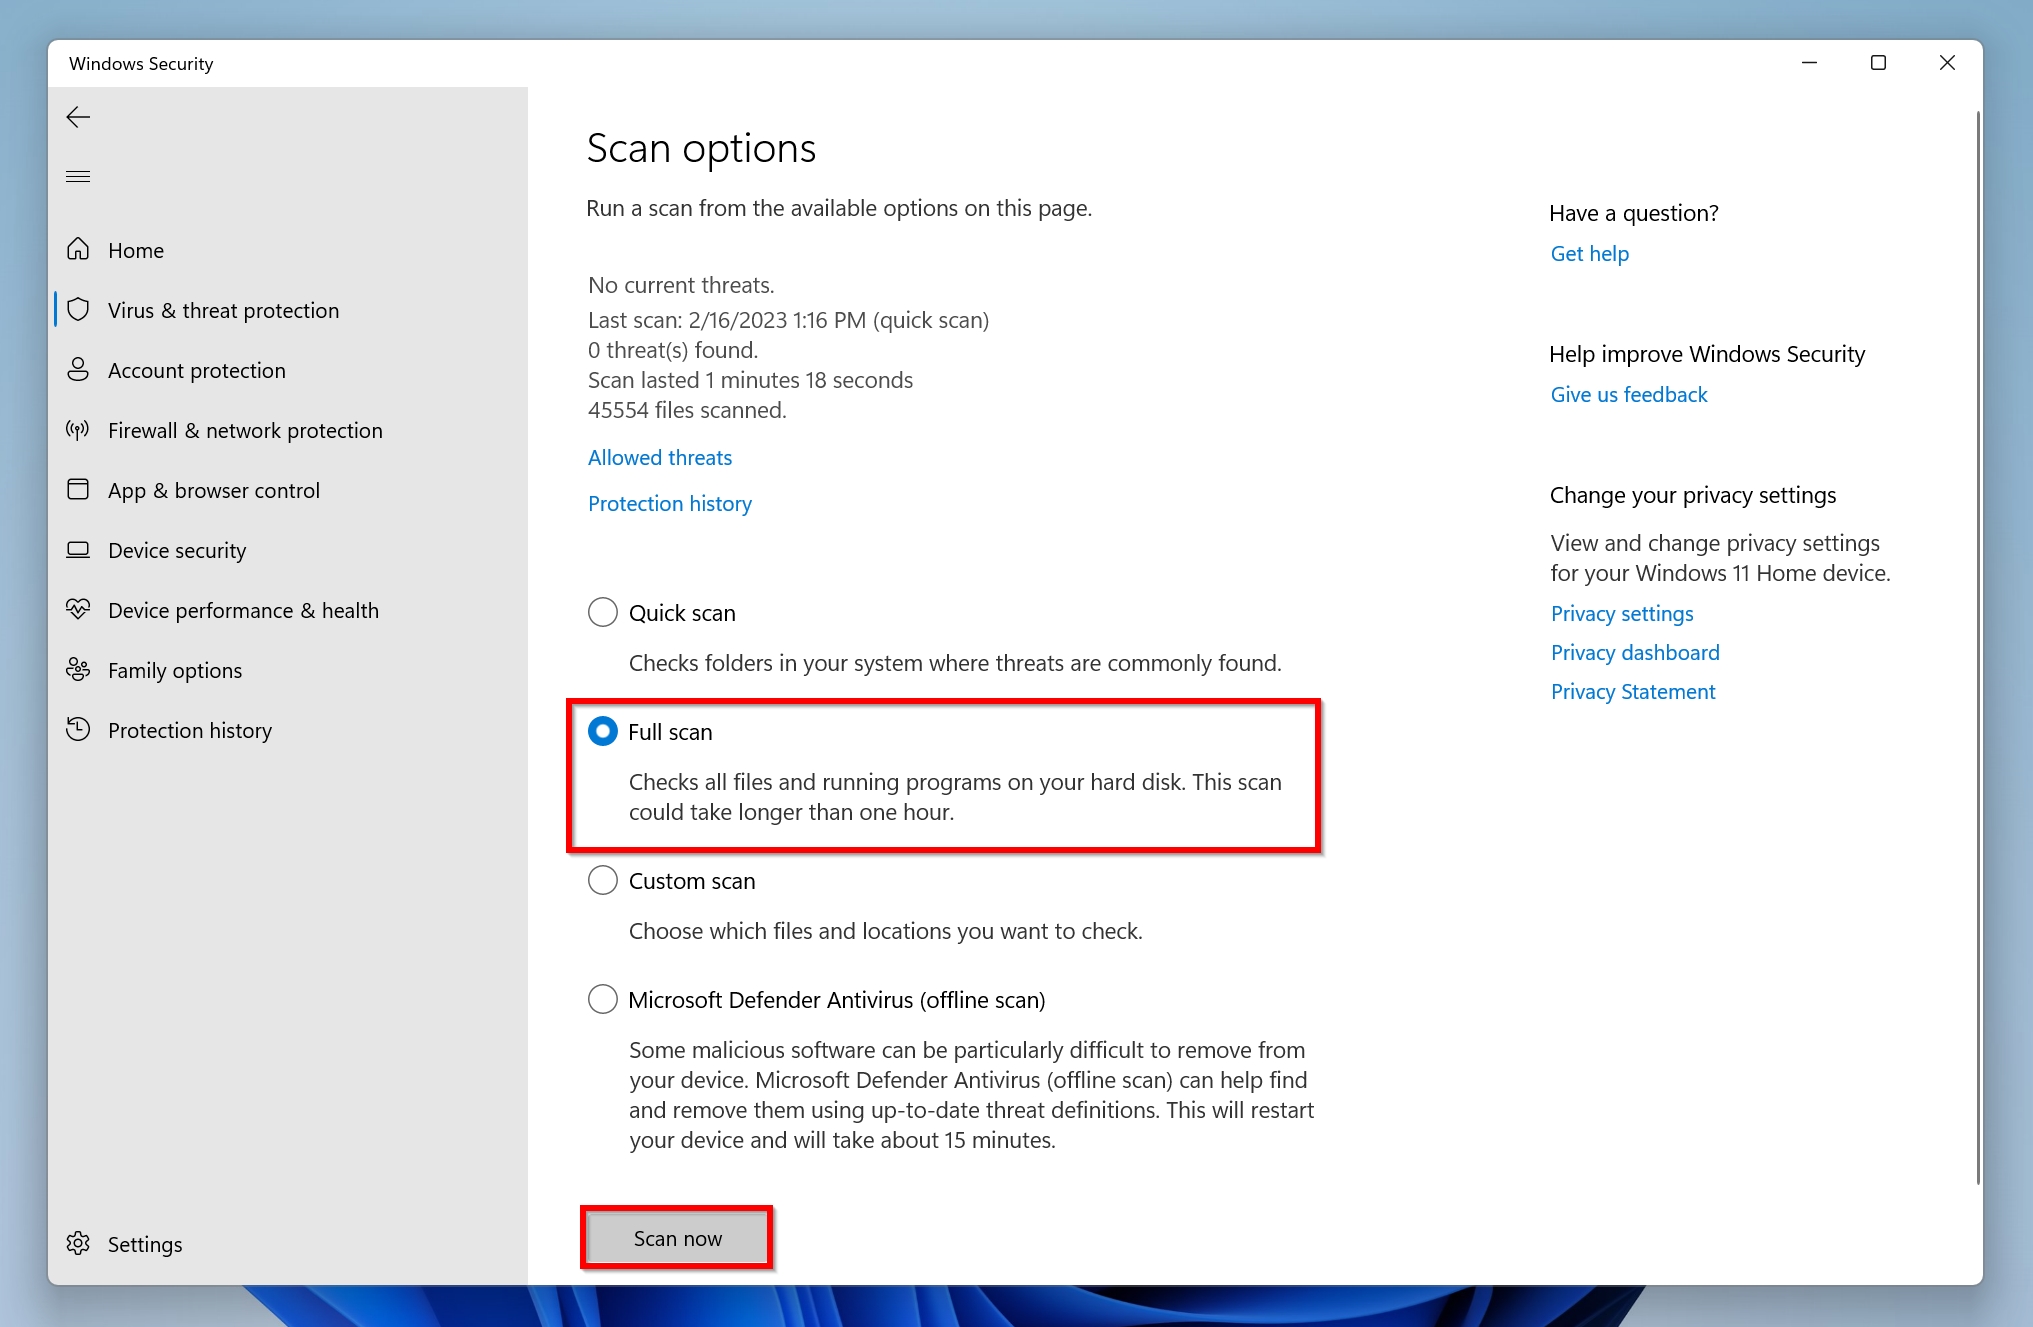
- Select Full Scan and then click Scan now to begin the scan.


Run a malware scan on your PC and remove any infections to prevent malicious software from deleting more files in the future. However, this action, like when you disable Storage Sense, will not restore any files that were already removed. To recover lost files, go to the next section and follow one of the methods described there.
How to Recover Files Lost After Restarting Your Computer
To maximize your chances of data recovery, act quickly and use your PC only when you begin the data recovery process. Here are some ways to recover your files after they disappeared from your PC:
Method 1: Check If You’re Logged In With a Temporary User Profile
When logged in with a temporary user profile, your files and settings are automatically deleted as soon as you log out. Additionally, the files from your user folders (Documents, Desktop, Pictures, etc.) will be inaccessible when using a temporary profile.
If you observe Windows 10/11 keeps deleting your programs and documents after a restart, you are likely logged in using a temporary user profile.
To switch back to your regular user profile, press CTRL + ALT + Delete and then choose the Switch user option.
If you’re unable to log in with your regular profile, we also recommend you perform an SFC scan to repair system files:
- Search for cmd in Windows Search (Windows Key + S), and right-click Command Prompt > Run as administrator.
- In the console, type SFC /scannow and press Enter.
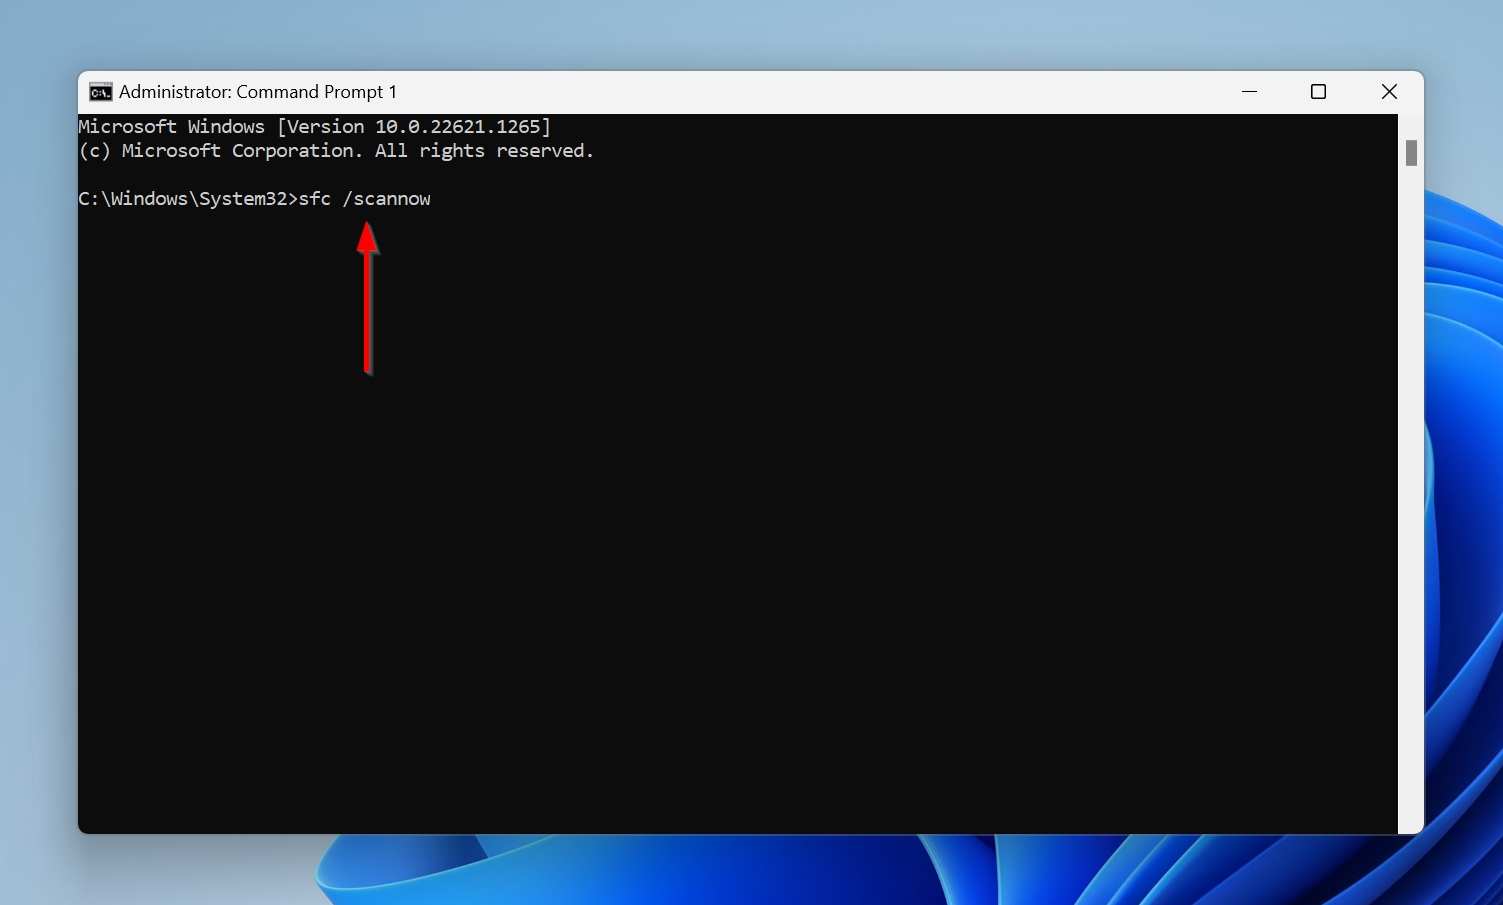
- Let Windows verify your files. It may take some time.

After performing the SFC scan, try logging in again. If you’re still unable to do so, use this guide to recover your user profile.
Important: Copy all files from the C:\Users\YourUsername folder to an external storage drive to prevent them from being lost when fixing the temporary profile issue.
If you require further help, Microsoft Answers also has helpful guides on fixing the temporary profile issue, and what to do when you’re unable to create a new user profile.
Method 2: Use Data Recovery Software
After fixing whatever was causing your PC to delete files after a restart, how do you get back the files that were deleted? This is where data recovery software comes in. There are plenty of options to choose from, but we’ll be using Disk Drill in our guide.
We selected Disk Drill because it has a proven track record of helping users recover their data from a variety of data recovery scenarios. Thanks to its simplistic, modern UI, the entire data recovery process takes only a few clicks. It recovers files regardless of type from NTFS drives (using file system indicators) and recognizes about 400 file formats in a signature scan, so you don’t need to worry about compatibility.
Here’s how you can Disk Drill to recover your files from a computer that restarted and deleted everything:
- Download Disk Drill, and install it.
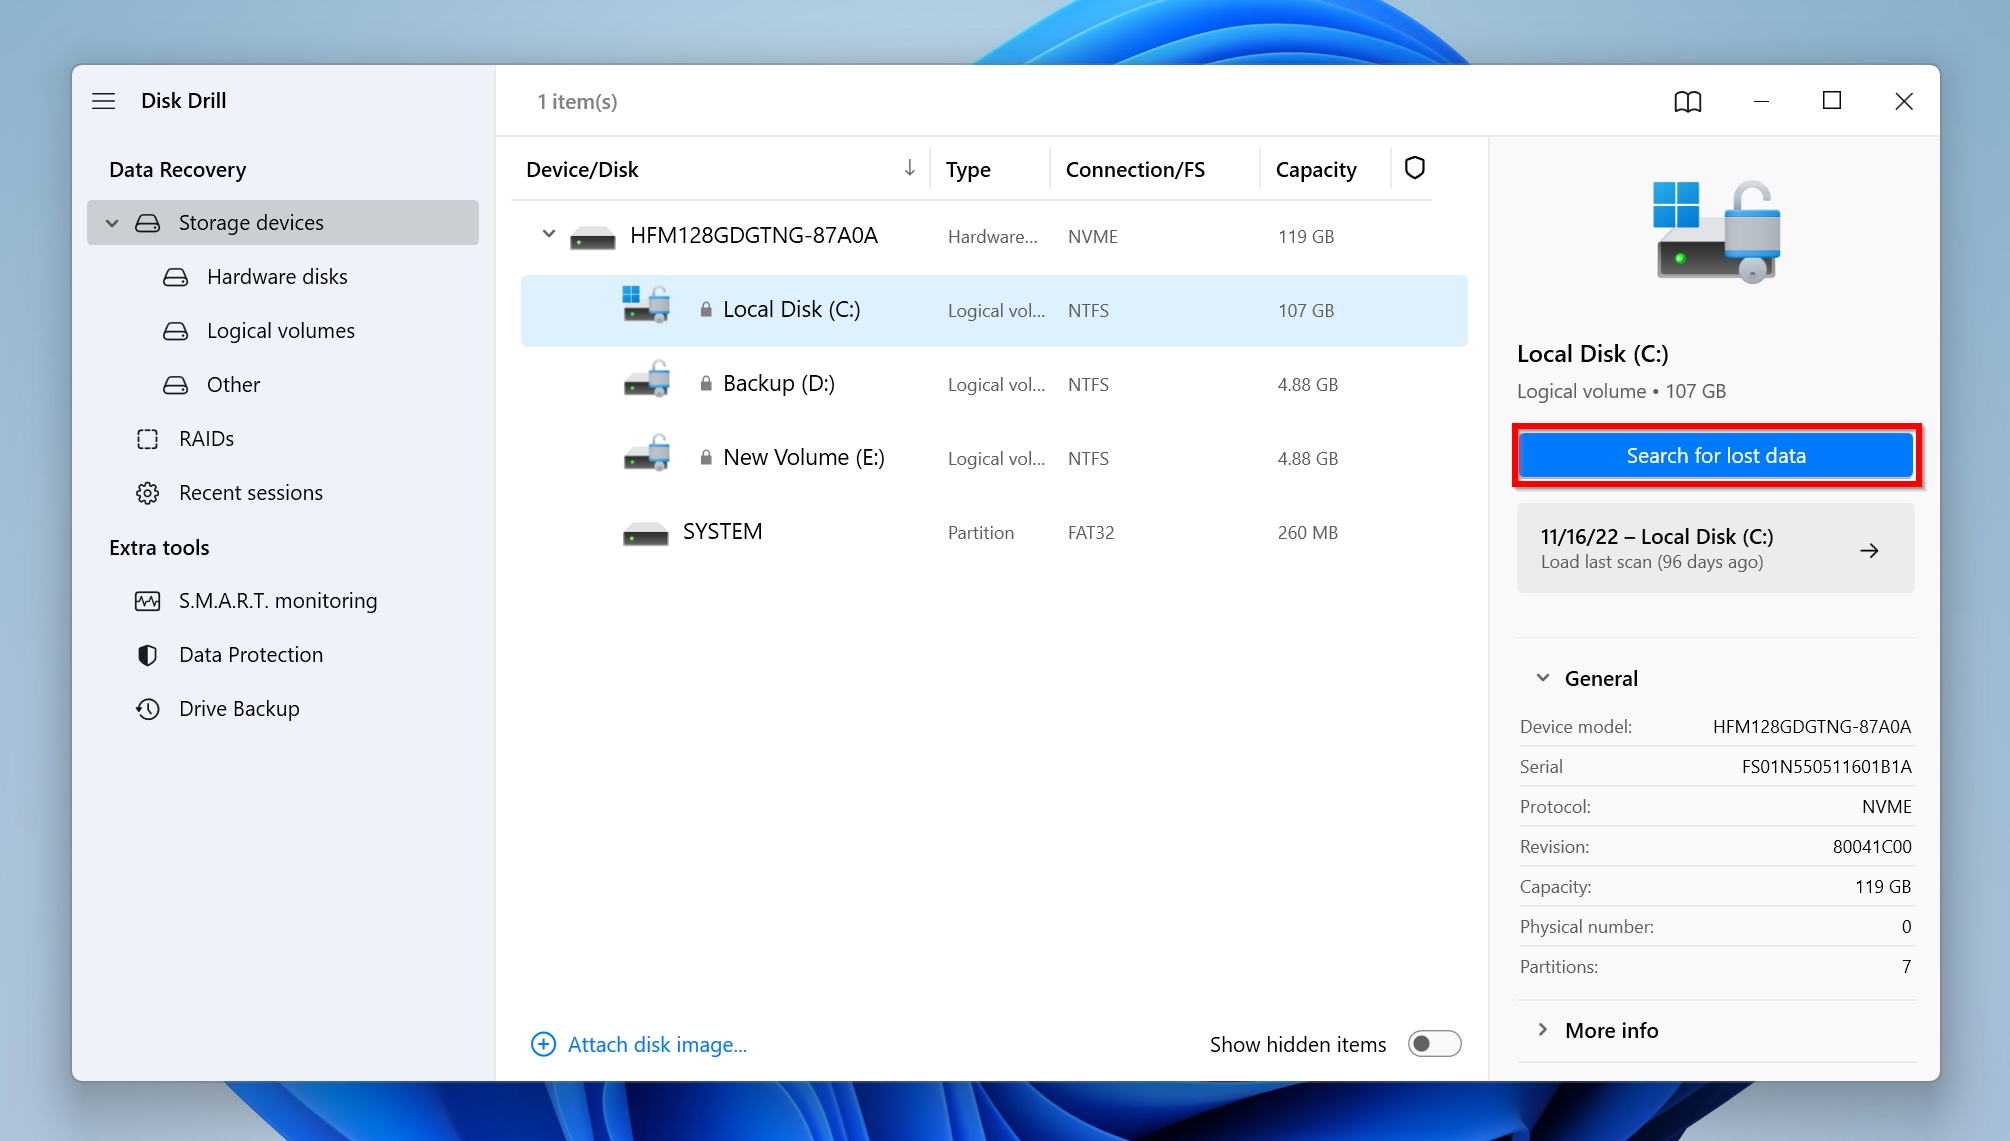
- Open Disk Drill, select the drive you want to scan and click Search for lost data. In our case, we’ll recover user data such as desktop files that are missing after a restart, Documents, Pictures, Music, etc. Therefore, we choose the system drive.
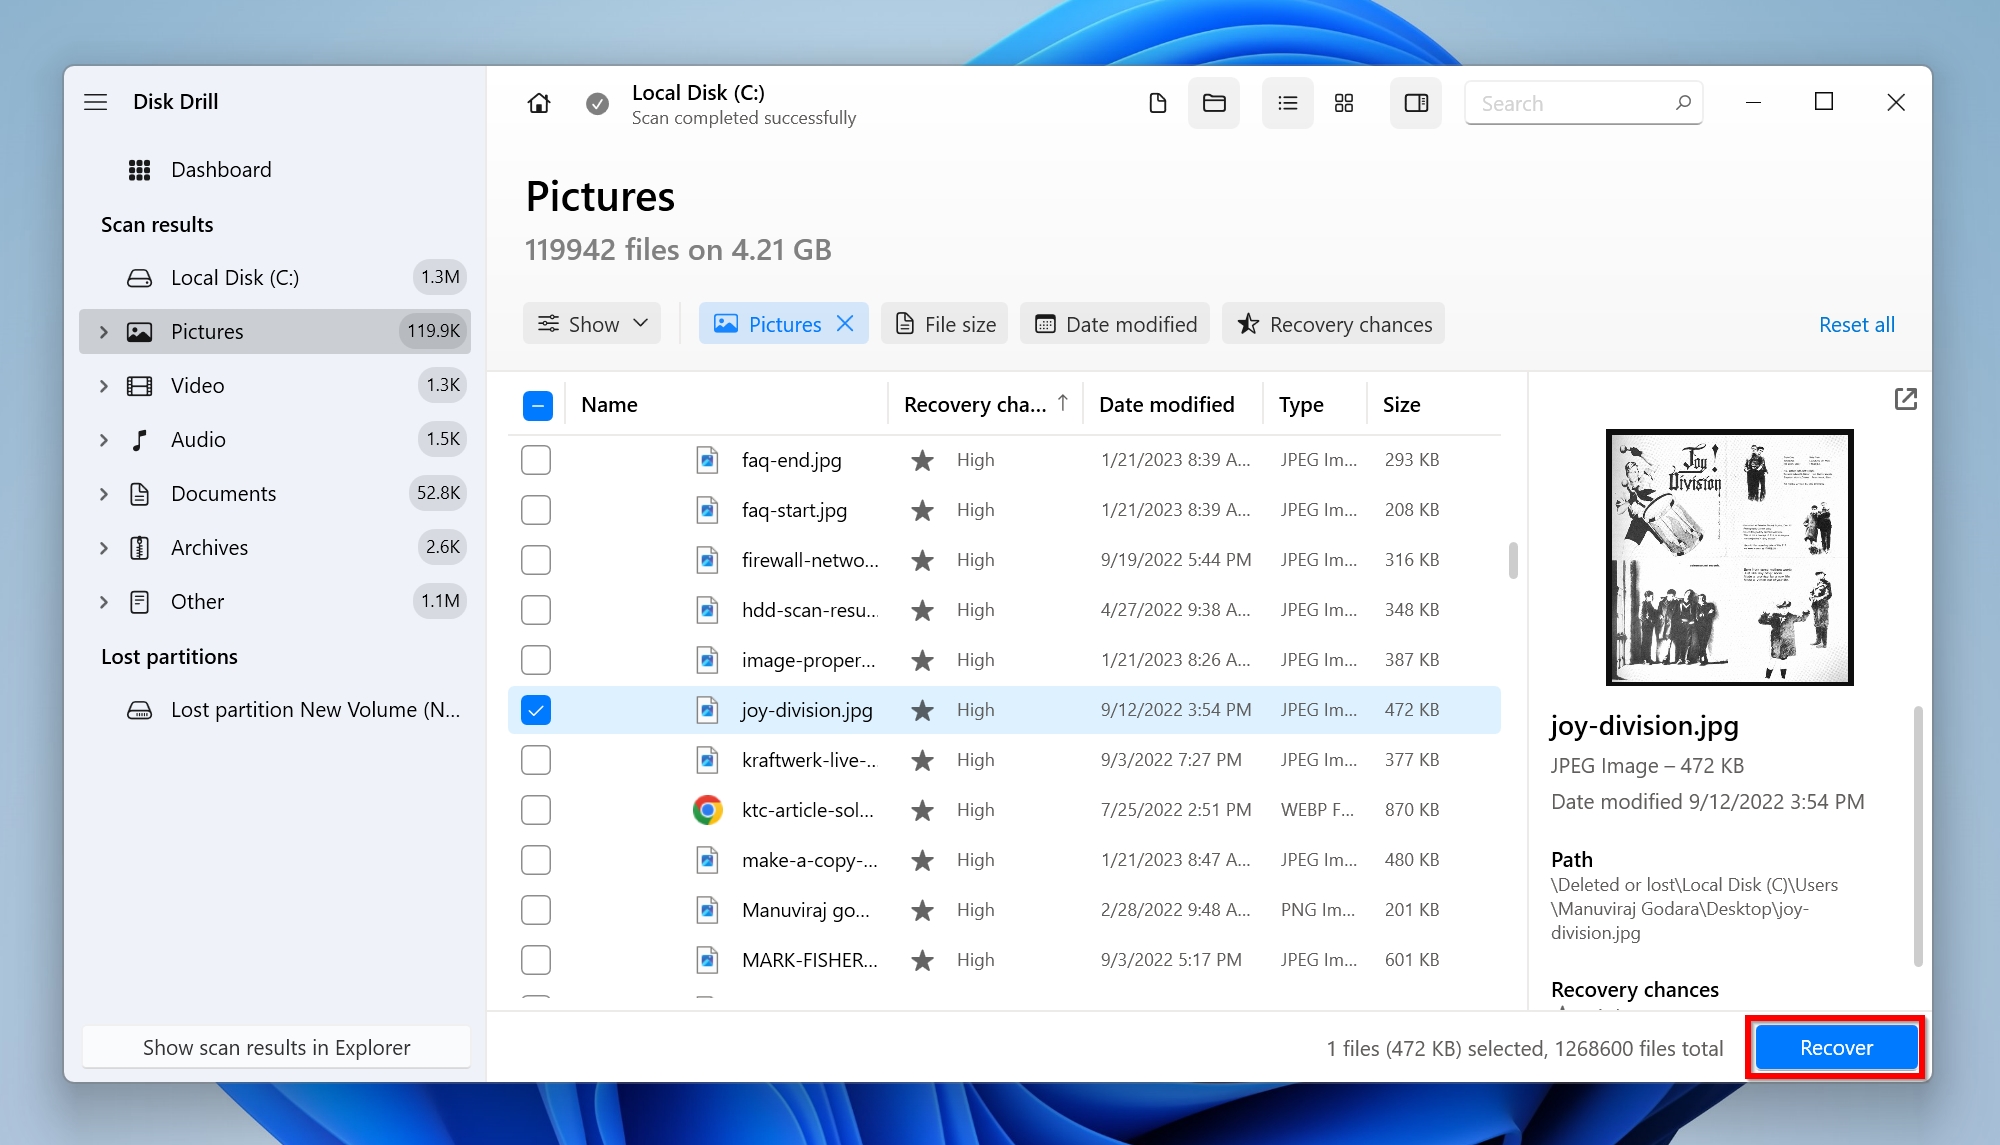
- Click on Review found items to view the files Disk Drill discovered. Alternatively, you can directly click on the file type you want to recover (Pictures, Videos, Audio, Documents, Archives, and Other) to filter out the results.

- Use the checkbox next to each file to select it. Disk Drill displays a preview of the selected file. After confirming the files you wish to recover, click on the Recover button. Windows users can recover up to 500 MB of data as part of Disk Drill’s free trial. Further recovery requires a license.
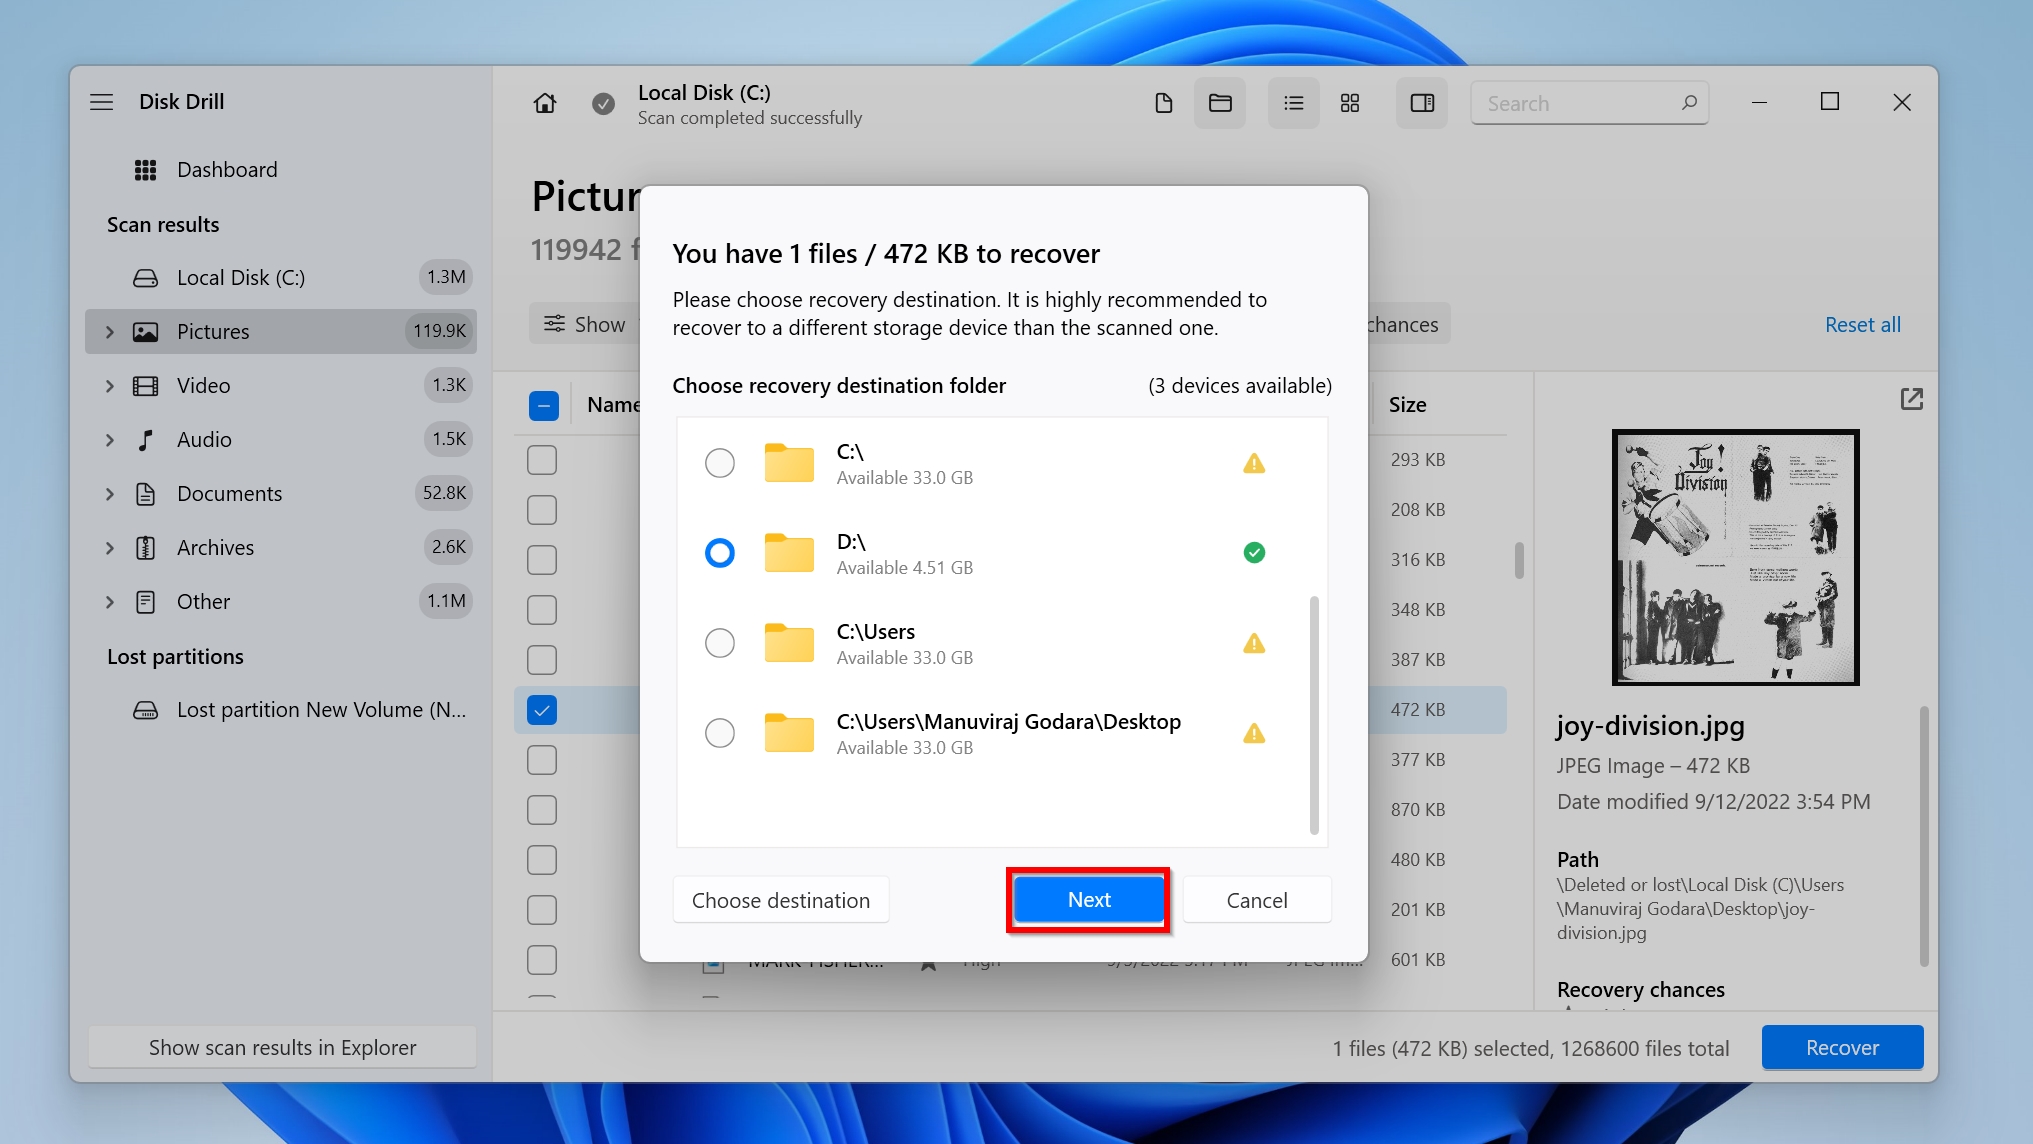
- Select a recovery destination for your files, and click Next. It’s recommended you recover the files to another drive or partition.
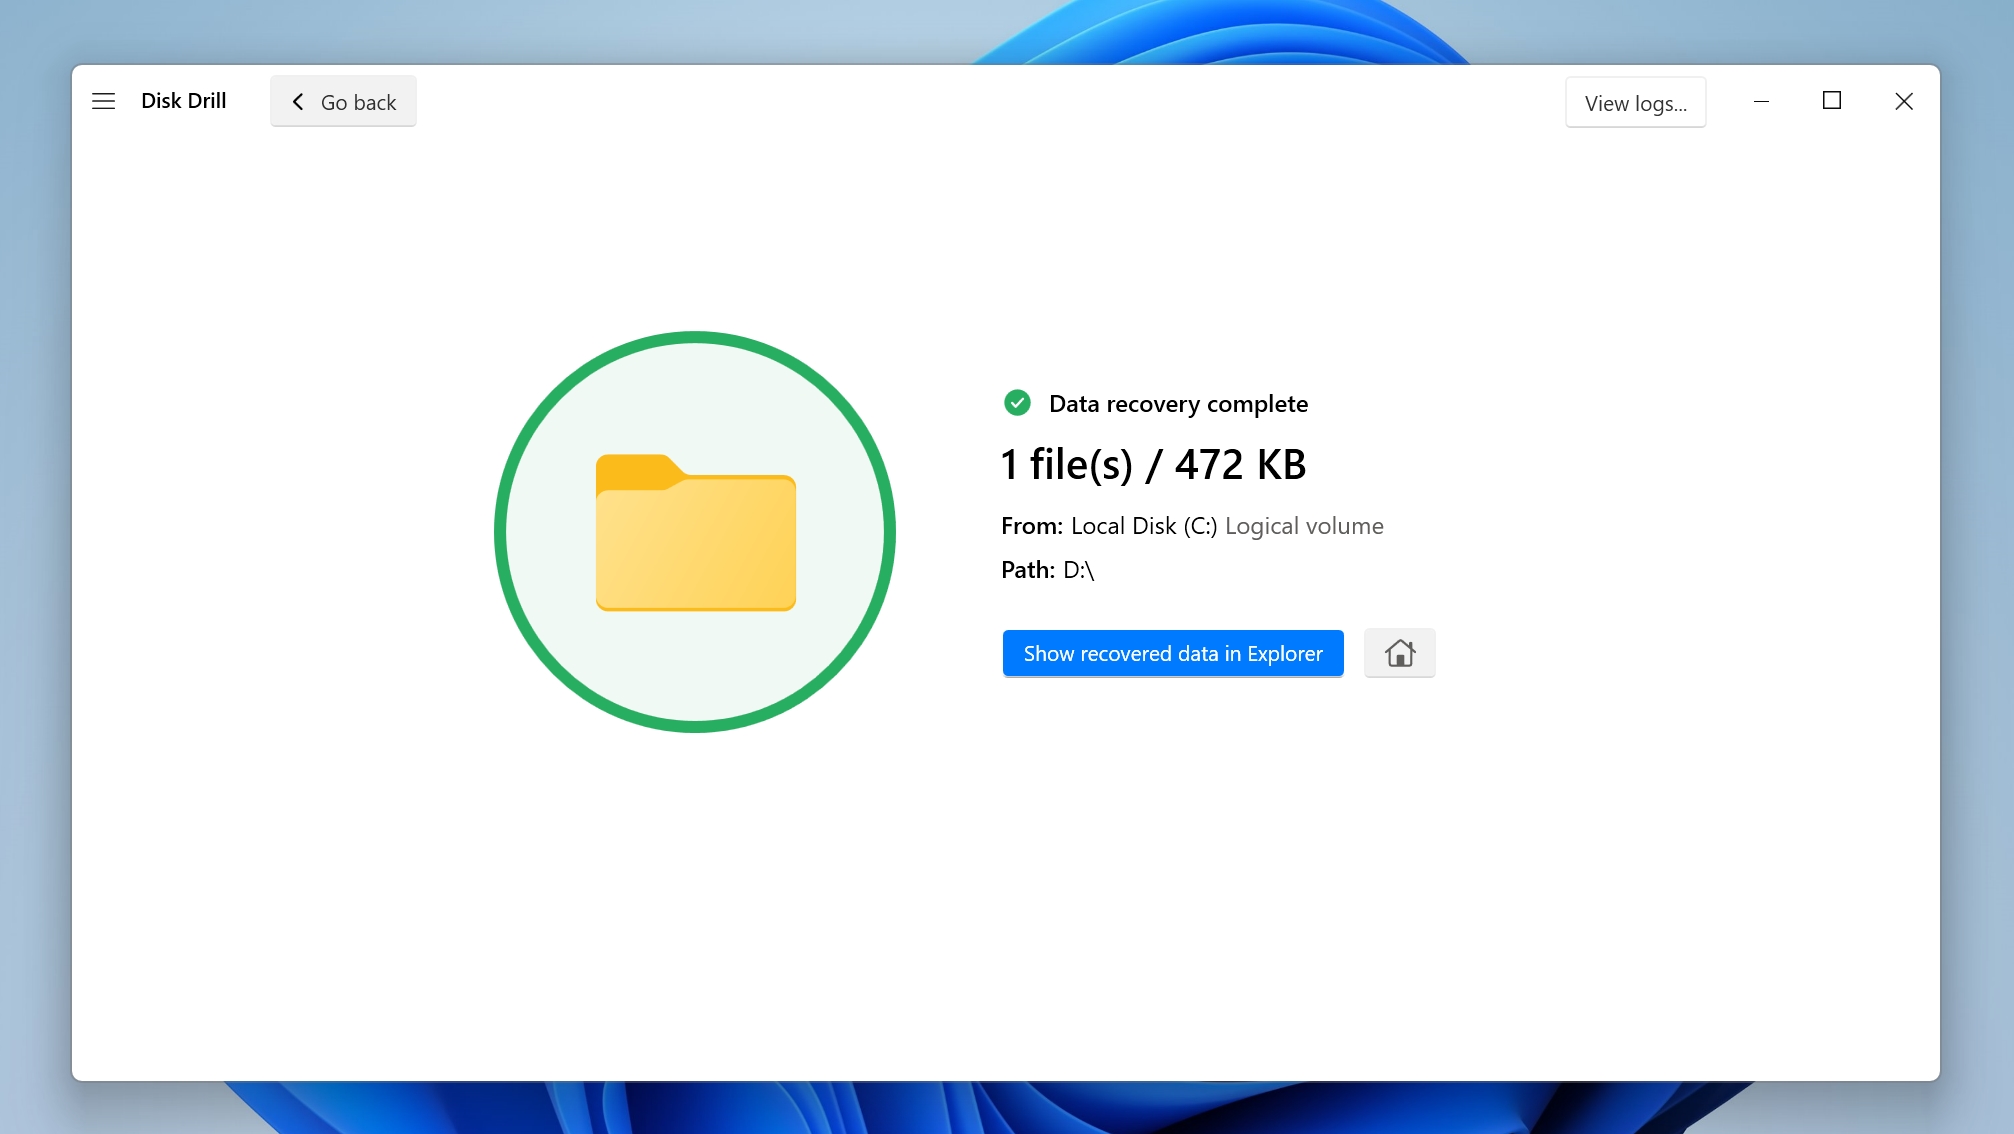
- Disk Drill will recover the files for you.


Bonus: To know more about Disk Drill and all its features, skim through our in-depth review of the tool. It’ll help you make a more informed decision as it also contains a comparison of the tool with other programs in the market.
Method 3: Windows File Recovery Tool
Windows File Recovery is a data recovery tool developed by Microsoft itself. Being a command-line tool, it is not as user-friendly as GUI-based data recovery programs. But, it is still quite effective at recovering lost data from the NTFS system drive.
Here is how to recover data using the Windows File Recovery tool:
- Download the Windows File Recovery tool.
- Run the application.
- In the console, type winfr X: Y:\RecoveryFolder /regular and press Enter. Here, replace “X” with the drive you want to scan, and “Y” with the destination you would like to save the recovered files on. In our case, we’re scanning the D: partition and saving the files to a folder called Recovery on the E: partition. Use the screenshot in the next step for reference.
- Press Y to begin the scan.
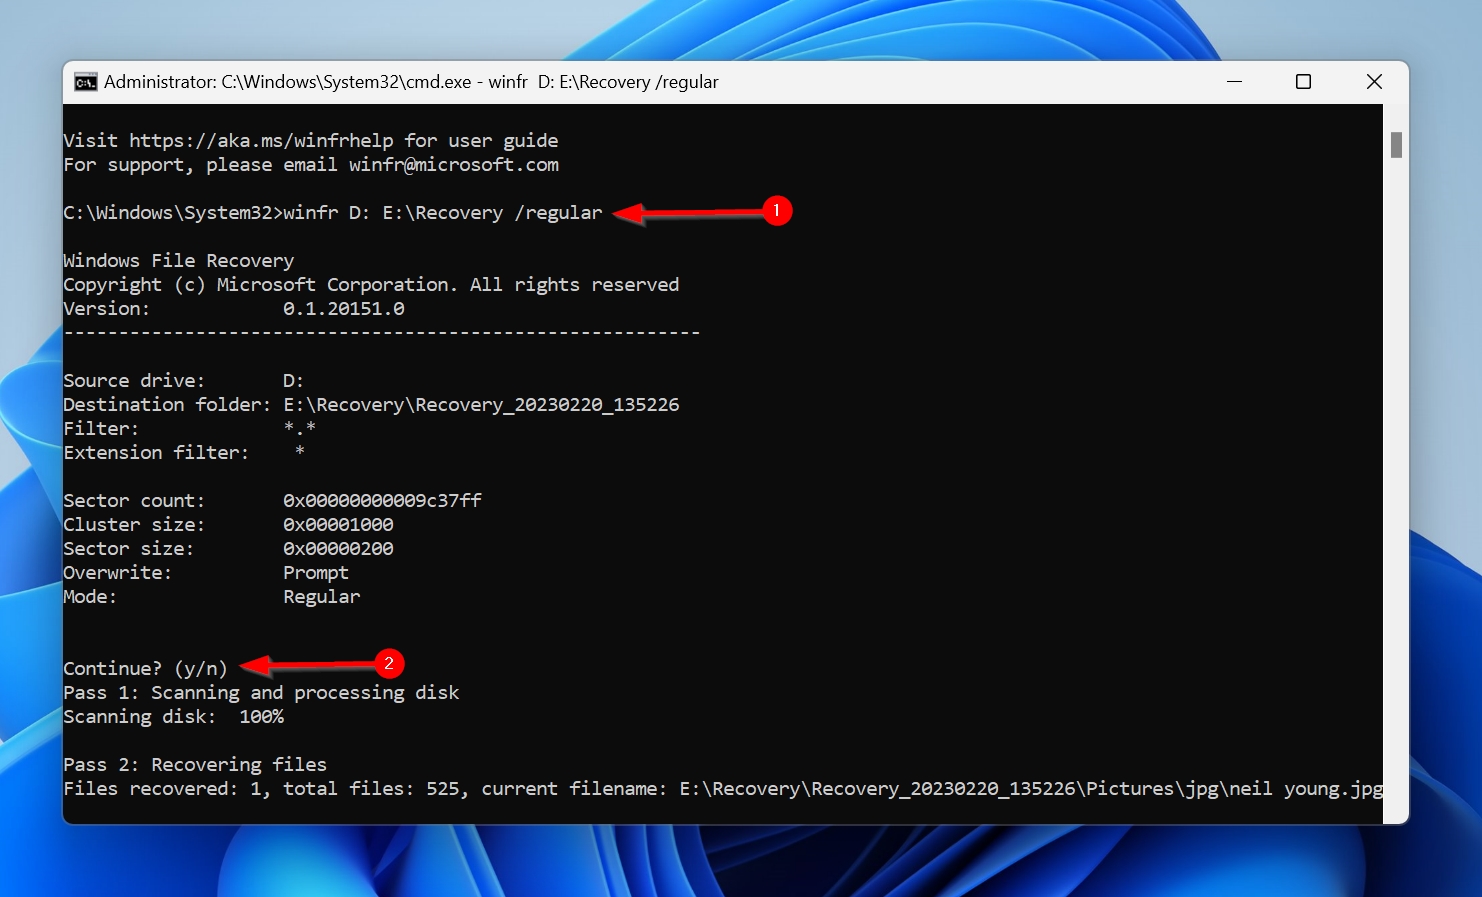

The winfr command in the Windows File Recovery tool has various other parameters you can use to filter out results, perform extensive data recovery scans, and more. A complete list of these modifiers is available on the Microsoft Support website.
Method 4: Windows File History
Windows File History is an excellent tool to create regular backups and restore previous versions of your files. If enabled, it saves a copy of your files at regular intervals and lets you restore them whenever you want.
User libraries are selected by default, but other destinations should’ve been manually added during configuration. As an example, if, after a restart, your desktop files went missing, Windows File History is a good choice to get them back.
Here’s how to use Windows File History to restore your files:
- Connect the external storage device that you used to set up Windows File History.
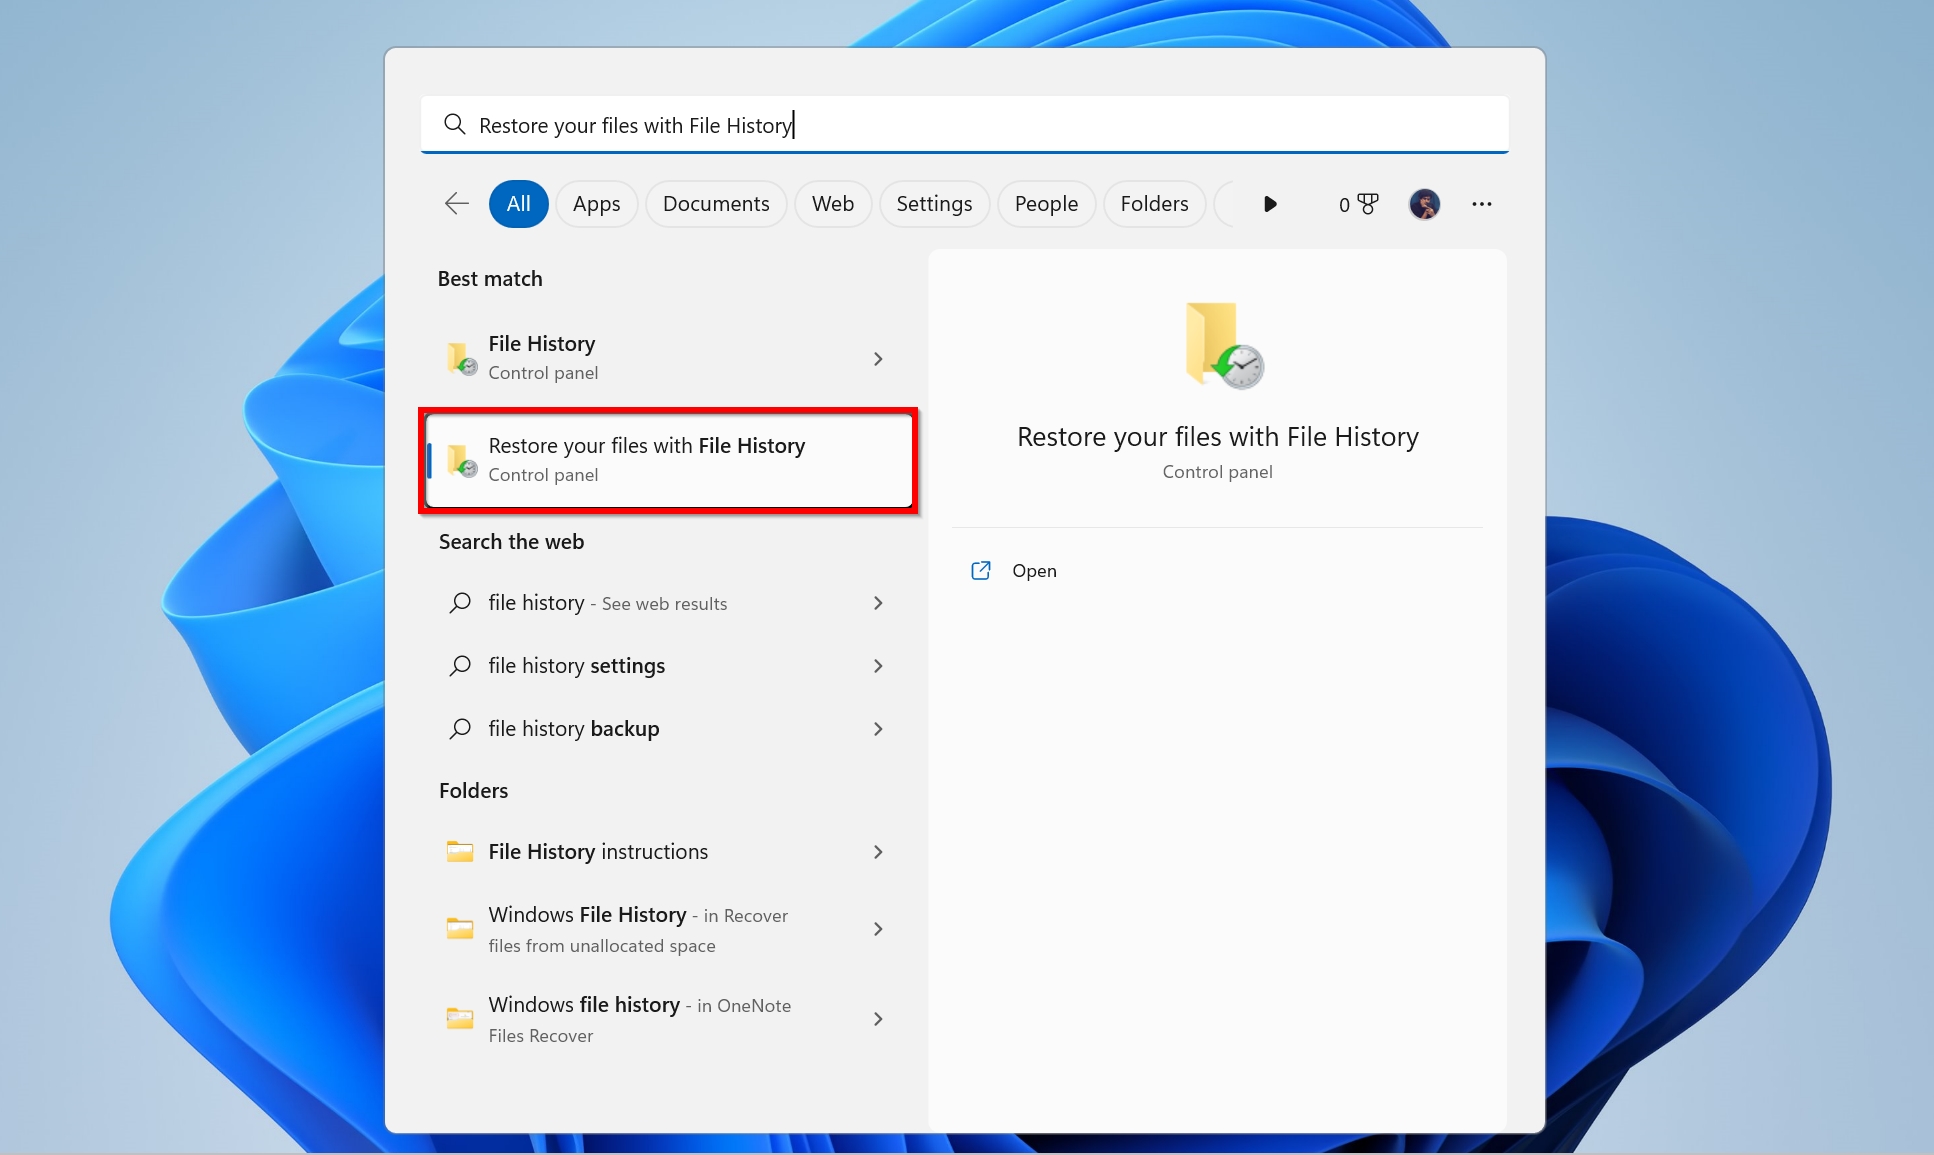
- Type “file history” in Windows Search (Windows Key + S). Click on Restore your files with File History from the search results.
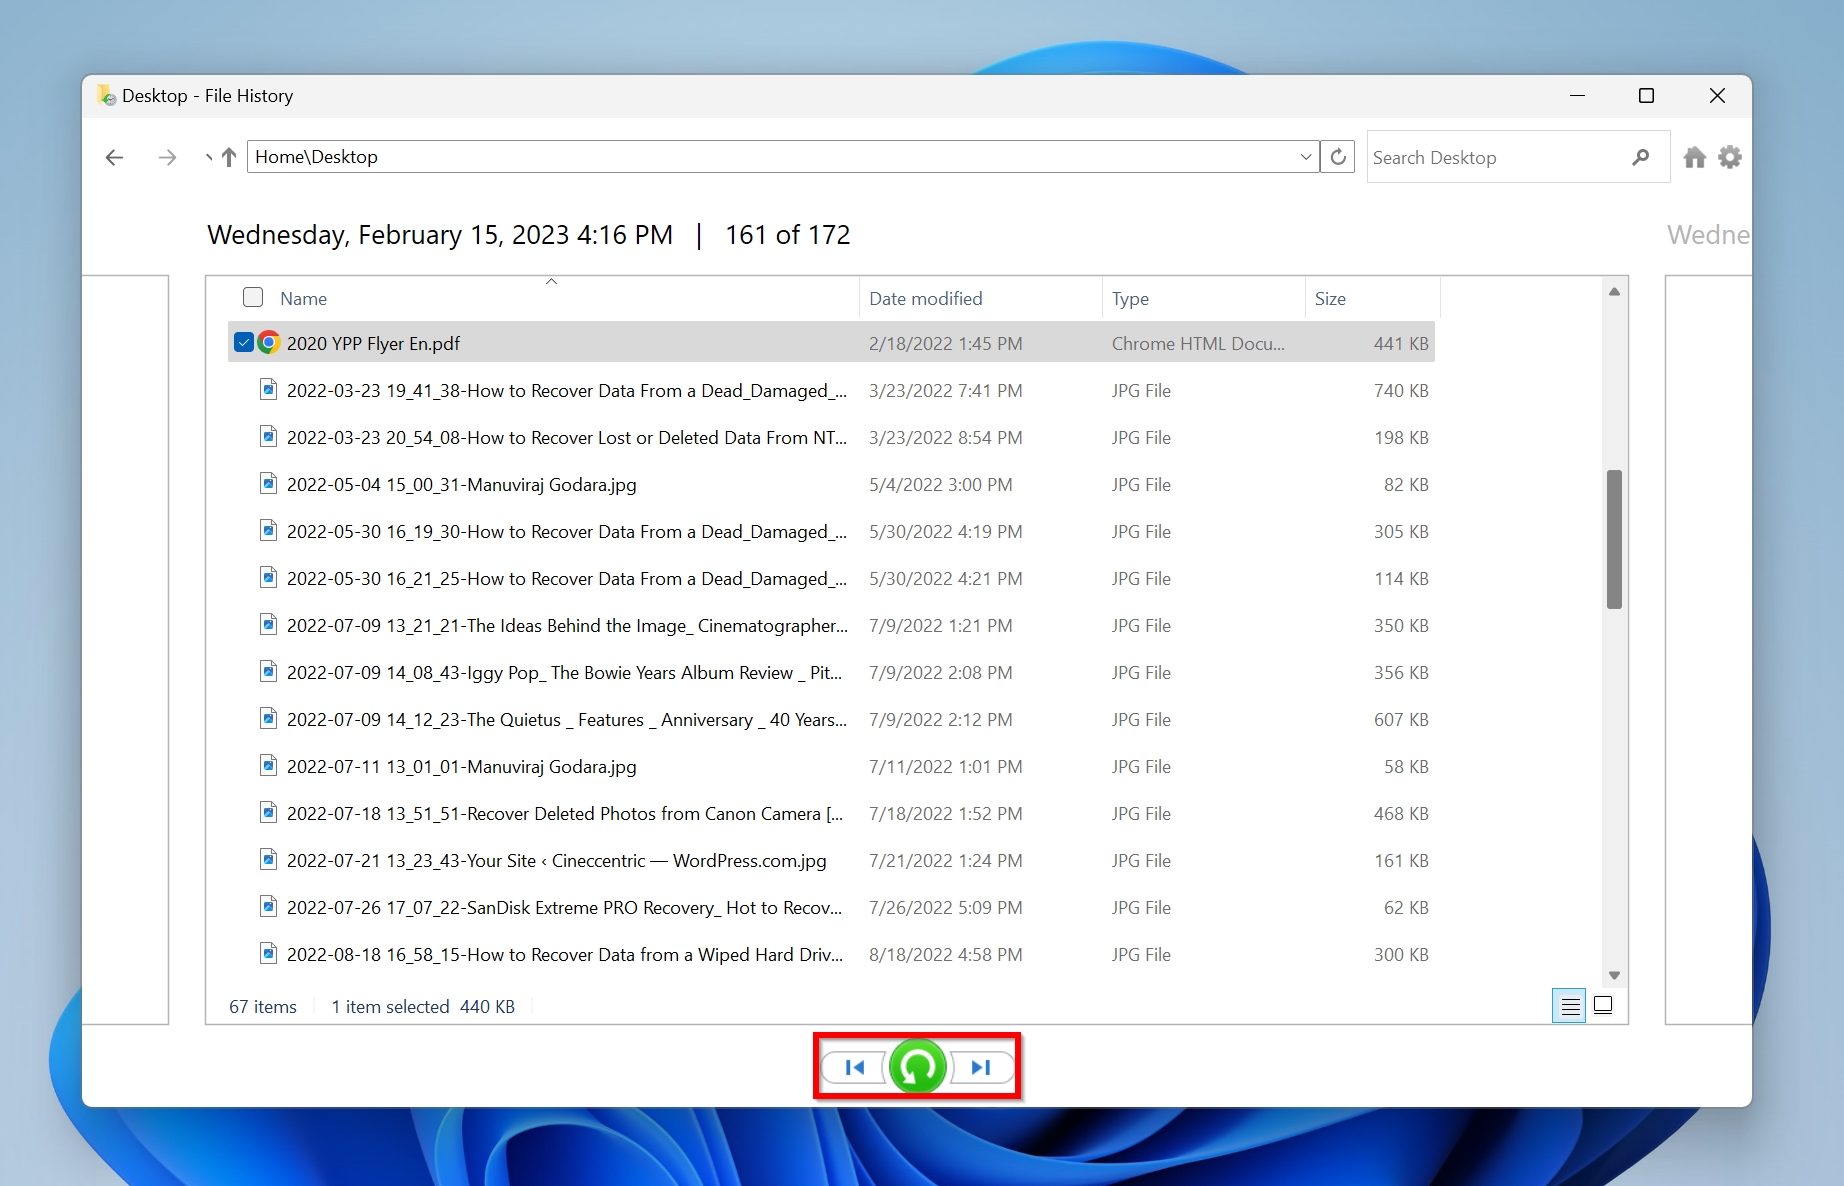
- Use the navigation buttons at the bottom to scroll between different backups. Press the green recover button to recover the selected files back to their original destination.


What to Do If Your Computer Automatically Restarts Itself
There are several reasons why your computer could be automatically restarting itself. While some of them can be fixed easily, others may require you to swap out hardware.
On Windows, the automatic restart issue is typically caused by one or more of the following reasons:
- Windows Update Reboot Loop: Faulty updates in Windows are known to cause an infinite reboot loop. Sometimes, an interrupted update process can also result in this problem. Fixing the infinite reboot issue in Windows involves performing a hard reboot, dual booting, accessing Safe Mode in Windows, or using installation media.
- Malfunctioning Hardware: A failing RAM and other hardware issues are commonly known to result in computers automatically rebooting. It’s advisable to use programs like HW Monitor to check the temperature of your PC because overheating also causes reboot loops.
- Malware: Computer viruses can damage system files, resulting in reboot loops and other issues on your computer. Perform a full system scan using Windows Defender or any other antivirus program to find and remove malware from your system.
- Outdated Drivers: It’s best to keep Windows and system drivers updated. If Windows didn’t update them automatically, you can use Device Manager to update your drivers manually. It’s also possible that a new driver update was faulty, causing the reboot loop. Here, you’ll need to uninstall or roll back the driver to resolve the issue.
Conclusion
A PC that doesn’t save information after a restart has underlying technical problems leading to data loss. Unless you address them, data loss will keep recurring. If you’re unable to resolve the issue, you can have an expert take a look at your computer, but be sure to save your data using a data recovery program first.
FAQ
- There’s a hardware issue.
- Windows is updating itself.
- There are outdated or faulty drivers on your PC.