
Reading Time: 5 minutesMost Windows users have, at one point or another, formatted their storage device. It’s an easy way to wipe out all your data and get a fresh start. But sometimes, users can accidentally format the hard disk drive while there is important data on it.
Luckily, the Quick Format option is ticked by default in the Windows Explorer format options menu. It’s fairly easy to perform a Quick Format recovery and get back your data using third-party data recovery software. Learn how to do so, below.
What Is Quick Formatting?
Windows users can choose to perform one of two format types on their hard drive–a Full Format, or a Quick Format. Naturally, a Full Format is more extensive and takes longer than a Quick Format. It’s also impossible to recover any substantial amount of data after a Full Format.
A Quick Format simply deletes all your data, rebuilds the file system, volume label, and cluster size without searching for bad sectors on the hard drive. Essentially, the data is still there, but the storage space is marked as free. So, users can perform a Quick Format recovery until the data is not overwritten by new files.
As a Quick Format doesn’t scan the disk for bad sectors, it usually completes in a matter of seconds. On the other hand, a Full Format can take several hours to complete, depending on the size of your hard drive.
Windows users can use Quick Format to format their hard drive to the NTFS or FAT file systems. A Quick Format is typically performed using the Windows Explorer or Disk Management.
Is it Possible to Recover Data After Quick Formatting?
When you delete a file, the file is marked invisible and the storage space is made available. But, the file is still there and data recovery programs can get it back as long as it’s not overwritten by a new file. When you perform a Quick Format, Windows essentially does this to all the files in a partition or drive.
So yes, it’s completely possible to undo a Quick Format and recover your data. However, time is of the essence, since the deleted data can be swiftly overwritten by users or even the normal functioning of Windows.
Here are some tips to improve the chances of a successful data recovery after a Quick Format:
- Don’t write new data to the hard drive. Even if you download a data recovery program, do it on an external storage device.
- Use a good data recovery program from the beginning. The first data recovery attempt has the highest success rate, so ensure you use a decent data recovery program to perform the scan.
- Attempt data recovery as soon as possible. Delaying data recovery and rebooting the computer increases the chances of new files being created.
How to Recover Data from a Hard Drive After a Quick Format
Your best bet for Quick Format recovery is using third-part data recovery software. Not only are these programs effective at recovering your data, they’re also relatively easy to use. But, it’s essential to use a good data recovery program because not all of them are equally effective.
After performing numerous data recoveries, Disk Drill is a data recovery program we can wholeheartedly recommend. The software checks all the boxes when it comes to gauging a good data recovery program–it’s easy to use, has a market-leading data recovery rate, and supports all major file types and file systems.
Important: Remember to download and install Disk Drill on an external storage device to prevent accidental overwriting of data on the hard disk drive.
Here’s a tutorial on how you can recover data after a Quick Format, using Disk Drill:
- Download Disk Drill and run the setup file.
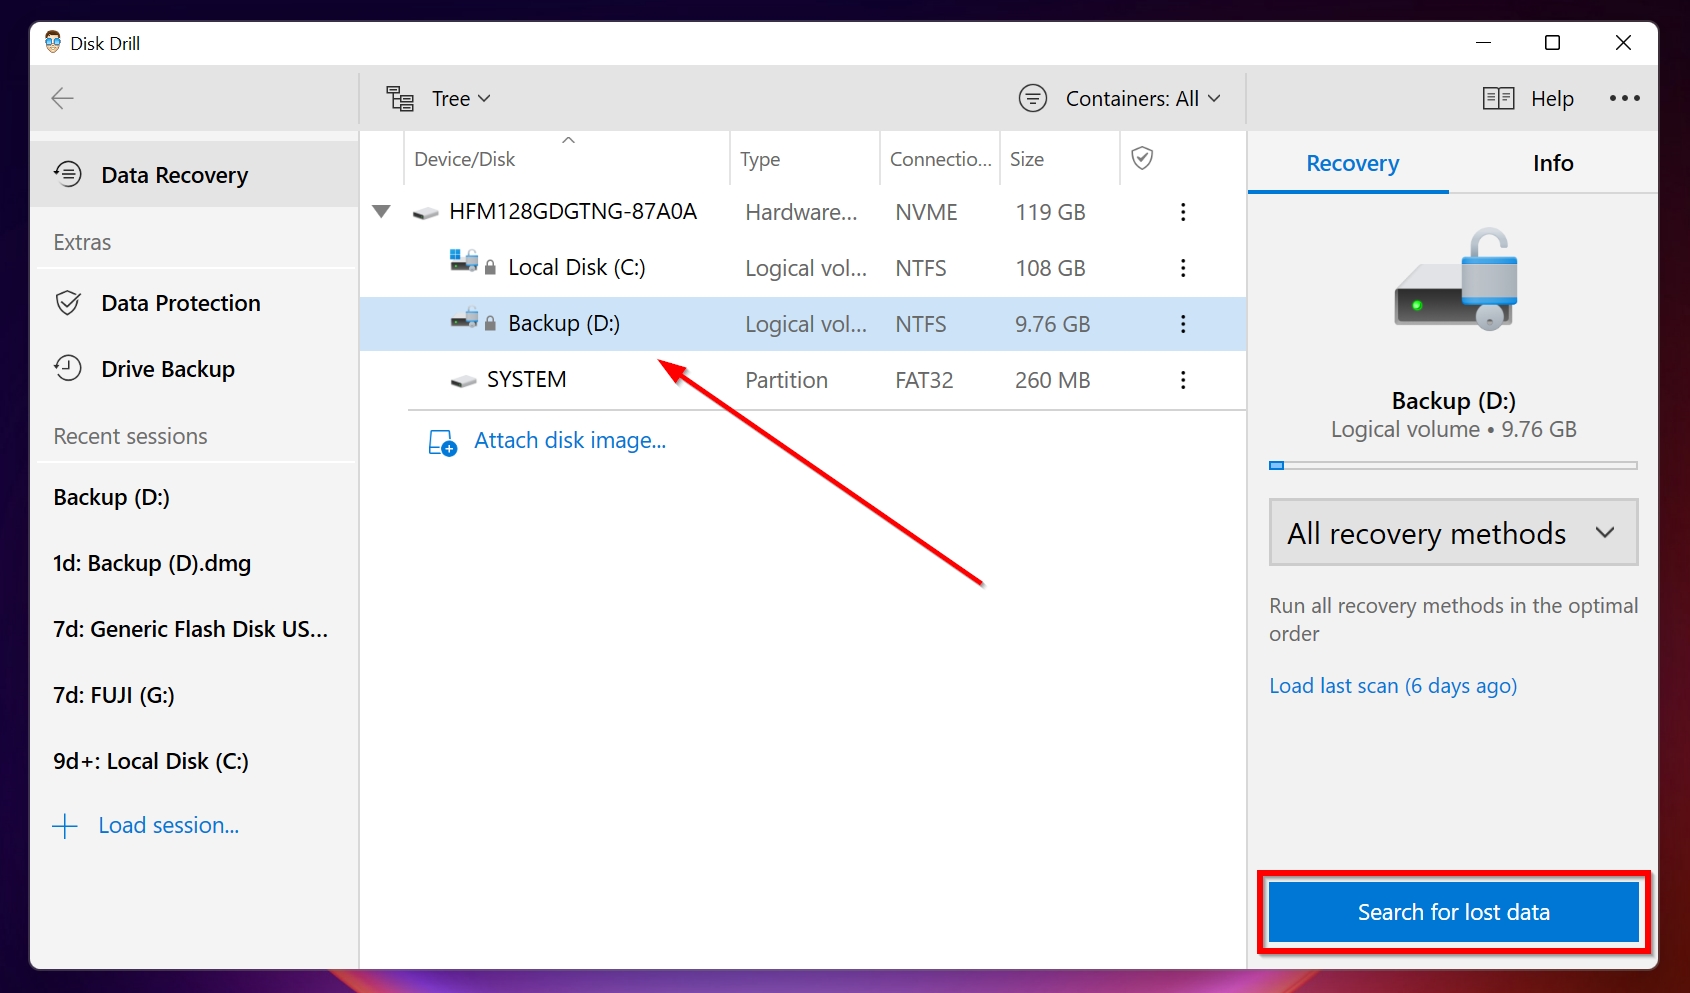
- Open Disk Drill, and select the partition or drive you Quick Formatted. Click on Search for lost data.
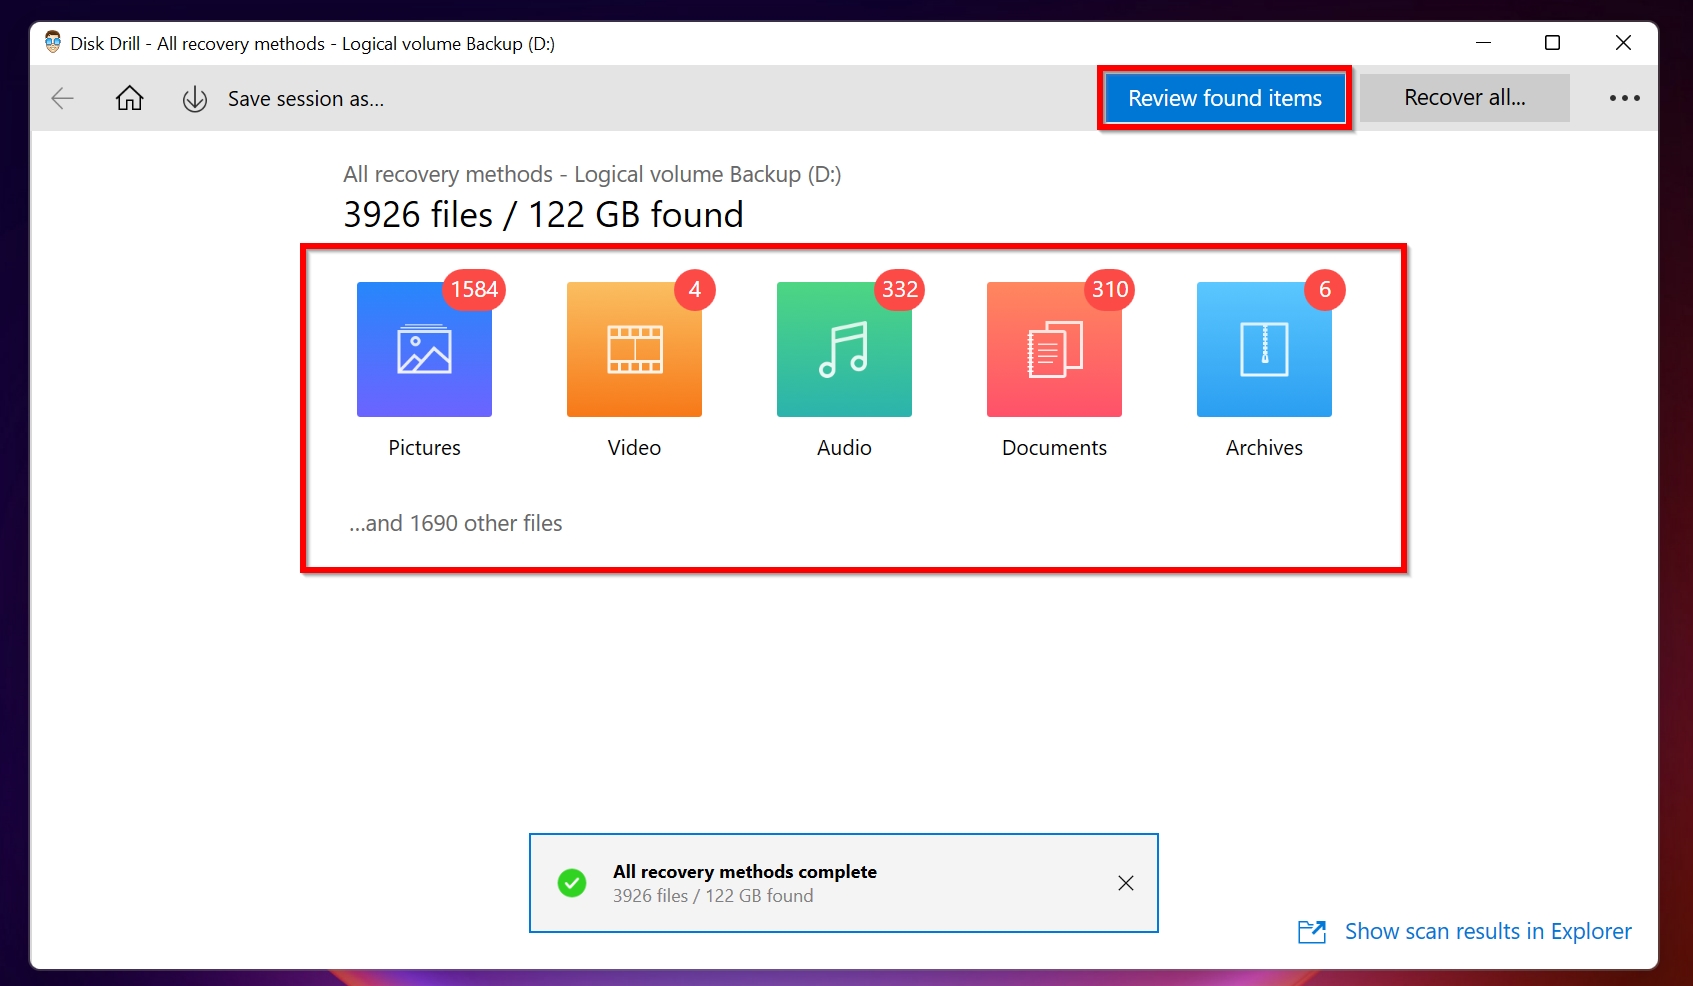
- Wait for Disk Drill to finish scanning. The scan time will mainly depend on the size of the partition or hard disk. Click on Review found items or directly click on the type of files you want to recover (Pictures, Videos, etc.).
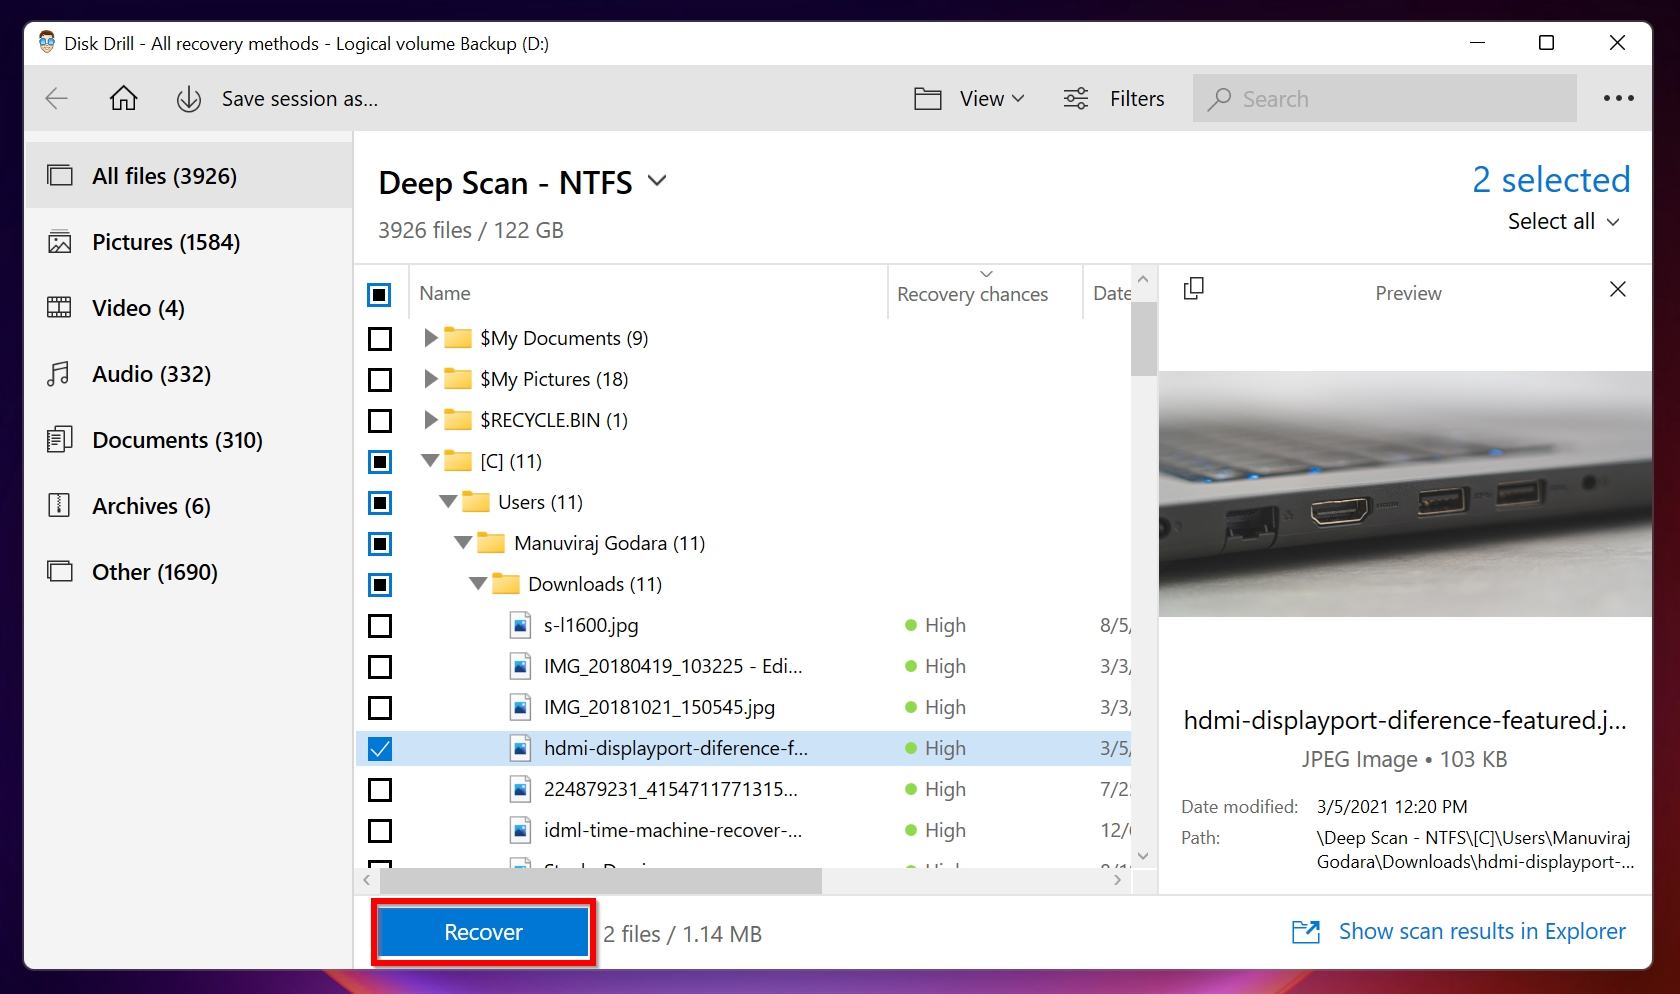
- Now, select the files you want to recover. Disk Drill will display the recovery chances next to each file, and you can double-click a file to see a preview. Click on Recover.
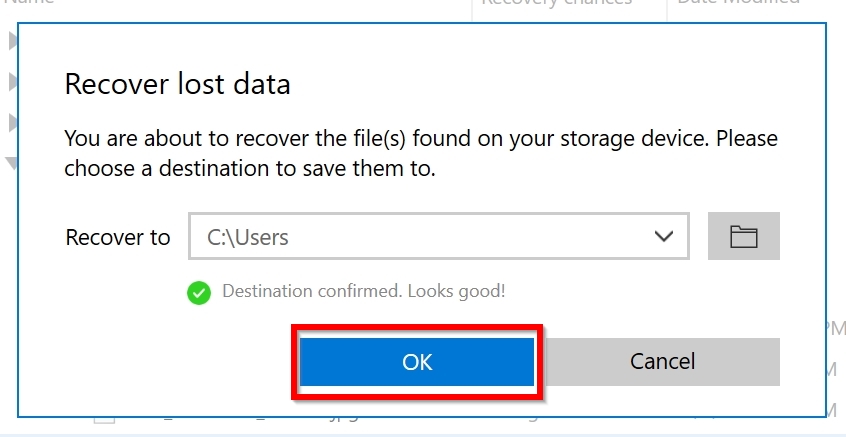
- Browse for a recovery destination for the files. Click OK.
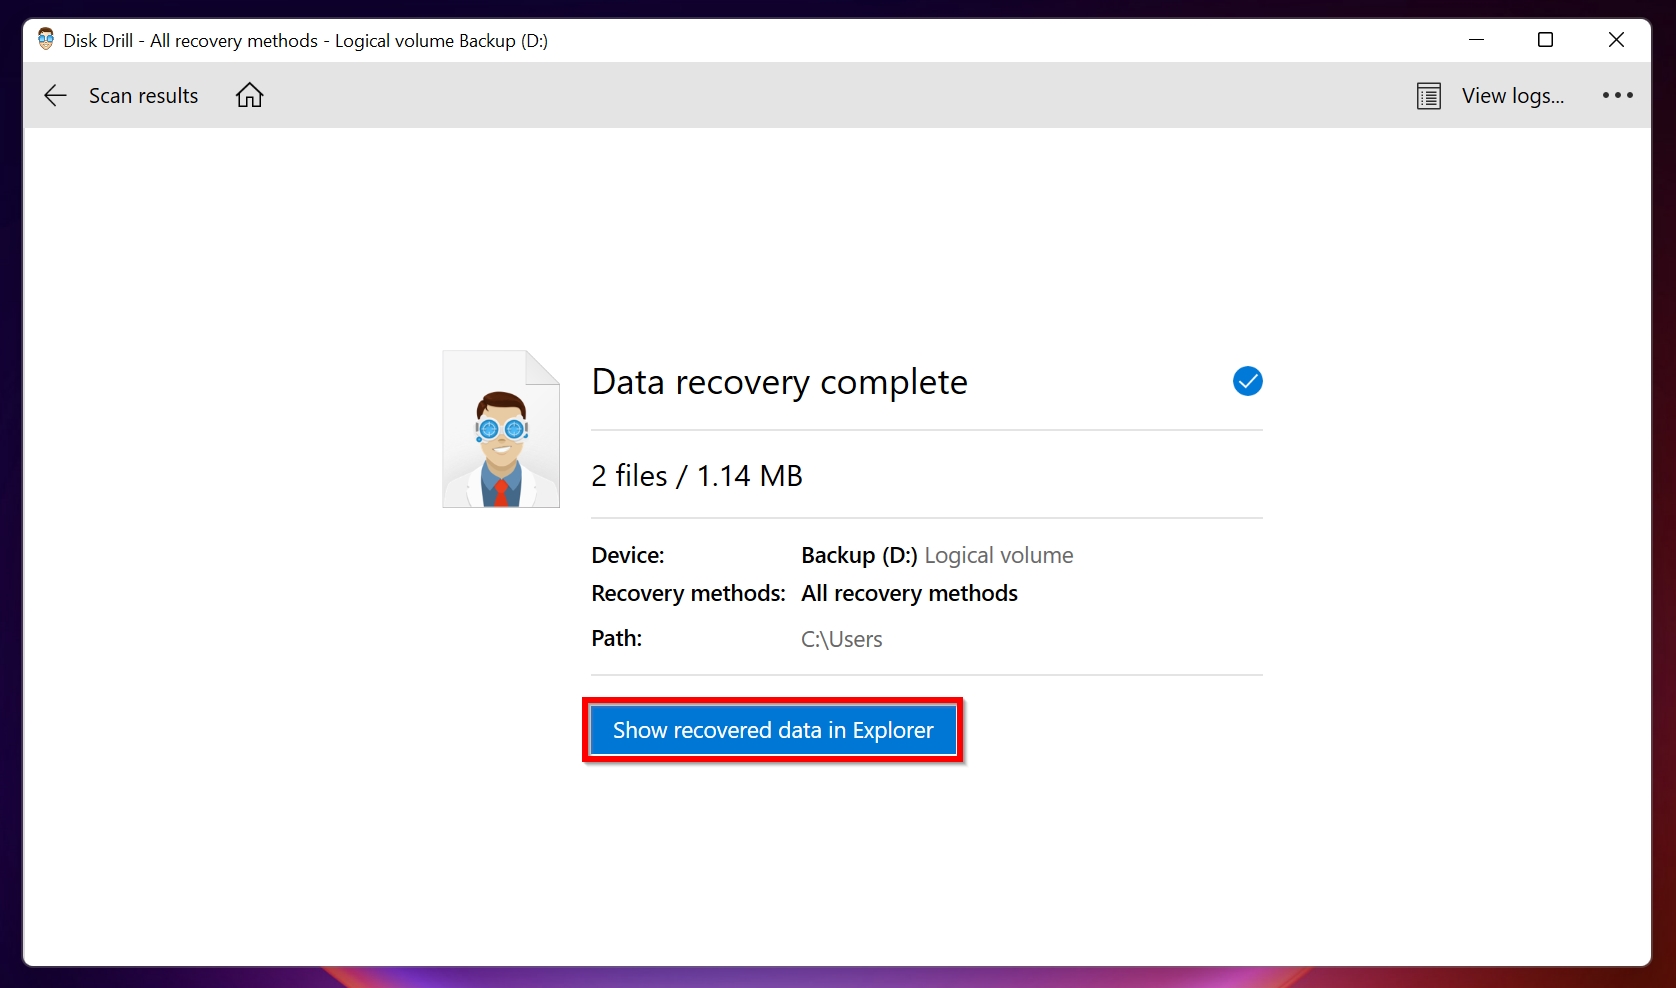
- After Disk Drill has recovered the files, you can click on the Show recovered data in Explorer button to view these files in Windows Explorer.
FAQ
- Download and install Disk Drill.
- Open Disk Drill, select the partition you want to scan and click on Search for lost data.
- Click on Review found items.
- Select the files you want to retrieve, then click on Recover.
- Select a recovery destination for your files and click OK.