Reading Time: 5 minutesThe Recycle Bin is, without a doubt, one of the most valuable features in Windows, so learning how to recover deleted files from it should be a top priority for all inexperienced users. Follow along as we explain everything you need to know about recovering from the Recycle Bin.
How Does the Recycle Bin Work?

The Recycle Bin is a special folder located at C:$Recycle.Bin that acts like a digital trash can for your Windows computer.
Deleted files are moved temporarily to the Recycle Bin before they completely (well, almost completely) disappear from your computer, giving you a chance to change your mind and easily recover them.
If the Storage Sense feature is on (which it usually is by default), then deleted files are kept in the Recycle Bin for 30 days and then they’re deleted automatically.
You can access the Recycle Bin by double-clicking its desktop icon (typically located in the top-left corner) or by navigating to the hidden Recycle Bin folder directly using File Explorer, which is possible only with the Hide protected operating system files setting in Folder Options disabled. There, you can see all deleted files just like in File Explorer, and you even have the same options to sort them.
To make things a bit more complicated, some deletions bypass the Recycle Bin, namely:
- Files deleted using the Shift + Delete combination.
- Files deleted from external USB drives, memory cards, etc.
In these cases, the Recycle Bin is skipped, and all references to the files are instantly removed. However, the files themselves remain on the storage device and are recoverable using specialized software, as explained later in this article.
How Can I Recover Data from the Recycle Bin?
To recover deleted data from the Recycle Bin, you first need to open the Recycle Bin folder. As we’ve already mentioned, the easiest way to do that is by double-clicking the Recycle Bin icon on your desktop. If you don’t see the icon, then it’s possible that it’s been disabled. You can follow the official instructions to enable it again.
![]()
Now that the Recycle Bin folder is open, you can hopefully see your deleted data. If not, then there’s a chance that they haven’t ended up in the Recycle Bin in the first place or maybe the Recycle Bin has been emptied. In such unfortunate situations, we recommend you scan your entire drive using data recovery software (see the next section of this article).

Choose all files you want to recover by clicking on them while holding the Ctrl key, or select them all in one go with Ctrl+A. Now, you have two recovery options:
- Simply drag the selected files to any folder you want.
- Right-click on any of the selected files and choose the Restore option. This option will send the files back to their original locations.

We went with the latter option for the purposes of this guide, and our files were restored back to their original folder.
When restoring files whose original locations are unknown to you, it can be useful to switch to the detailed view because it displays a lot more information about each file than the thumbnail view. To do so, click the small icon in the bottom-right corner of the Recycle Bin window, as shown in the screenshot below.

In the detailed view, you can click any column header to sort the files based on that attribute. For example, you can Sort by “Date Deleted” to find your most recently deleted files or to locate files you accidentally deleted a while ago.
How to Recover Files That Are No Longer in the Recycle Bin?
Just because your files are no longer in the Recycle Bin doesn’t mean they’re gone for good. When files are deleted from the Recycle Bin (or bypassed entirely), Windows simply marks that space as available for new data, but your files are still there. Where? On the storage device from which they were deleted, waiting to be overwritten by new data.
Unfortunately, there’s no tool in Windows that lets you locate and recover files that are no longer in the Recycle Bin, but there are many third-party data recovery software solutions for Windows that fill this gap.
One data recovery software we don’t hesitate to recommend to Windows users who are forced to look beyond the Recycle Bin is Disk Drill. The free version of Disk Drill can recover up to 500 MB of data using its world-class data recovery algorithms, and its modern user interface makes the recovery process just as simple as the Recycle Bin recovery we demonstrated earlier.
To recover files that are no longer in the Recycle Bin using Disk Drill:
- Download and install Disk Drill on a different storage device than the one on which your Recycle Bin folder is located. In 99% of cases, this means you need to install Disk Drill on a non-system drive, such as an external hard drive.
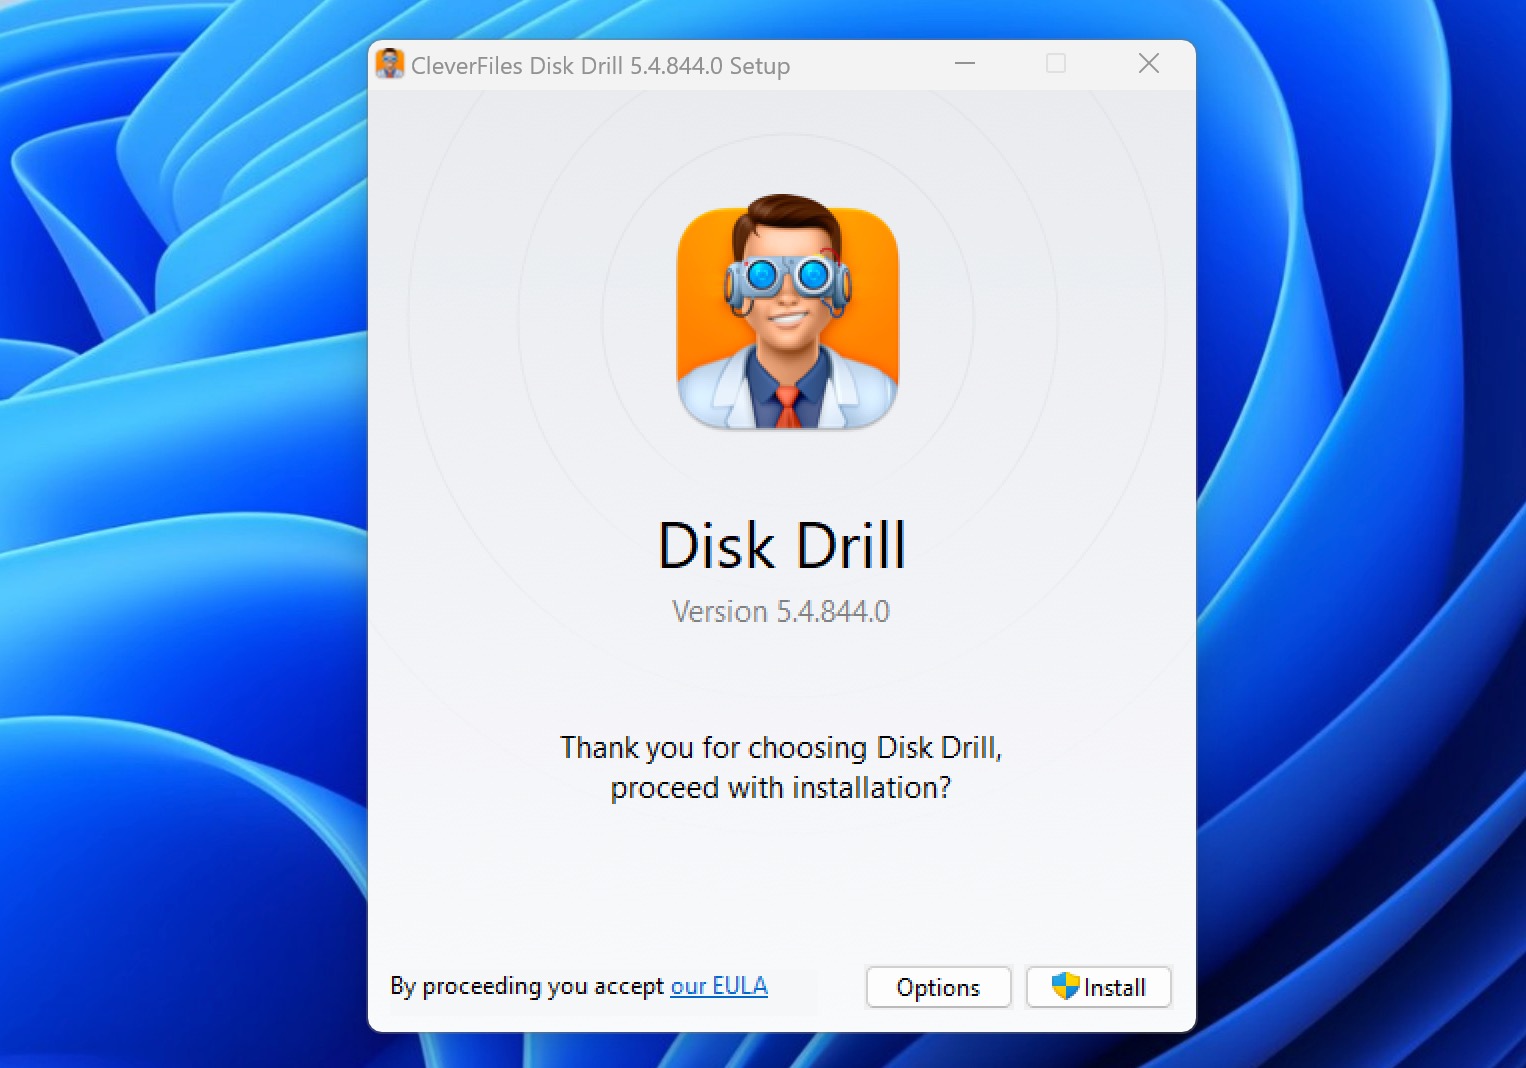
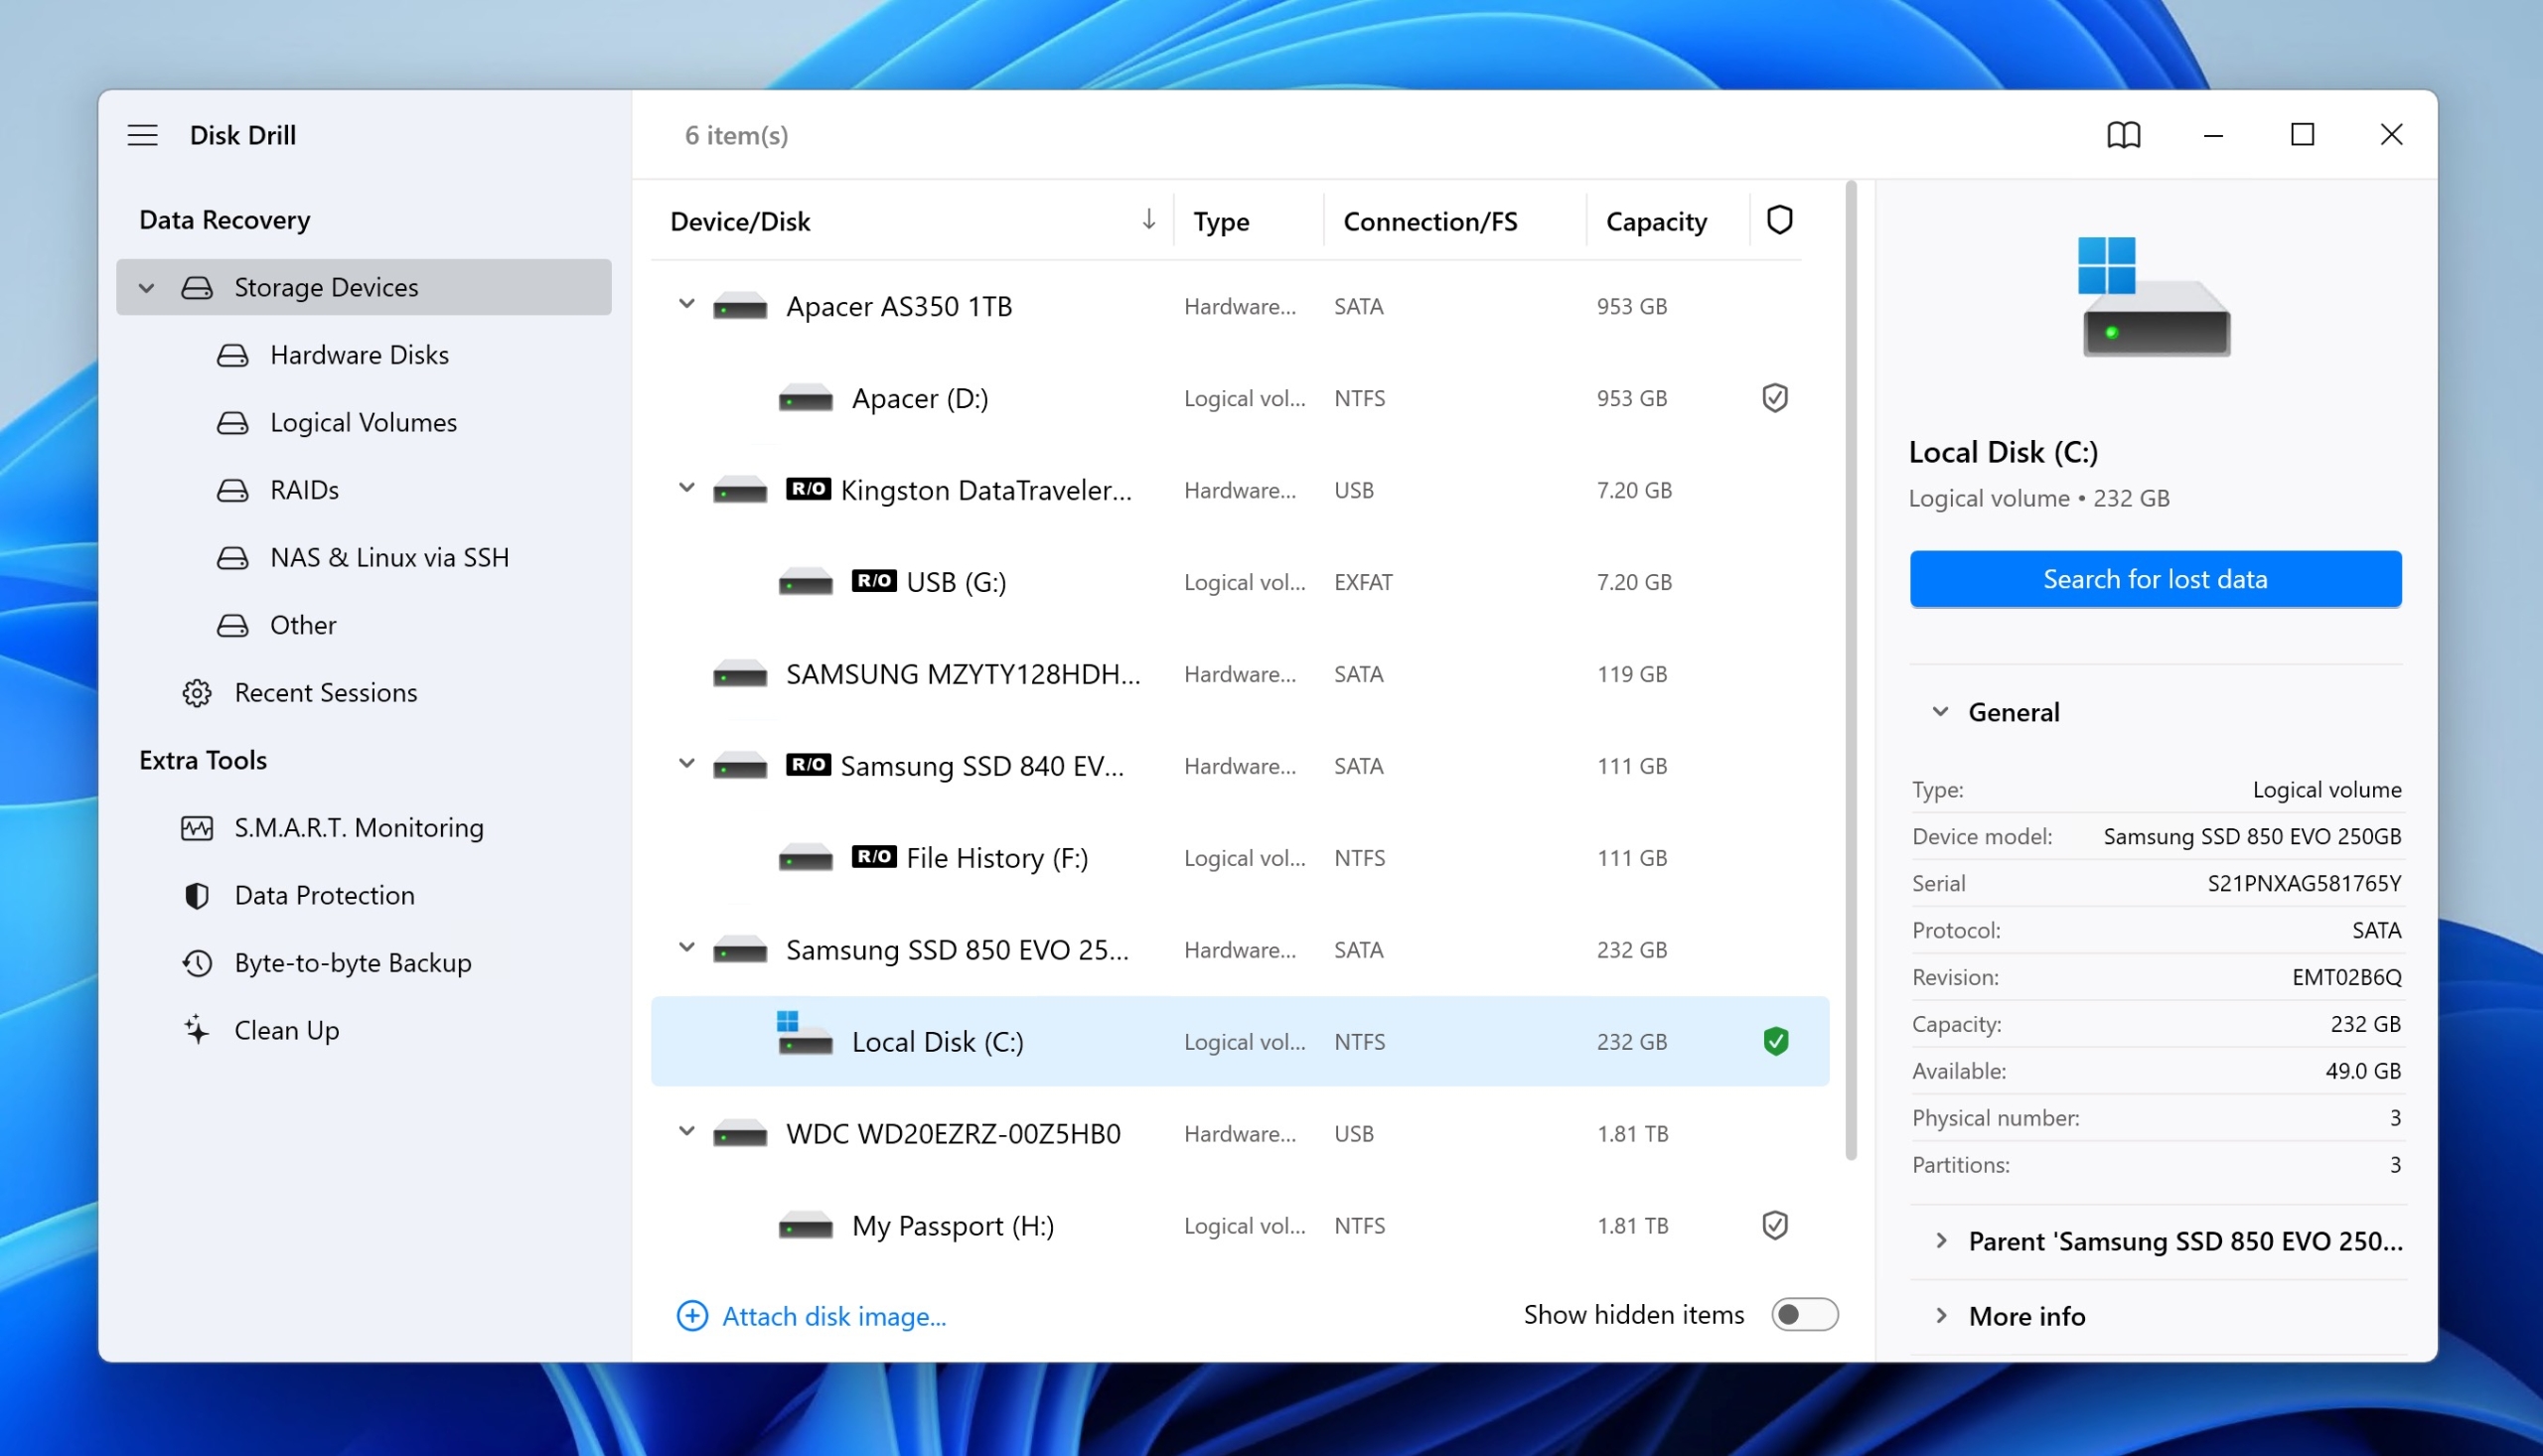
- Launch Disk Drill and, if recovering data that have been permanently deleted from the Recycle Bin, select the drive where your Recycle Bin is located (your system drive C: likely). If you’re trying to recover data that has never made it to the Recycle Bin, such as a file that was deleted from a USB flash drive, then you need to select that specific drive instead.
- Click the Search for lost data button to initiate the scan. Wait for the scan to complete. This may take some time depending on the size and speed of your drive.
- Browse through the recoverable files and select the files you want to recover. Use the file type filters or search function to locate your deleted files more easily.
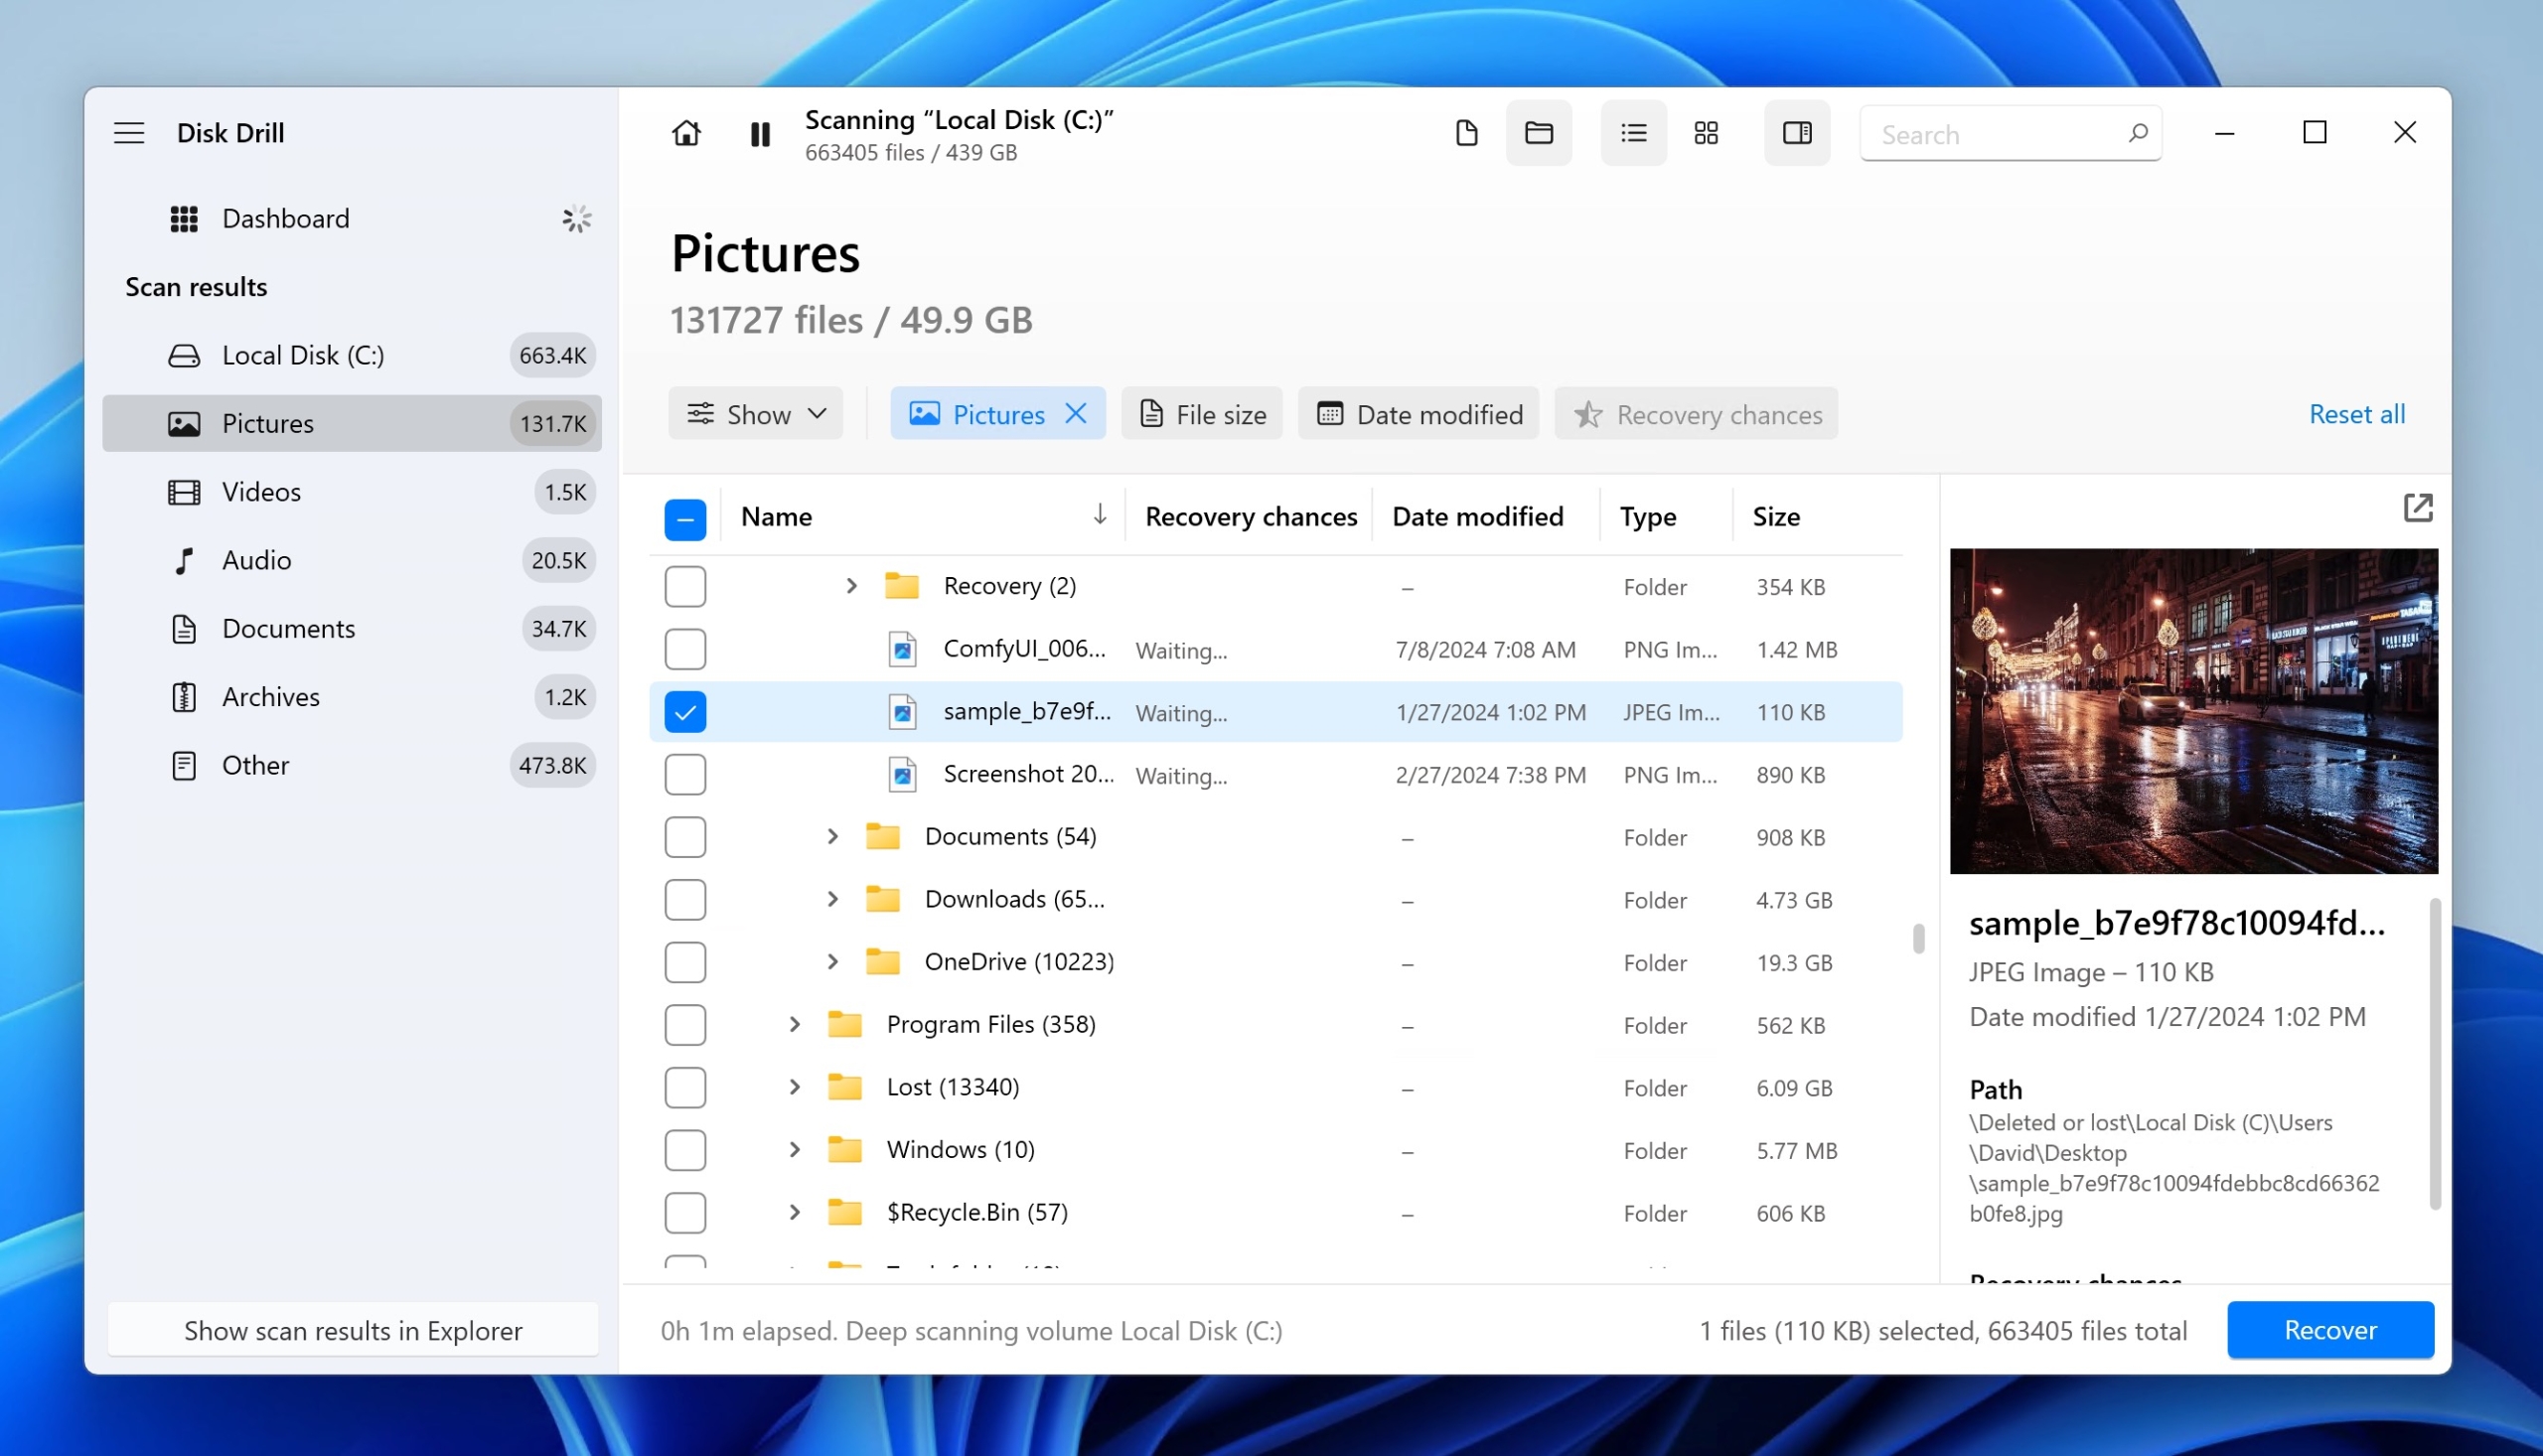
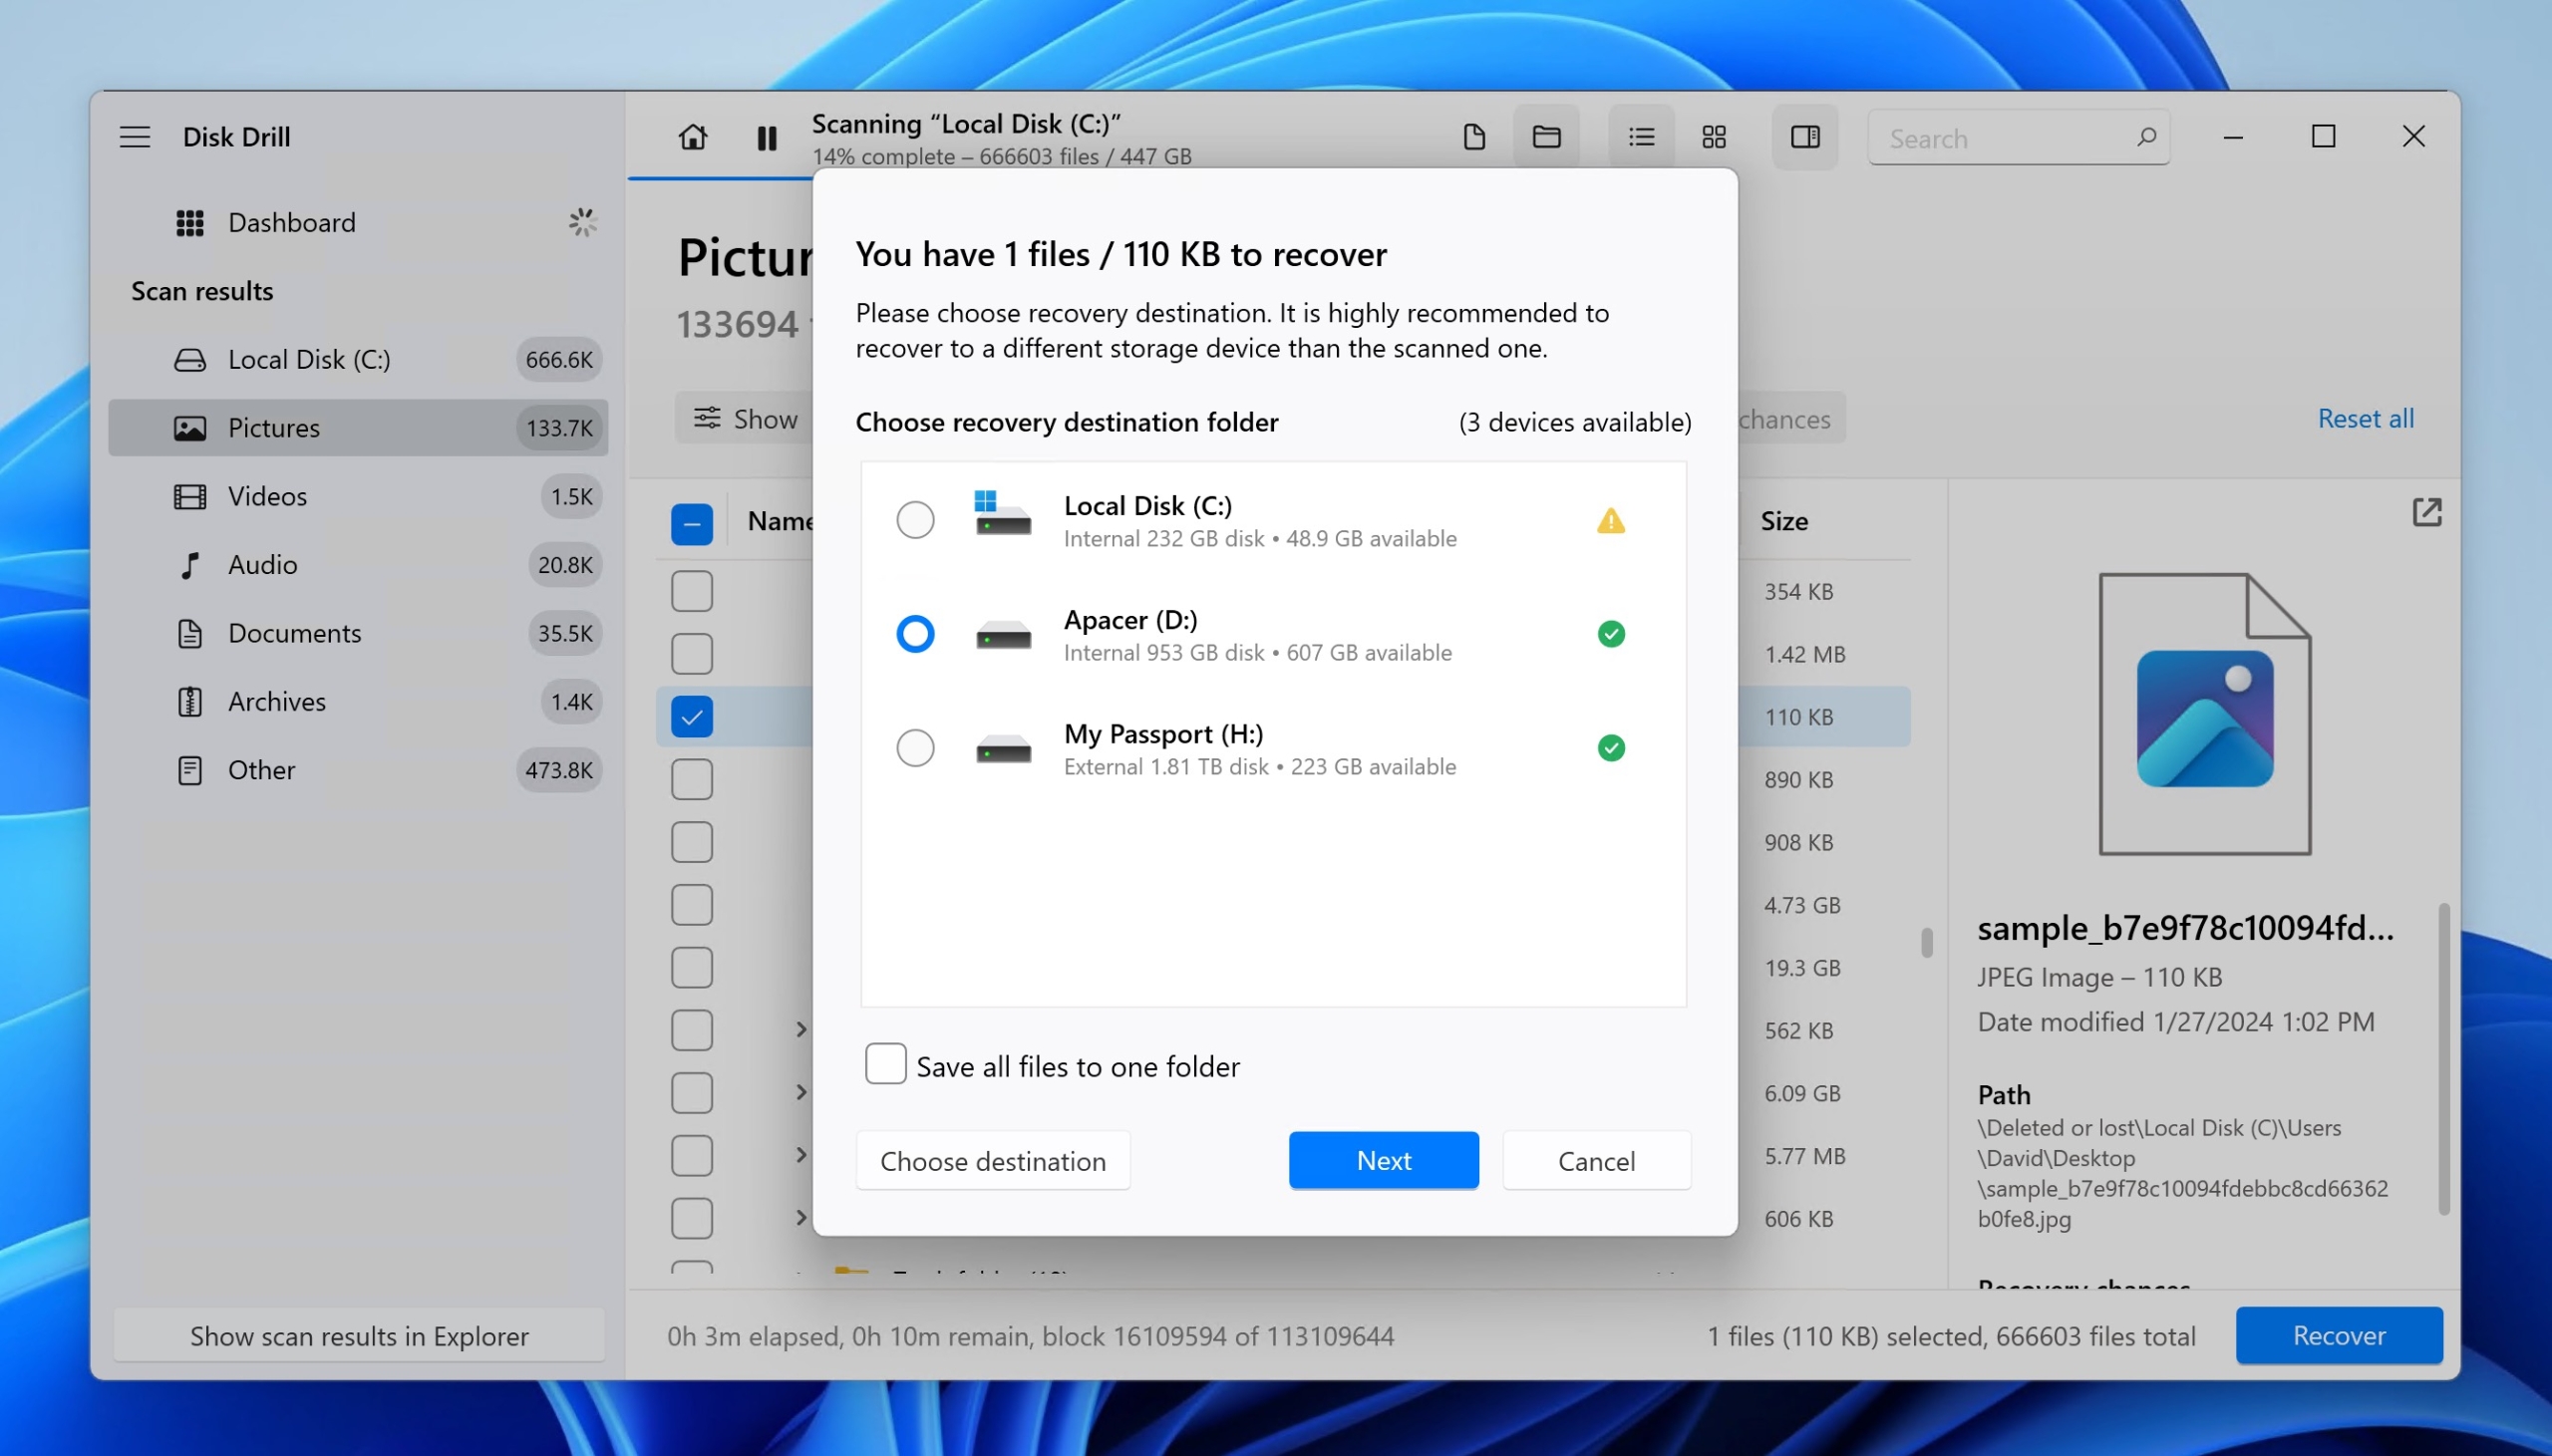
- Click the Recover button and choose a recovery destination. Remember to select a different drive than the one you’re recovering from to avoid potentially overwriting your data.
The success of recovery depends on how soon you act and whether the data has been overwritten.
Key Takeaways
If you’ve just deleted a file, then it very likely ended up in the Recycle Bin. That’s great news if the file is actually important because you can easily recover it. In situations where the Recycle Bin was skipped (the Shift + Delete key combination was used or the file was deleted from a USB flash drive, for example), the Recycle Bin won’t be able to help you. In these cases, you’ll need to use specialized data recovery software like Disk Drill or restore from a backup (if you have one, of course).

