Reading Time: 9 minutesNo matter what photos you have on your PC, whether they are personal photos or for work, losing them is never pleasant.
If you accidentally deleted photos on your Windows 10 PC, there are plenty of ways to retrieve them. Existing resources on your laptop can be used to restore deleted photos just as well as any third-party app.
In this article, we explore some methods you can use to recover deleted photos on a PC. Following these processes will help you retrieve deleted photos from computer devices; no matter the volume of photos that have been deleted.
Where are Photos Stored on Windows 10?
Before attempting to recover deleted photos from your PC, you must first know where your photos are being stored. While there are several locations on your computer where your photos can be stored, Windows stores them in the “Pictures” folder by default, there are other possibilities:
- Downloads folder: This can be a location for photos you’ve downloaded from the internet, especially if you haven’t chosen a specific save location in your browser.
- Other folders: You might have additional photos stored in folders you created yourself or that specific programs use.
How to Find All Photos on Windows 10
Computer devices are capable of storing photos in multiple locations. That said, there are two main ways to identify all the photos stored on your Windows 10 PC. You can either search for these photos manually or automatically.
Searching for Photos Manually
Searching for photos on your PC manually is one of the oldest ways to identify all the available photos on your PC. Tracking all of your photos manually is accurate, but it could turn out to be a very cumbersome process that only a few are willing to do. To search for photos manually, you need to follow these steps:
Step 1. Launch File Explorer by clicking the windows button and then type “file explorer” in the search tab.

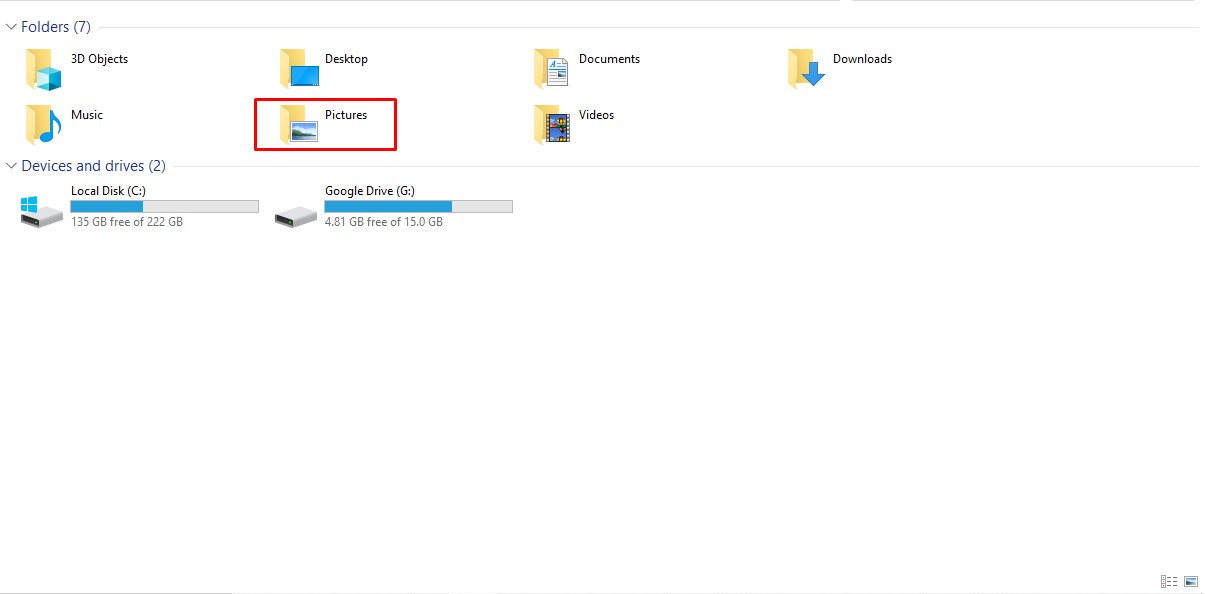
Step 2. Click the “Pictures” folder on the left panel as seen in the image below. Clicking on it would reveal all the folders and subfolders that could contain some of your stored photos.
 Step 3. Additionally, you can click on the “Downloads” folder. The “Downloads” folder contains the majority if not all the photos you have saved from the internet onto your PC.
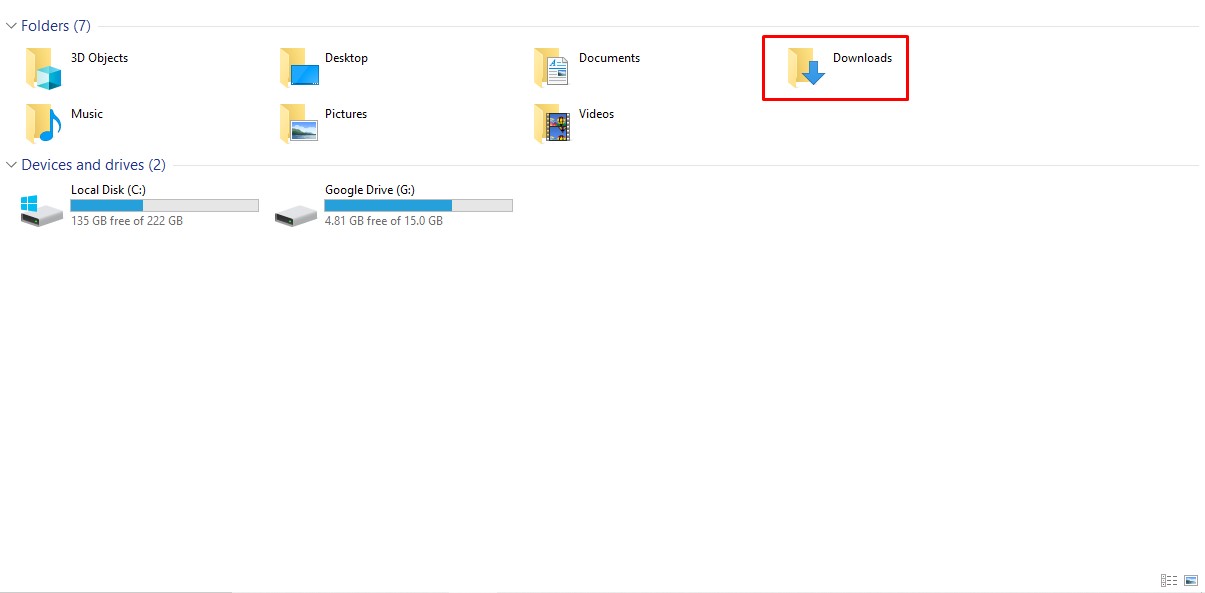
Besides these two major drive locations, your photos may be stored in other areas on your PC as already indicated. Therefore you need to take the time to click on every storage location possible including your desktop, documents folder, etc. to identify all your photos.
Using Built-in Explorer Search
This method shows you how to search for all your photos in a much simpler fashion. All you need to do is to perform the following:
Step 1. Launch File Explorer. A window that lists your available partitions is displayed.
Step 2. Open at least one of them by double-clicking on it.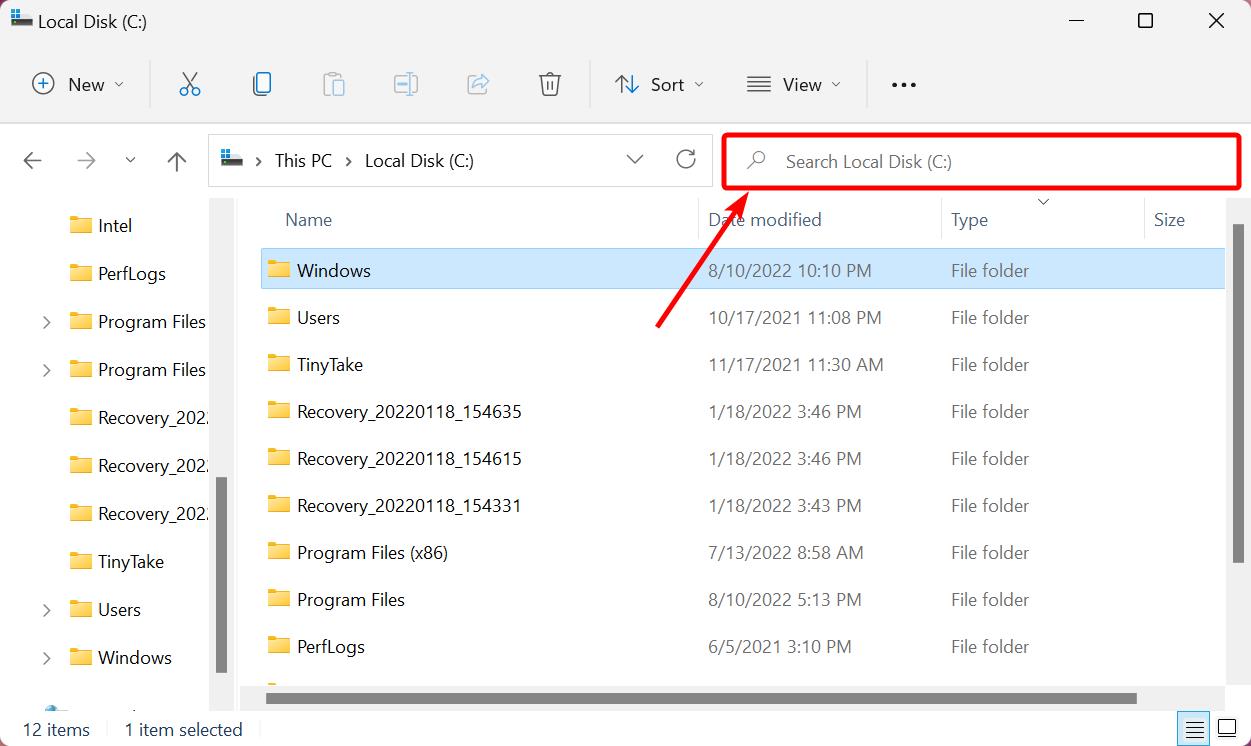
Step 3. Attempt to search for an item in the search bar to bring up the search tool ribbon. You will see “kind” displayed as part of the options under the search tool. Clicking it will reveal a drop-down menu that contains some listed items.
Step 4. Selecting “Pictures” will display all the available photos stored in that partition.
Using any of the above methods would instantly help you locate all the photos stored on your PC. Knowing where your photos are being stored is an essential part of your quest to retrieve them after they have been deleted or moved to a different location.
6 Methods to Recover Deleted Photos on Windows 10
Getting back deleted photos on your computer isn’t as complex as you might imagine it to be. Depending on the time that passed after deletion as well as the number of photos involved, you have a good chance to retrieve them without paying a dime.
The key to successful photo recovery is to act quickly. The more you use your computer after deleting photos, the greater the chance they’ll be overwritten by new data, making them unrecoverable.
We will explore some very common methods of photo recovery as well as others you may be discovering for the first time. Regardless, the following methods will help you to recover deleted photos on your Windows 10 PC.
Method 1: Recover Deleted Photos from the Recycle Bin
The Recycle Bin is a temporary storage space for deleted items on your Windows 10 PC. What this means is that anytime you delete photos, your files are not erased permanently. Instead, they are moved to a new temporary storage location known as the Recycle Bin.
Recovering files from the Recycle Bin requires little effort compared to other methods of data recovery. Follow these instructions to recover photos from the Recycle Bin.
Step 1. Open the Recycle Bin by double-clicking on the icon. The Recycle Bin icon is usually located on your Desktop.
 Step 2. Identify the photos you want to recover.
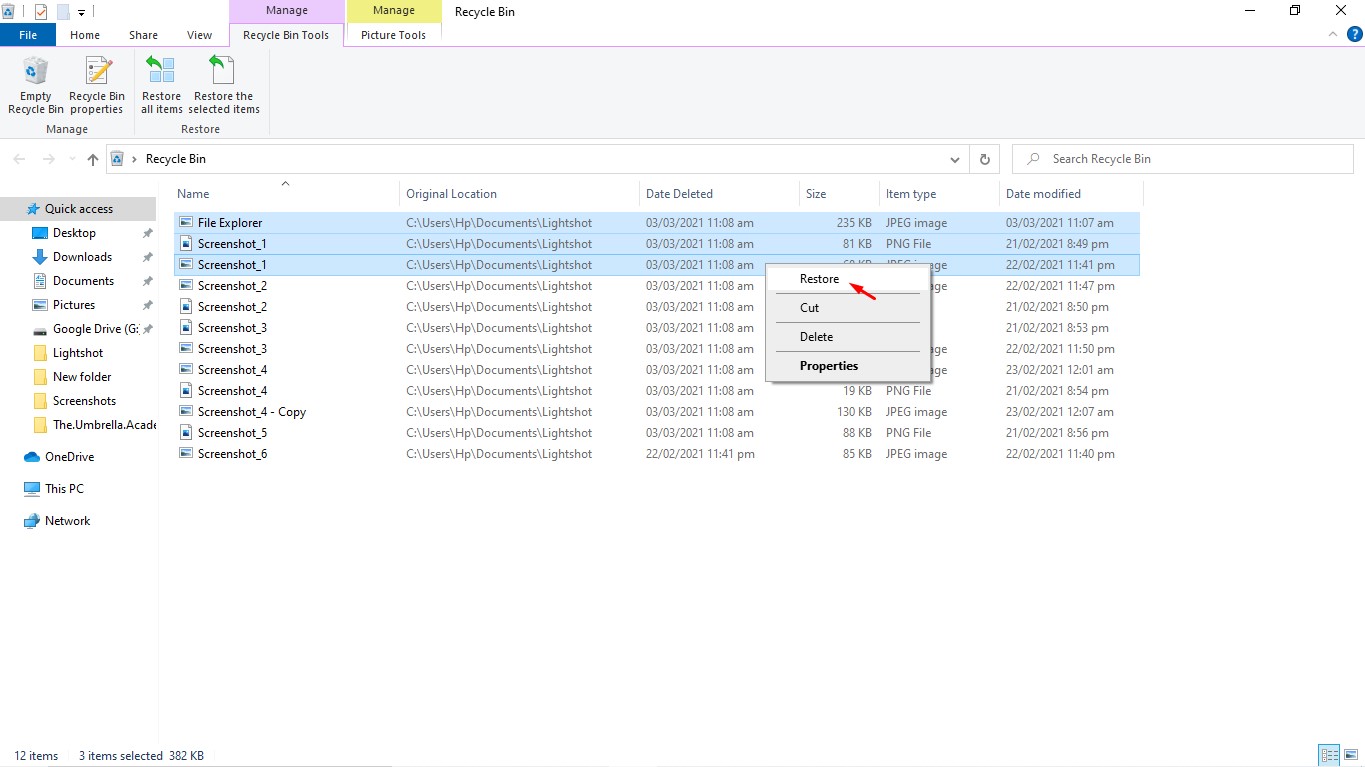
Step 3. Select the photos you want to restore, double-click on them, and choose the “Restore” option to recover them to their original storage location.
Method 2: Recover Deleted Photos from the Windows Backup
An existing backup is the best thing possible in the unforeseen event of a data loss. If you regularly back up your photos using File History, a built-in Windows 10 tool, you will be able to recover them easily and for free.
Follow these steps to recover photos using Windows 10 File History:
Step 1. Go to the Start menu and search for “Restore your files with File History”.
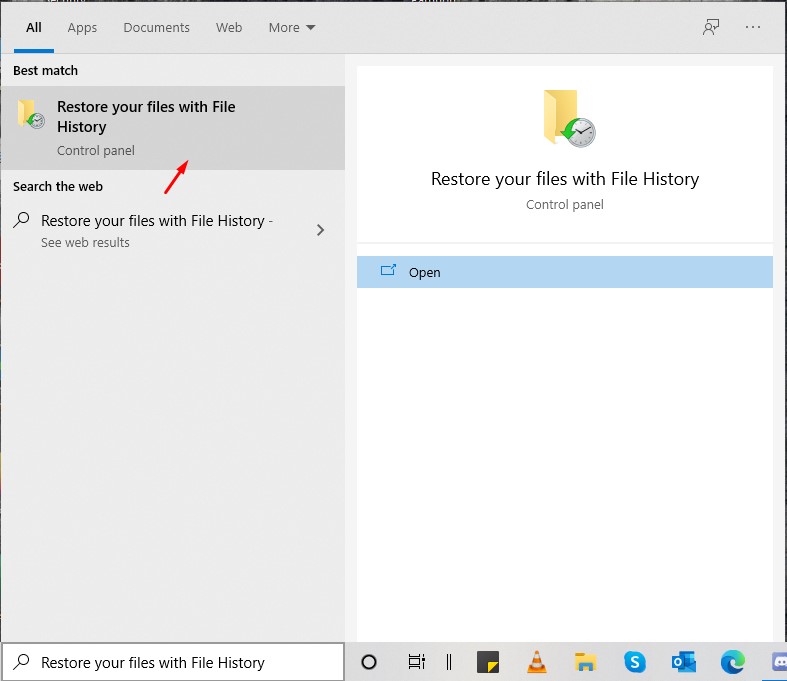 Step 2. Scroll through the list of files and select the photos you intend to recover.
Step 3. Finally, click the “Restore” button to recover your photos to their original location.

Method 3: Recover Deleted Photos from the Cloud
Data storage services are growing steadily in demand. Cloud technologies have become an increasingly sought-after commodity. Unlike traditional data storage devices, Cloud storage is relatively cheaper, far more accessible, efficient, and most secure.
Most people today prefer cloud backups over local backups because of their enormous benefits. Restoring your photos from a cloud backup is just as easy as deleting a file permanently with the shift+delete command.
Using the Google Drive app as an example, we are going to demonstrate how you can recover Photos to your computer.
Step 1. Download and install the Google Drive App.
Step 2. Open File Explorer in Windows 10 and select the Google Drive Partition.

Step 3. Locate the Photos you want to recover.
Step 4. Right-Click on the Photos and select Copy.
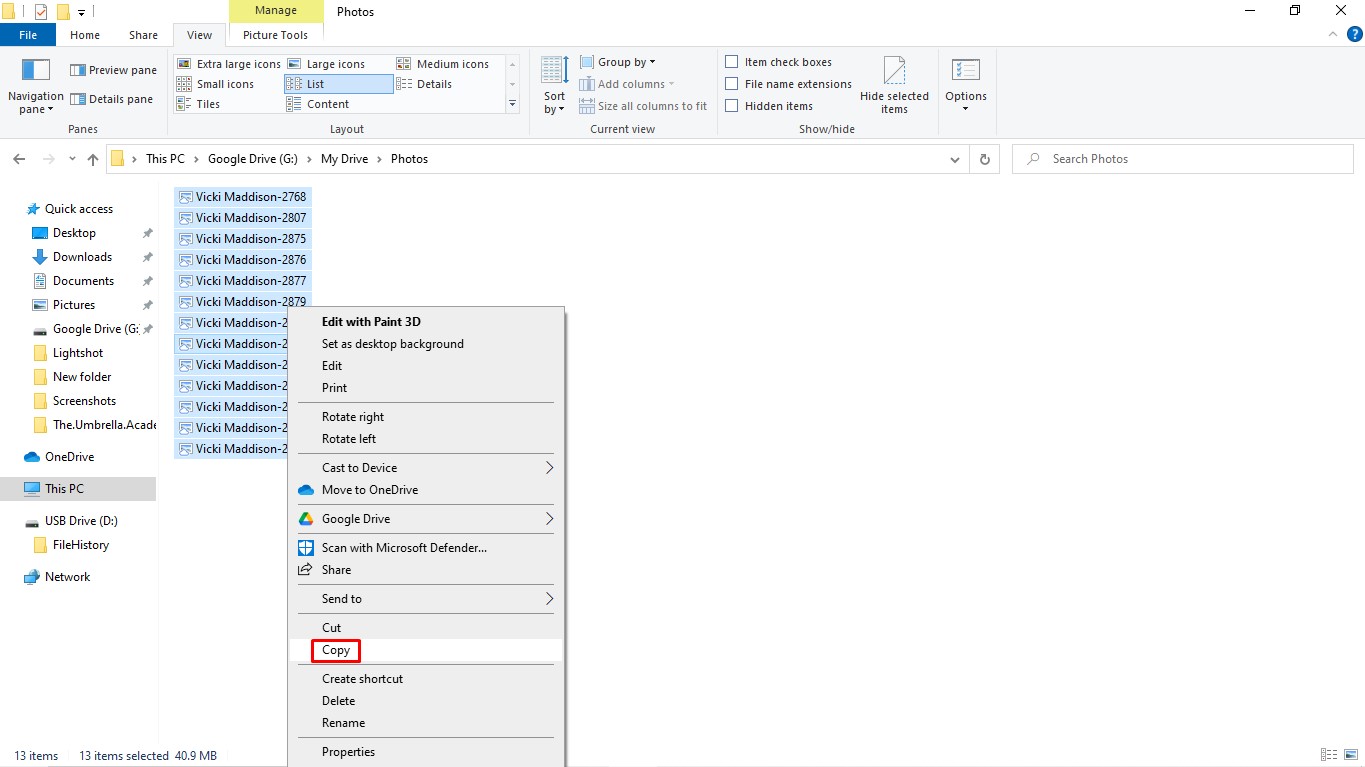 Step 5. Open a new folder or an existing folder in your local storage location and paste the Photos to recover them.
Method 4: Recover Deleted Photos With a Free Data Recovery App
Windows File Recovery is a free data recovery app you can use to retrieve deleted photos on your Windows PC. This method is geared towards more advanced users comfortable with the command prompt interface. Though not beginner-friendly, it remains a viable data recovery app.
Follow these steps to recover photos for free using Windows File Recovery.
Step 1. Download and install the Windows File Recovery app.
Step 2. Secondly, start the Windows File Recovery app.
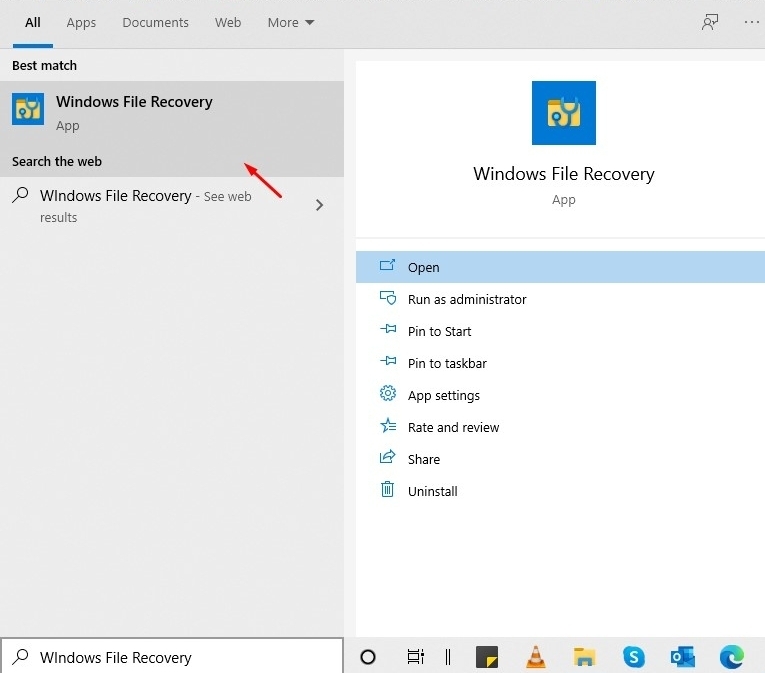 Step 3. In the Command Prompt window, enter the following command:
winfr source-drive: destination-drive: [/switches]
 Step 4. Recover photos from your source folder to the recovery folder on an [X:] drive.
winfr C: X: /n \Users\<username>\Pictures\*.JPEG /n \Users\<username>\Pictures\*.PNG
winfr C: X: /x /y:JPEG,PNG

The source and destination drives must be different. When attempting to recover from the operating system drive (usually C: ), use the /n <filter> switches to highlight the specific drive or folder.
Step 5. Windows File Recovery will now scan for the photos and a recovery folder called, Recovery_<date and time> will be automatically created on the destination drive.
Step 6. When you receive a prompt to continue, enter Y to start the recovery operation. Press Ctrl + C to stop the recovery process.
Method 5: Recover Deleted Photos With Premium Data Recovery App
Several data recovery software programs can potentially help you recover deleted photos on your Windows PC. One such program is Disk Drill. Aside from the simple user interface, you also get to recover photos in many different formats. The file formats include JPEG, PNG, Raw, TIFF, and more. Moreover, you have added features such as the ability to preview files and recover 500 MB for free.
To recover permanently deleted pictures from laptops using Disk Drill, follow these steps:
Step 1. Download and Install Disk Drill.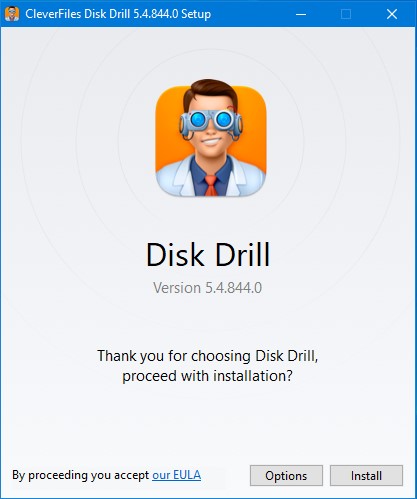
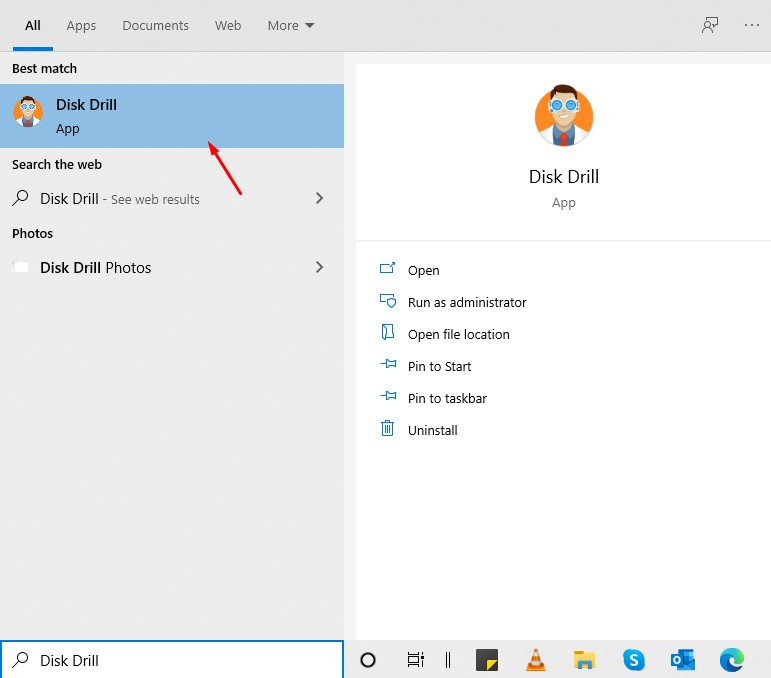
Step 2. Run the Disk Drill app.
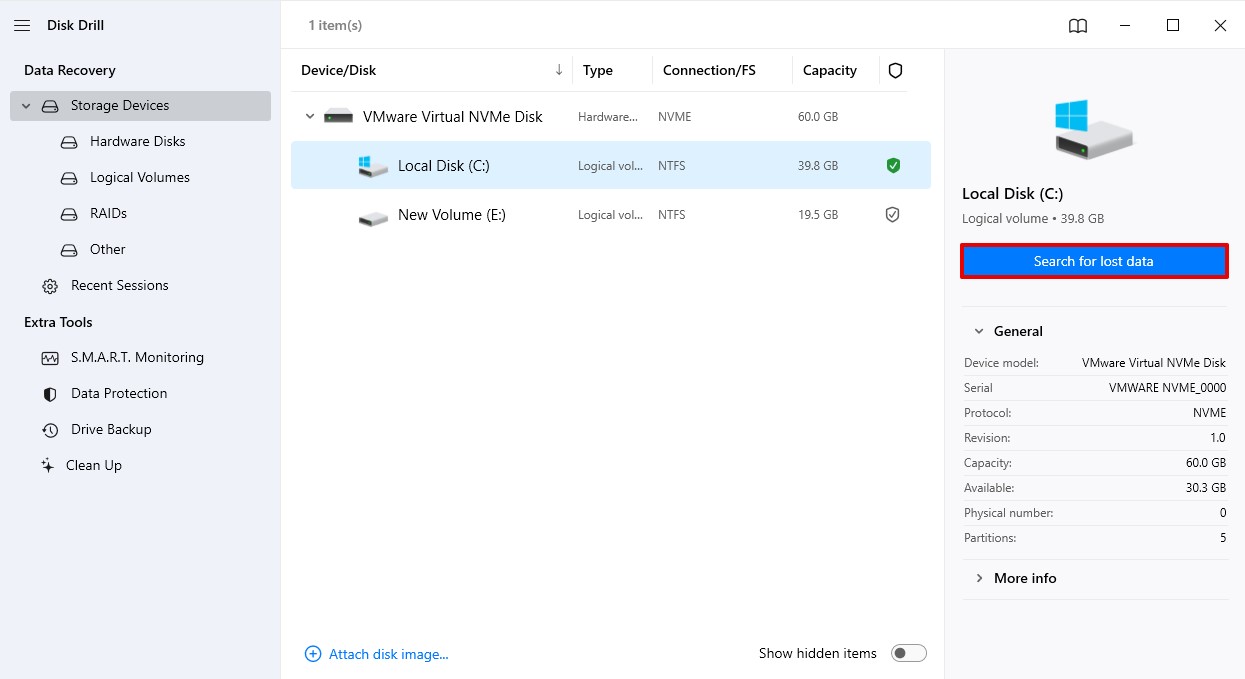
 Step 3. Select the storage location from which you want to recover the deleted photos and click “Search for lost data”.
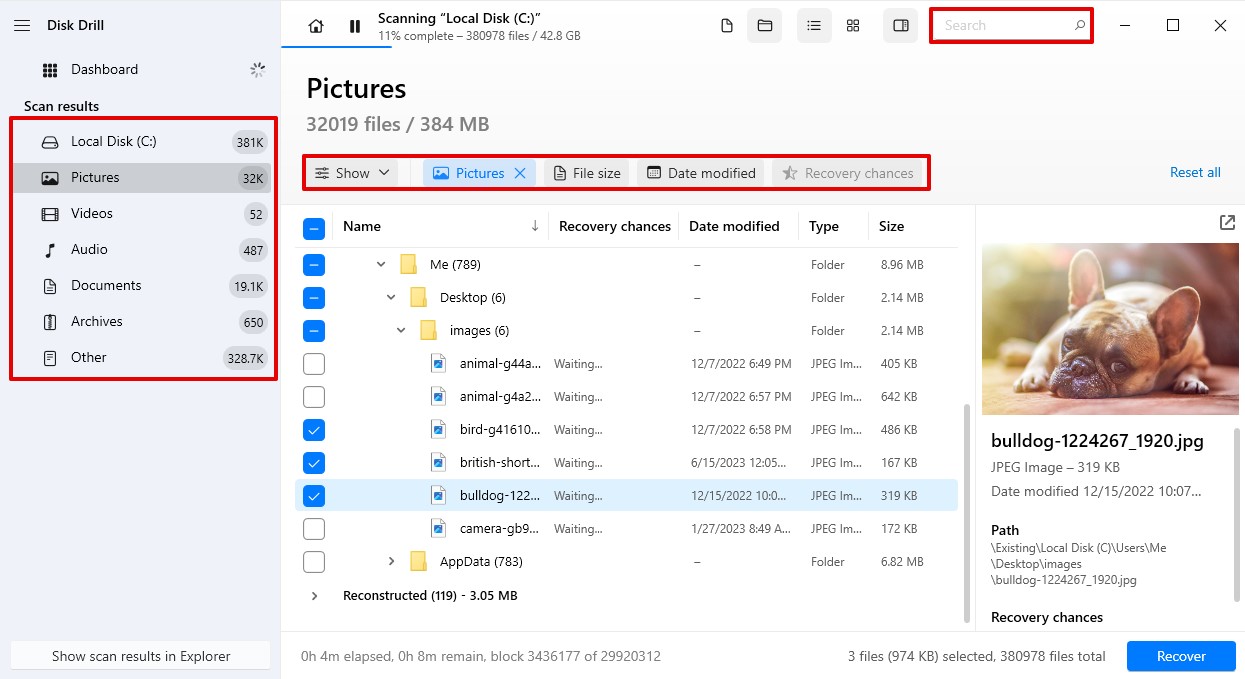
Step 4. Disk Drill allows you to filter results by file type, size, date, or even name using a search window. In this case simply filtering all pictures should be enough.
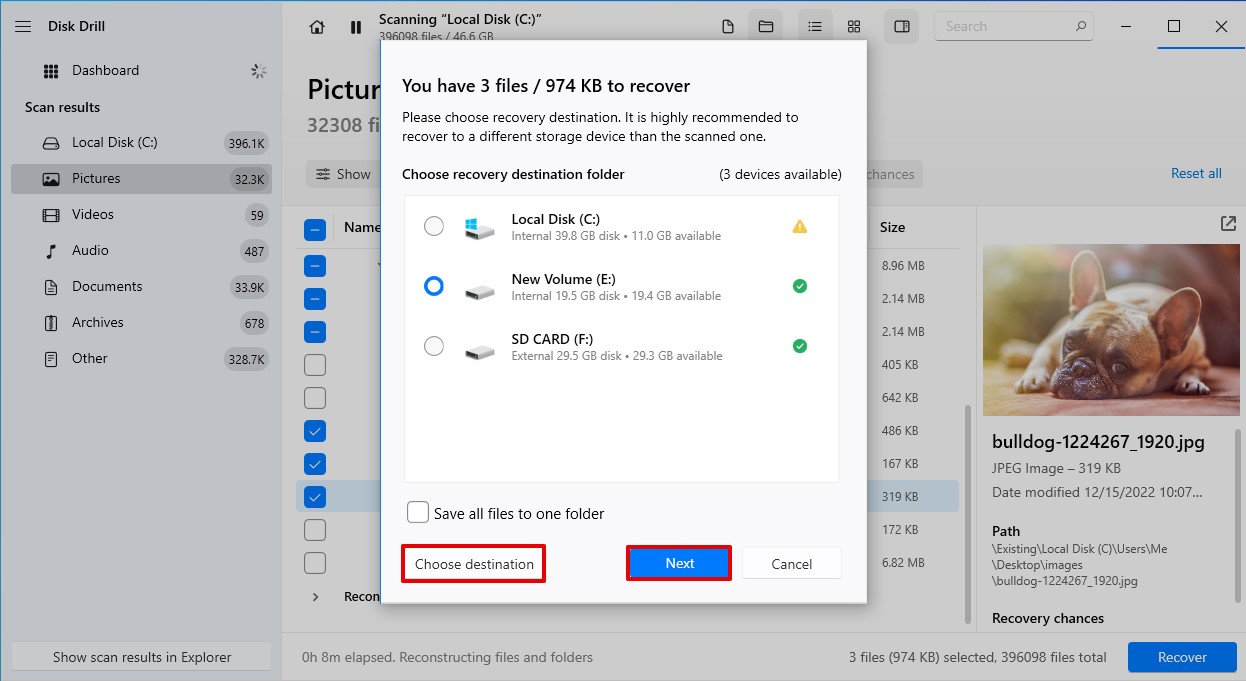
Step 5. Choose which photos you want to keep, and select “Recover”. In the Popup window select recovery location and press Next. Try to choose different location to avoid overwriting photos you’re trying to recover
Method 6: Recover Deleted Photos with Data Recovery Services
If you are unable to recover photos using any of the methods above, you should seek help from a professional near you. However, bear in mind that this approach will be costly as no provider will recover your data for free.
A notable data recovery service available is the CleverFiles Data Recovery Center which offers some of the best data recovery options of any kind. Some of the perks you will enjoy include:
- Free evaluation.
- Priority service.
- No data, no charge.
- 98% success rate.
- Original drive warranty.
Conclusion
Losing photos can be stressful, but there are several ways to get them back. The best course of action depends on how you lost your photos and how comfortable you are with technology. You might be able to recover them yourself using free or built-in tools. For more complex situations, professional data recovery services might be necessary.
Remember though – the most important thing is to act quickly! The sooner you start trying to recover your photos, the better the chances of success. So don’t hesitate and proceed to recover your photos as soon as possible.


