
Reading Time: 9 minutesAvast is one of the most popular antivirus programs out there. It protects your computer or laptop from viruses that can slip in through certain files. Like most antivirus tools, it either quarantines or permanently deletes anything it sees as suspicious or dangerous. Most of the time, it catches real threats, but every now and then, it flags something safe by mistake. Maybe it deleted a document you needed for studies or a program you actually use. Either way, you’ll want to get that file back. So, in this article, we’ll walk you through how to recover files deleted by Avast antivirus.
Does Avast Automatically Delete Infected Files?
By default, the manual scan of Avast antivirus deals with infected files in the following order: it first detects and attempts to fix the infected file, upon failure to do that, the file is moved to a quarantine folder and is subsequently permanently deleted.
In real-time virus detection operates in the same manner, Avast repairs the file, and upon failure to fix it, it’s moved to quarantine.

Upon detecting potentially unwanted files or folders, Avast notifies the user and confirms the recommended action to take.

Talking about manual scans, in our copy of Avast antivirus, the Perform automatic actions during the scan option was unchecked. It was the case for all scan types.

How to Recover Files Deleted by Avast Antivirus
Avast deals with suspicious files in two main ways – it either moves them to quarantine or deletes them completely. In this section, we’ll walk you through both scenarios. You’ll learn what to do if your file got sent to quarantine and what steps to take if Avast wiped it from your system entirely.
Before you move forward, take a moment to double-check the situation. Are you sure Avast removed the file by mistake? Make sure it’s not actually a virus or something that could put your system at risk. Restoring a harmful file can mess up your computer or even lead to bigger data loss.
Option 1: Recover Files from the Avast Quarantine Zone
If you haven’t spent much time digging into Avast’s settings, here’s one key feature you should know about: the quarantine zone. This is where Avast stores any files it flags as infected. In older versions, it was called the Avast Chest. Once a file gets moved there, it disappears from its original folder, but you can still access it through Avast and restore it if needed.
This recovery process takes just a few simple steps, much like restoring a file from the Recycle Bin. That said, we want to remind you – only restore the file if you’re confident it’s free of viruses or other threats.
- Open Avast antivirus.
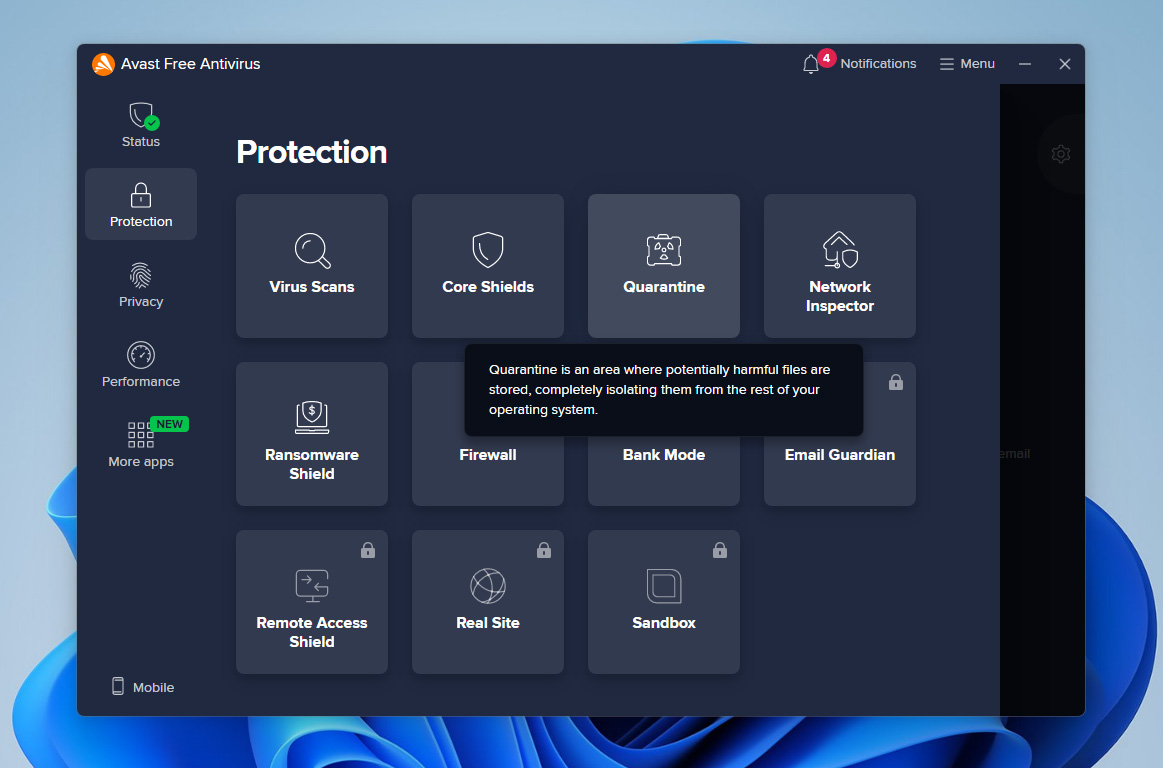
- Click on the Protection tab in the left navigation bar.
- Now, click the Quarantine option.
- Select the files you want to restore from Avast Chest.
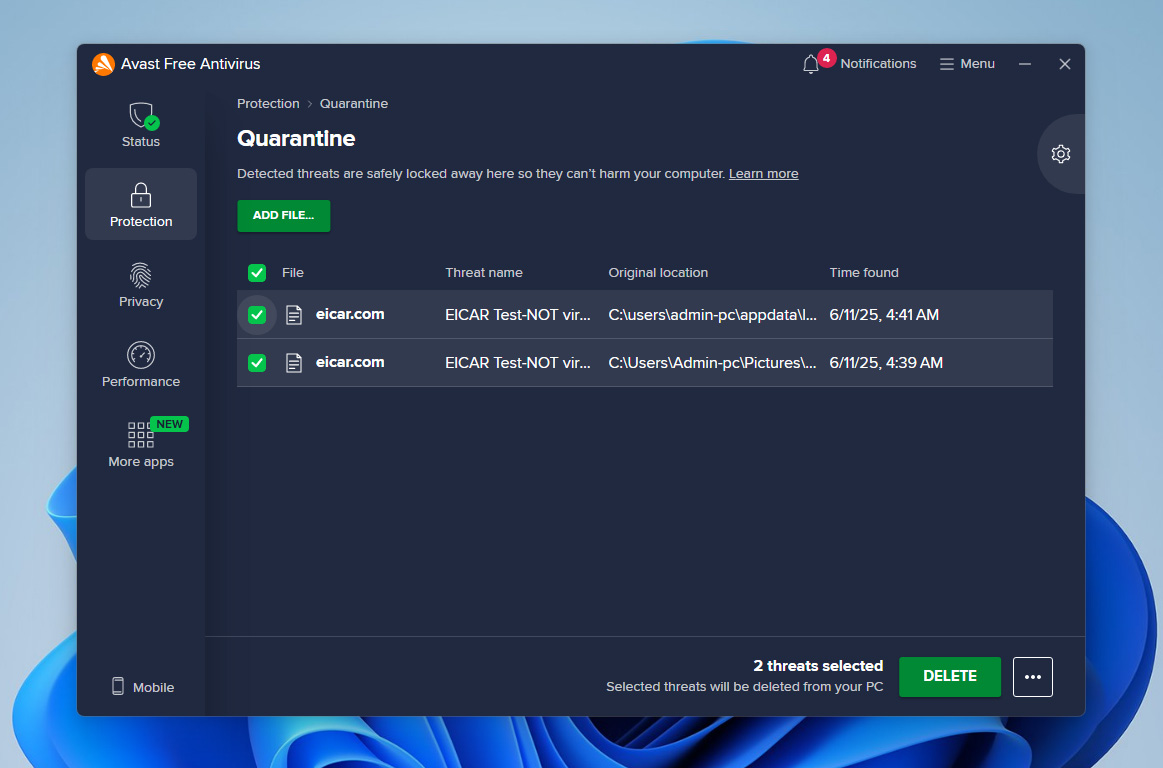
- Click on the three dots, next to Delete all, and then click on Restore.
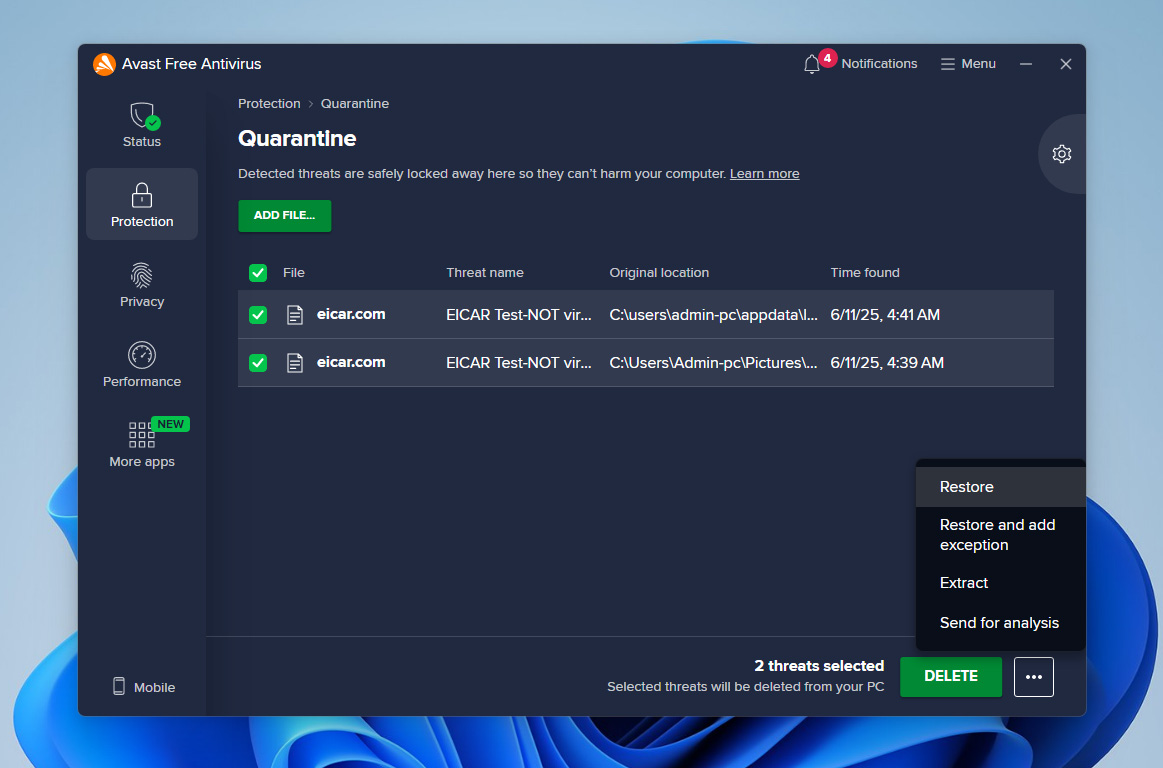
- Avast will restore the file.


Once you finish these steps, Avast will put the file back where it was originally. But keep in mind – on the next scan, Avast might flag it again and send it back to quarantine. To stop that from happening, don’t just use the basic Restore option. Instead, choose Restore and add exception. This tells Avast to trust the file and skip it in future scans.
Option 2: Restore Files Not in Avast Quarantine Using Third-Party Tools
If you can’t find the files you need in Avast’s quarantine, it probably means Avast deleted them from your system completely. These files won’t show up in the Recycle Bin either. To get them back, you’ll need a dedicated recovery tool that can scan your file system, find leftover file fragments, and restore them. Keep in mind, this only works if the deleted data hasn’t been overwritten. If you’ve saved new files or installed software since the deletion, recovery might not be possible.
There are tons of data recovery programs out there, but not all of them actually work well. To keep things simple, we recommend Disk Drill. It’s one of the most reliable tools in the data recovery space, with a high success rate. It can recover just about any file type – photos, videos, documents, apps, and more, basically anything Avast might’ve deleted. Windows users also get a free trial that lets you recover up to 500MB of data, which is usually enough if you just need to bring back a few files instead of your whole system.
If a file doesn’t show up in quarantine, it usually comes down to two things. One, the file might have contained high-risk malware that Avast couldn’t safely repair, so it just deleted it right away. Two, the quarantine might’ve hit its file limit. Recovery is only a good idea in that second case. If Avast skipped quarantine and deleted the file instantly, there was probably a solid reason. You really shouldn’t try to bring it back unless you’re absolutely sure it’s safe.
Before we demonstrate the data recovery process in Disk Drill, it’s recommended you add the folder that contained the file to Avast antivirus’ exception list. Otherwise, Avast’s real-time protection will simply quarantine or delete the file, as soon as you recover it to the destination.
Step 1: Add an exception to Avast antivirus
- Open Avast antivirus.
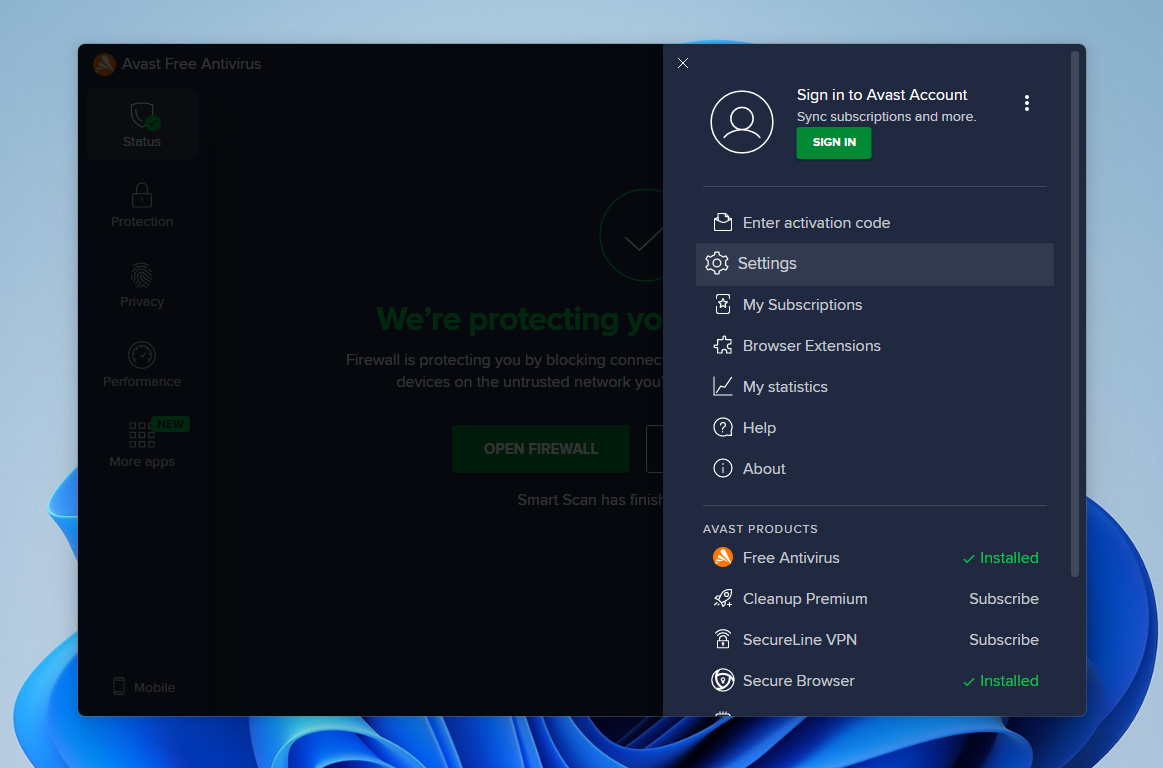
- Click on Menu at the top of the screen and then click on Settings.
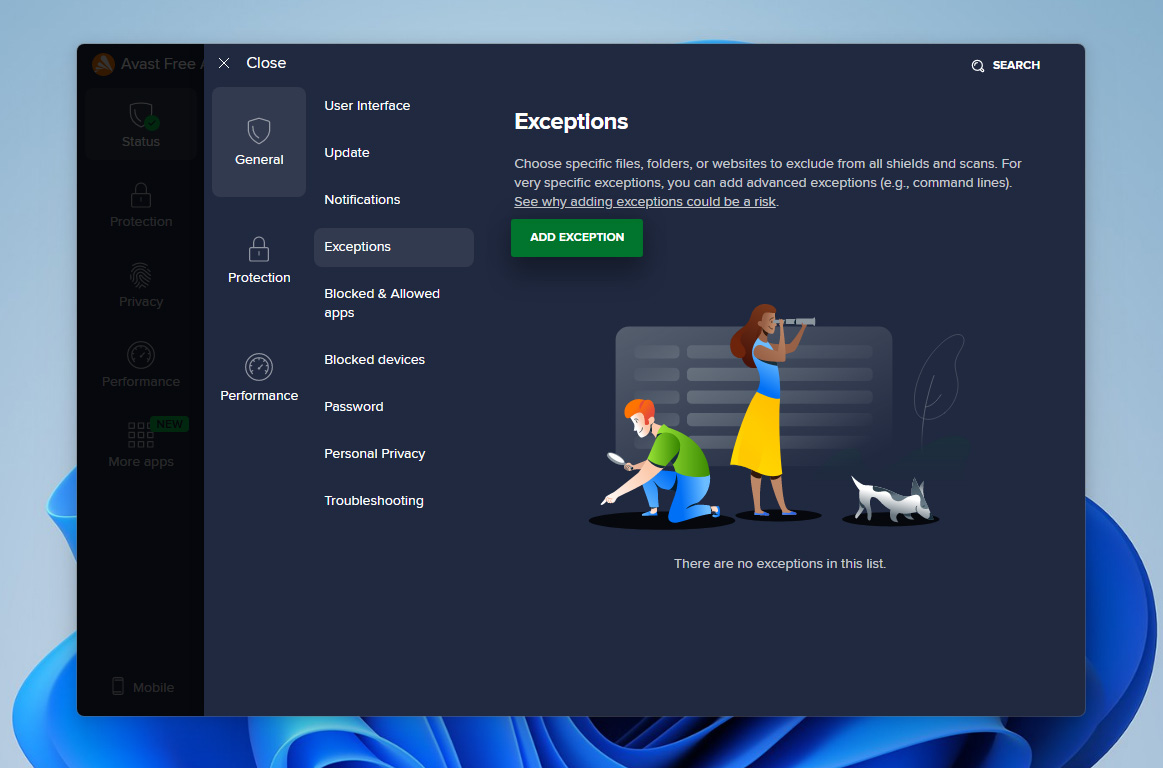
- Now, select the General tab, then click on Exceptions.
- Click on the green Add Exception button.
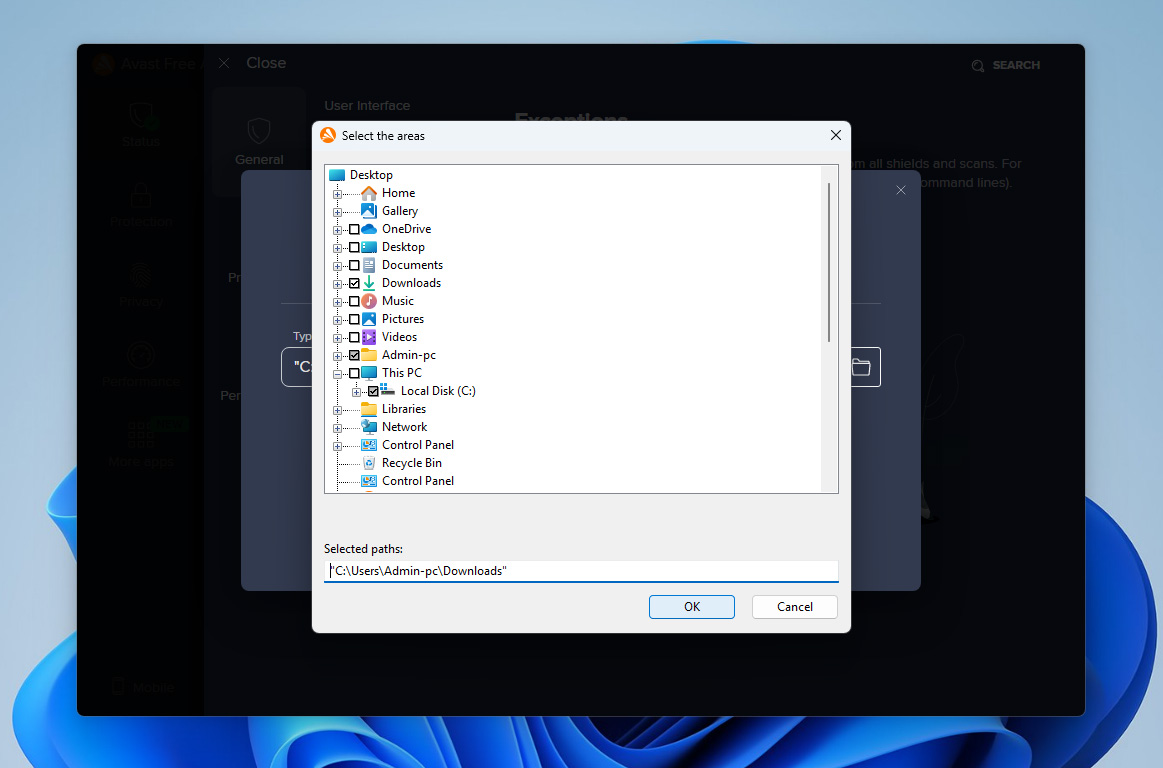
- Click on Browse. Navigate to the folder you want to add as an exception and check the small checkbox next to it. Click on OK.
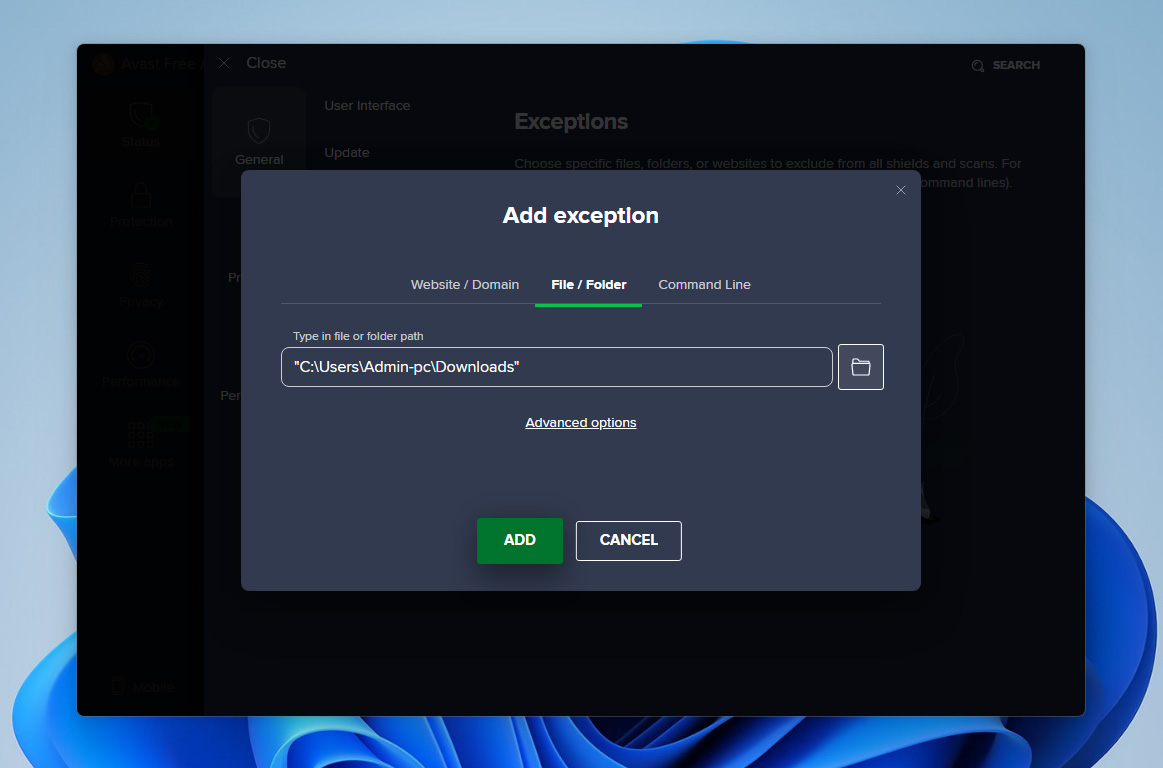
- Click on Add, and the folder will be added to Avast’s exception list.


Step 2: Recover files deleted by Avast using Disk Drill
- Download Disk Drill from the official website and run the setup wizard. Don’t install it on the same drive where Avast deleted the files – doing so will overwrite whatever’s left and make recovery impossible.
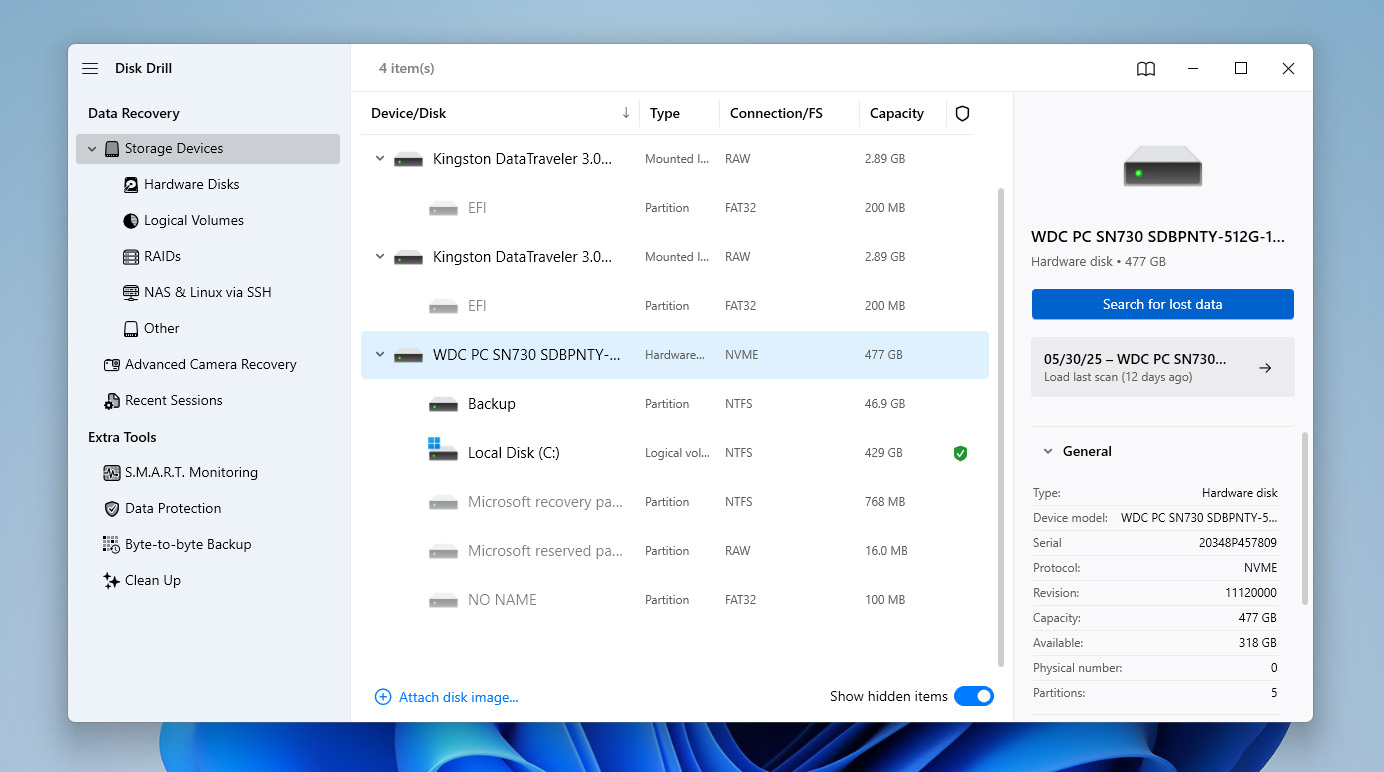
- Launch Disk Drill after installation. Select the drive that contained the file Avast has removed. Click Search for lost data to start a scan of the drive.
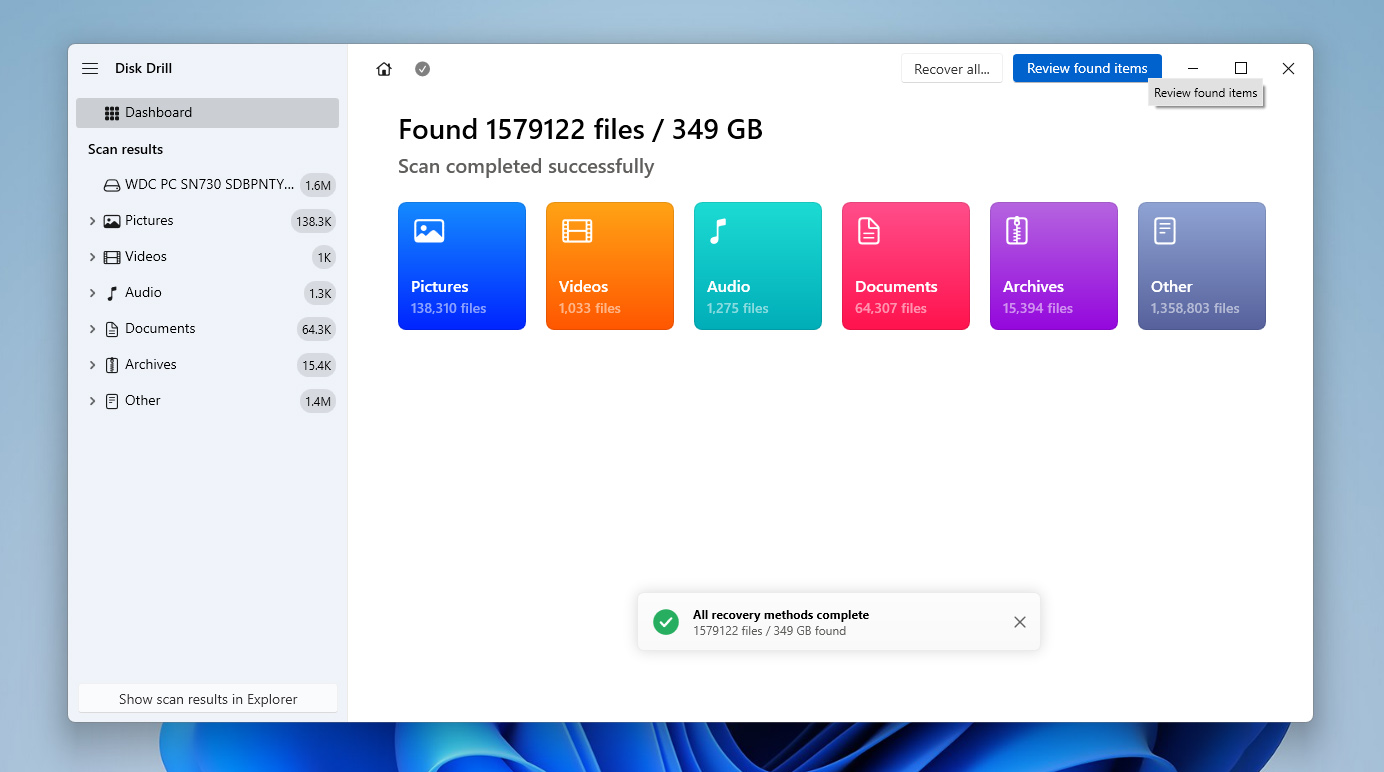
- Disk Drill will begin to show recoverable files almost immediately. However, we recommend waiting for the scan to finish. When the scan completes, click Review found items.
- If you need a specific file type, such as a video, document, or image, use the filters on the left to narrow the list.

- If the filenames appear unclear or generic, click the eye icon or double-click any item to preview its contents. Disk Drill also shows the recovery chance next to each file, so pay attention to those indicators.
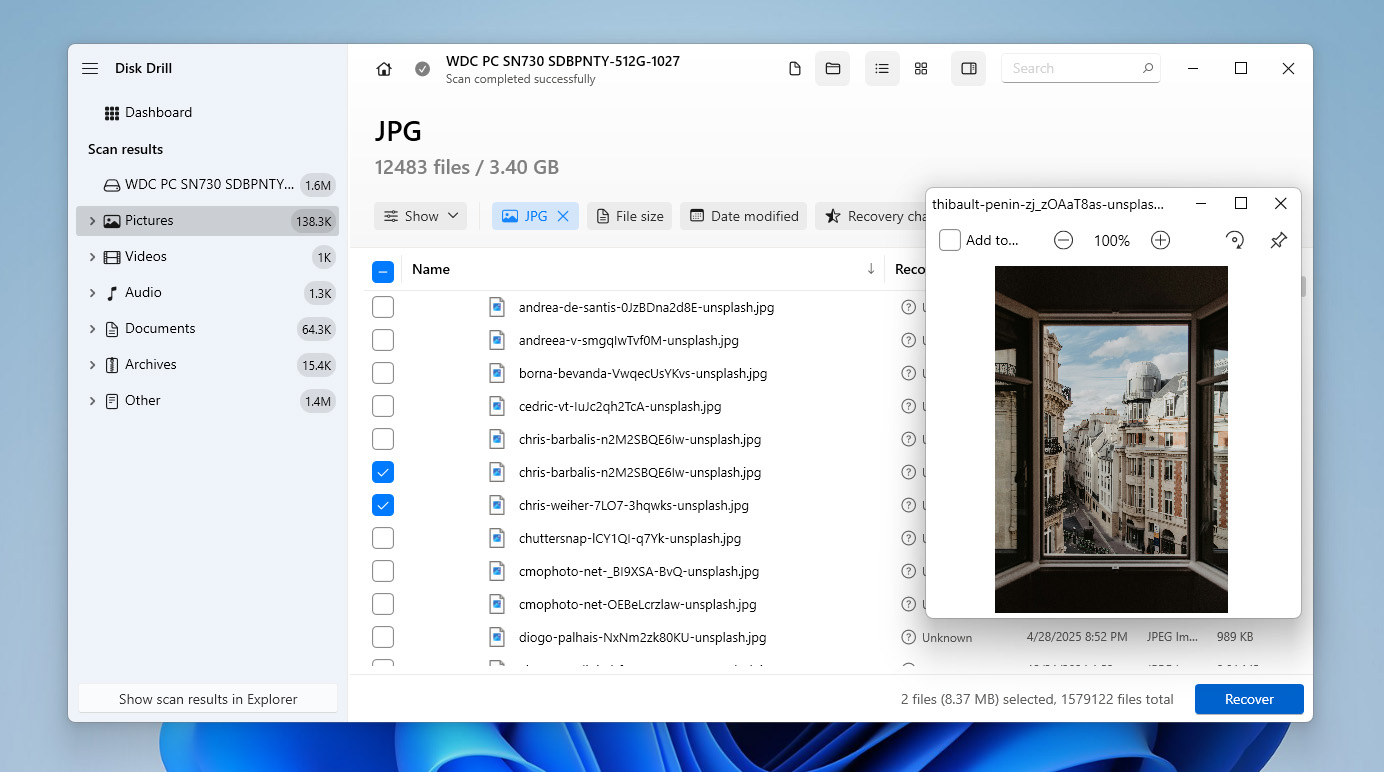
- Once you locate the files you want to recover, check the boxes next to them. Click the Recover button.
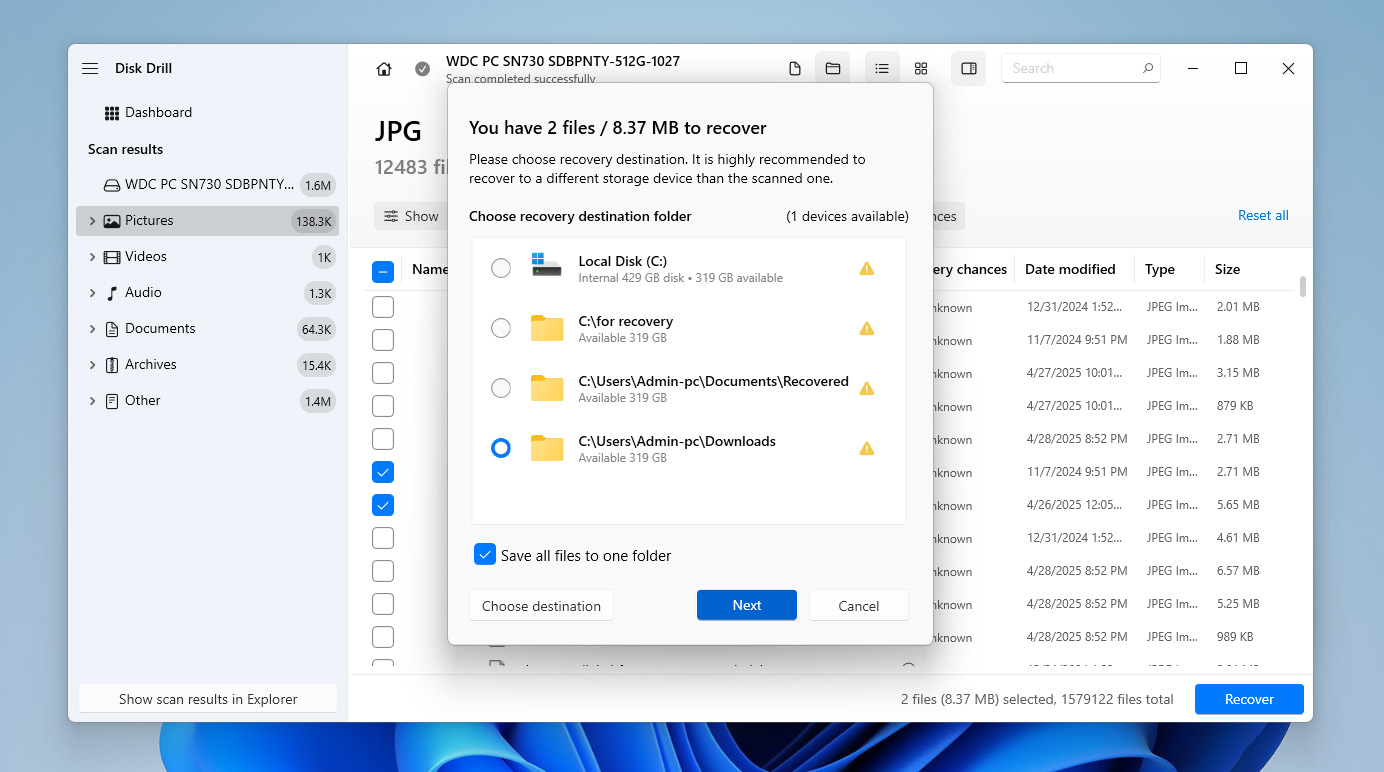
- When Disk Drill asks for a recovery destination, select a folder that you already added to Avast’s exception list (as described earlier in this section). Click Next to begin the recovery process.
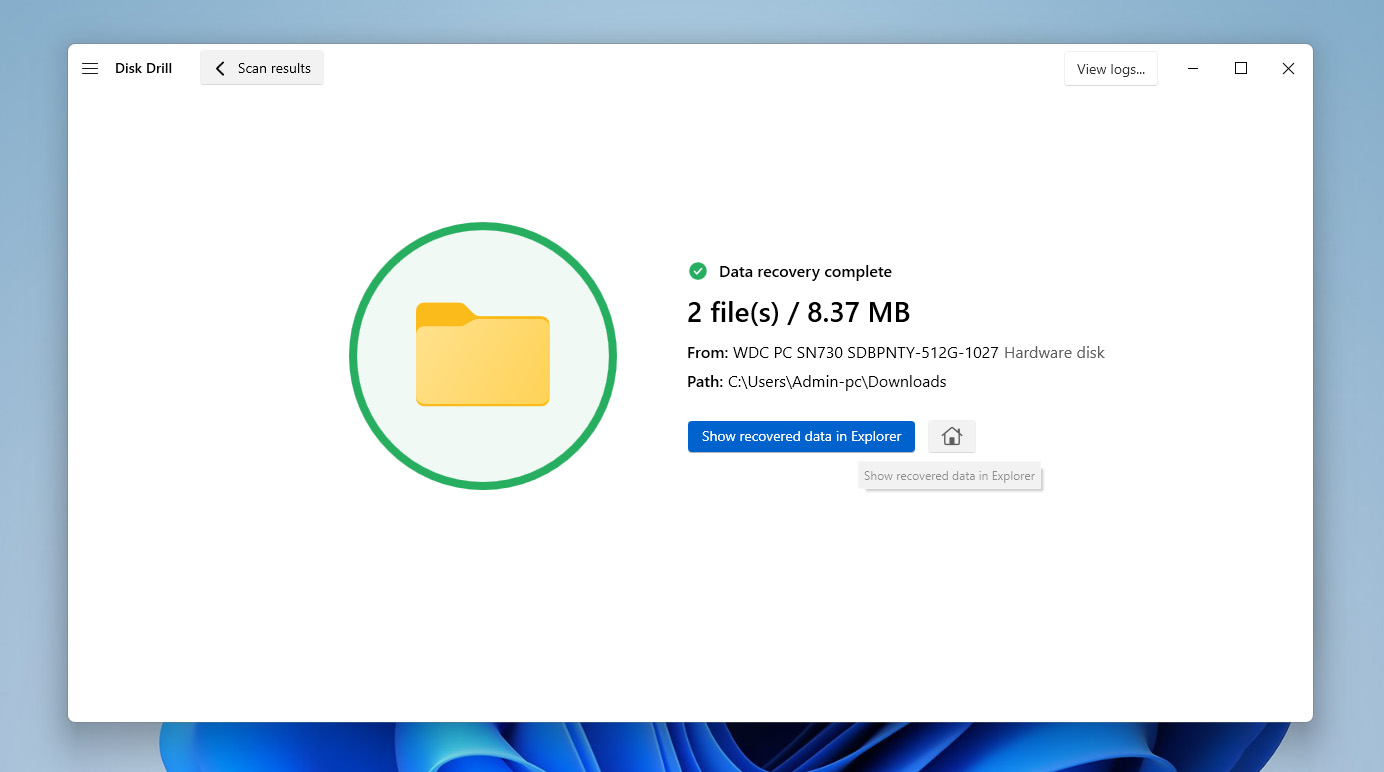
- After Disk Drill restores the files, you will see a confirmation window. Click Show recovered data in Explorer to open the folder immediately, or close the program and browse to the folder manually. That’s it. Your files should now be back and safe from future Avast scans.


If you exceed the 500MB free recovery limit, you’ll need to upgrade to the Pro version of Disk Drill to unlock full recovery.
Option 3: Recover Deleted Files by Avast Antivirus Using the Built-In Windows Backup Tool
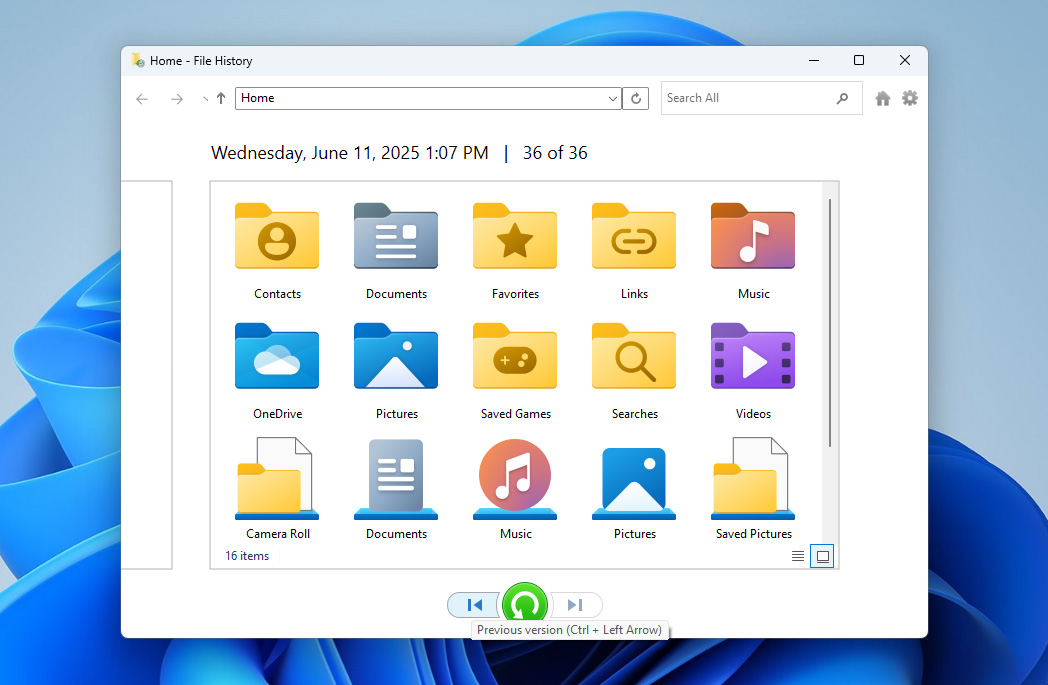
As an alternative to third-party recovery software, you can try using the built-in Windows feature called File History. This tool allows you to recover deleted files, even those removed by Avast antivirus, but only if you enabled it before the file disappeared. Since this method depends on prior setup and availability, we placed it last. Still, it works and provides a simple and reliable solution.
Keep in mind, File History only backs up files from certain folders, like Desktop, Documents, Downloads, Music, Pictures, and Videos. If Avast deleted a file that was outside of those, like in a custom folder, on the system root, File History won’t have a backup. In that case, you won’t be able to recover the file using this method – you’ll need a third-party recovery tool like Disk Drill, as we mentioned earlier.
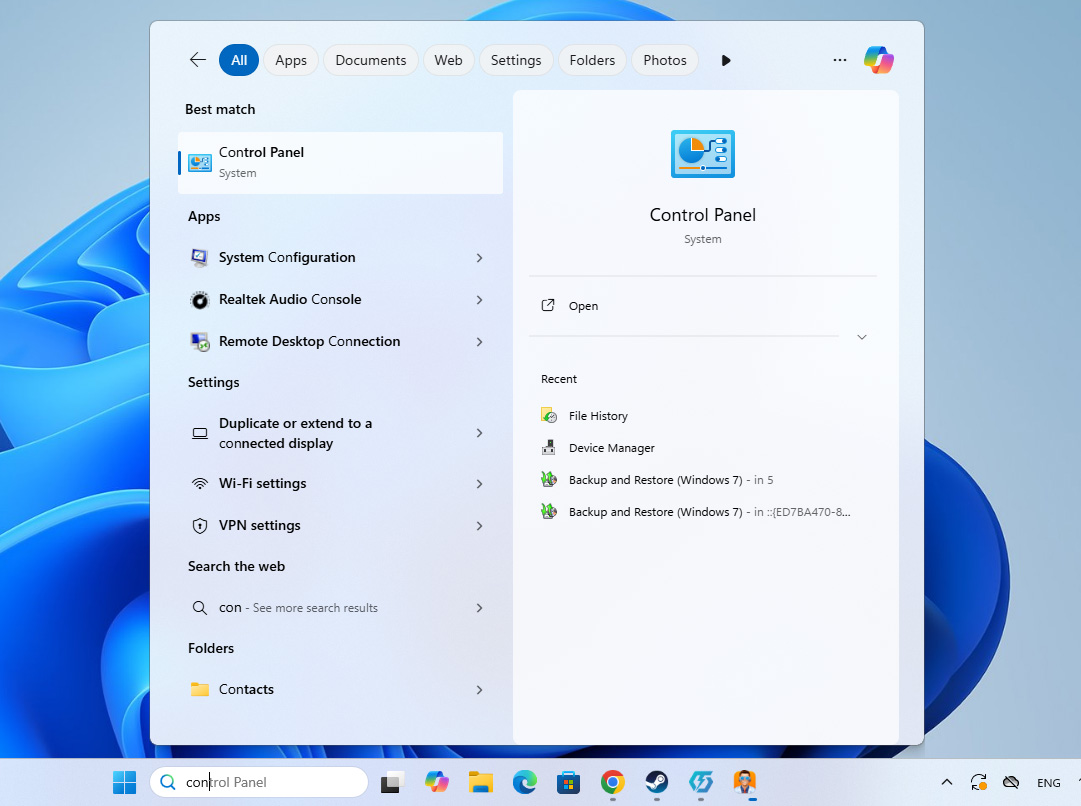
- Open the Control Panel on your Windows PC.
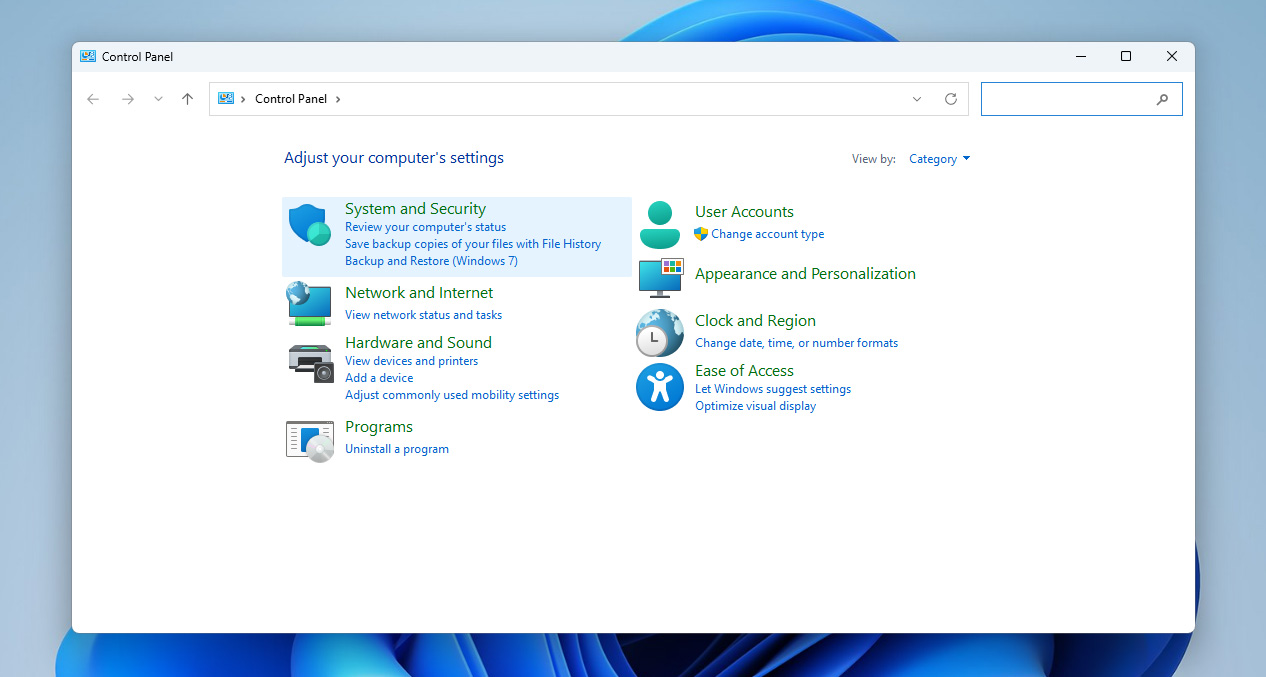
- In the Control Panel, click on System and Security.
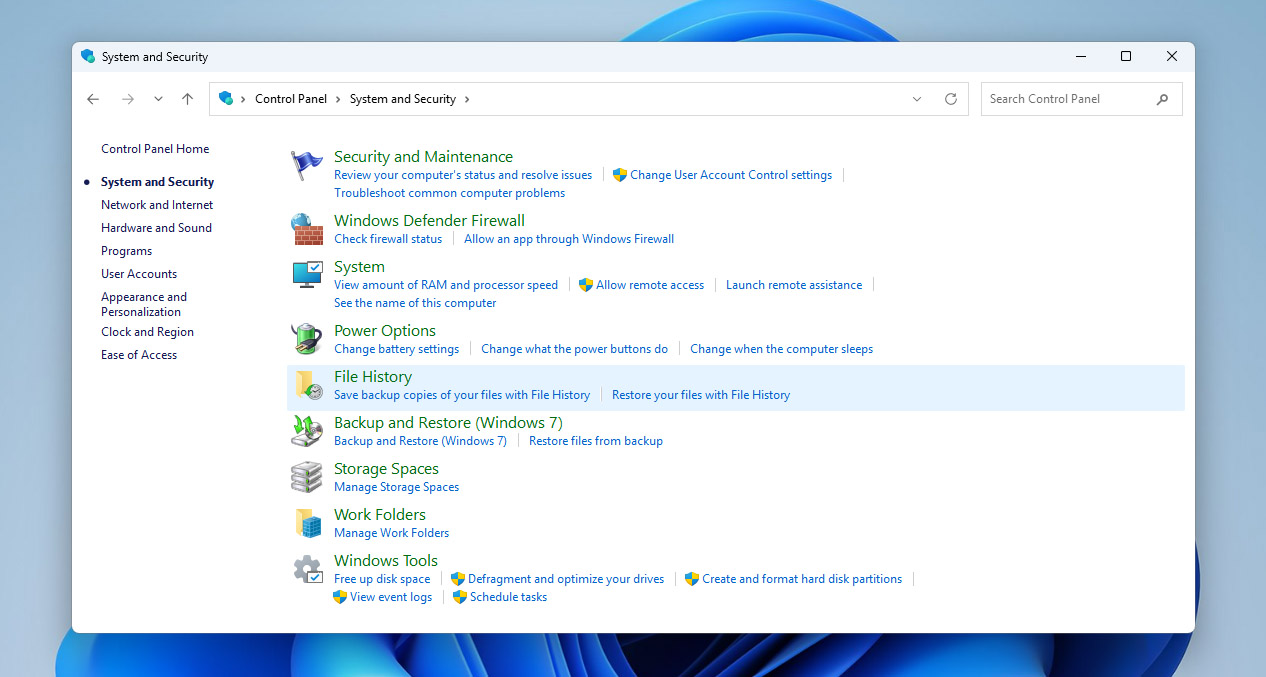
- Select File History from the list of options.
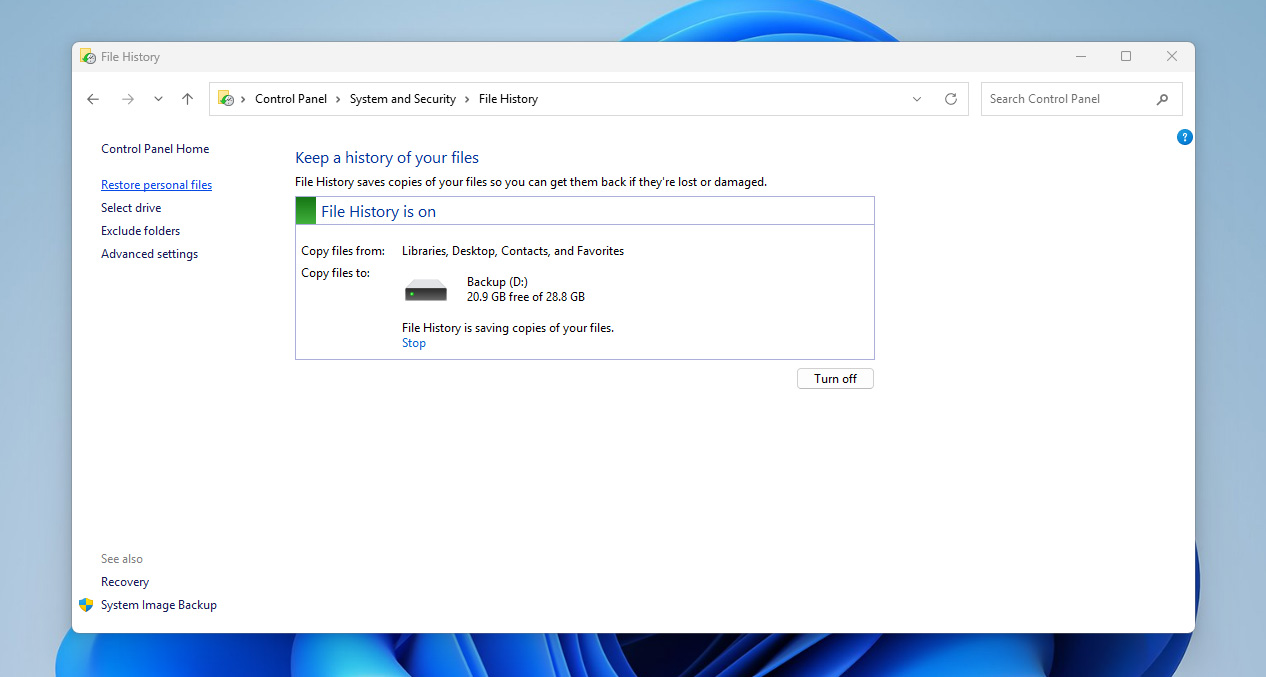
- Click Restore personal files on the left side of the window.
- Navigate through the folders to locate the file or folder that Avast deleted. Use the arrow buttons at the bottom to browse through different backup versions.
- Once you find the correct version of the file, select it and click the Restore button. Windows will return the file to its original location.


In addition to File History, Windows provides other built-in recovery tools such as Backup and Restore and Previous Versions. These features also help you recover deleted files in some cases. To learn how to use them correctly, refer to our separate guide. It explains each method in detail and outlines the exact steps required for recovery.
How to Stop Avast from Deleting Files
The best way to stop Avast from deleting your files, is to change the automatic action preferences. As mentioned earlier, Avast automatically moves suspicious and infected files to quarantine if it fails to repair them. You can modify this setting and have Avast display a notification that asks you what to do with the file.
Here’s how you can stop Avast from deleting files automatically:
- Open Avast antivirus.
- Click on the Menu option, then choose Settings.
- Choose the Protection option and subsequently click on Core Shields.
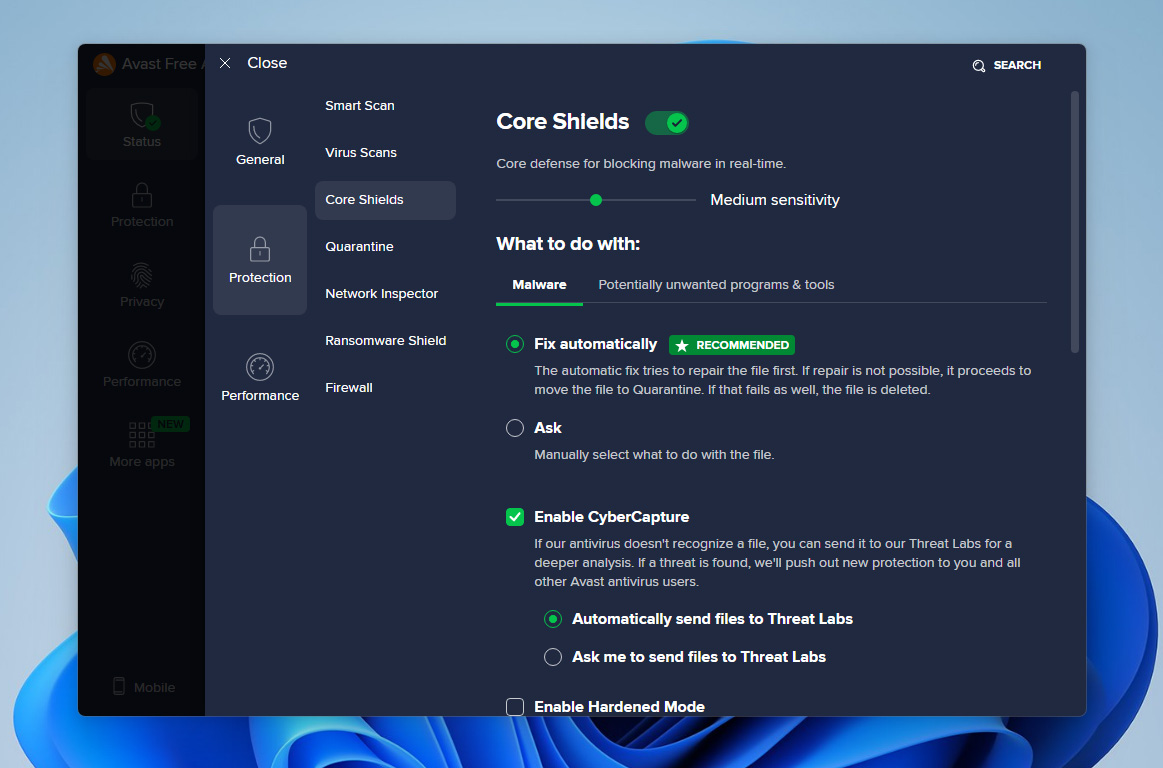
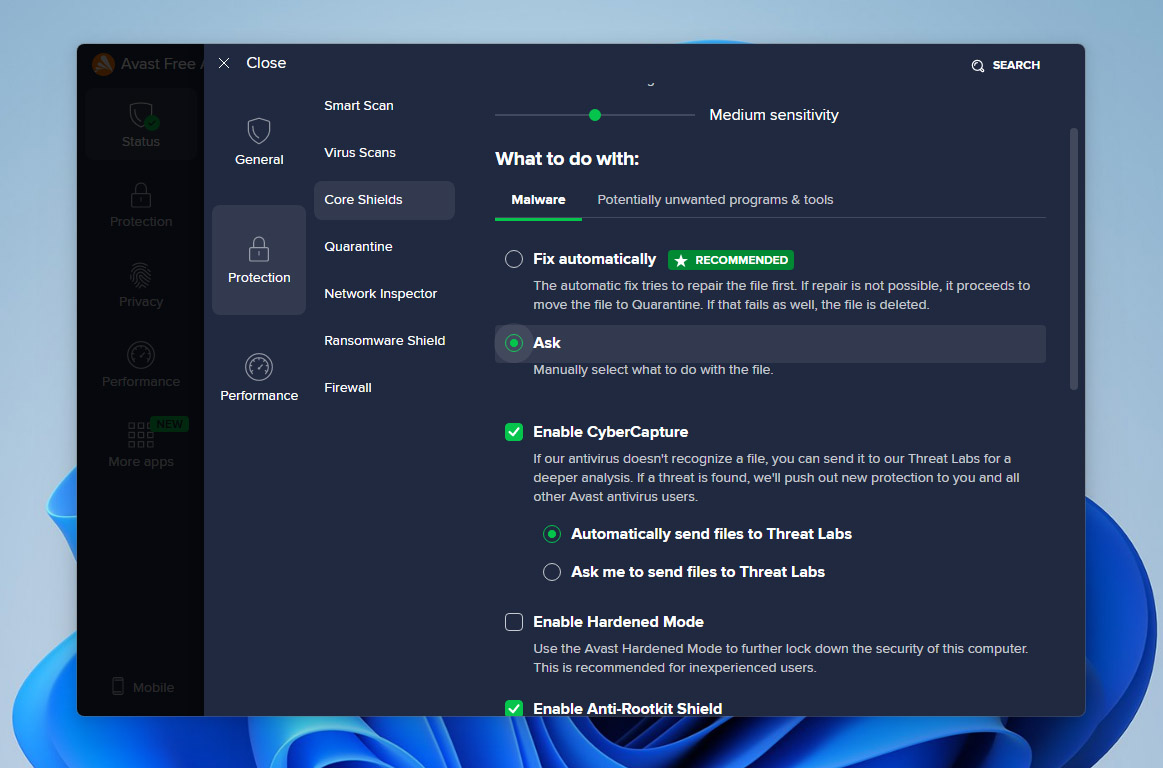
- Under Malware, select the Ask option.
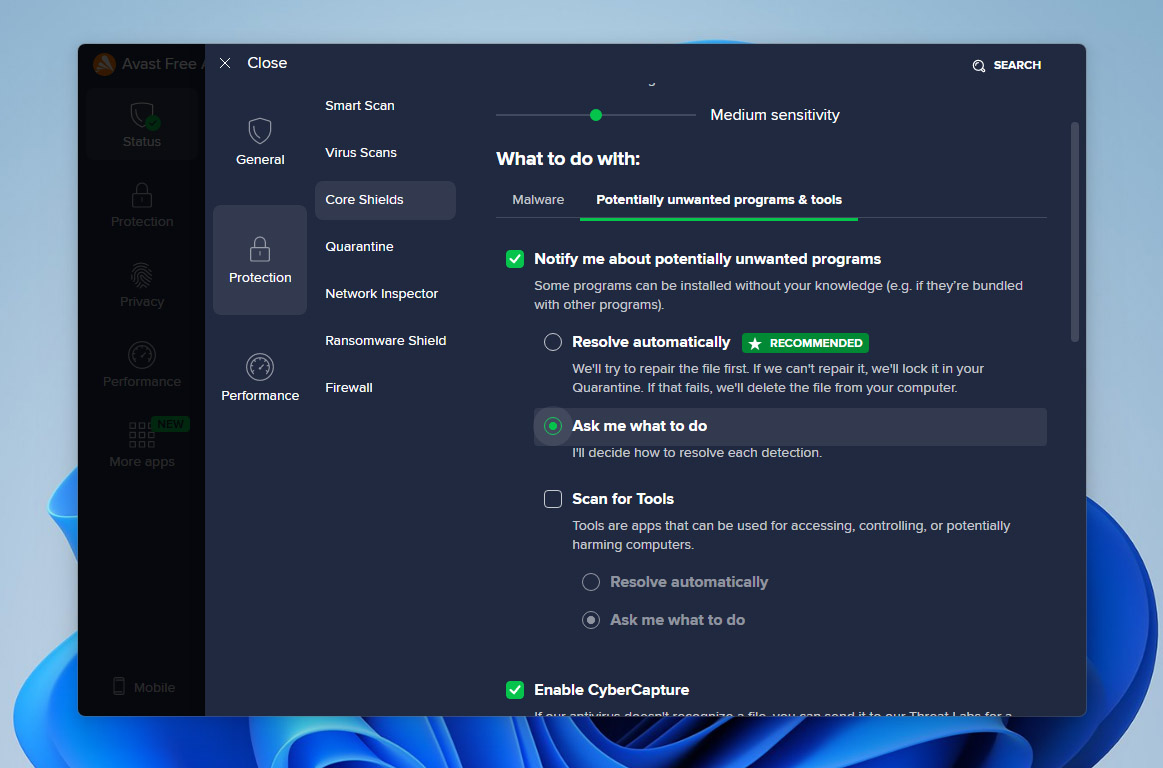
- Now, navigate to the Potentially unwanted tools and programs tab, and again, select the Ask me what to do option. Avast will now ask for a confirmation before it deletes any suspicious files.


If you want Avast to stop deleting files from certain folders, simply add them to the exception list, using the steps provided in the previous section.
FAQ
- Open Avast Antivirus on your computer.
- Click on Protection in the left-hand sidebar.
- Select Quarantine from the list.
- Check where the file came from and make sure it’s a trusted source.
- Scan it with a different antivirus program. Upload it toVirusTotal to get a second opinion from multiple antivirus engines.