
Reading Time: 10 minutesWhen an external drive suddenly becomes inaccessible, everything on it is at risk, and the drive itself is basically useless. You might still see it in File Explorer or Disk Management, but any attempt to open it throws up errors like “Access denied” or “You need to format this drive before you can use it”.
Regardless of the reasons for this issue, this guide provides safe, step-by-step solutions to fix it. Whether you need to repair the drive, recover your data (a highly recommended step), or do both, this article covers all possible options.
First, we’ll walk through recovering data from an inaccessible drive. We’re starting here because some troubleshooting methods might lead to data loss. It’s much easier (and safer) to secure your files upfront than to search for recovery options later. But if the data on your drive isn’t important, feel free to skip ahead to the next section.
How to Get Data From a Drive That Is Not Accessible
Since you can’t just copy files from an external drive that is not accessible, you’ll need specialized software to access and scan it. Before jumping into recovery tools, first confirm the drive shows up correctly in Disk Management:
- Press Windows + X to open the Power User menu.
- Click Disk Management from the list.
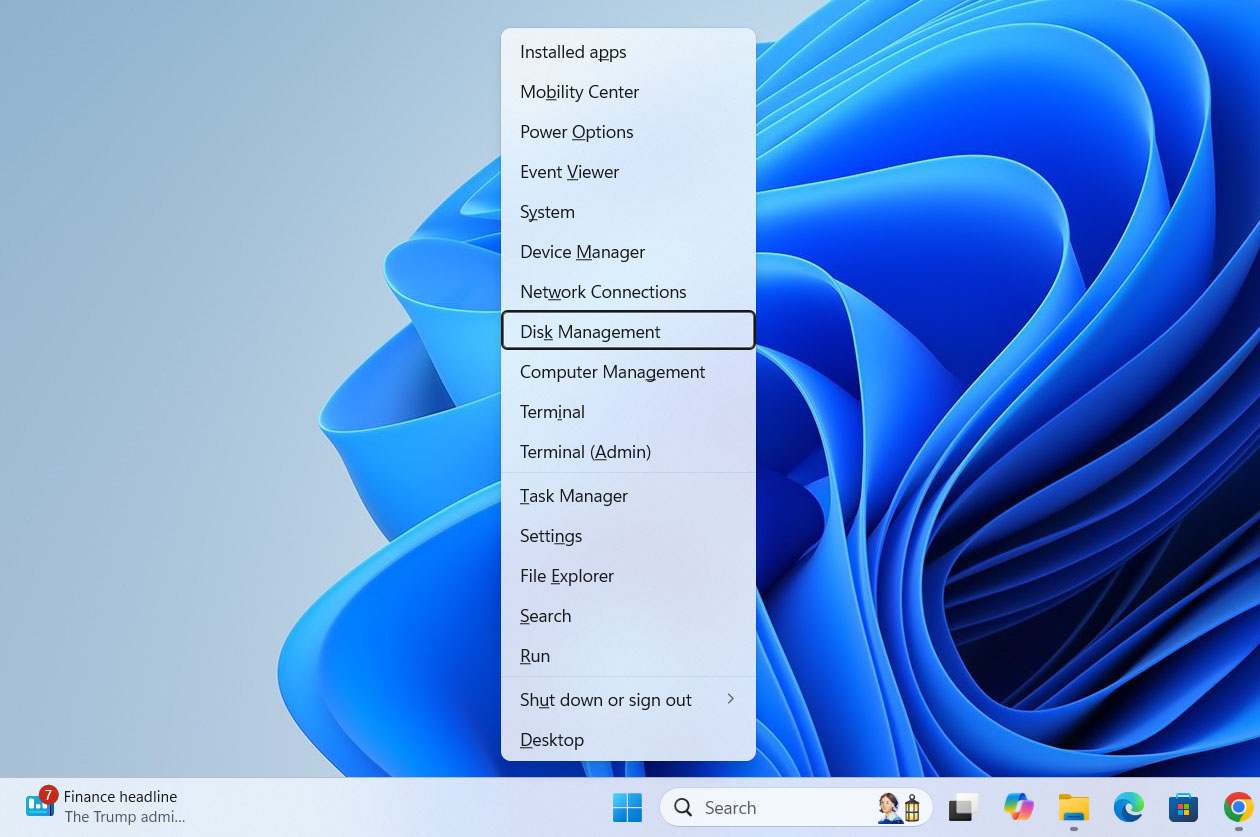
- Check if your external drive is listed and shows the correct storage capacity.

If you see your drive in Disk Management and it’s showing the right capacity, you can follow the recovery steps below. But if it’s missing entirely or reporting the wrong size, you’re likely dealing with a hardware failure, so pause any DIY attempts and contact a professional data recovery service.
There are plenty of data-recovery tools for Windows out there, so spend a little time comparing your options. It is important to choose one that works with problematic external drives. In this guide, we will use Disk Drill. It works well with drives that have access issues or are not recognized correctly by your PC. Additionally, it consistently receives great reviews, delivers solid results, and has a user-friendly interface. A standout feature is its ability to create a full, byte-by-byte clone of your external drive – ideal if the drive fails, as you can work from the copy instead of risking further damage to the original.
- Download Disk Drill and install it.
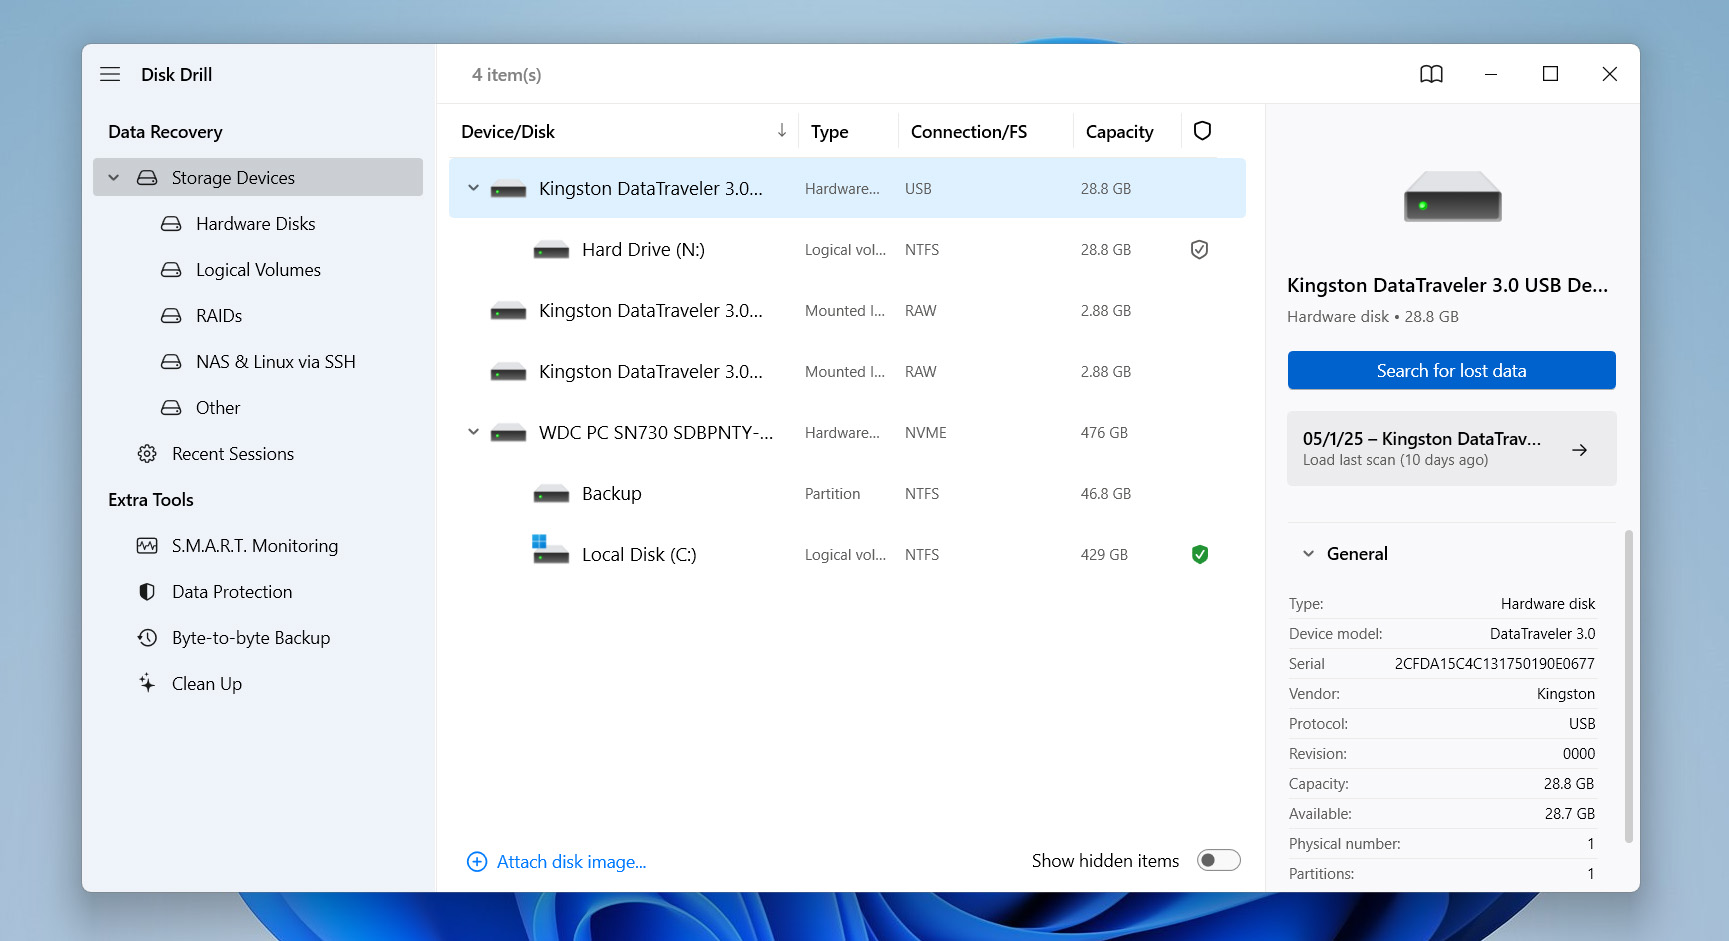
- Connect your external hard drive and launch Disk Drill. You’ll see all connected storage devices, including your external drive. Choose your drive from the list, then click Search for Lost Data.
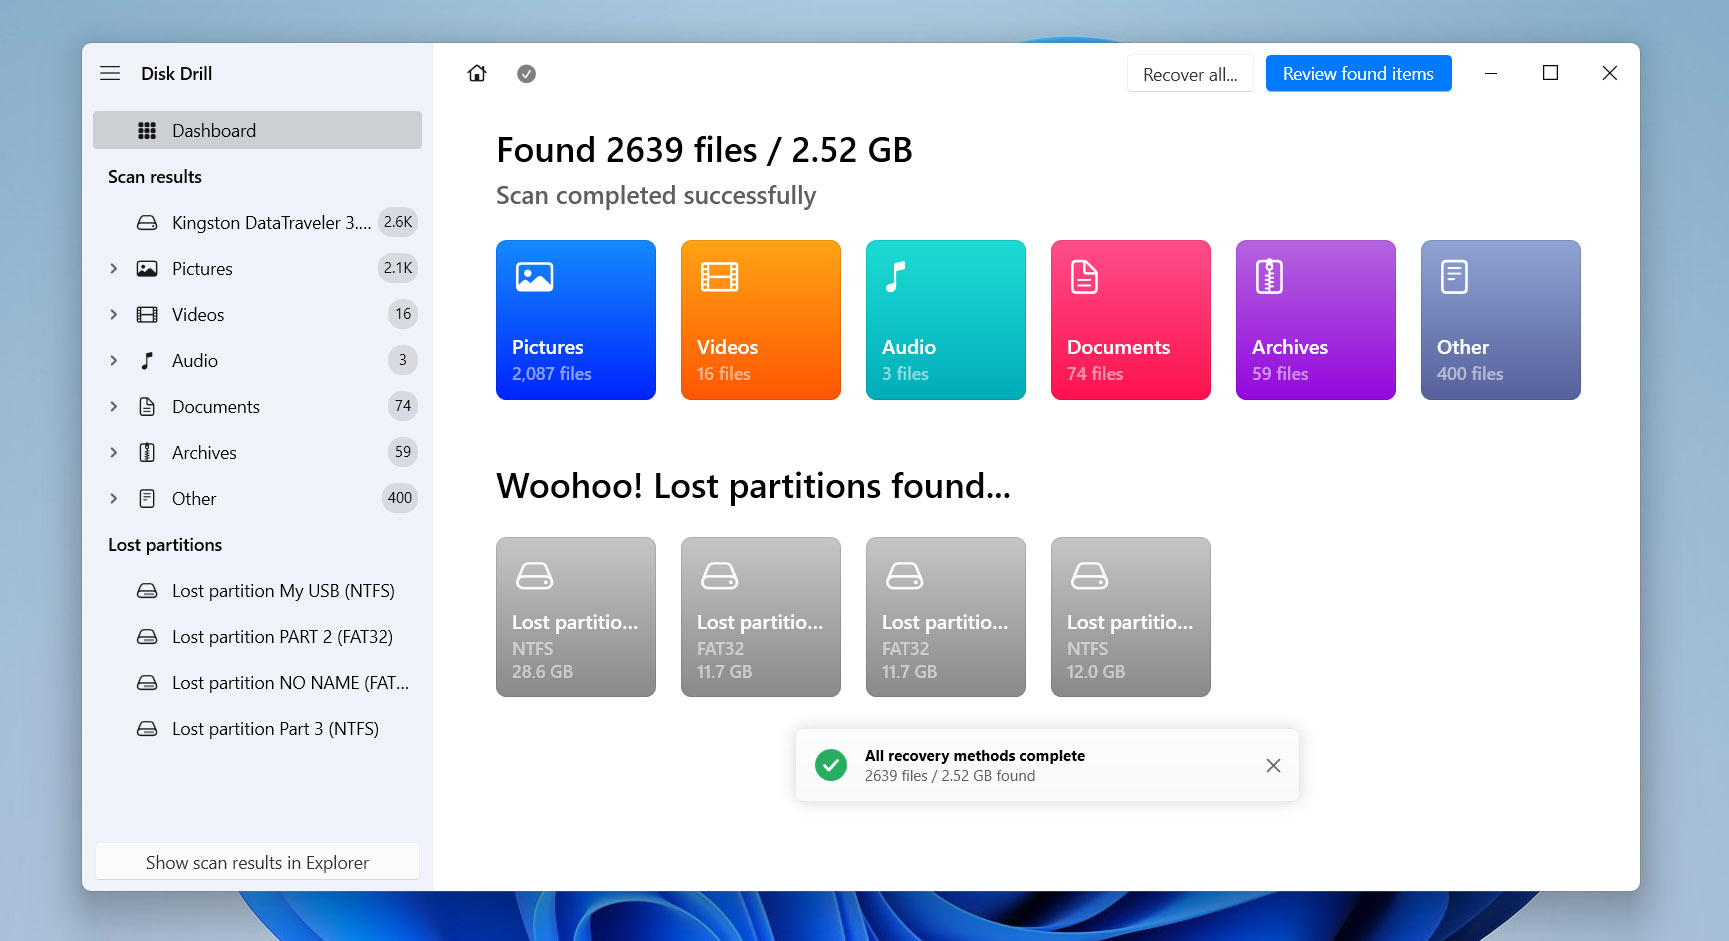
- Wait for the scan to finish. Once done, you can either click Recover All to recover everything or select Review Found Items to pick specific files.
- If you choose Review Found Items, you’ll see files grouped into categories: Deleted or Lost, Reconstructed, and Existing. If your files still exist on the drive, check the Existing category. To find previously deleted files, explore the Deleted or Lost category.
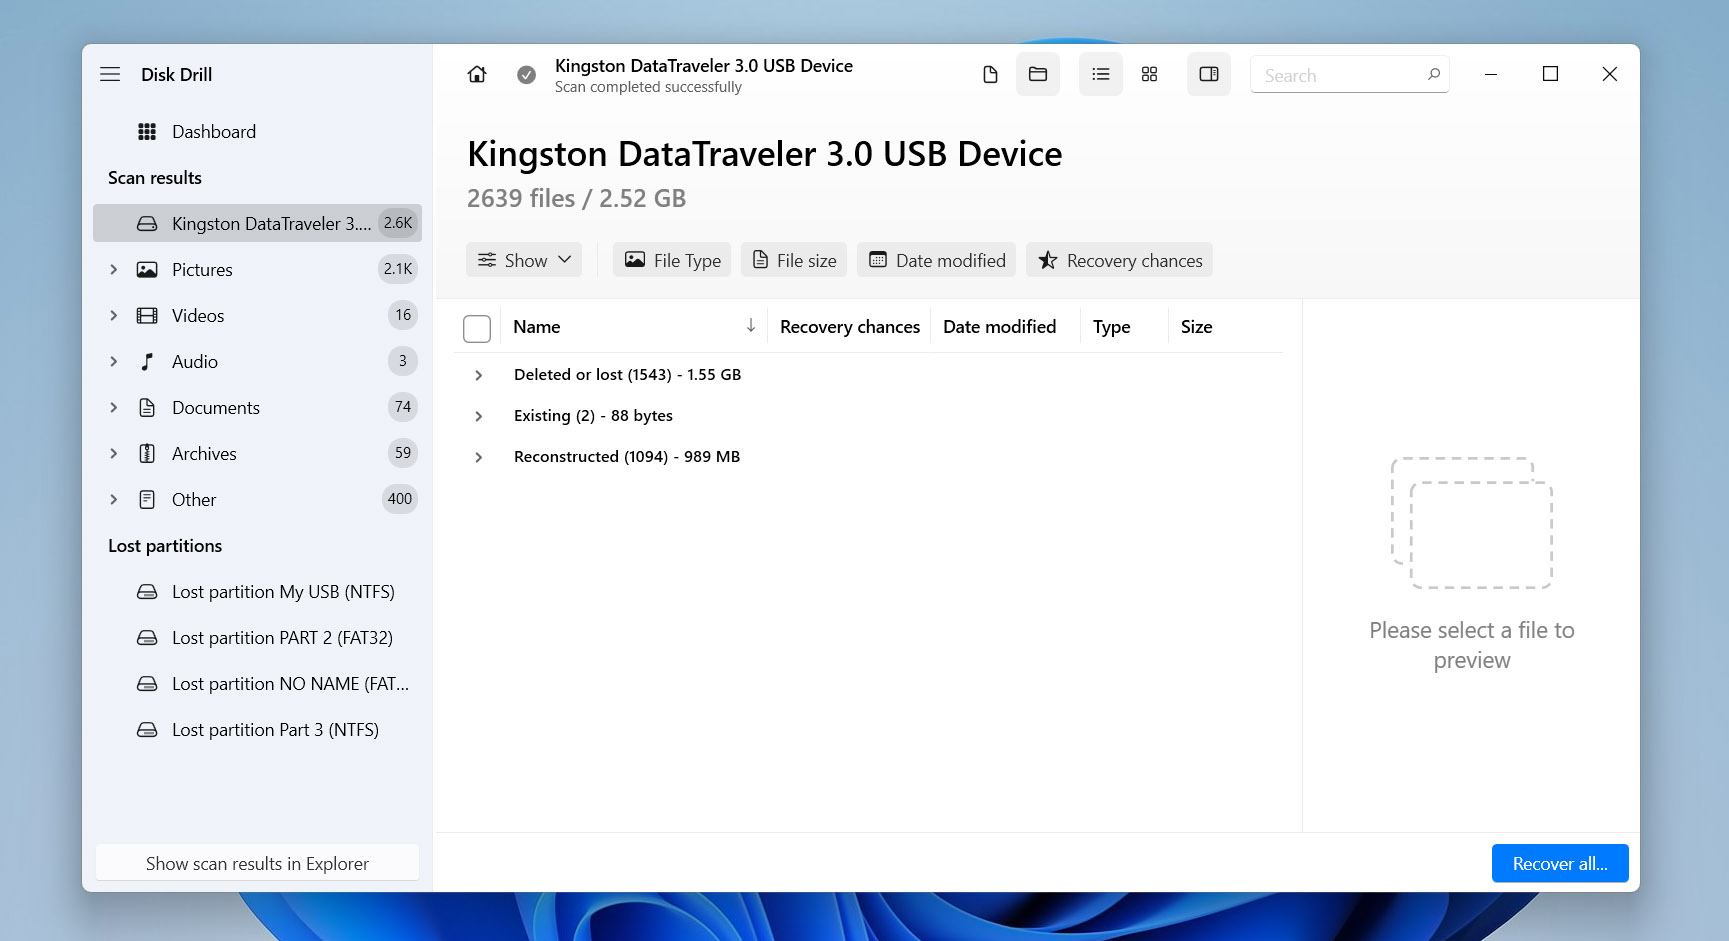
- Browse the list to find your files. If you’re unsure about a file, use the preview feature – just hover your cursor over the file and click the small eye icon, or simply click it.
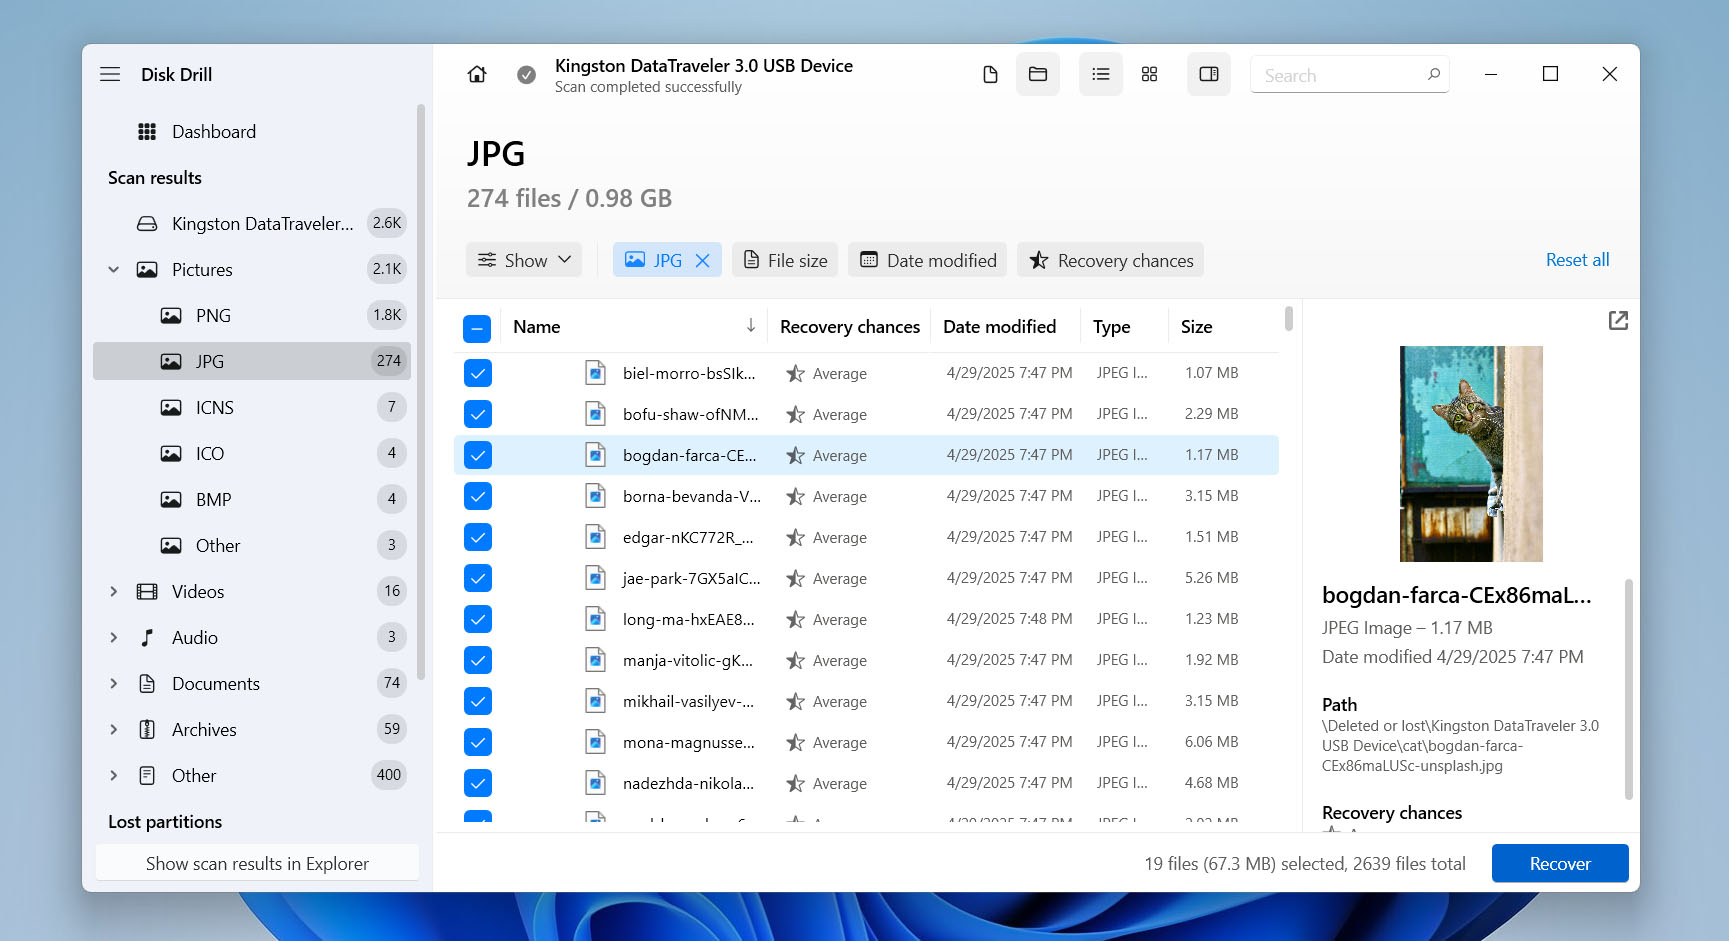
- Check the boxes next to the files you want to save, then hit Recover at the bottom.
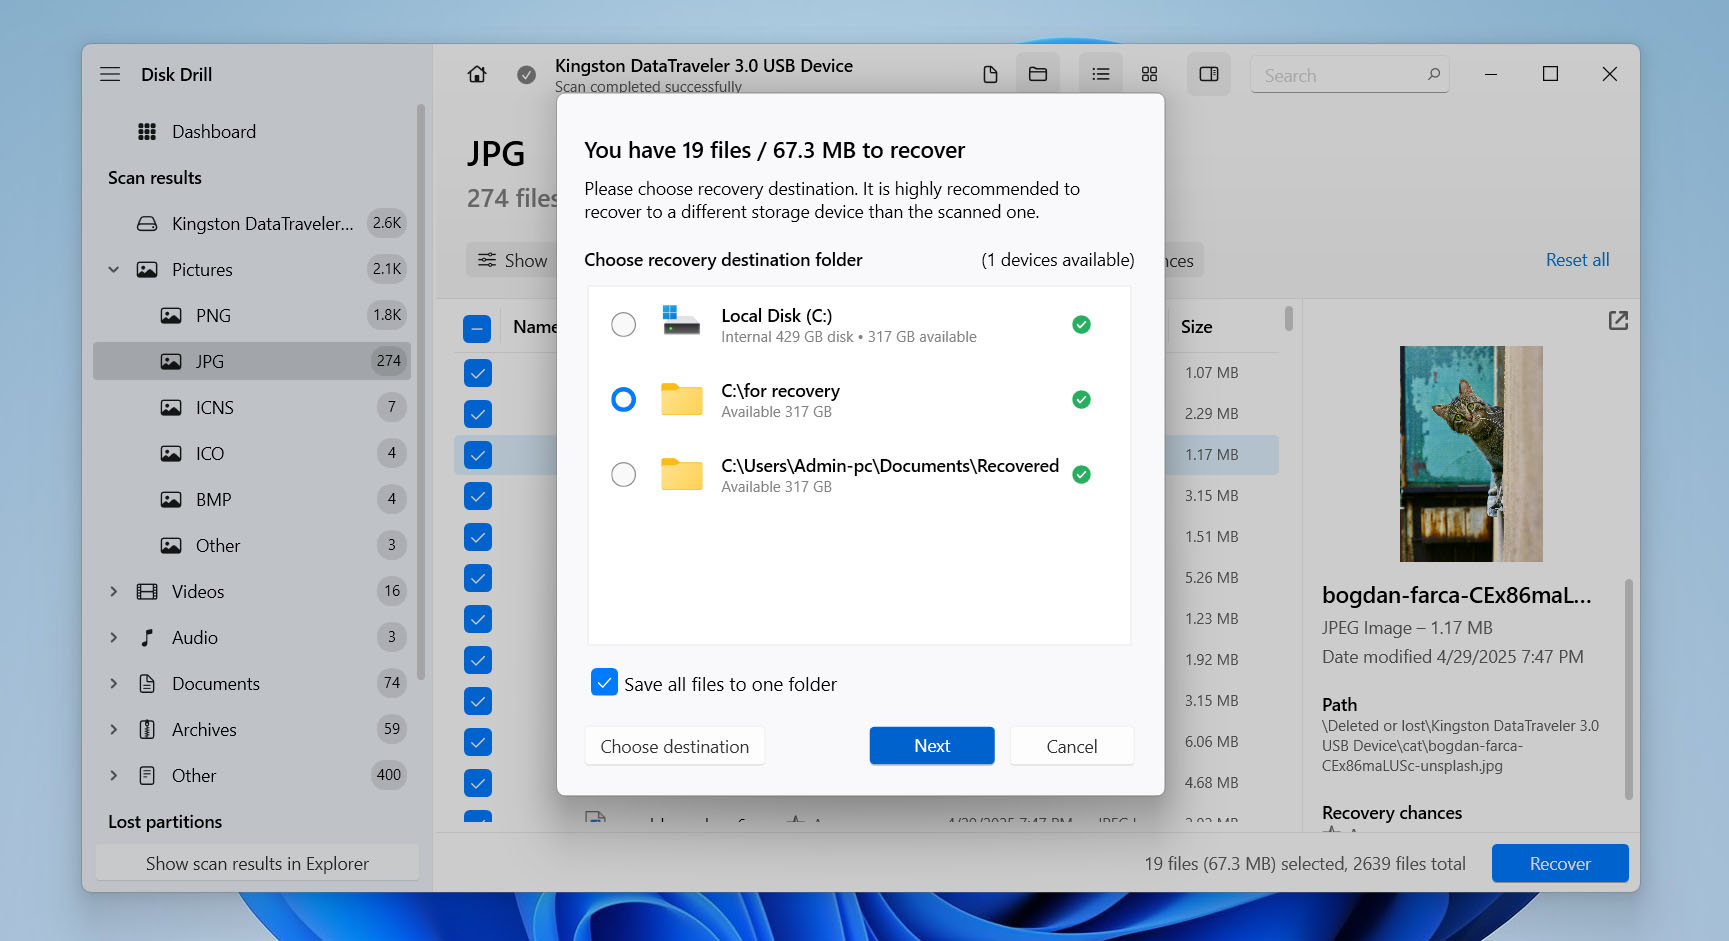
- When prompted, choose a safe recovery location – this should be a different drive from the one you’re recovering from, like your computer’s main disk or another external drive. Click Next, and Disk Drill will recover the selected files.


Disk Drill lets you recover up to 500MB of data for free. That’s usually enough if you only have a few important files to save. But if you need to recover more than that, you’ll have to upgrade to the Pro version from the same page where you downloaded the app – this unlocks unlimited data recovery. If upgrading isn’t an option for you, you might consider open-source data recovery tools instead. Just keep in mind they usually aren’t as powerful or user-friendly as Disk Drill.
How to Fix a Hard Drive That Is Not Accessible
Now that you’ve recovered your data from the external drive that is not accessible, you can shift your attention to fixing the main issue and getting your drive working again. The methods below are listed from easiest to most complex, both in how to do them and how much they affect your drive. We’ll start with options to fix the drive without formatting, but sometimes formatting might be unavoidable.
Solution 1: Check Your External Drive Connection
First things first, you should double-check the basics. A loose or damaged cable, or even a bad USB port, can keep your drive from mounting. Swap out the cable, plug into a different USB port, or test the drive on another computer. If it’s still not showing up, confirm that your system at least recognizes the device. Ruling out these simple connection issues saves a lot of guesswork later.
Solution 2: Edit Ownership of the Drive
If your external drive shows up in File Explorer but you get an “Access is denied” message when you try to open it, the problem is probably ownership. In other words, your Windows account doesn’t have permission to read the drive. Switching ownership to your account usually sorts it out and lets you see and edit the files again.
This fix only works if the drive is formatted as NTFS (the standard for most external hard drives). It won’t help with FAT32 or exFAT drives.
- Open File Explorer and find your external drive in the left-hand sidebar.
- Right-click the drive and choose Properties.
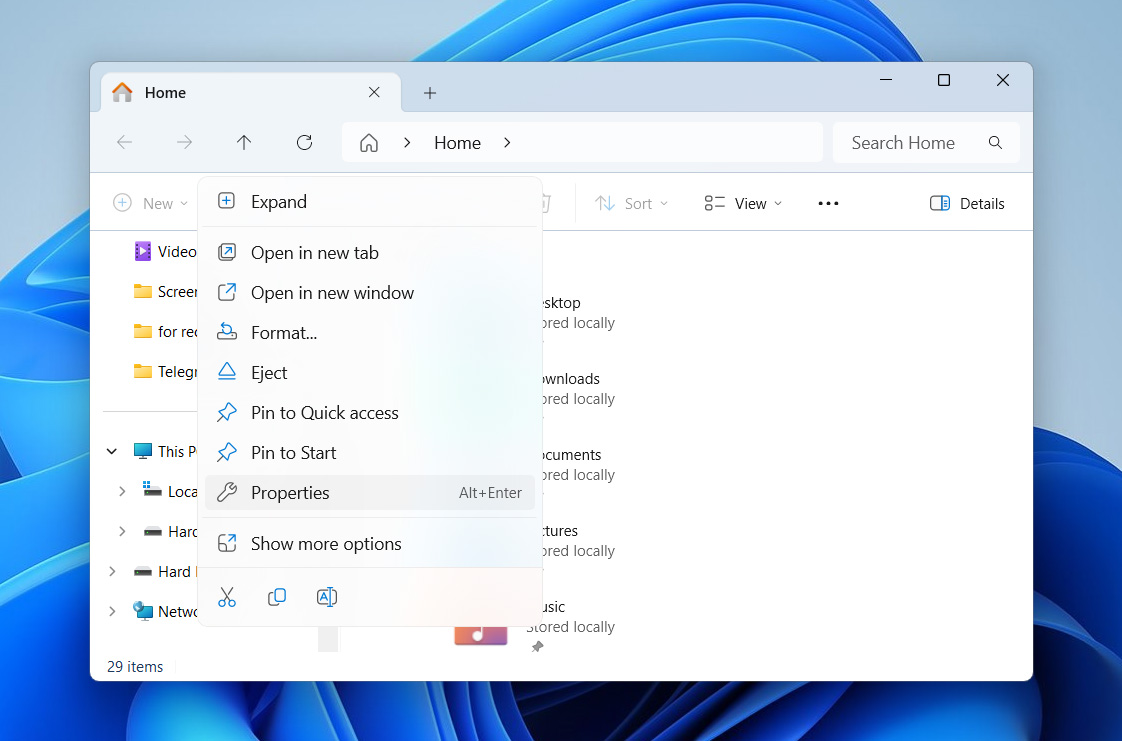
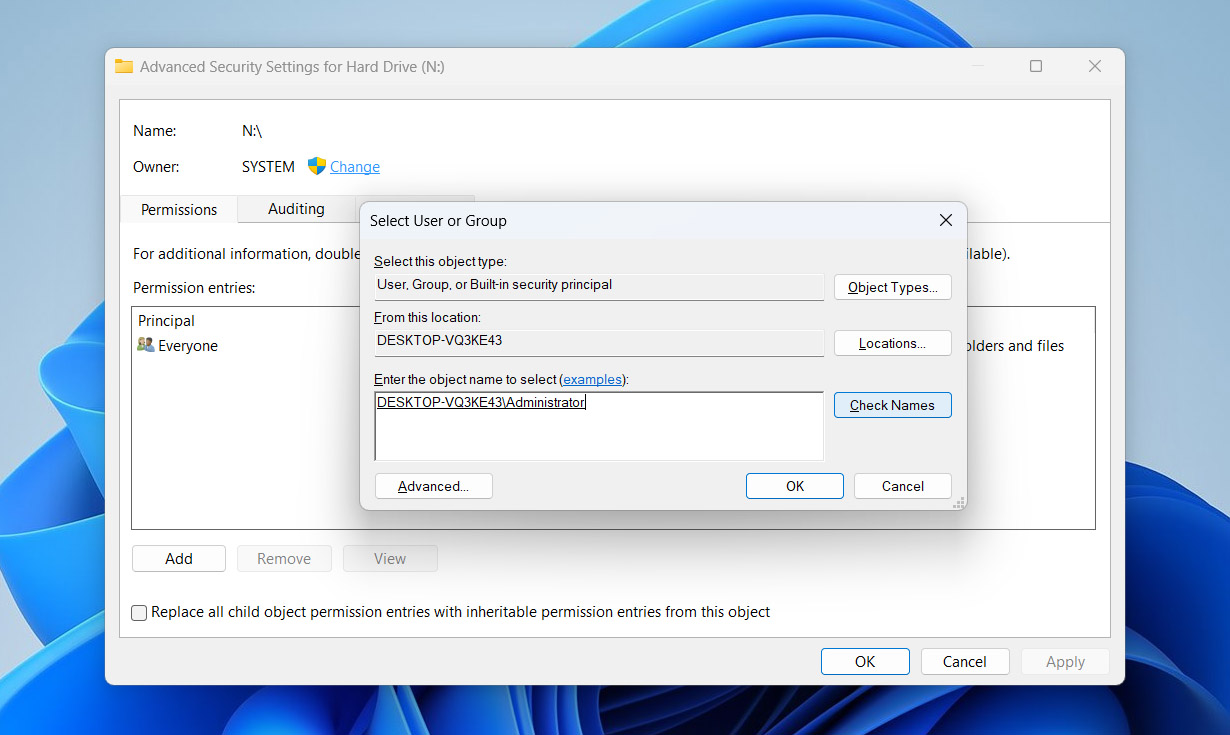
- Go to the Security tab, then click Advanced.

- In the Advanced Security Settings window, hit Change next to Owner.
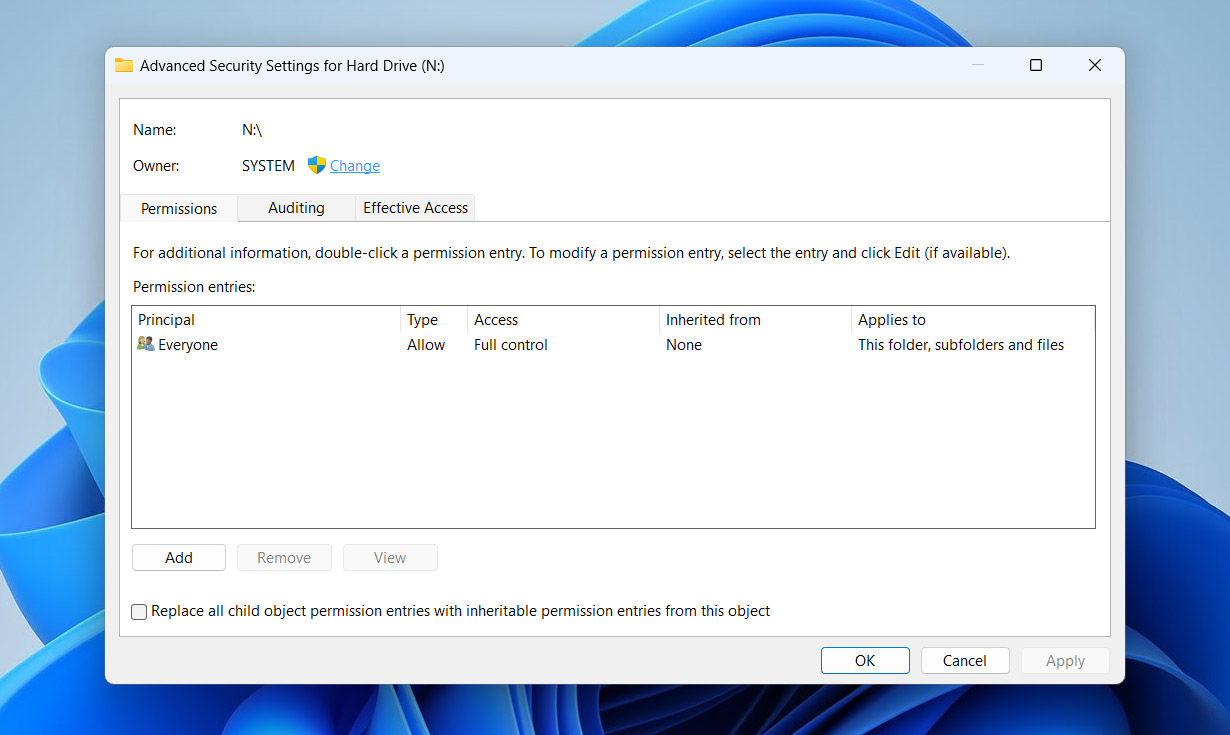
- Click Select a principal.
- Type your Windows username in the box, click Check Names, then press OK.
- Back in Advanced Security Settings, tick Full control under Permissions and click OK.
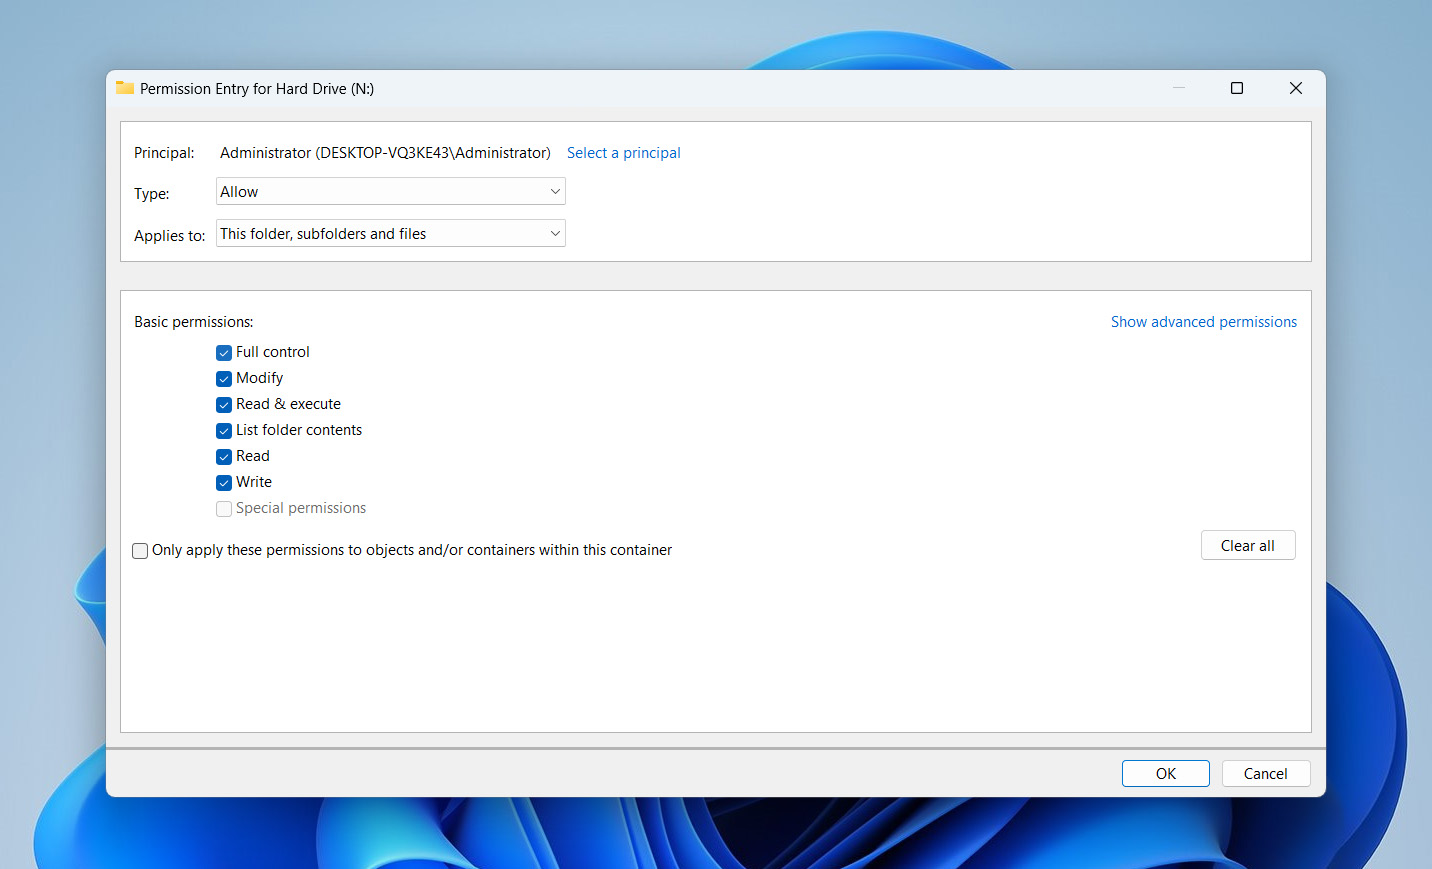
- Click OK again to confirm.
- Close the Properties window – your account should now have full access to the drive.


Solution 3: Disable Encryption to Access the Drive
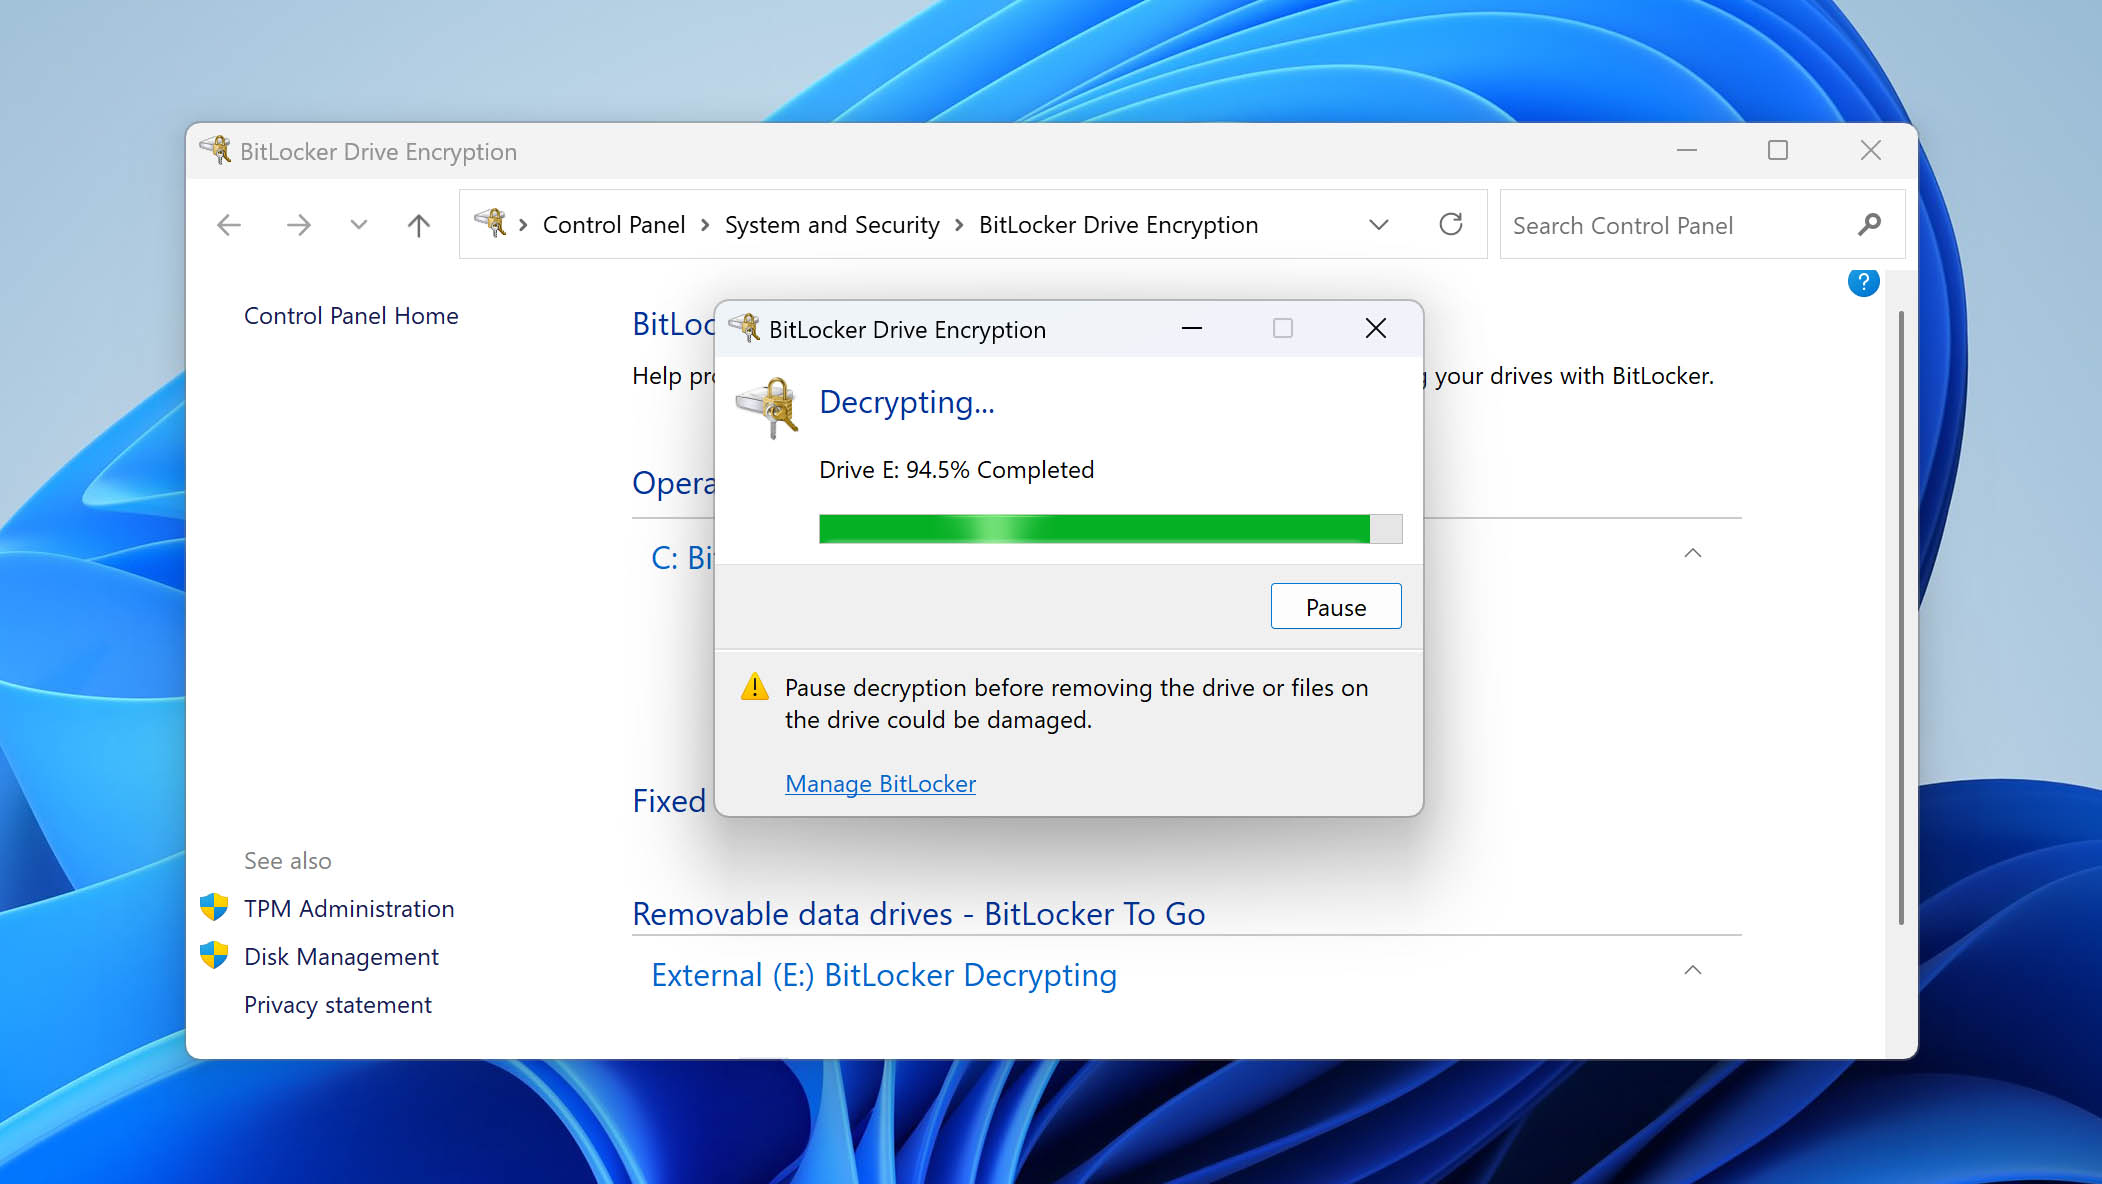
Sometimes, an external drive will show up in Disk Management or File Explorer but is still not accessible because it’s encrypted – Windows Home uses Device Encryption, while Pro and Enterprise editions use BitLocker. Encryption means you need the right decryption key to open the drive; until you unlock it, Windows won’t let you access anything inside.
- Press Windows Key + S to open the Windows search bar and type Device Encryption (for Home editions) or Manage BitLocker (for Pro/Enterprise editions).
- On Home, flip the Device Encryption switch to Off, which decrypts the drive so you can use it normally.
- On Pro/Enterprise, find your external drive under BitLocker To Go and click Turn off BitLocker.
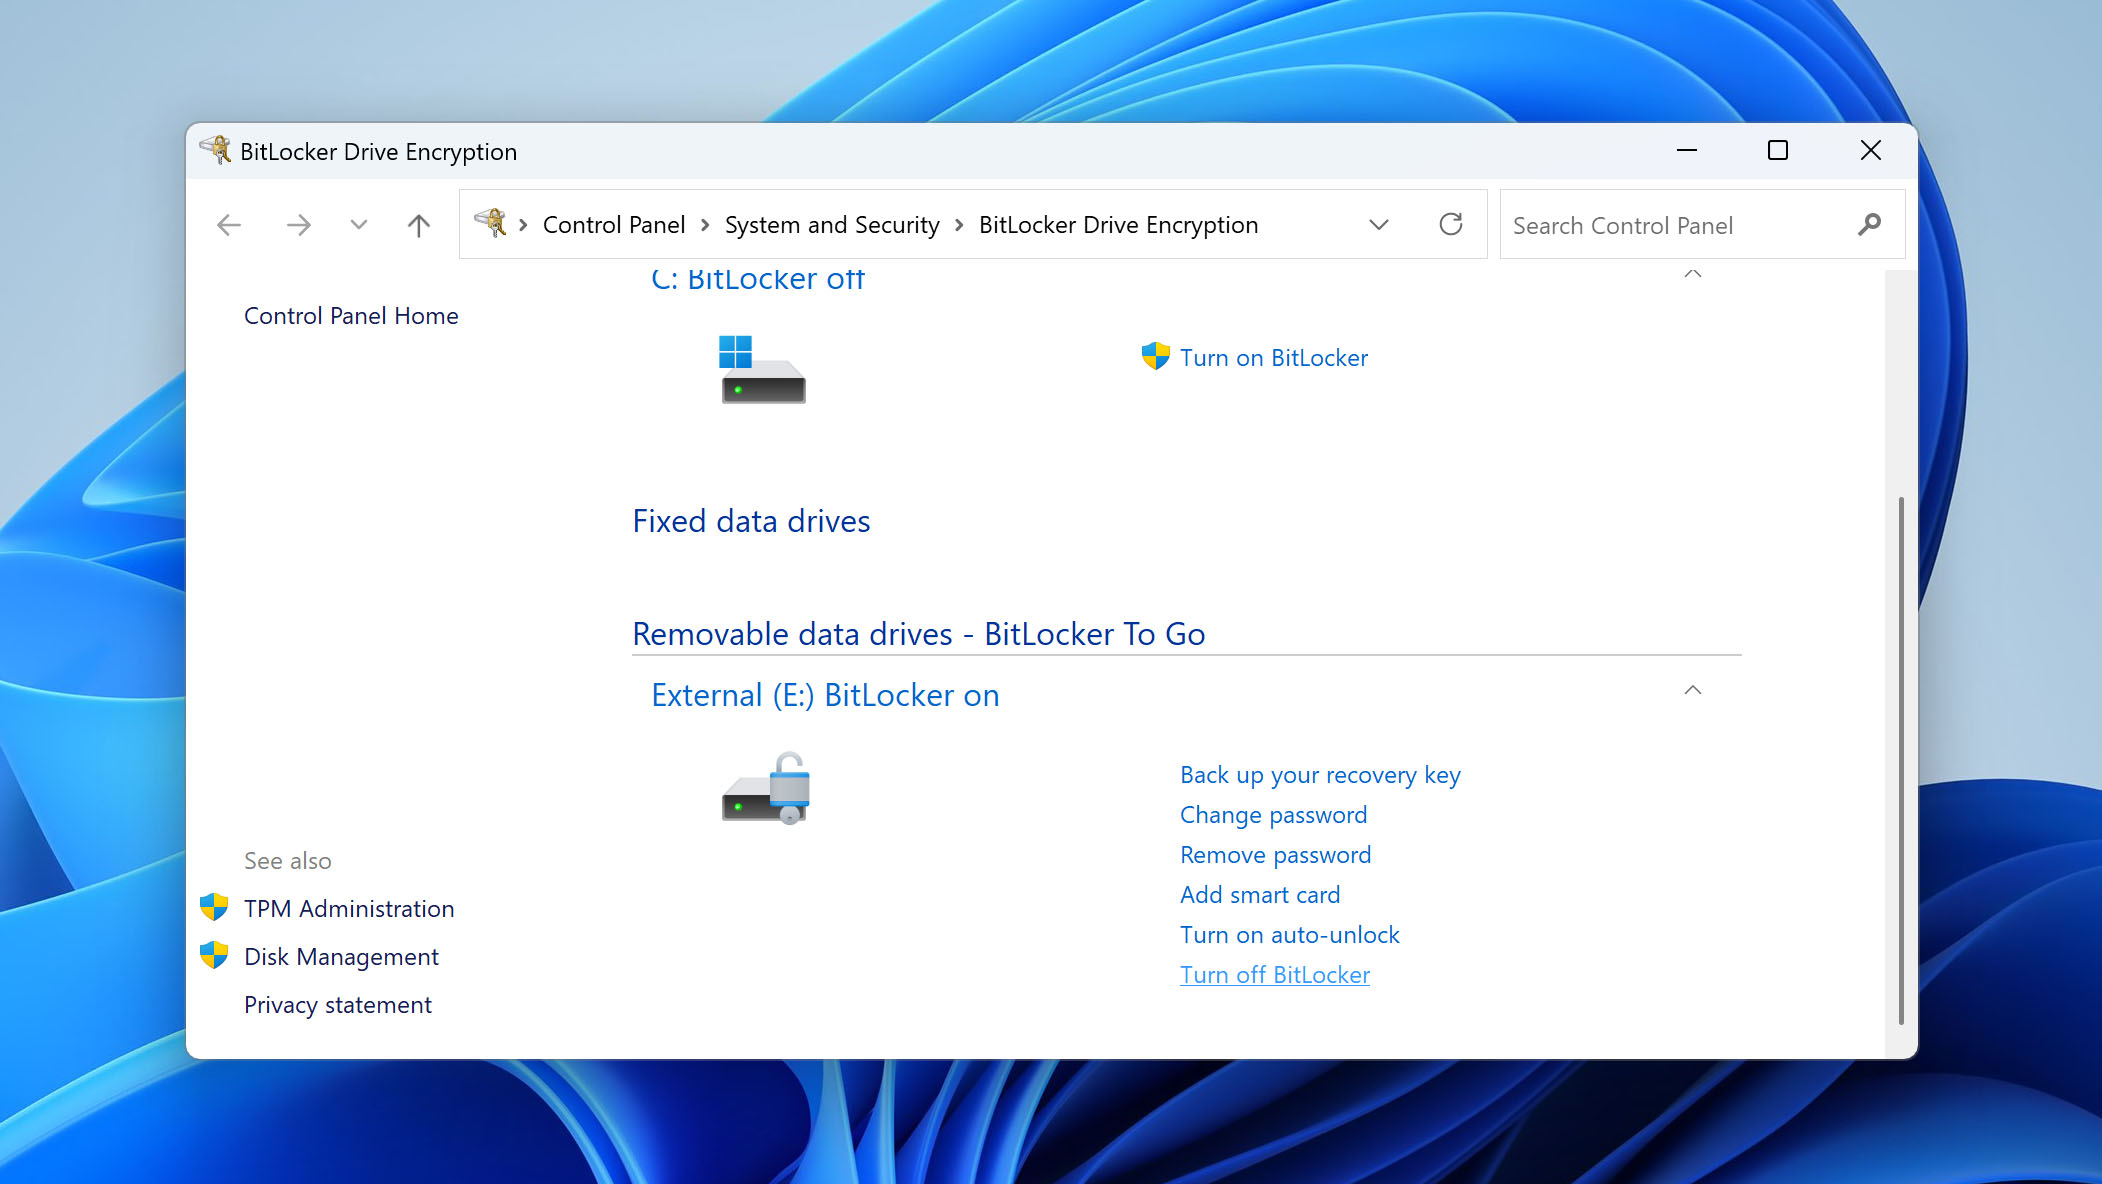
- When prompted, enter your BitLocker recovery key. (If you don’t have it, follow the on-screen links or check your Microsoft account/backup to retrieve it.)


Solution 4: Change the Drive Letter
Another possible reason your external drive may not be accessible is a conflict with the drive letter assigned to it. Windows gives every storage device its own letter (C:, D:, E:, and so on). If Windows accidentally assigns your external drive a letter that’s already being used, usually C:, the system drive, it can’t be accessed.
Fortunately, you can simply resolve this issue – just give the external drive a new letter, and the conflict will disappear.
- Press Windows + X and choose Disk Management.
- In Disk Management, find your external drive, right-click it, and select Change Drive Letter and Paths.

- Click Change.
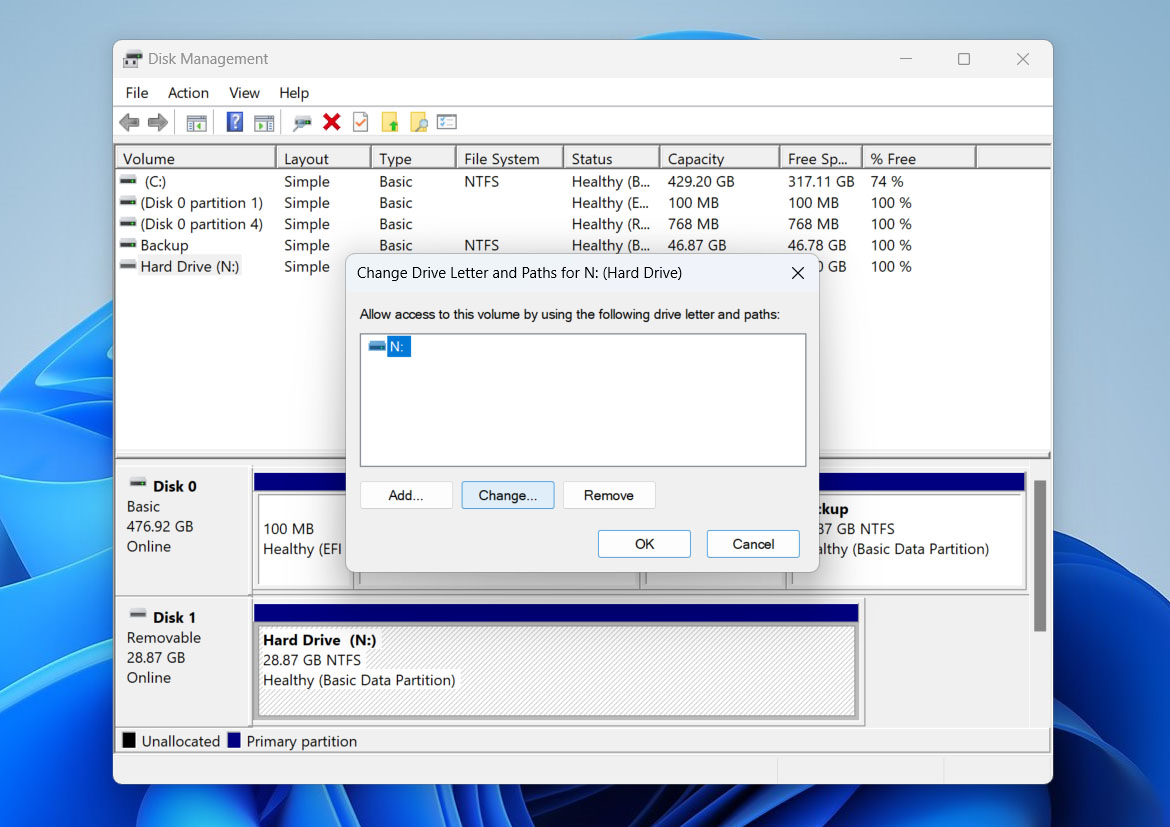
- Pick a new letter from the drop-down menu – make sure it isn’t already in use.

- Click OK. If Windows warns that some programs rely on the old letter, click Yes to continue.
- Your external drive should now show up under This PC in File Explorer and be fully accessible.


If the drive is not accessible after you assign the new letter, restart your computer. Windows sometimes needs a reboot to lock in the change and recognize the drive correctly.
Solution 5: Check the Drive for Errors
The next step is to check the drive for logical errors. These hiccups happen when the file system gets corrupted, often from yanking the drive out without ejecting, sudden power loss, or similar mishaps. The hardware may be fine, but Windows still can’t read the disk.
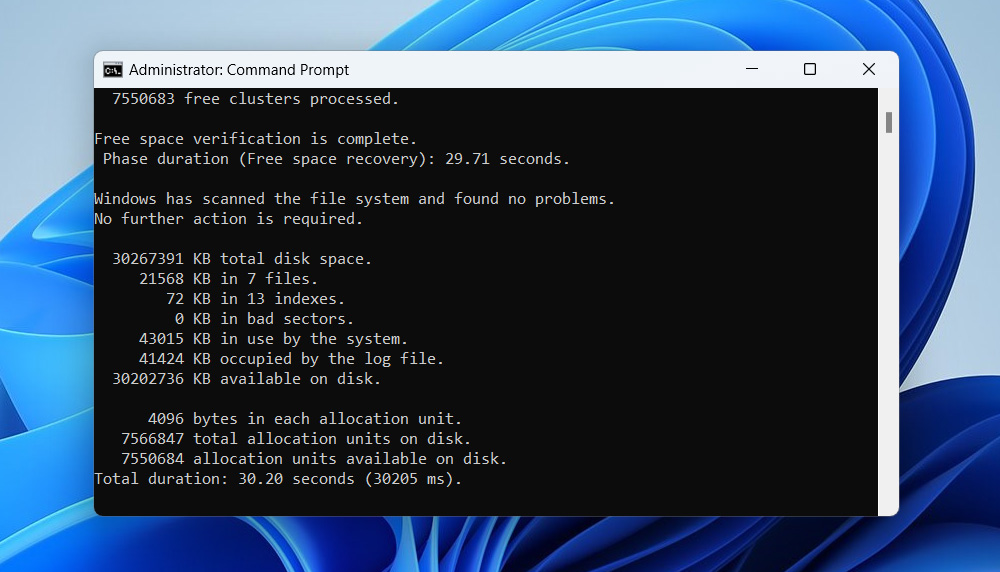
Luckily, Windows ships with CHKDSK, a built-in tool that scans for and repairs file-system issues. CHKDSK hunts down problems in the file allocation table, directories, and other key areas, then patches them so the drive can work normally again.
If you run CHKDSK on a damaged drive, it can sometimes cost you files. As it repairs the file system, it might delete or alter anything it sees as corrupted or unreadable. If you haven’t already protected your data, pause here, head back to the first section, and recover your files before running CHKDSK.
- Press Windows, type cmd, then right-click Command Prompt and choose Run as administrator.
- In the Command Prompt window, enter this command, but replace X with your drive’s letter: chkdsk X: /f /r. (/f fixes file-system errors, /r finds bad sectors and tries to recover any readable data).
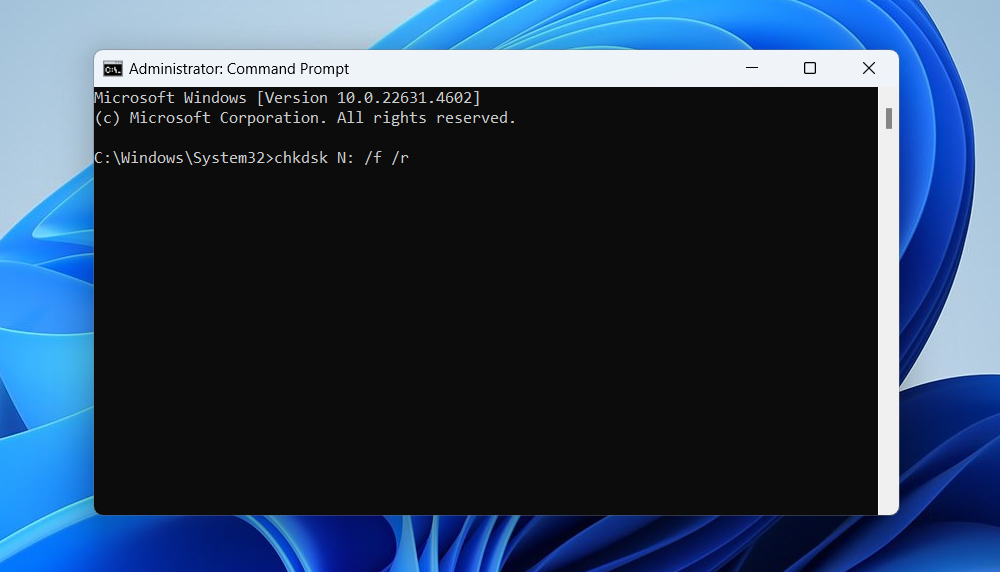
- Hit Enter and let CHKDSK run. The scan can take a while, depending on the drive size and the number of errors it finds. When it’s done, you’ll see a summary of the repairs. Try opening the drive again to see if the issue is resolved.


Solution 6: Format Your External Drive
As a last resort, if your external drive remains inaccessible, you can format it. In some cases, formatting may be the only solution to restore the drive to working condition. This can be necessary if Windows does not support the file system or if the drive is corrupted beyond repair. Formatting the drive works by removing all existing data and creating a new file system, which allows Windows to recognize the drive and make it usable again.
We remind you that several of the solutions discussed in this article could lead to data loss, and formatting is the nuclear option and guarantees total data loss. If you don’t care about the files and just want a working drive, go for it. Otherwise, circle back to the first section and recover your data before you hit “Format.”
There are a few ways to format a drive, but we’ll walk you through one of the easiest and fastest methods.
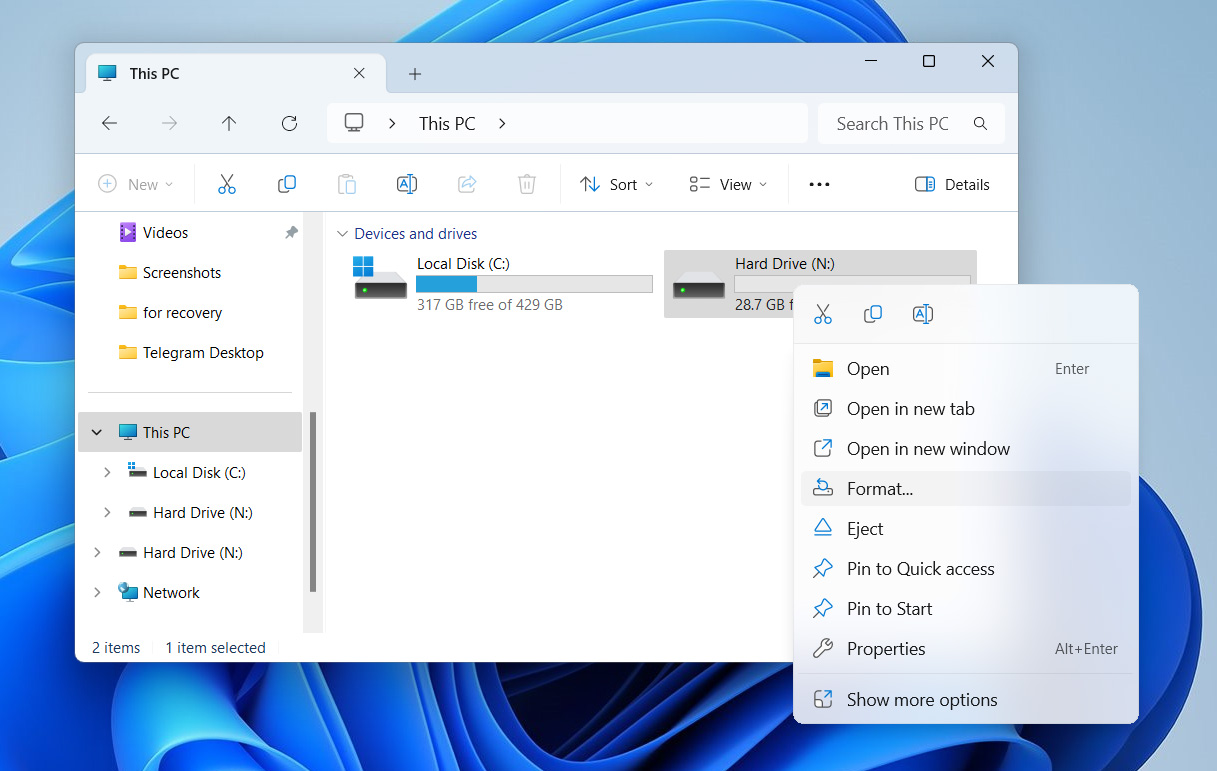
- Open File Explorer and find your external drive under This PC.
- Right-click the drive and choose Format.
- In the Format window, pick a file system. Leave Quick Format checked for a speedy job. (Uncheck it for a full, slower format.)
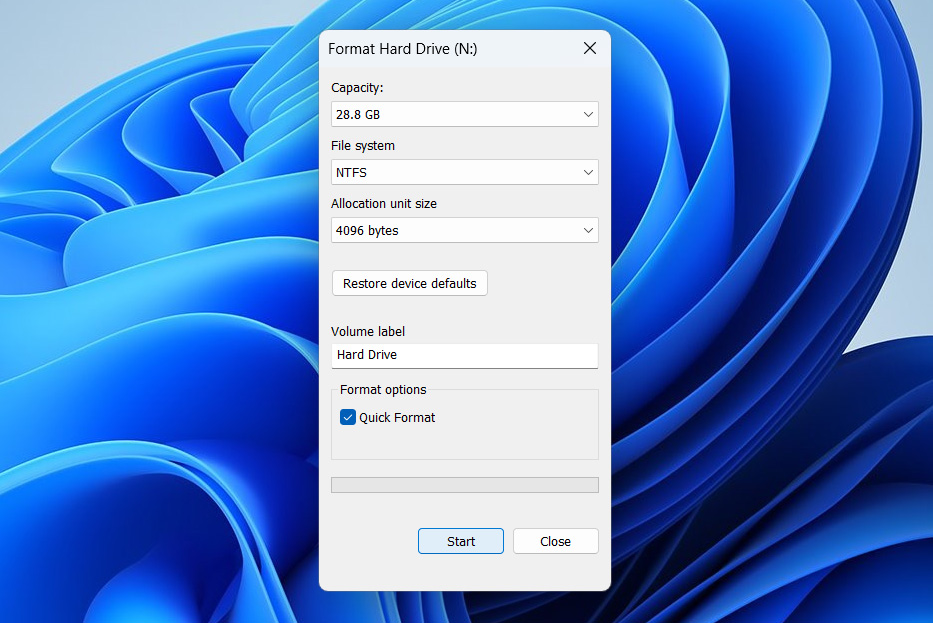
- Click Start. A warning says everything will be erased – click OK to continue. Wait for Windows to finish. When it’s done, the drive should be accessible and ready to use.


Why Does a Drive Become Inaccessible?
If you’ve stuck with this guide all the way through, you’ve seen just how many reasons can make an external drive inaccessible. Tracking down the exact cause isn’t always easy, so the quickest path is to work through the fixes until one actually gets you back in.
Remember, though, that even after you restore access, the issue can come back. Next time, knowing the root cause will save you a ton of troubleshooting. Sometimes, these hiccups are your cue to replace the drive altogether. Below is a rundown of the most common reasons an external drive becomes inaccessible, plus warning signs to look for if it happens again.
- ⚙️ If Windows has the wrong permissions set, you’ll hit an “Access is denied” error. The drive shows up in File Explorer, but you can’t open certain files or folders.
- 🔌 Pulling the cable without “Safely Remove” or keeping the drive plugged in nonstop can corrupt it. After a rough disconnect, you might see weird errors, or the drive may simply stop responding.
- 🗃️ When Windows doesn’t recognize the drive’s format, you’ll get prompts like “This drive isn’t formatted – format now?” That happens if the disk was formatted on another OS or with the wrong settings.
- 🖱️ A flaky port (or cable) makes the drive appear, vanish, and then reappear. If other devices work fine in that same port, swap the cable first – it’s a cheap fix with a big payoff.
- 🦠 File-system errors, malware, or sudden power cuts can trash data structures. Clues: super-slow transfers, unreadable files, random “Please format drive” pop-ups, or the disk freezing after a few minutes.
- 🔨 Drops, spills, or power surges can wreck the hardware. Clicking or grinding sounds, extreme heat, or the drive spinning up then stopping are bad signs. Skip DIY attempts and call the pros if you hear or see any of these.
Conclusion
An inaccessible external drive is quite common and, in most cases, it’s a quick fix. Swapping out a flaky cable, plugging into a different USB port, or giving the drive a fresh drive letter can bring it right back to life. If you do wind up having to reformat, we’ve already provided instructions on how to pull your files off first, so you’re not scrambling for recovery tools afterward.
Remember, a lot of these problems come down to how the drive is treated. Always eject it safely, avoid yanking cables, and keep it away from drops and power surges. Even the priciest external drives only last so long, so a little TLC will help your drive last until it’s naturally time for a replacement.