
Reading Time: 8 minutesCut and paste files – this is the keyboard shortcut that almost every Windows PC user is familiar with. On the one hand, these commands seem safe because the cut files don’t disappear from the previous location until they’re added to the new one. But even with such reliable functionality, there are situations where the files don’t appear in the new location, and they’re no longer in the old one either. To resolve these situations and help you recover your files, we’ve described the best recovery methods.
Possible Issues with the Cut and Paste Process

The Cut and Paste process is a common file operation used to move data from one location to another. When you cut a file (by default, via Ctrl + X shortcut), the operating system flags the file for relocation. It’s not immediately deleted from its original location; instead, the system marks it for removal once the paste action is successfully completed. In this phase, the file is held in a volatile memory buffer (clipboard), and only after the paste (Ctrl + V) is confirmed does the system complete the transfer and update the file system structure.
However, this process isn’t foolproof. Several things can go wrong between the cut and the paste:
- The first and most common problem is a system crash or sudden power loss during the transfer. If this occurs in the middle of the process, the file can disappear from both the original and destination locations.
- Next on the list are user-related slip-ups. For example, you can cut a file and then forget to paste it before you shut down or restart the computer. Since the clipboard gets cleared, the file is left in limbo with no trace of it anywhere.
- Another problem that can arise is file system errors or corruption, especially when a file is being written to a new location. If something goes wrong, the transfer may not take place, and the file may be lost. This scenario is more likely when you copy data to unstable disks.
- There’s the added complexity when a file moves between different drives or partitions. In such cases, the system deletes the file from the original location and creates a new copy in the target location. This two-step process increases the risk of file loss if the operation stops unexpectedly.
- Third-party software can introduce complications. Conflicts or bugs in clipboard managers, file explorers, or security tools might interfere with how files are cut, stored in memory, or pasted, leading to unexpected problems.
Copy and paste provides speed and convenience, but lacks a built-in safety net. When files disappear after a cut and paste, shut down the PC right away. Further activity risks overwriting the lost data, which can complicate or prevent recovery.
How to Recover Files Lost During Cut and Paste
Several methods exist to recover files lost after a Cut and Paste operation. This guide focuses on those that provide a real chance to retrieve your data. Some articles suggest using Undo (Ctrl + Z), but that solution applies only if your files remain in either the original or new location. If the files have disappeared from both of them, go to the recovery methods described below.
Method 1: Use Search for Lost Files
Before you can start recovery, you need to make sure that the files are really lost. In many cases, they may not have been deleted at all – they may have simply been moved to an unexpected folder or disk. A thorough file search can help you find them quickly.
Start with the built-in Windows Search, though it shows limits in speed and indexing depth. For faster and more accurate results, use a free third-party tool such as Everything from Voidtools. This tool indexes files almost instantly and locates misplaced files with far greater efficiency.
Do not install Everything on the same disk where the files are lost. Newly installed software on this disk may overwrite the very data you are trying to recover if it is indeed lost.
- Download Everything from the official website and install it on a different drive.
- Launch the program after installation. It will begin indexing your drives automatically.
- In the search bar at the top, enter part of the file name, file type (e.g., .docx, .jpg), or even folder name.
- Once you locate your file, right-click it and select Open Path to go directly to its location.
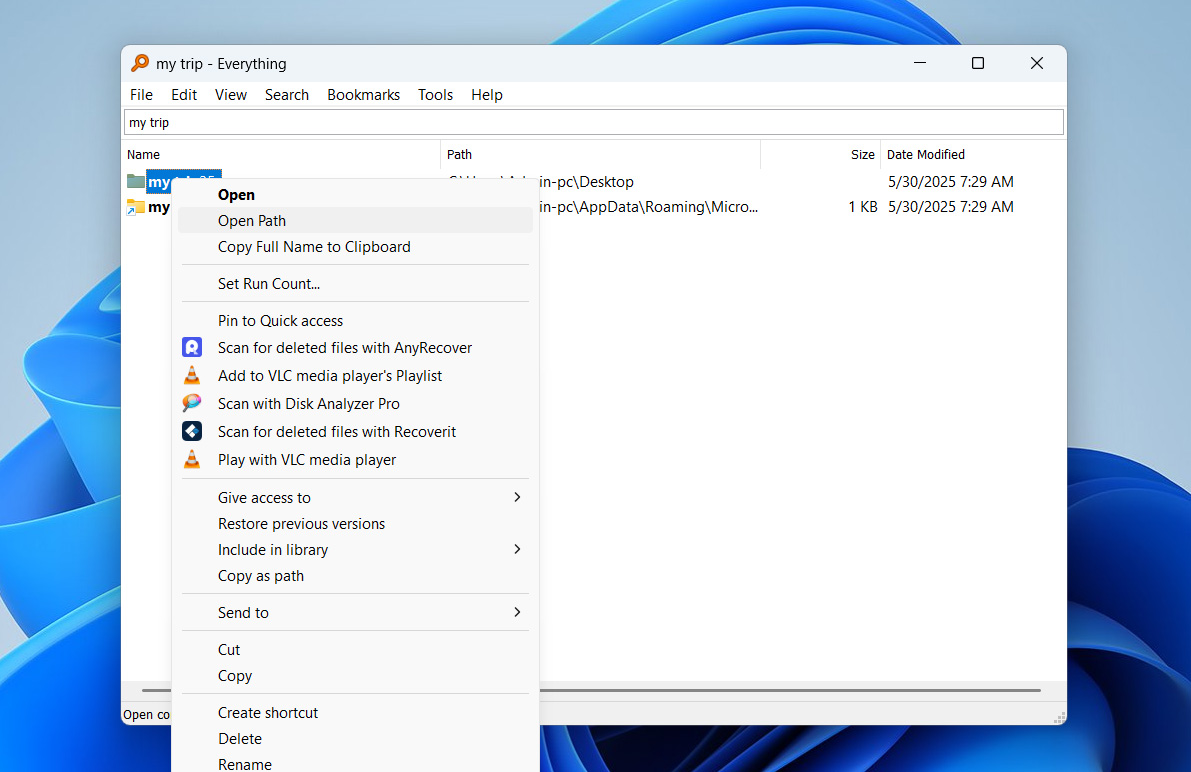
- If the file is intact, you can move it back to your intended folder.


If your files do not appear in Everything’s search results, this means they’ve been removed from direct access by the file system. In that case, you’ll need to proceed with recovery methods that can scan the drive for deleted data – these are covered in the sections below.
Method 2: Recover Data with Data Recovery Software
When files are lost after a cut and paste operation, they’re not immediately destroyed. Instead, the file system simply does not have direct access to them, but they are present in the physical memory cells of your disk. Until that space is overwritten, recovery is possible with the specialized data recovery tools.
Disk Drill is one such tool. It works with Windows file systems such as NTFS, exFAT, FAT32, and can recover files based on the indexes of these file systems. Given the links to your files, Disk Drill can recover them with their original names. If this metadata has already been lost, software uses signature-based scanning to detect and recover files based on known file headers for the nearly 400 file types it supports.
If the files were lost after Cut and Paste from an internal SSD, recovery may be less likely. Most modern SSDs have the TRIM command enabled by default, which actively clears deleted data blocks. This means the physical data might already have been wiped.
- Visit the Cleverfiles official website and download the Disk Drill installation file to a separate drive.
- Run the file and follow the instructions provided until you properly install the program. Just like with Everything, do not install it on the disk from which you lost files.
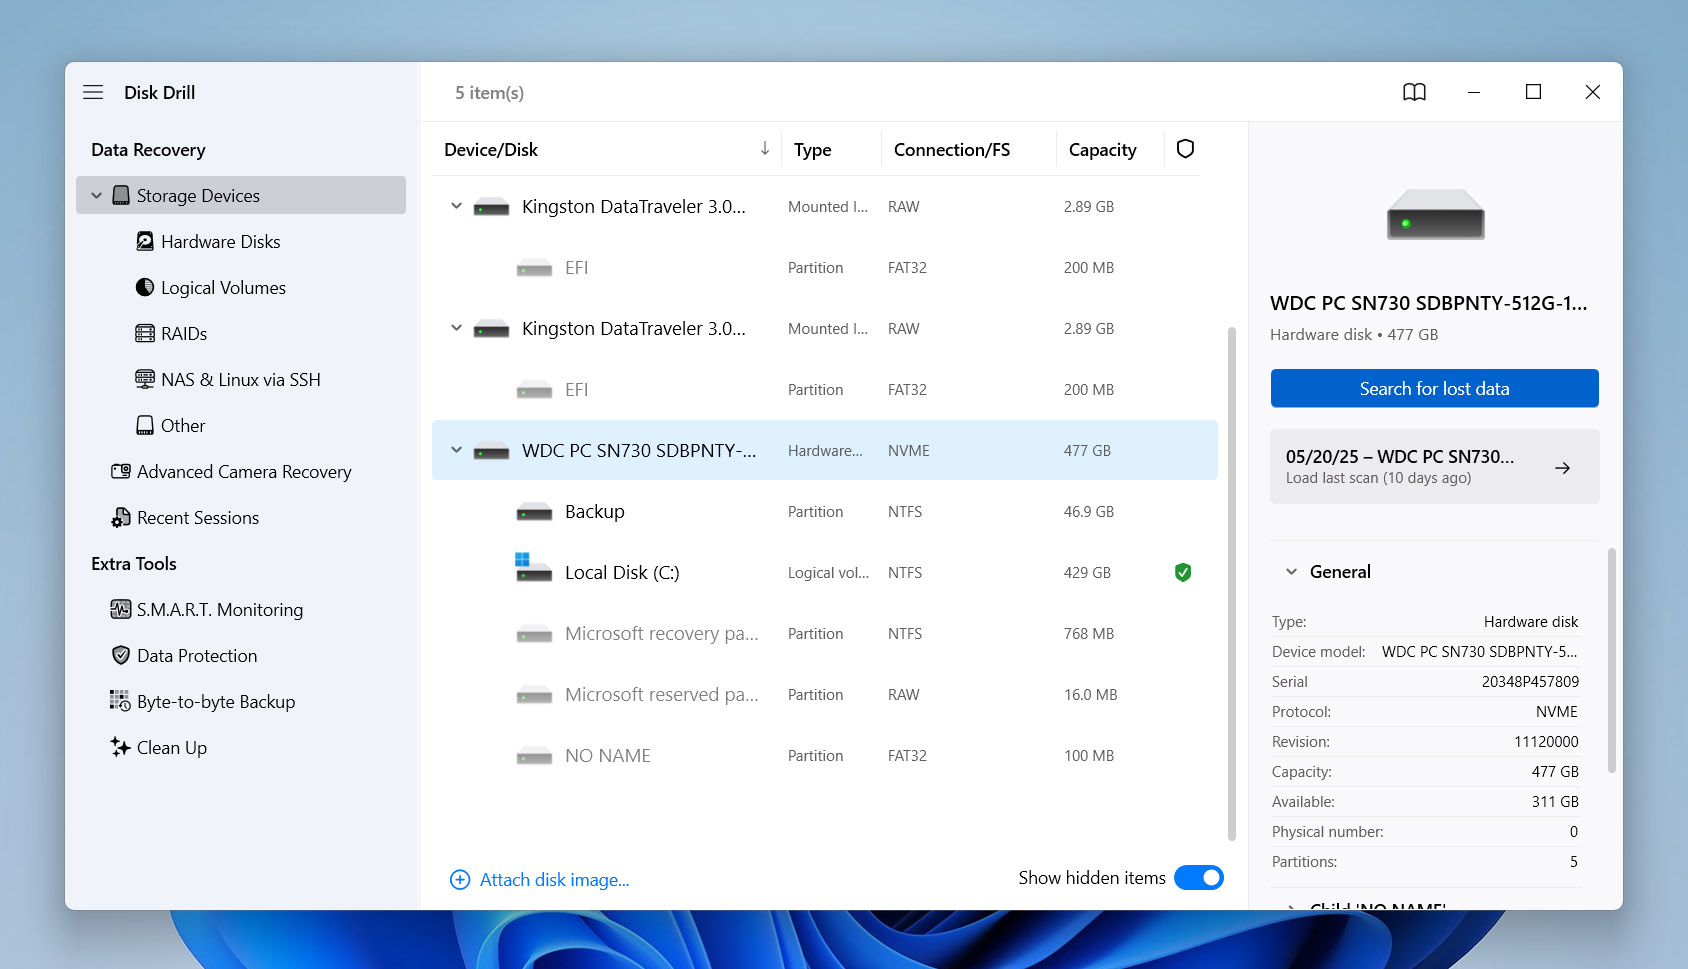
- Launch Disk Drill and select the disk where the files were last located before they were lost due to a copy and paste operation. Click the Search for lost data button when you’re ready.
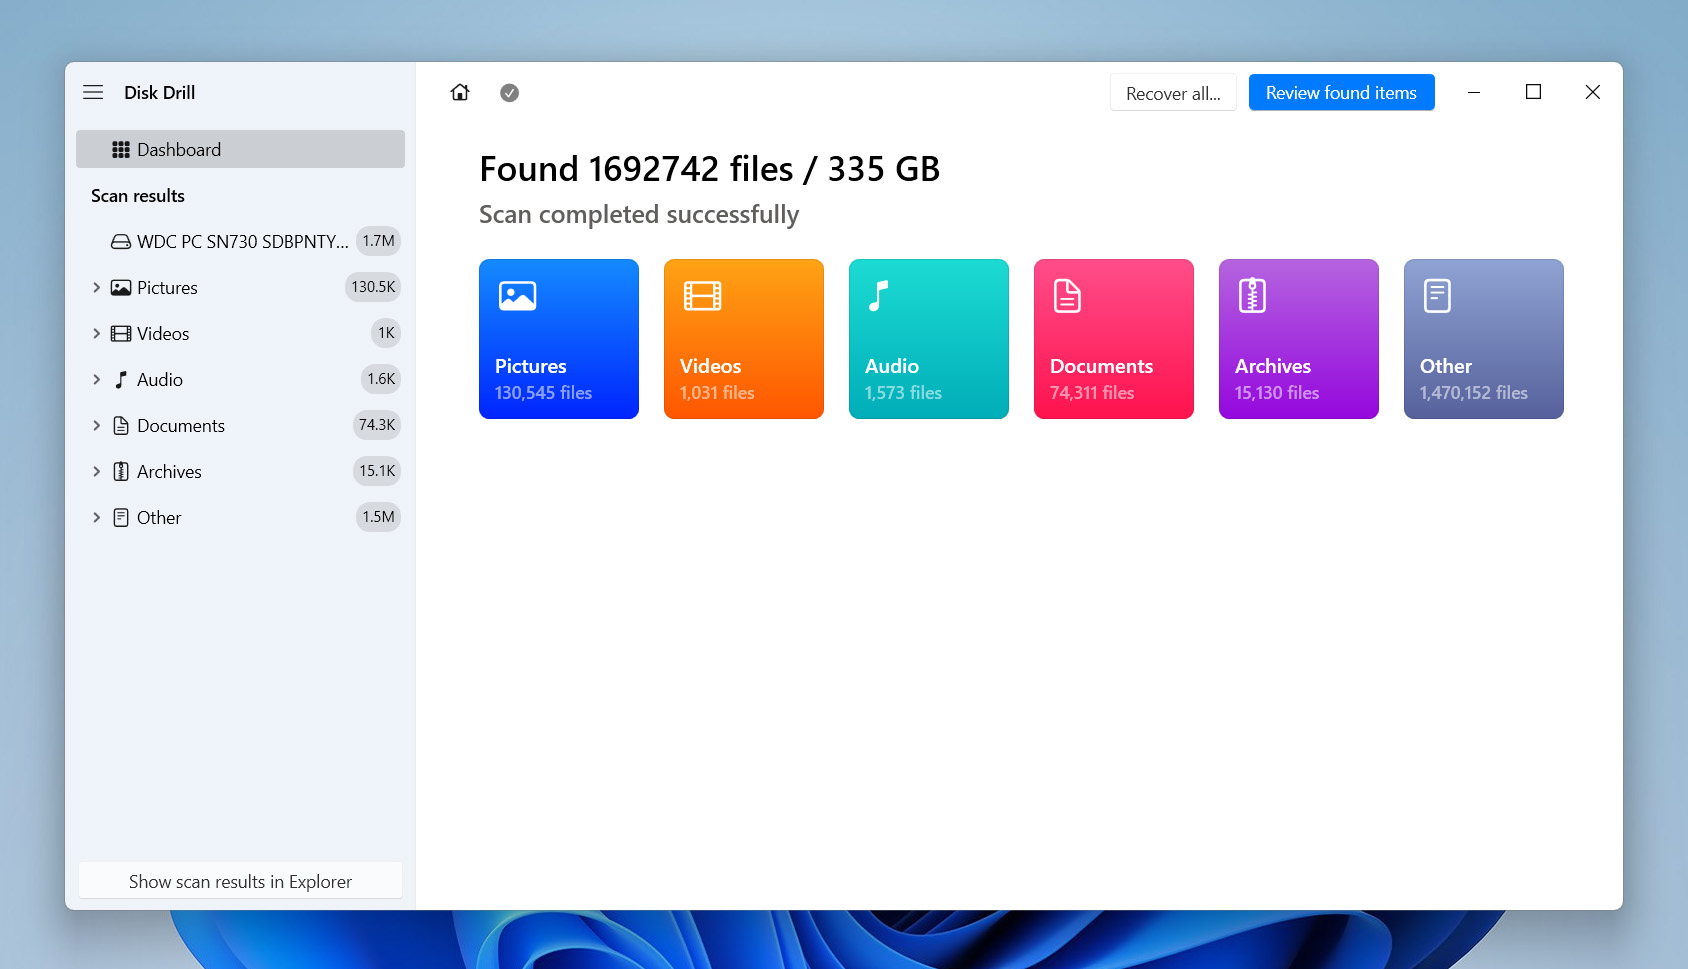
- The program will now initiate the scan. This could take a while, based on the size of your storage media. You can click the Review found items button at the top-left corner at any time if you’d like to browse through the recoverable files that Disk Drill has found so far.
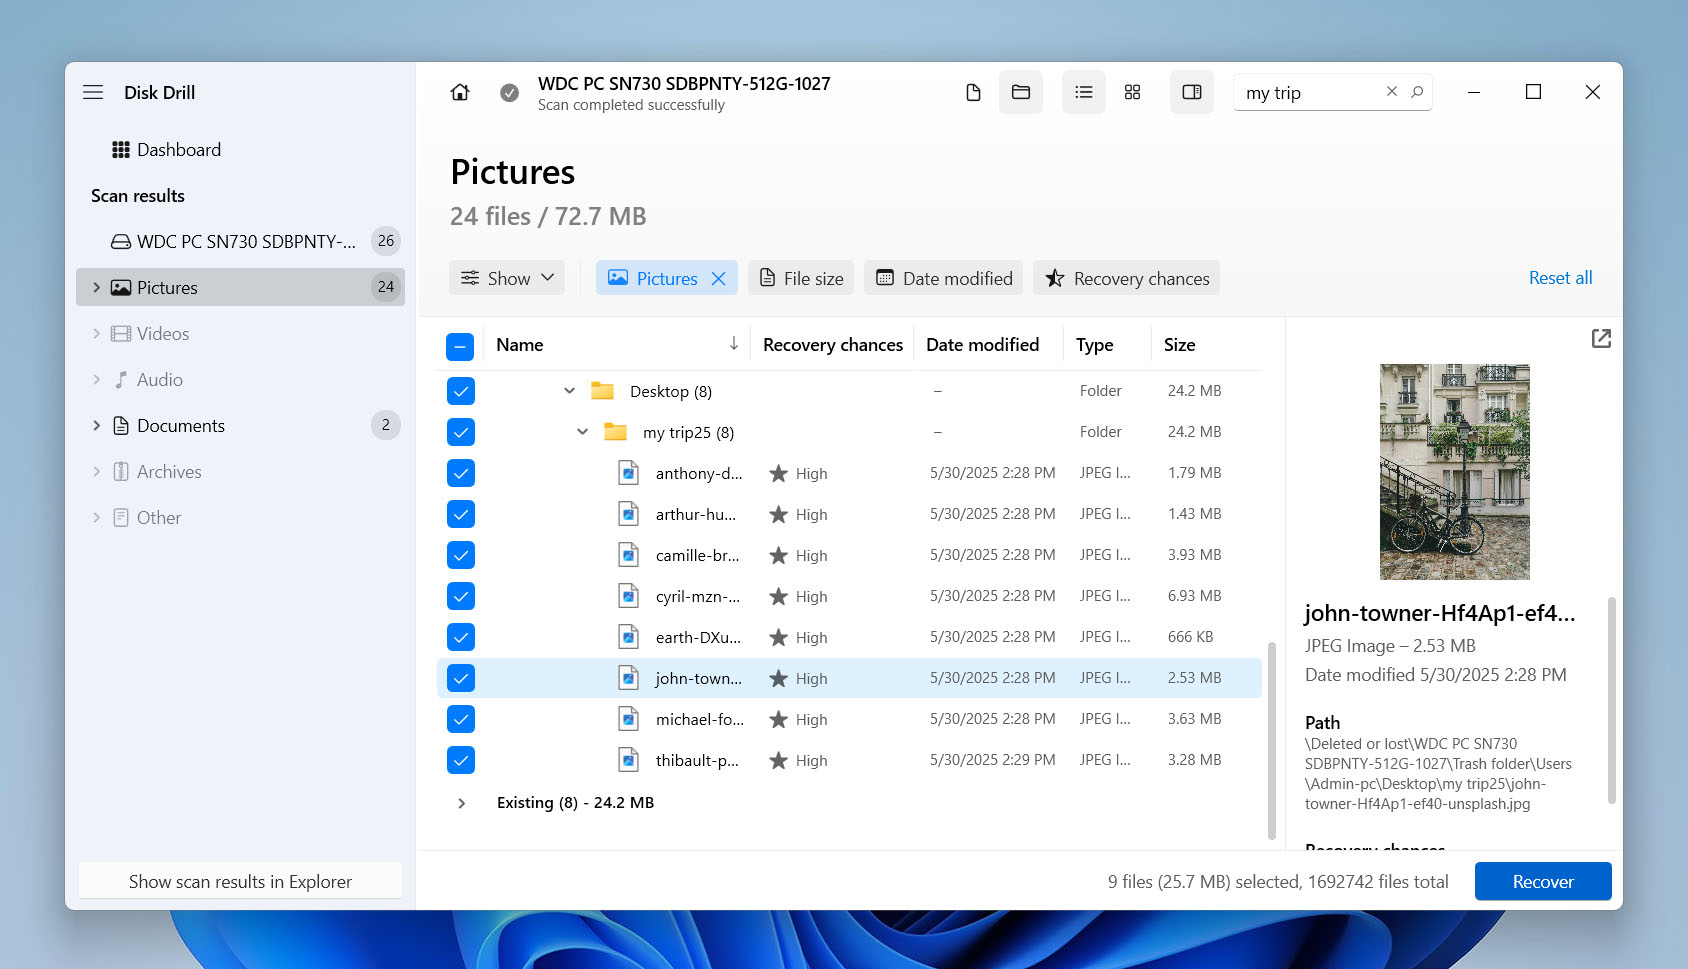
- Once you’re on the results page, you’ll need to find your files. If you remember the name of the file or folder, you can type it into the search bar in the upper right corner of the window to make it easier to find it, or you can choose a file type to sort the results.
- When you find your files, select them by checking the boxes next to the file names, and then click the Recover button to continue.
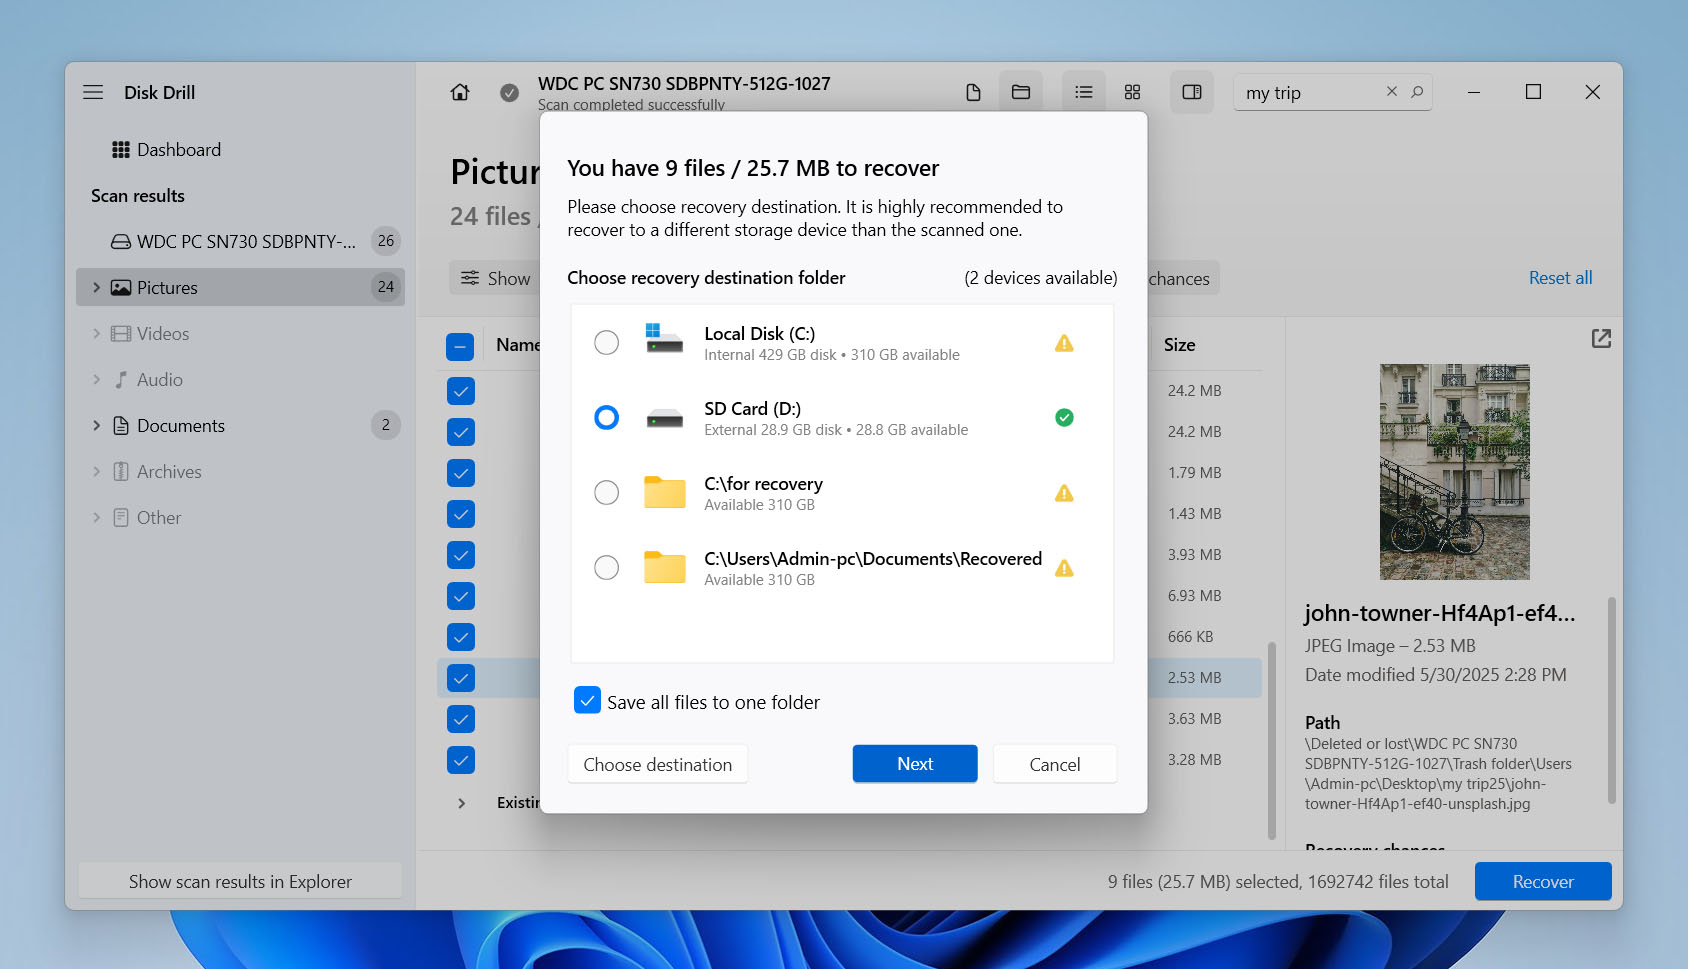
- In the pop-up window that appears, select a location to save the files. This should be a different disk to avoid overwriting. Click the Next button to continue.
- Disk Drill will now begin the recovery process for your files. On the completion screen, you’ll see a button labeled Show recovered data in Explorer. To access your recovered files directly, click this button.


Disk Drill is installed in a trial version that allows you to test all the features of the program, but with a recovery limit of up to 500 MB. If you need more lost files, you will need to purchase the Pro version.
Method 3: Restore Files from Cloud Backup (OneDrive)
If you installed Windows 10 or Windows 11 with a Microsoft account for login, then OneDrive was likely activated by default. In such cases, OneDrive automatically backs up key folders, such as your Documents, Pictures, and Desktop locations, where many users perform cut-and-paste operations. If you’ve lost files from these folders, there’s a good chance they were synced to OneDrive. Even if they were lost, they might still be recoverable from the OneDrive Recycle Bin. Here’s how to check it out:
- Go to https://onedrive.live.com and sign in with your Microsoft account.
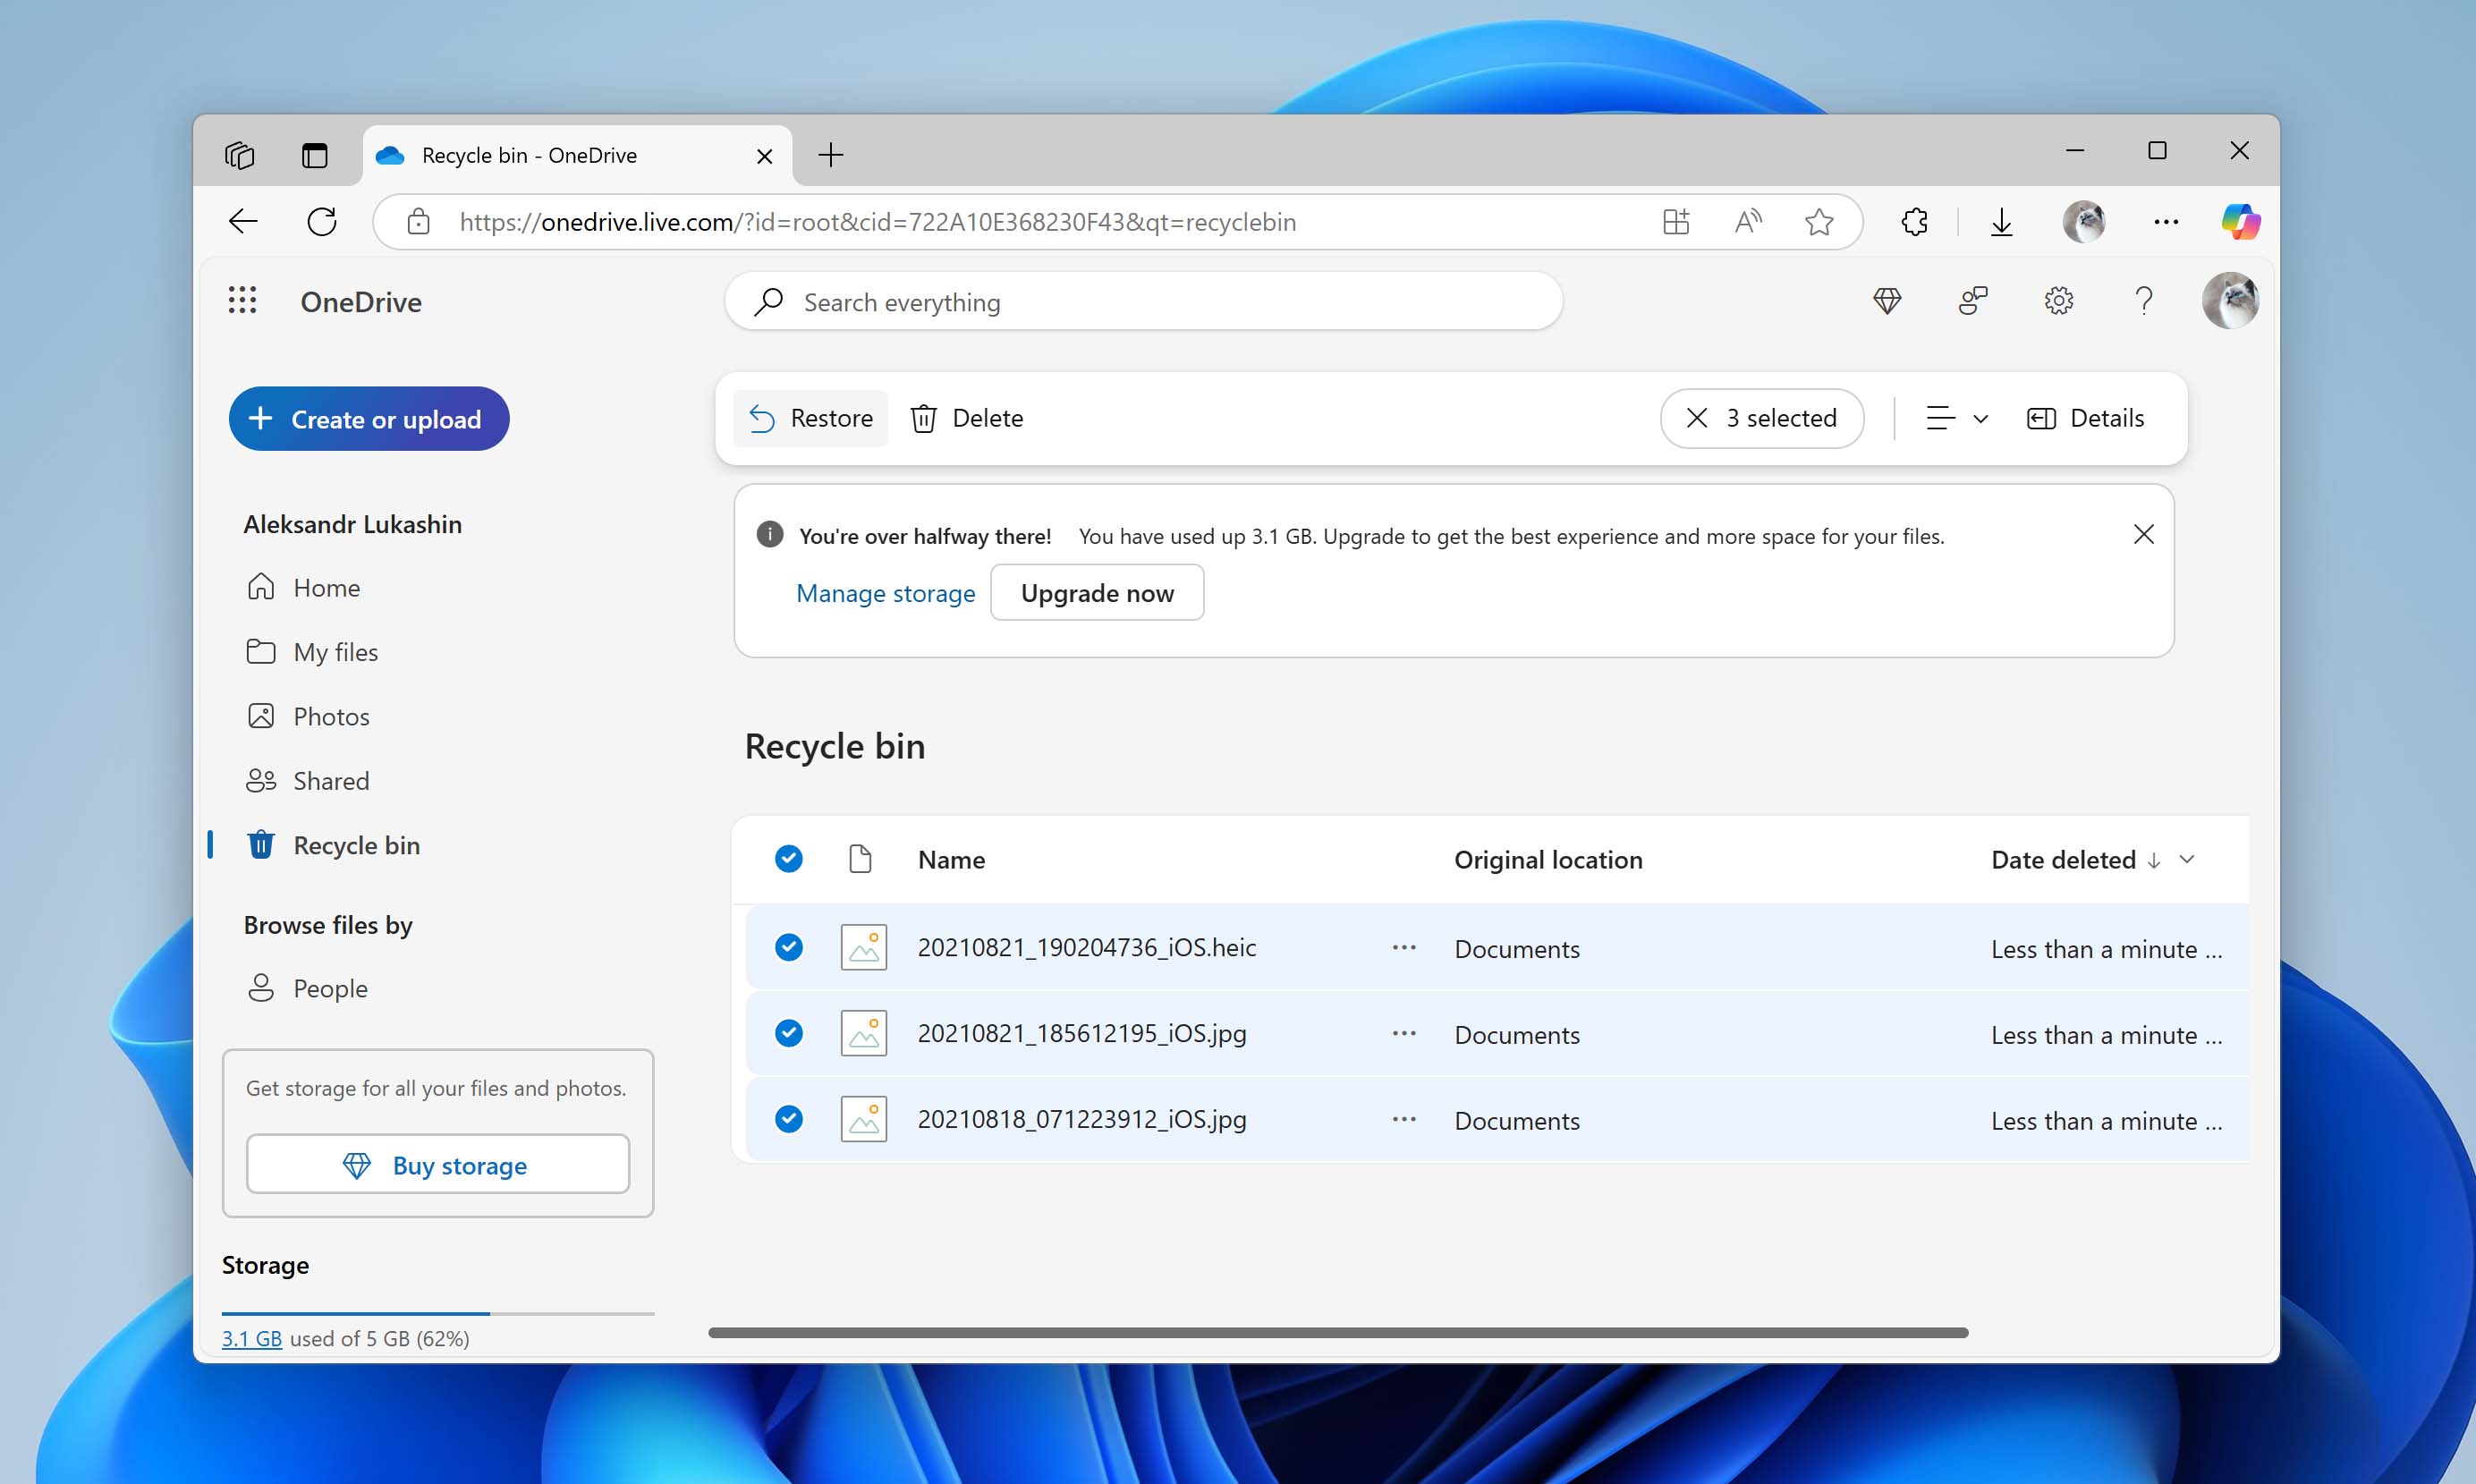
- On the left sidebar, click Recycle Bin. Search for your lost files.
- Select the file(s) and click Restore to return them to their original location within OneDrive.

Method 4: Recover Data Using File History
Suppose you had File History enabled before the file loss occurred, and the missing files were located in user libraries (Documents, Pictures, Videos, Music), or on the Desktop. In that case, there’s a chance they were automatically backed up. File history periodically creates snapshots of your data, which enables you to restore lost files or recover overwritten files that data recovery programs can no longer recover.
However, because File History only backs up specific locations and requires prior configuration, its use is limited to certain situations. That’s why we’ve placed it last place on our list – it’s helpful, but only if you’re already set up and your lost files are backed up.
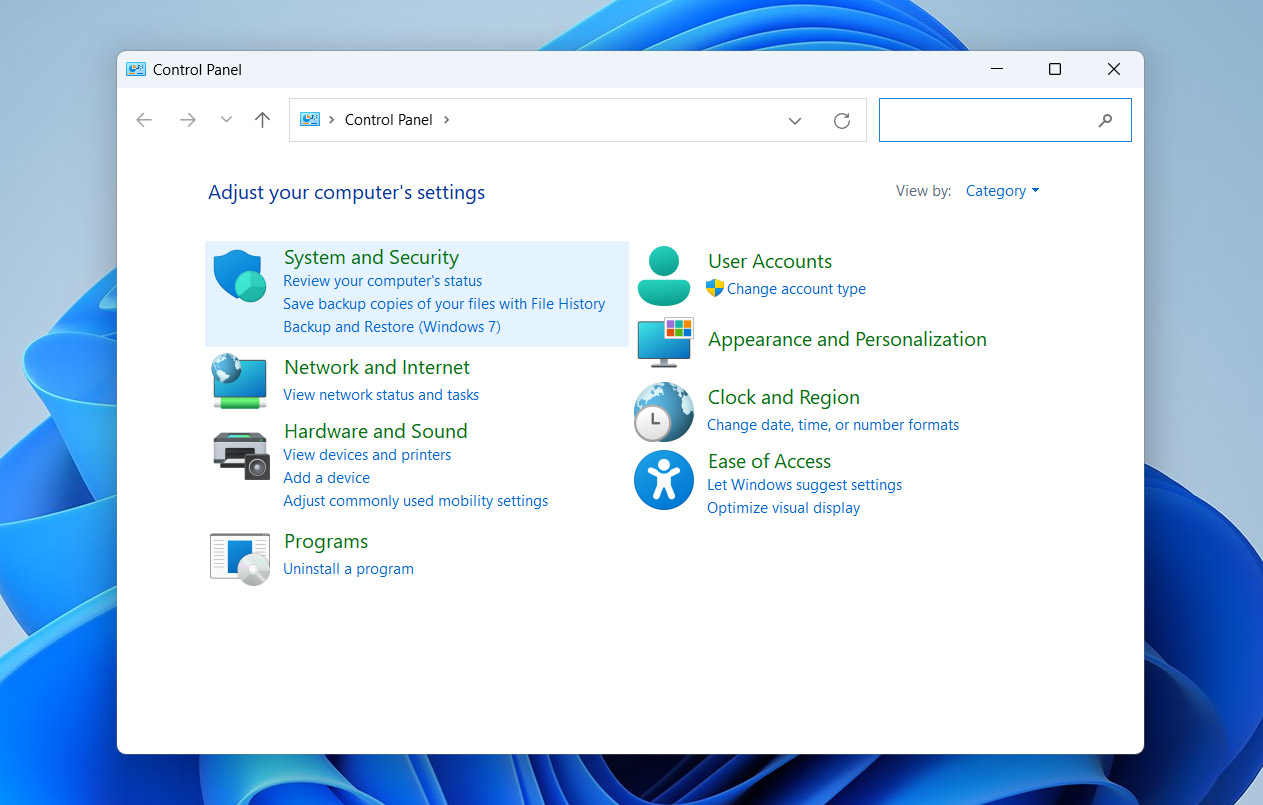
- Type “control panel” into the search bar embedded in your taskbar. Choose the top result.
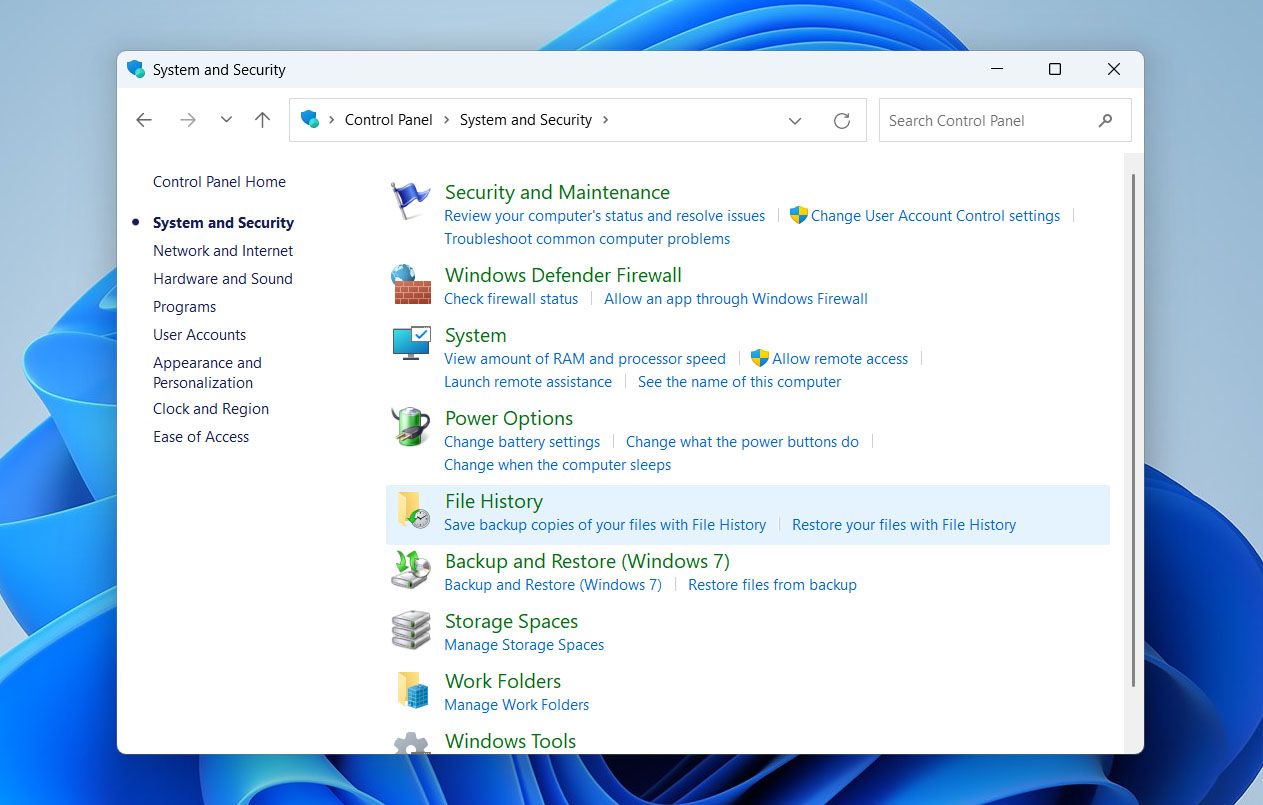
- Once you’re on the control panel window, click System and Security.
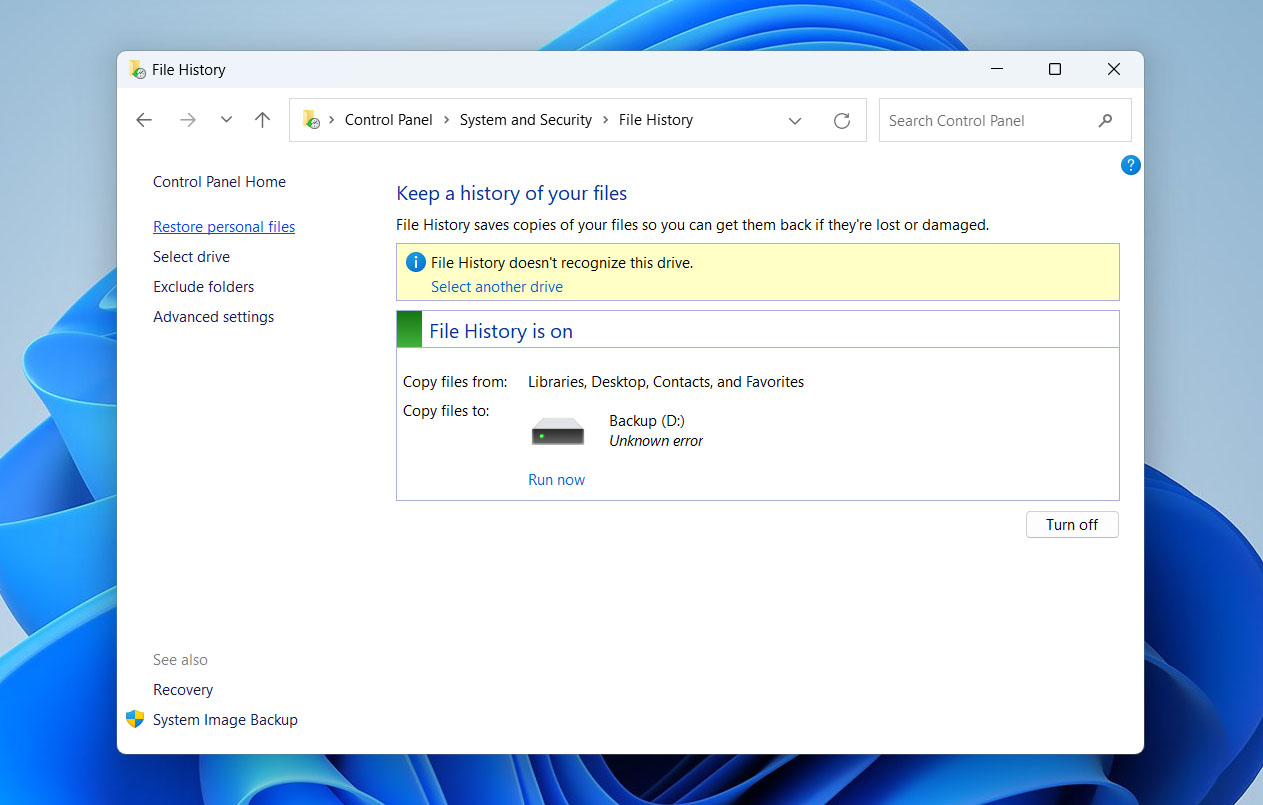
- On the next screen, head to File History.
- Click the Restore personal files link on the left side of the window.
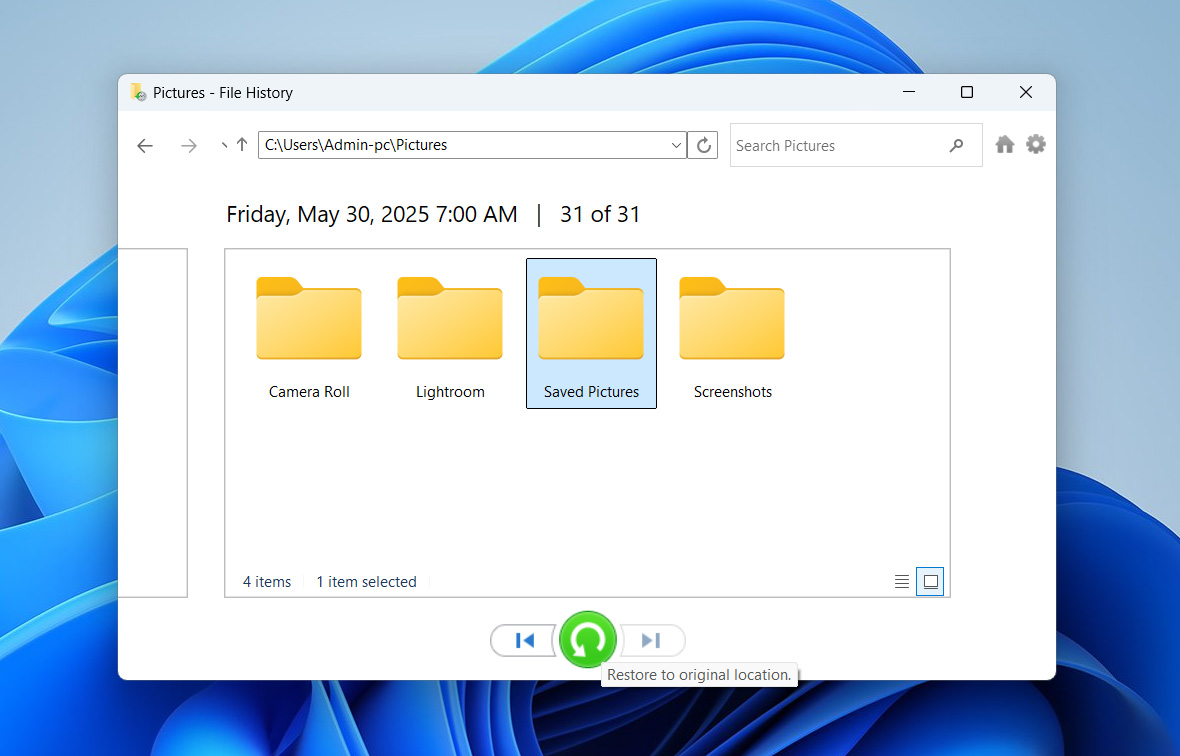
- A pop-up window will appear. Navigate to the location where your lost files or folders are located and highlight the data you want to retrieve. When you’re ready, click the green rounded arrow icon along the bottom side of the window. This will restore the files to the location where you found them in File History.


That wraps up the most effective ways to recover files lost during a Cut and Paste operation. Whether the issue was caused by a crash, accidental shutdown, or a clipboard glitch, the right recovery method can often restore your files.