
Reading Time: 7 minutesAnyone with a Windows computer eventually has to erase files for one reason or another. Or perhaps an unforeseen event like a sudden computer restart caused files to be deleted. Some of them end up in the Recycle bin, while others seemingly vanish into the void. So, exactly where do permanently deleted files go?
In this guide, we’ll discuss what happens to deleted items on your Windows PC and walk you through how to find and potentially recover them.
Where Do Deleted Files Go in Windows 10?
If you deleted a file by hitting the “Delete” button on your keyboard or by right-clicking and selecting the “Delete” option, then chances are the file you erased ended up in the Recycle Bin tool.
Windows operating systems create a “Recycle Bin” folder in each recognized internal storage device and some external ones, which reserves a certain amount of space for storing erased files.
For permanently deleted files that were erased through the “Shift + Delete” command, purged from the Recycle Bin, or are just too big to be housed in the Recycle Bin, the Windows 10 OS makes it appear as though they have been completely removed from your computer.
In truth, while your files may no longer be accessible through Windows Explorer, they actually still exist on the storage device and can be located using certain third-party programs. However, Windows will now allow those files to be overwritten by new files that come into the storage device.
How to Find Deleted Files on Windows 10
There’s a built-in search function in your OS that you can use to find deleted files on Windows 10, but before you start searching, you’ll want to check your Recycle Bin to see if that’s where your erased files landed.
Recycle Bin
There are two ways you can go about reaching the Recycle Bin tool:
- You can access the Windows Recycle Bin tool by double-clicking its icon on the desktop.
- You can bring up the Run feature by pressing the “Windows” + “R” keys, then typing in “explorer.exe shell:RecycleBinFolder” and hitting “Enter”.
Windows File Explorer
If the deleted files aren’t available in the Recycling Bin, you can thoroughly sweep your computer using Windows File Explorer to see if they’ve just been misplaced somewhere.
Before proceeding with this method, however, it’s worth considering that the files you’re looking for might be hidden, so you’ll want to go into folder options and make sure it’s set to show hidden files and folders.
From there, you can follow the steps below to use Windows File Explorer to find missing files:
- To get started, simply press the “Windows” and “E” keys simultaneously to bring up an instance of Windows File Explorer, then click on “This PC” from the left-side panel.
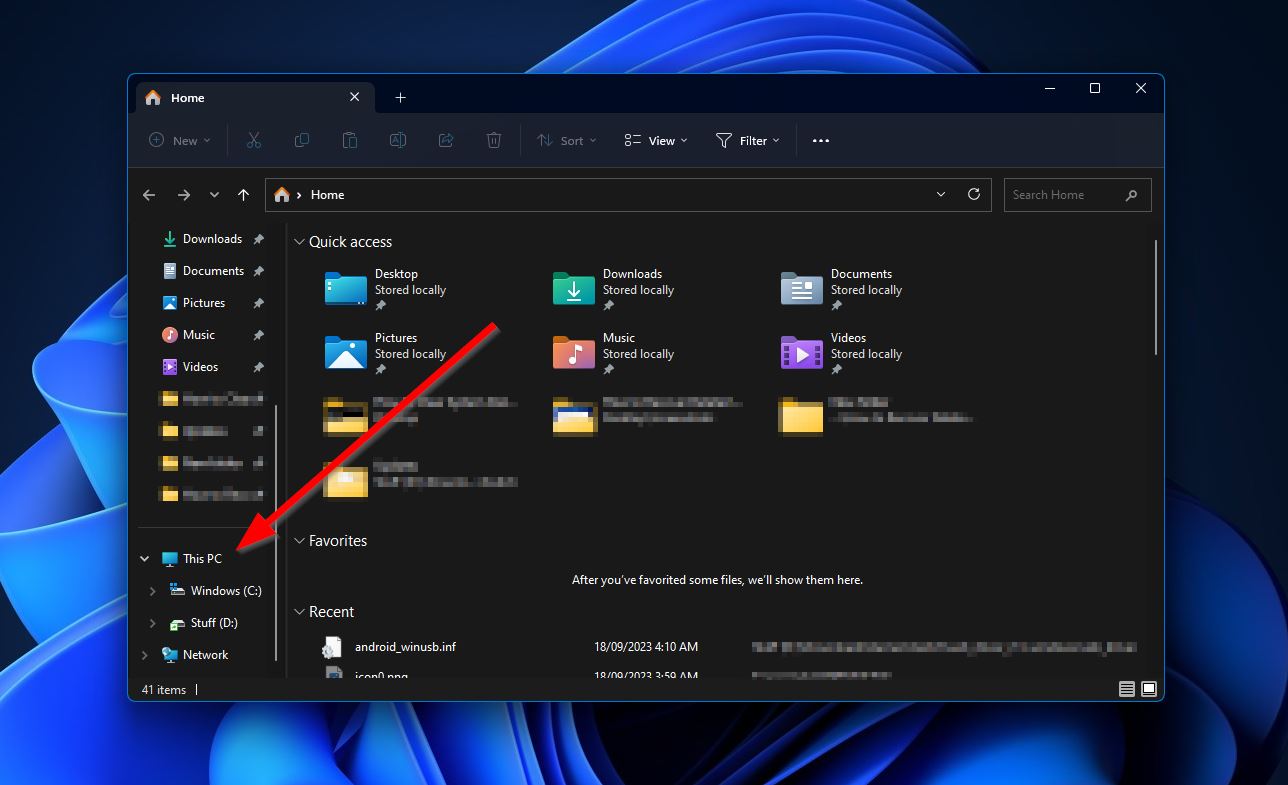
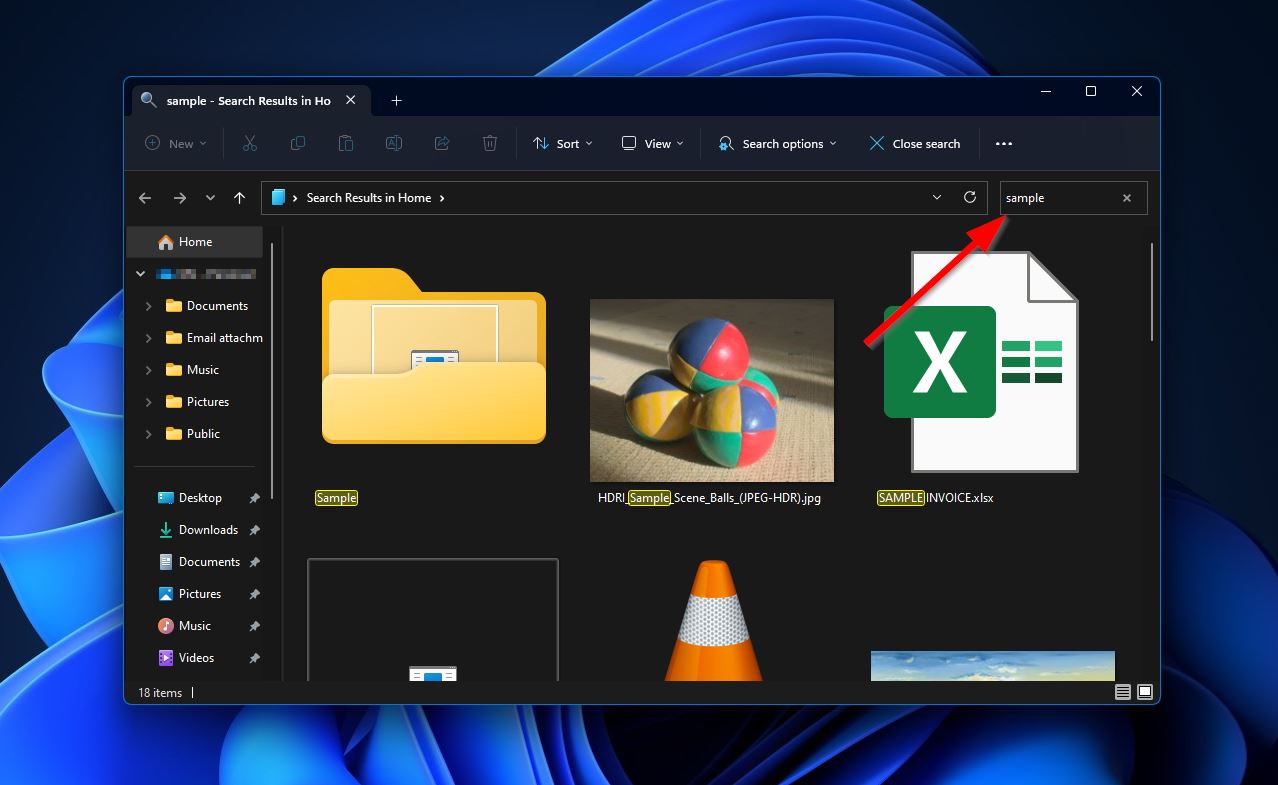
- Next, type the name of your deleted file into the search box in the upper-right corner of the File Explorer window and hit “Enter”. Alternatively, you can also key in file extensions, though this will likely yield an overwhelming number of results unless it’s a rare file type.
Note: Using this method while you’re on “This PC” will cause File Explorer to search through all connected storage media for your deleted files. You can narrow down your search by using the function while you’re at the root of a specific drive or a particular folder that you’d like to investigate.


In case your files don’t turn up after using the methods outlined above, they’re likely inaccessible using conventional methods and will require the help of a third-party data recovery tool to find and restore.
How to Recover Deleted Files on Windows 10
There are a few tried and tested ways to restore permanently deleted files on Windows 10, one of which utilizes a built-in Windows tool while the other requires a third-party app.
Restore Permanently Deleted Files Using a Data Recovery Program
One of the most popular methods of retrieving accidentally deleted or lost files is through the use of a data recovery app. But finding one that actually delivers on its promises can be quite a challenge.
Disk Drill is one of the more well-received file recovery programs available, boasting a polished user interface, quick scans, and a staggeringly high recovery rate.
Furthermore, it’s compatible with just about any file type around and supports all manner of storage devices. Plus, it offers a free trial version (on Windows) that allows you to test all of the program’s features and rescue 500 MB of data.
Just keep in mind that the latest version of Disk Drill works with Windows 10 and 11, but older operating systems will require a previous version of the program.
Here’s a quick and easy guide on how you can recover deleted files using Disk Drill:
- First, download the newest Disk Drill version from the Cleverfiles website and install it on your Windows 10 PC.
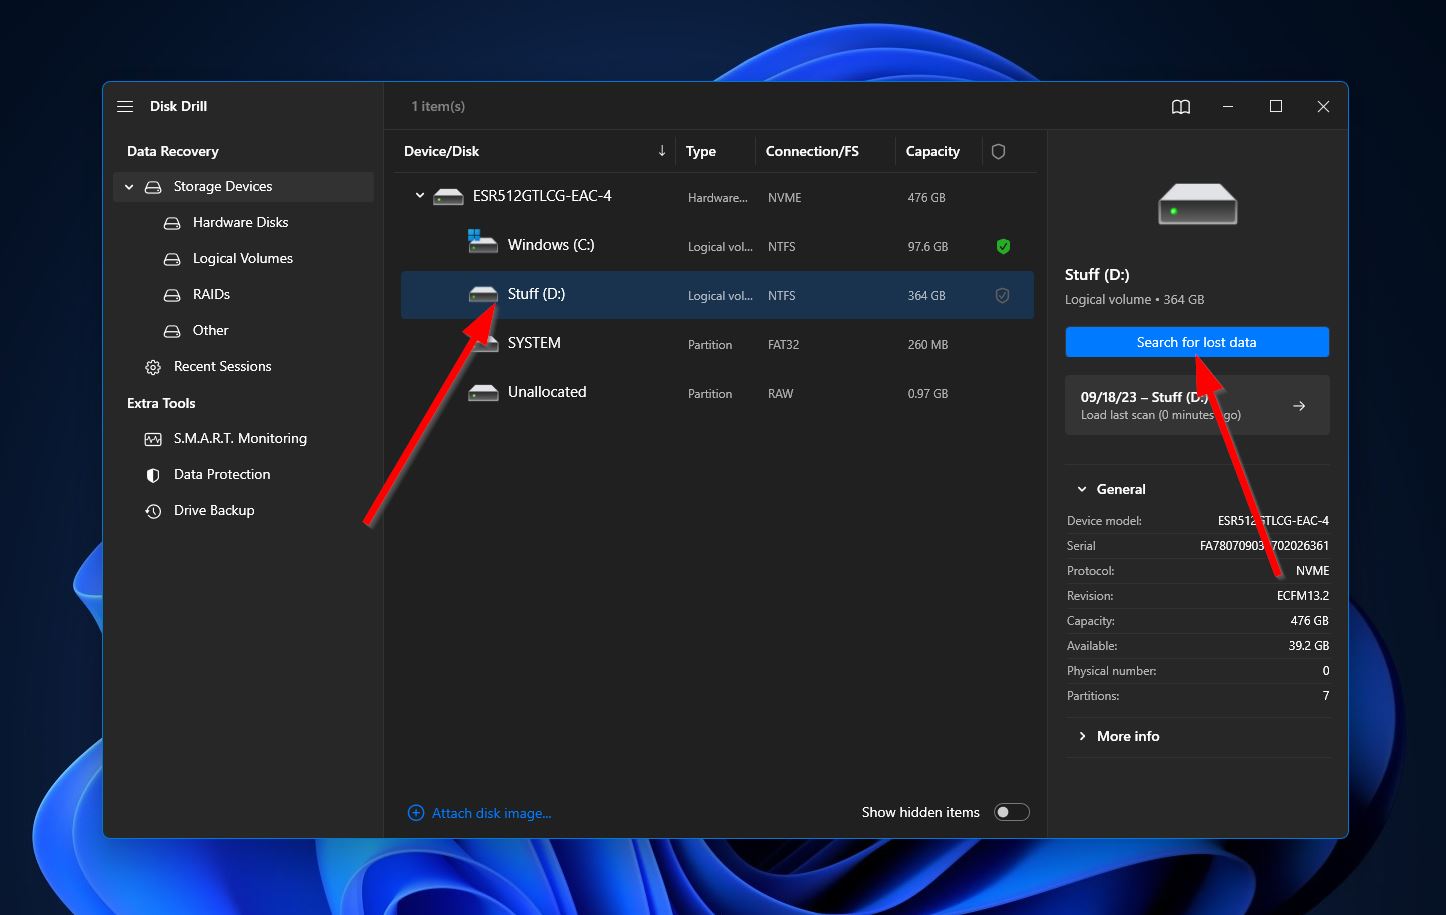
- Launch the app, then select the storage device where your deleted files were last located. From there, click “Search for lost data” to proceed.
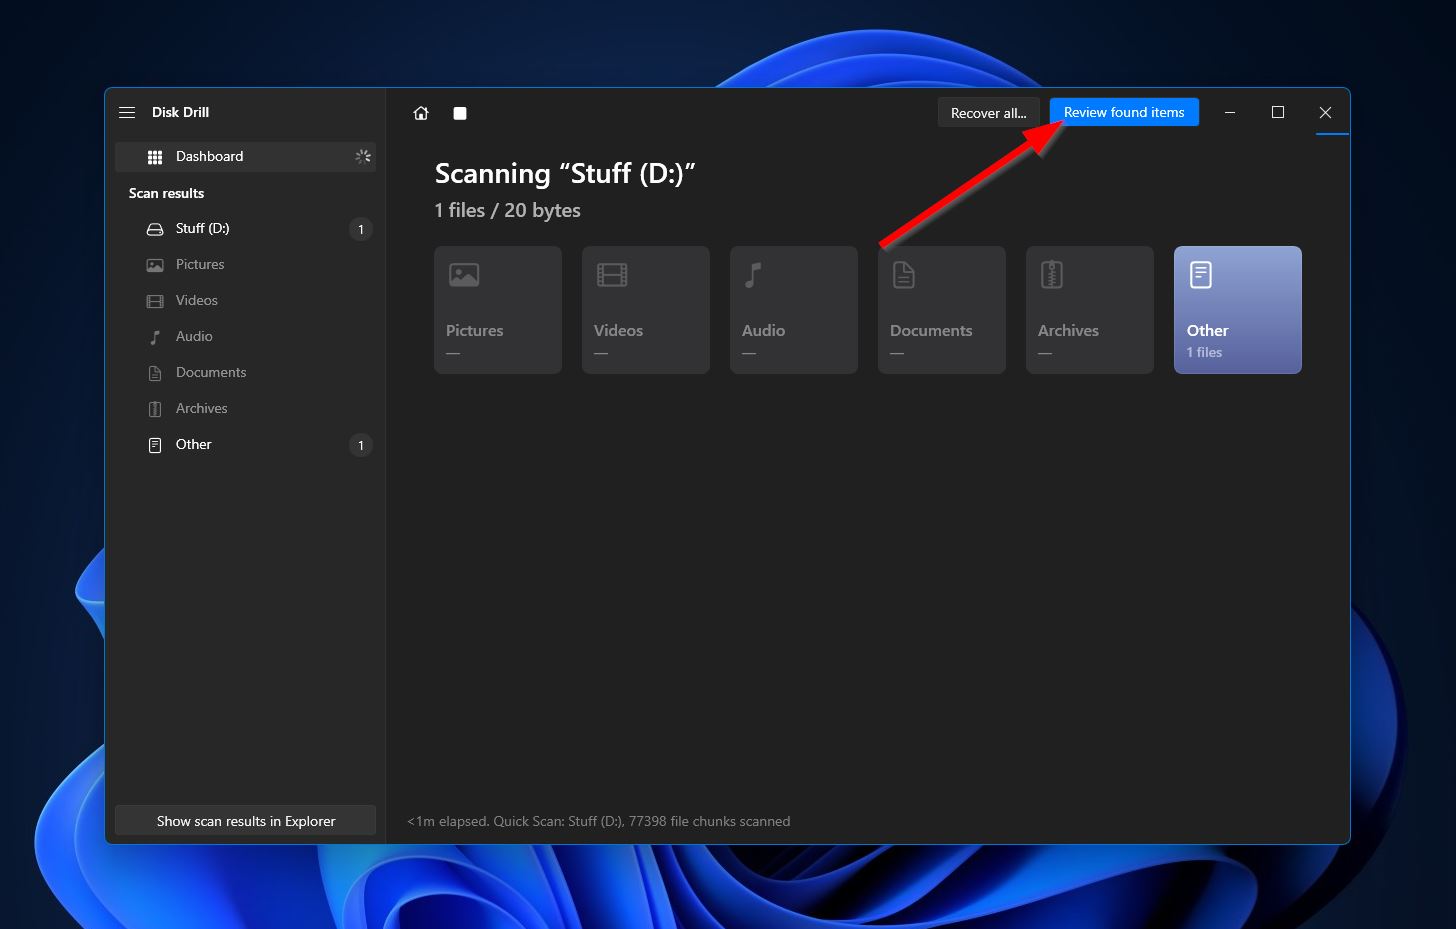
- Upon clicking, Disk Drill will start thoroughly scanning the selected drive for any potentially retrievable files. Once you’re ready to continue to the “Results” page, click the “Review found items” near the top-right corner of the window.
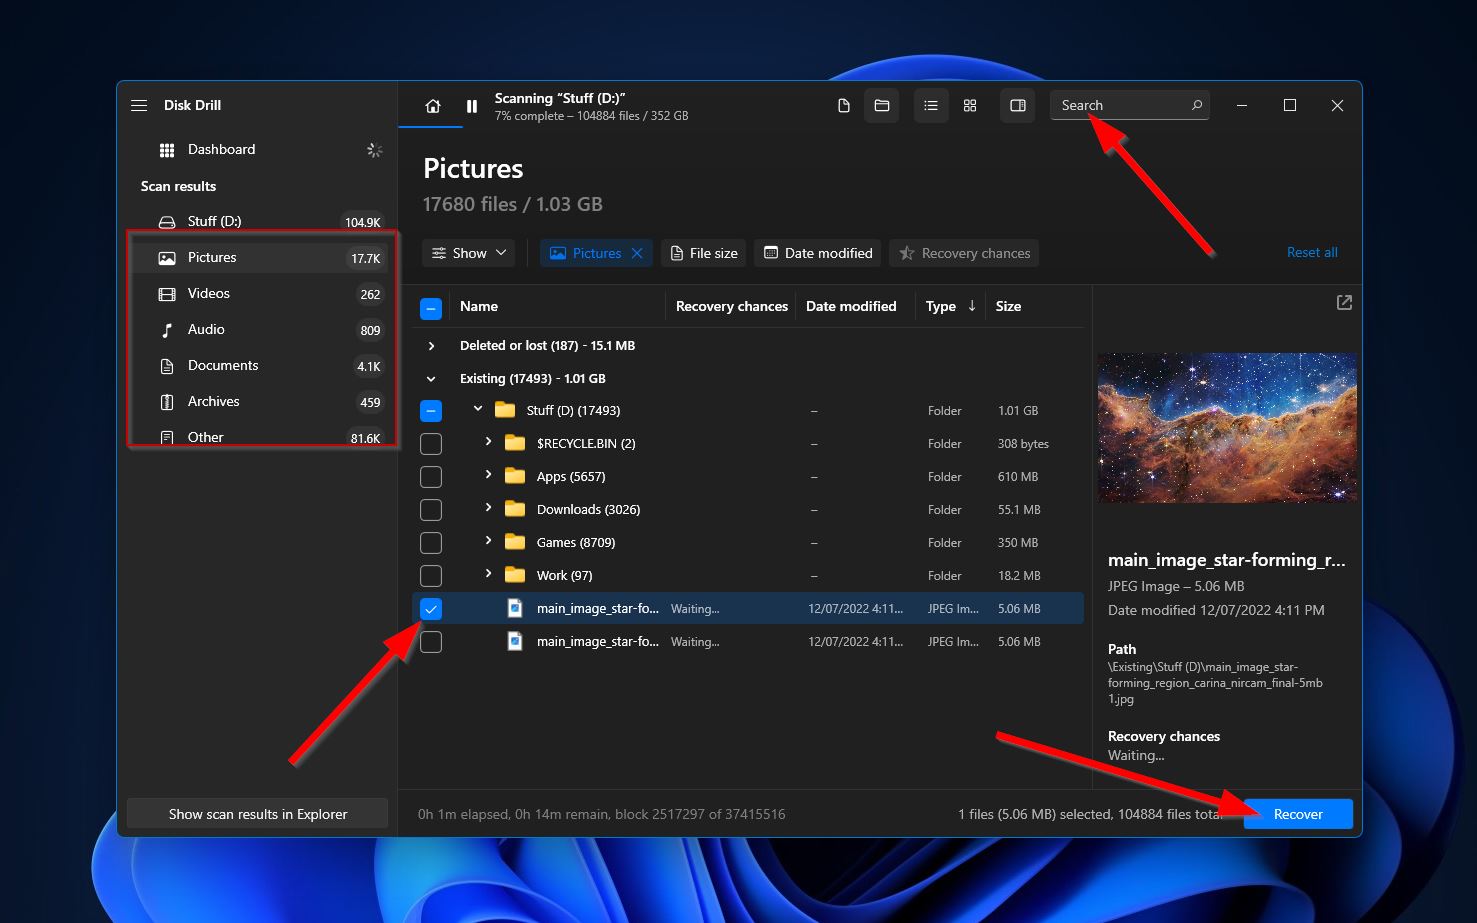
- Next, you’ll see a list of all the files found by Disk Drill. If you’re interested in narrowing down the list, you can use the categories on the left side of the window or the search bar in the top-right corner. It’s worth mentioning that the search bar accepts both file names as well as extensions. When you find the deleted files you’re looking for, highlight them by ticking the checkboxes next to the file names, then hit “Recover” to continue to the next step.
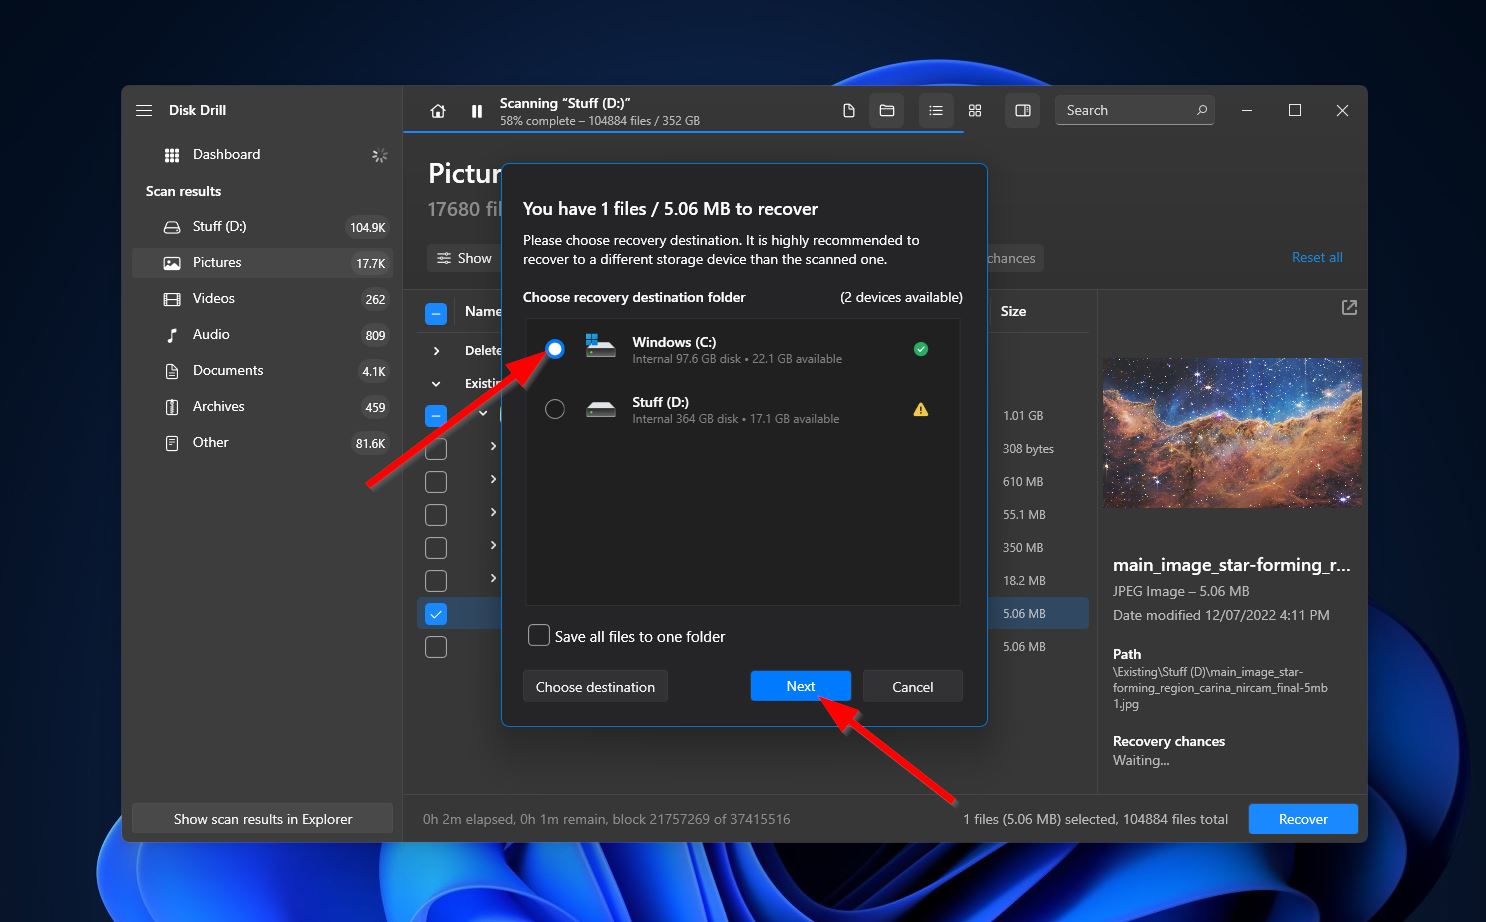
- After that, a pop-up will appear where you’ll need to select a destination for the files you want to recover. After deciding, click the “Next” button.
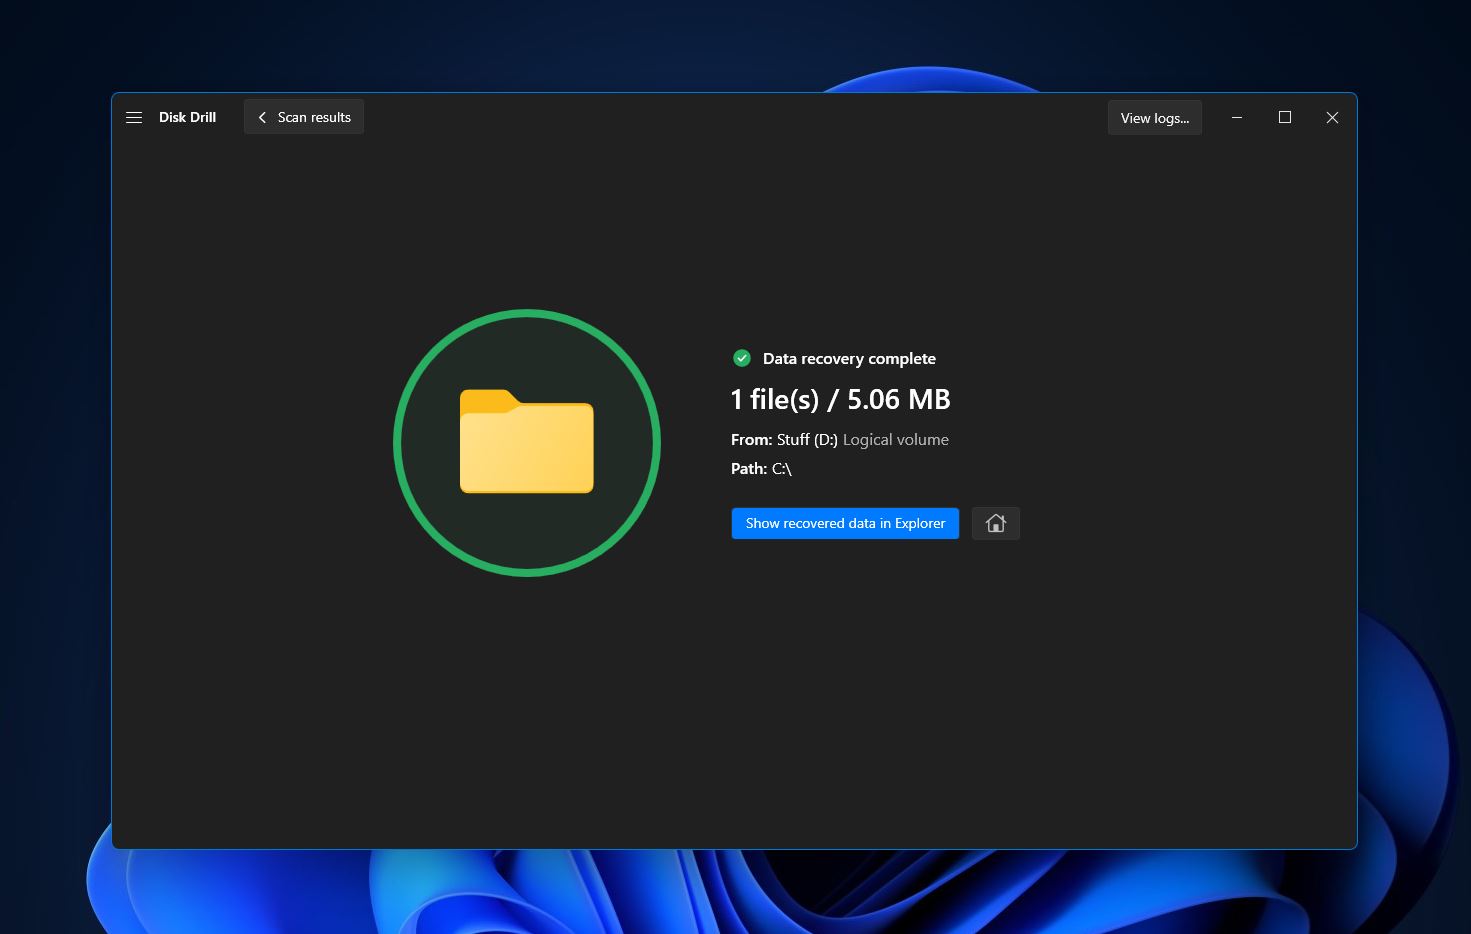
- Disk Drill will now try to rescue your selected files. When it’s done, you’ll see a completion message and a button labeled “Show recovered data in Explorer”. Click the button if you want to go straight to your recovered files.


Recover Permanently Deleted Files Using File History
Windows 10 comes with a built-in feature called File History that allows you to use regularly created backups to restore files.
It’s a nifty tool for recovering lost files housed on your primary storage drive. You can even recover different versions of the same file, depending on the date.
The main condition for using this method to recover deleted files is that the feature should have been enabled prior to the files being erased. If you happened to have File History switched on before the data loss happened, here’s how you can use it to get your files back:
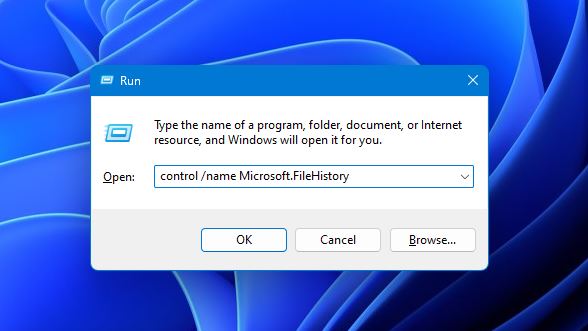
- First, bring up the Run feature by pressing the “Windows” + “R” keys, then type in “control /name Microsoft.FileHistory” and hit “Enter”.
- Then, click “Restore personal files” on the left side of the window.
- Browse to the folder that your files were in before being deleted, then highlight the ones you want to recover and click the rounded green button near the bottom of the window.
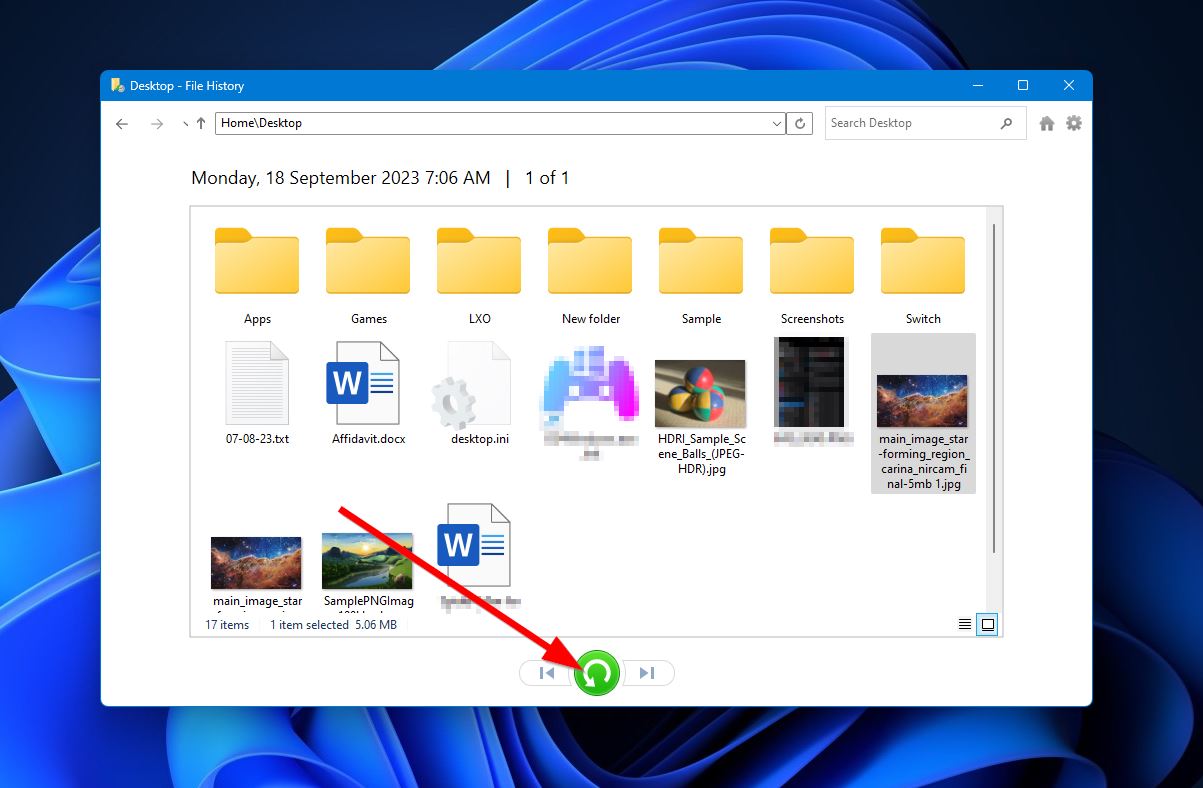
- Your files will now be restored to that same folder.


Conclusion
Contrary to the belief of many novice computer users, deleted files on Windows 10 don’t just disappear.
If they don’t get sent to the Recycle Bin tool, they’re made inaccessible via the Windows OS, despite still actually existing on the storage device. The data often remains stored on the storage device until overwritten by other files.
On the plus side, there’s a good chance that these deleted files can be retrieved through the use of a capable data recovery program. You can also get them back using the Windows File History feature, provided it has already been set up beforehand.