
Reading Time: 7 minutesSystem restore is a backup feature that’s been built into Windows since time immemorial. What it essentially does is take a snapshot of your computer’s storage at a particular point in time. This allows you to restore the computer to that state if you have a problem with new programs or a bad update.
This feature doesn’t necessarily always work how it should. We’re going to go through your options if your system restore failed on Windows 10.
How System Restore Works on Windows 10
System restore is an in-built feature on Windows 10 but it needs to be activated manually. The first thing that you need to do is create a system restore point, so that your computer has a snapshot that it can take you back to.
Here’s how to create a system restore point in Windows 10.
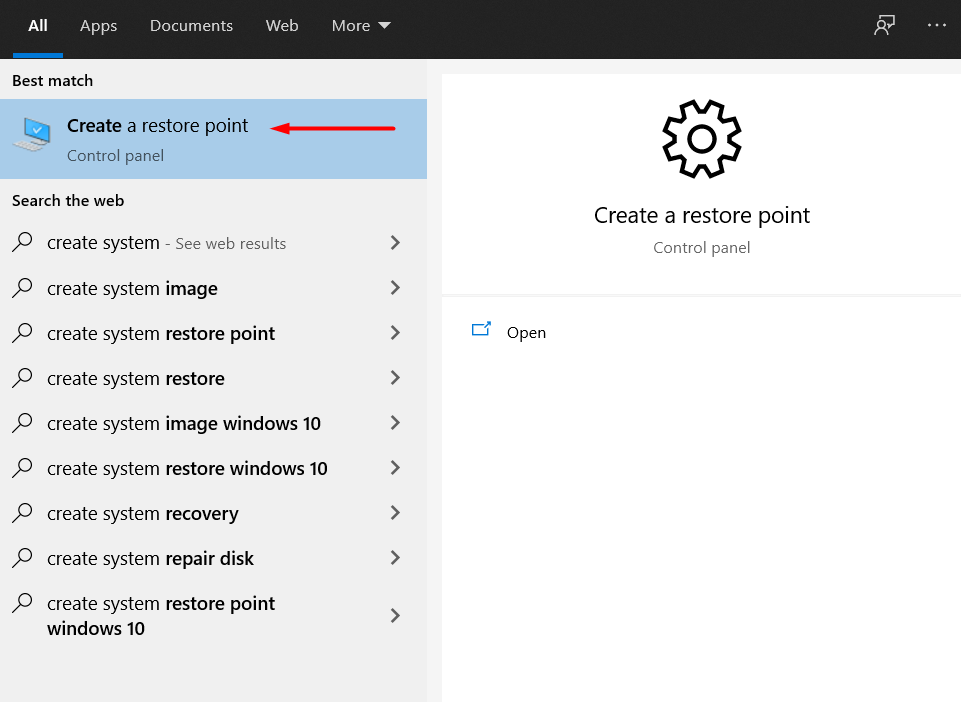
- Search for Create a restore point in the Windows 10 search bar and click on that option.
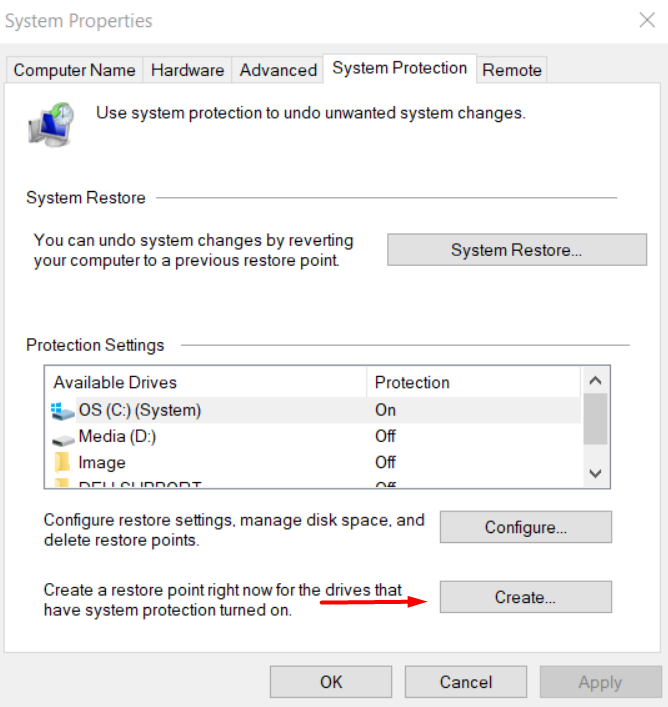
- You will now see a screen with a section titled as Protection Settings. Choose the system drive option, which is usually the (C:) drive.
- Next, click the Configure button and select Turn on system protection on the screen that follows.
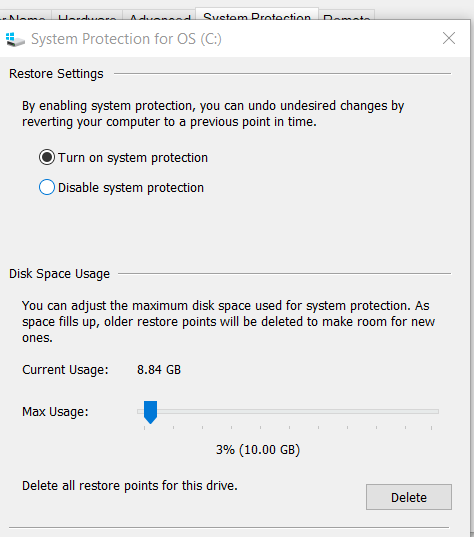
- Move the Max Usage slider around the set the maximum space that restore points will take up. Around 4 to 5 GB is about how much space you’ll need to dedicate to it.
- Hit the Apply button and then OK to complete the process of activating the system restore feature.


Now that you’ve activated system restore, it’s time to create a restore point. Here’s how to do that.
- Go back to the Protection Settings section we saw previously and hit the Create button.
- Name your system restore point on the screen that follows. Make sure that you name it descriptively so that you can identify when the restore point was made. For example, choose a name like, “Windows 10 Update November 21”
- Hit the Create button and then click Close.

You now have a system restore point that you can go back to in case something goes amiss. Here’s how to take your system back to a restore point.
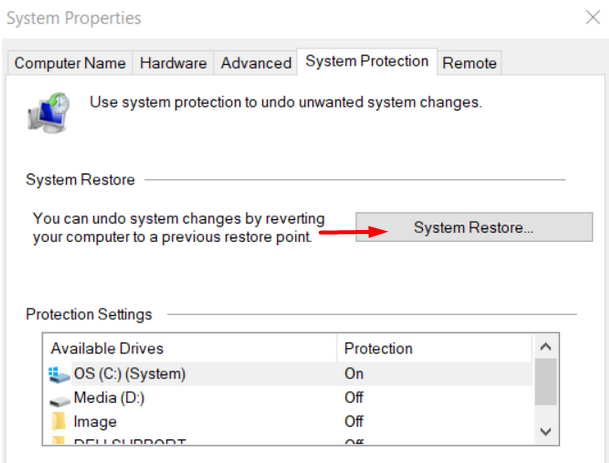
- Click on the System Restore button just above the Protection Settings section.
- Click Next. You will then be met with a list of restore points that you’ve created.
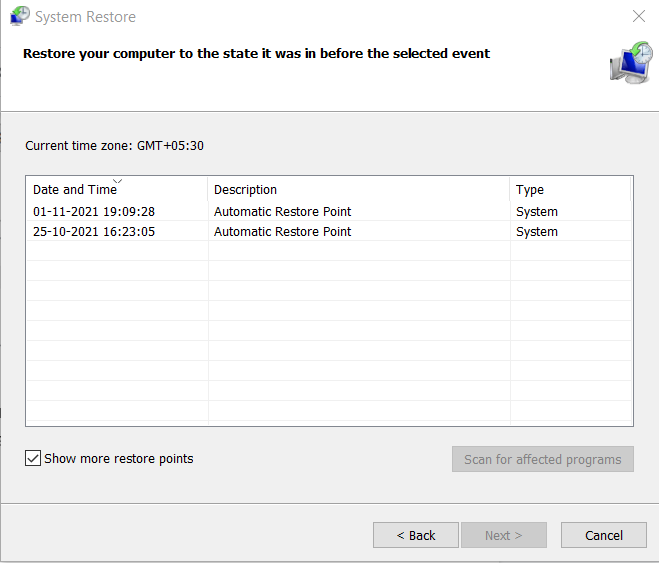
- Click on the Scan for affected programs button at the bottom right of that screen to see which programs will be affected by the system restore.
- Click Close and then hit Finish on the screen titled Confirm your restore point.


At the completion of this process, your computer will have been returned to a previous state. You will have to reinstall any programs that you installed after the restore point was made.
How to Recover Files Deleted During System Restore
In some rare cases, it is possible that your system restore didn’t complete successfully on your Windows 10 computer. That means that you could have lost certain files that you didn’t expect to. This usually happens because there was a fault in the way the restore point’s data was stored on the system.
Since you’ve lost your data because system restore is not working, you want to start by identifying the drives and partitions from where you lost your files. This will help when it comes time to recover them. This process applies only if a system restore fails; the steps look a little different if you have to recover data after a Windows 10 factory reset.
Disk Drill can help you recover files if your Windows 10 restore point failed. Here’s how to do that.
- Download Disk Drill at this link and install it on your computer.
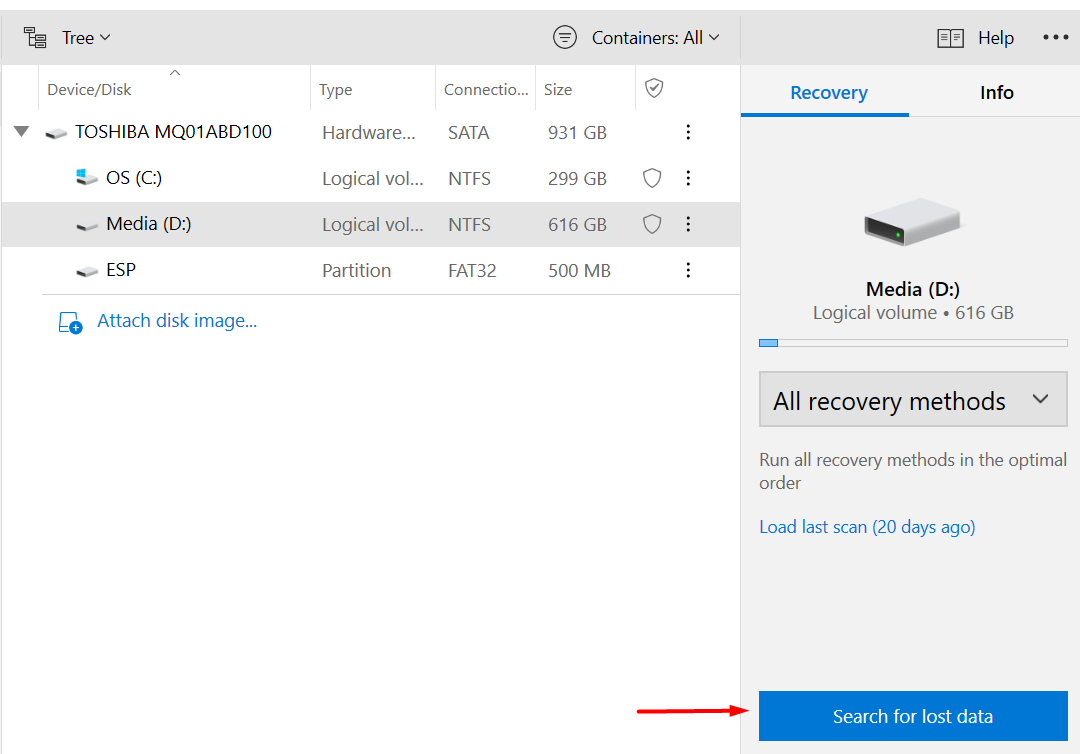
- Select the drive that contains the files that you lost because the system restore cannot be completed. Then click on Search for lost data.
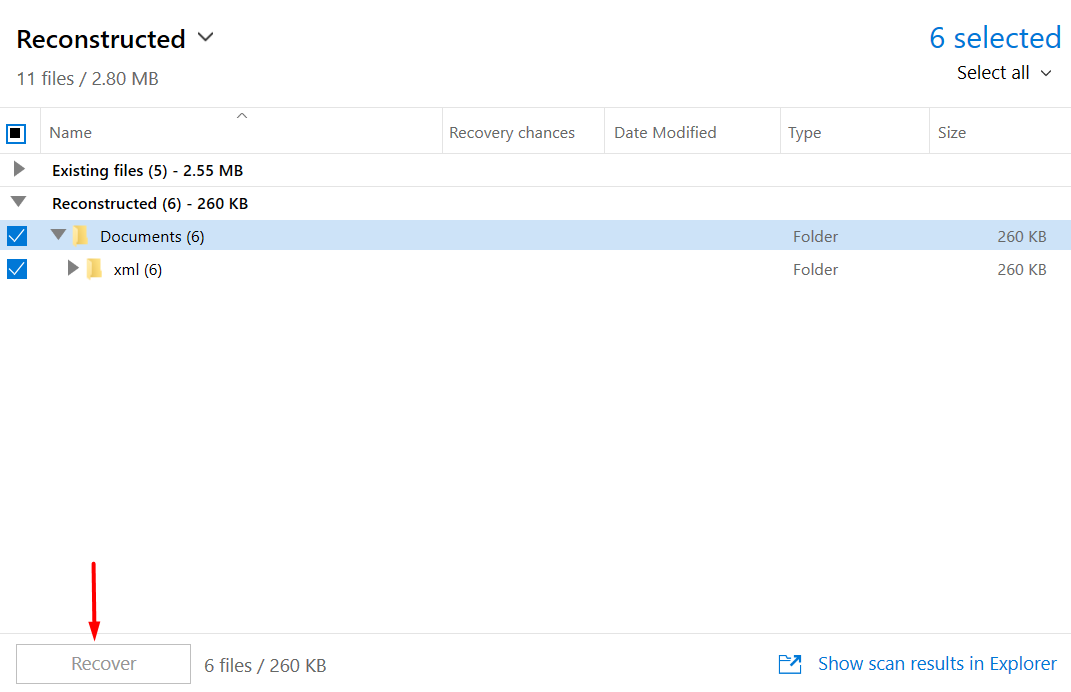
- Disk Drill will scan the drive and show you a list of all the recovered files for you to review.

- You can then click on the Recover button to regain the files that you lost because of a system restore error.


And just like that, the files that you lost because of a system restore error are now back on your computer.
How to Fix Windows 10 System Restore Error
We’ve seen that Disk Drill can help recover files if your system restore couldn’t be completed successfully on Windows 10. But you don’t want to have to rely on the software every time you use the system restore feature. Let’s take a look at a few things you can do so that the system restore features works the way it should.
Method 1: Choose Another Restore Point
As we saw earlier, you can choose from several restore points if you want to go back to a previous snapshot of your computer. If you find that a particular system restore cannot be completed properly and you have other restore points available, then try to choose a different restore point using the same process we outlined earlier in the article.
Method 2: Disable Your Antivirus
In some cases, the system restore feature might need access to a file that’s being used by the antivirus program or blacklisted by it for some reason. Carry out your system restore after disabling the antivirus so that the latter doesn’t impede the process. To disable your antivirus program, right click on its icon in your system tray and hit the disable option.
Method 3: Restore System in Safe Mode
Use this method if a system restore has caused your computer to crash repeatedly or become unstable in some other way. Safe mode loads only the most essential drivers and programs that your computer needs to run, so it tends to be a more stable way to access it.
To run your computer in safe mode:
- Restart your computer and hit the F8 key on your keyboard while it’s booting.
- In the Advanced boot options screen, click on Safe Mode.
- Once the computer loads up in safe mode, follow the same system restore process that we laid out earlier in the article and choose a different system restore point if you need to.
Method 4: Adjust System Restore Disk Space Usage
In some instances, a Windows 10 restore point fails because the computer doesn’t have enough storage space to write the restore point data into. Here’s how you can increase the space available to the restore point feature.
- Search for Create a restore point in the Windows search bar and click on that option.
- Under the Protection Settings header, click on Configure. You will be met with the following screen.
- Under the Disk Space Usage header, move the Max Usage slider to the right to increase the amount of disk space assigned for system restore points.
Once that’s done, your system restore is better equipped to return to restore points without losing files.
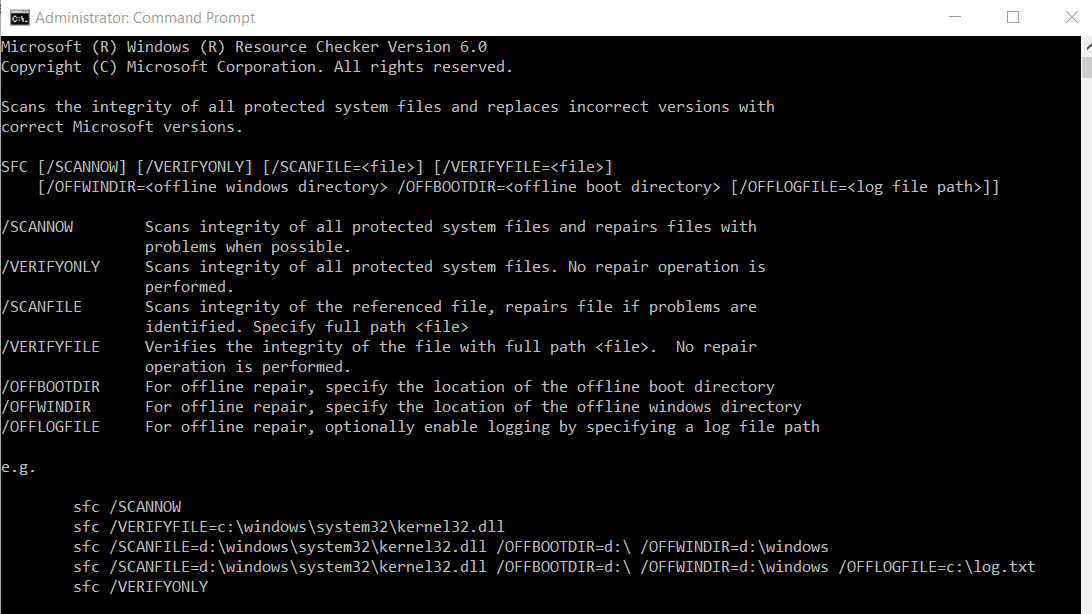
Method 5: SFC Command
System File Checker (SFC) is a utility that’s available in Windows 10 to scan for and restore system files specifically. If a system restore is not working because it messed with the system files in your computer, then use the sfc command to regain lost files.
Here’s how to use the SFC command in Windows 10.
- Run your computer’s command prompt as an administrator.
- Type the sfc command into the prompt. You will be met with the following screen.
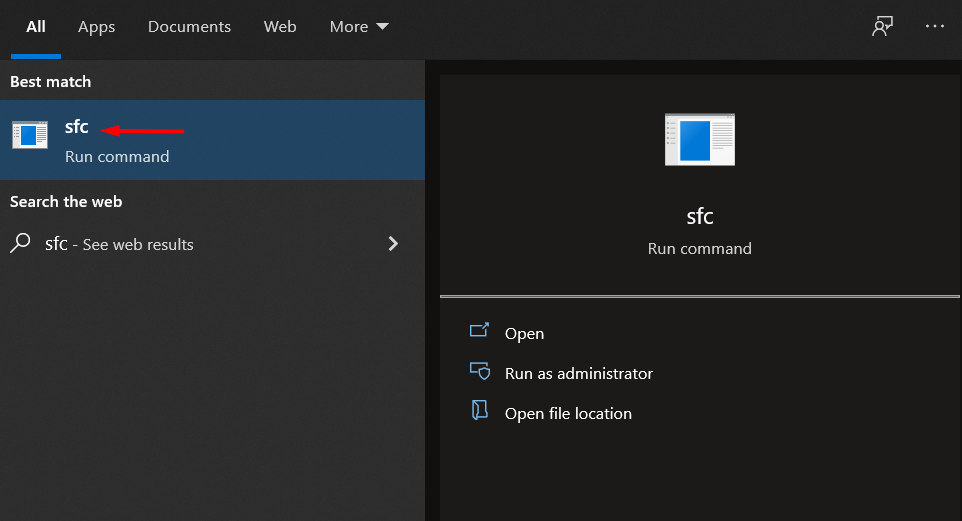
- Choose the appropriate command from the list that’s displayed. For example, if you want to scan all the system files on your computer and repair them, type:
sfc /SCANNOW

Method 6: Check Volume Shadow Copy Service
A Volume Shadow Copy service is a feature in Windows that creates snapshots of files on the computer even if that filesystem is being used. Here’s how you can activate the feature.
- Open the Run dialog box and type:
services.msc
- Search for the Volume Shadow Copy service from the list that appears.
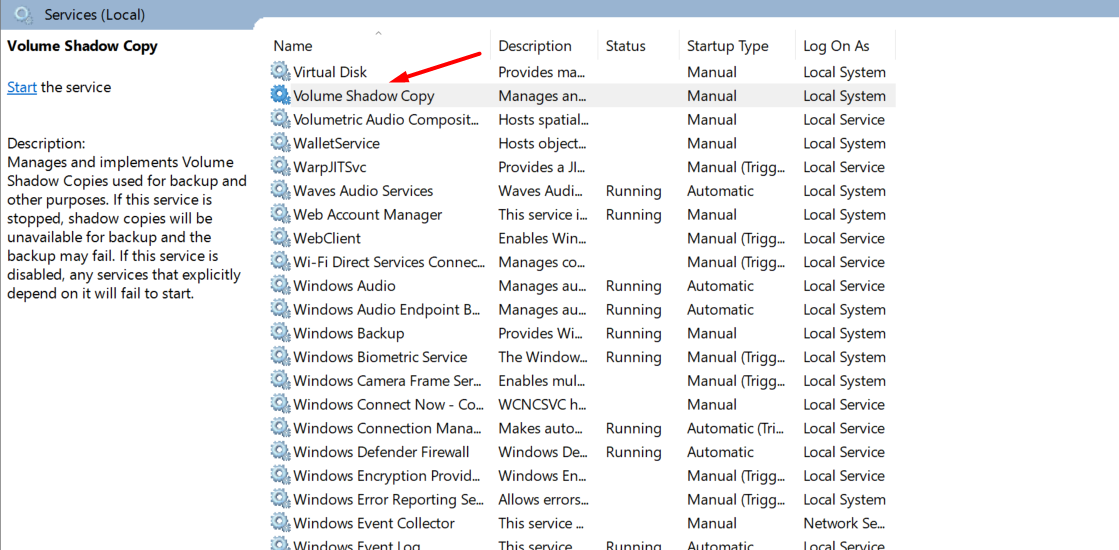
- Right click on the option and selection Properties. There, change the Startup type to Automatic so that the service starts up automatically when you start Windows.
- Restart the computer so your new settings are activated.
- Now that this utility has been activated, you can right click on any folder on your computer and the Restore previous versions option will appear. You can click on that and either restore that version or copy the previous version so you can paste it in a different location.