
Reading Time: 10 minutesUsually, updates leave your data exactly where you left it. However, if a buggy patch, a sudden shutdown during the update, or a disk error occurs, your files can be deleted or relocated to other folders. So, if you lost files after a Windows update, there are a few ways to get them back.
How to Recover Lost or Deleted Files After a Windows Update
If you suspect that a Windows update has deleted your files, that’s not always what happened (though it’s definitely possible). Sometimes your files just get moved or hidden, and each of those situations has a different fix. How you recover them also depends on how you use Windows, like whether you’ve been taking advantage of its built-in backup features.
Since actual file deletion is the most problematic scenario, we will start there and then move on to the simpler cases.
Method #1: Recover Deleted Data with Data Recovery Software
If a Windows update deleted your files and you don’t have any backups from before the update, your best bet is data recovery software. These programs search through your drive’s file system to find and restore deleted files. And if the file system itself is damaged, look for a tool with signature-based scanning – it can recover files, ignoring the file system.
One standout option is Disk Drill. It can recover almost any file type – photos, videos, documents, and even system files that were lost after a Windows update. You should run Disk Drill as soon as you notice something’s gone, as the longer you wait, the higher the chance new data will overwrite it. After the scan, Disk Drill shows both deleted and still-existing files, which is handy if you’re sure a file is there but can’t find it. Here’s how to get started:
- Download Disk Drill from the official website and install it on your computer.
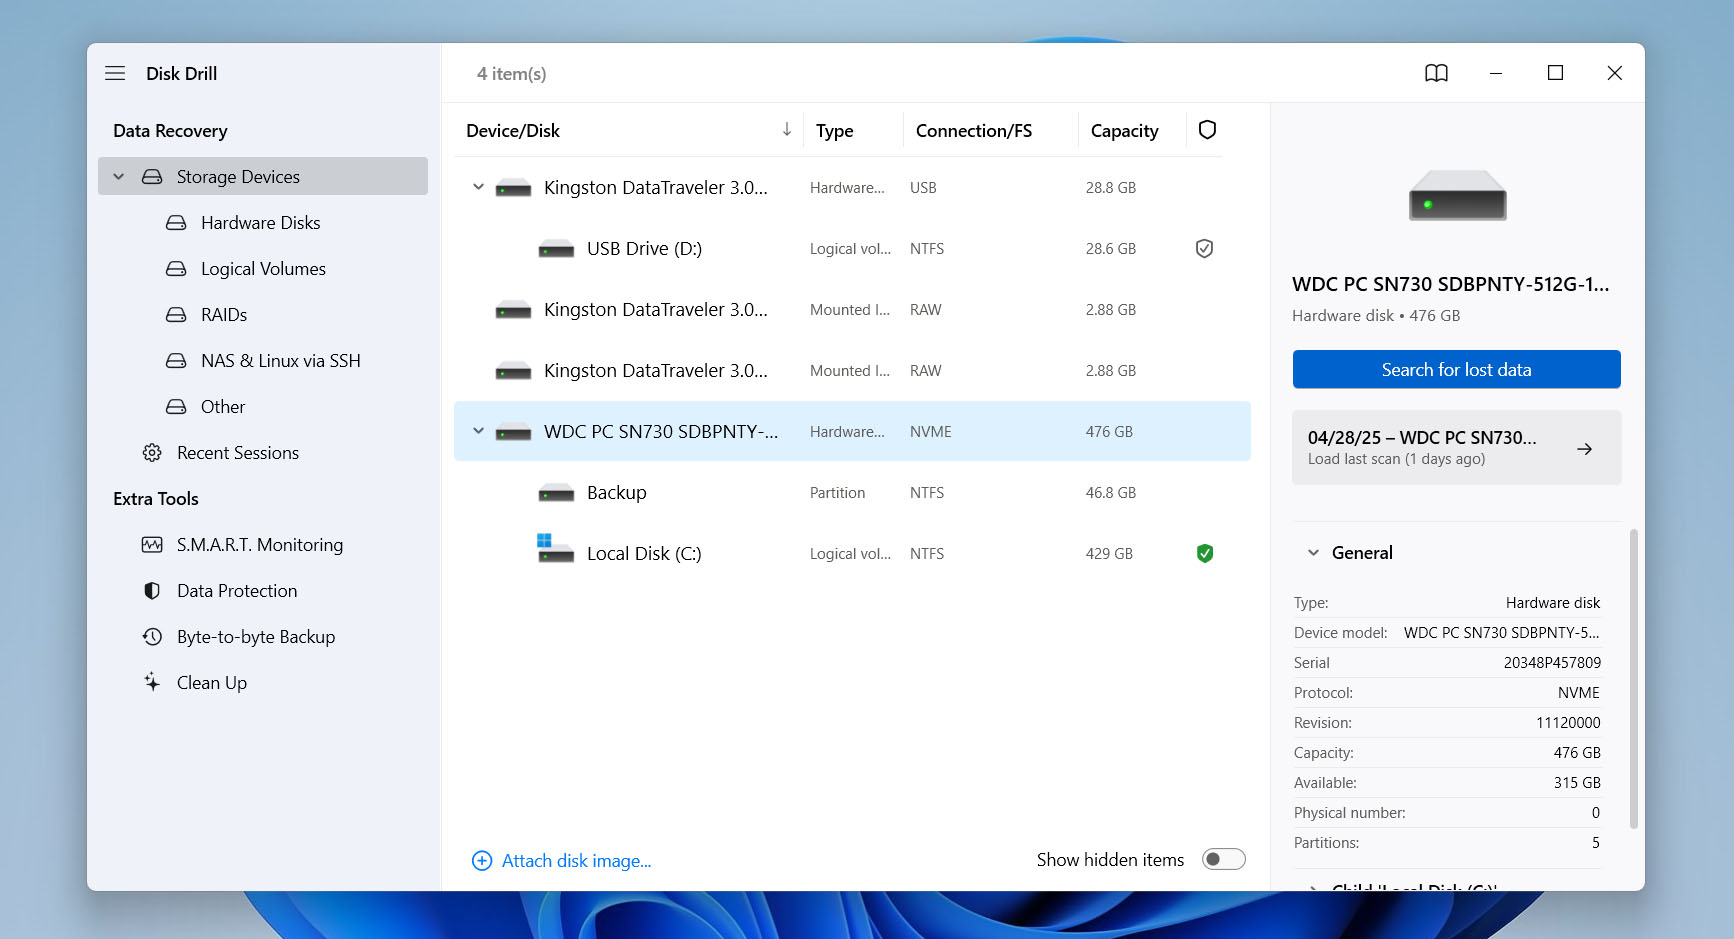
- Once it’s installed, launch Disk Drill. You’ll see a list of available drives -select the one you want to recover files from and click Search for lost data in the bottom-right corner to start scanning.
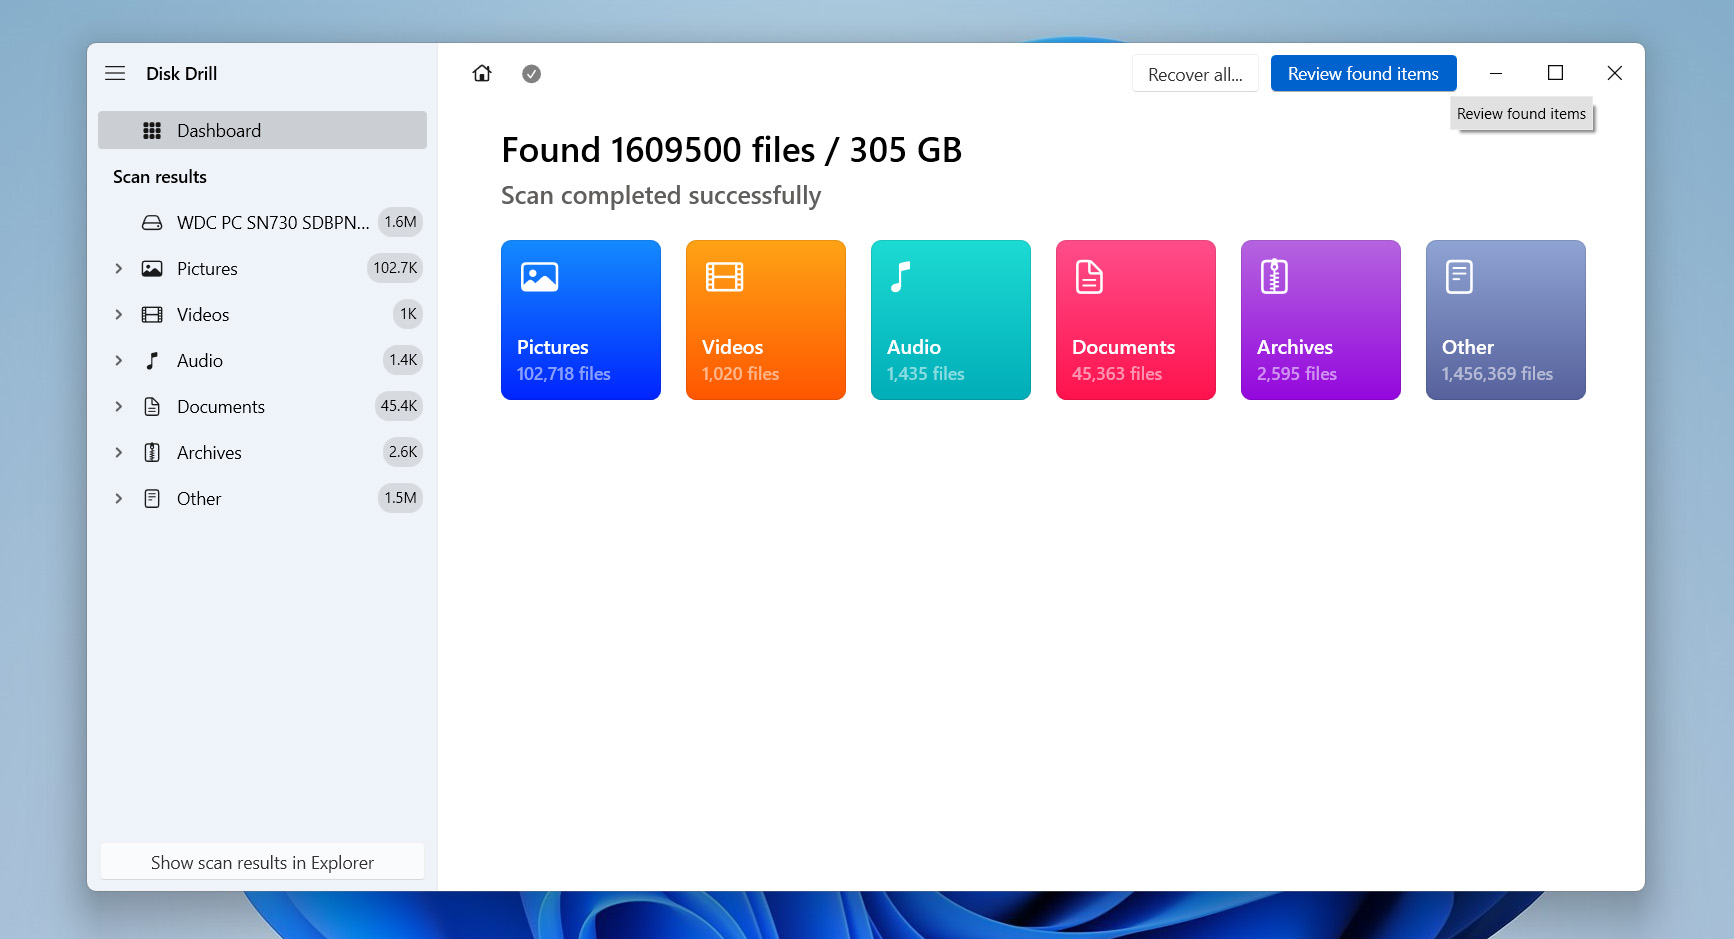
- You’ll be able to monitor the scan in real-time and even start recovering files as they appear, but it’s best to let the scan finish so you don’t miss anything. When the scan is done, click Review found items to see everything Disk Drill found.
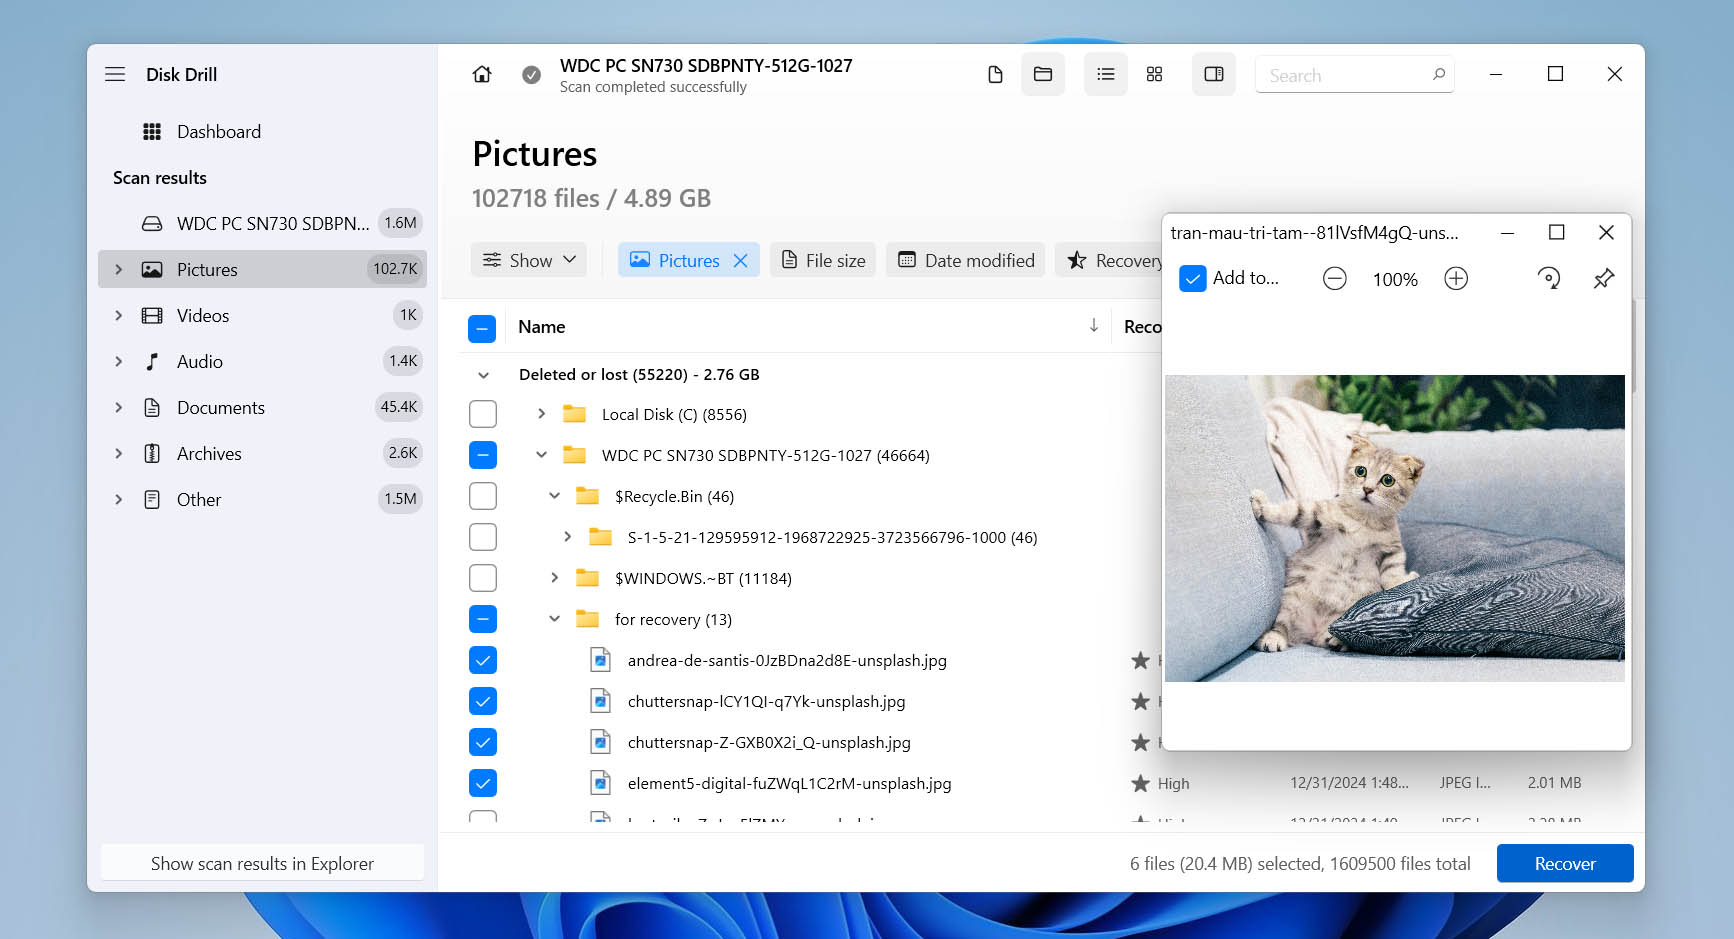
- On the next screen, check off the files you want to recover. You can double-click any file to preview it first. Once you’ve made your selections, click Recover to kick off the recovery.
- Choose where you want to save your recovered files. If you plan to scan the same drive again later, save them to a different drive to avoid overwriting. Disk Drill highlights good recovery spots in green and warns you away from risky ones with yellow. Pick your folder and click Next.

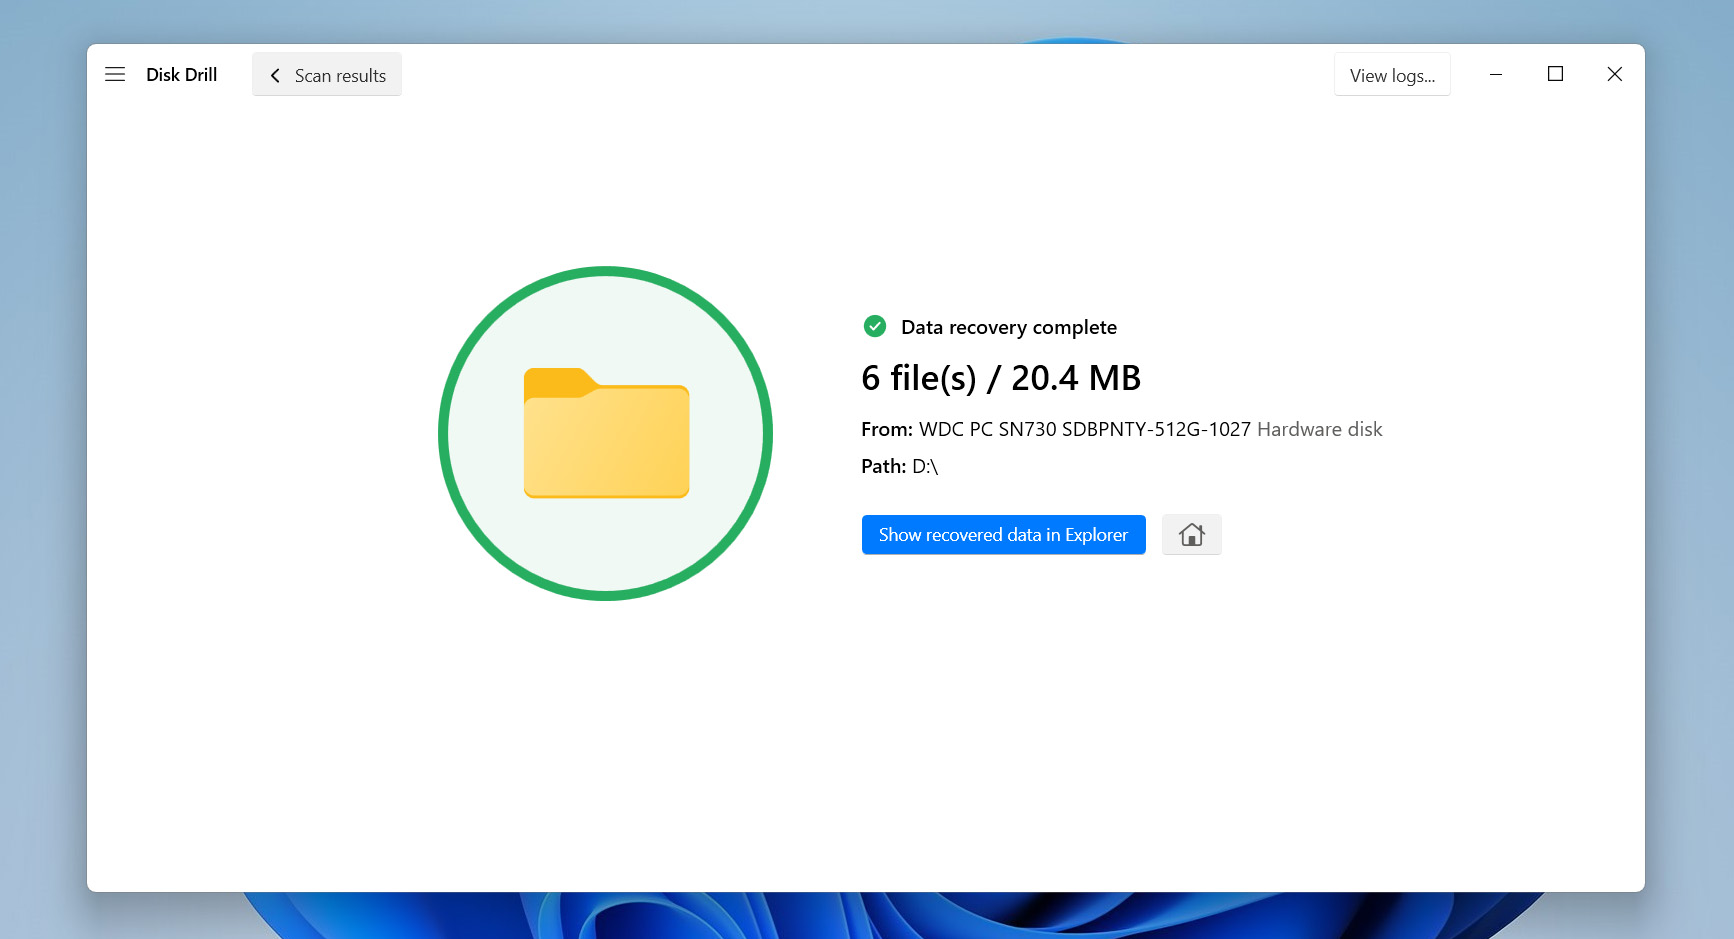
- Head to the folder you chose, and you’ll find your recovered files neatly organized. Disk Drill usually keeps their original folder structure, making it easier to find what you’re looking for.


Disk Drill lets you recover up to 500 MB of files for free. Need more? You’ll have to upgrade to the Pro version. If you want a 100% free option, give PhotoRec a try. Just be aware that it’s not as user-friendly, won’t let you preview files, and recover everything in one big, unorganized list.
Method #2: Use the File History to Restore Files
If recovery software can’t find your lost files after a Windows update, they were probably overwritten. At that point, your only option is to restore them from a backup you created before the update, such as using File History.
File History automatically backs up versions of files in the main folders – Documents, Music, Pictures, Videos, Desktop, and Favorites. If your missing files lived in one of those spots and you had File History turned on, you can use it to restore them.
- Open the Control Panel on your Windows PC.
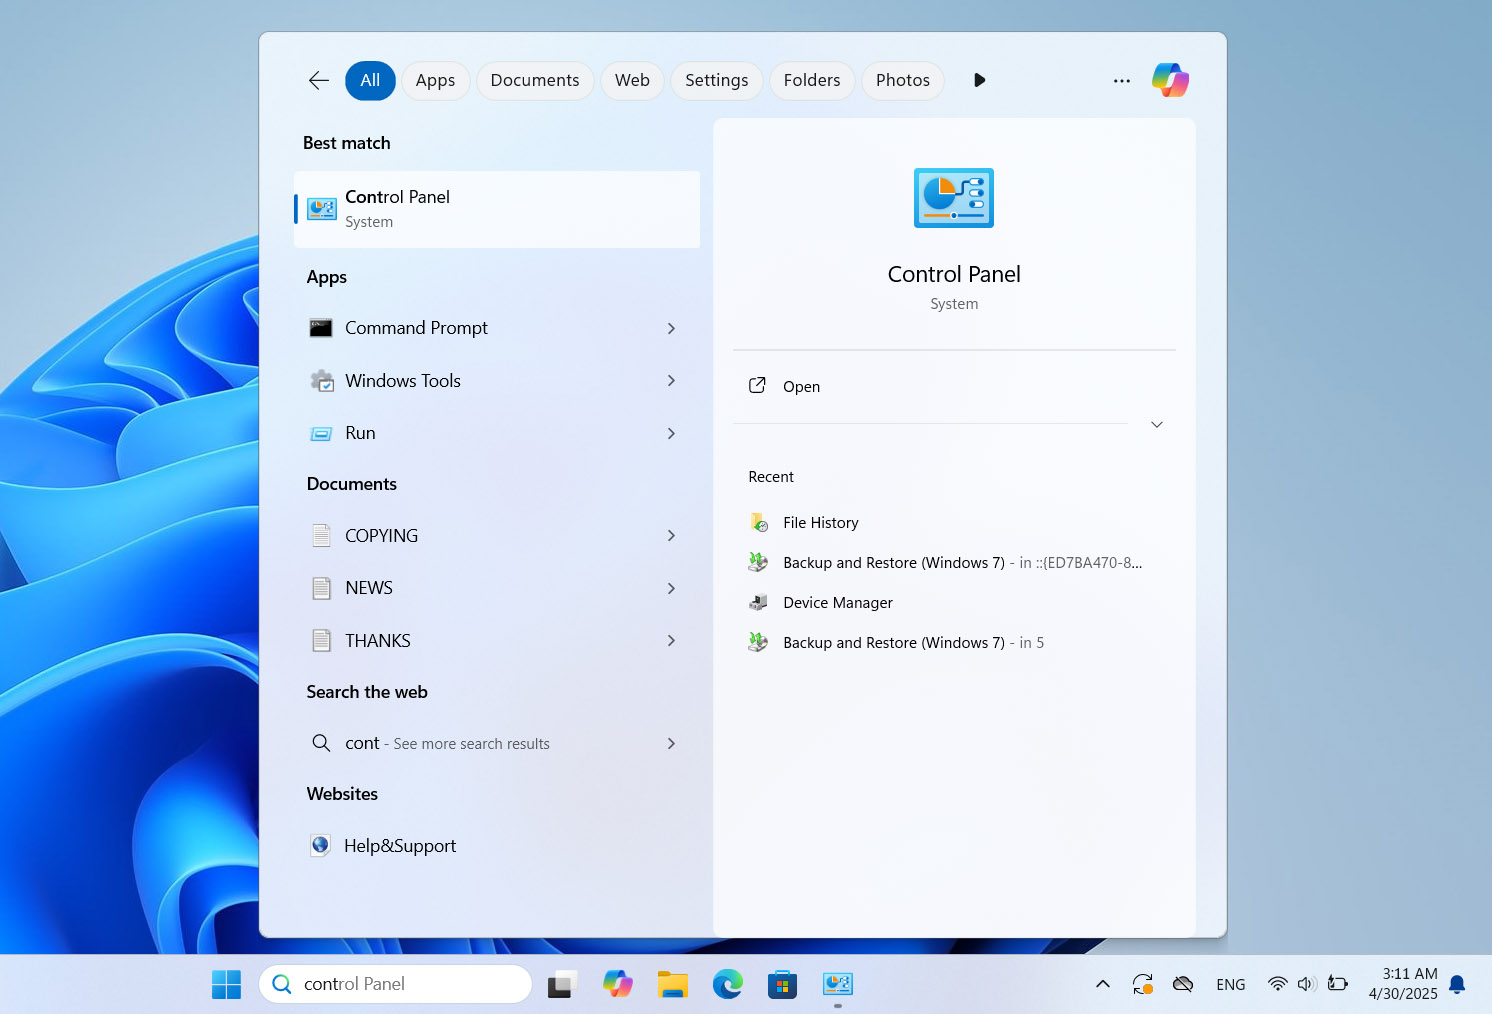
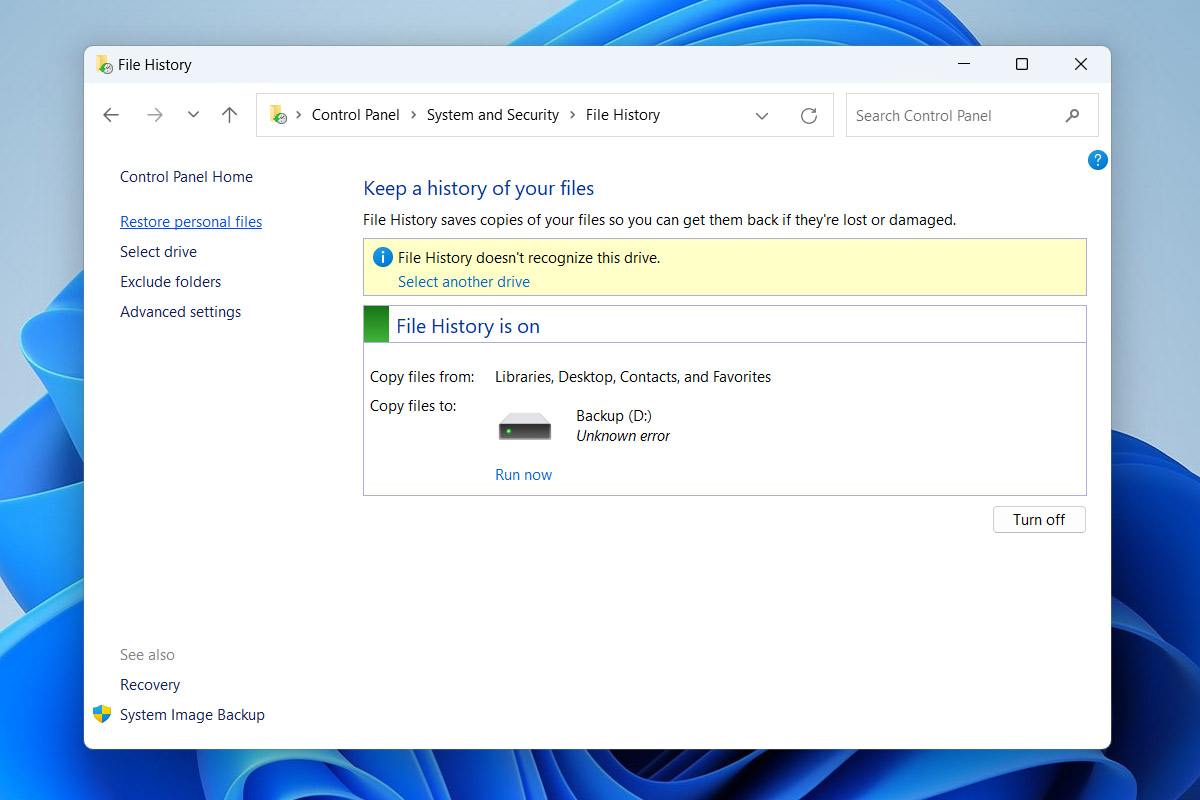
- Go to System and Security, then click on File History.

- Plug in the external drive or access the location where you saved your File History backups.
- In the File History window, look for the Restore personal files link on the left-hand side and click on it.
- This will display a timeline of backups. Navigate through the backups to find the version of the folder or file you want to restore.
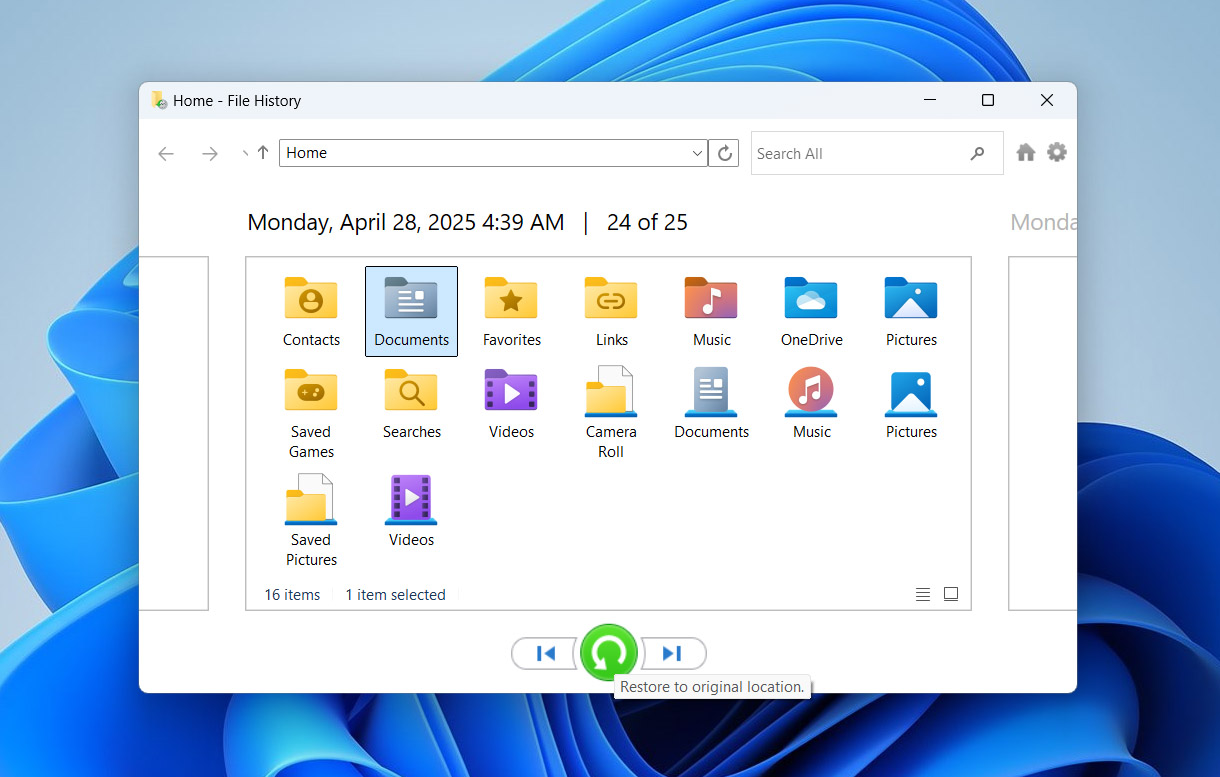
- Once you find them, right-click and choose Restore to send the file back to its original location, or select Restore to if you want to save it somewhere else.


If you didn’t have File History enabled, or your files weren’t in the folders it backs up, this method won’t work. You’ll need to try other recovery options.
Method #3: Check Cloud Storage for Deleted Files
If you back up important files to cloud storage, that can be a super reliable way to recover them. It’s often easier than managing an external drive. Just a heads-up – we’re talking manual uploads, not automatic syncing with your PC. Manually uploading guarantees your files stay safe in the cloud, no matter what happens to your computer.
If you have automatic sync set up between your device and cloud storage, deleting a file in one place usually deletes it everywhere. Still, there’s a good chance the file is sitting in the cloud’s trash or recycle bin – most services hang onto deleted items for about 30 days. It’s definitely worth checking.
OneDrive is a great example of cloud storage recovery in action, and the steps look almost the same if you use Google Drive or iCloud:
- Launch the OneDrive app on your computer or visit the OneDrive website. Sign in with your Microsoft account.
- Once you’re in, navigate to the main Files section, where you typically store your documents, photos, and other files.
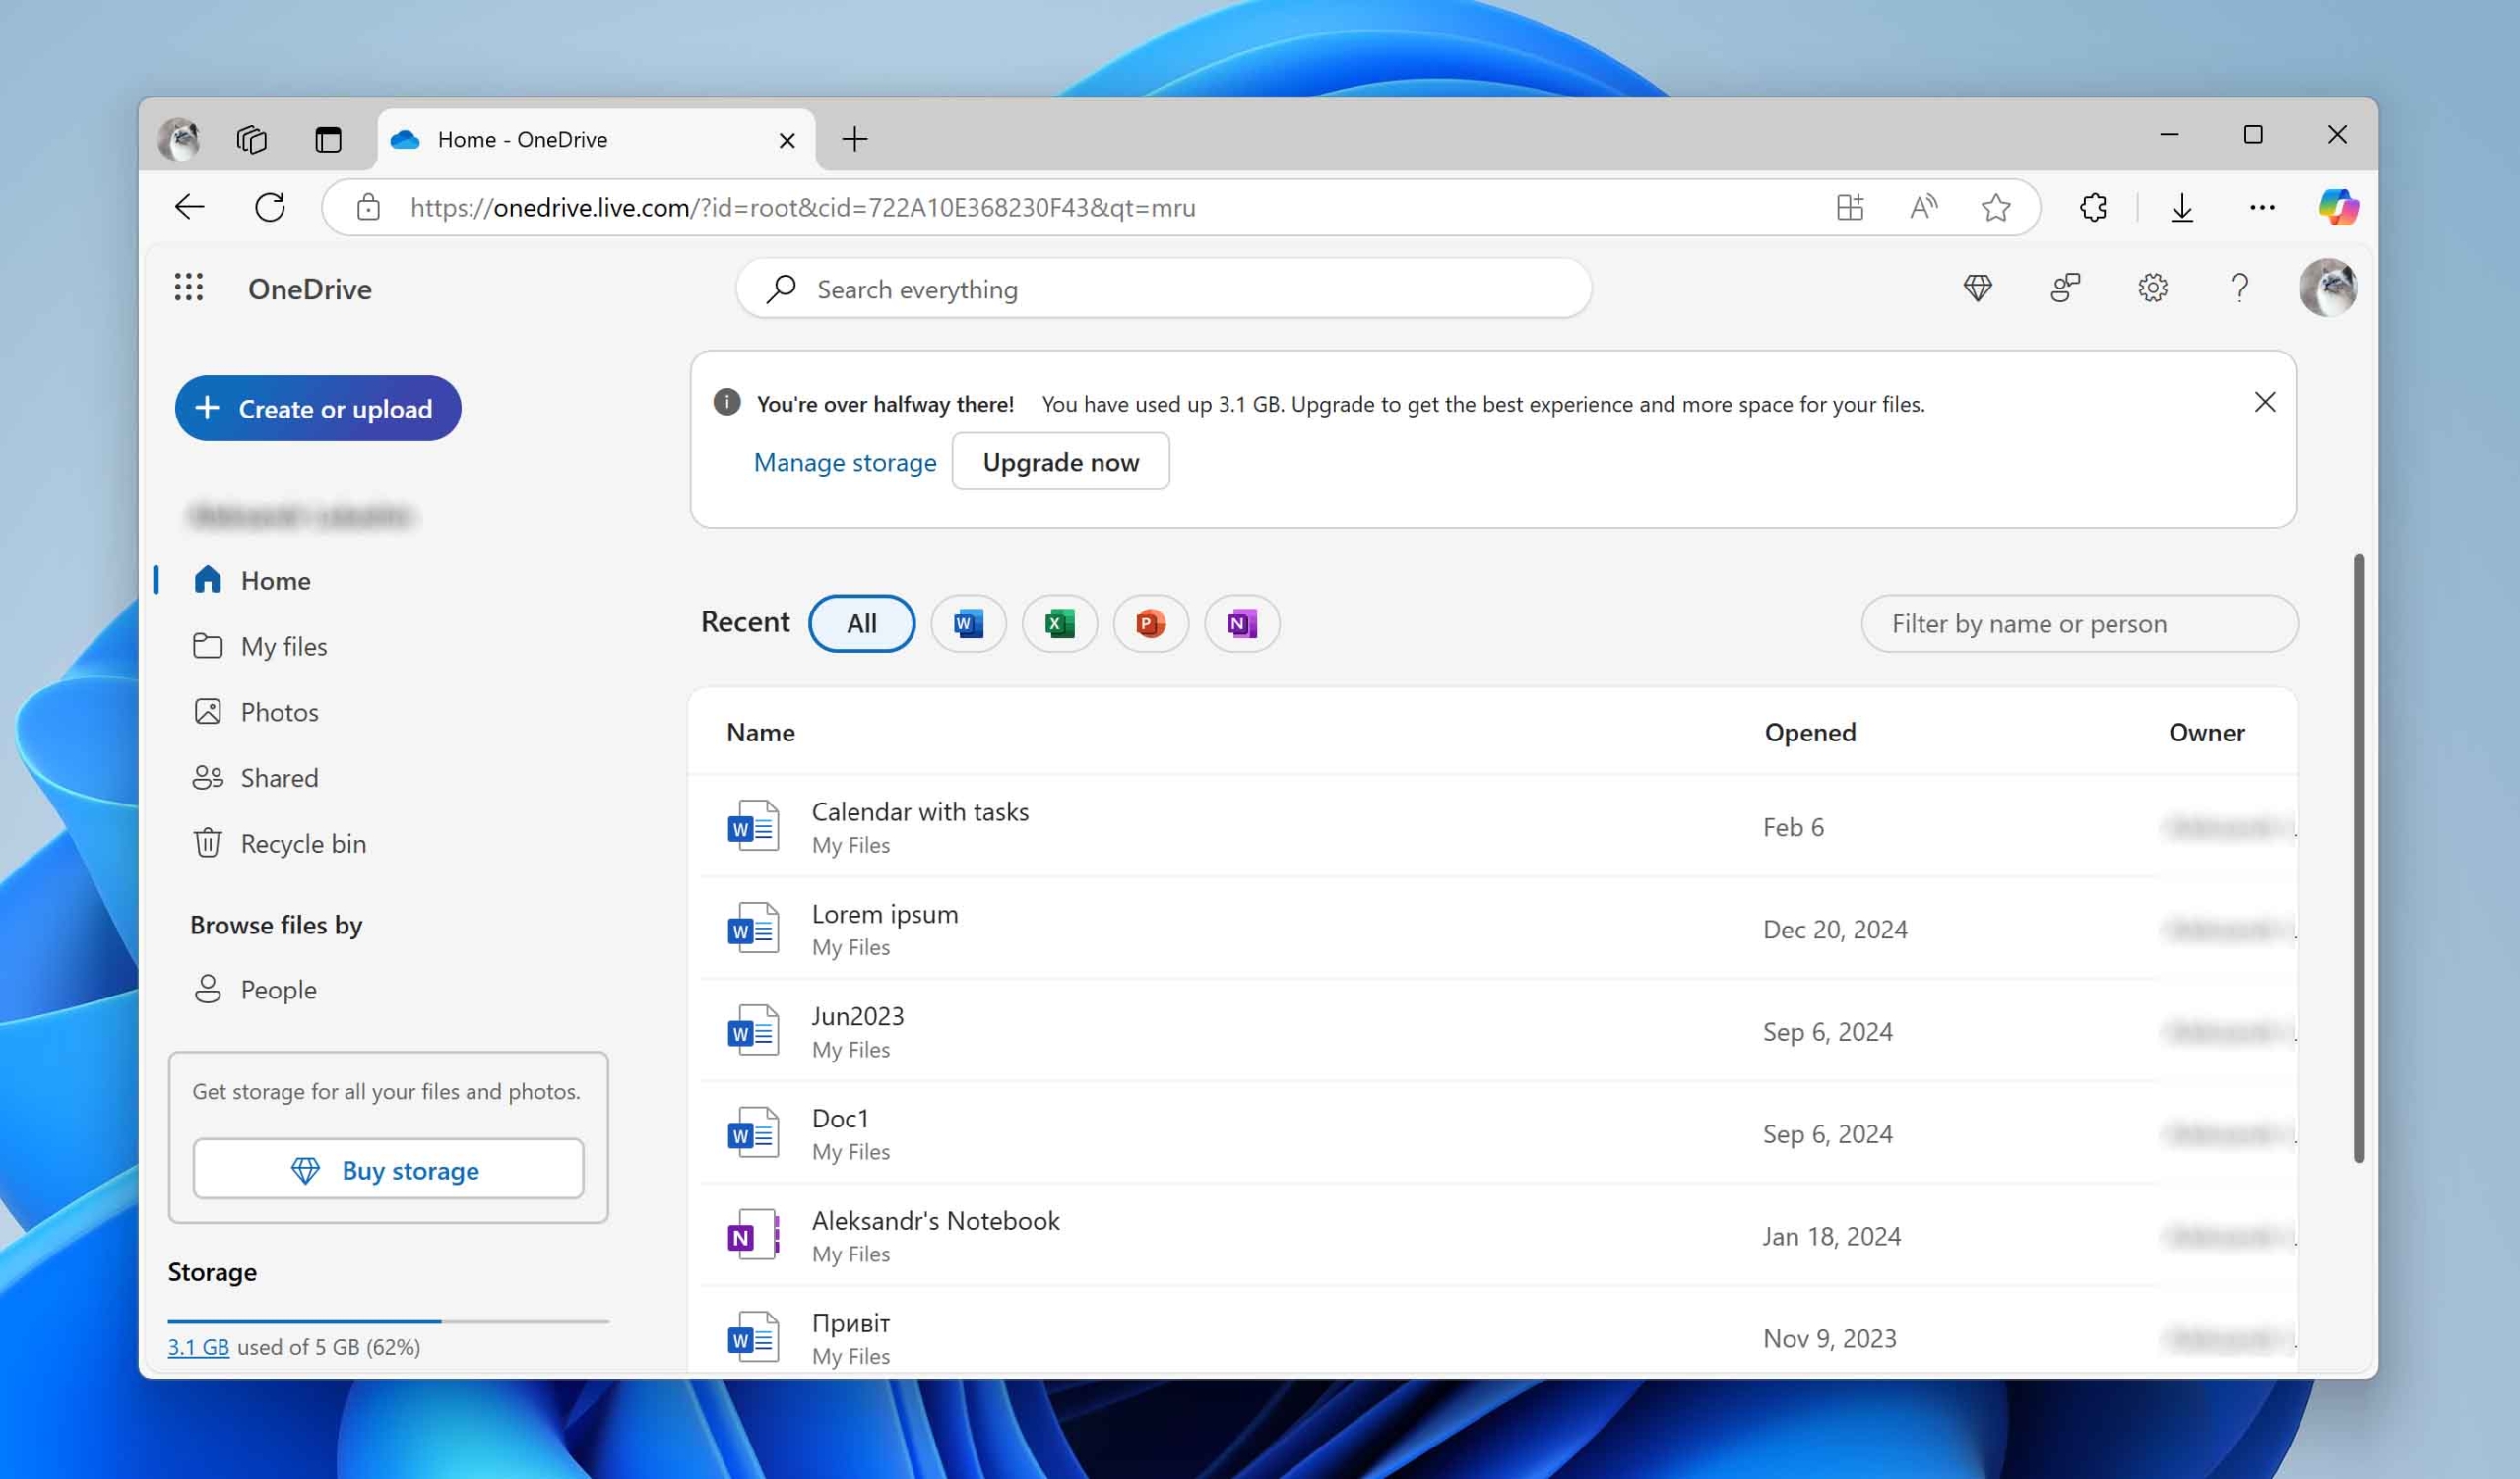
- Use the search bar at the top to look for specific files by name or file type. If you remember the name of the file, type it in and see if it appears.

- If the search doesn’t work, manually check the folders where you usually save files. Sometimes files aren’t deleted – they’re just moved somewhere else. If you find the files in your OneDrive, click the Download button at the top of the screen to save them to your computer.

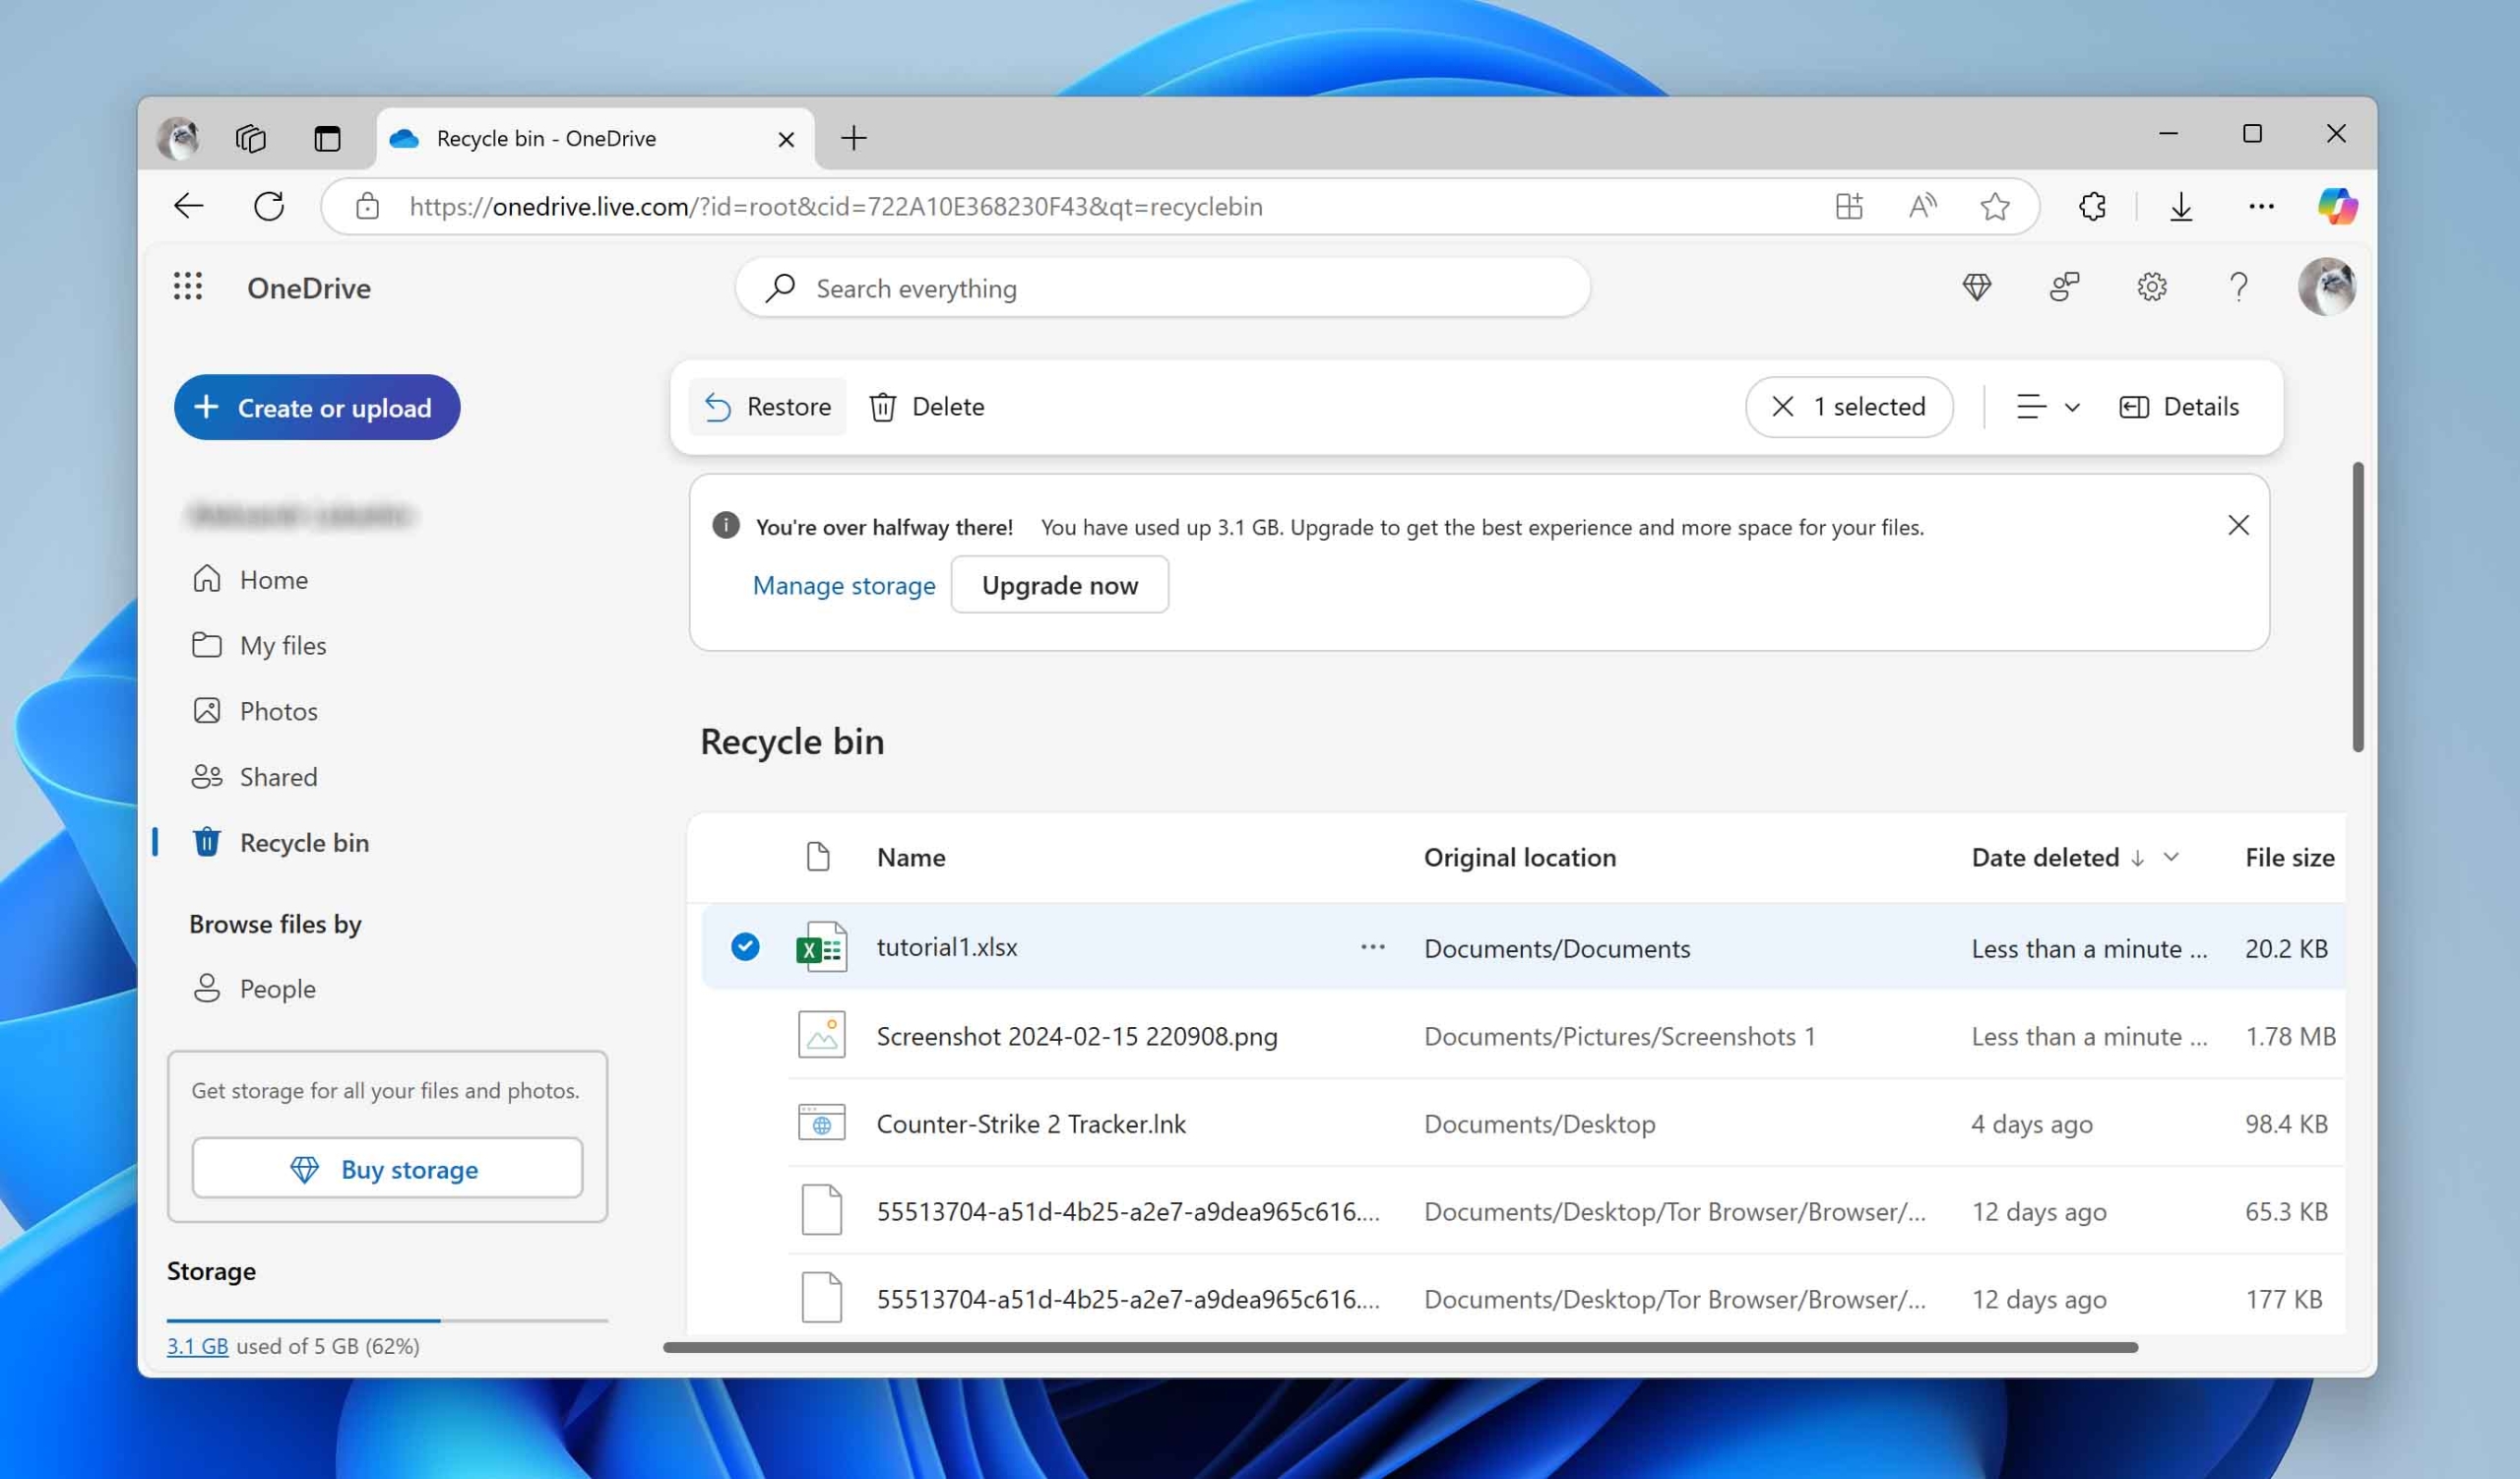
- Still no luck? Scroll to the bottom-left corner and click on Recycle Bin. OneDrive stores deleted files there for up to 30 days.
- If you find what you’re looking for in the Recycle Bin, select the files and click Restore. They’ll go back to their original folder, or you can choose a different location if you want.
- After restoration, navigate to the file’s location, select it, and then use the Download option to save it to your computer.


Method #4: Perform a Thorough Search of Your File
After a Windows update, it’s easy to assume your files have vanished when they’ve just been shuffled into different folders. Significant updates or complex system changes can rearrange both system files and your personal data. If you’ve got a ton of files, hunting down the missing ones without any clue where they landed can be difficult. That’s where File Explorer’s search bar comes in – use it smartly, and you’ll track down your files in no time.
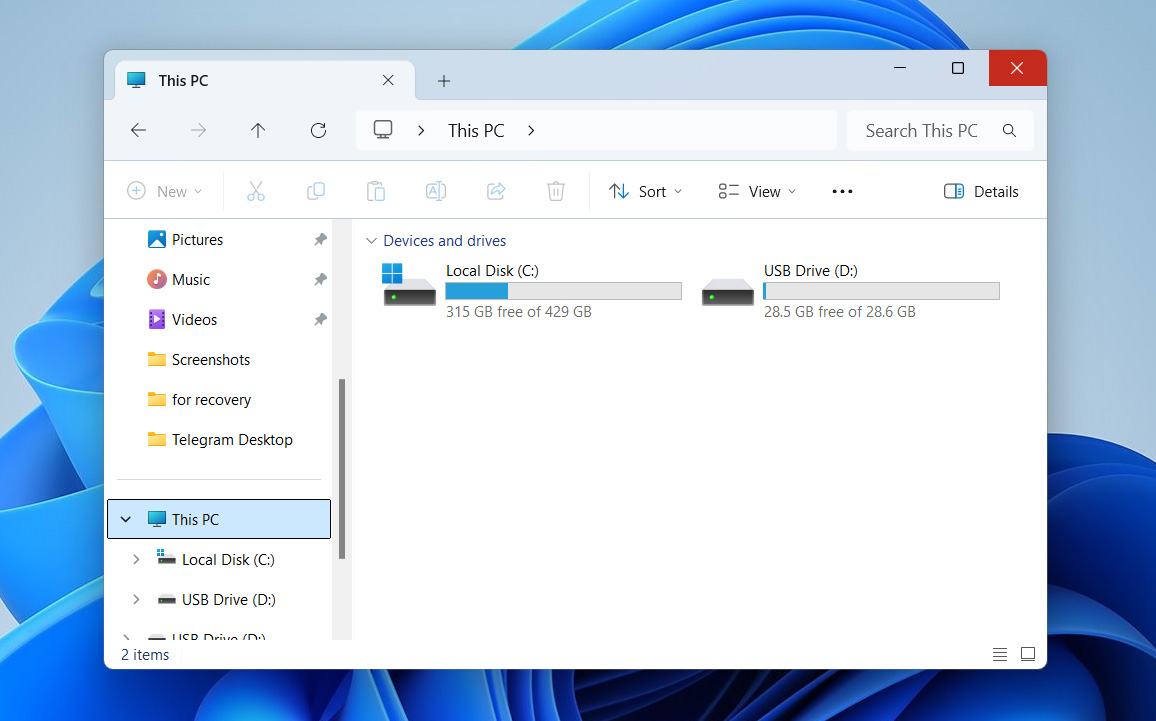
- Press Win + E or click the File Explorer icon on your taskbar to open File Explorer.
- If you’re not sure where the file is, start your search from This PC – that way, you search across all drives and folders.
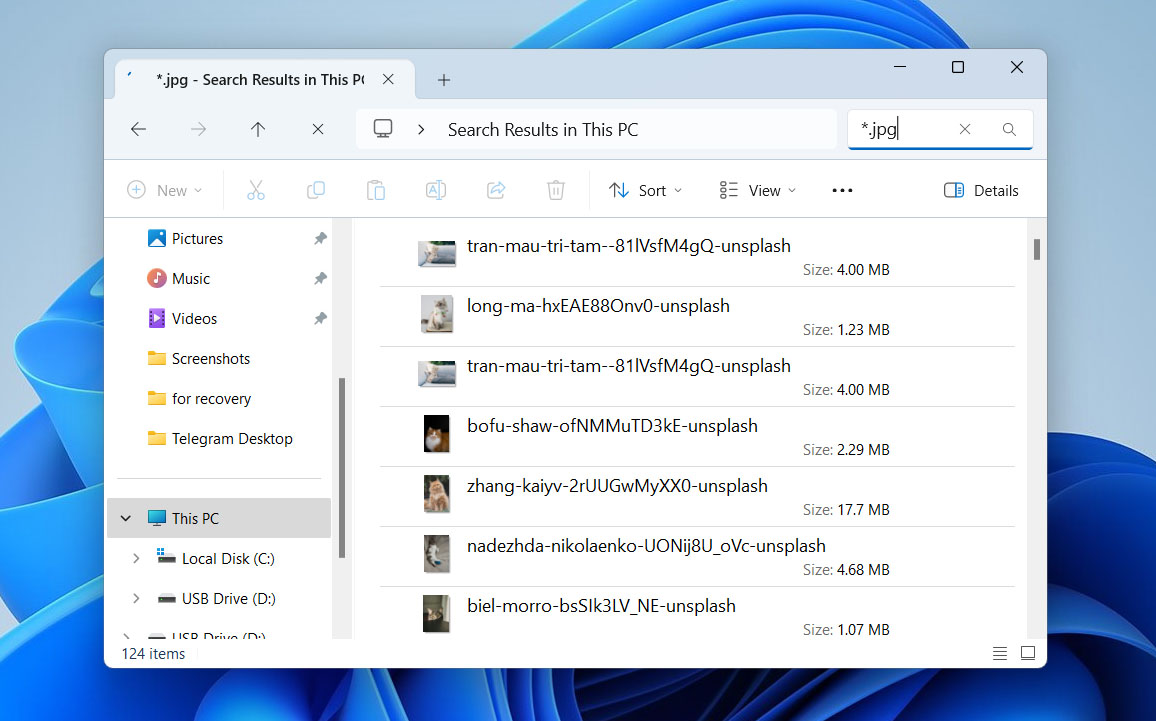
- If you remember the file name, type it into the search bar in the top-right corner and hit Enter.
- If you don’t remember the name but know the file type, use a wildcard. For example, typing *.jpg will bring up all files.
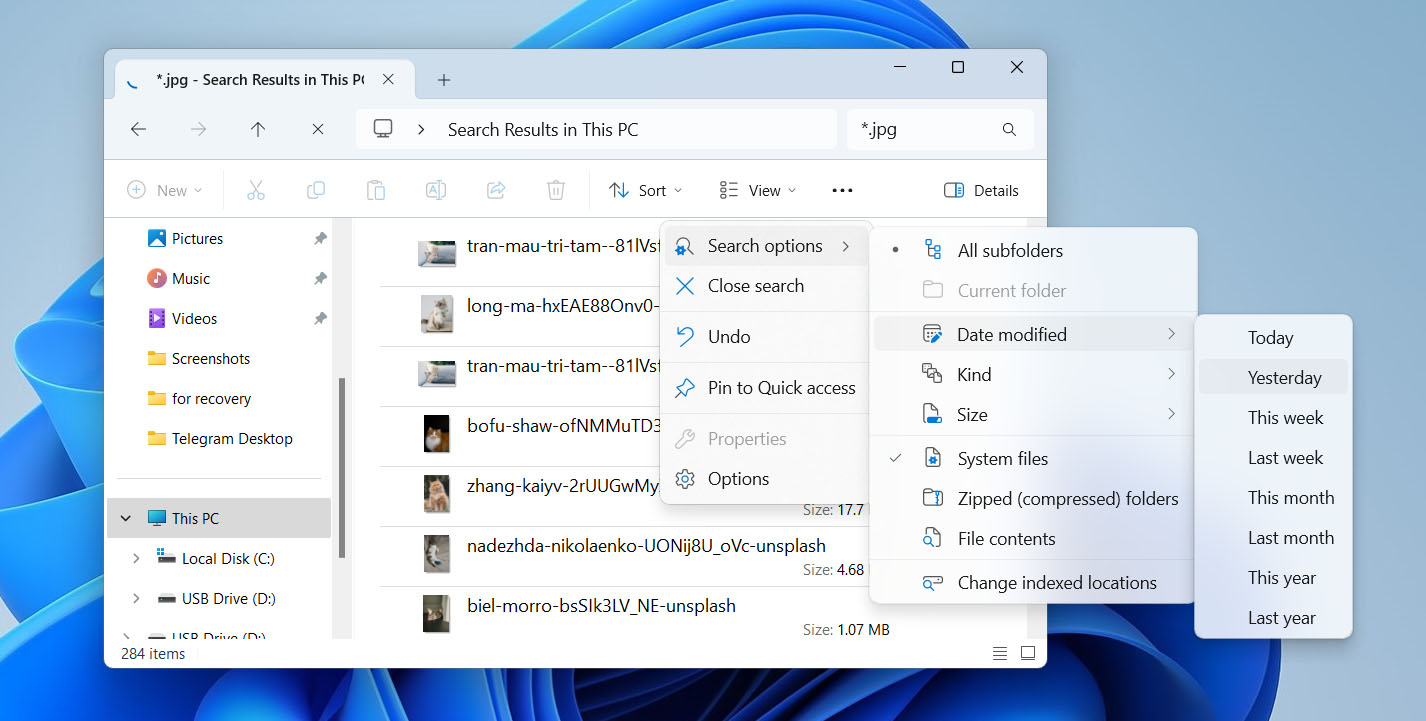
- To narrow things down, click the three dots icon > Search option and use filters like Kind, Size, or Date modified to make your search easier.


Method #5: Search for Hidden Files in Windows
If some files on your computer are hidden, they won’t show up in File Explorer searches. To see them and make sure they stay accessible, you’ll need to tweak a few settings in Windows.
- Press Win + E or click the File Explorer icon on your taskbar to open it.
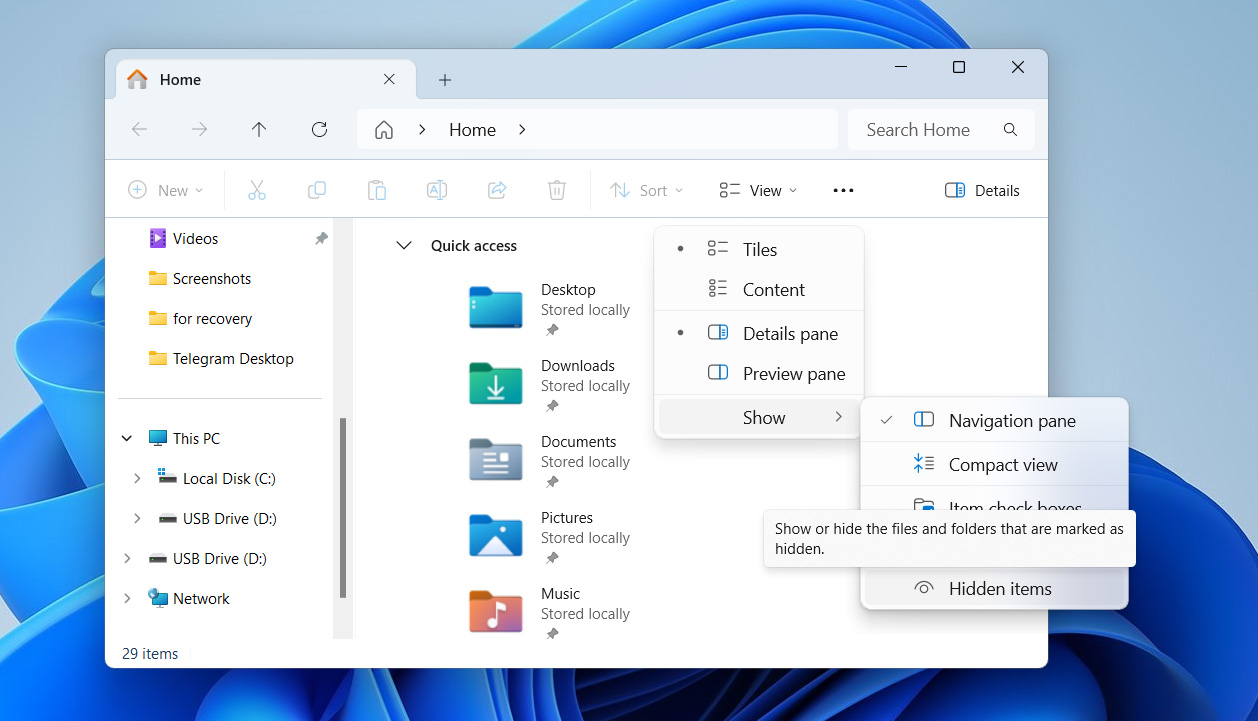
- At the top, click the View tab, then hover over Show in the dropdown menu.
- Check the box for Hidden items – this makes hidden files and folders visible.
- Once that’s done, use the search bar in File Explorer to find your files. You should now see anything that was hidden before.

If you regularly need access to hidden files or just want certain ones, like photos or important documents, to stay visible, here’s how to make that happen:
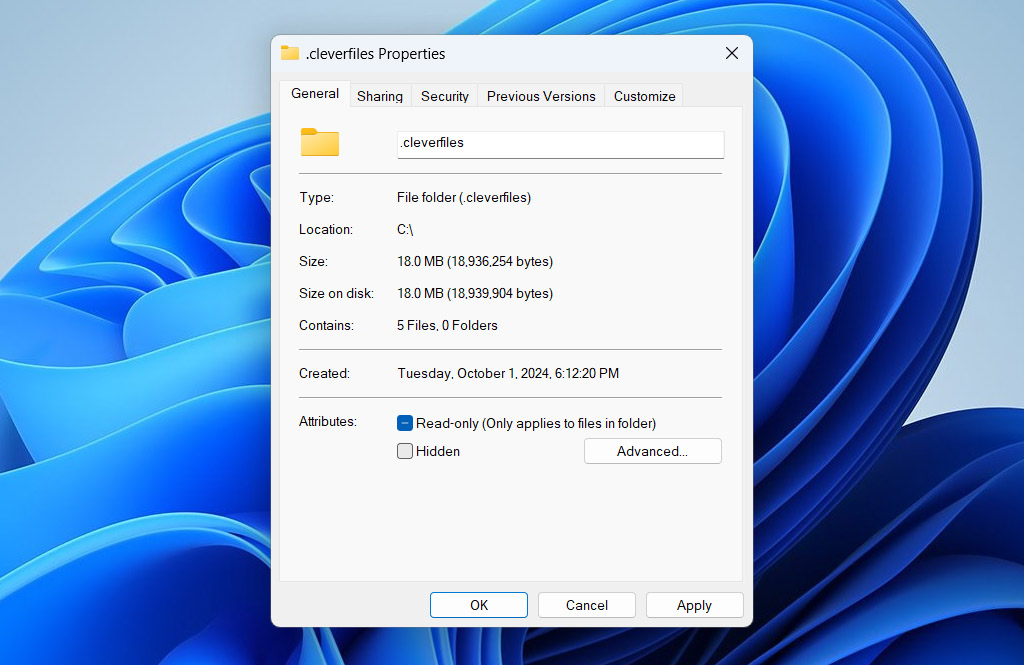
- Go to the file or folder, right-click it, and choose Properties.
- Under the General tab, find the Attributes section. If the Hidden box is checked, uncheck it.
- Click Apply, then OK to save the change.

Method #6: Sign Out from the Temporary Windows Profile
If you notice that Windows update erased everything – your files are missing, your desktop is empty, and all settings have reverted – you’ve probably been signed into a temporary user profile.
Think of it as a fallback that Windows uses when your main profile can’t load. This temporary profile will not retain any of your custom settings, files, or apps, and any changes you make here will be lost once you sign out. So, if this happens, switch back to your regular profile as soon as you can.
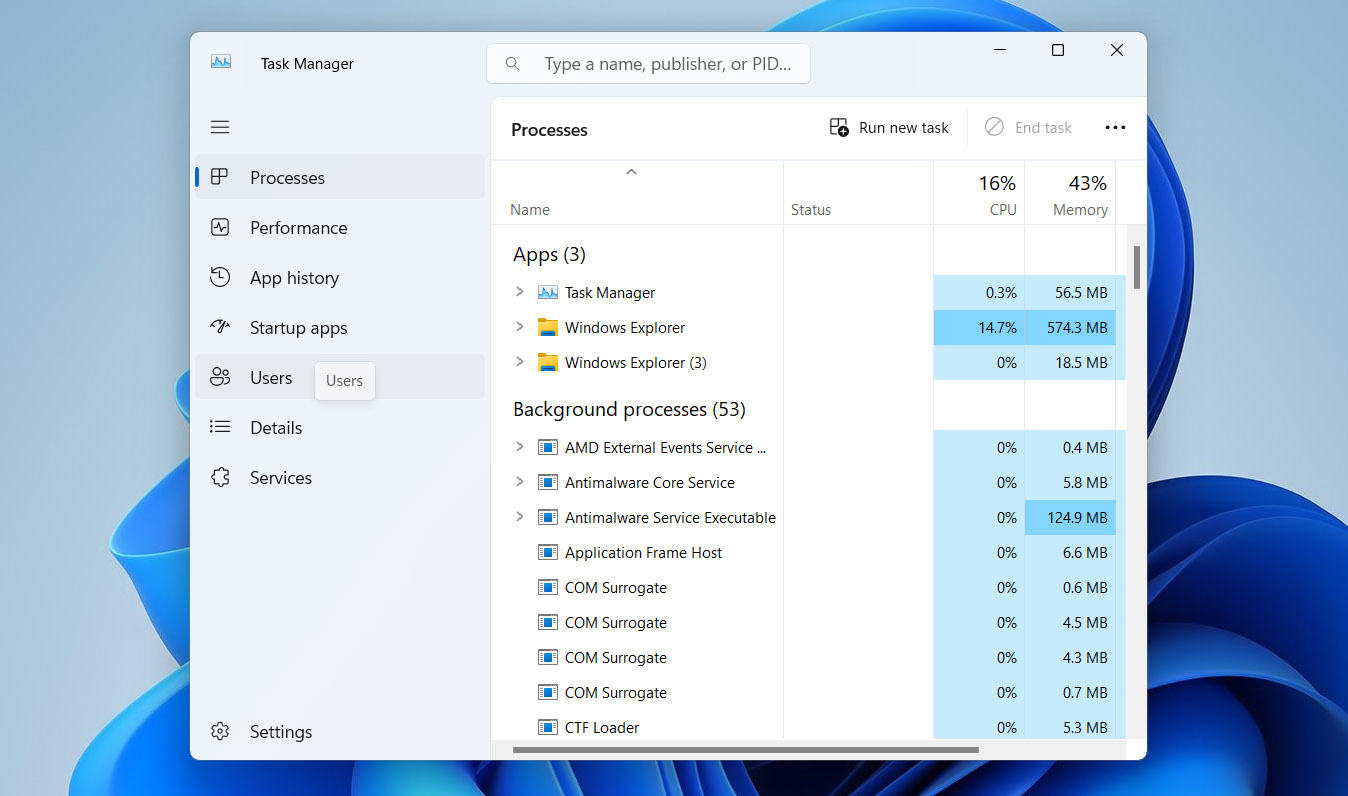
- Press Ctrl+Alt+Del and select Task Manager. Go to the Users tab to see which profile you’re using. If it says Temporary, you’re in a temp profile.
- Click the Start menu, then click your profile icon at the top. Select Sign out.
- Once you’re back at the login screen, enter your credentials to sign into your main profile. If your PC has multiple accounts, confirm you select the correct one.
- After logging in, verify that your files and settings are restored to normal.

Method #7: Check the Windows.old Folder
The Windows.old folder is automatically created when you upgrade from one version of Windows to another. It holds a copy of your old system, including system files, user profiles, and anything in your Desktop, Documents, and Pictures folders. If you need to recover files after an update or roll back to your previous setup, Windows.old is your go-to.
If you don’t see Windows.old on your system drive (usually C:), a few things could have happened: you might’ve done a clean install instead of an upgrade, someone could’ve deleted it manually, or Windows wiped it out for you. By default, Windows deletes Windows.old about 10 days after an upgrade to free up space.
- Press Win + E to open File Explorer, then head to your system drive – usually the C: drive. Look for the Windows.old folder right in the root directory.

- Open it, and go into subfolders like Users\[YourUsername] to find your old Desktop, Documents, Pictures, and other personal folders.
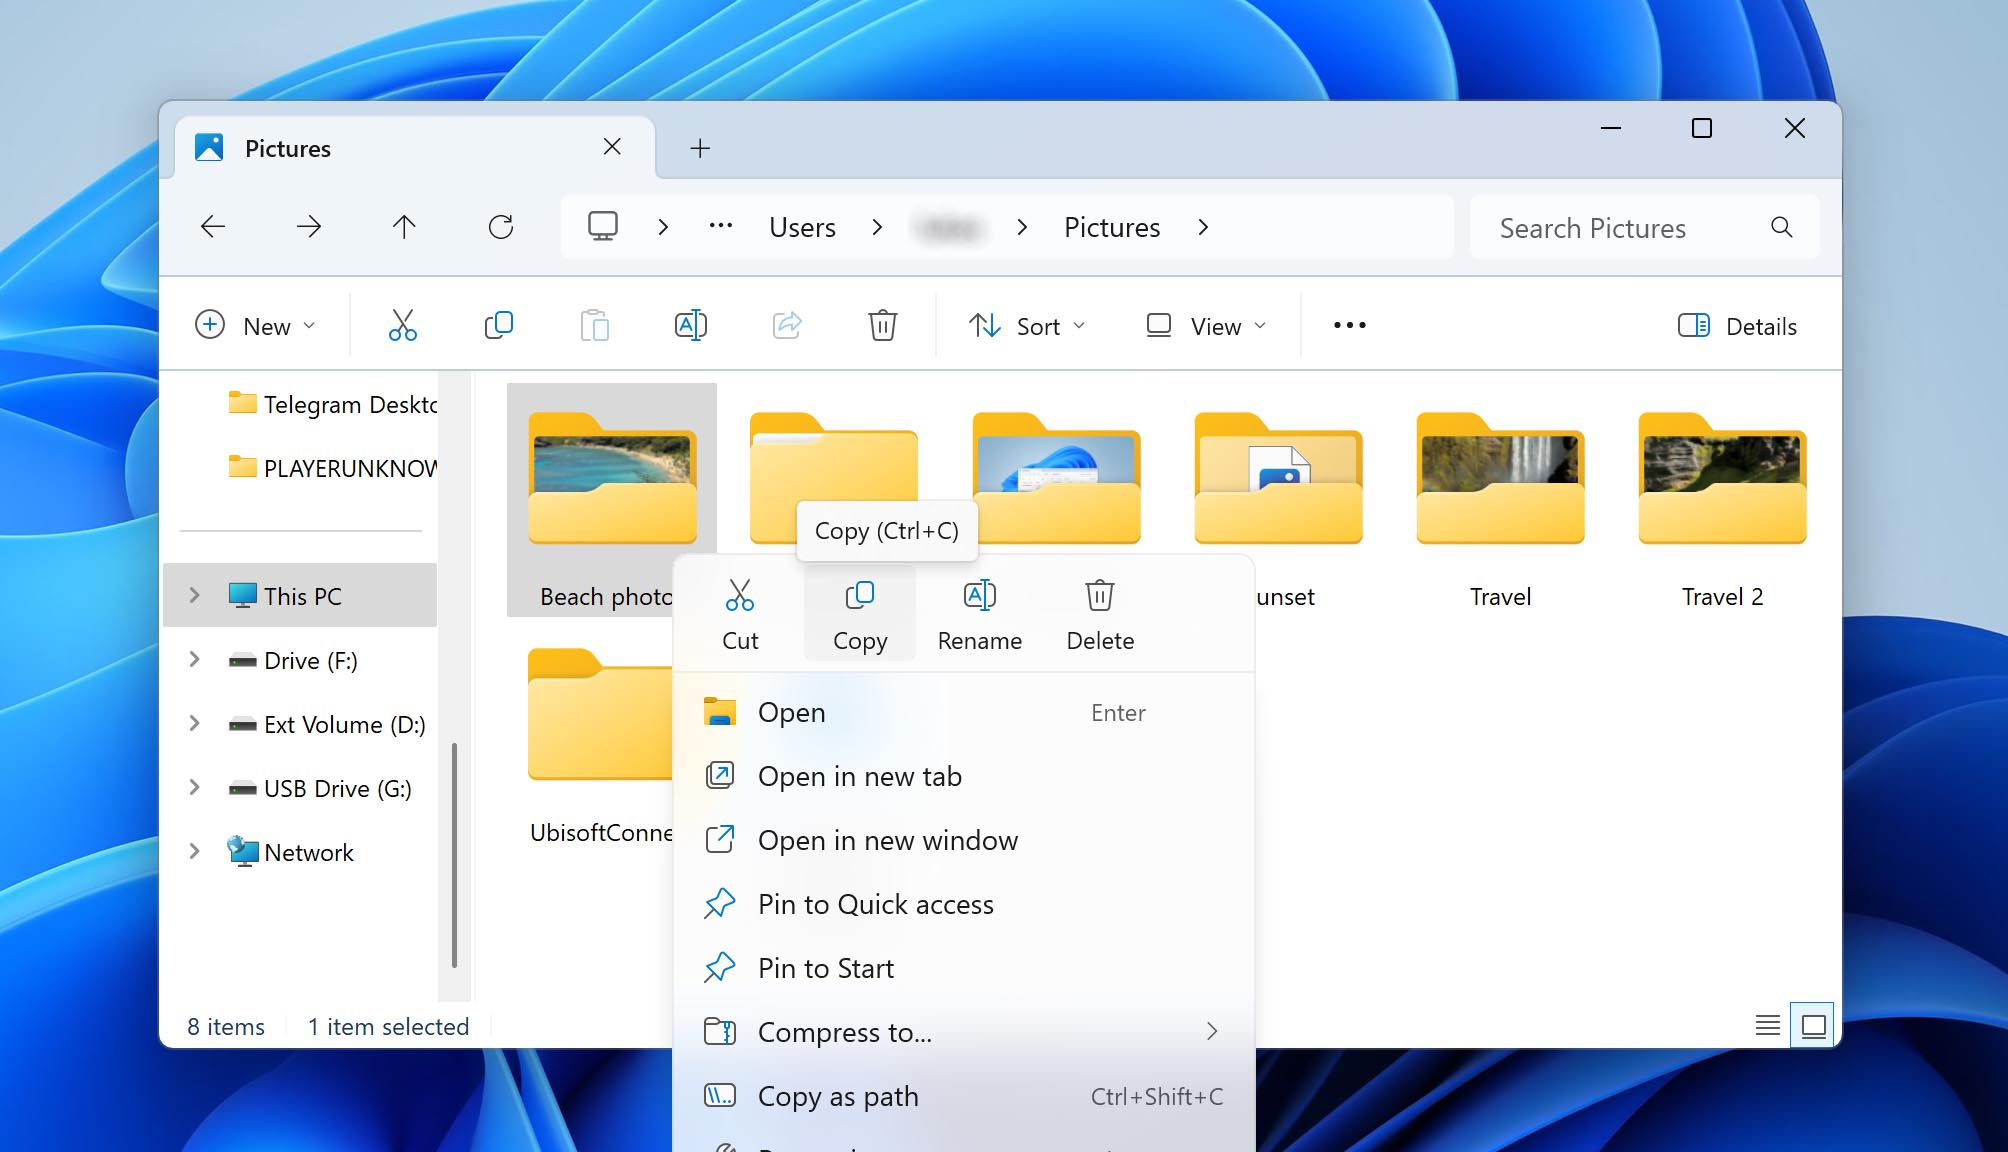
- Once you spot the files you want, right-click and select Copy. Go to the folder where you want to move them, right-click again, and choose Paste.
- Double-check that the files work as expected. If you’ve recovered everything you need, you might want to delete the Windows.old folder to free up a good part of the disk space.


Method #8: Recover Lost Files from a Previous System Restore Point
A System Restore Point in Windows allows you to roll back your PC to an earlier setup. This feature captures snapshots of your system when everything was running smoothly. It saves copies of specific system files, program files, registry tweaks, and settings at a particular moment. If a new installation, such as a Windows update, causes trouble or data loss, you can revert to that snapshot and restore your system to a stable state.
Before you roll back to a System Restore Point, make sure you had it set up before installing the update. Remember, restoring will undo any apps or updates you added after that point.
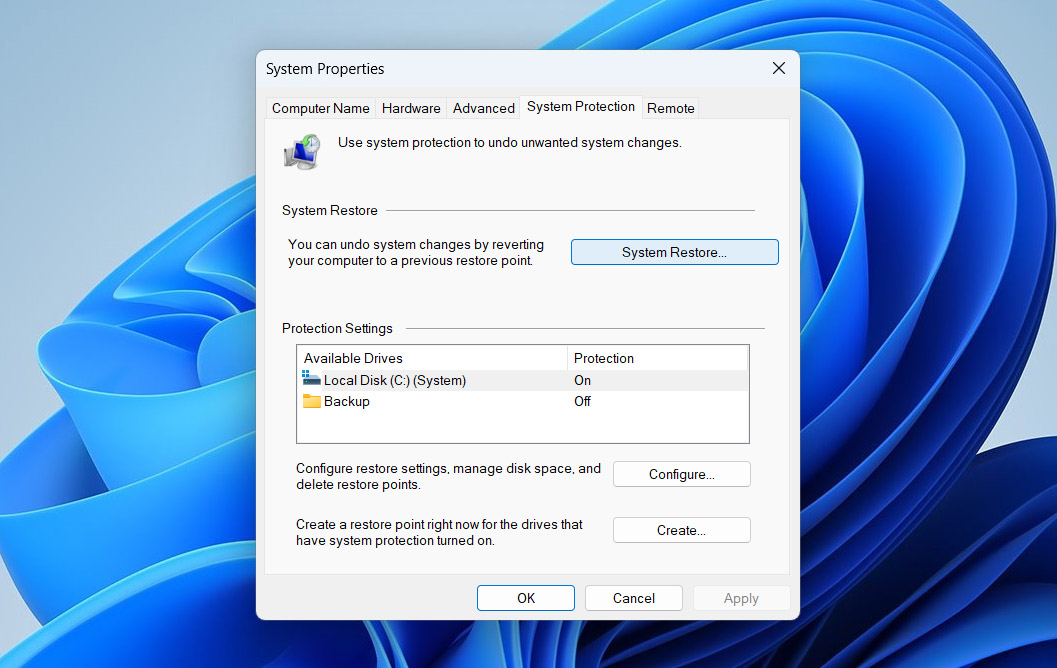
- Type Create a restore point into the Windows search bar and click the top result to open System Properties.

- Go to the System Protection tab and click the System Restore… button. A wizard will launch – click Next to continue.
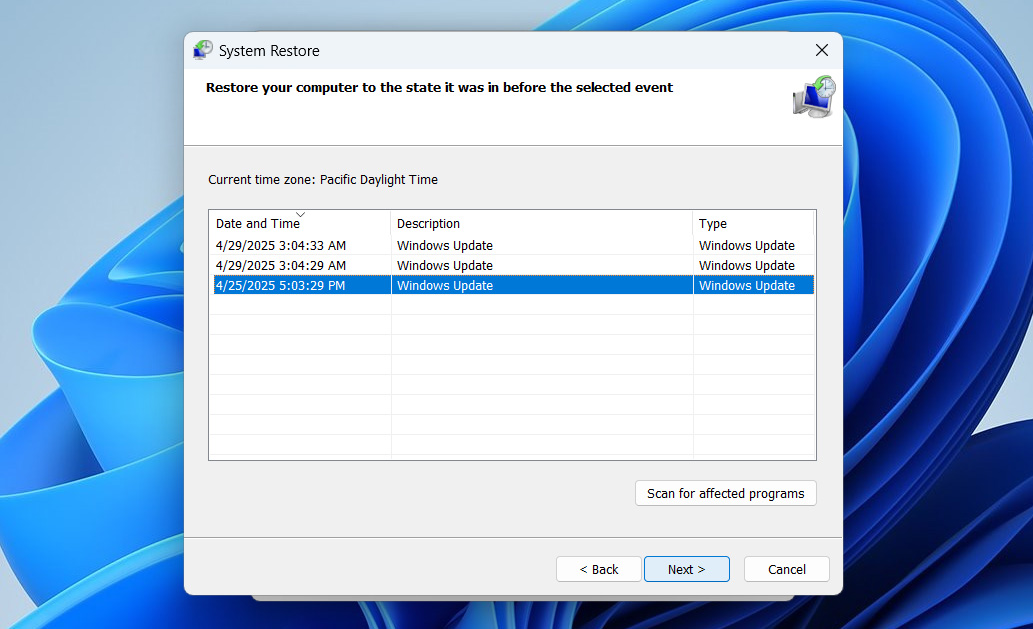
- You’ll see a list of available restore points. Select one that was created before your issues started (before the most recent Windows update), then click Next.
- Review the restore point information to confirm it’s the correct one. If everything looks good, click Finish to kick off the restore process.
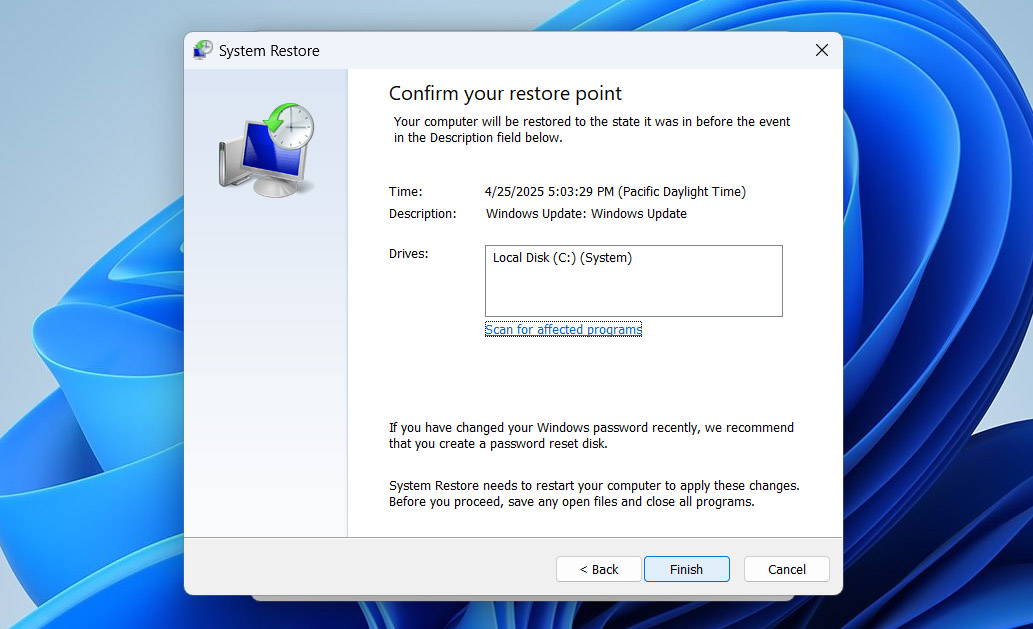
- Windows will reboot to apply the changes. Depending on your system and how many changes it needs to undo, this could take a little while.


Conclusion
Most of the time, a Windows update won’t affect your data, but glitches do happen, so you can still lose files. If you’ve run into that problem, this article gives you a bunch of ways to recover your lost or deleted files after an update. And if you’re just reading up on what could go wrong, now you know what to expect and how to be prepared.
We’re confident that at least one of these recovery methods will work for you. If you’ve tried them all and still can’t get your files back, you might be dealing with more serious issues in your file system or storage hardware, whether it’s an HDD or SSD. In that case, consider contacting a local data recovery center. Many offer free consultations to diagnose the problem and help you decide if paying for recovery makes more sense than replacing the drive.
From now on, make it a habit to back up your important files. Spending a few minutes on a backup now can save you hours, and possibly hundreds of dollars, on data recovery later. It’s always better to have a backup you don’t need than to need one you don’t have.