Reading Time: 9 minutesDo you need to format your hard drive but don’t want to lose your data? Most experts advise against formatting unless it is absolutely necessary, and for good reason. Formatting usually erases all content from the device, and recovering your files afterward requires special recovery software or is not possible at all. That said, there are times when formatting is the best, or the only, way to fix a problem. So what should you do? We’ll show you how to format a disk without losing your data.
Does Formatting a Hard Drive Always Mean Losing Your Data?
When you format a hard drive, you erase the data that is stored on it. But let’s break it down a little more. There are two main types of formatting, and each affects your data differently:
- Quick format wipes the table your system uses to keep track of where files are stored, but it doesn’t actually delete the files themselves. It just marks the space as free for new data. So, until something new overwrites it, your original data remains intact, and you can often recover it later (but if you can avoid it, why not?).
- Full format takes things a lot further. It wipes out all the data on the drive, checks for bad sectors, and overwrites every sector with zeros. Not only does it completely erase your files, but it also helps keep the drive healthy by spotting and isolating bad sectors. After a full format, recovering your original data is impossible.
Instead of scrambling later to figure out how to recover data from a formatted hard drive, it’s better to take a few easy steps beforehand. That way, you can format the drive without losing any files.
How to Save Your Data During the Formatting Process
To reformat a hard drive without losing data, you first need to copy all the data on your hard drive to another partition or an external storage device. This method allows you to access your files through Windows File Explorer.
Sure, if your drive’s working fine, you can just copy your files and paste them onto another device. However, when you’re thinking about formatting a hard drive, it’s usually because something’s wrong, such as your system not recognizing it, the drive appearing as RAW, or the file system being corrupted and needing to be changed. In those cases, you can’t just open it up and move your files like normal.
In this case, you’ll need solid data recovery software for Windows. We’ve compiled a few lists of the best options that do a great job handling difficult recovery situations, such as when you can’t access your data even though it’s still there. Take a look through these options and pick the data recovery software that works best for you.
For this article, we’re concentrating on Disk Drill. We like it because it’s super easy to use, but still packed with powerful features. It can scan a problem hard drive and recover your data using a signature scan. Additionally, Disk Drill allows you to create a full byte-by-byte copy of your disk, which is a smart move if the file system is corrupted. That way, you’re working off the copy, not putting more stress on the original drive.
We’ll show you how to create a full byte-by-byte copy of your disk and recover data from it. If you’re confident that your hard drive is in good shape and don’t want to bother with a copy, you can skip ahead to the recovery steps listed below.
Step 1 (optional): Create a Disk Image Using Disk Drill
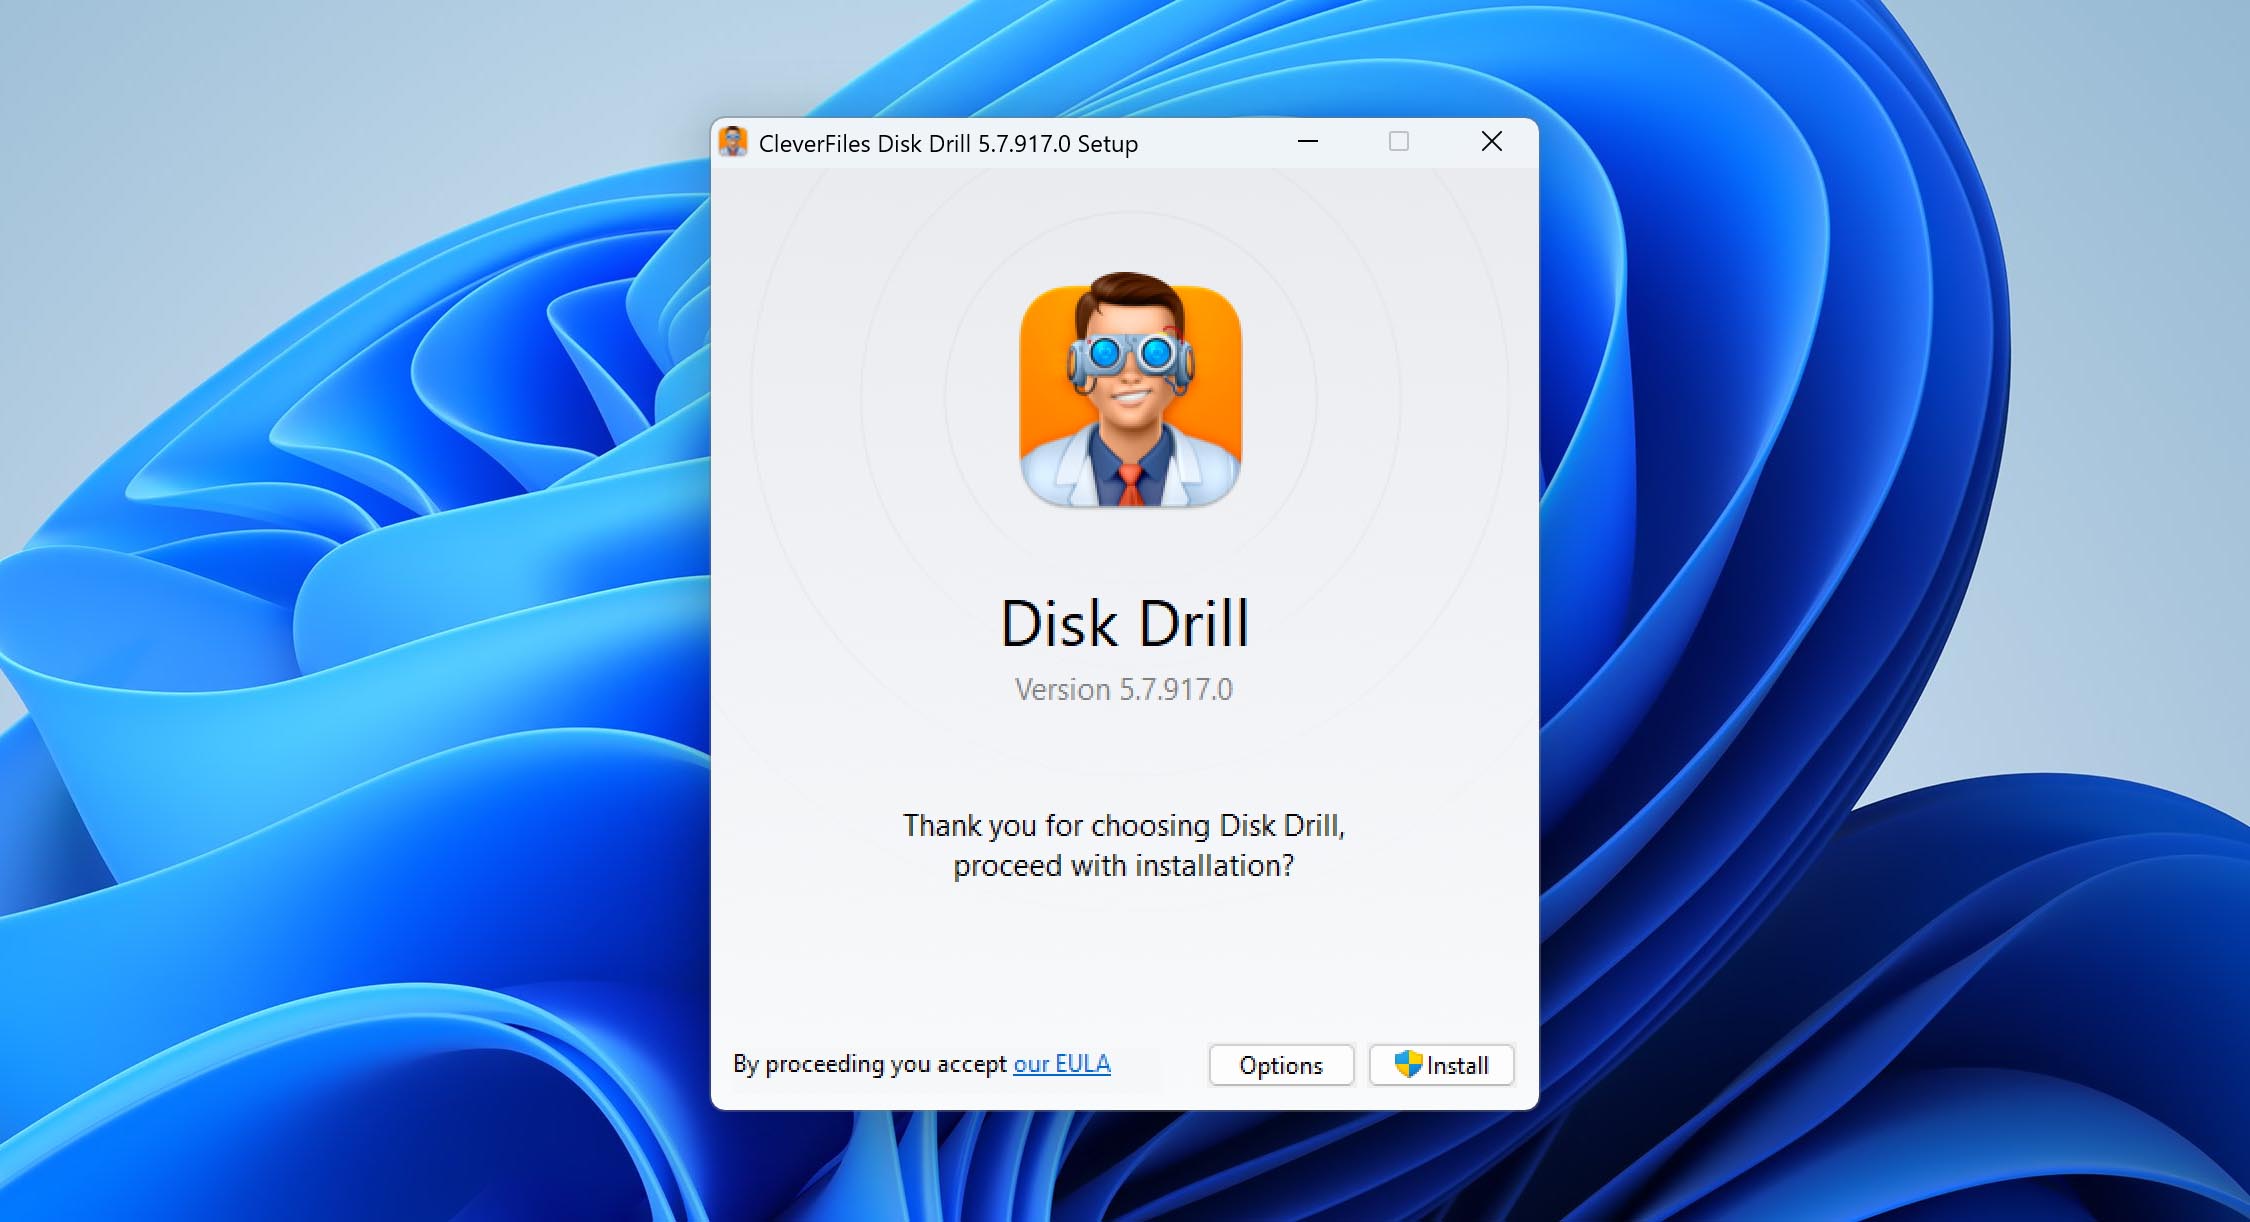
- Visit the official Cleverfiles website and download the Disk Drill installer. Just a heads-up – don’t install the software on the drive you’re planning to format (you could accidentally overwrite important files).
- Run the installer and follow the on-screen instructions to complete the setup.
- Once it’s installed, open Disk Drill and click on Byte-to-byte Backup from the menu on the left.
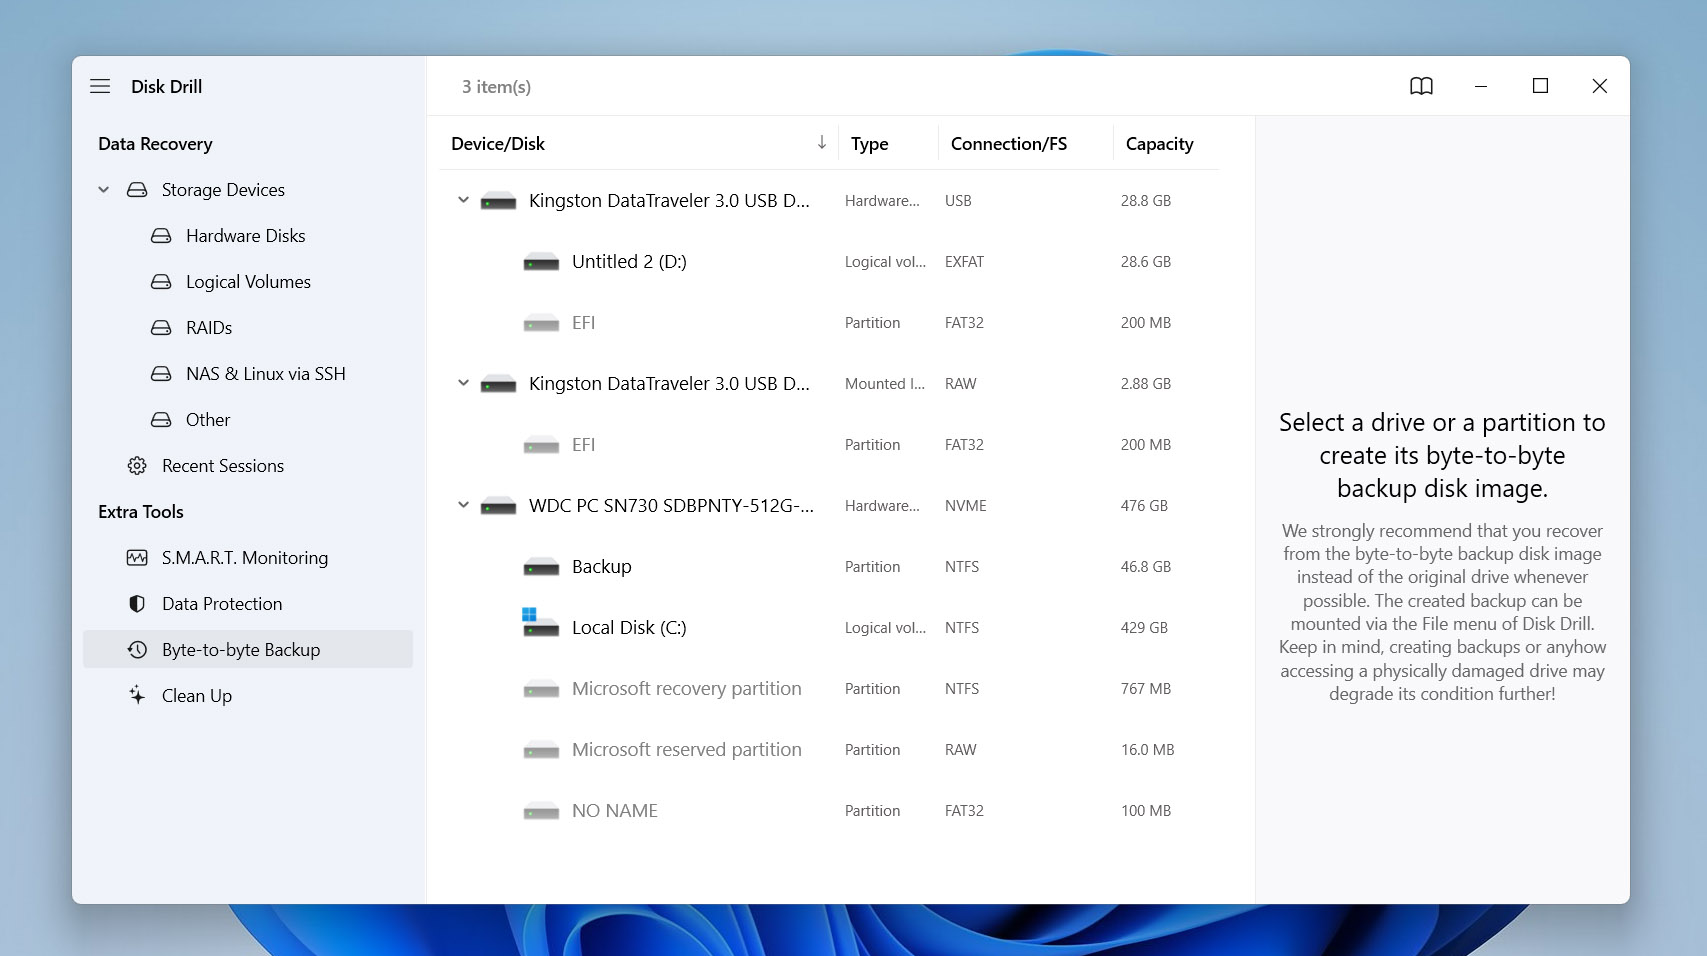
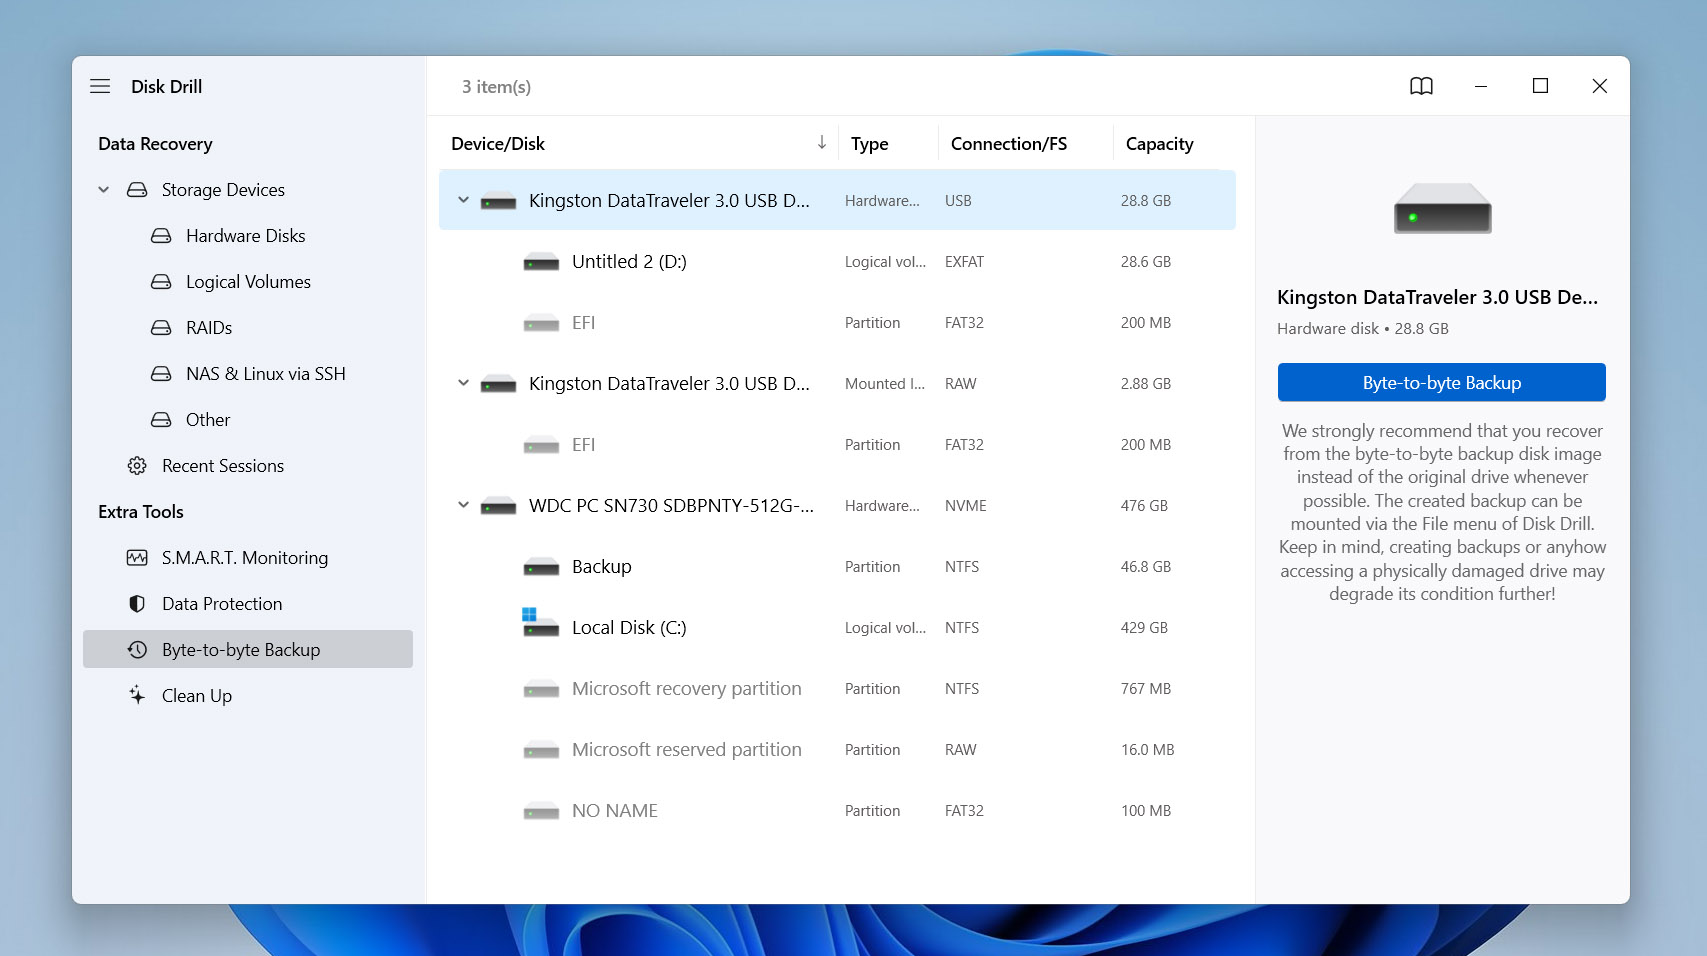
- Locate your hard drive in the list and click the Byte-to-Byte Backup button to initiate the process. If you’re using an external drive, make sure it’s plugged in; it’ll show up in the list once connected.
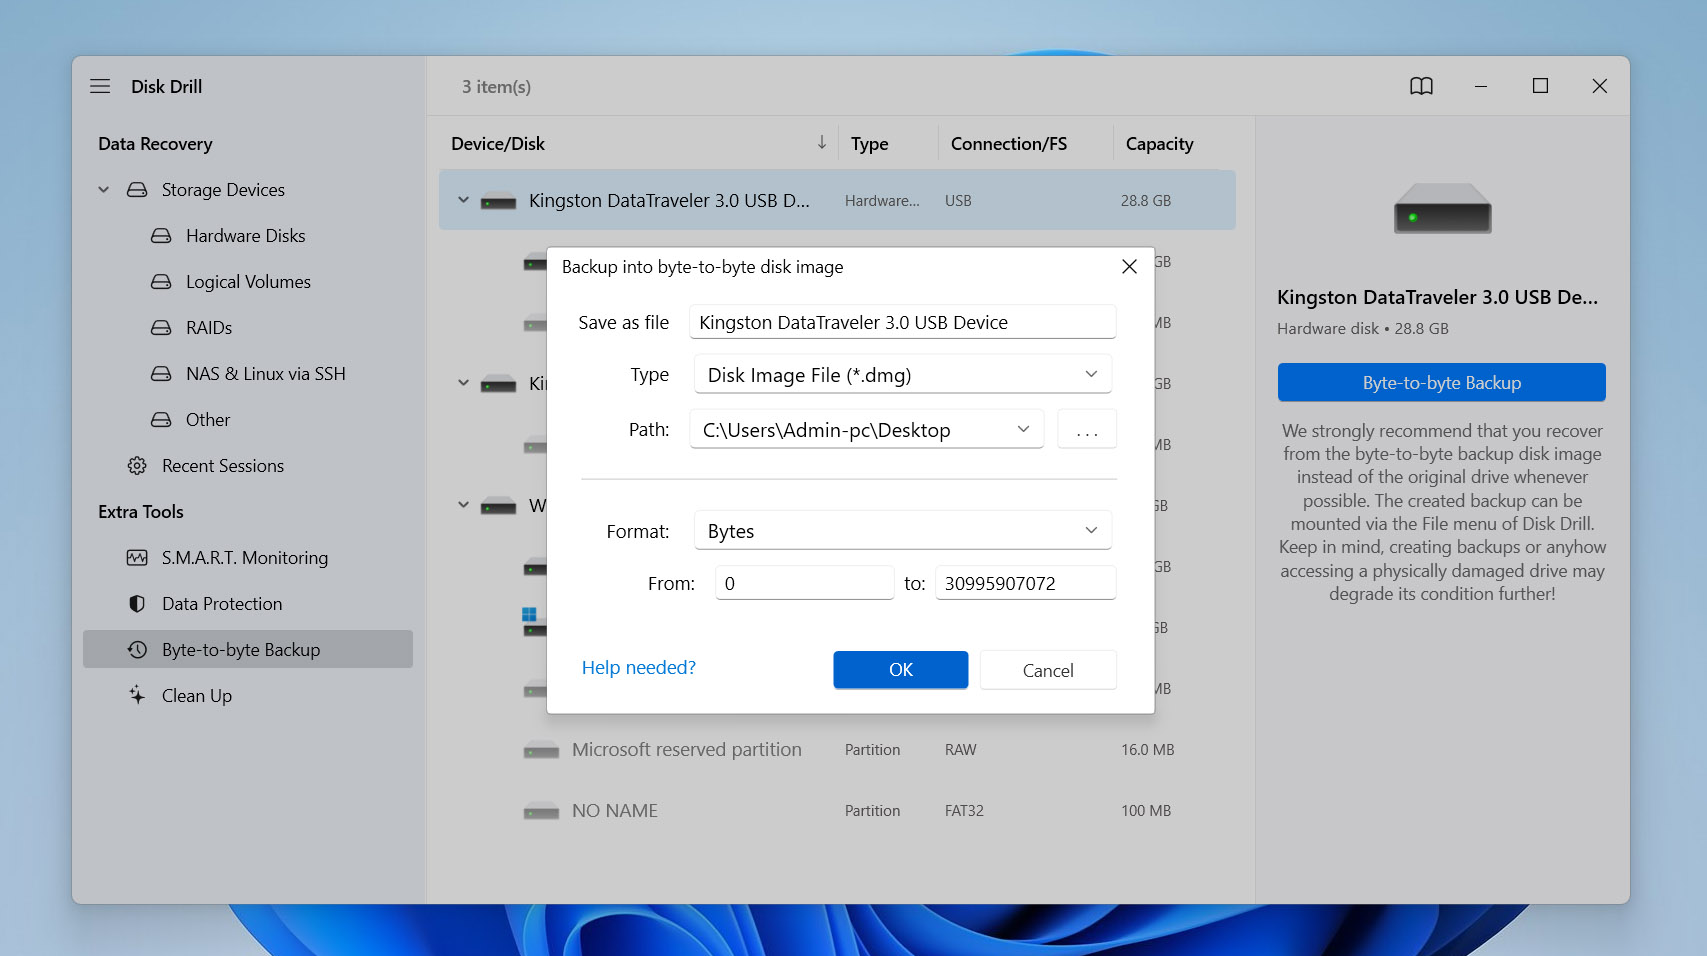
- When the settings window appears, select the location where you want to save the backup (confirm it’s a different drive from the one you’re working on and that it has enough space for a copy). Click OK to start the backup.
- Disk Drill will get to work. Depending on the size of your drive, it may take some time. Once it’s done, you’ll see a confirmation message. Then, click the house icon to head back to the main screen.


Step 2: Perform Data Recovery with Disk Drill
- If you skipped the step for creating a byte-by-byte copy and you’re just getting started with Disk Drill, head to the official website and download the software. Follow the setup instructions to install it on your computer.
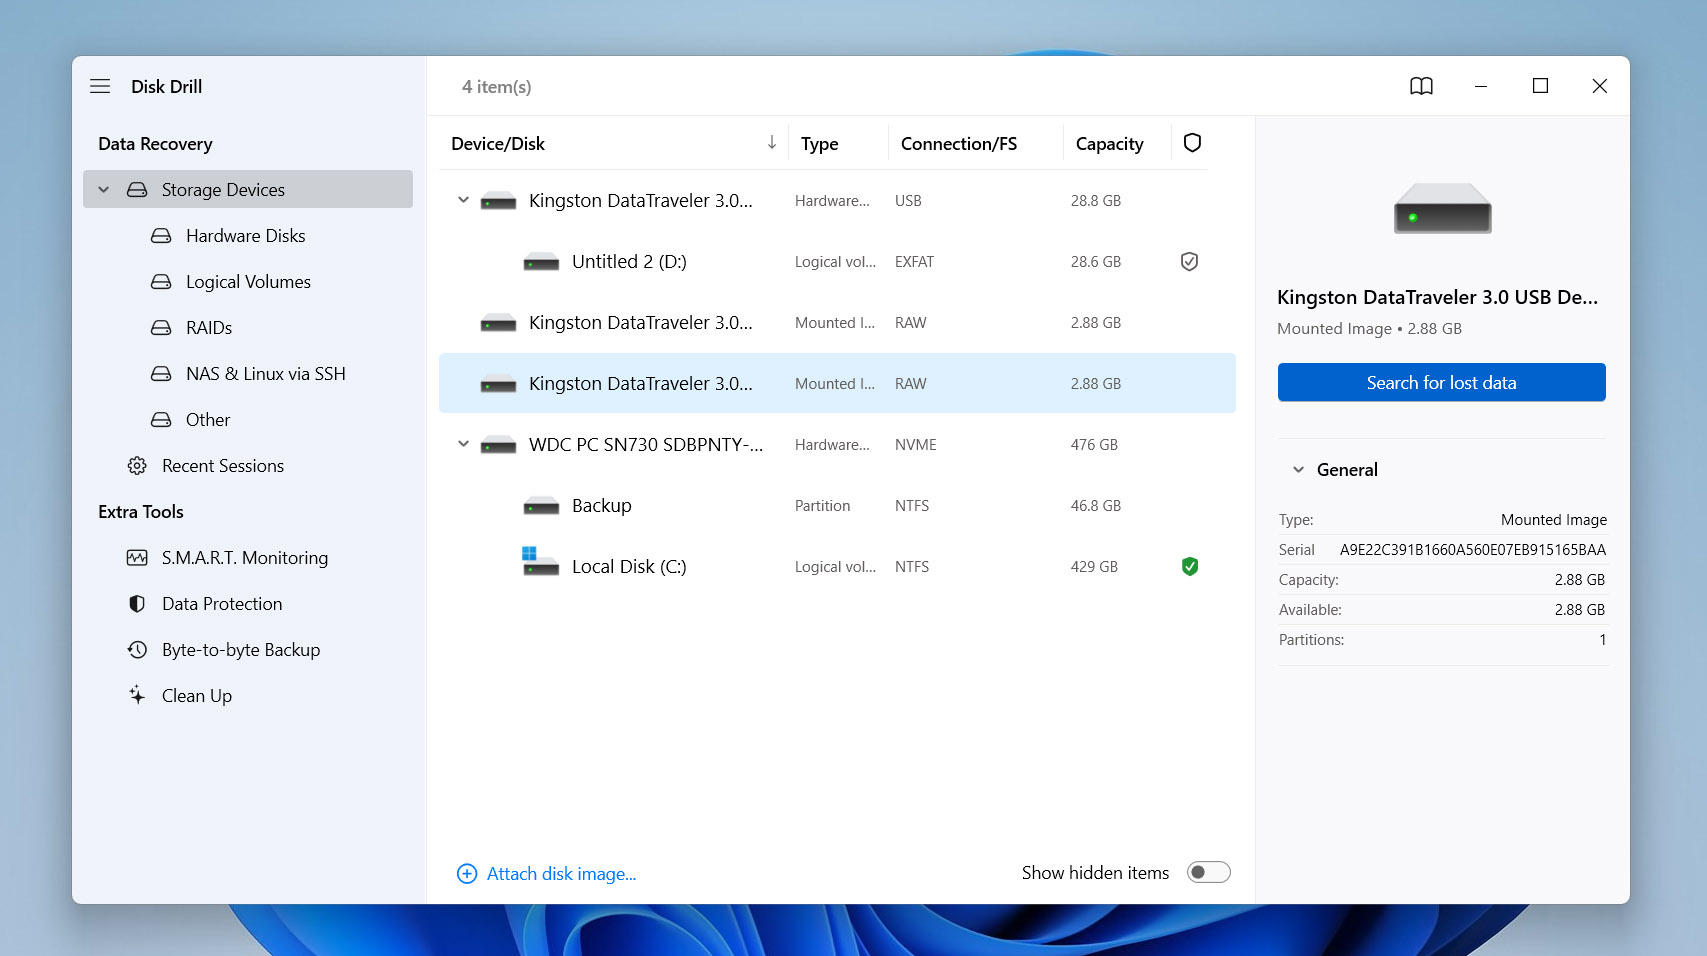
- Once it’s installed, open Disk Drill and select the hard drive you want to recover from the list of available devices. If you have already created a byte-by-byte backup and want to recover data from it instead, click Attach disk image and select the backup file you created earlier. It’ll show up in the list of recoverable devices. Pick it, then hit Search for lost data to get started.
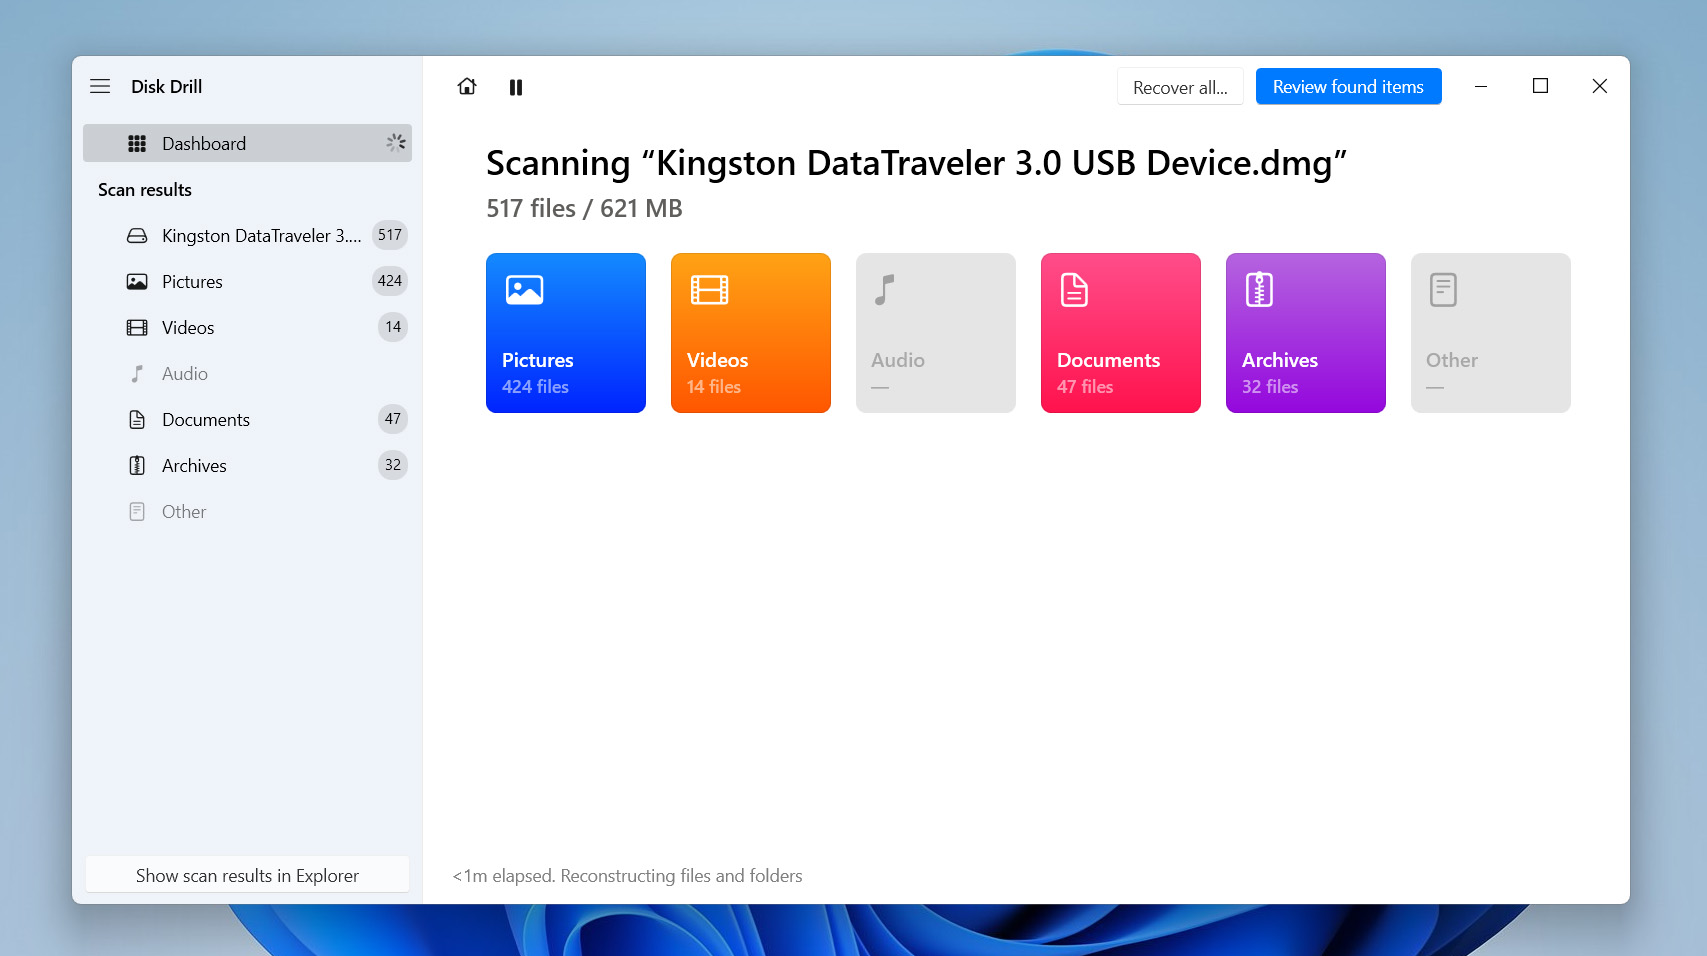
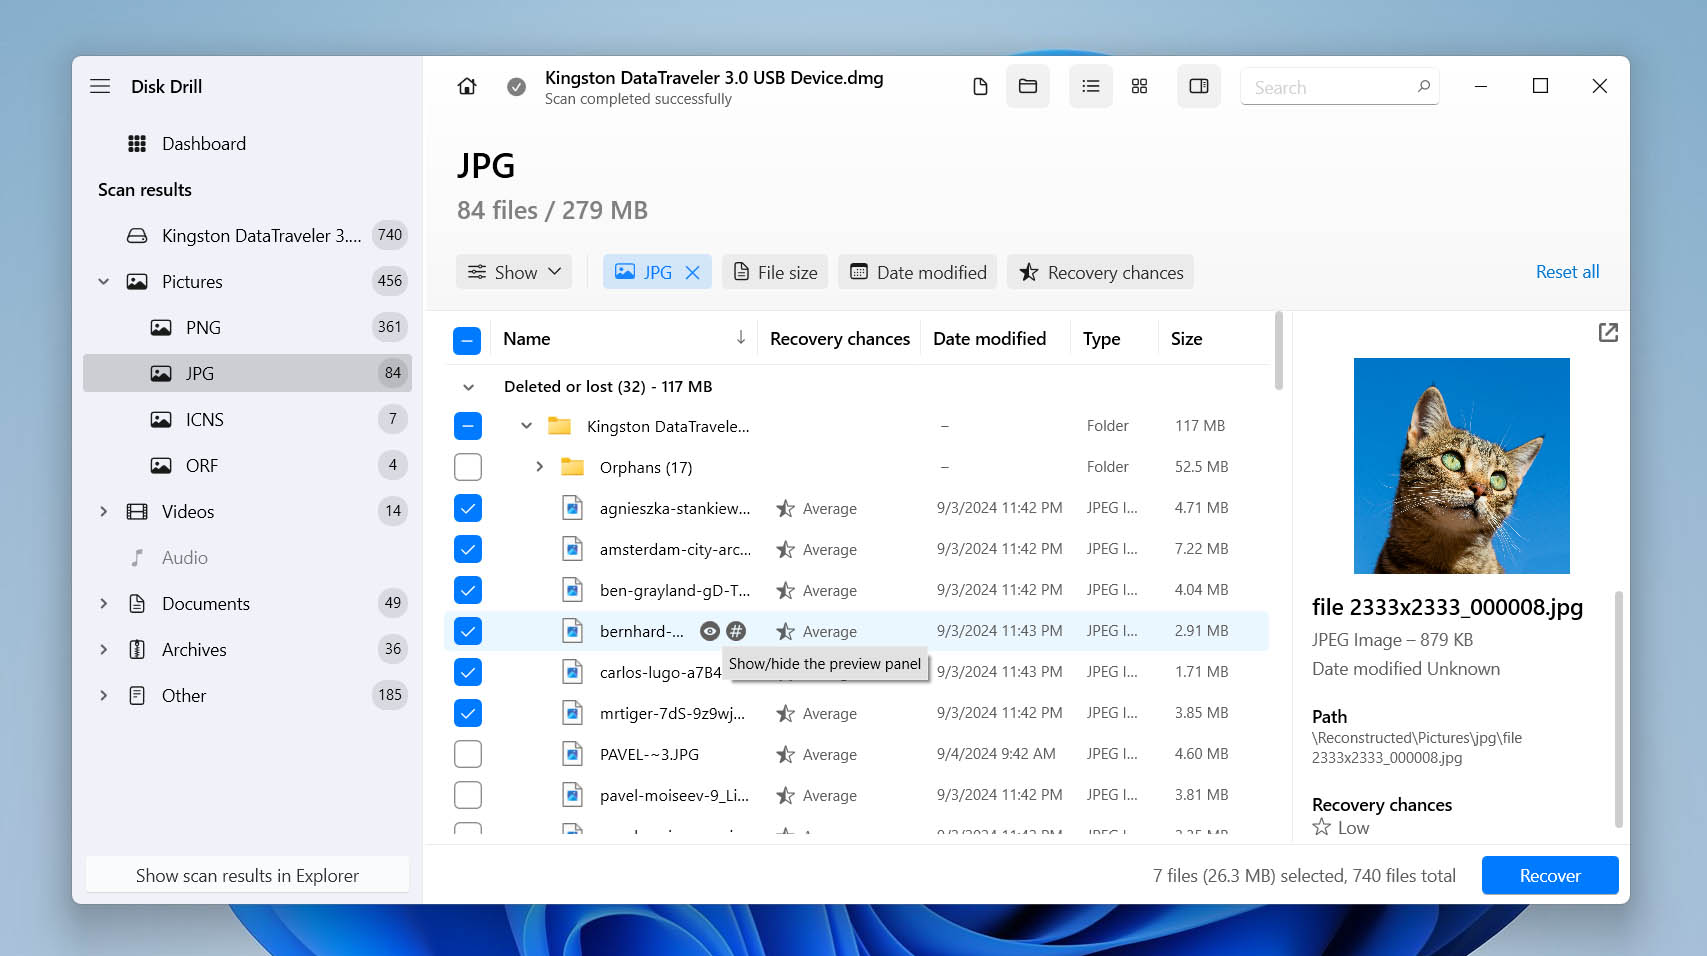
- Disk Drill will begin scanning the drive or disk image. While you can start recovering files as they appear, it’s usually better to wait until the scan is complete. Once it’s done, Disk Drill will show the recovery chances for each file, labeled as high, average, or low.
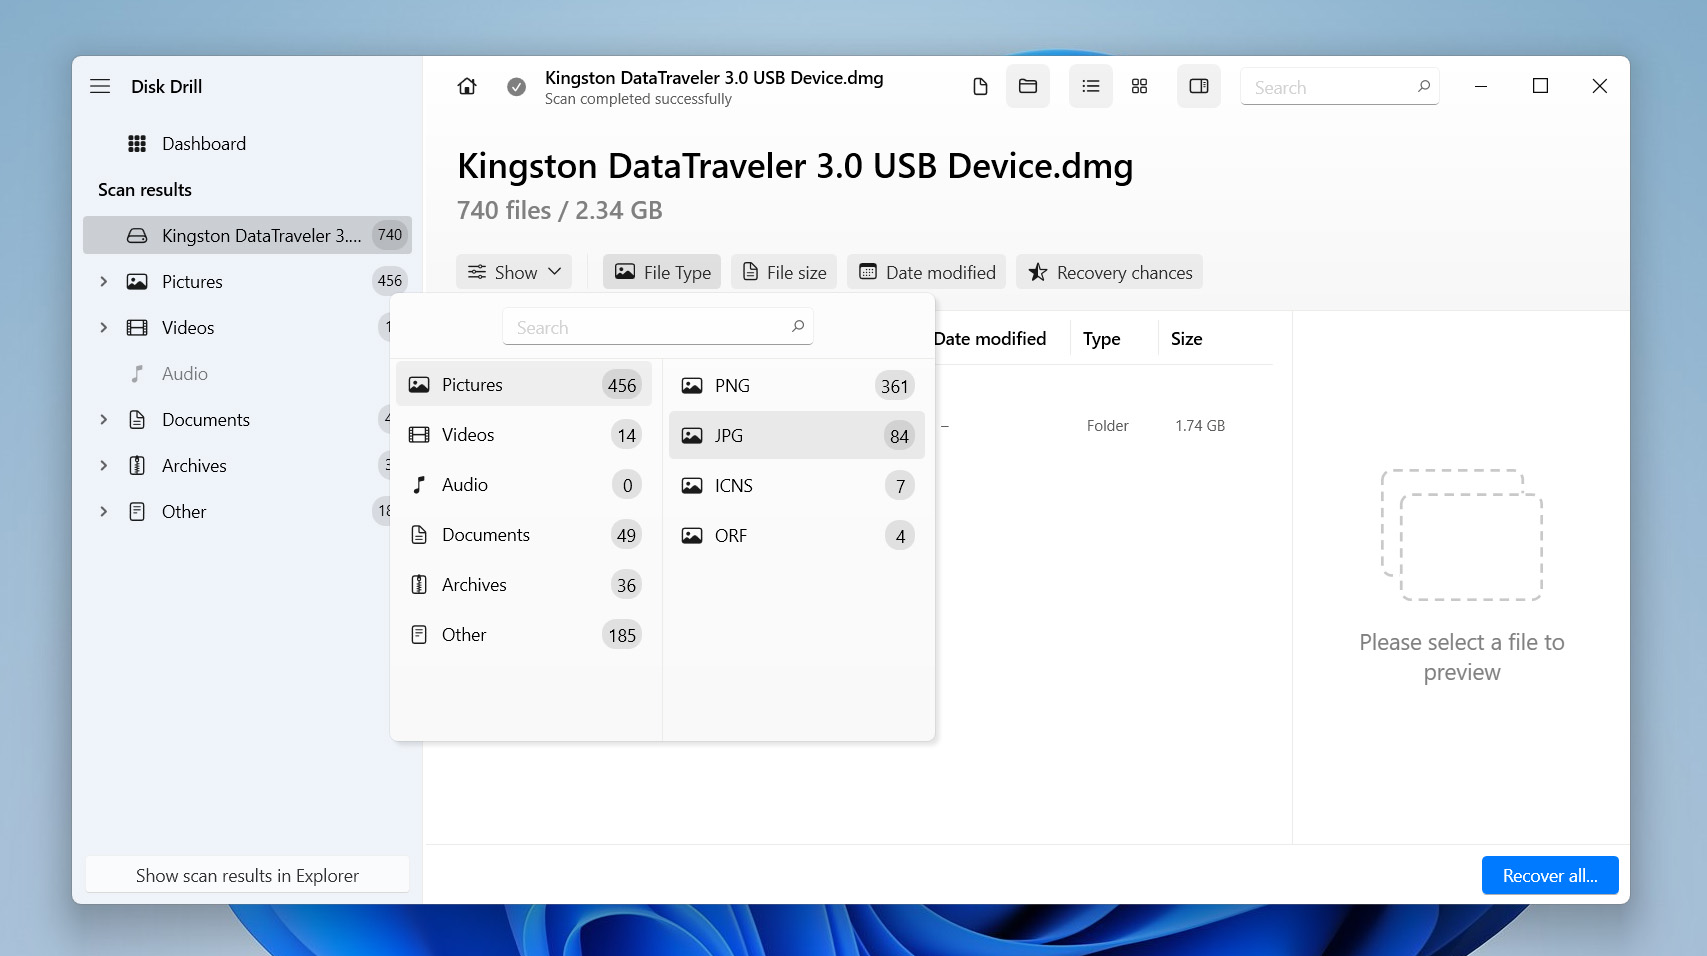
- You can use the filtering options to narrow down your search by choosing specific types, such as photos, videos, or documents, and even by filtering by file extensions like JPG, MP4, or DOC. This helps you concentrate only on the files you actually need.
- Review the list of found files, check the boxes next to the ones you want to recover, and when you’re ready, click the Recover button at the bottom of the screen.
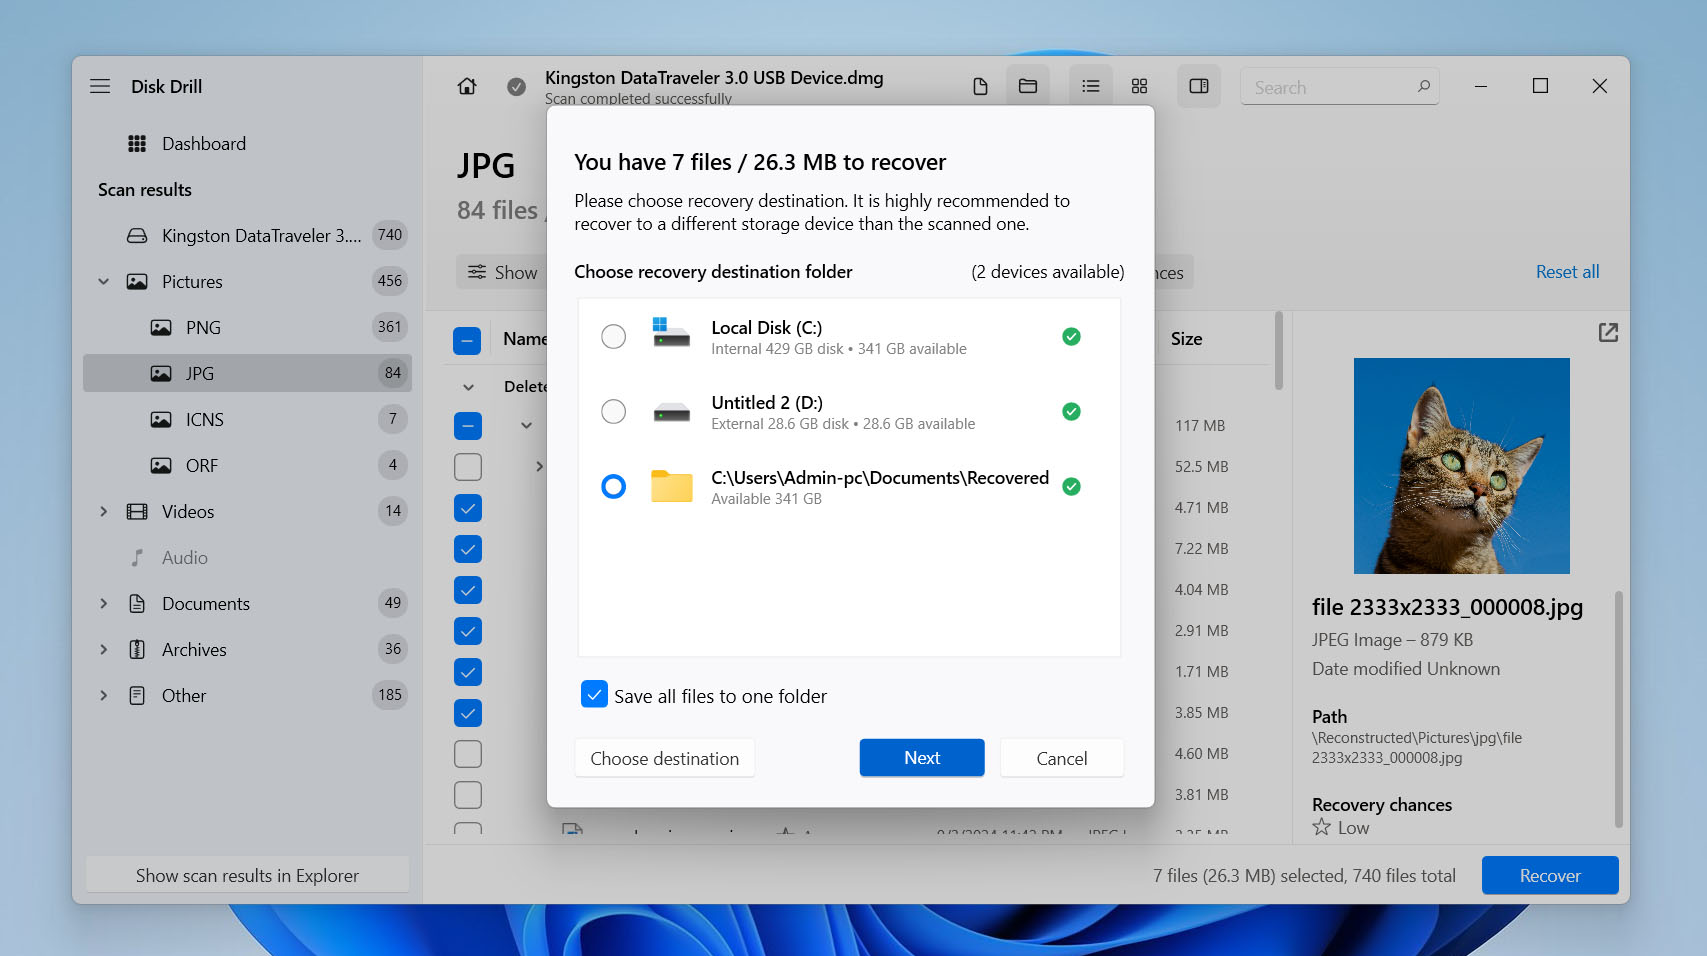
- A pop-up will ask where you want to save your recovered files. Disk Drill will mark safe drives with a green check mark. Pick a safe location and click Next.
- Disk Drill will recover your files, either from the hard drive or the disk image. When it’s done, you’ll get a summary of what was recovered. To view the recovered files immediately, simply click Show recovered data in Explorer. If not, you can close the program.


You can use Disk Drill for free to create a byte-by-byte copy, scan it (or scan the drive directly), and preview the files available for recovery. You can also recover up to 500 MB of data for free. If you need to recover more, you will need to upgrade to the Pro version.
How to Format Your Hard Drive on Windows
Now that your data’s safe, you can move on to actually formatting your hard drive. On Windows, you’ve got three ways to do it. These methods differ only in their execution and the appearance of the interfaces, the result remains the same. We’ll walk you through all three so you can pick the one that works best for you.
Option 1: Format Your Disk Directly Through Windows Explorer
Windows Explorer (called File Explorer in newer versions of Windows) is the built-in tool that lets you browse and manage the files and folders on your computer. It provides an easy-to-use interface that allows you to access your drives, organize your files, and manage tasks such as copying, moving, or deleting.
When it comes to formatting a disk, this is the easiest way to do it, as you don’t need any extra tools – simply open Windows Explorer. It’s perfect if you’re looking for a quick, no-fuss solution without additional steps.
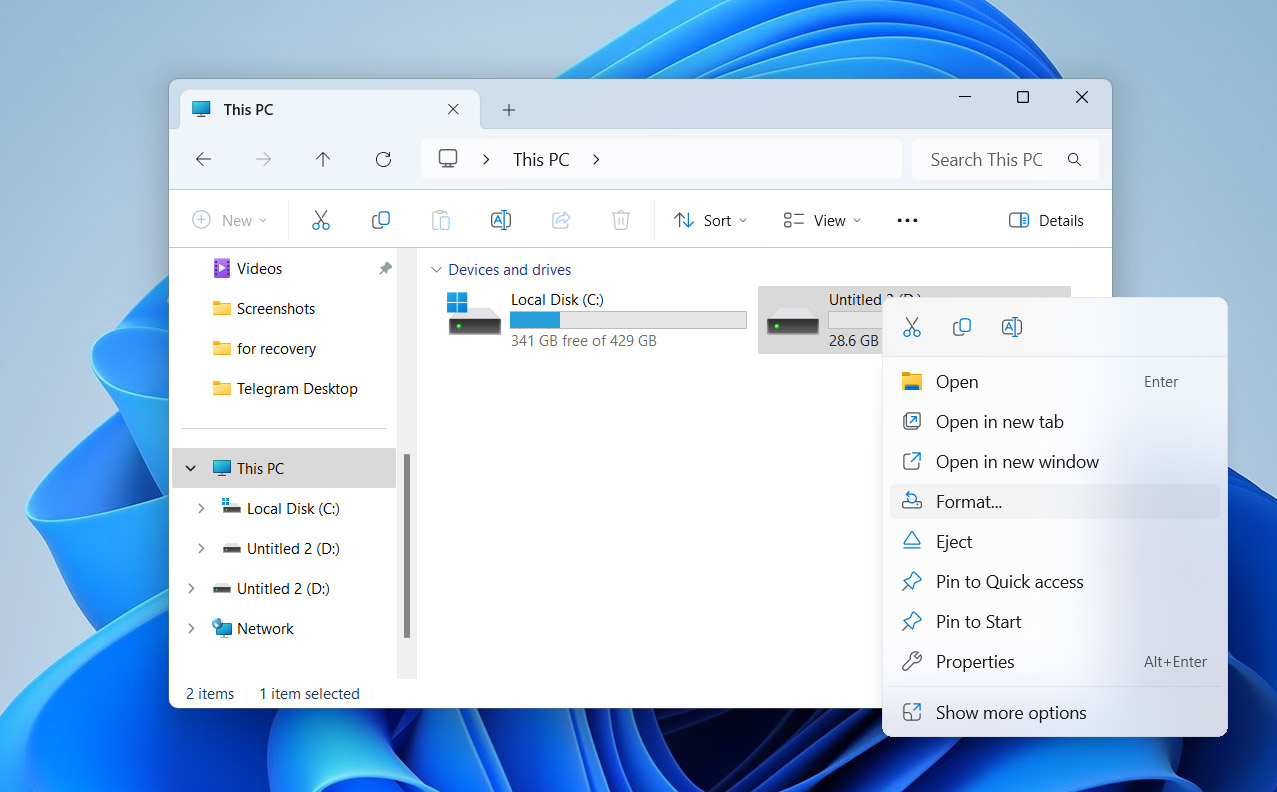
- Open Windows Explorer by clicking its icon on the taskbar or by searching for it in the Start menu.
- Right-click the drive you want to format and select Format from the menu.
- A pop-up window will show up. Here, you can adjust the settings, such as the file system type, change the allocation unit size, and determine whether you want a quick format. Set everything the way you need it.
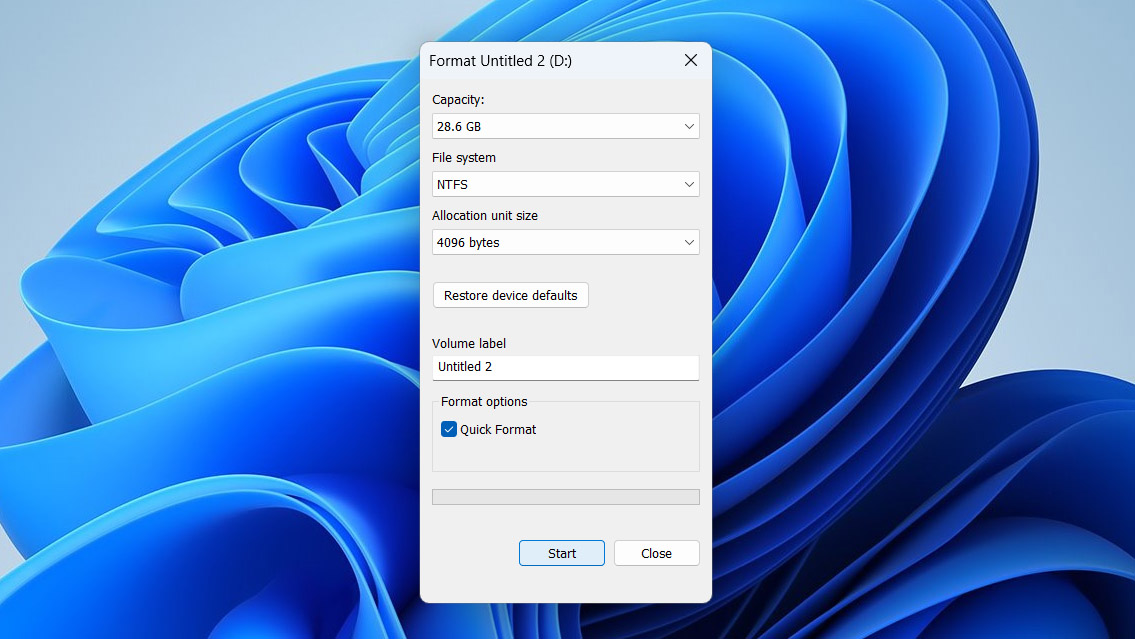
- Once you’re ready, click Start to kick off the formatting process. You will receive one last warning, asking you to confirm that you want to erase all data on the drive. Confirm it, and the format will begin.


Option 2: Utilize Disk Management to Format Your Hard Drive
Another way to format your hard drive is by using the Disk Management tool. It’s a built-in Windows utility that lets you handle more advanced storage tasks. With Disk Management, you can manage volumes, partitions, and drive letters. It provides more detailed information and options than Windows Explorer, making it a great choice for tasks such as formatting, extending, or shrinking partitions.
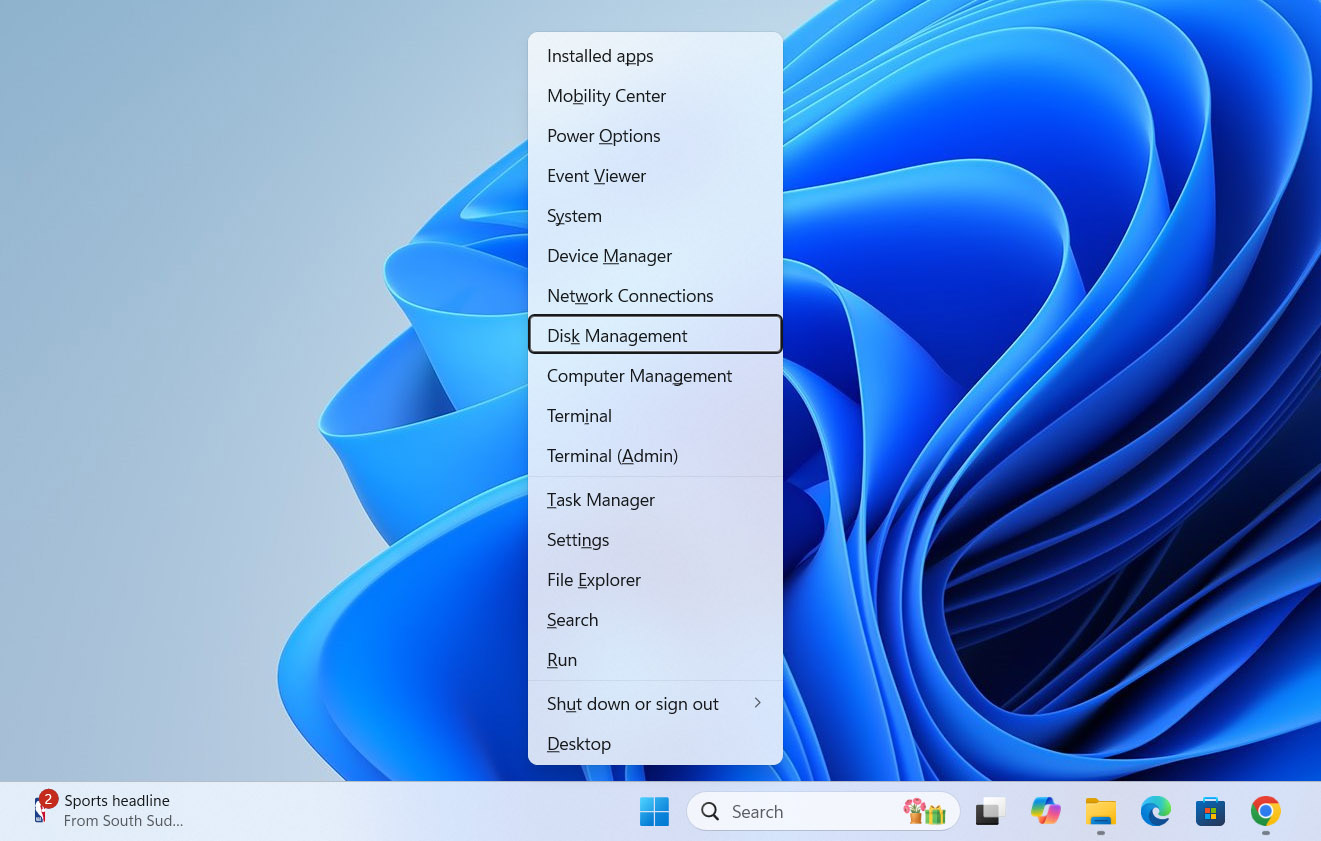
- Press the Windows key + X and select Disk Management from the menu that appears.
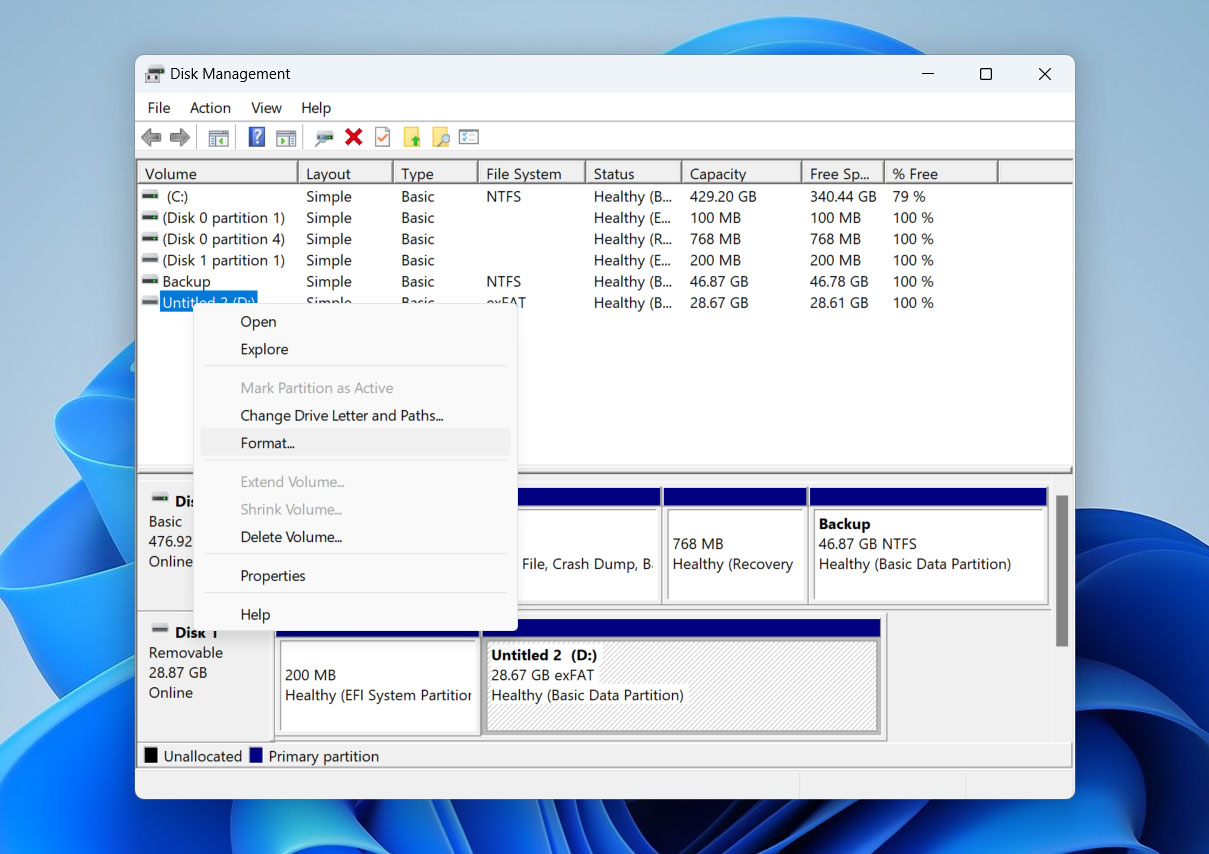
- Once Disk Management opens, locate the hard drive you want to format, right-click on it, and select Format from the menu.
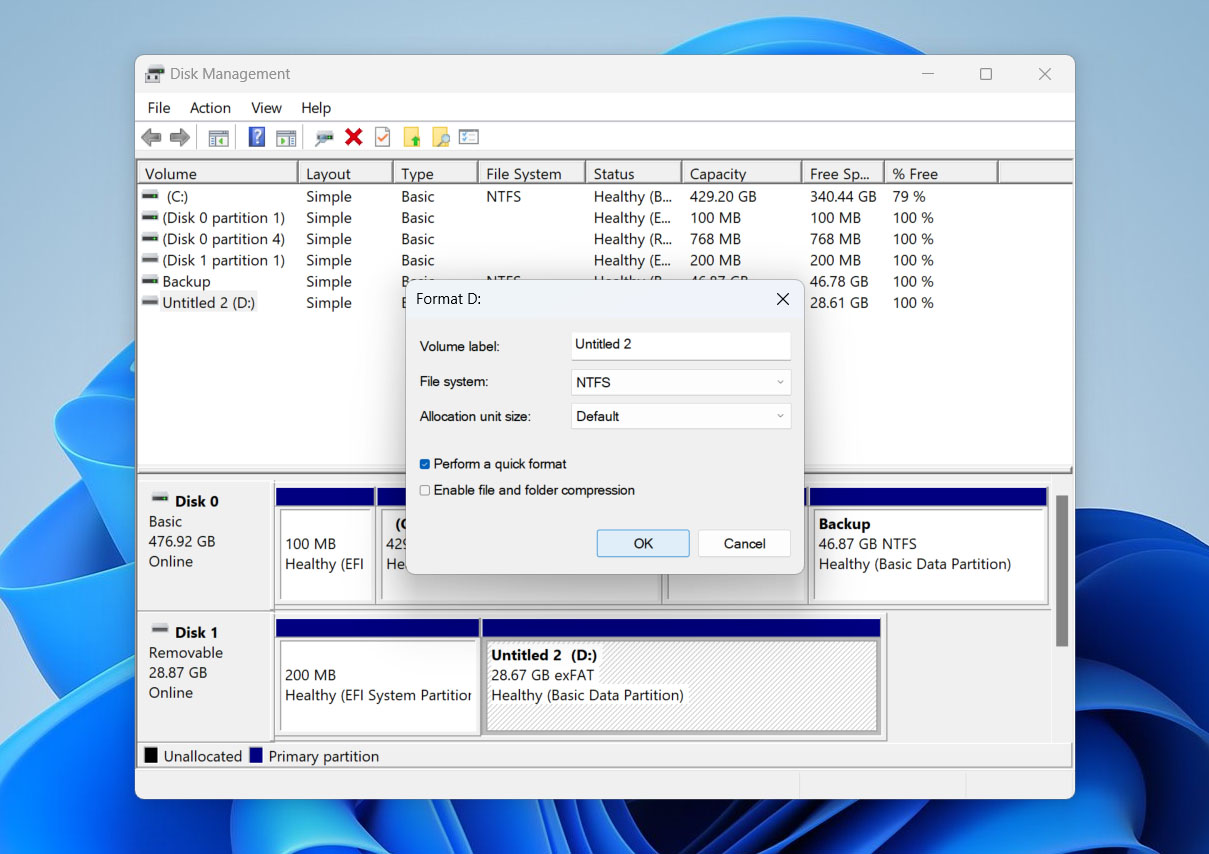
- A pop-up window will appear, allowing you to set up the format options. Choose the file system type (such as NTFS or FAT32), select the allocation unit size, and decide whether to perform a quick format. When you’re ready, click OK to move forward.
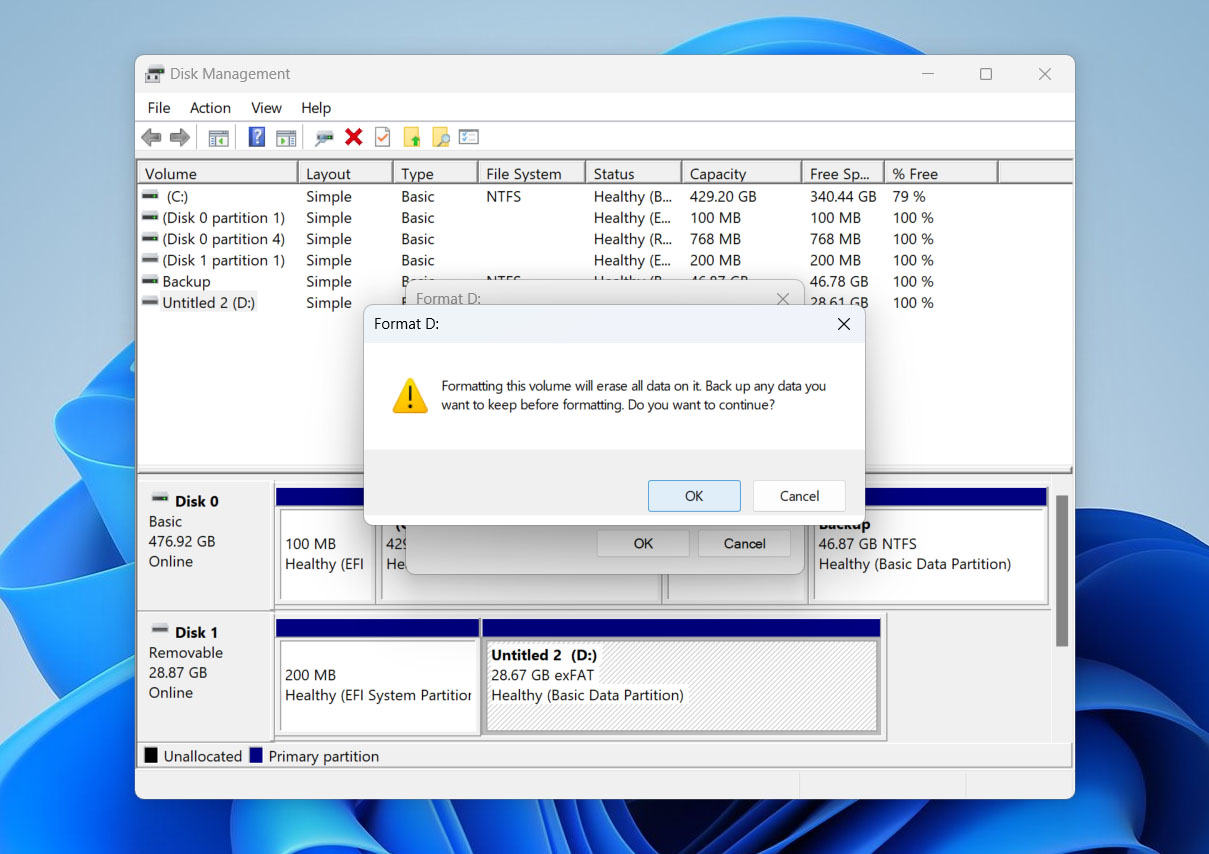
- You’ll see a warning that informs you that formatting will erase everything on the drive. If you’re sure, confirm it, and the format will start.


Option 3: Perform Disk Formatting via Command Prompt
The last method for formatting a hard drive is to use the Command Prompt. We usually recommend this method for users who are comfortable working with command-line tools. If you’re more of an everyday user, you’re probably better off sticking with one of the earlier methods we covered.
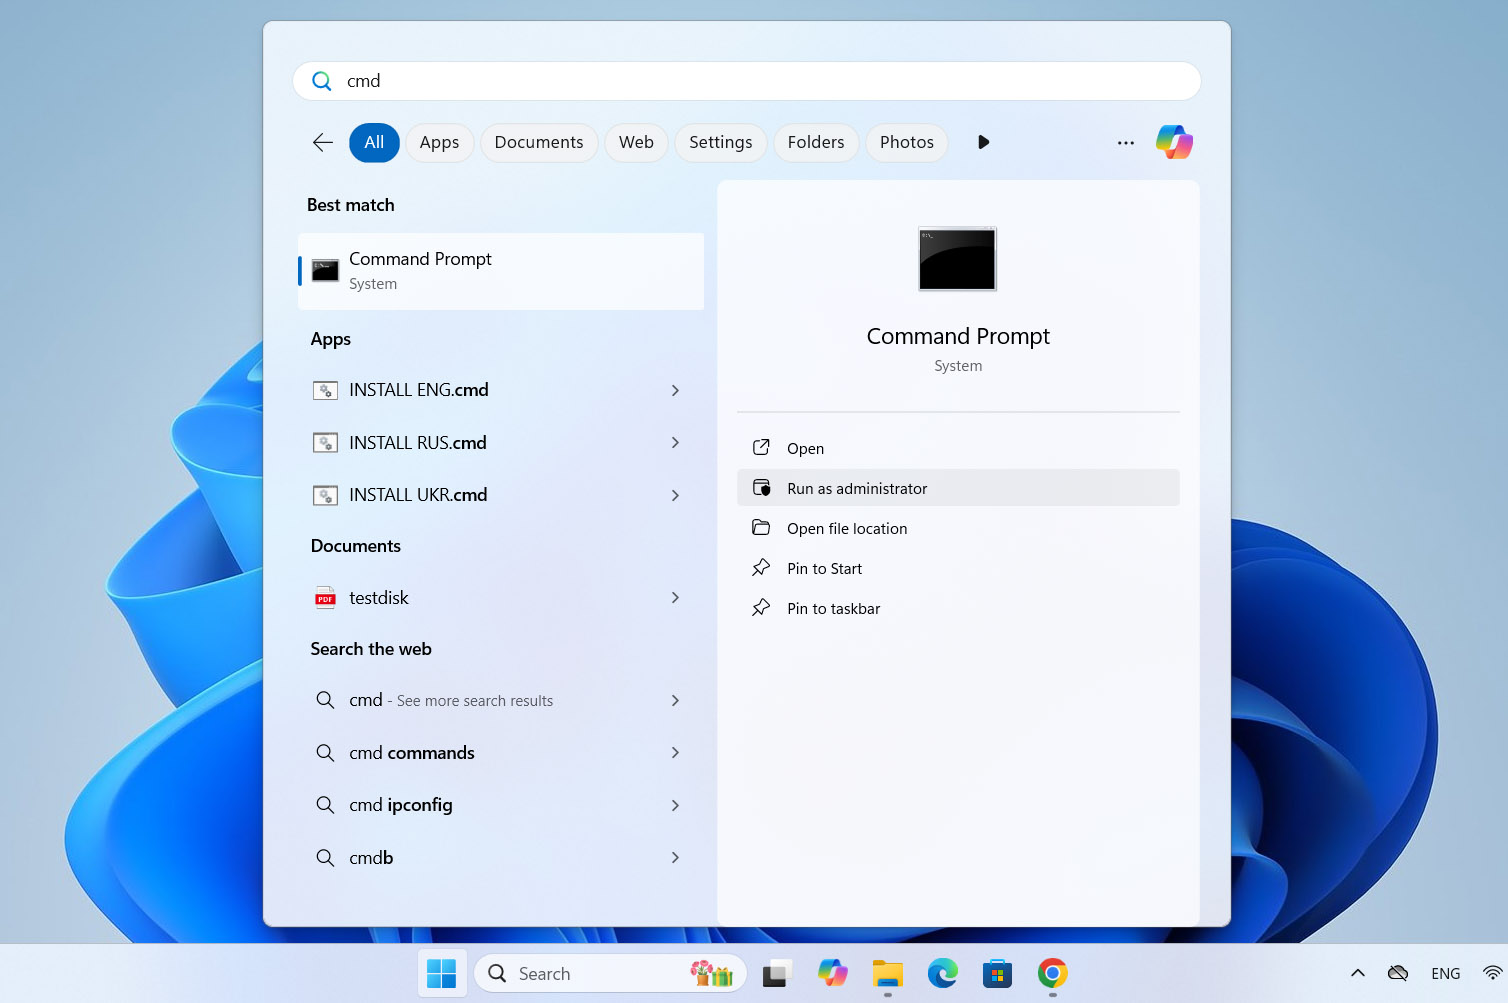
- Search for cmd in the Start menu and select Run as administrator. This grants you the necessary permissions to modify your disks.
- At the command prompt, type
diskpartand press Enter. DiskPart is a built-in tool that helps you manage your disks and volumes through the command line. - Next, type
list diskand press Enter. You’ll see a list of all the disks connected to your computer. Find the number for the disk you want to format. - Type
select disk x(replace x with the number of your target disk) and press Enter. This selects the disk you’ll be working with.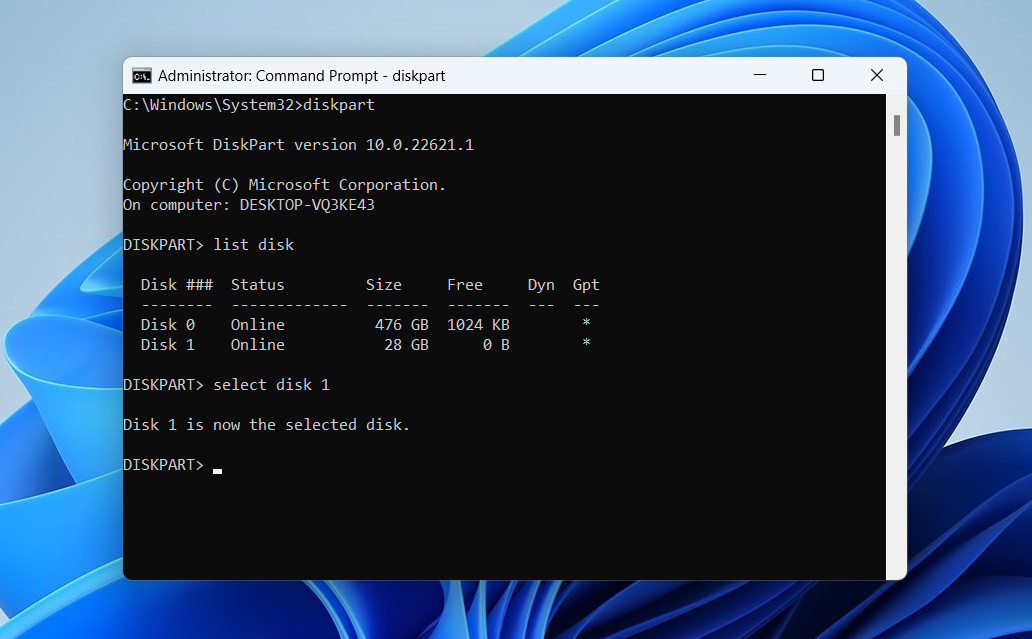
- Then, type
list volumeand press Enter. This shows all the partitions (volumes) on that disk. - Now, type
select volume x(replace ‘x’ with the number of the partition you want to format) and press Enter. This tells DiskPart which partition you want to format.
- Finally, type
format fs=ntfs quickand press Enter to do a quick format. If you want a different file system, you can swap ntfs for fat or exfat.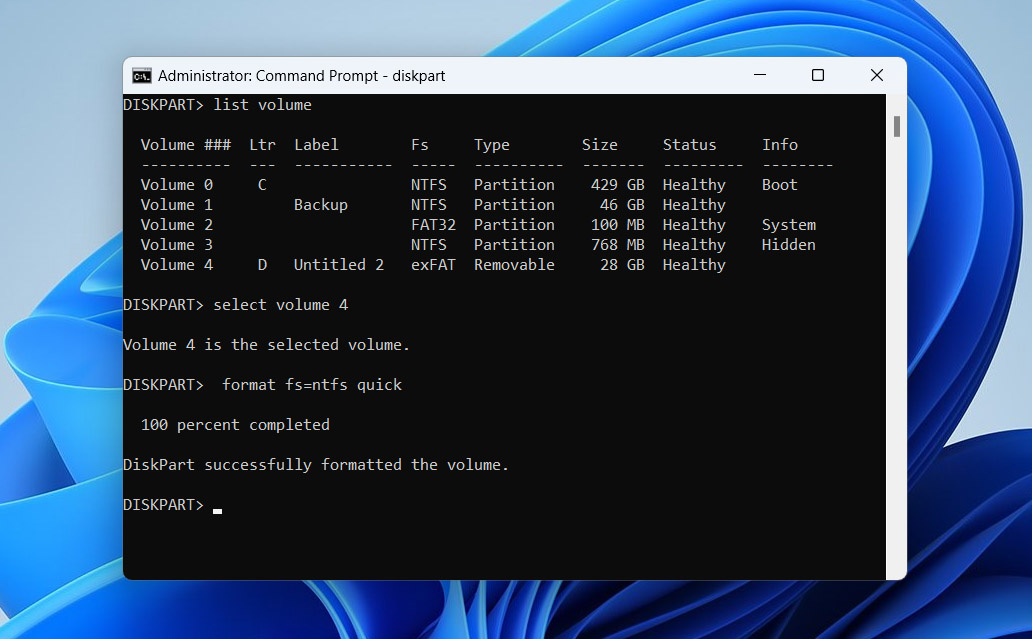
- If you want to do a full format instead of a quick one, simply omit the quick at the end.


Сonclusion
It’s important that formatting always leads to data loss, no matter which type you choose. At the same time, formatting is often the only real solution when a hard drive becomes corrupted or encounters file system errors. These problems usually pop up without warning, so instead of scrambling to save your data at the last minute, it’s smarter to regularly check your drive’s health and back up your important files to another device, say once a week or every other week.
If you haven’t been doing that, no worries. This article provides a solid method for formatting a hard drive without losing your data. Use recovery software like Disk Drill to secure your files first, then proceed with the format, whether it’s a quick or full format. That way, you’ll keep your data safe and fix the drive.
Additionally, the methods we covered here are also applicable to other types of devices, such as USB drives, SSDs, and SD cards. The steps are the same.